How to Install and Optimize Redis on macOS for Faster Apps

 9m
9m
 0 comments
 Print
Print
If you’re a software developer like me, you know that data access speed is one of the most important factors in the user experience and performance of your applications. Redis, an in-memory caching system, allows you to store and retrieve frequently used data in real time, avoiding frequent visits to large databases. In this article, you will easily learn step-by-step and in simple language how to install and run Redis on macOS, and even store simple data, and my personal experiences are also included along the way to avoid common problems Redis is not only a simple caching tool, but it can also really improve the speed and efficiency of your applications and make the development experience on Mac more enjoyable, you can visit our website for more.
Step 1: Install Homebrew
If you don’t already have Homebrew installed on your system, you’ll need to install it first. Homebrew is a popular package manager on macOS that makes installing and managing software a breeze.
1- Open a terminal and enter the following command:
/bin/bash -c "$(curl -fsSL https://raw.githubusercontent.com/Homebrew/install/HEAD/install.sh)"
2- Follow the on-screen instructions to complete the installation.
Expert Tip: Sometimes Homebrew requires administrator access. If you encounter an error, run the command with sudo and enter your password.
Step 2: Install Redis
After installing Homebrew, installing Redis is very simple. Enter the following command in the terminal:
brew install redis
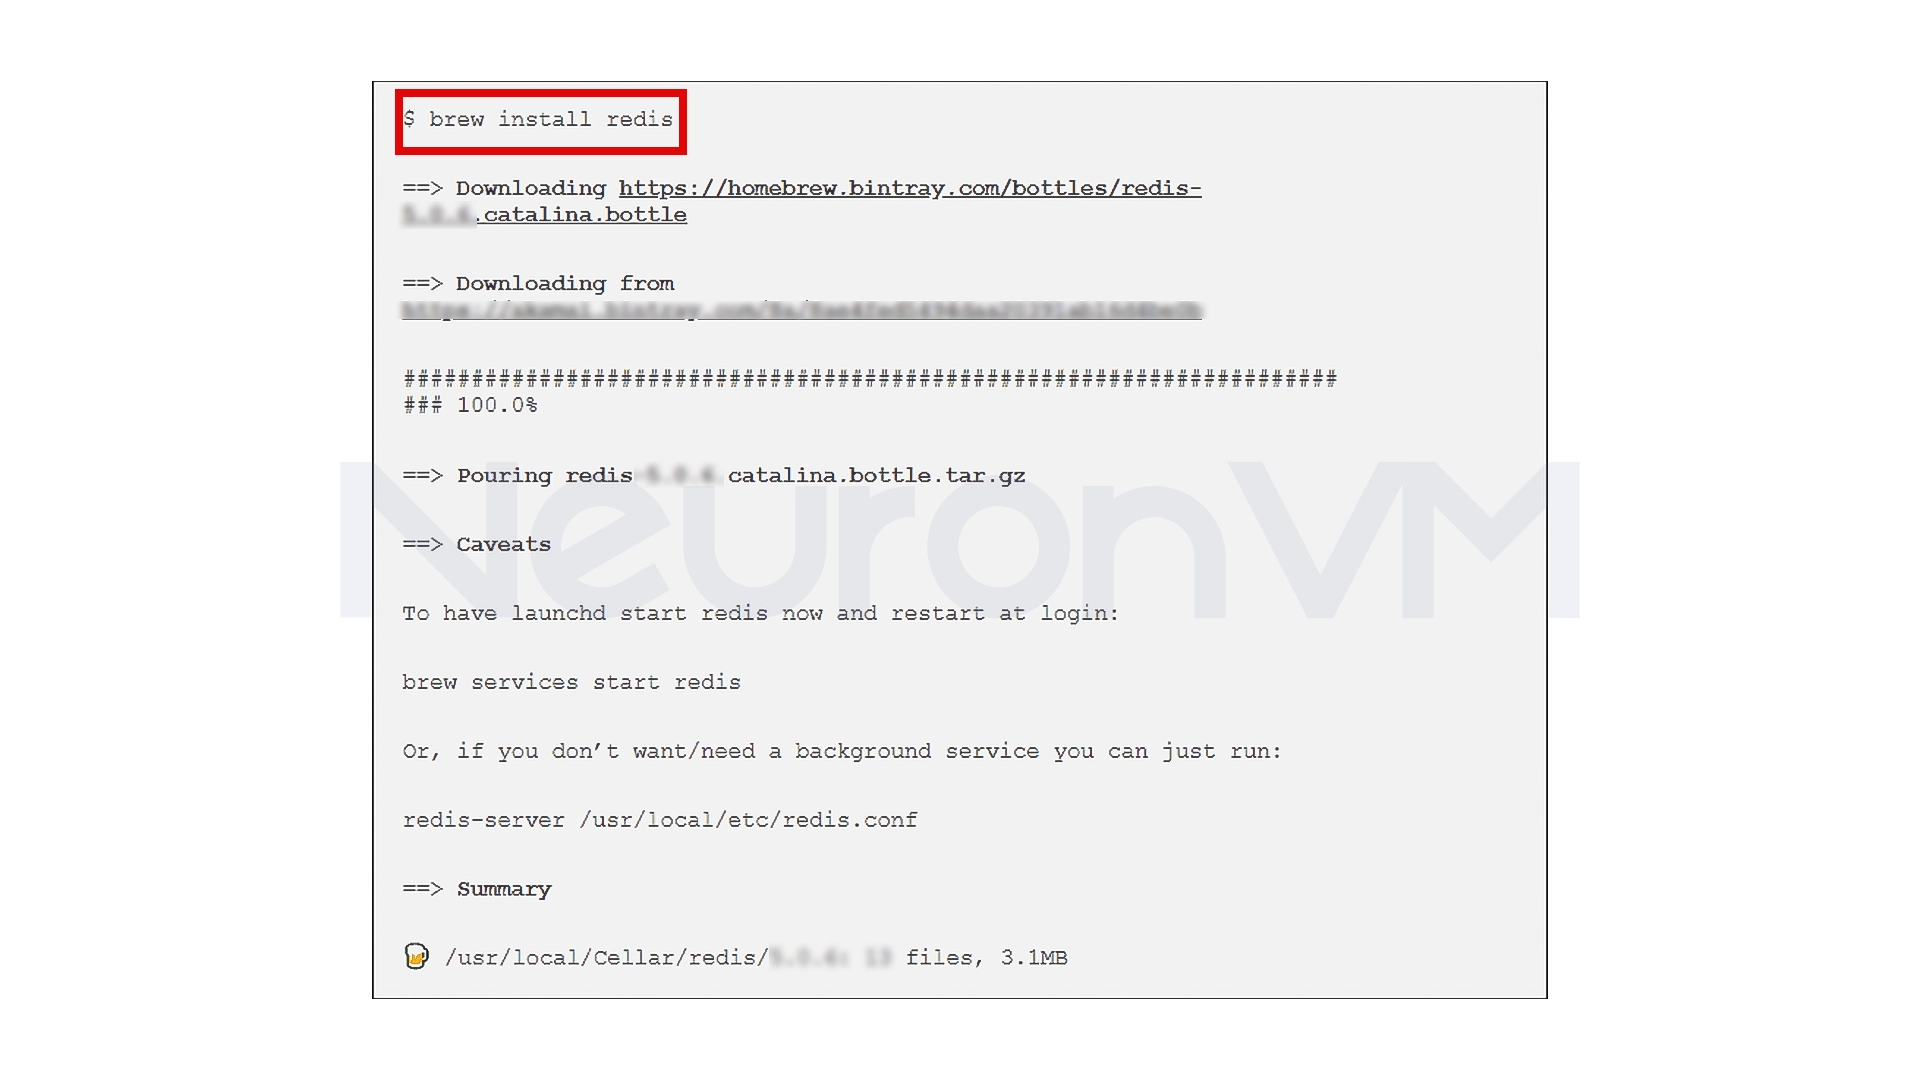
My experience: Installing Redis with Homebrew has always been quick and easy, but if you have a previous version of Redis installed, it’s best to clean it first to avoid any conflicts.
Step 3: Start Redis
You have two ways to start Redis:
Automatically start at login:
brew services start redis
This command will make Redis start automatically every time you start your system.
Manual setup:
redis-server
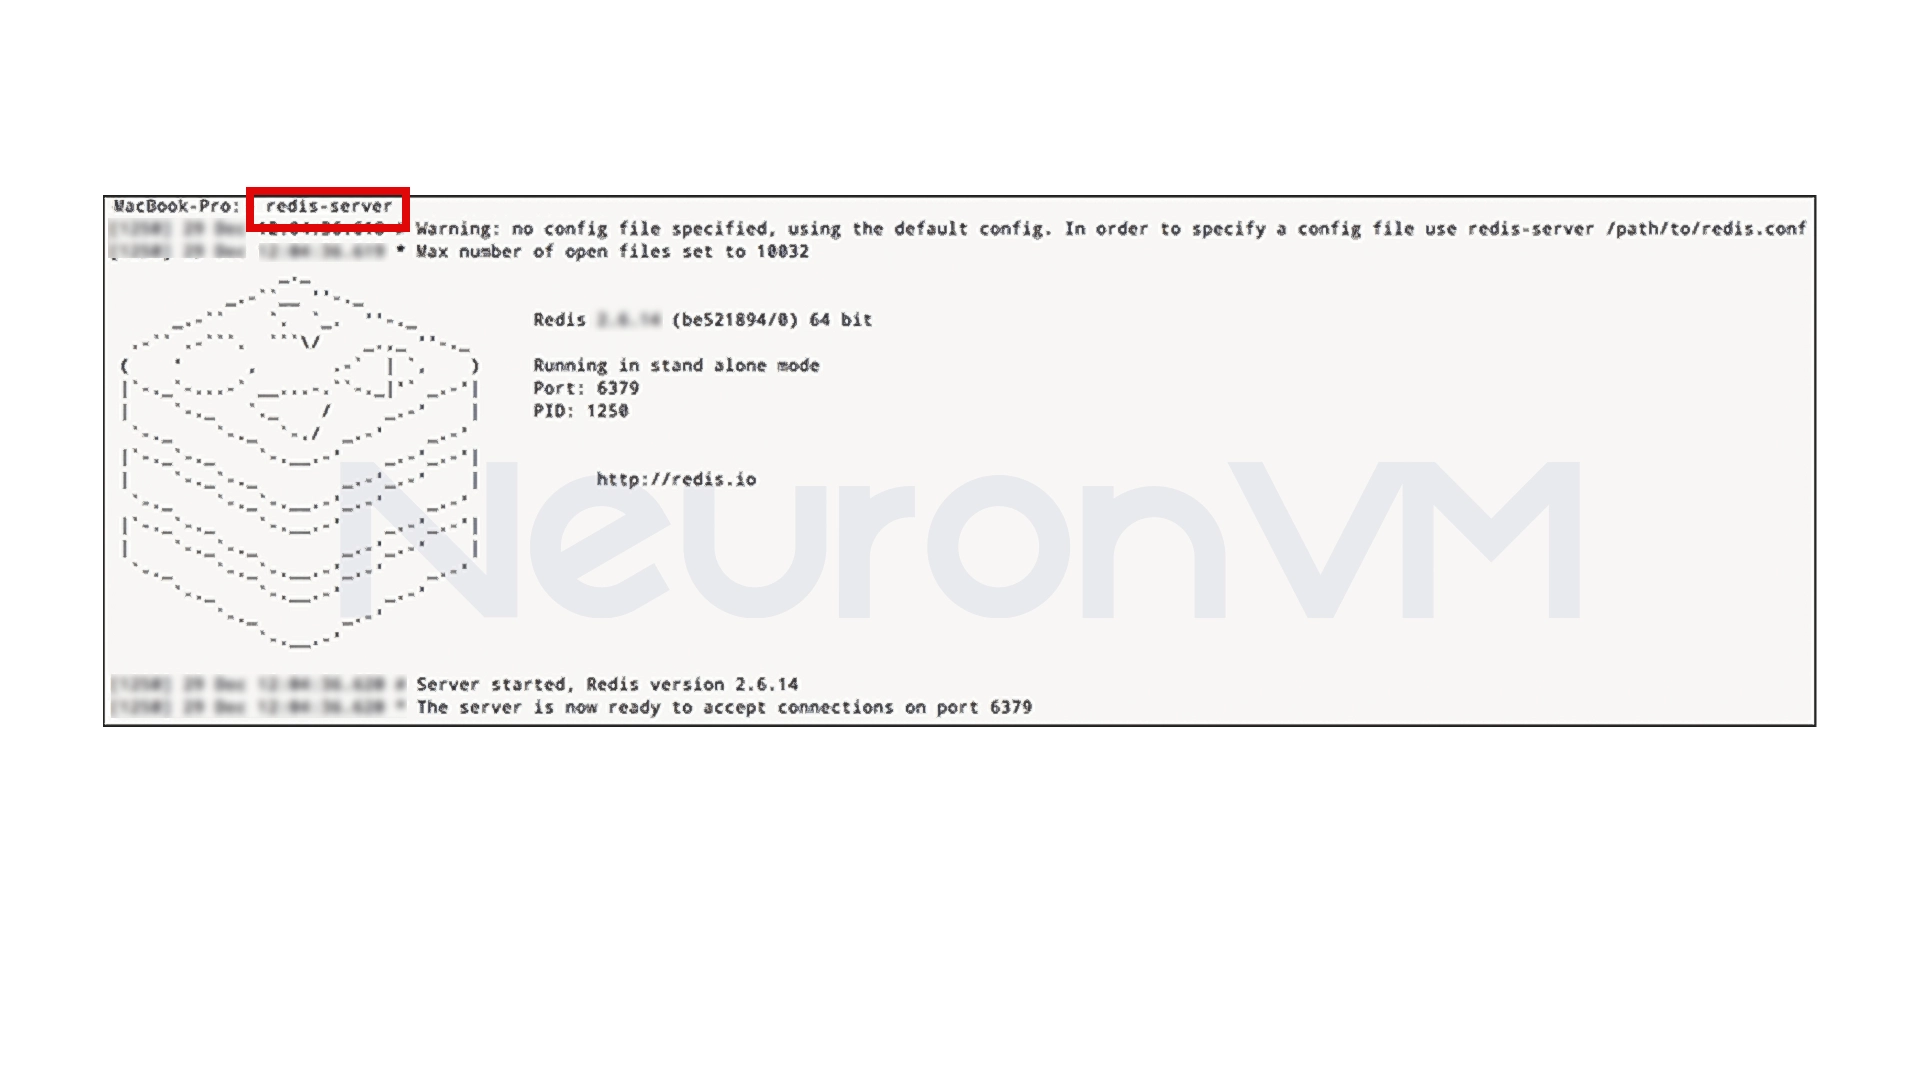
Personal experience: If you just want to run Redis for short-term testing and development, the manual method is sufficient, and there is no need to set up a permanent service.
Step 4: Test Redis
To make sure Redis is running properly, open a new terminal and enter the following command:
redis-cli
Then type the following command:
ping
If Redis is up and running, you will get a response:
PONG
Note: Seeing PONG means the connection was successful and you can now start working with Redis.
Step 5: Store and Retrieve Data in Redis
Store a string value
In the CLI, enter the following command:
set greeting
Retrieve string value
To retrieve the stored value:
get greeting
Pro tips and my personal experiences using Redis on macOS
After installing Redis on macOS and getting familiar with its basic commands, I realized how useful it can be in optimizing projects and also caching data, In this section, I will write down some of the tips that I learned while working with Redis which made my work easier, i hope these are useful for you.
1. Use advanced data structures
Redis is not just for storing strings! I also use lists and sorted sets in my projects, especially when I need the data to be ordered or searchable. For example, for storing user scores in a game, sorted sets really make things easier.
2. Back up your data
Because Redis stores data in memory, if the system is shut down, the data may be lost. So if your data is important to you, be sure to use RDB or AOF for data persistence. I choose RDB for small projects and AOF for more sensitive projects.
3. Test performance with real data
Before you finalize your project, be sure to test Redis with a large amount of real data. This will help you make sure that it is fast in real-world conditions and that its response is not slow.
My personal experience
When I put Redis as a cache layer between the database and the application, my applications ran at least 2-5 times faster. Even on my regular MacBook, Redis handled thousands of concurrent requests without a hitch. Honestly, since I introduced Redis into my workflow, I can’t imagine going back to the old ways.
Conclusion and Final Tips for Using Redis on macOS
Installing Redis on a Mac is not that complicated, and its true value becomes apparent when you start using it in your personal projects, this tool is not just a simple caching tool, because it can increase the speed and responsiveness of your applications easily, and from my personal own experience, here are a few key tips for success with Redis:
- Always store temporary data with a TTL to avoid running out of memory.
- Run Redis with Homebrew Services to keep it running in the background.
- Before deploying it in production, test Redis’s performance with real data and volume tests.
With the tips provided, Redis can be a reliable companion for your applications and even on a regular Mac, using Redis makes such a difference by making your applications lighter and more stable.
Yes, you can install and run Redis with just a few simple commands using Homebrew.
No, in addition to caching, you can use Redis to store temporary data, queues, and even user privileges.
By default, no, unless you use RDB or AOF capabilities for data persistence.
You might like it