How to Create an SSL Certificate for pfSense Firewall

 Study duration :
14 Minutes
Study duration :
14 Minutes
 0 Comment
Keeping your network safe is very important, and securing your pfSense firewall with an SSL certificate is one of the best ways to do that, SSL helps protect your login details and data by making the connection between your computer and firewall private and secure, in this simple and clear guide, you will learn How to Create an SSL Certificate for pfSense Firewall.
● What is pfSense?
It is a free and open source operating system for firewalls and routers, it can be installed on old systems and small systems, it also offers a user-friendly web interface, which makes updates simple even for those with less experience or those who do not have command line knowledge.
● Importance of SSL for securing access to your firewall: SSL for securing your access to your firewall is essential for protecting sensitive data and ensuring that you have secure communication.
● In this article, we will cover:
- Why do you need an SSL certificate
- Methods to create an SSL certificate
- Step-by-step guide to create an SSL certificate
- Troubleshooting tips
- Security best practices after SSL setup
- Using pfSense with Mikrotik or VPS setups
🔼 Why Do You Need an SSL Certificate for pfSense Firewall?
You need SSL for several reasons, like avoiding browser security warnings, because without an SSL certificate from a trusted source, your browser will display a warning that your connection is not secure. pfSense controls your network’s security; without it, your login details will not be safe, so you need an SSL certificate to ensure encrypted admin access, also, if you are using SSL at work, having a good SSL certificate shows you care about security.
🔼 Step-by-Step Guide to Create an SSL Certificate for pfSense
Now that you understand why an SSL Certificate is important for your firewall, let’s walk through the steps to create one, for the first step, start by logging in to your pfSense firewall using web browser.
Create pfSense Backup
Before changing anything on your pfSense firewall, it is a good idea to make a backup of your current settings, so that if something goes wrong, you can bring everything back in the way it was, To do this, go to the “Diagnostics” menu and click on “Backup & Restore” and make sure the file type is set to XML then click “Download Configuration” to save the file and keep this file somewhere safe like USB.

Turn on SSH in pfSense
Now we can turn on SSH, which gives you another way to get into your pfSense firewall If the web page ever stops working, you need to go to the System > Advanced, then scroll down till you see SSH, check the box to enable it, and leave the port 22, later you can turn SSH off if you don’t need it anymore.

Turn on Serial Access
If your pfSense device has a serial port, you can turn it on in another way to get access if something goes wrong, you will find this setting just below the SSH option; you have to check the Serial Terminal to enable it.

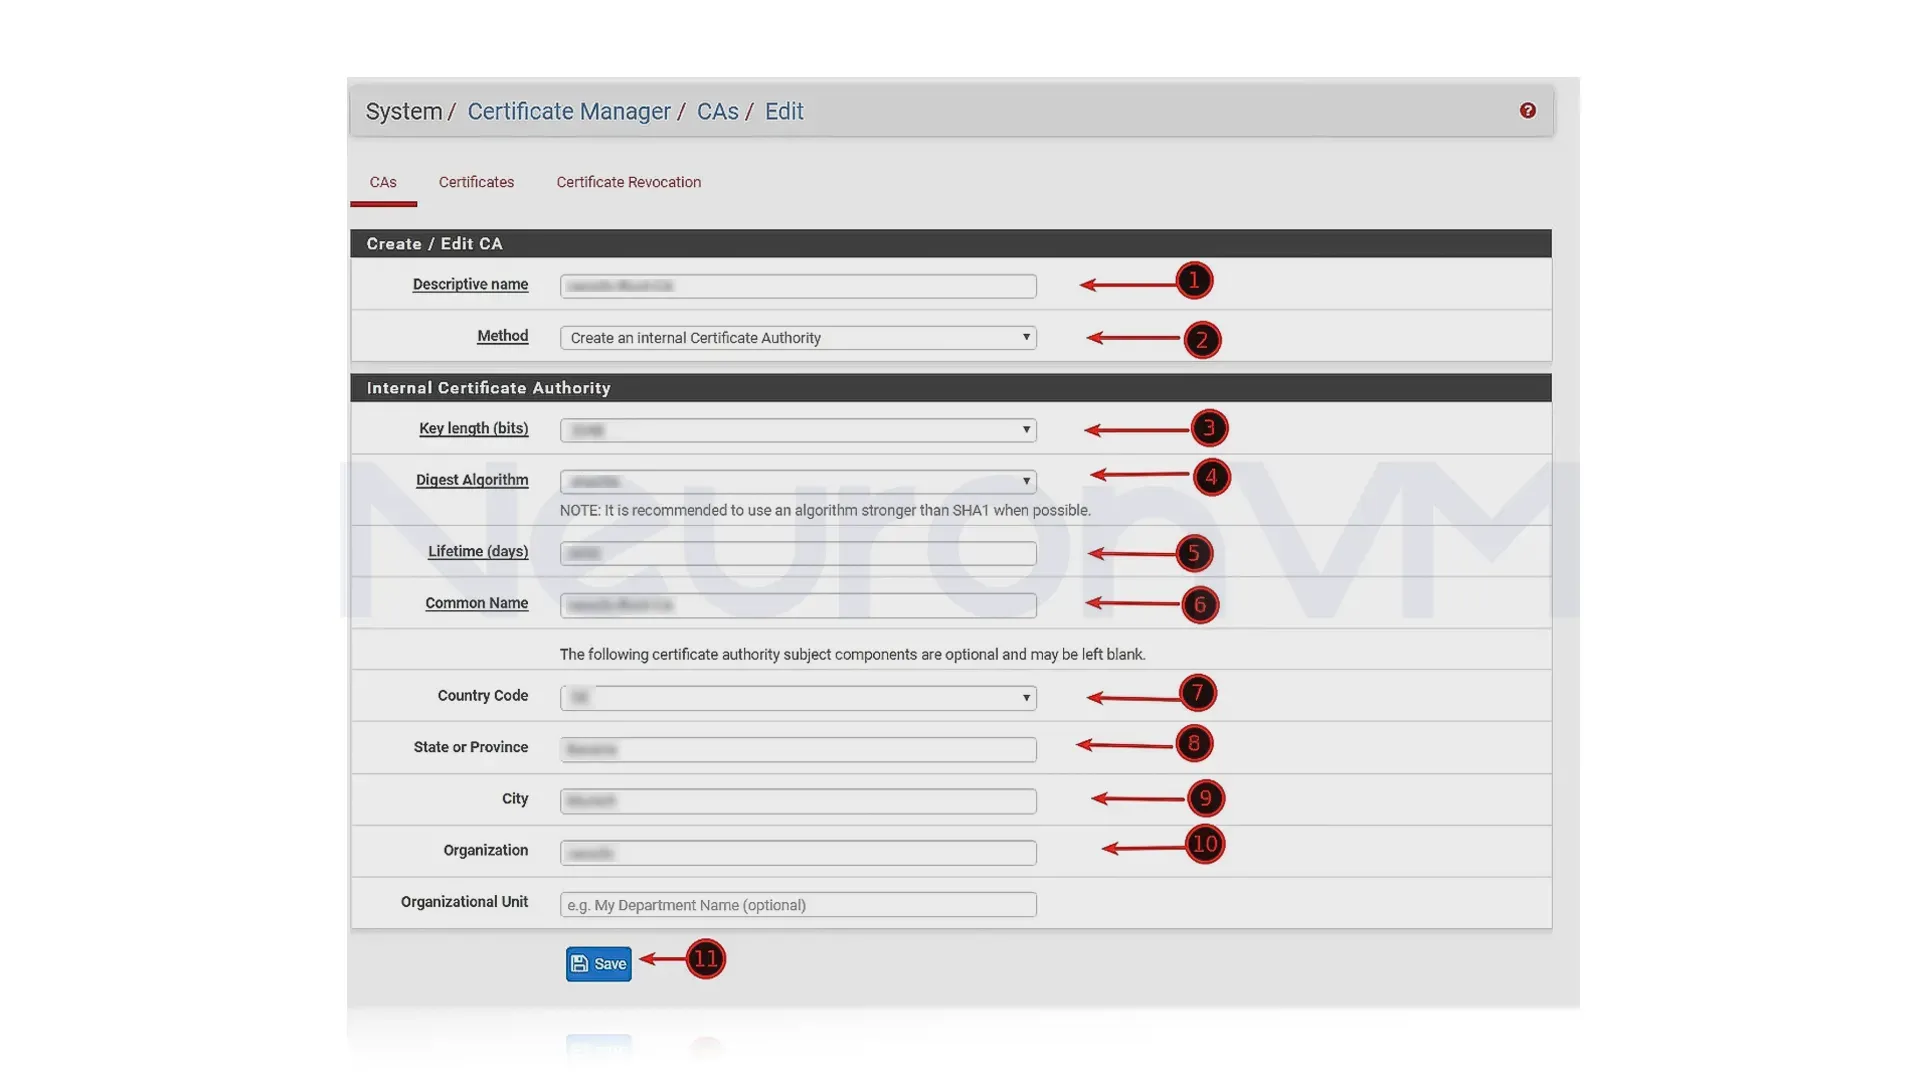
Make a Certificate Authority
To create a Certificate Authority, go to the top menu and click System, then choose Certificate Manager, then choose CAs, and on that page, click Add.
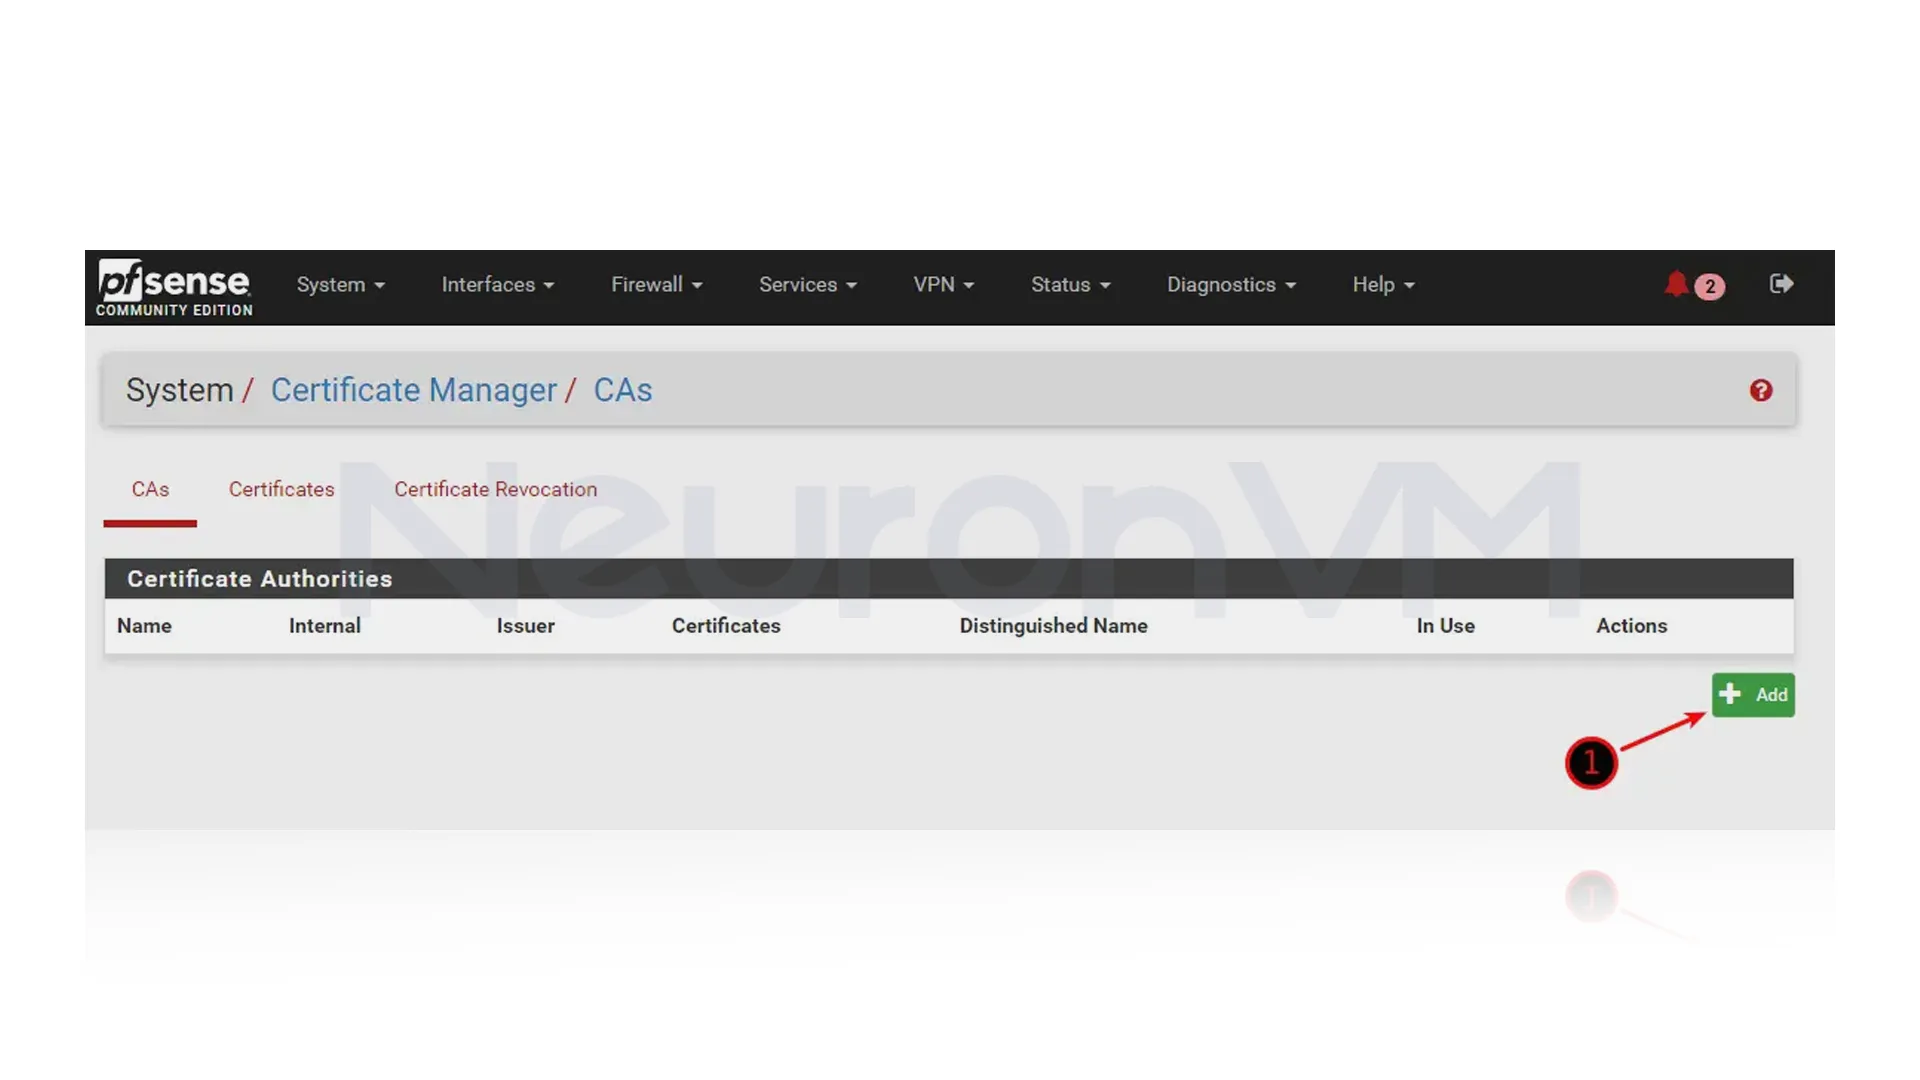
After clicking on Add, you need to fill out the basic details like a name and location, This CA will be used to create your SSL certificate in the next step.
Creating a Sub Certificate
This step helps add another layer of trust to your SSL setup, to do this, go back to the System > Certificate Manager > CAs and just click add again, and fill in the details.

Creating a New Sub Certificate
To add a new certificate in pfSense, go to the System > Certificate Manager, click the certificate tab, select Add, fill out the required information, and make sure to put your Domain Name in the required fields, In pfSense, you can configure FQDN on the System > General Setup page, where you will find fields for both Hostname and Domain.
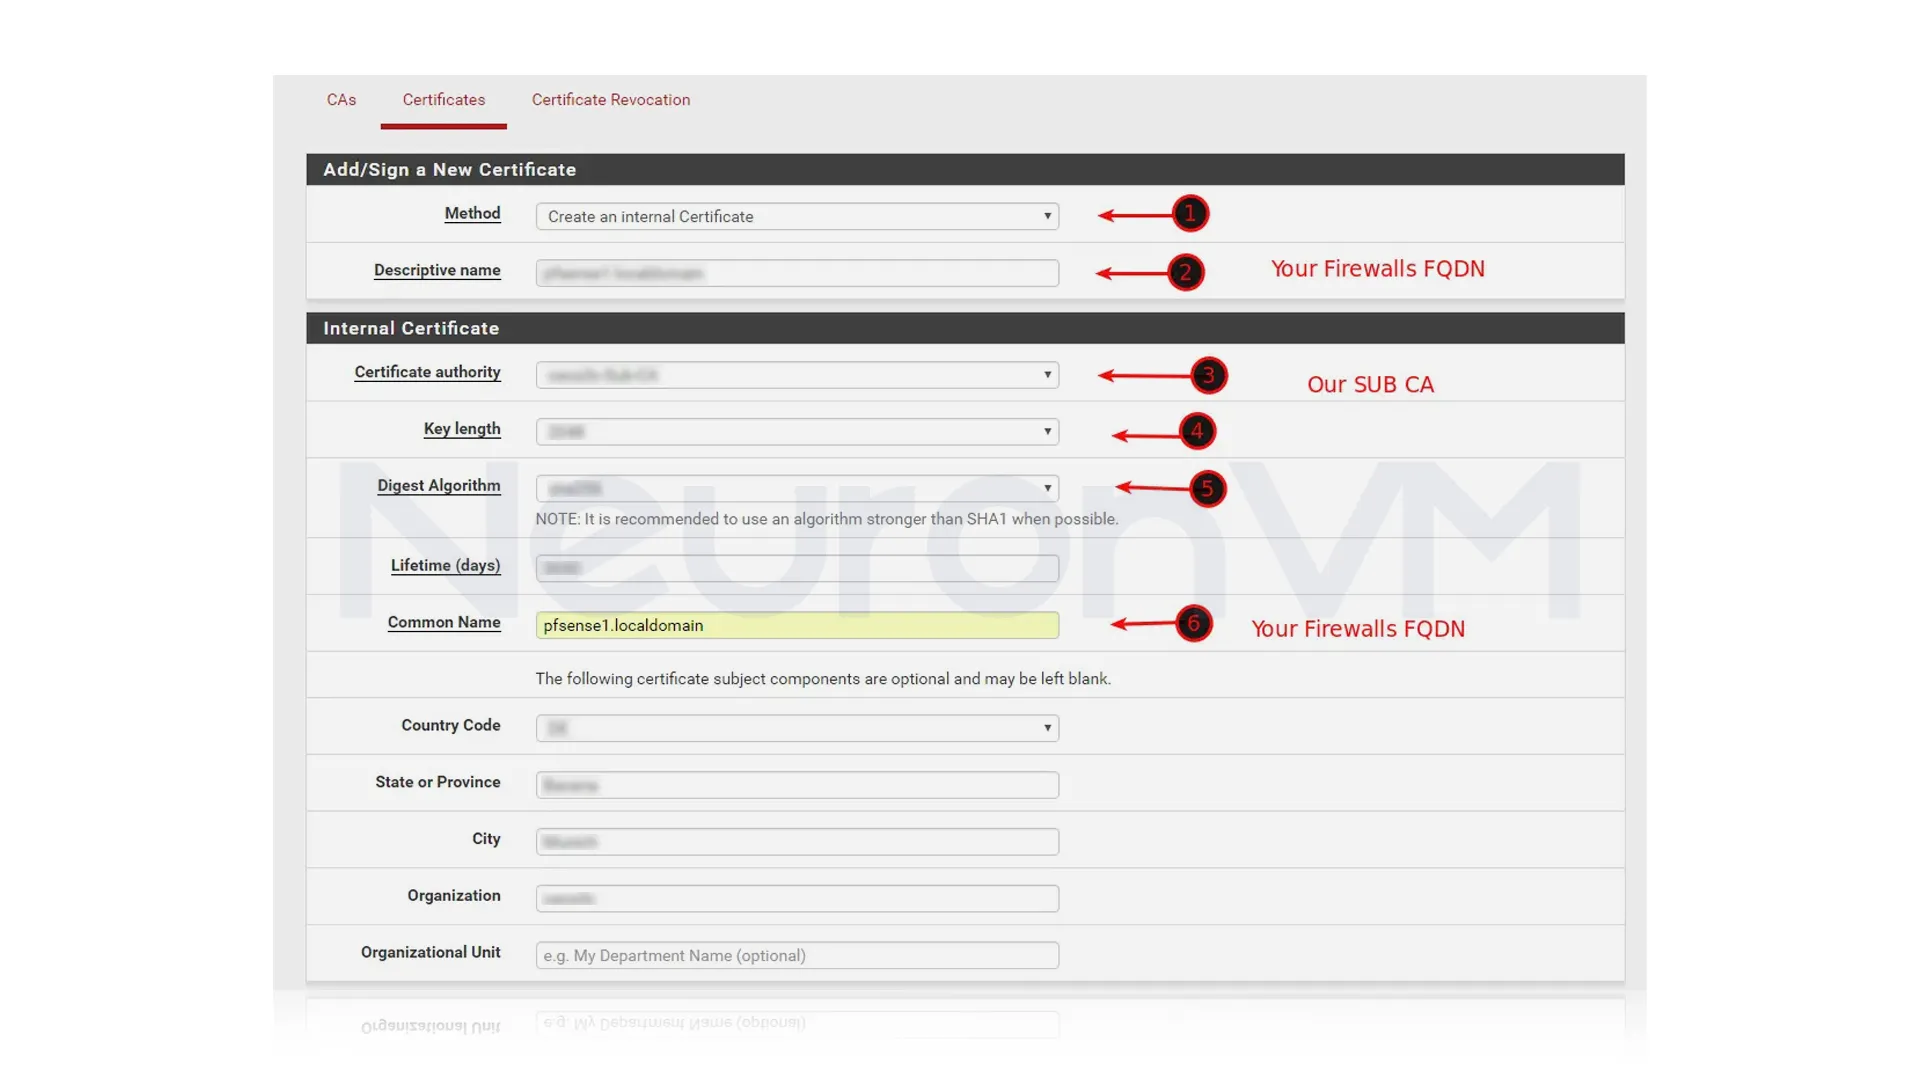
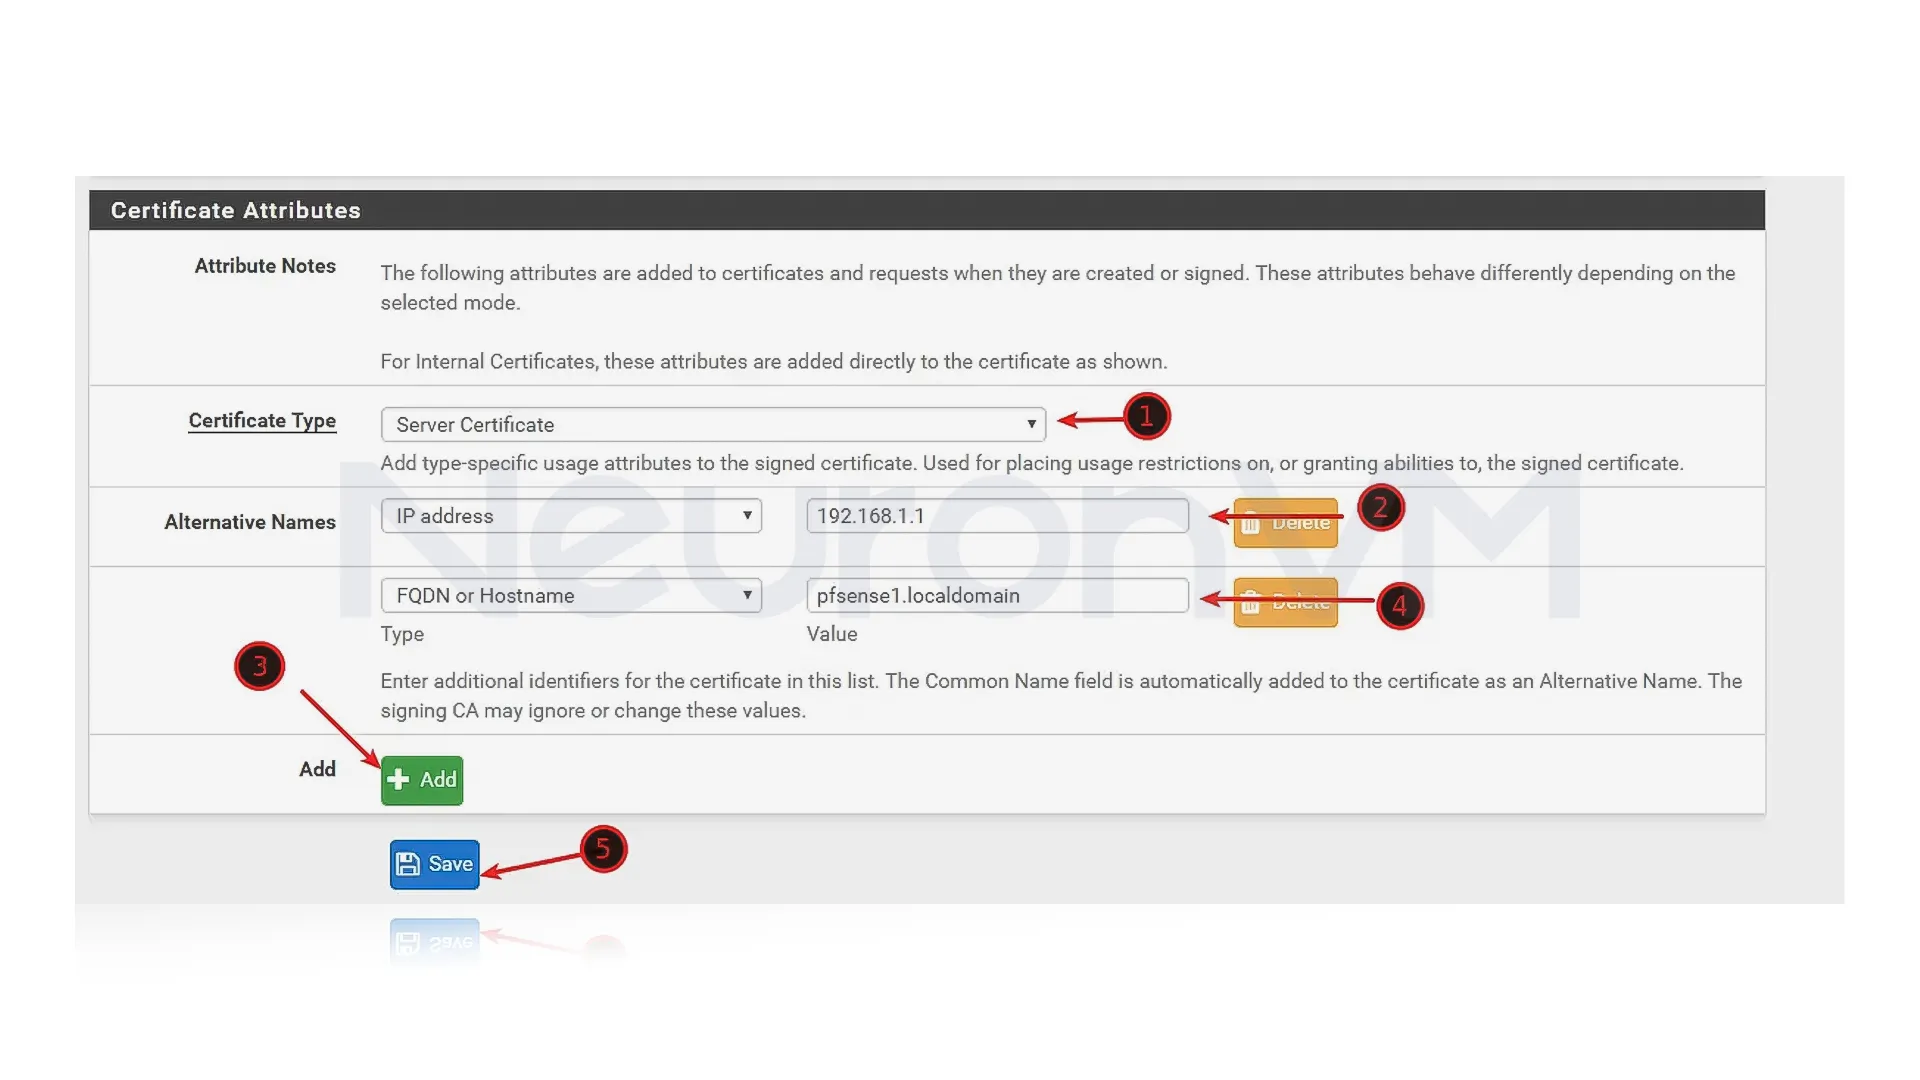
Make sure to enter the IP address of your pfSense Firewall in step 2 and the FQDN of your Firewall in step 4, also make sure that you have selected a Server Certificate in step 1.
Exporting the Certificate Authorities
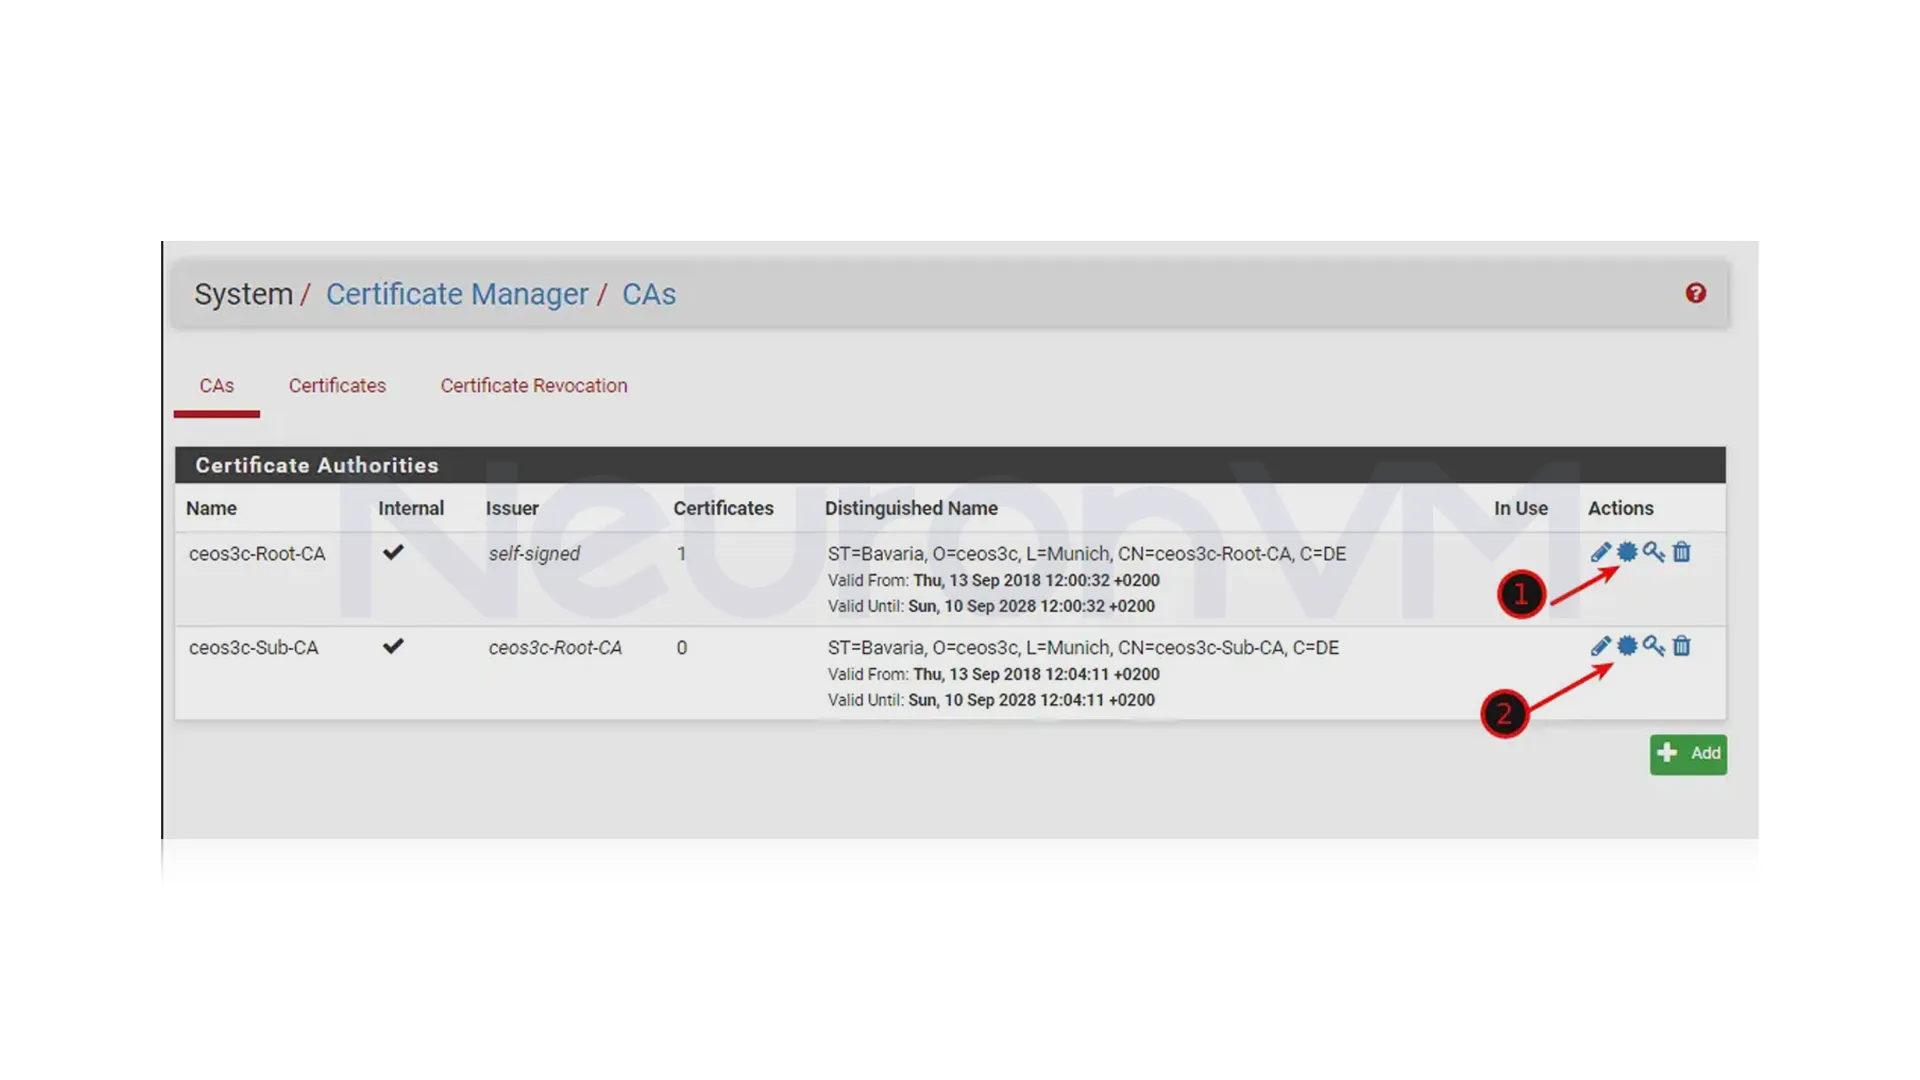
To export the Certificate Authorities, go to System > CAs, This step is important, after this step, click Export on both CAs.
💥 There are two ways to add the certificates, but in this article, we provided steps for Chrome.
- For Chrome: You need to add both certificates, depending on the browser you are using.
- For Firefox: Only the Root_CA needs to be added directly into Firefox.
Google Chrome
To make Chrome trust the certificate, you need to add the Root-CA to your Windows trusted certificates, to do this, go to the Windows Settings, type “certificate” in the search bar, then you have to choose “Manage computer certificates” from the results.
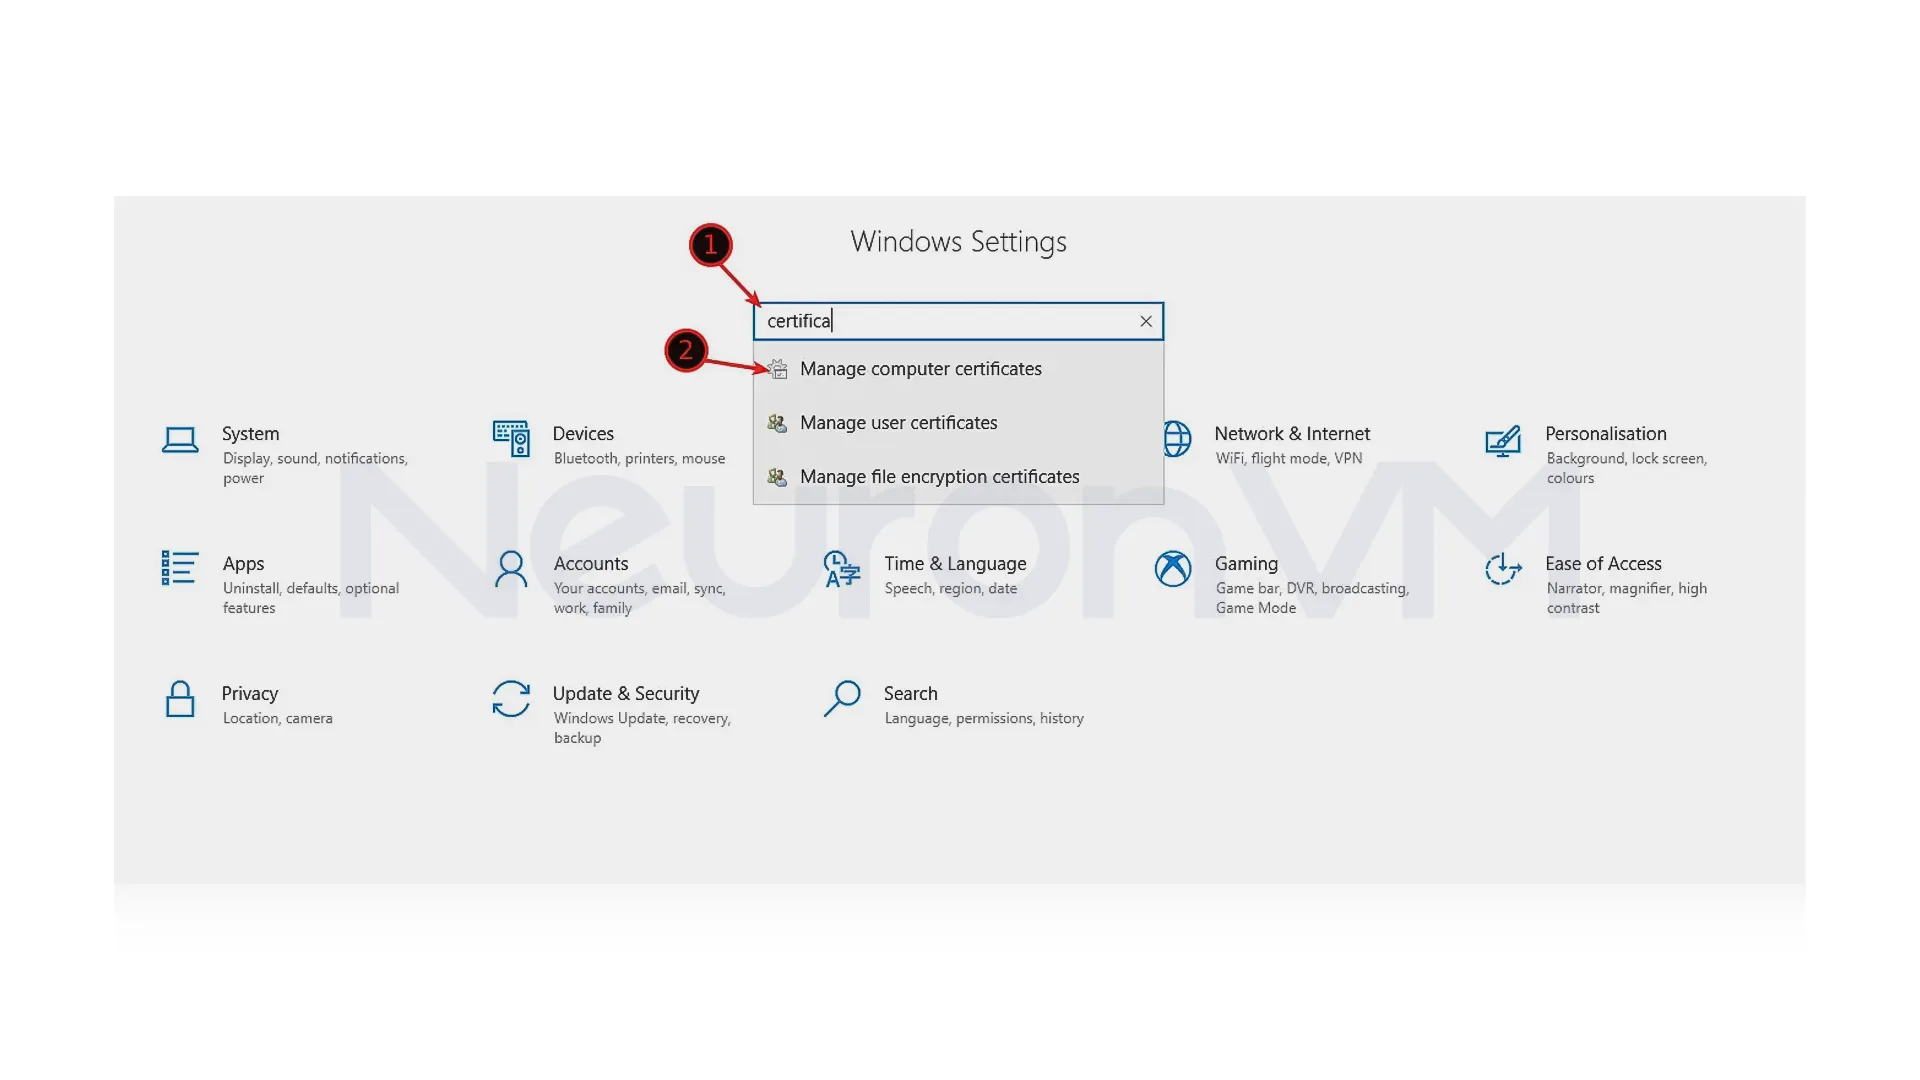
To use the certificate with Google Chrome, you need to import the Root-CA, open Windows Settings, search for “Certificate”, and then click on “Manage Computer certificates” to open the certificate manager.
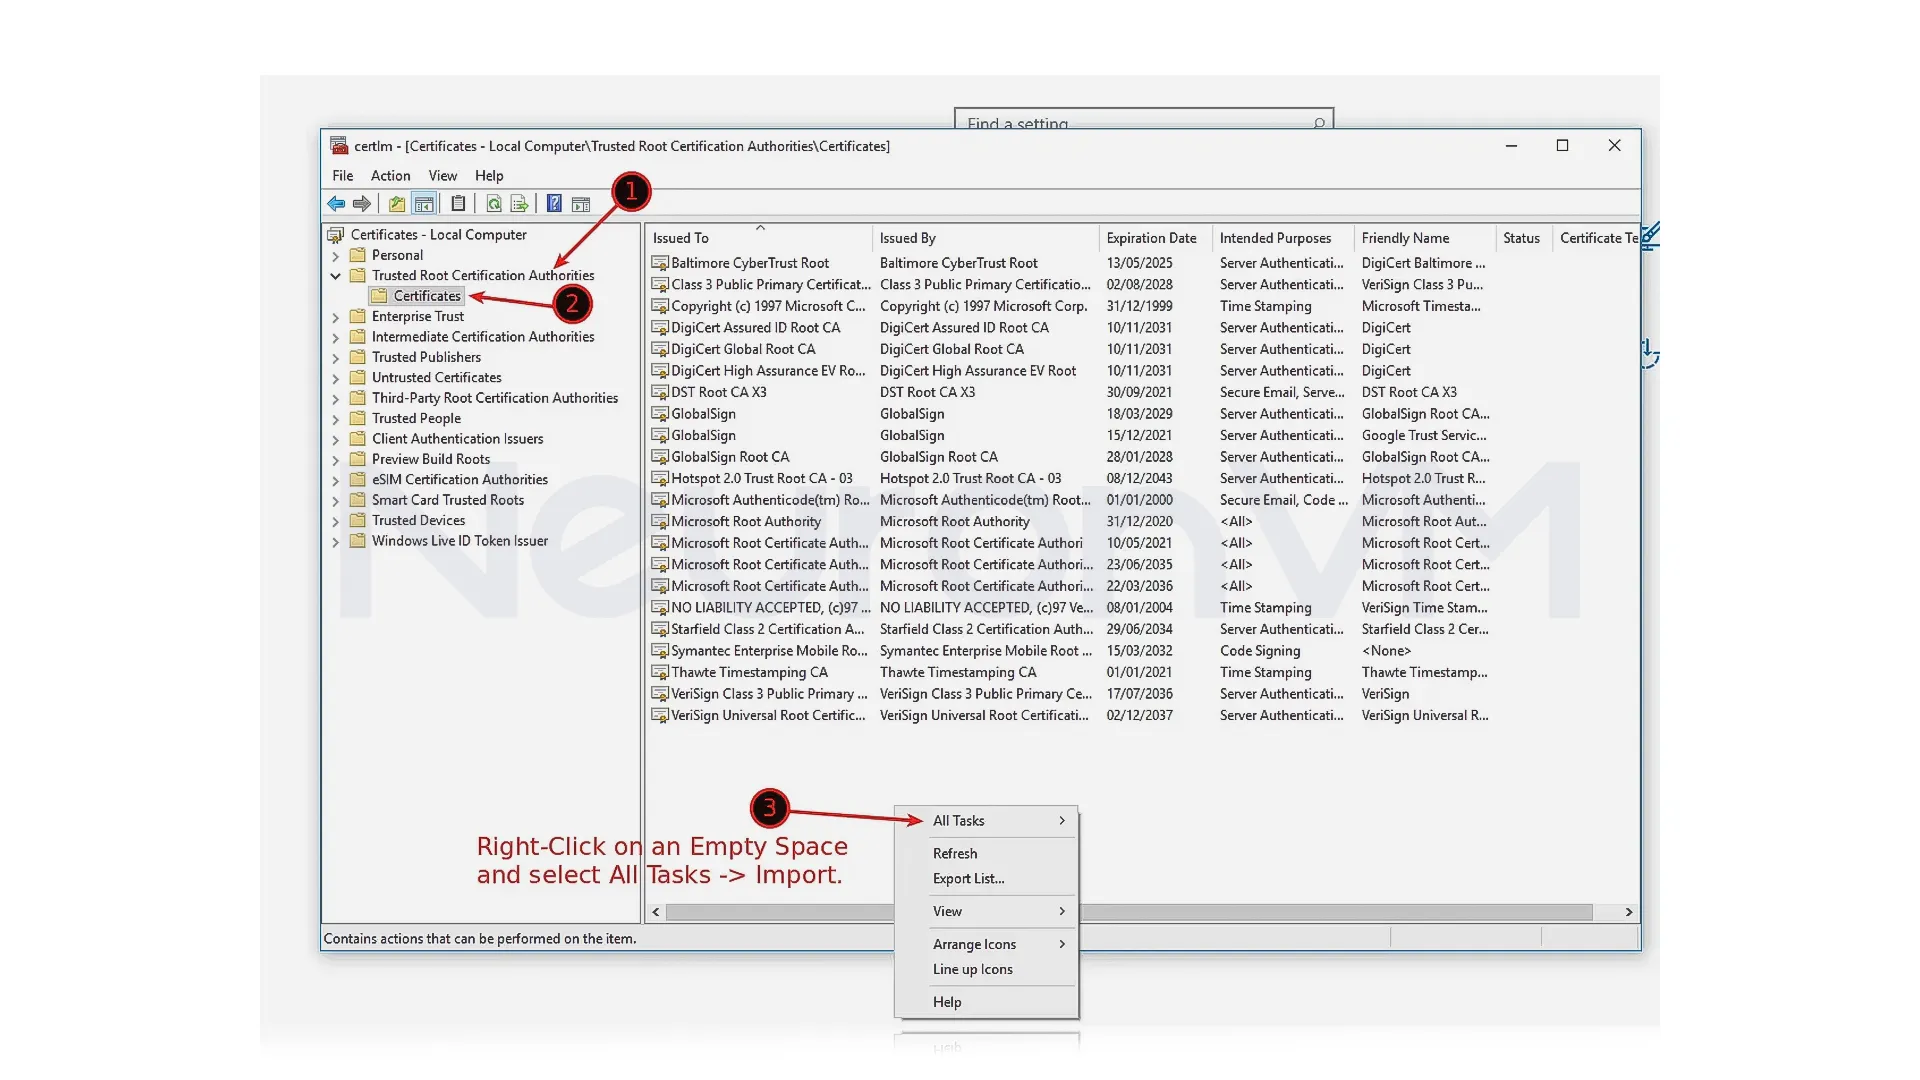
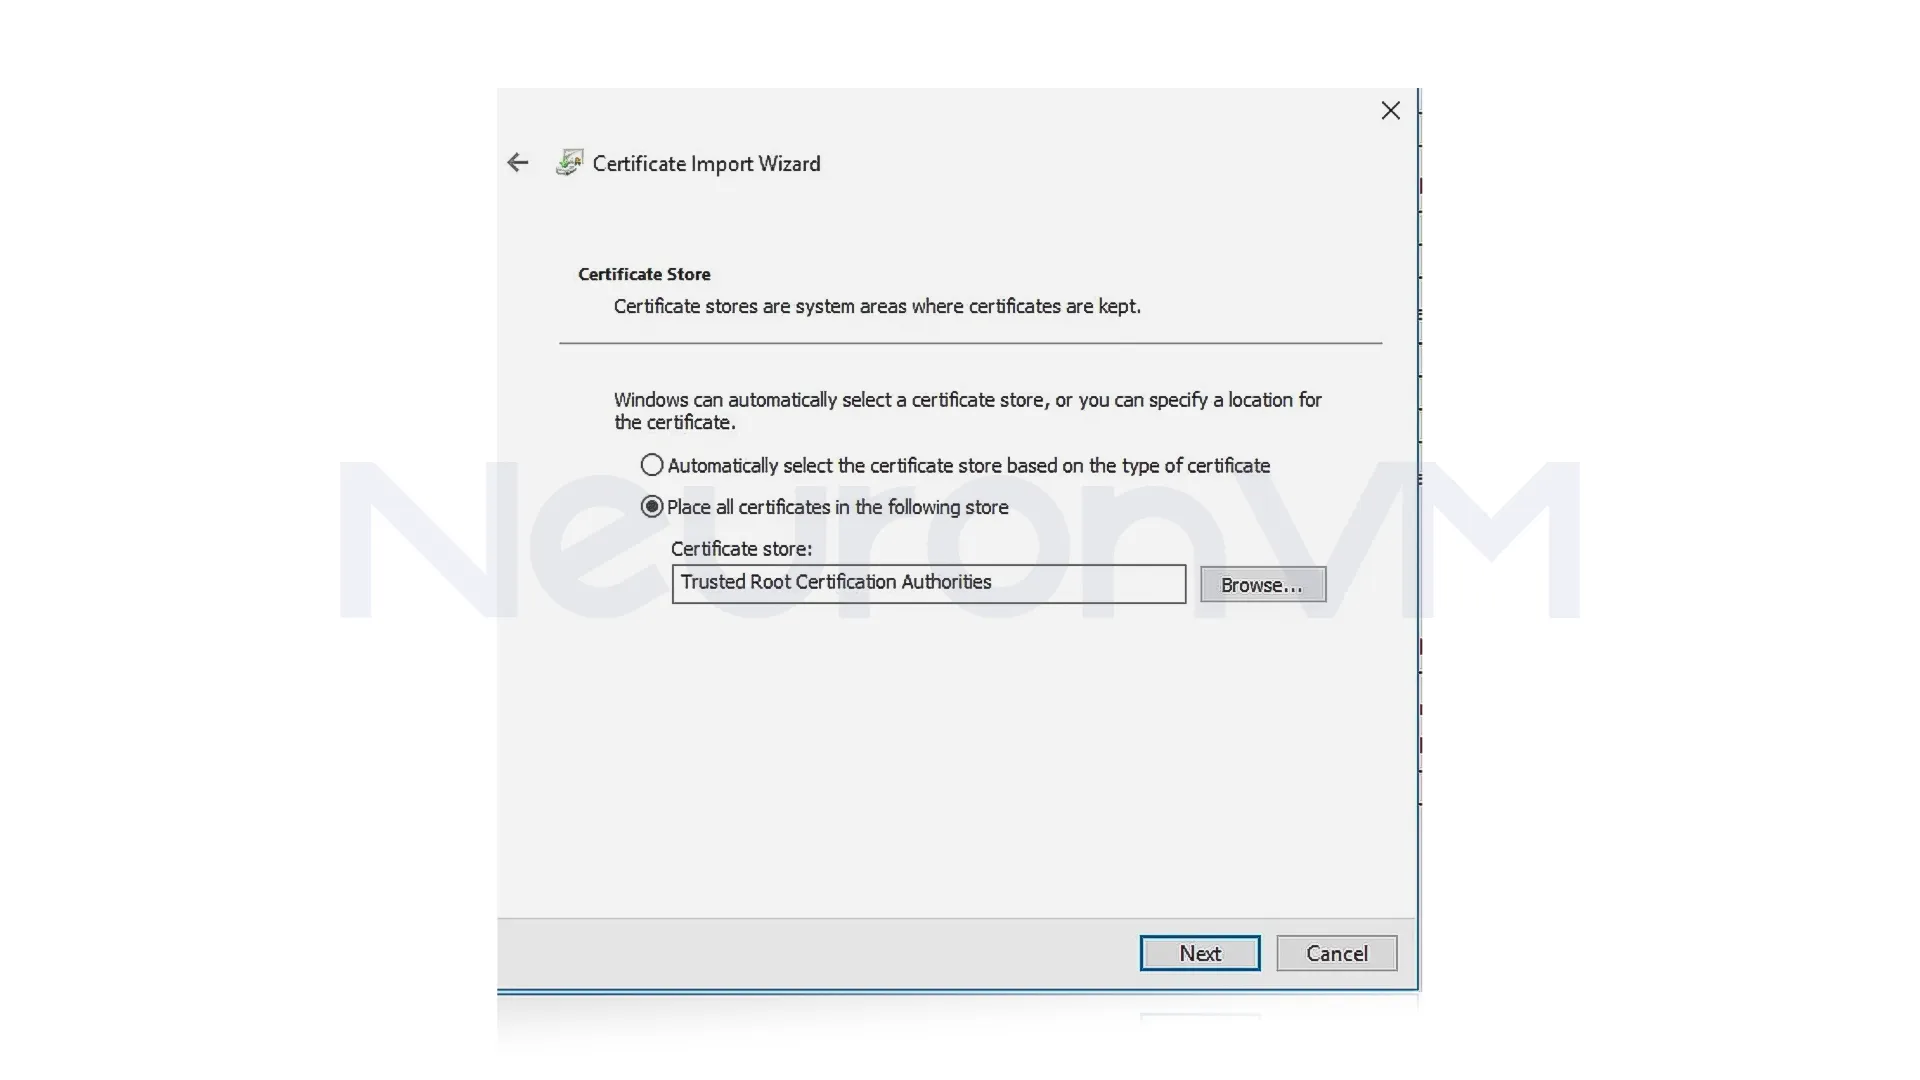
In this step, you have to choose the option “Place all certificates in a specific store”, then pick “Trusted Root Certification Authorities” from the list, after that click Next, and then click Finish to complete the import.
Enable SSH for pfSense
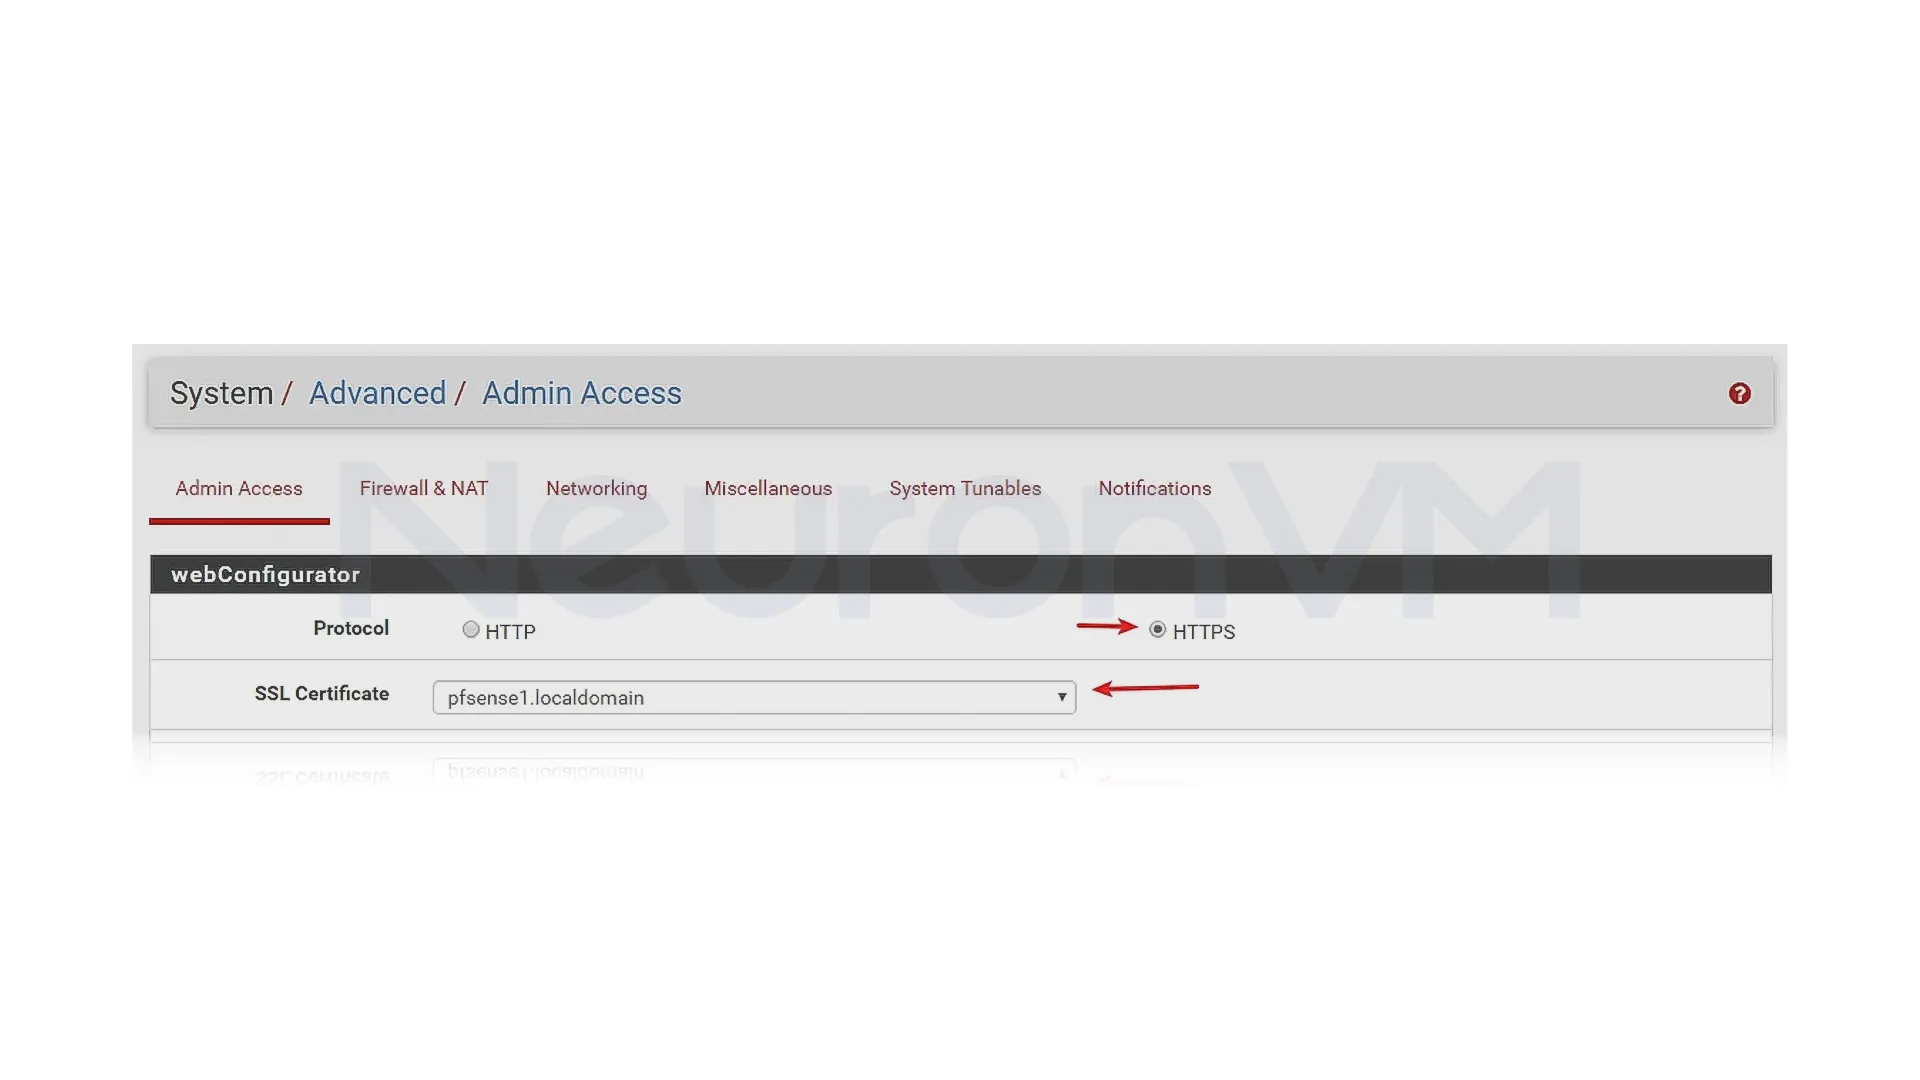
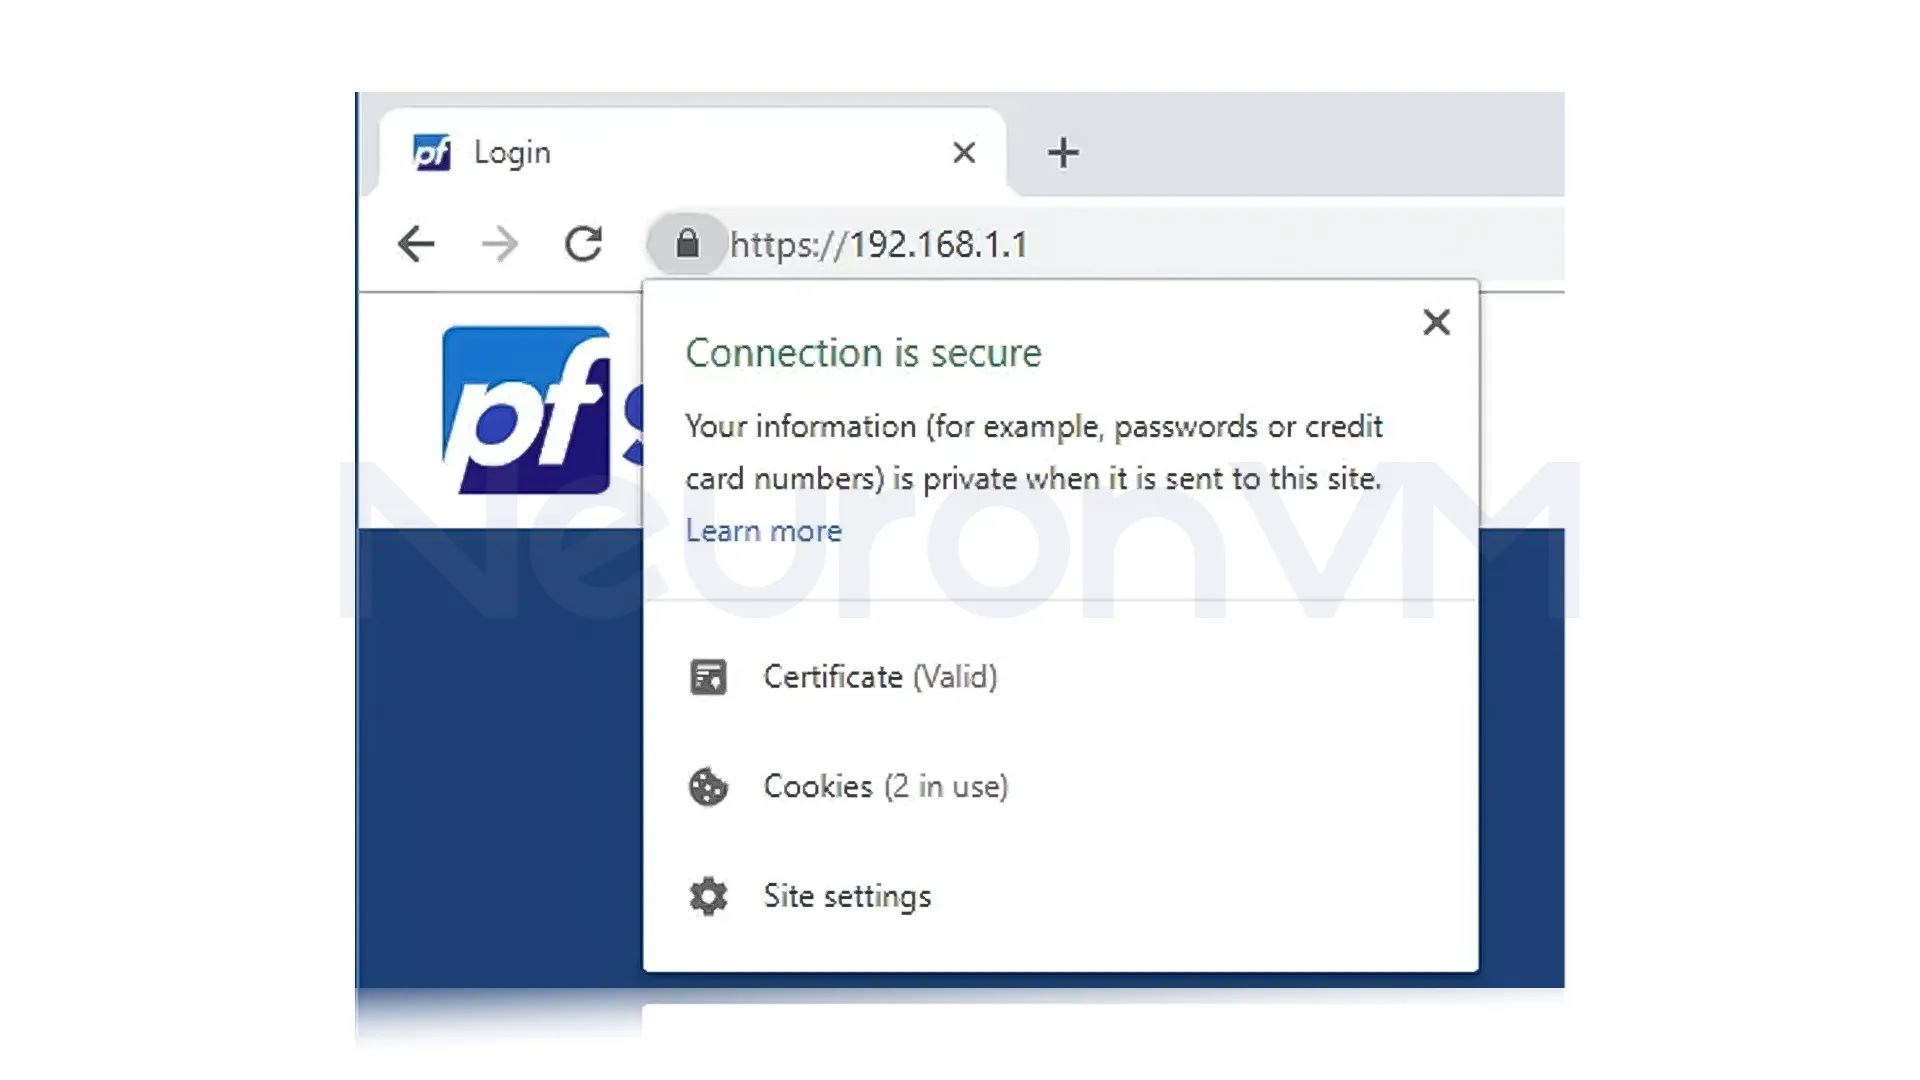
Log back in to your pfSense firewall and go to System > Advanced > Admin Access, make sure the Protocol is set to HTTPS, then change the SSL Certificate to the one you created earlier, scroll down, click save, and restart your web browser, The next time you access pfSense, you should see a secure HTTPS connection.
Wrapping Up
Since you added the Alternative Names when creating the certificate, now you can securely access your firewall using either the FQDN or the IP address.
🔼 Troubleshooting Tips
● Common SSL errors on pfSense: When you see errors like “security warning” or “wrong website name,” you need to ensure your certificate is set up right, and make sure the website name is right, and that you added the security pass right.
● Fixing the certificate trust issues: If your computer doesn’t trust the certificate, to fix this problem, you can use a certificate from a trusted company like Let’s Encrypt.
● DNS Settings for domain-based certs: If you are using a certificate for your website name, make sure your computer knows where to find your pfSense, to check if your website name points to the right place, you can use online tools.

🔼 Security Best Practices After SSL Setup
●Enforce HTTPS: After you get your certificate, make sure you use the safe “https.”
●Use strong ciphers: Use strong security codes instead of weak ones to keep your pfSense more secure.
●Regularly renew and audit certificates: Make sure your certificate gets renewed before it expires; you can set your pfSense to do this automatically.
🔼 Using pfSense with Mikrotik or VPS Settings
SSL is a key part to keep your network safe, when you use pfSense with other network tools like MikroTik or VPS, make sure they are a safe tunnel between your official network and pfSense, if you are considering purchasing a VPS plan, check NeuronVM for the smoothest experience.

🔼 Everything about SSL Certificate
SSL certificates help websites be safe by using HTTPS, these files are in the website’s computer, and make data unreadable for others, they are essential for HTTPS because they provide a secure connection, when your device goes to a website it uses public code from the certificate to make the connection but the website’s secret code is kept hidden.
Conclusion
Securing your pfSense firewall with an SSL certificate is a beneficial step to protect your network and ensure private communication, in this guide, we walked you through the process of generating a CSR, installing the necessary certificates, and verifying your installation by following the provided steps, you can enhance your pfSense firewall’s security, we encourage you to explore the pfSense’s main website and leave your thoughts for us in the comments, if you are looking for a fast and secure VPS for pfSense, our plans on NeuronVM.

