How to Split MP3 Files on Windows 11 (Step-by-Step Guide)

 12m
12m
 0 comments
 Print
Print
If you’ve ever tried organizing your audio files, you know how chaotic it can get especially when you’re dealing with a three hour podcast, a full concert mix / or lecture recordings that feel endless. I’ve been there too, scrolling through long audio tracks just to find that one perfect section. That’s when splitting MP3 files becomes a total game changer. Breaking a long MP3 into smaller, organized clips makes everything easier from trimming out the boring bits to creating custom ringtones or keeping your playlist neat and clean!!! Luckily, if you’re on Windows 11, you already have access to a few excellent tools that make this process smooth and quick. In this guide, I’ll walk you through two of my favorite ways to split MP3 files: Audacity (a pro-level editing tool) and Online MP3 Cutter (a quick, web based option). You’ll learn how to use each one step by step, plus when it makes more sense to pick one over the other depending on what you’re trying to do.
Why Even Bother Splitting MP3 Files?
Before jumping into the tools, let’s talk about the why. There are tons of situations where splitting an audio file saves time and your sanity:
1- Personalized playlists: Maybe you only love that 45-second guitar solo in the middle of a song. Clip it out and make it your jam.
2- Podcast cleanup: Tired of skipping long intros or ads? Just cut them once and save a cleaner version!!!
3- Audiobooks: Instead of keeping one huge file, break it into chapters for easier navigation.
4- Sharing made simple: Smaller files upload faster and take up way less storage.
It’s not just about editing, it’s about control, efficiency, and making your listening experience exactly how you want it.
How to Cut MP3 Files on Windows 11
Let’s imagine this! You’ve got a track, maybe it’s a podcast episode or a music mix that runs for an hour. But you only need the funny part at the 20 minute mark. You could scroll endlessly and play-pause your way through it, or you could simply cut that section out and save it separately. Windows 11 gives you plenty of options for this, from beginner-friendly online tools to advanced software like Audacity. Let’s start with the one that audio enthusiasts swear by: Audacity.
Fun fact: Did you know Audacity was first released back in 2000 by two Carnegie Mellon University students? Over two decades later, it’s still one of the most trusted open-source editors in the world. The reason?! It’s completely free, lightweight, and powerful enough to handle everything from podcasts to professional studio mixes.
Bonus Insight
One thing I’ve learned from editing countless files both for work and for fun is that no two audio projects are ever the same. Sometimes you just need a clean, fast trim (and an online tool works great for that). Other times, you want full control over fade-ins, volume balance, and precision cuts and that’s when Audacity shines. Once you get the hang of it, splitting MP3s feels less like “editing” and more like curating your own mini soundtrack.
Transition to Next Section
If you’ve ever done any audio editing. you’ve probably heard of Audacity a free open source program that professionals and beginners both love. It gives you full control over your sound and supports many formats including MP3 / WAV / and FLAC. Here’s how to split your MP3 file step by step:
Method 1: Split MP3 Files Using Audacity
If you’ve ever done any audio editing, you’ve probably heard of Audacity a free, open source program that professionals and beginners both love. It gives you full control over your sound and supports many formats including MP3, WAV, and FLAC. Here’s how to split your MP3 file step by step:
Step 1: Download and Install Audacity
Visit “audacityteam.org” and download the latest version compatible with Windows 11. Follow the setup wizard to install it!!!
Step 2: Import Your Audio File
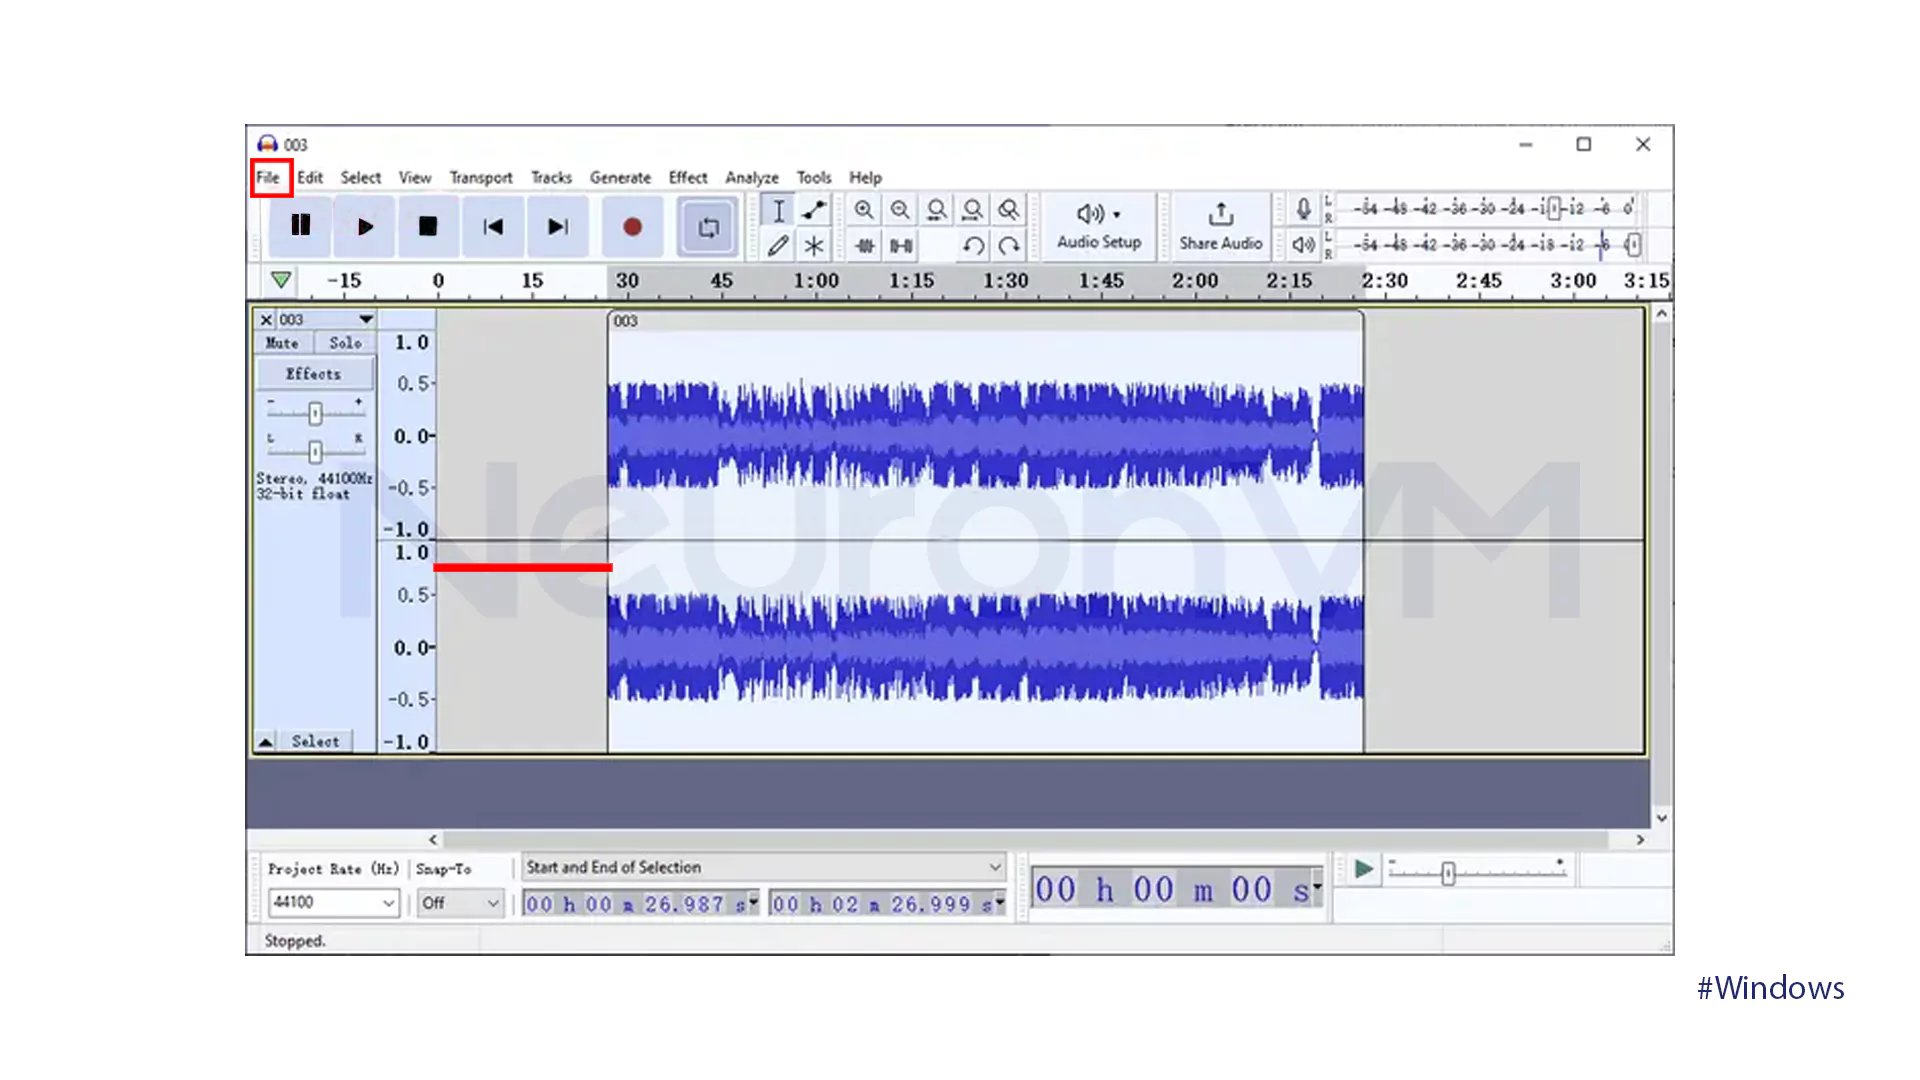
Open Audacity. Go to File > Import. Audio, then select the MP3 file you want to edit. You can also drag and drop the file directly into the window.
Step 3: Select the section you want
Click and drag across the waveform to highlight the portion you want to keep or cut!!! Use the Zoom Tool (Ctrl + 1) to fine-tune your selection for precise editing.
Step 4: Cut or Trim the Audio
From the top menu, choose Edit > Remove Special > Trim Audio. Everything outside your selected portion will be deleted. leaving only what you highlighted.
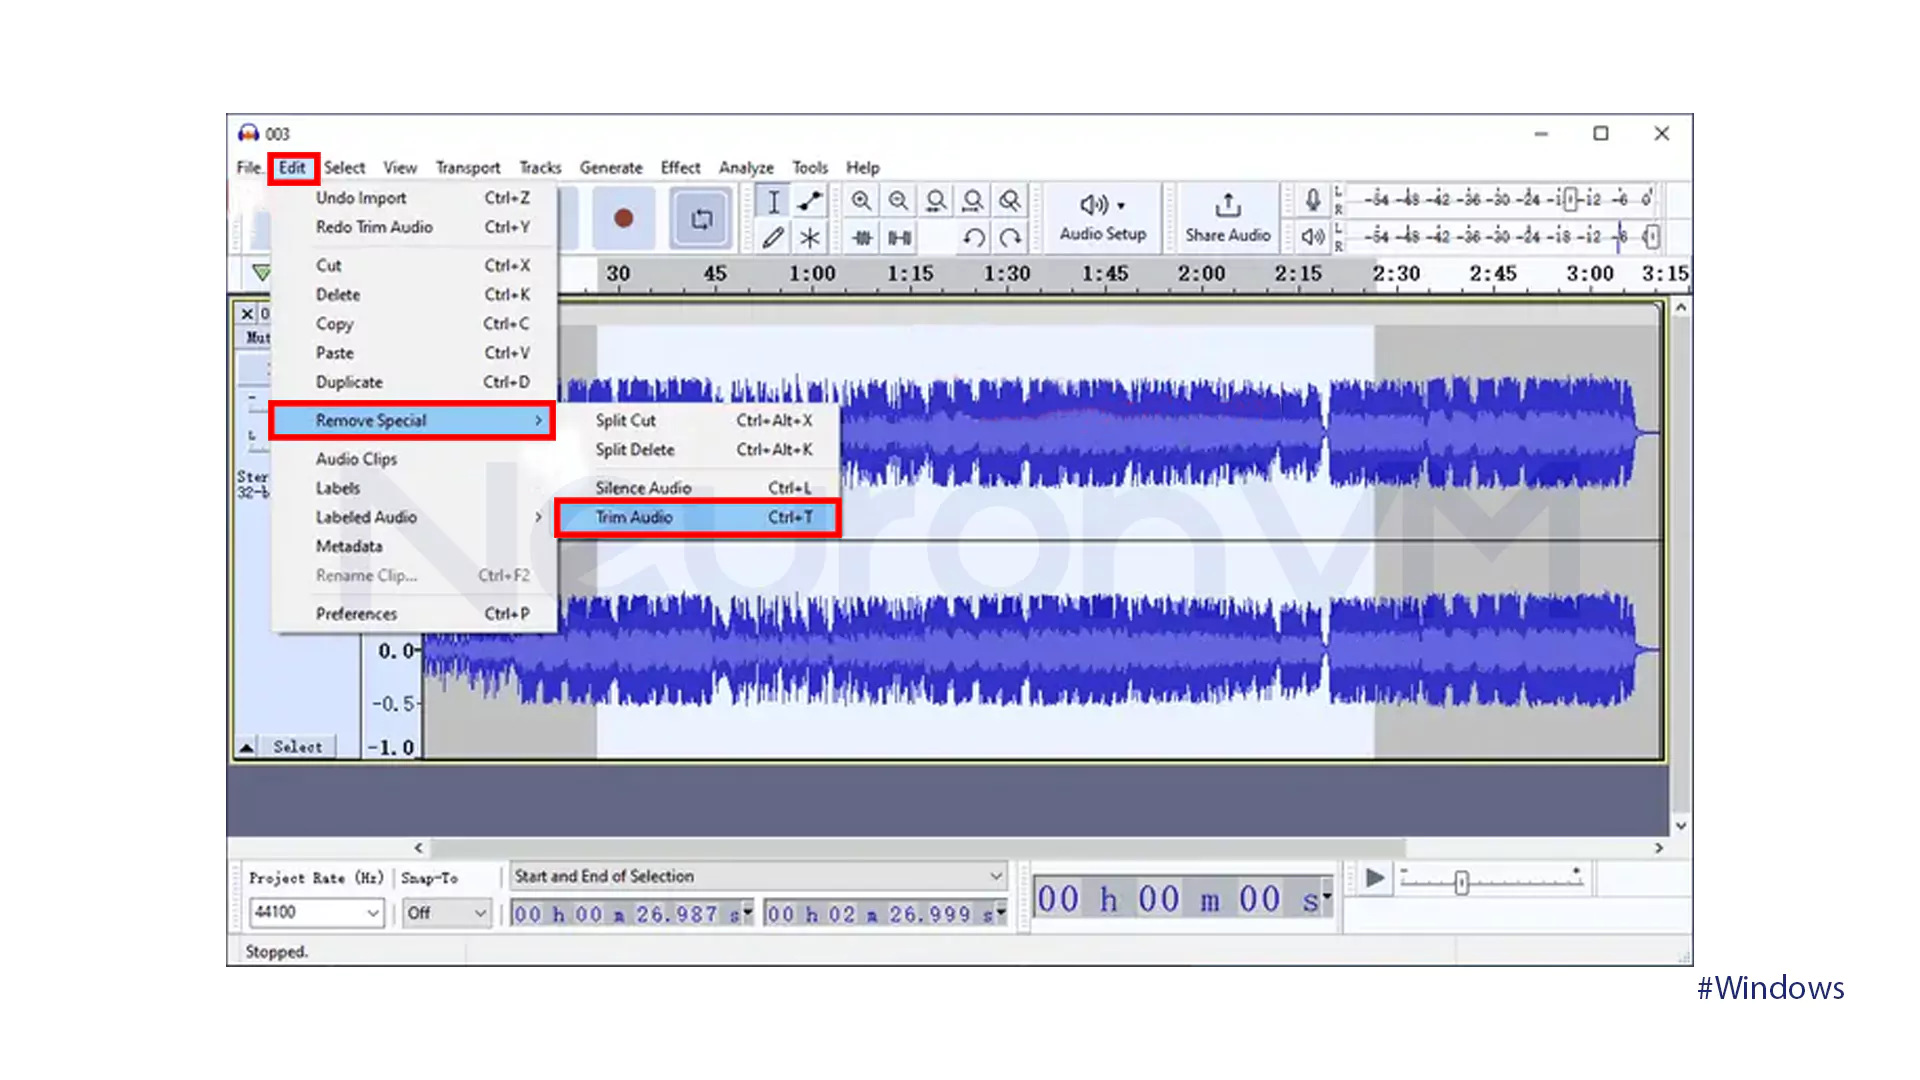
💡 Pro tip: If you hear extra silence at the beginning or end. select the full track (Ctrl + A), cut (Ctrl + X), move the playhead to the beginning, and paste (Ctrl + V). This removes dead space instantly.
Step 5: Export the edited MP3
When you’re done, go to File > Export > Export as MP3, choose a destination folder, and give your file a unique name. Click Save, and you’re all set.
Method 2: Split MP3 Online (Using MP3Cut.net)
Suppose you have a song that you want to keep only a part of or remove extra silences. The Online MP3 Cutter site is made for exactly that. Just upload your song, then use the start and end sliders to cut out the part you want!!! It even has a cool feature called Audio Remover that removes empty or extra parts on its own.
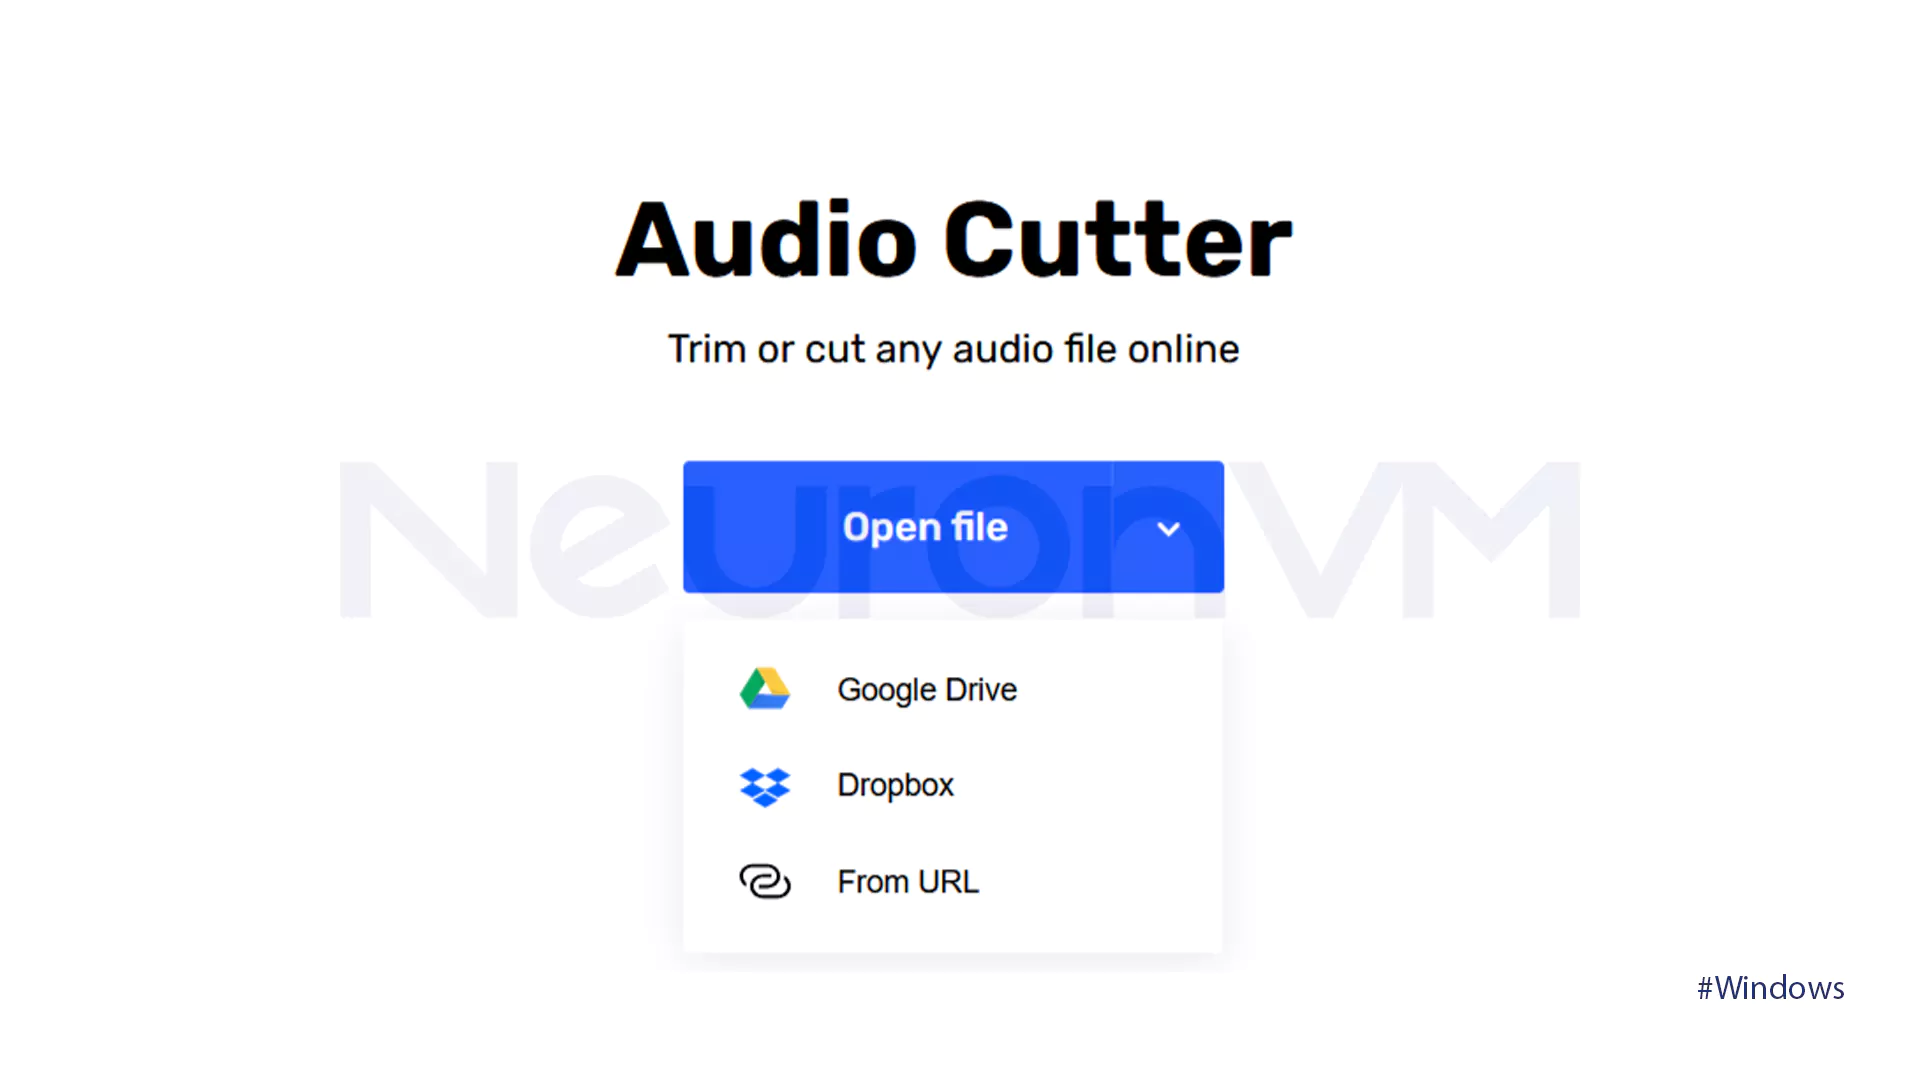
Step 1: Upload Your File!
Go to “mp3cut.net” and click Open File. You can upload directly from your computer. Google Drive. Dropbox or even paste a file URL.
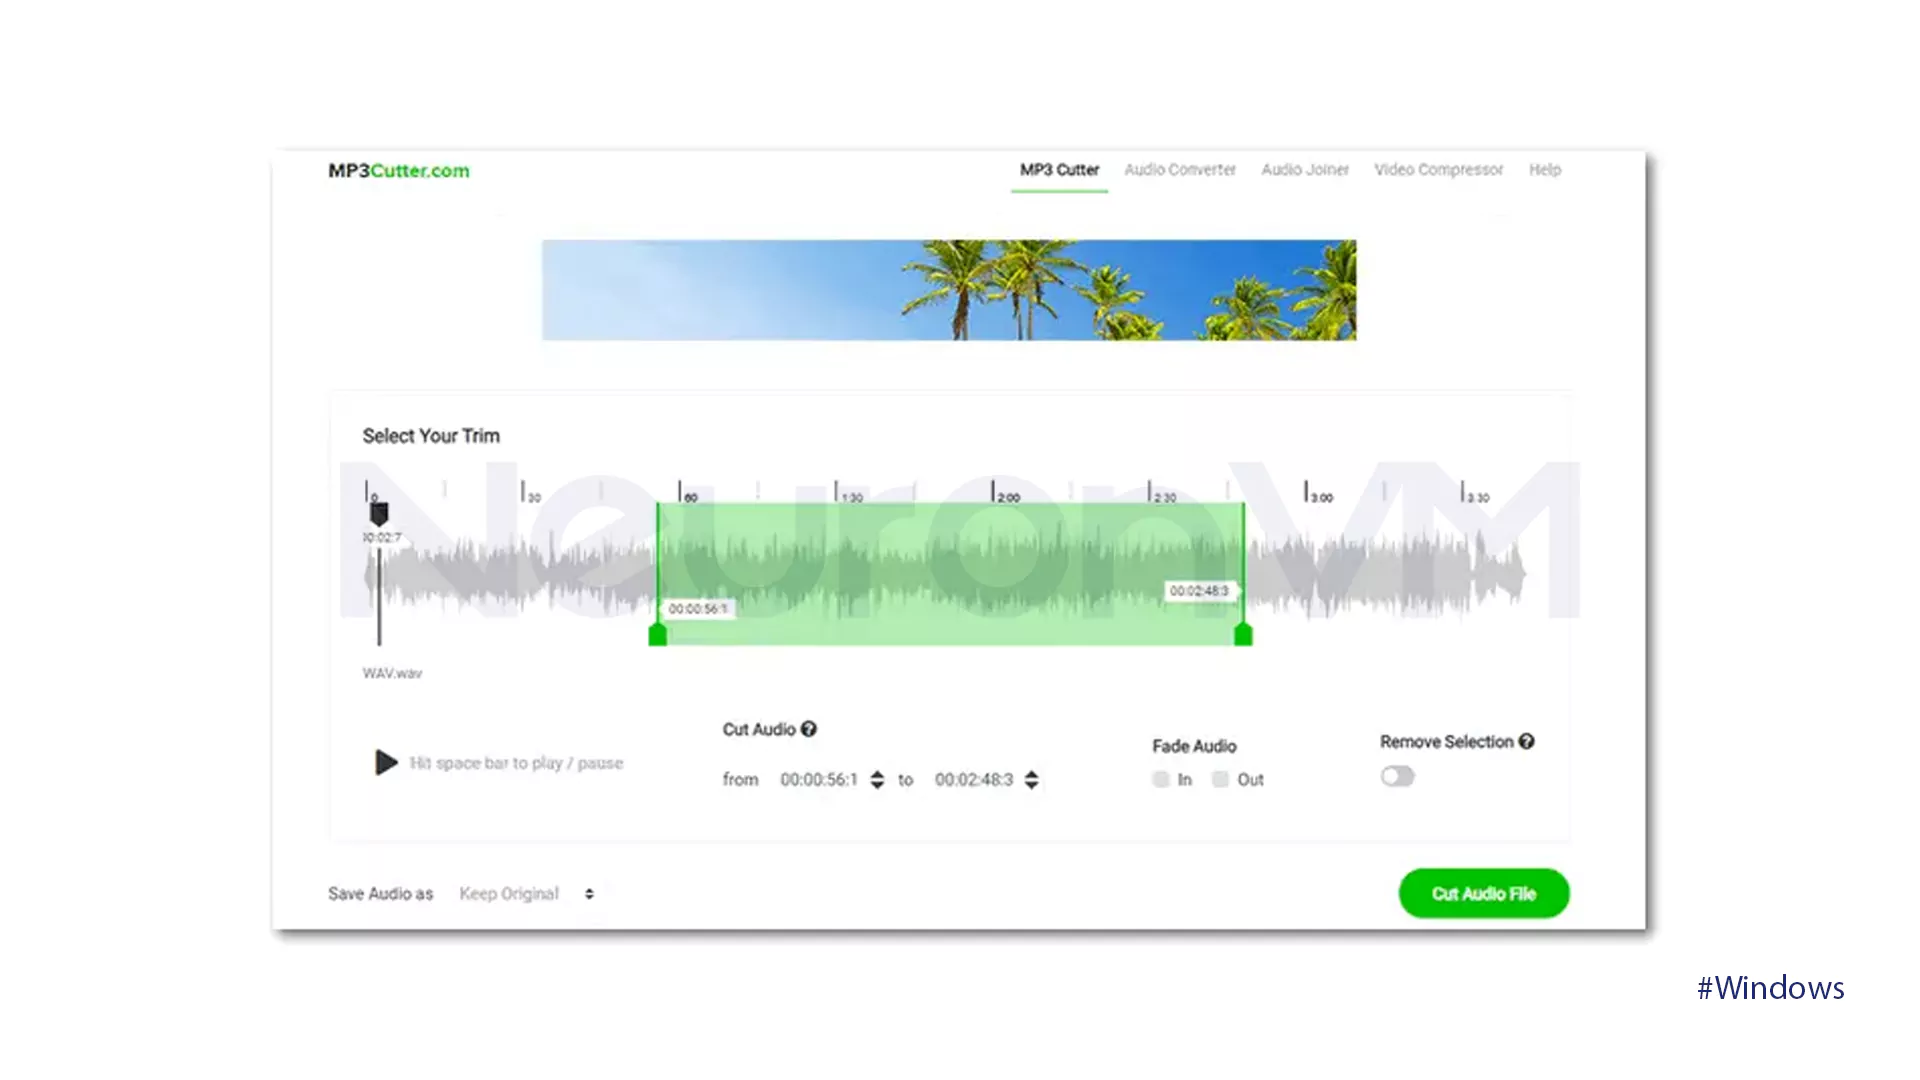
Step 2: Adjust the Sliders
Use the start and end sliders to mark the part of the song you want to keep or remove!!! You can listen to previews to make sure the timing is accurate.
Step 3: Optional Enhancements!
Turn on the “Remove Selection” option if you want to delete a section or turn it off to keep only the highlighted part. You can also apply Fade In or Fade Out effects to make transitions smoother.
Step 4: Save and Download
Now Save Audio with MP3! Cut Audio File. When it’s ready hit Download Your File Here to save it to your computer.
Conclusion
Cutting or splitting MP3 files on Windows 11 isn’t just a technical process it’s about customizing your audio experience. If you want professional level control Audacity is your best option. If you just need a quick and simple trim MP3Cut.net gets the job done online within seconds. Learning how to split an MP3 file can help you create ringtones, edit classes, or prepare short clips for social media. The more you practice the more efficient and confident you’ll become in managing digital audio like a Professional.
Splitting MP3 files helps you manage long audio recordings more efficiently. You can create personalized playlists, remove unwanted sections from podcasts, organize lengthy audiobooks, or make files easier to share. It’s a practical way to take control of your music and recordings.
It depends on your needs. Audacity is perfect for detailed editing, professional features, and full control over audio. MP3 Cutter Online is faster and simpler, ideal if you just want to trim a section or remove silences without installing software.
In Audacity, select the track, use Ctrl + X to cut, move the cursor to the start, and paste with Ctrl + V to remove silence. In MP3 Cutter Online, you can use the “Remove Selection” or automatic Audio Remover feature to eliminate unwanted silent parts quickly.
You might like it