How to Install Yarn on Debian (and Why It’s Better Than NPM)


 7m
7m
 0 comments
 Print
Print
Sometimes, when you work with Node.js projects on Debian, managing packages with npm can be really frustrating. Slow speeds, messy dependencies, and incompatible versions can waste hours of your time. That’s where I first came across Yarn, a simple but smart tool that both speeds up installations and keeps my projects cleaner. I remember on one of my big React projects, npm kept giving me dependency mismatch errors. After installing Yarn and running the same commands, everything went smoothly. Since then, I’ve always used Yarn for team projects because it’s faster and handles security and version control much better. In this article, you will learn step by step how to install Yarn on Debian, and along with it, I have written some practical tips and personal experiences for you so that you can learn not only how to install, but also how to use Yarn professionally.
Why is Yarn better than NPM?
Before you install, it’s good to know why so many developers use Yarn:
- Simultaneous and parallel installation of packages, which multiplies the speed
- Strict version management with the “yarn.lock file”
- Smart caching system to save on downloads
- Better security and more control over dependencies
But most importantly: Yarn makes your development environment more reliable.
When you work as a team, this consistency means everyone is working on the same version.
Steps to Install Yarn on Debian
Step 1: Add the Yarn Repository
On Debian, the best way to install Yarn is to use its official repository. First, add the repository’s GPG key and then introduce the repository to the system:
curl -sS https://dl.yarnpkg.com/debian/pubkey.gpg | sudo apt-key add -
echo "deb https://dl.yarnpkg.com/debian/ stable main" | sudo tee /etc/apt/sources.list.d/yarn.list
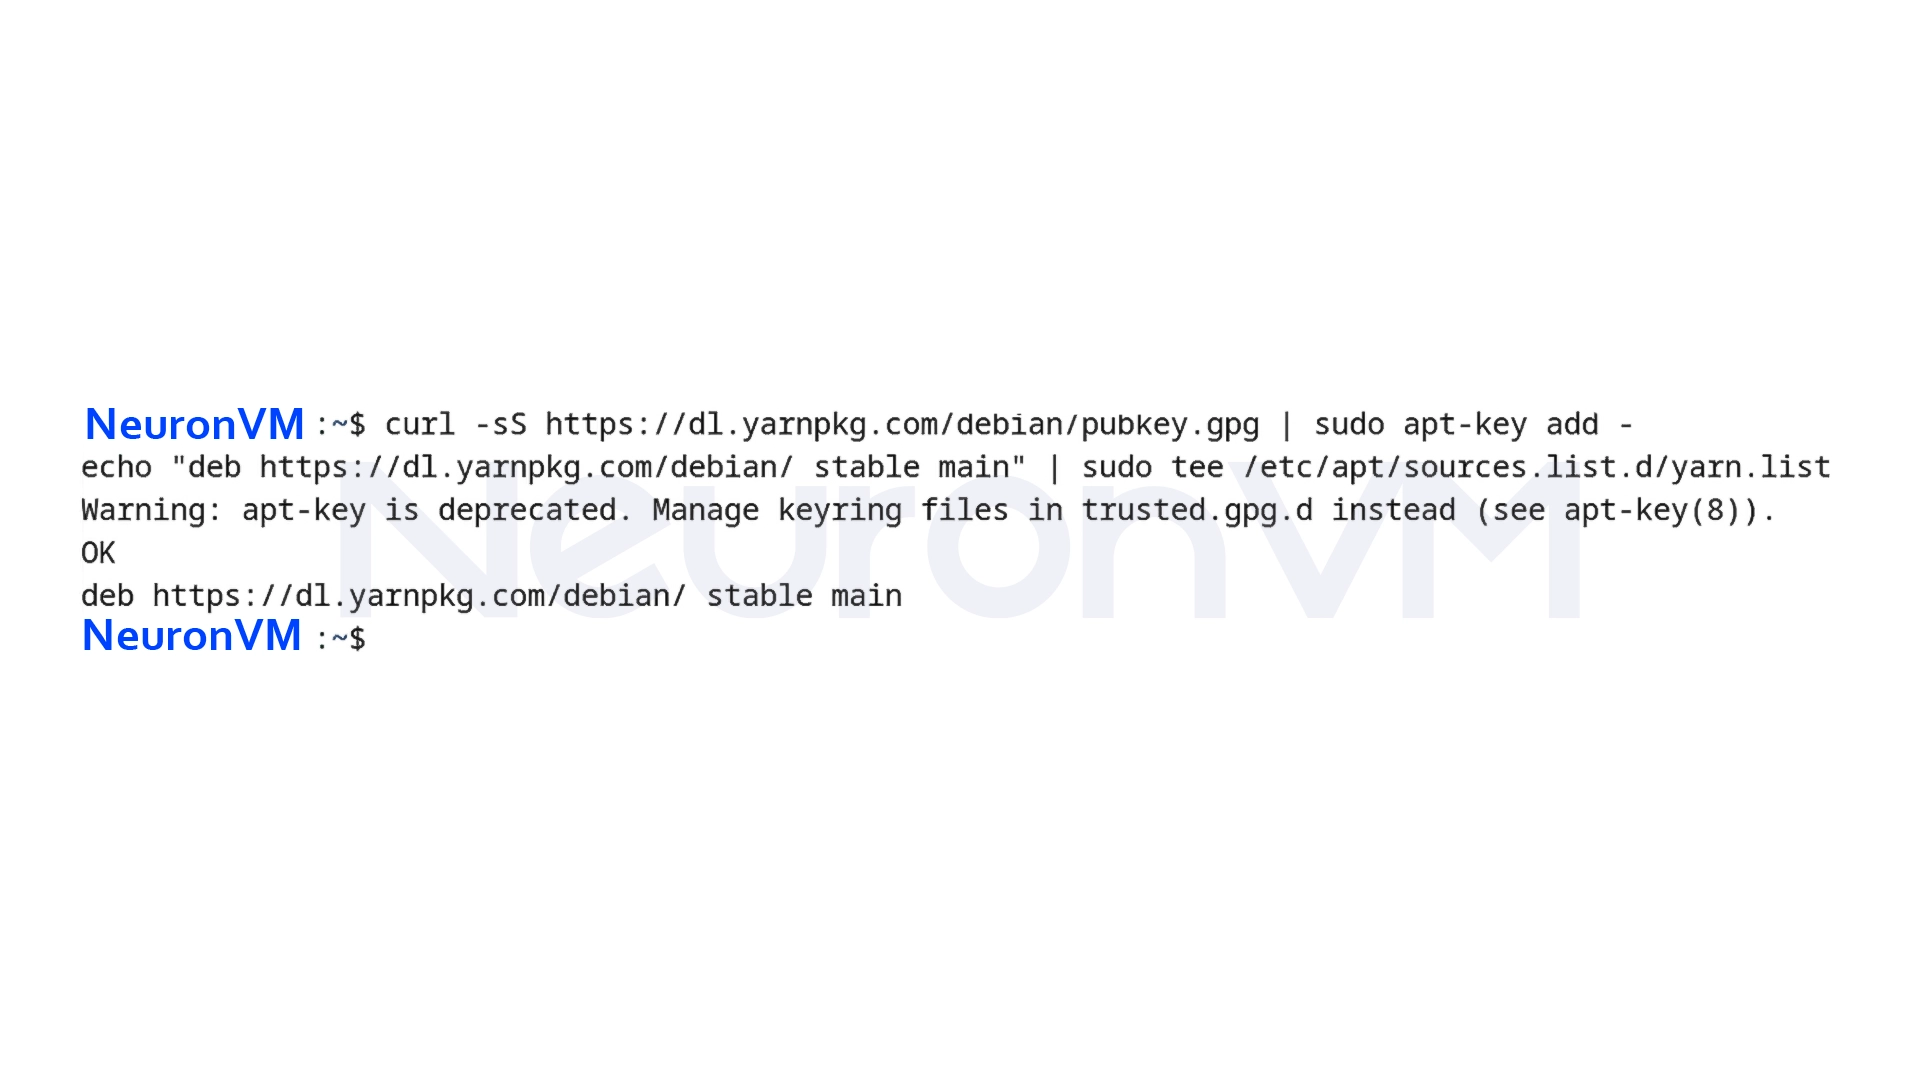
With this, your system is ready to receive the latest version of Yarn from the official repository.
Step 2: Install Yarn
After adding the repository, update the system and install Yarn with APT:
sudo apt update && sudo apt install yarn

This command will install the required packages, and Yarn will be ready to use on your system.
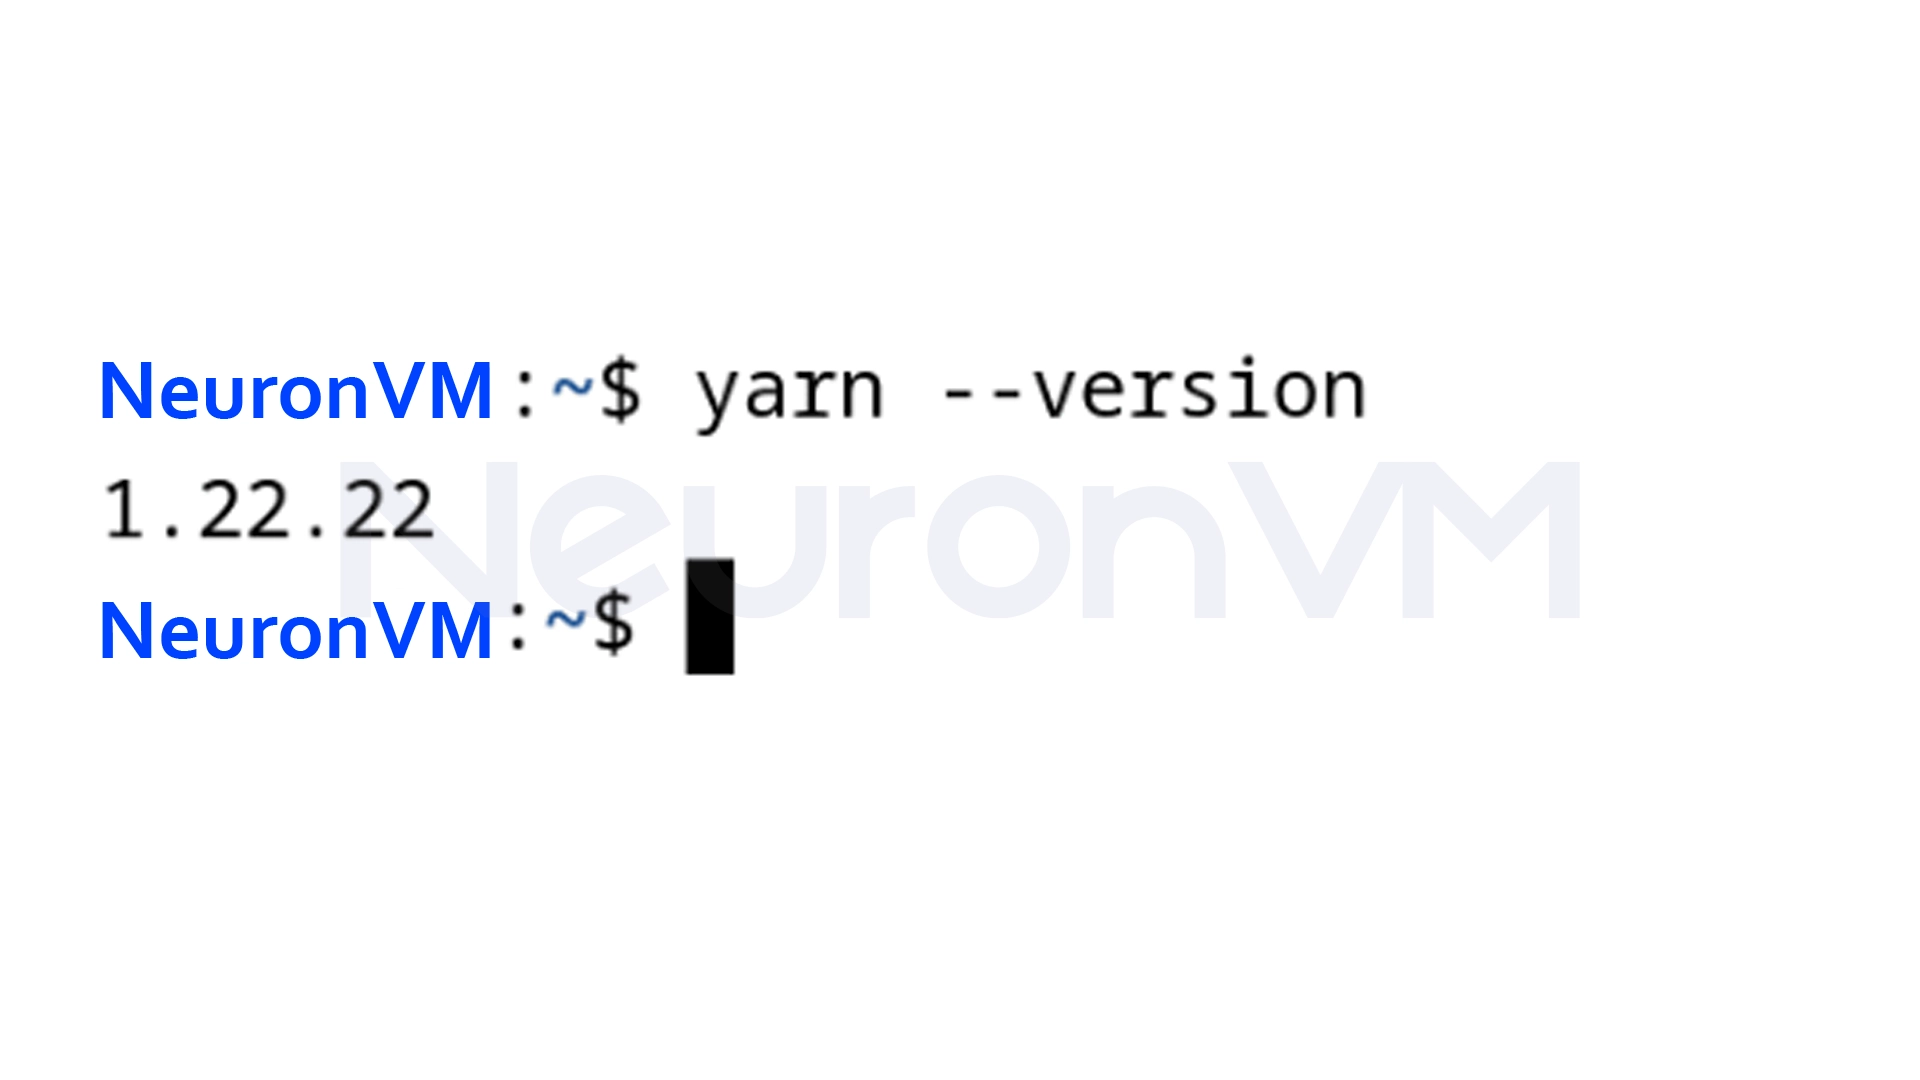
Step 3: Verify the installation
After the installation is complete, make sure Yarn is installed correctly. To do this, run the following command:
yarn --version
Step 4: Uninstall Yarn (if needed)
sudo apt purge -g yarn
With this command, you can completely remove Yarn from your system.
Practical tips and advice
1- Always use the official Yarn repository to get a stable and secure version.
2- When adding the repository with curl, make sure that the internet is secure and that you are not using a public network.
3- If you have multiple Node.js projects, Yarn helps manage version conflicts.
4- After installation, it is a good idea to check the Yarn path in PATH to ensure that commands work in any directory.
My Personal Experience
The first time I installed Yarn, I had a Vue project that kept giving me npm errors, but after using Yarn, all dependencies were installed without any errors in just a few seconds, and after that, I learned something:
“Yarn is not just a tool, it’s a way of thinking about organizing projects.”
And since then, whenever I think about starting a new project, the first thing I do is to install Yarn, not just for the speed, but to have a cleaner and also more stable experience.
Conclusion
It takes a few minutes to install Yarn on Debian, but the impact it has on the speed and security of your projects is really remarkable. Remember to always use the official version and take “yarn.lock” seriously, and if you’re a beginner, these simple steps will help you get started in the world of JavaScript more professionally, but if you’re a professional user, Yarn will make you and your team’s work more organized and reliable.