


How to Install and Configure VMware ESXi on Ubuntu 22.04

 10m
10m
 0 comments
 Print
Print
VMware ESXi is one of the most popular hypervisors in the virtualization world, used in both large data centers and lab and educational environments. If you plan to run multiple virtual machines on a single physical server, ESXi is a great starting point. In this article, we’ll walk you through the installation and configuration of VMware ESXi on Ubuntu 23.04 step by step, based on our practical experience, so that even if you’re new to ESXi, you’ll know exactly what you’re doing at each step and why.
Prerequisites
Before you begin the installation, make sure your system or server meets the following requirements:
- 64-bit x86 processor with at least 2 cores
- At least 4 GB of RAM (8 GB or more is recommended)
- VMware ESXi-compatible network card
- A USB flash drive of at least 8 GB to create installation media
- VMware ESXi ISO file
- Server or system listed in the VMware Hardware Compatibility Guide (HCL)
Many ESXi installation problems are directly related to the incompatibility of the network card or storage controller, be sure to check the HCL before doing anything.
Step 1: Check Hardware Compatibility
In this step, you need to make sure your hardware is suitable for running ESXi:
- Match the server model and its components with the HCL
- Enable virtualization (Intel VT-x or AMD-V) in the BIOS or UEFI
- Specify the storage type: internal disk, RAID, or network storage
These decisions directly affect the performance and stability of your system.
Step 2: Download the ESXi ISO file
You will need a VMware account to download ESXi:
- Log in to VMware Customer Connect
- Download the ESXi version that matches your hardware
- Save the ISO file to your system
Note: Always use the version that is most compatible with your hardware, not necessarily the latest version.
Step 3: Create a bootable flash drive for installing ESXi
After downloading the ISO, you need to create a bootable flash drive:
- Connect the USB flash drive to the system
- Run the Rufus tool
- Select the flash drive as the Device
- Specify the ESXi ISO file
- Keep the default settings and start the process
Once finished, your flash drive will be ready to install ESXi.
Step 4: Boot the server and install ESXi
Now it’s time for the main installation:
- Connect the USB flash drive to the server
- Enter BIOS/UEFI and set USB as the first boot
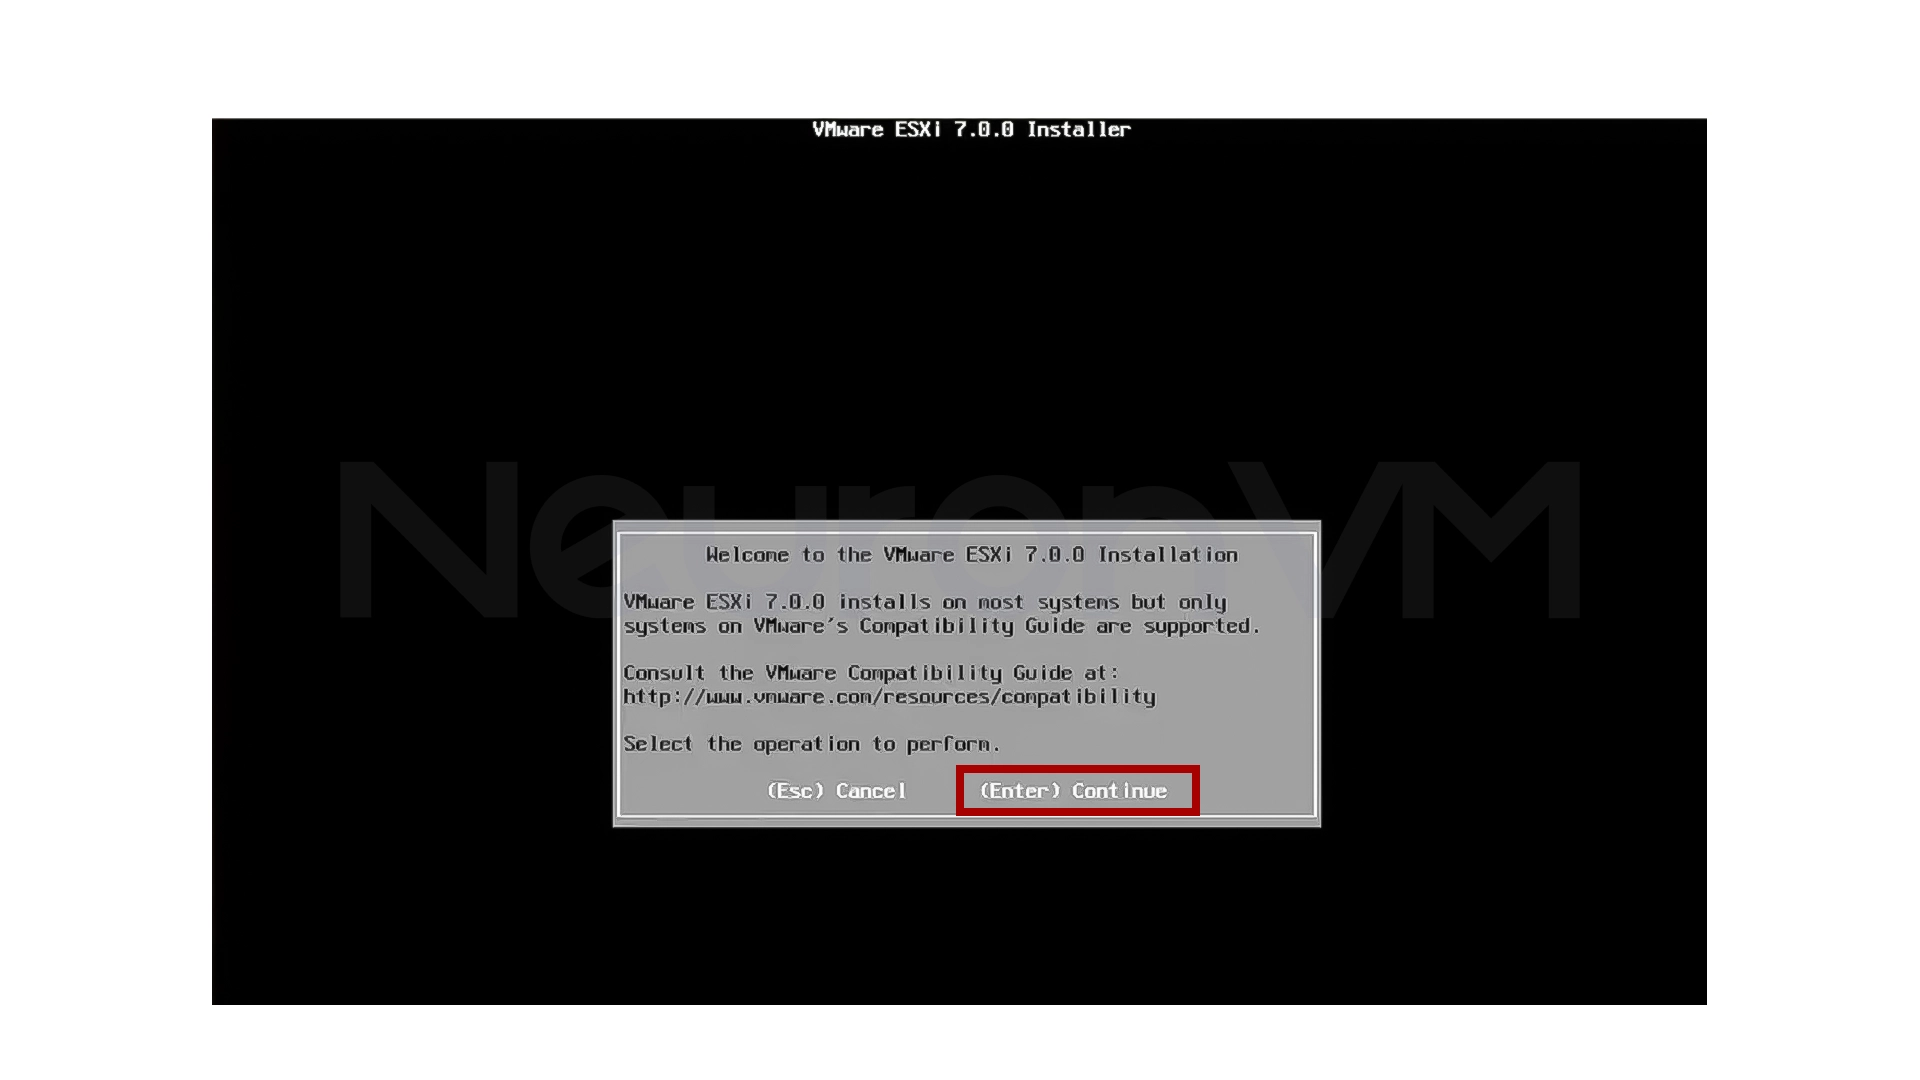
- Boot the system to run the ESXi installer

- Start the installation by pressing Enter
- Accept the agreement
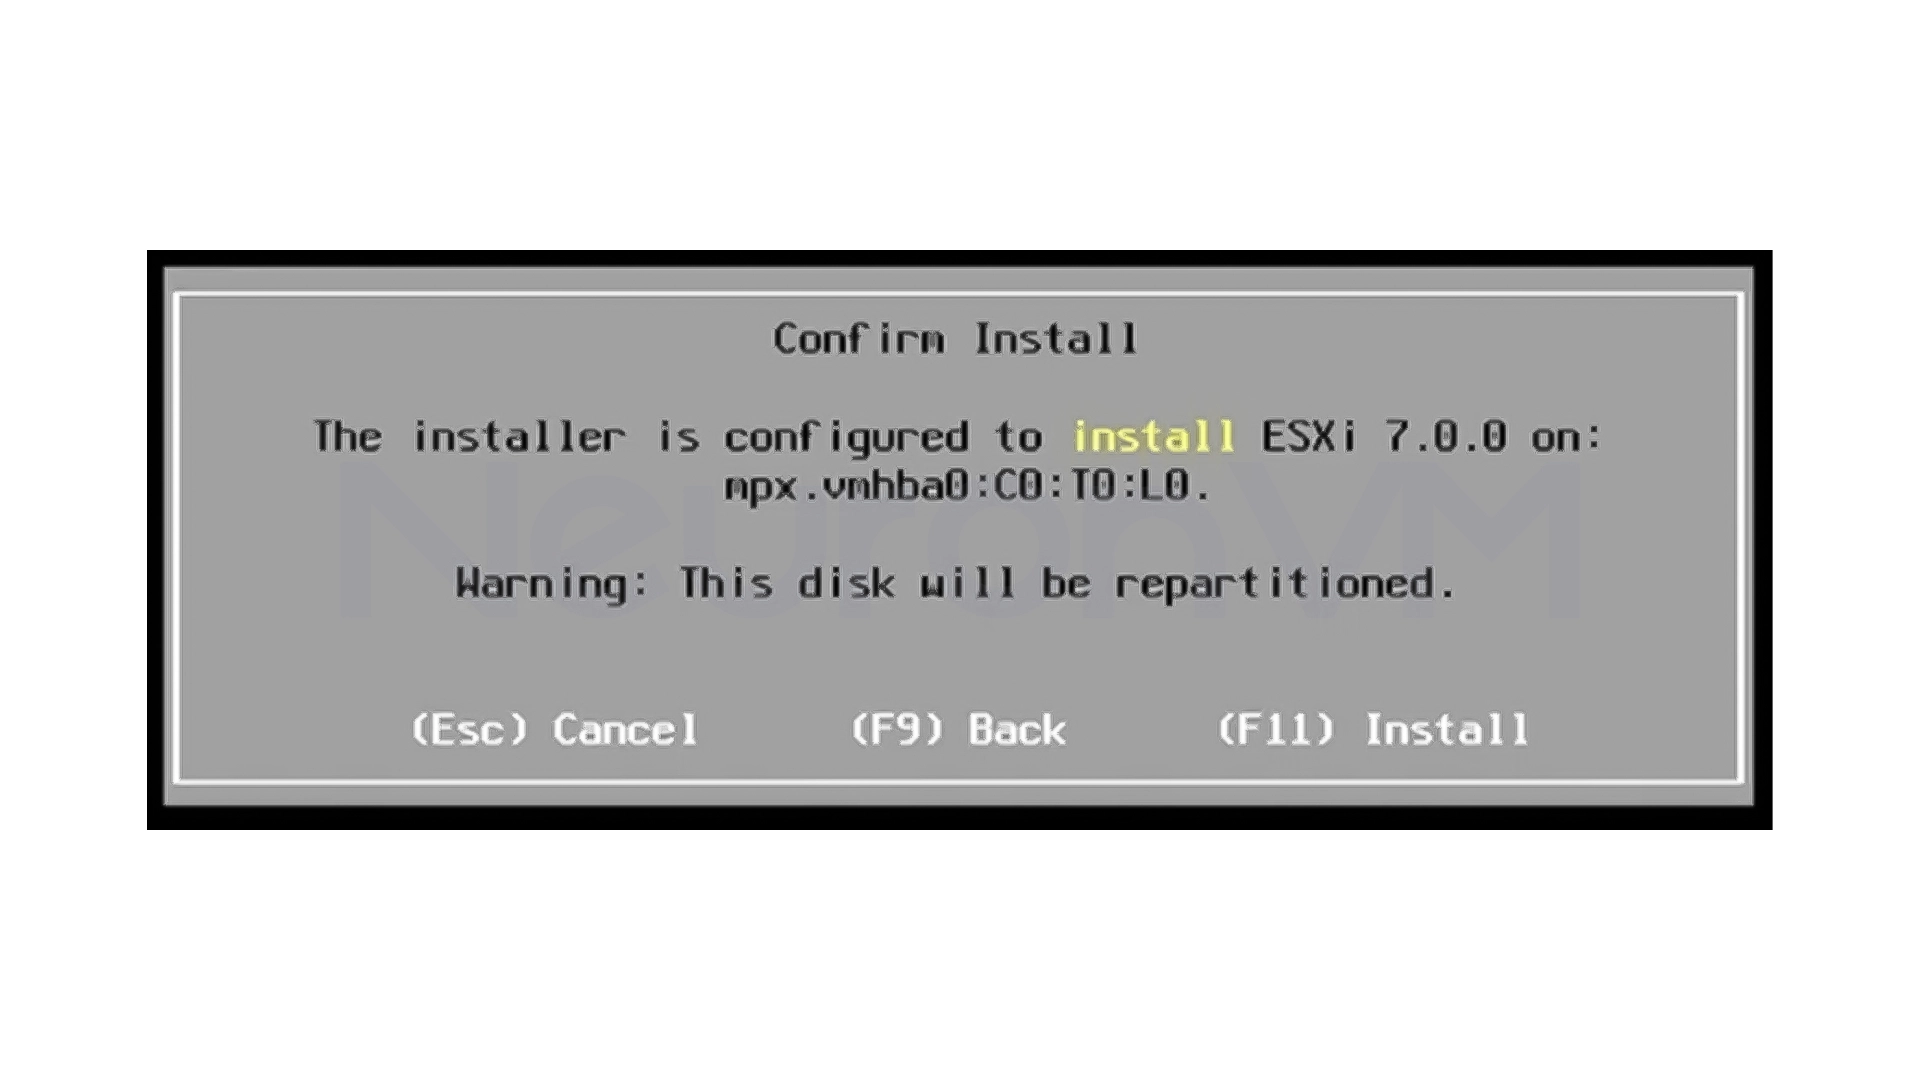
- Select the installation destination disk (all data on it will be erased)
- Select the keyboard layout
- Set the root user password
- Start the installation
- When finished, remove the flash drive and reboot the system
Personal experience: Be careful choosing a strong password for root; this account is the key to controlling the server.
Step 5: Initial Host Configuration (DCUI)
After reboot, the DCUI screen will be displayed:
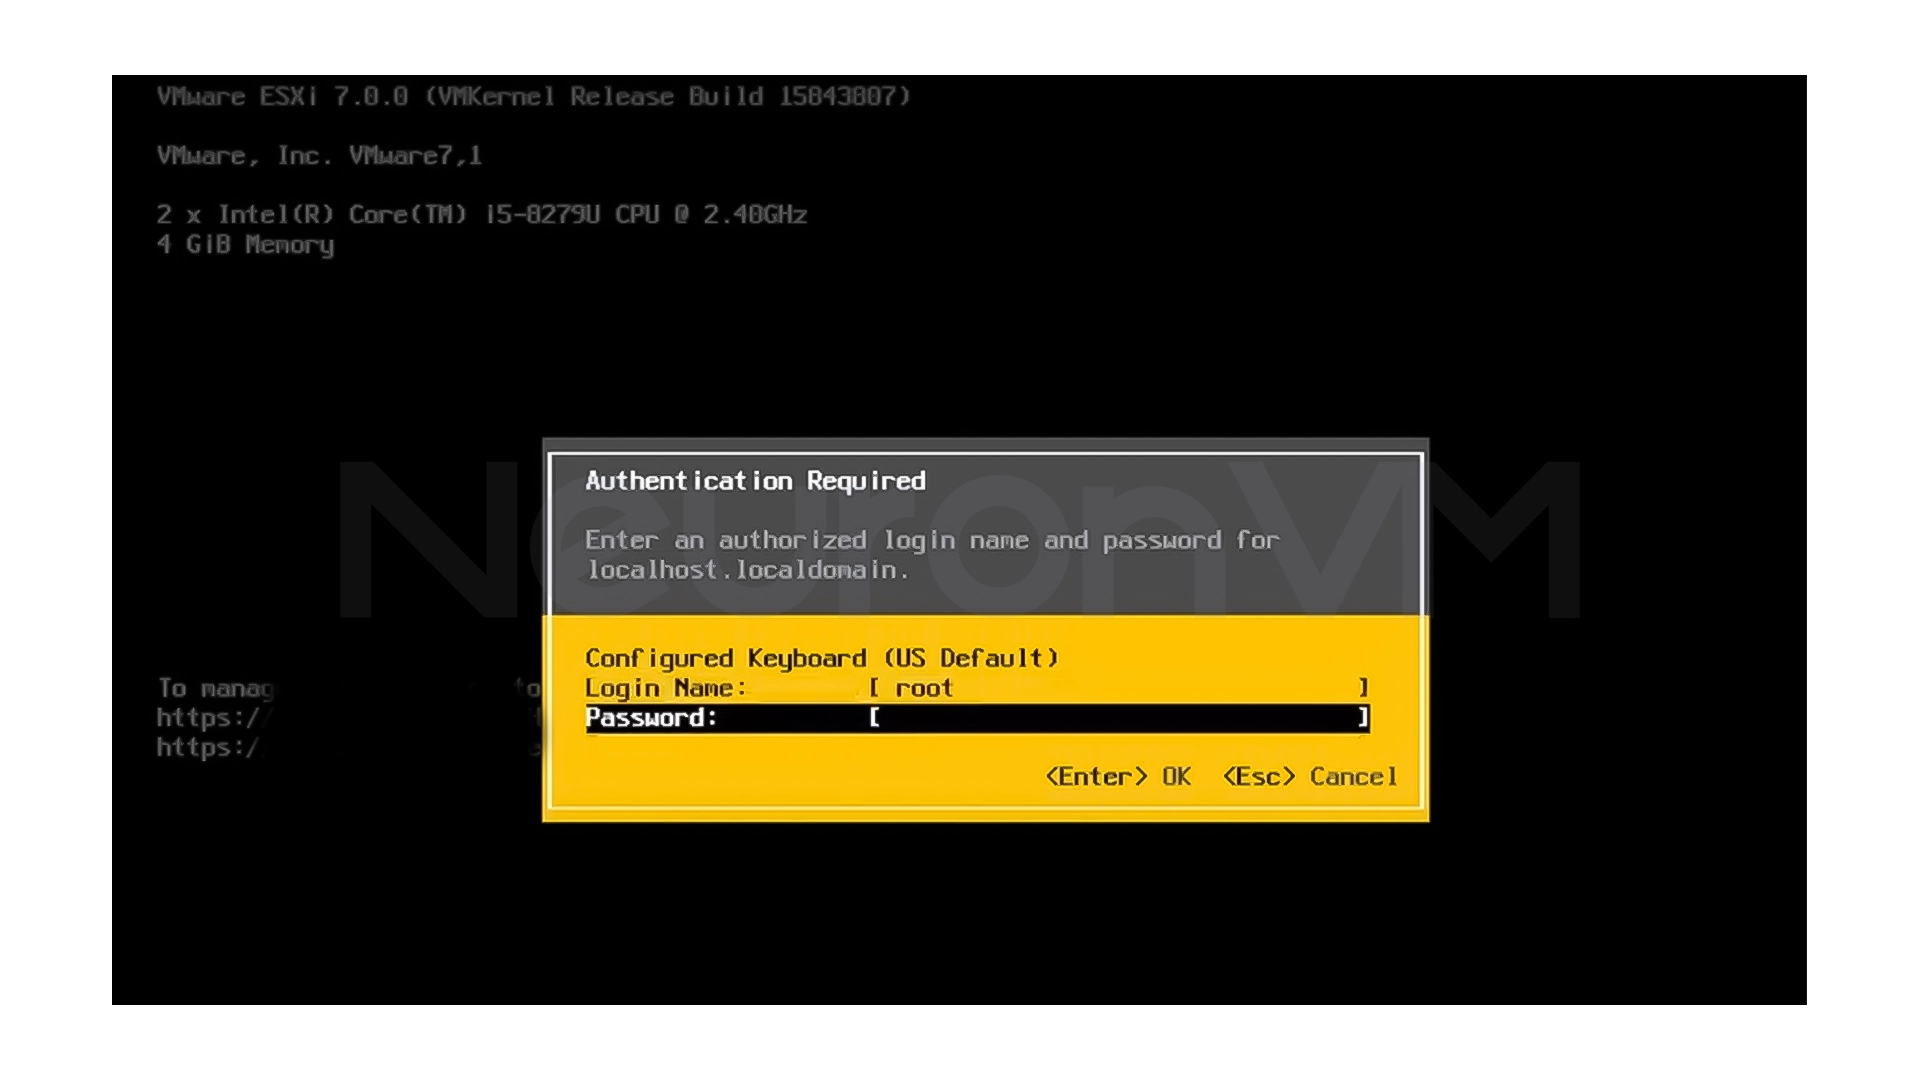
- Enter the settings by pressing F2
- Log in as root
- Enter the Configure Management Network section
- Set the IP address, Subnet, Gateway, and DNS

- Save the settings and restart the management network
This step will make the ESXi manageable over the network.
Step 6: Log in to the ESXi web panel
From a system on the same network:
- Open a browser
- Enter the address https://IP-ESXi
- Accept the security warning
- Log in as root

After logging in, you will see the main ESXi dashboard, from where everything is managed.
Step 7: Create a Datastore
To store virtual machine files:
Go to Storage -> Datastores
Create a new Datastore
Select the VMFS type
Specify and name the disk
Select the space allocation type (Thin or Thick)
Thin is more suitable for test environments, but Thick is more stable in sensitive environments.
Step 8: Network Configuration
In this step, we will configure the virtual machine network:
Check that vmk0 is enabled for network management
Create a new Port Group for the VMs such as VM-Network
Configure VLAN if needed
For greater stability, enable NIC Teaming
This will increase the speed and fault tolerance of the network.
Step 9: Create your first virtual machine
For the final test:
- Go to the Virtual Machines section
- Create a new VM
- Select the Ubuntu Linux (64-bit) operating system
- Set CPU, RAM, and Disk resources
- Select the VM-Network
- Mount the Ubuntu ISO file
- Power on the VM and complete the installation
Finally, be sure to check the following:
- Set the time (NTP)
- Back up the Host configuration
- Install ESXi updates
- Check the hardware health
My Experience Installing VMware ESXi on Ubuntu
The first time I installed ESXi, my biggest challenge was an incompatible network card. Everything would install correctly, but the network wouldn’t come up. After checking the HCL, I realized that was exactly where the problem was. Since then, I always seriously checked the hardware before installing. An important thing that experience has taught me is that ESXi is very stable, but it is hardware-sensitive. If the prerequisites are met correctly, it can be a pleasure to install and manage, for more personal tips and tricks, check out NeuronVM.
Conclusion
In this article, we have reviewed the VMware ESXi installation and configuration process step by step, from preparing the hardware and checking the system compatibility to setting up the network, creating the Datastore, also and creating the first virtual machine.
VMware ESXi, as one of the most stable and powerful virtualization platforms, enables optimal management of hardware resources and also quickly simultaneous execution of multiple operating systems, By observing the basic principles such as selecting compatible hardware logically allocating resources to virtual machines, a reliable and scalable virtualization infrastructure can be created, this guide can be a good starting point for system administrators, IT experts, and people who plan to practically enter the world of virtualization with VMware ESXi and then use the more advanced capabilities of this platform.
If you follow the installation steps carefully, installation is quite simple. Experience tips will help you avoid common errors.
A 64-bit processor with at least two cores, at least 4 GB of RAM, a compatible network card, and sufficient storage space.
Things such as creating a Datastore, configuring the VM network, creating the first VM, checking the hardware health, and applying updates are essential steps.rnappl
You might like it

Debian Tutorials
CSF Firewall on Debian 10: Installation & Configuration

Ubuntu Tutorials
How to Install Ubuntu 22.04 on Windows 10: Dual Boot or Repl...

Linux Tutorials
How to Set Up Metasploit on Termux in 2025
