


How to Install and Configure Neos CMS on Ubuntu 22.04

 9m
9m
 0 comments
 Print
Print
If you have ever worked with content management systems, you have probably wondered how to set up a powerful, flexible, and professional CMS on a Linux server. Neos CMS is one of those options that you will notice the difference from regular CMSs when you first start using it. In this tutorial, I will explain how to configure and set up Neos CMS on Ubuntu 22.04 in a step-by-step and completely practical way, based on my real-world experience. The focus of this article is not just on the installation; it is on setting up Neos so that it runs smoothly and you do not encounter common errors from the very beginning. If you are looking to set up a modern CMS for corporate projects or professional websites and want to have a stable and reliable environment on Ubuntu 22.04, this tutorial can make your path much smoother.
Prerequisites Before We Begin
Before we get into the installation process, make sure you have the following:
A server running Ubuntu 22.04
A domain pointing to the server IP
Root access or a user with sudo access
If you have these three things ready, let’s get started with the installation.
9 Step to Install Neos CMS on Ubuntu 22.04
Step 1: Update the system
First, we update the system to the latest versions of the packages to avoid possible incompatibility issues and errors:
sudo apt-get update -y && sudo apt-get upgrade -y
Personal experience: Always make sure that the system is fully up to date before installing any software. This will fix most of the strange installation errors right away.
Step 2: Install the Apache web server
Apache is a reliable and compatible web server with Neos. To install and activate:
sudo apt install apache2 -y
sudo systemctl enable apache2.service && sudo systemctl start apache2.service
sudo systemctl status apache2.service
If the service status is active (running), the web server is ready.
Tip: Apache is a good choice because it easily supports the plugins required by Neos, and it is easier to manage permissions.
Step 3: Install MariaDB
Neos needs a database to store data, we recommend MariaDB, because it is a stable and secure choice:
sudo apt install mariadb-server -y

sudo systemctl start mariadb.service && sudo systemctl enable mariadb.service

sudo systemctl status mariadb
Make sure the database service is running without errors, because as the slightest problem at this stage will disrupt the Neos installation.
Step 4: Create the Neos database and user
For better security and management, we will create a dedicated database and user:
CREATE DATABASE neosdb;

CREATE USER 'neosdb'@'localhost';

GRANT ALL PRIVILEGES ON neosdb.* TO 'neosdb'@'localhost' IDENTIFIED BY 'YourStrongPasswordHere';

FLUSH PRIVILEGES;

EXIT;
Note: Using a separate user for Neos increases security and ease of project management.
Step 5: Install PHP 8 and Extensions
Neos requires PHP 8 and a number of extensions, you can add by entering:
sudo apt-get install php8.1 php8.1-cli php8.1-common php8.1-imap php8.1-redis php8.1-snmp php8.1-xml php8.1-zip php8.1-mbstring php8.1-curl libapache2-mod-php php8.1-mysql -y
Personal experience: Installing all the required extensions from the beginning prevents errors later in the Neos installation process.
Step 6: Install Composer
Composer is the dependency management tool for Neos, to install:
curl -sS https://getcomposer.org/installer | php -- --install-dir=/usr/bin --filename=composer
composer
Note: Always make sure that Composer is installed correctly and does not give any error messages.
Step 7: Install Neos CMS
Go to the default Apache path and clone Neos:
cd /var/www/html/
git clone https://github.com/neos/neos-base-distribution.git.
composer install
After installation, set permissions:
chown -R www-data:www-data /var/www/html/
find. -type d -exec chmod 755 {} \;
find. -type f -exec chmod 644 {} \;
Then, prepare the Development and Production configuration files and enter the database information.
Step 8: Create a Virtual Host in Apache
Create a configuration file for Neos:
cd /etc/apache2/sites-available/

touch neos.conf
Then enter the Virtual Host settings, including the domain, Neos execution path, and Rewrite settings, after activation:
sudo a2enmod rewrite
sudo a2ensite neos.conf
apachectl -t
systemctl reload apache2.service
Step 9: Complete the installation via browser
Open the browser and enter your domain. The setup steps include:
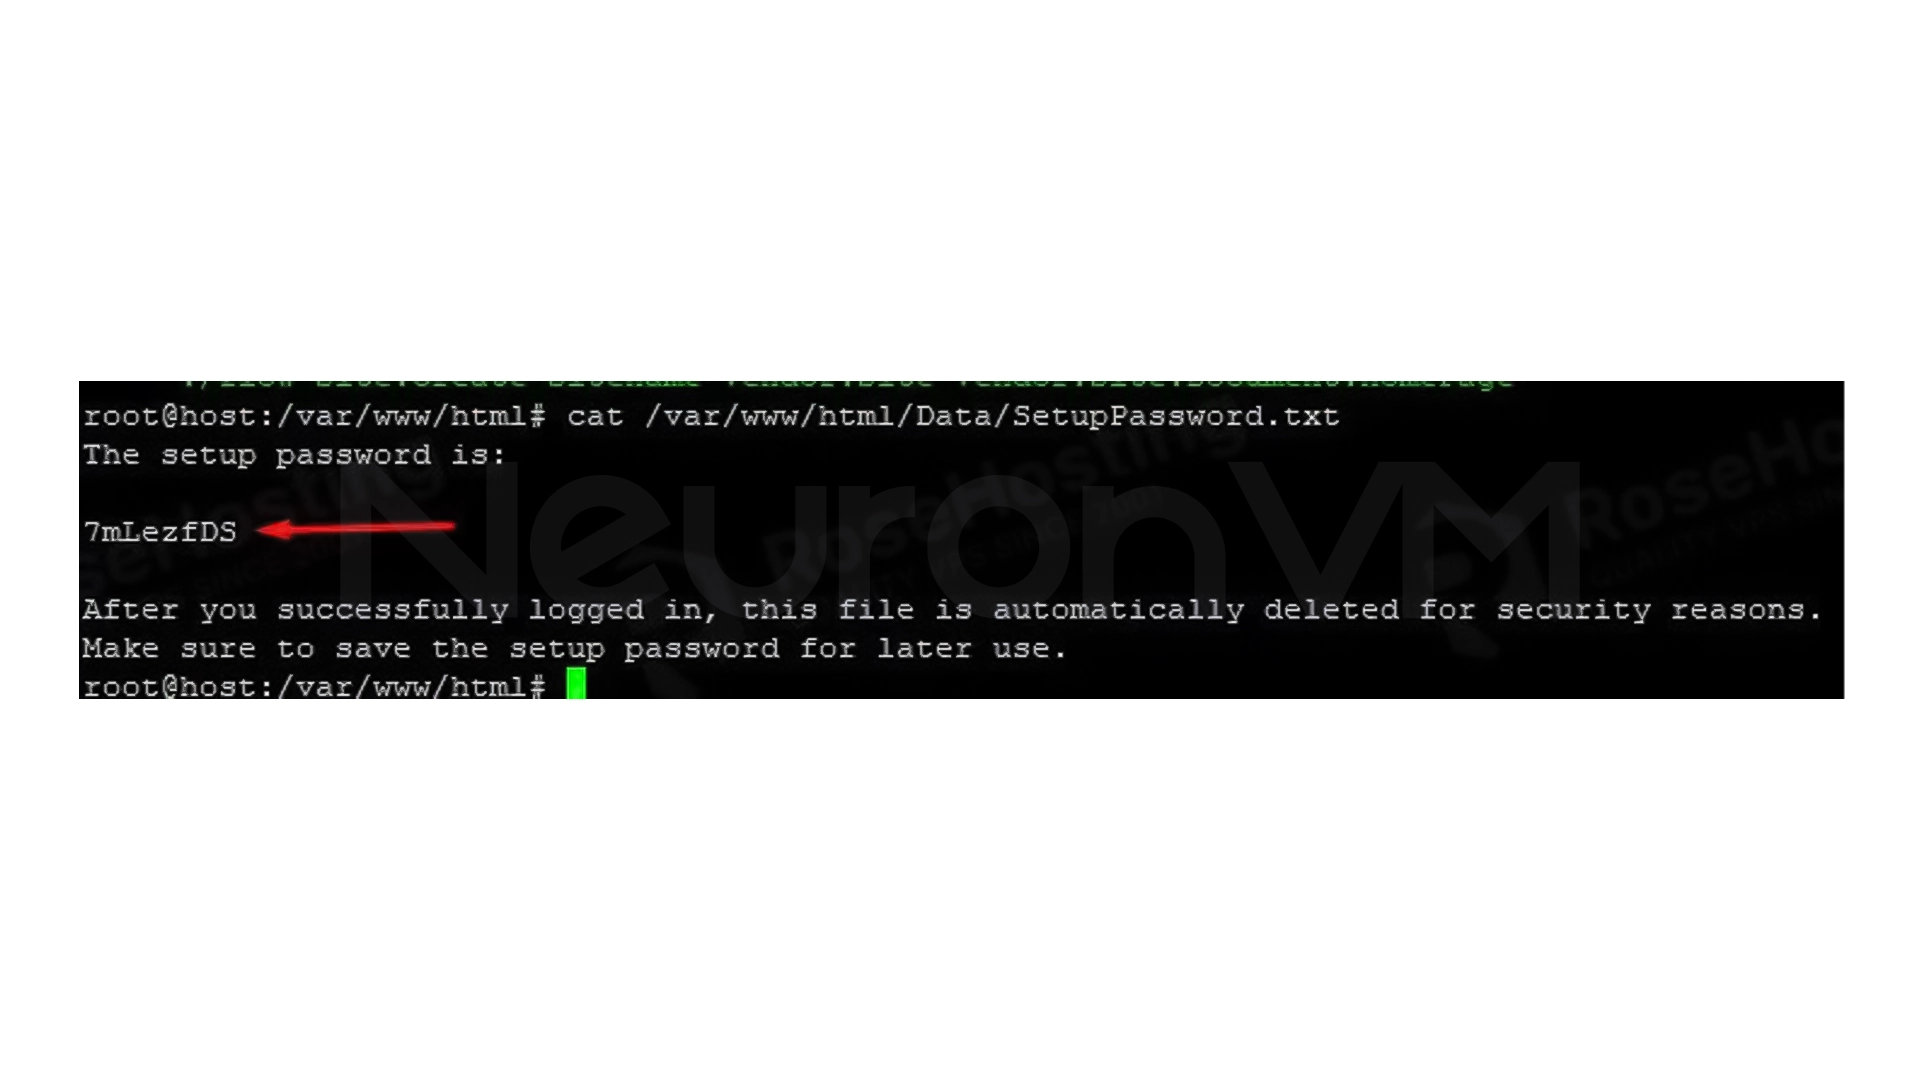
Read the initial password from the SetupPassword.txt file
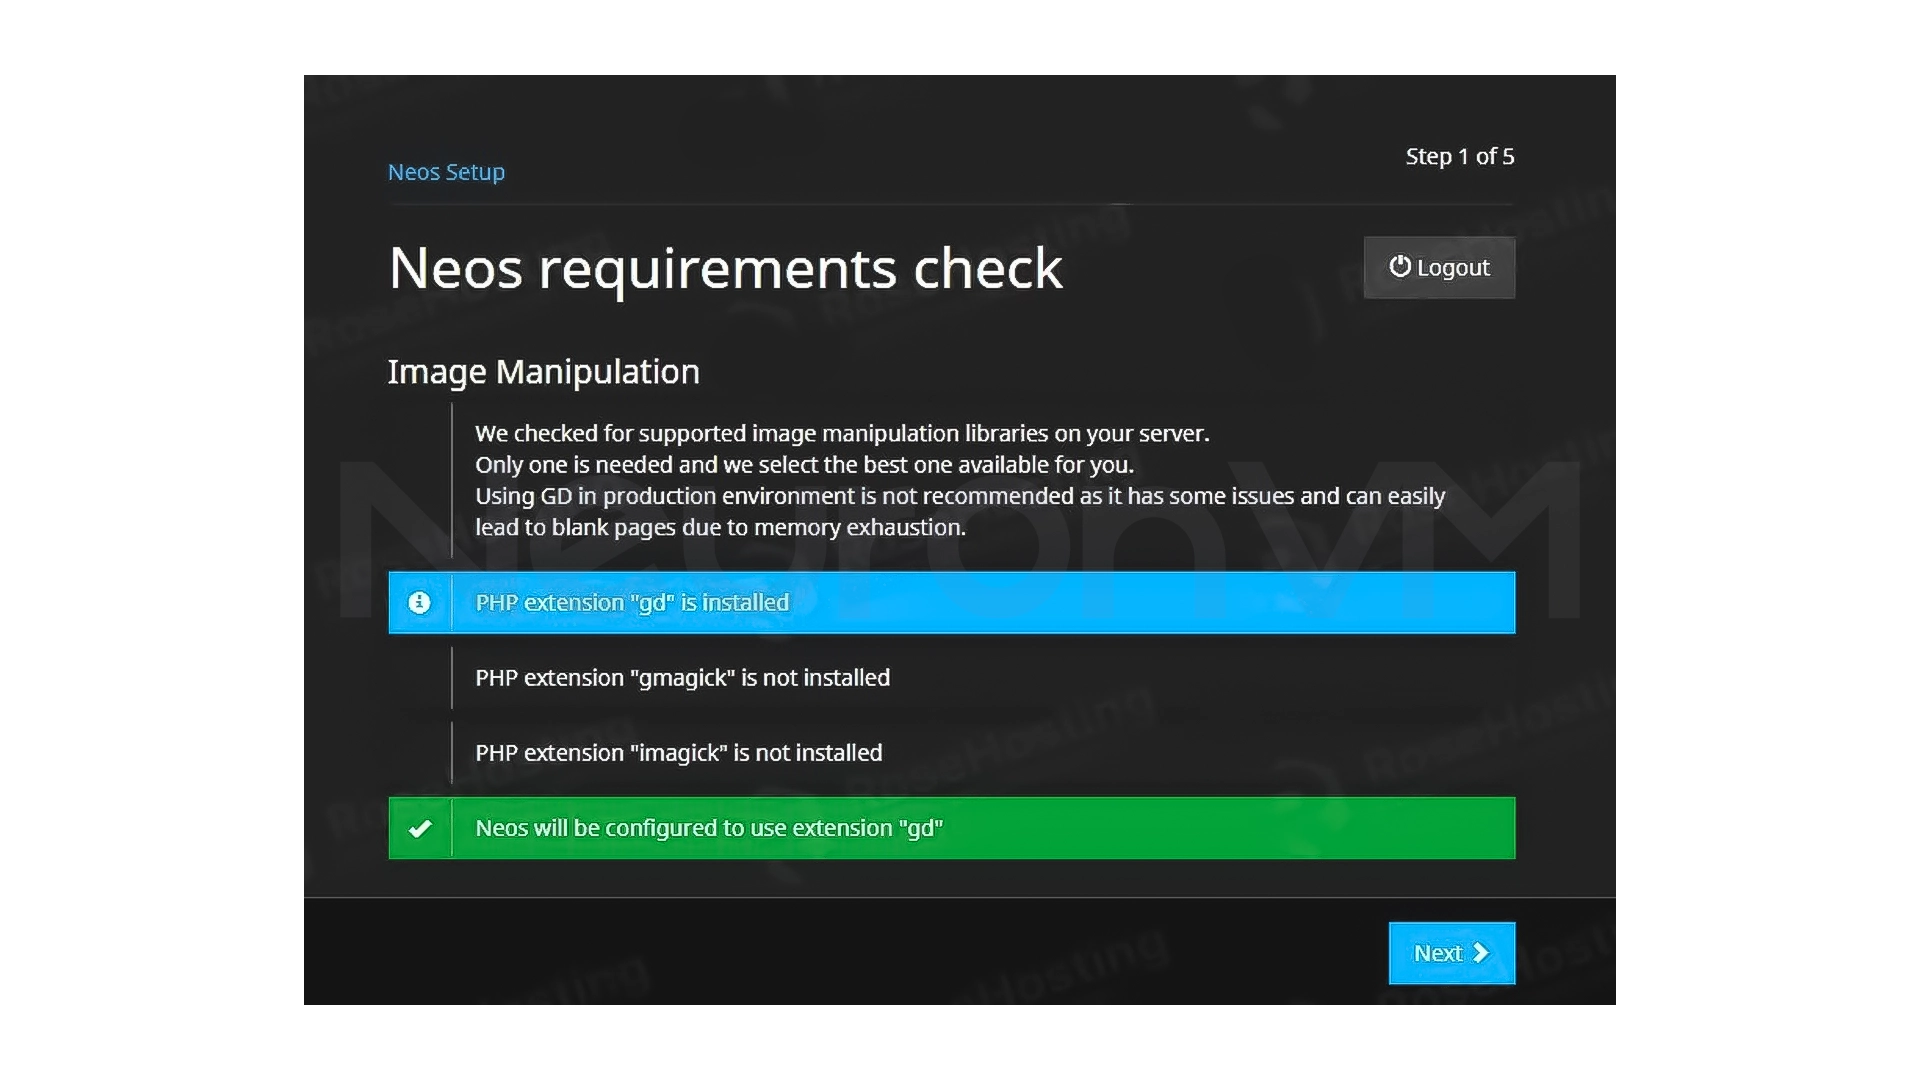
Check the installed extensions
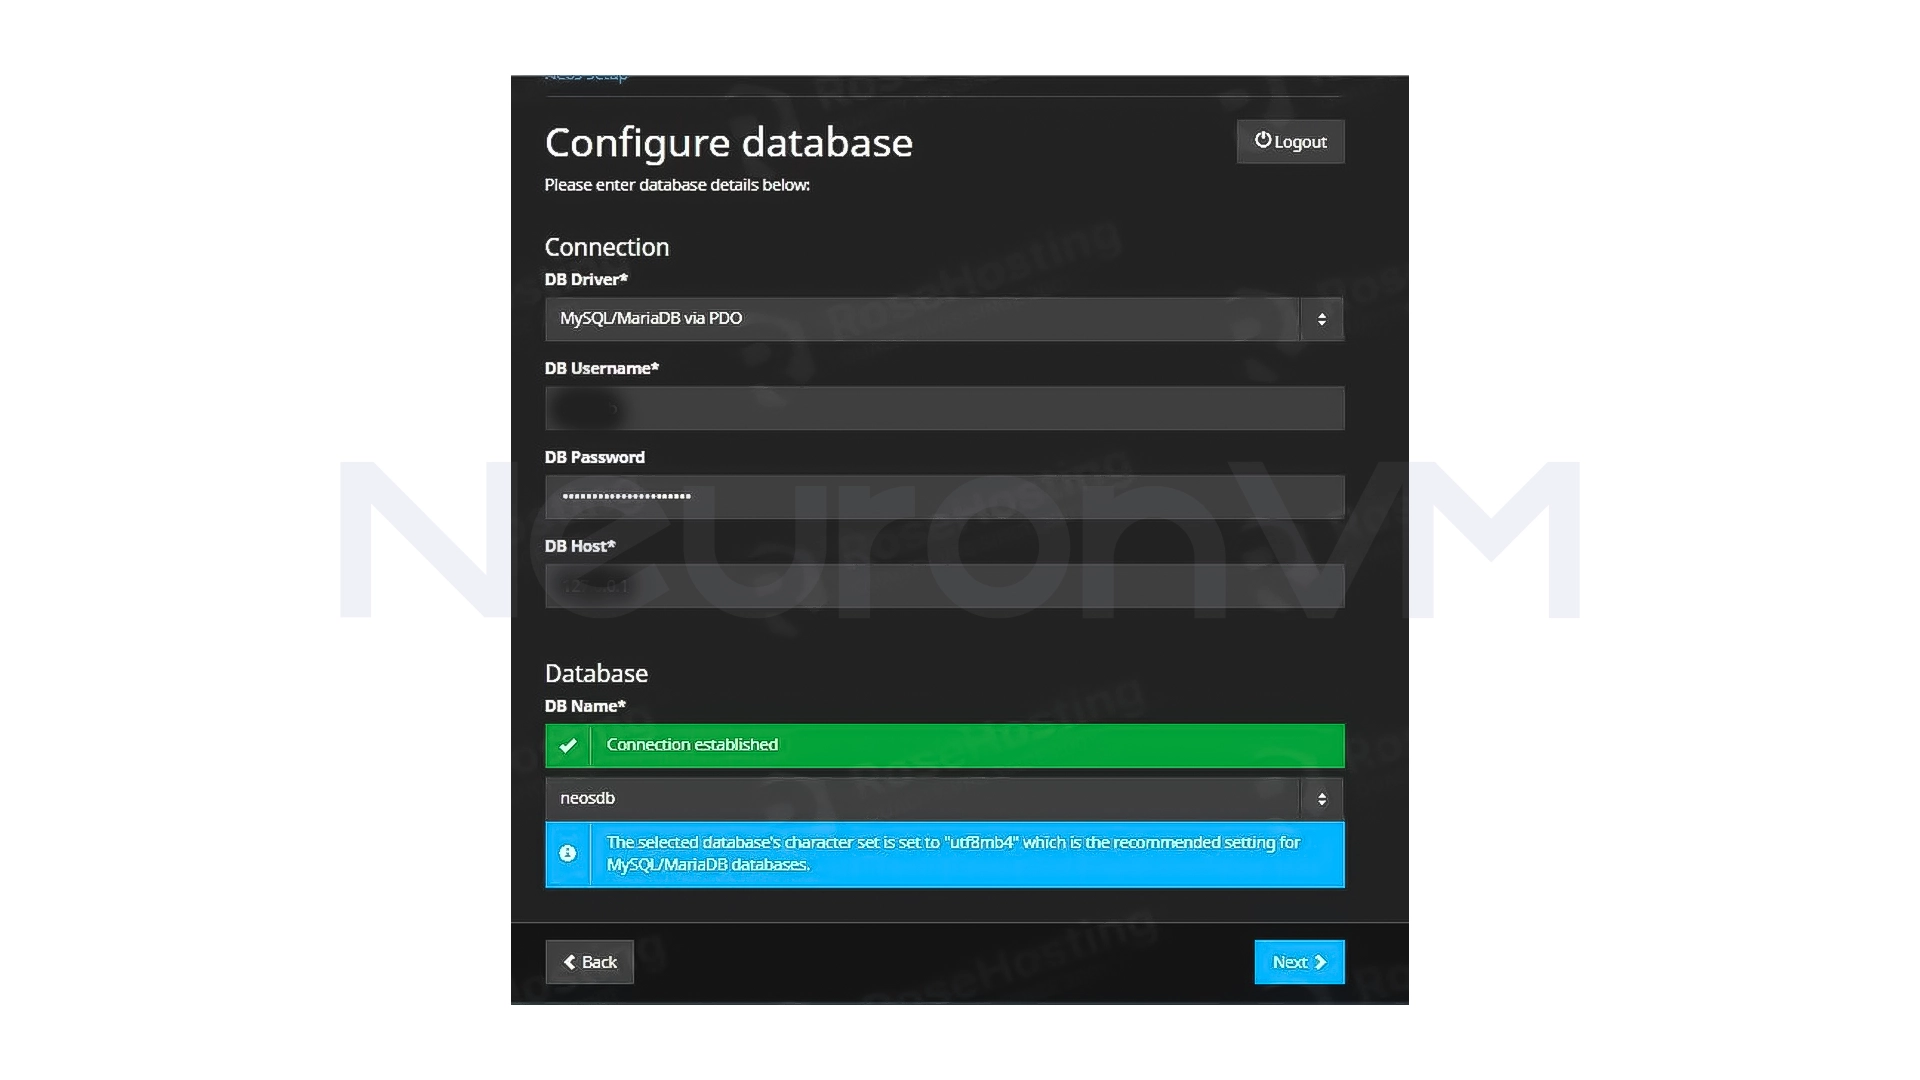
Import the database information
Create the system administrator account
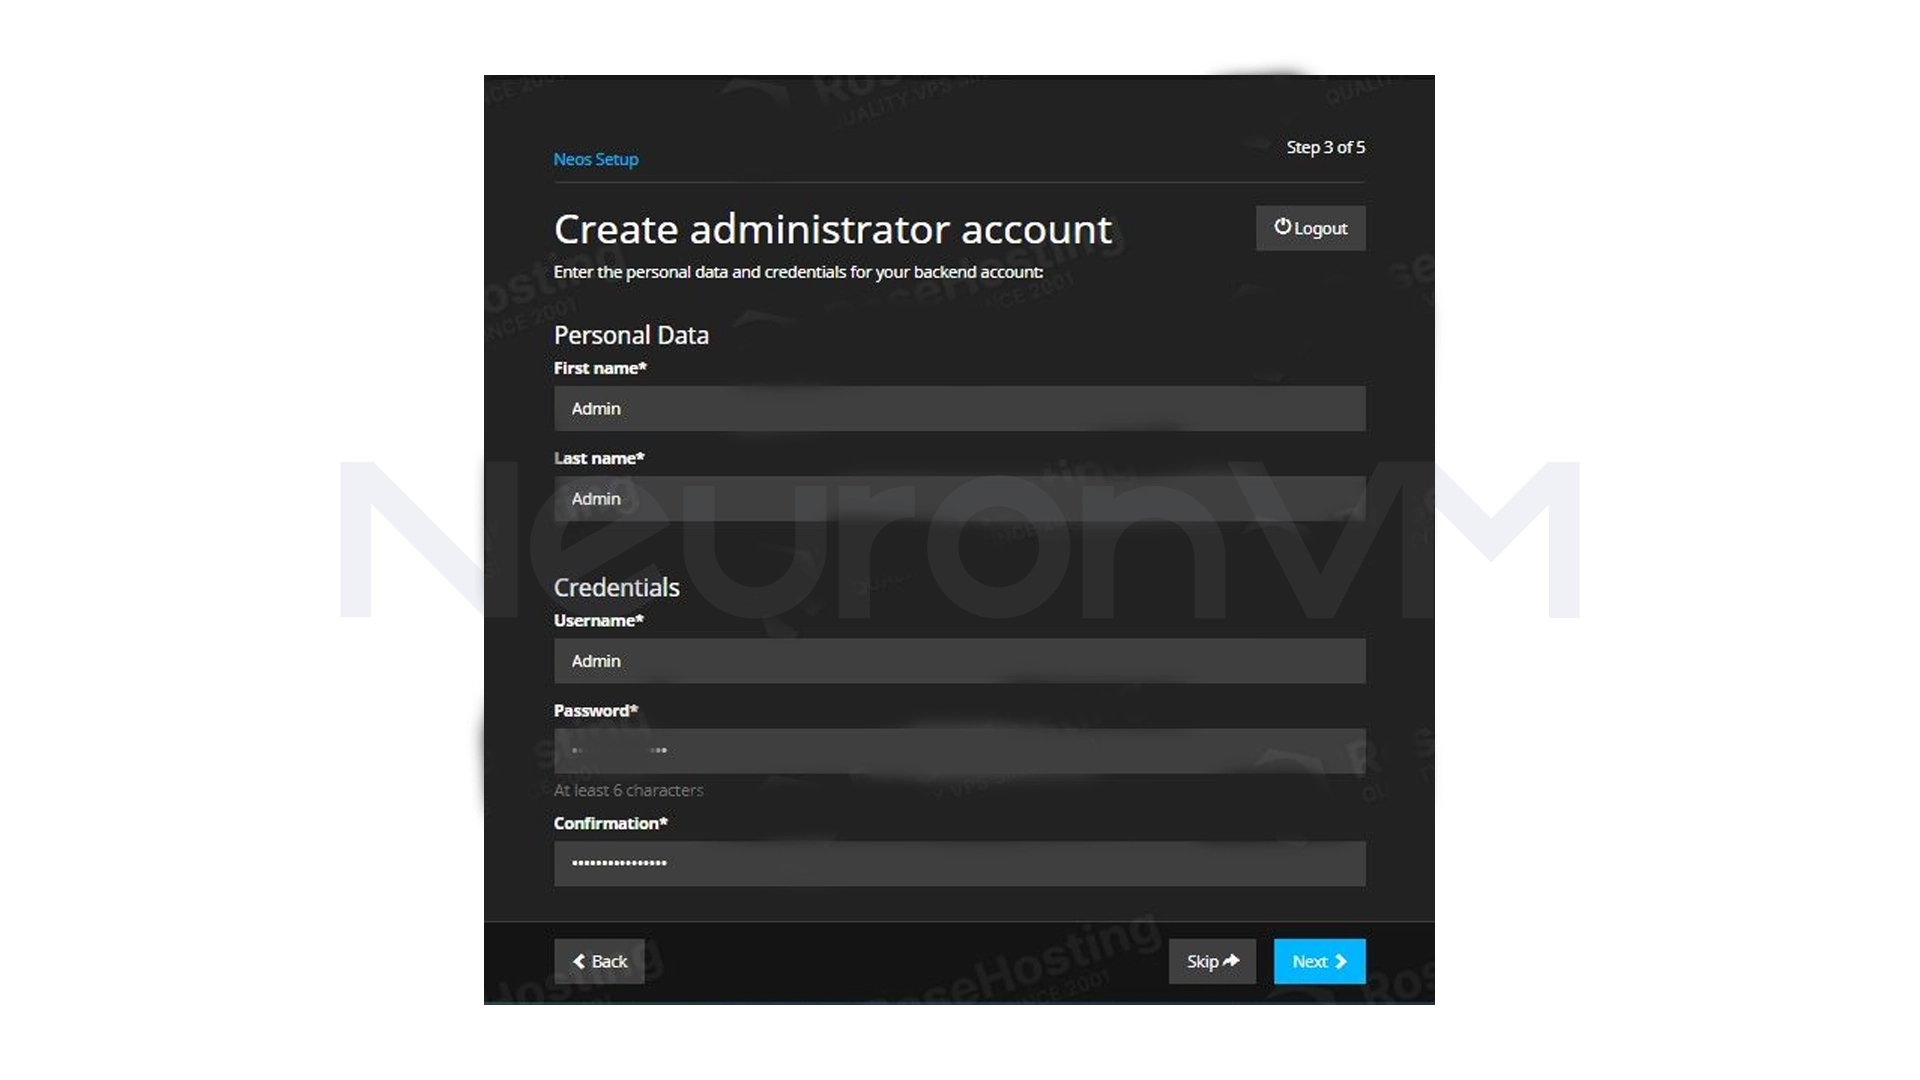
After this step, Neos CMS is ready to use.
My experience
The first installation of Neos CMS had some challenges; the most important of which were file access errors and database settings. When I followed these steps carefully, the installation went smoothly and without errors, one thing I learned is that being patient and careful in entering the initial information and permissions is the most important factor in successfully installing Neos, you can always check for more on ourwebsite.
Conclusion
Setting up Neos CMS on Ubuntu 22.04 is a straightforward and manageable process following the steps above, experience has shown that careful access control, proper database entry, and thorough installation of prerequisites are key to a successful installation, and just by following this guide, you can create a stable, ready-to-use environment for your professional content management and take advantage of the advanced features of Neos CMS.
Neos is best suited for en websites and projects that require high flexibility.
By following the detailed steps and observing the prerequisites, the installation is not that hard.
Yes, after creating an administrator account, Neos CMS is completely ready to use.
You might like it

Kali Linux Tutorials
A Foolproof Guide to Install a Proxy on Kali Linux

Linux Tutorials
How to Install Desktop Sharing in Ubuntu - GUI on Ubuntu

How to Check for Rootkits on a Dedicated Server (Step-by-Ste...