


How to Install KVM on a Dedicated Server with Virtualizor


 9m
9m
 0 comments
 Print
Print
Today, data center managers are looking for a way to run multiple services on a single server. Purchasing multiple physical servers is expensive and difficult to manage; that’s where virtualization comes in.
KVM (Kernel-based Virtual Machine) is one of the most popular options because:
It’s free and open source.
It’s built into the Linux kernel and is very fast.
It supports both Linux and Windows.
Benefits of Install KVM for Dedicated Server
Before we jump into the installation steps, let’s talk about why KVM is a favorite among admins, and it is a popular choice:
Speed that feels real: KVM uses your processor’s virtualization tech, so your virtual machines run almost as fast as they would on bare metal.
Runs almost anything: Whether you need Linux Ubuntu, CentOS, Debian, or Windows, KVM can handle it.
Easy to scale: Add a VM when you need one, shut it down when you don’t, no need to keep buying more hardware.
Keeps things separate: Each VM is on its own island; if one breaks or gets hacked, the others stay safe.
Example: one IT team replaced 15 physical servers with a single KVM-powered machine. The result? Around 30% less hardware cost, and each VM handled tasks like hosting sites or running databases with no slowdown.
KVM Compared to VMware and Xen
When it comes to virtualization, three names are often heard: KVM, VMware, and Xen.
KVM: Free, open source, part of Linux, large community support.
VMware: It is really powerful but expensive.
Xen: It is old and stable, but it is not that popular.
Requirements to Install KVM
- Disable SELinux
- 64-bit OS
- Virtualization enabled in BIOS (VT-x/AMD-V)
Recommended partitioning:
- Root: 80–100 GB
- Swap: at least 4 GB
- Rest: Storage
Note: For heavy usage, LVM or ZFS offer better snapshot management.
How to install KVM with Virtualizor
Step 1: Connect to the server and install KVM
Log in to the server using SSH and enter the following command
wget -N http://files.virtualizor.com/install.sh
chmod 0755 install.sh
./install.sh [email protected] kernel=kvm
Step 2: Access the Virtualizor panel
Visit the following URL:
https://Your-Server-IP:4085/

http://Your-Server-IP:4084/

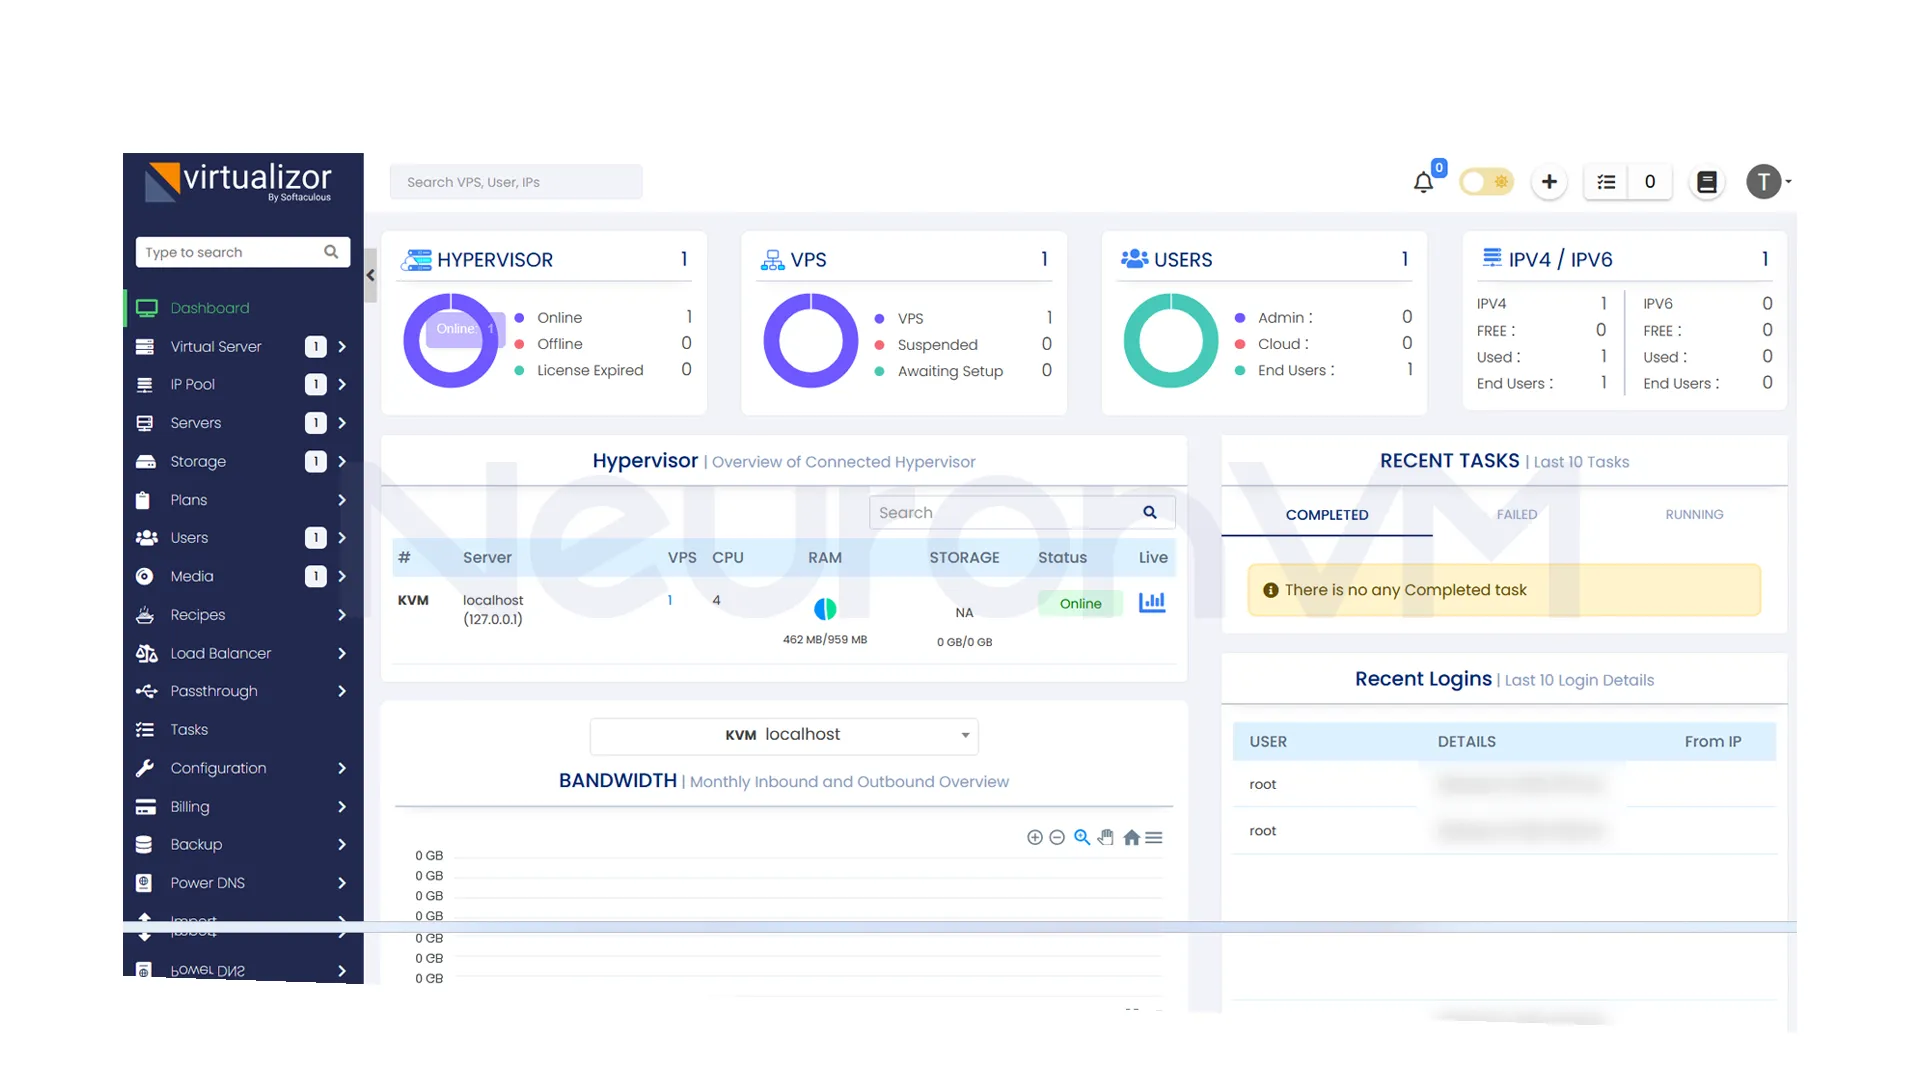
Step 4: Log in to the Admin dashboard
Log in with your credentials and manage your virtual machines, network, and storage.
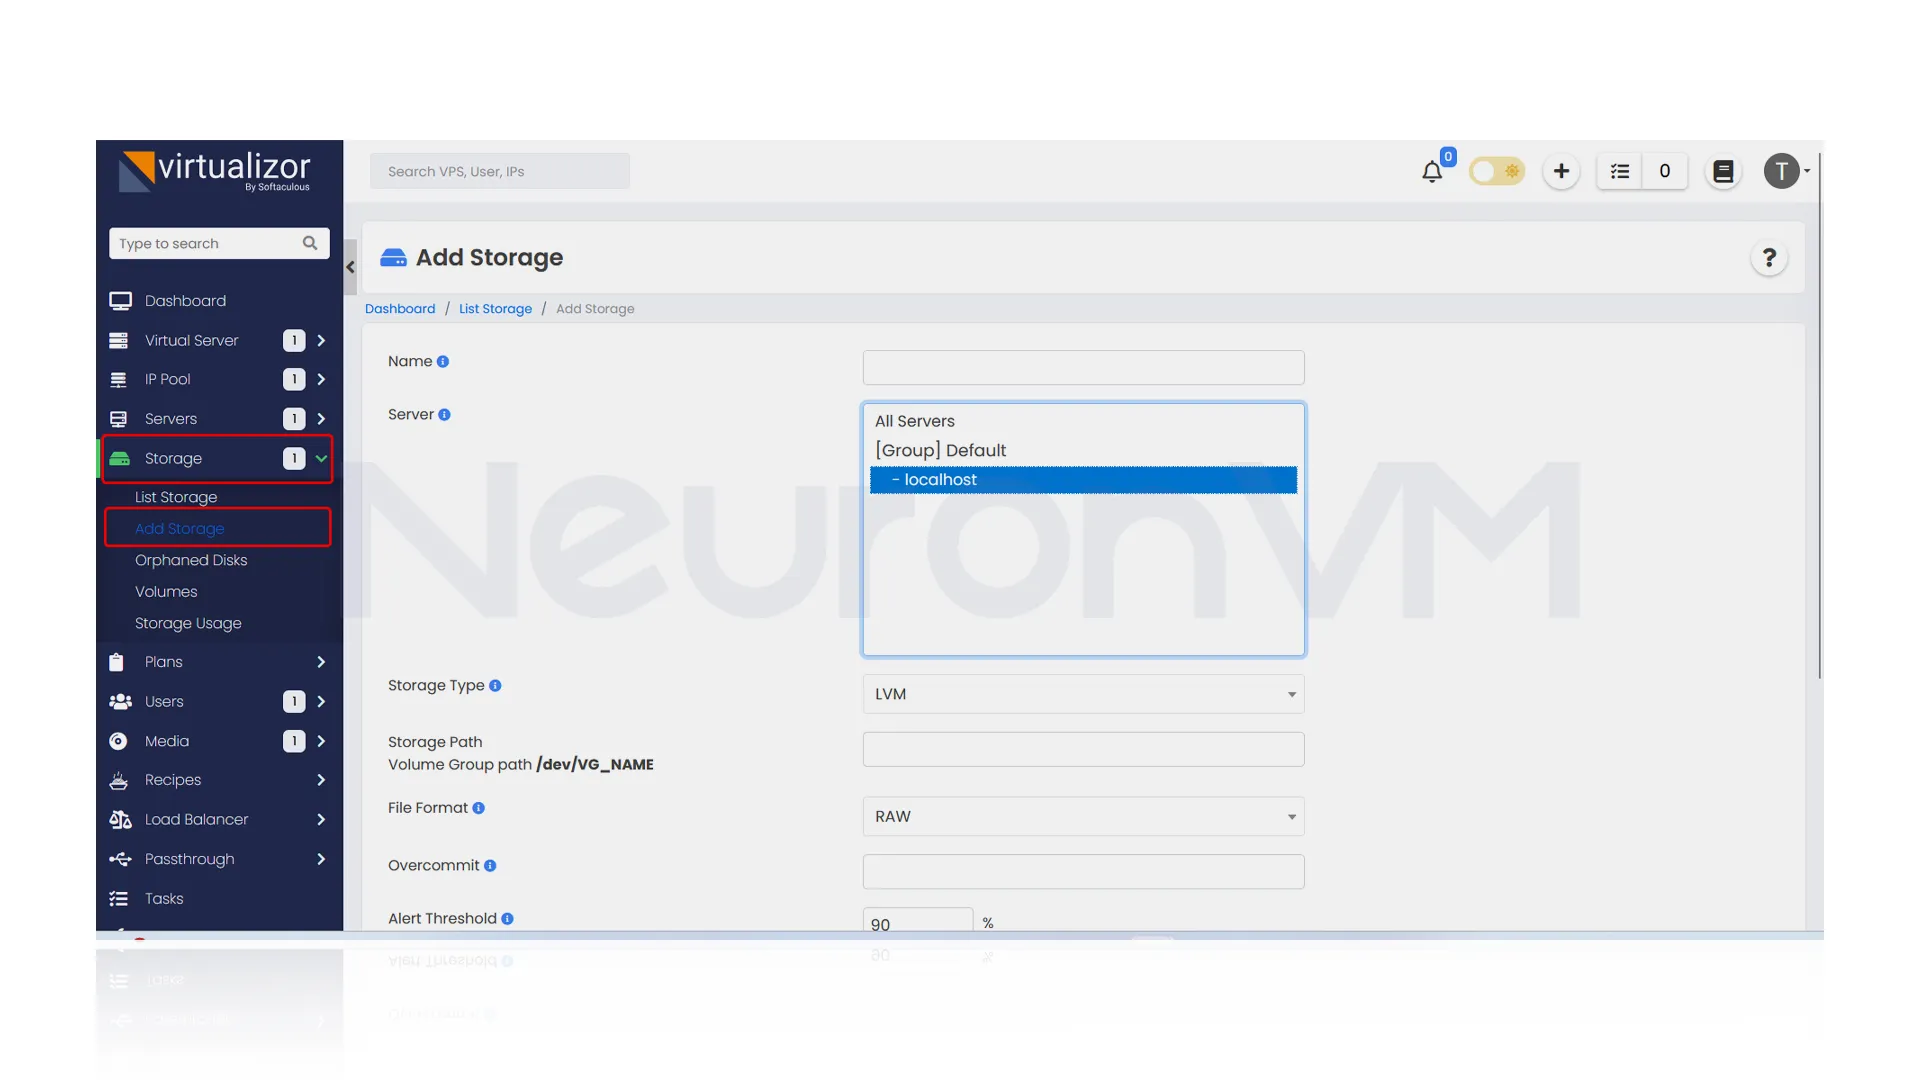
Step 5: Create Storage Through Admin Panel
Before doing anything, it is better to define your storage by navigating to the admin panel, then you need to go to the storage section and select ” Add Storage”, and you will see the following wizard.
Common Problems and How to Avoid Them
When installing and using KVM on a dedicated server, you may encounter a few common problems that are fortunately, easy to prevent and fix.
1- Virtualization is Disabled in the BIOS
If this option is not enabled, KVM will not run properly. Before starting the installation, make sure that Virtualization (VT-x/AMD-V) is enabled in the BIOS.
2- Firewall Ports are Closed
KVM and Virtualizor require specific ports to manage virtual machines. After installation, be sure to check that the required ports are open so that access to VMs is possible without problems.
3- Wrong Storage Partition
If you plan to run databases or heavy virtual machines, it is recommended to use ZFS or LVM instead of the default storage. This will improve performance.
When is KVM not suitable?
If you have a non-Linux operating system and need VMware-specific tools
If you need an advanced graphical GUI to manage VMs
If your data center requires extensive official support and a high SLA
Pro Tips After Installing KVM
After you set up the basics of KVM, there are some extra tips that can make your server run even better, one is CPU pinning, which means locking a virtual machine to certain CPU cores so it runs more smoothly, for apps that use a lot of memory, turning on Hugepages helps the system handle RAM more efficiently, it’s also a good idea to use snapshots and backups with LVM or ZFS, so you can quickly go back if something breaks after an update, And if you manage more than one server, live migration is super handy because t lets you move virtual machines from one server to another with almost no downtime, making updates and scaling much easier.
Real-world Example: Saving costs with KVM
A small web hosting company was using 10 physical servers to host their customers’ websites and databases. Each server cost around $2,500 and requires constant maintenance, After moving to a dedicated server with KVM virtualization, they were able to create 12 virtual machines on the same server.
1- Hardware costs were reduced by 70% because there was no need to buy multiple servers anymore.
2- Power costs were reduced, because one server consumes much less energy than 10 servers.
3- updates and backups were done centrally.
Conclusion
Installing KVM on a dedicated server allows you to run multiple virtual machines with high performance and easy management. With Virtualizor, you can quickly and easily install and create a reliable environment for hosting websites and databases, if you are looking for a free and professional solution to VMware, KVM is the best choice.
You might like it

Ubuntu Tutorials
How to Restart Network on Ubuntu 22.04


Ubuntu Tutorials
How to Install VNC on Ubuntu (18.04, 20.04, 22.04) – Full Se...


Linux Tutorials
How to Connect Studio 3T MongoDB to local DB