


How to Install CUDA on Ubuntu 22.04 (Step-by-Step with Fixes)


 9m
9m
 0 comments
 Print
Print
CUDA is a computing platform and programming model developed by NVIDIA and designed for parallel processing using graphics cards (GPUs), properly installing CUDA on Linux systems, especially Ubuntu 22.04, can dramatically speed up the processing speed of machine learning applications, In this article, we will go through the detailed steps of installing CUDA, along with some expert tips and also important recommendations. Unlike traditional CPU processing, CUDA uses the processing power of the graphics card to run thousands of instructions, this feature makes running heavy data analysis many times faster, and that’s why install CUDA on Ubuntu is really important for data scientists and software engineers.
Prerequisites
Before starting the installation, make sure that the following requirements are met:
An installed Ubuntu 22.04 system
Root or sudo access
NVIDIA graphics card with up-to-date drivers
Stable internet connection
Step 1: Update Ubuntu
First, it is best to update the system to the latest version of packages and software to avoid errors when installing CUDA. Enter the following commands:
sudo apt update
sudo apt upgrade
Step 2: View recommended NVIDIA drivers
In this step, we need to identify the recommended driver for our graphics card. To do this, first install the ubuntu-drivers-common package and then view the list of drivers:
sudo apt install ubuntu-drivers-common
sudo ubuntu-drivers devices
The command output will display the model of your graphics card. For example, you might see something like this:
model : GP108M [GeForce MX150] (Mi Notebook Pro)
driver : nvidia-driver-535 - distro non-free recommended
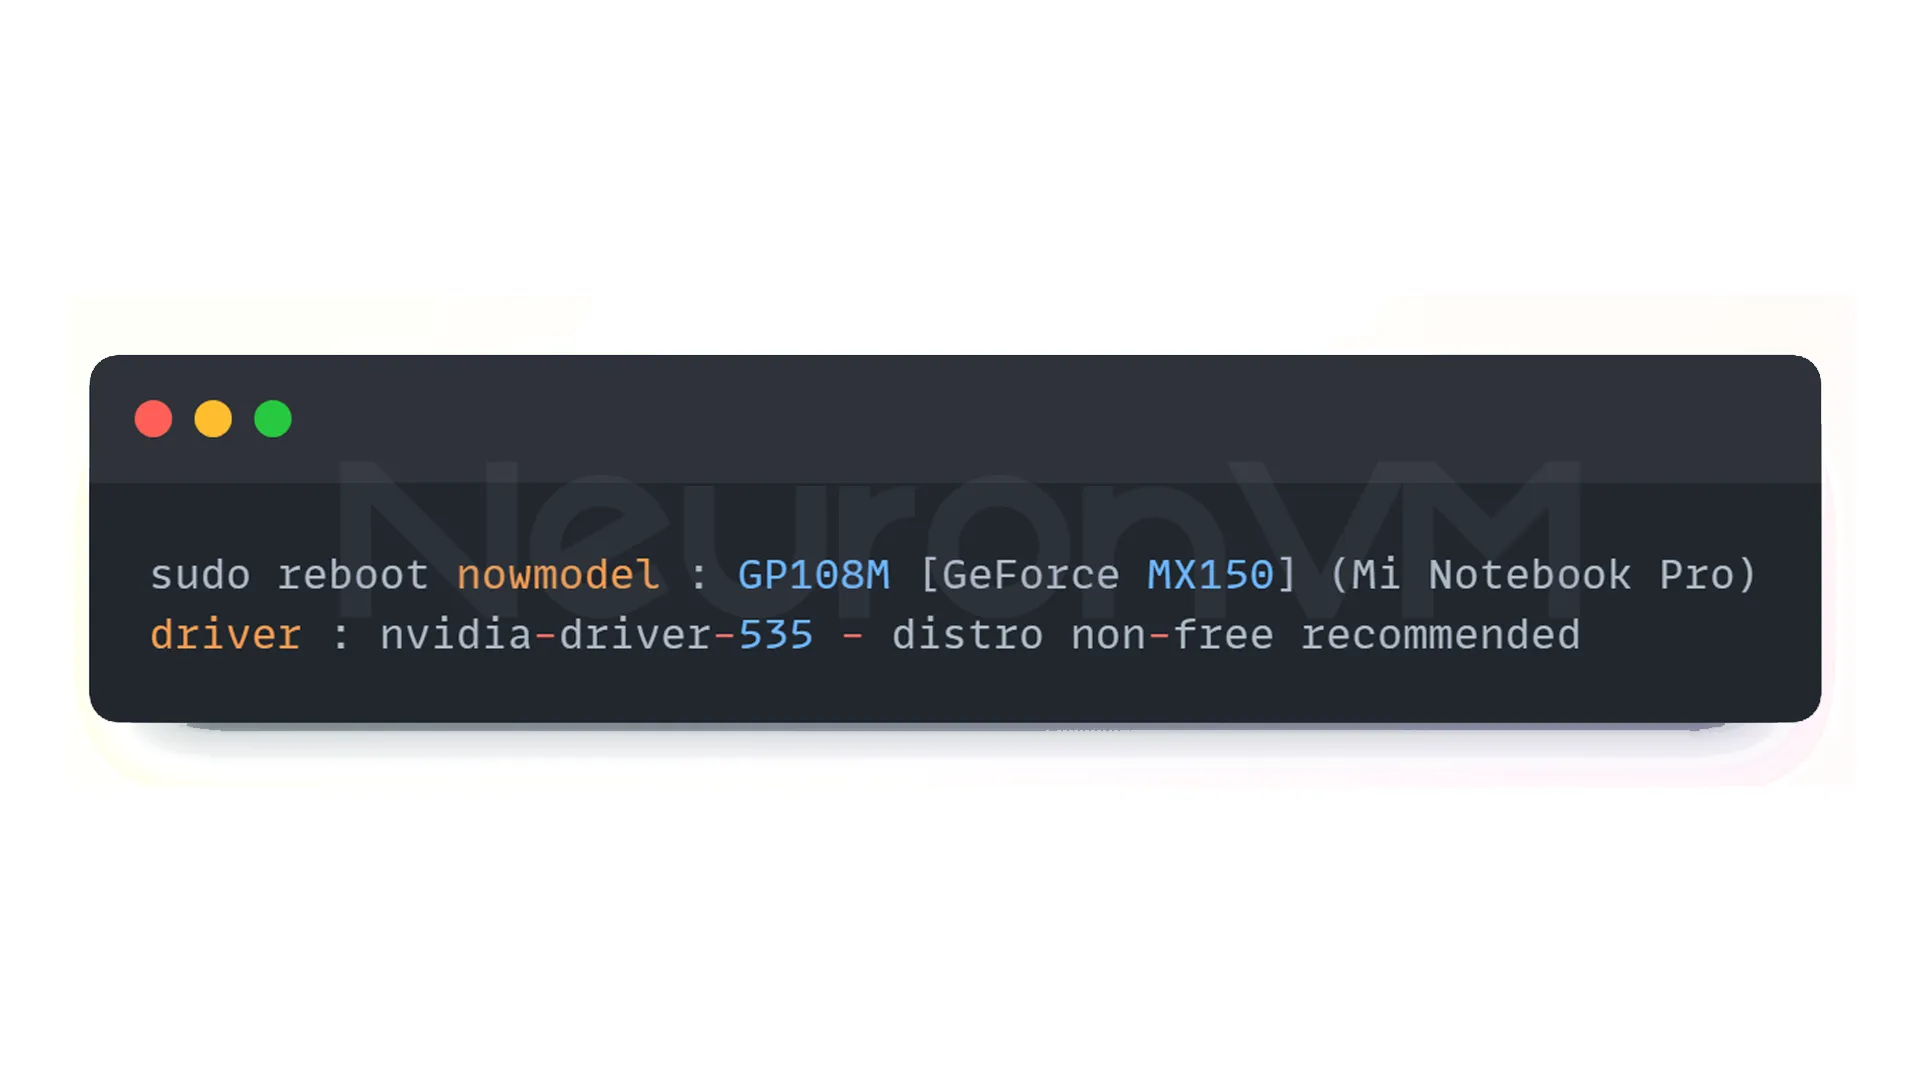
As you can see, driver 535 is recommended for this card.
Step 3: Install NVIDIA Driver
To install the recommended driver, use the following command. You can read more about this tool on their main website.
sudo apt install nvidia-driver-535
On some versions of Ubuntu, this driver may be installed by default, but if not, running this command is sufficient.
Step 4: Reboot the System
After installing the driver, you need to reboot the system for the changes to take effect:
sudo reboot now
Step 5: Verify Driver Installation
After rooting, you can verify the successful installation of the driver with the following command:
nvidia-smi
At the top of the output table, you will see the driver version and CUDA version, for example:
NVIDIA-SMI 535.86.05 Driver Version: 535.86.05 CUDA Version: 12.2
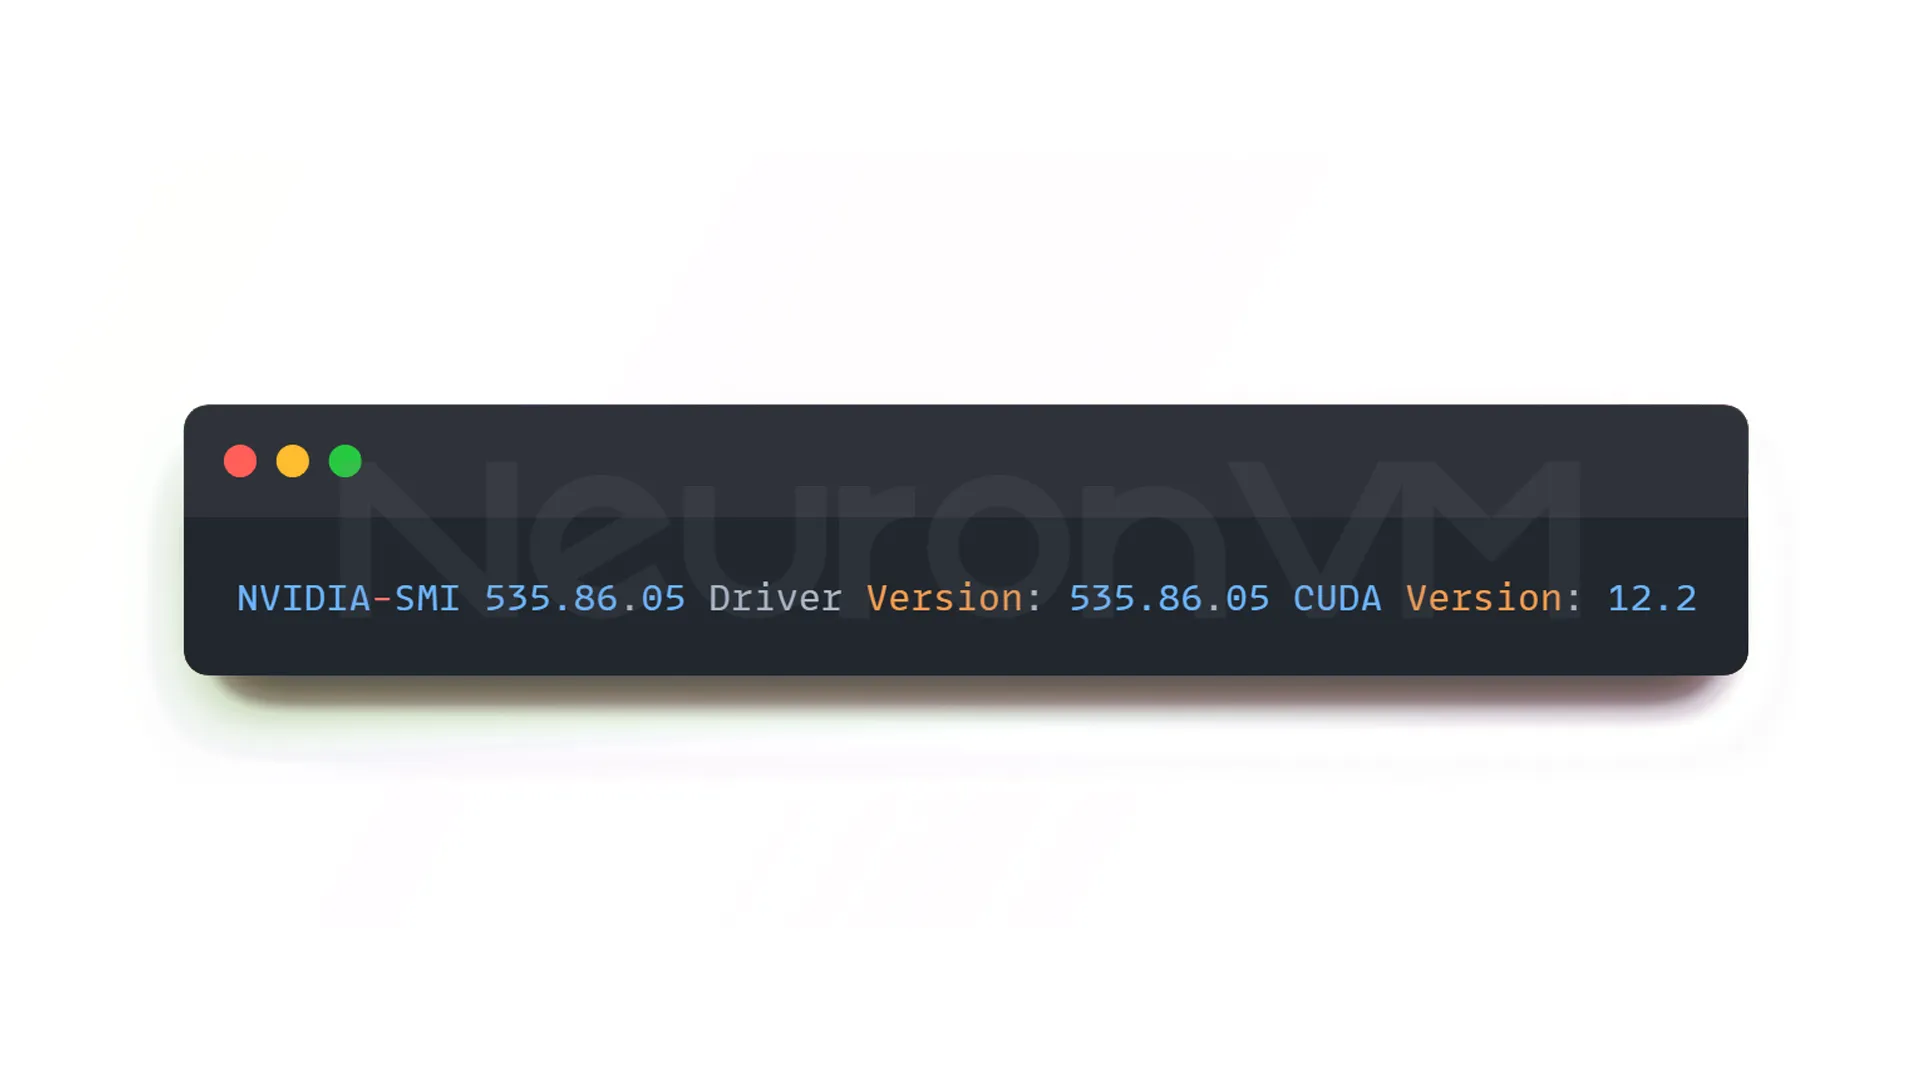
At this point, the CUDA Toolkit is not yet installed, only its driver is ready.
Step 6: Install GCC
You need the GCC compiler to install the CUDA Toolkit. If you don’t have it installed yet, add it with the following command:
sudo apt install gcc
To ensure the installation was successful, you can check the GCC version:
gcc -v
Step 7: Install the CUDA Toolkit
Now it’s time to install the main CUDA package. First, download and install the NVIDIA keyring file:
wget https://developer.download.nvidia.com/compute/cuda/repos/ubuntu2204/x86_64/cuda-keyring_1.1-1_all.deb

sudo dpkg -i cuda-keyring_1.1-1_all.deb

sudo apt-get update

sudo apt-get -y install cuda
If you encounter a dependency error, run the following command:
sudo apt --fix-broken install
This command usually fixes broken packages.
Step 8: Reboot
After installing the CUDA Toolkit, you can reboot the system once again to load the CUDA modules properly:
sudo reboot now
Step 9: Set Environment Variables
In this step, we need to add the CUDA paths to the environment variables so that the system can access the CUDA files, to do this, open the “~/.bashrc” file:
nano ~/.bashrc
At the end of the file, add the following lines:
export PATH=/usr/local/cuda/bin${PATH:+:${PATH}}
export LD_LIBRARY_PATH=/usr/local/cuda-12.2/lib64${LD_LIBRARY_PATH:+:${LD_LIBRARY_PATH}}
Then save the file and load the settings with the following command:
. ~/.bashrc
Step 10: Test the CUDA Installation
Now you can check the CUDA installation. The following command will display the installed version:
nvcc -V
If the installation was successful, the CUDA and Compiler version information will be displayed in the output for you.
Fixing Common CUDA Installation Errors
1- “NVIDIA driver not found” error
If CUDA is installed but the GPU is not detected yet, reinstall the graphics driver by entering the following command:
sudo apt install nvidia-driver-535

sudo reboot
2- “nvcc command not found” error
This error usually happens because the CUDA path is not set in the environment. Add the PATH command again and run the “.bashrc” file.
3- Kernel version incompatibility issue
If CUDA stops working after updating the system, reinstall the NVIDIA driver to make it compatible with the new kernel.
Pro Tips
In research environments or ML servers, it is best to use a specific CUDA version 11.8 or 12.2 to match your TensorFlow or PyTorch version.
To run multiple CUDA versions at the same time, add the paths individually to “.bashrc”.
If you plan to use CUDA on a virtual machine or Docker, you will also need to install the NVIDIA Container Toolkit plugin.
Practical tips for installing CUDA on ubuntu in real-world environments
On research servers or multi-GPU systems, it is best to use a specific CUDA version to match the version of TensorFlow or PyTorch.
Also, after every system update, check that the NVIDIA driver is compatible with the new kernel.
Conclusion
With the steps above, CUDA has been successfully installed on Ubuntu 22.04, note that this tool not only optimizes the performance of your graphics card but also serves as the basis for many AI and also parallel computing frameworks. Finally, after installation, it is recommended that you make sure the correct performance of CUDA by running NVIDIA test samples or simple TensorFlow GPU projects.
Yes, CUDA only runs on NVIDIA GPUs.
The driver is for identifying the graphics card, the CUDA Toolkit provides GPU development and processing tools.
Yes, just add the path to each version separately in the environment variables.
You might like it
Linux Tutorials
How to Install Yarn on Alpine Linux [Step-by-Step Guide]
Windows Tutorials
How to Connect to VPS on Windows 10


Almalinux Tutorials
How to Install Cloudlinux on Almalinux 9