How to Install and Configure WHMCS on Your Server

 12m
12m
 0 comments
 Print
Print
Based on NeuronVM‘s professional experience configure WHMCS, many users face the same challenge! Daily operations become harder to handle as hosting businesses scale. The best solution is to configure WHMCS, which streamlines workflows and automates billing, client management, and support. At first, handling a few clients by hand might seem easy. But pretty quickly, late payments, missed renewals, and unanswered tickets start piling up. WHMCS takes care of these repetitive tasks automatically, and it will prevent mistakes. In this guide, we’ll show you how to configure WHMCS on your server step by step and point out common slip-ups, like extracting files to the wrong folder or skipping cron jobs, so you can get it right from day one.

WHMCS Setup Requirements: Preparation before installing and configuring WHMCS
Before you go straight to installing and configuring WHMCS, it is better to prepare all the prerequisites like a hosting expert. Our experience at NeuronVM has shown that most installation errors are not due to the software but due to neglecting these basic things. Follow this easy checklist to avoid hours of hassle later:
➊ A PHP- and MySQL-ready hosting server
It doesn’t matter if you are using a dedicated server or a VPS, the important thing is that the PHP and MySQL versions are compatible with the WHMCS version. We have seen many times during the Configure WHMCS steps that people started with an old version of MySQL and after a few days, the payment modules had problems. So it is better to check the compatibility of the versions right from the start.
➋ Latest version of ionCube Loader
ionCube Loader is the main pillar of running WHMCS modules. If your version is old, you may see strange errors like “file corrupted” or payment module incompatibility during the Configure WHMCS steps. We spent over 4 hours searching for the cause of the error for one of our clients who was using an old version, while the problem was solved in 5 minutes with just an ionCube update. To stay secure, install the latest version every time.
➌ Valid WHMCS License
Without a license, WHMCS will not even run. We recommend that you get the license from the official site to avoid problems when updating in the future. Many people use invalid licenses, but this makes them lag behind in security updates. For a hosting business, security should always be the number one priority.
💡 Practical tip: At NeuronVM, we always check the versions and active extensions on the server once with the PHP Info tool before installation. This only takes 2 minutes, but it will prevent hours of subsequent errors in Configure WHMCS.
Downloading WHMCS: Step-by-Step Guide to Configure WHMCS
If it’s your first time setting up WHMCS, head over to the official website and look for the Full Release section, then just click Download. It’s really straightforward, but don’t rush it!
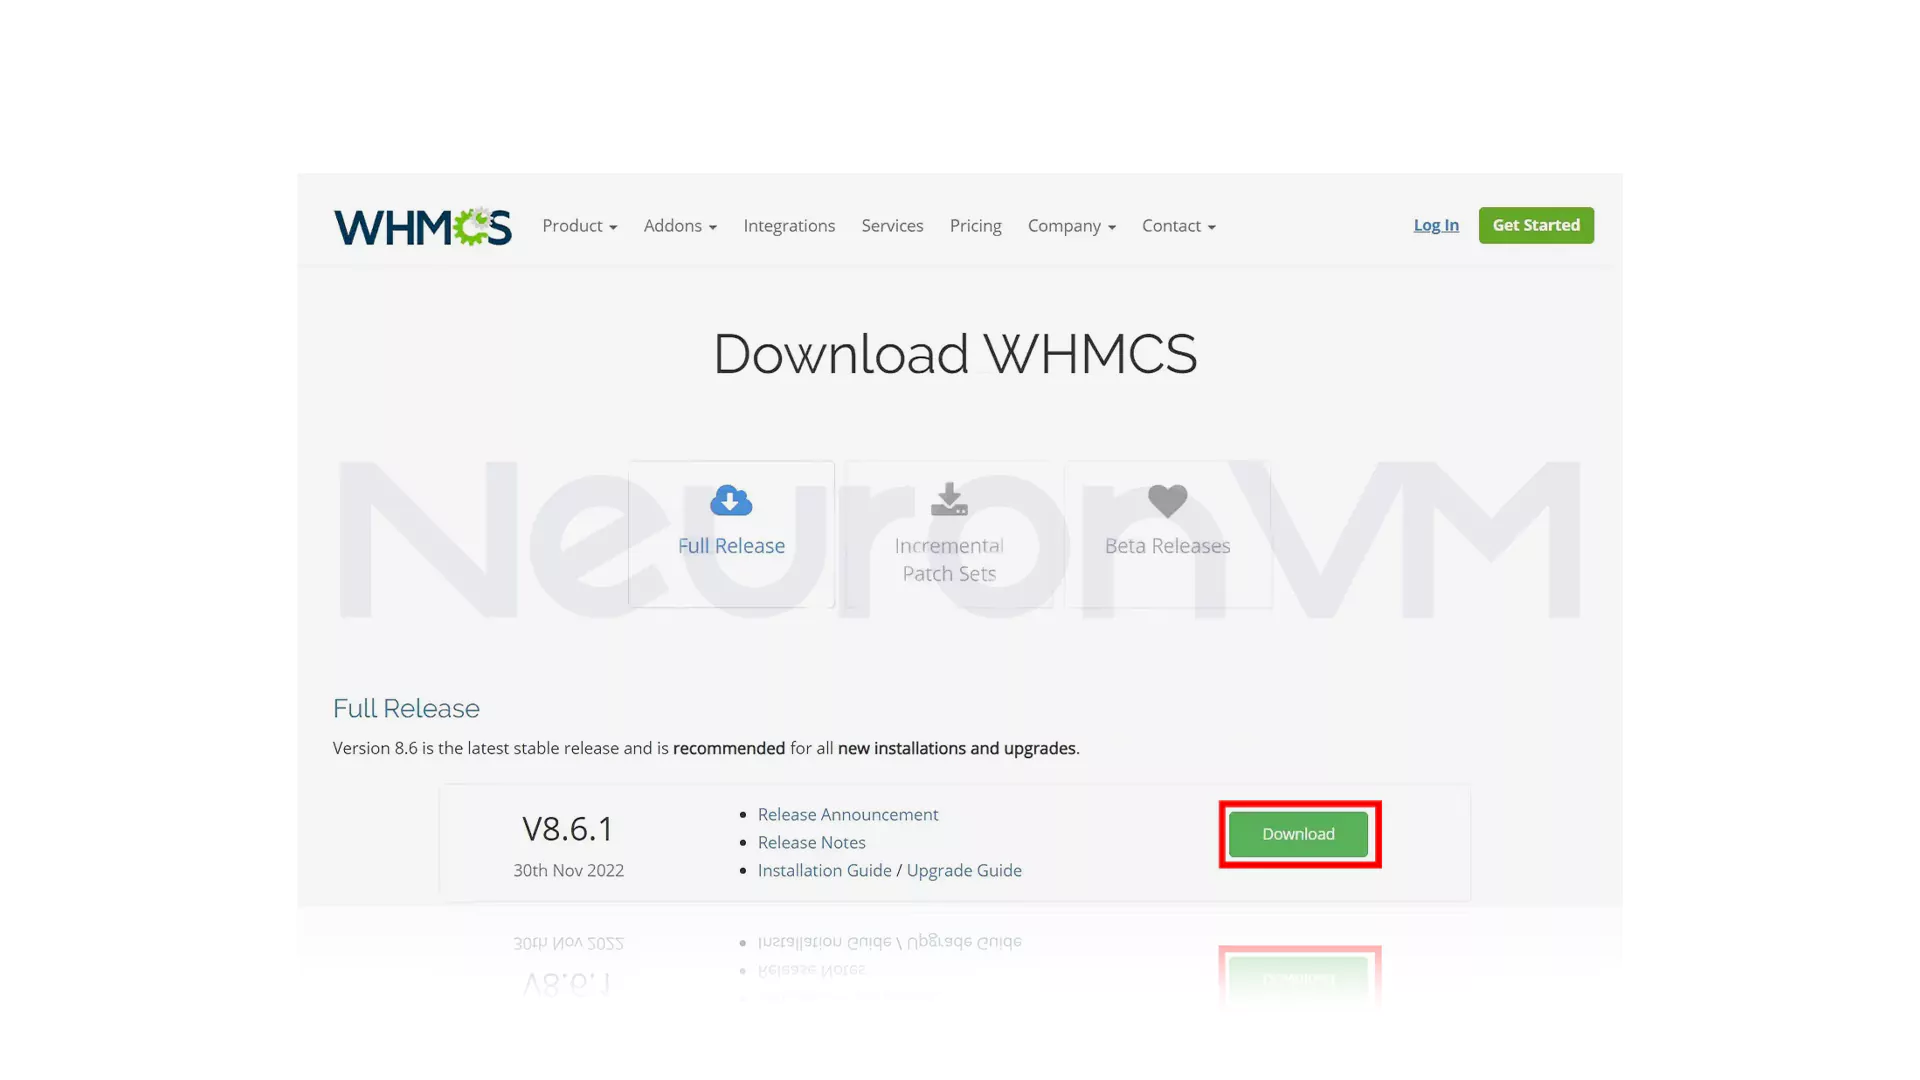
Wait for the download to finish.
Uploading WHMCS to Your Dedicated Server: Full Instructions to Configure WHMCS
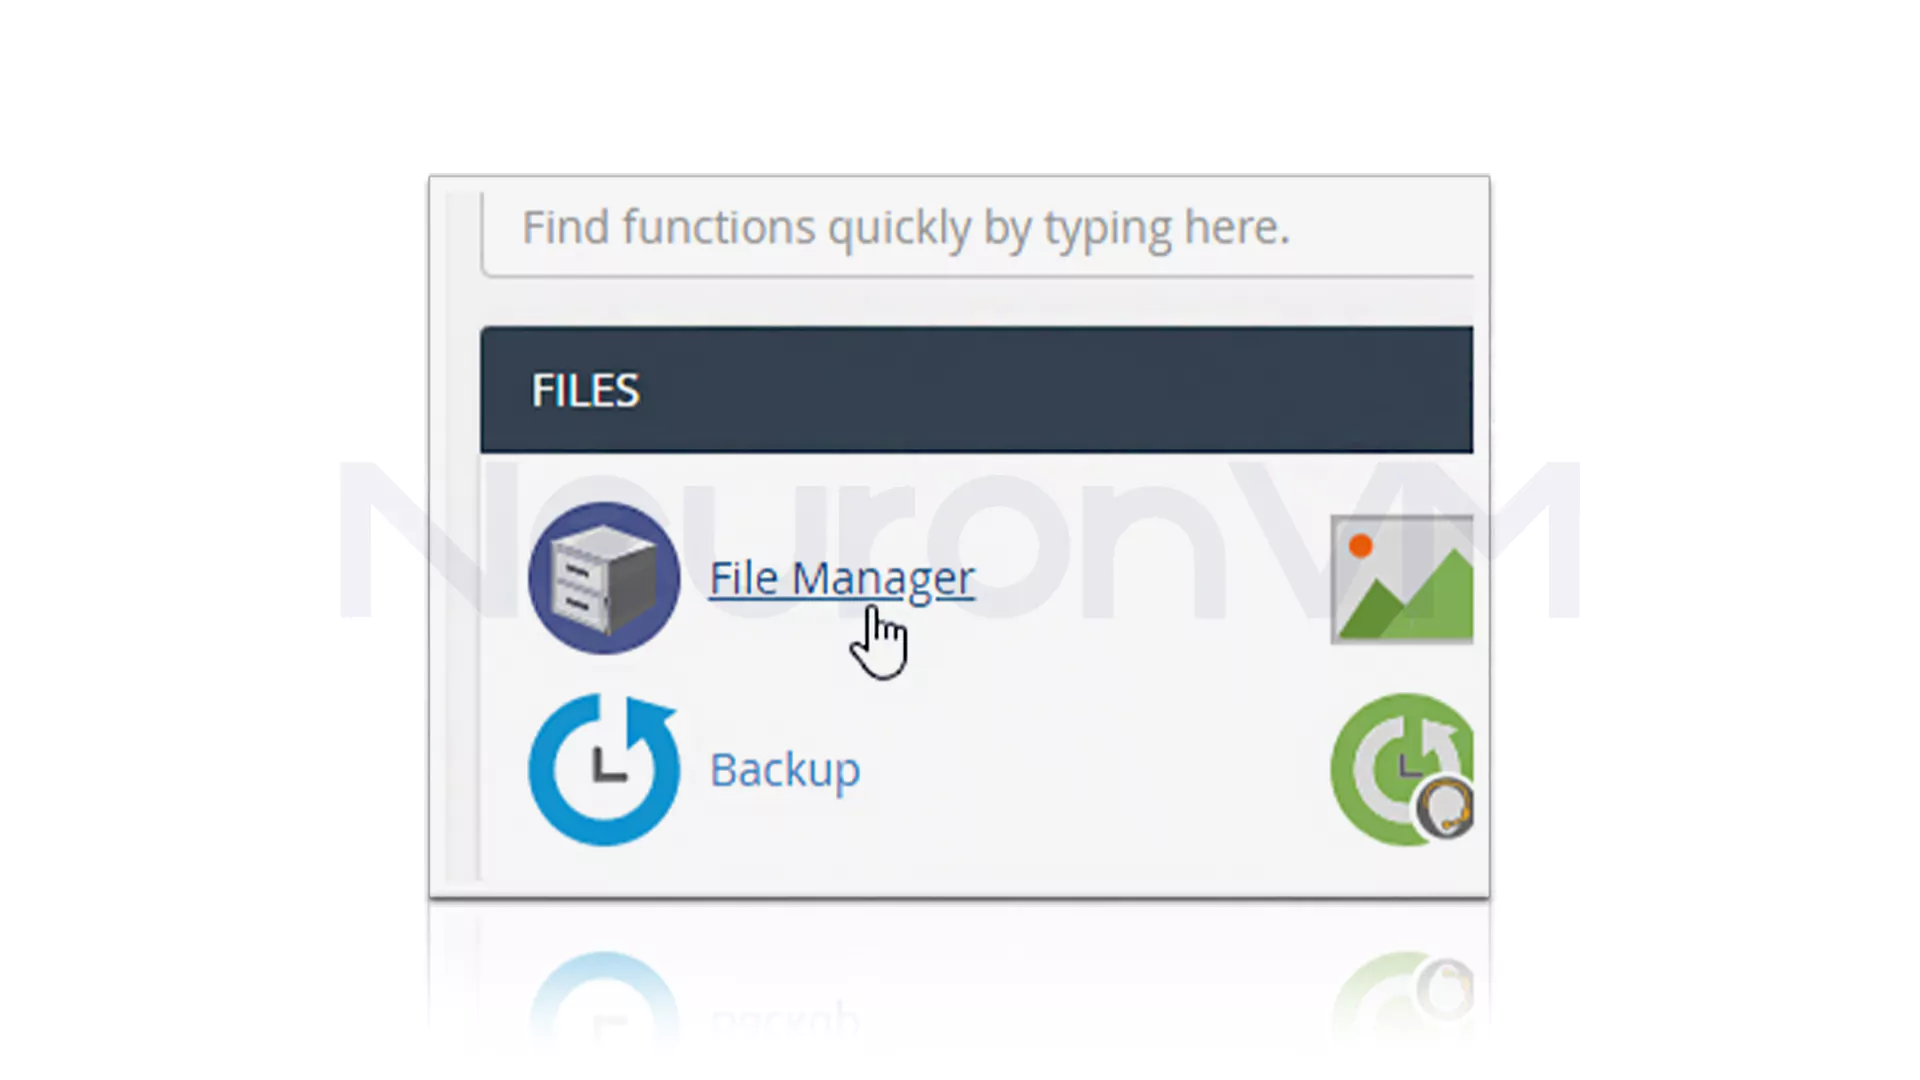
Now it’s time to install WHMCS on your server for configure WHMCS. Remember that this step uses cPanel Server. If you have not installed cPanel on your server, check our related article. Firstly, you should log in to your cPanel account and navigate to the Files >> File Manager path to the File Manager interface of cPanel. Just remember that a common mistake is extracting files to the wrong folder; avoid this by carefully checking the path.
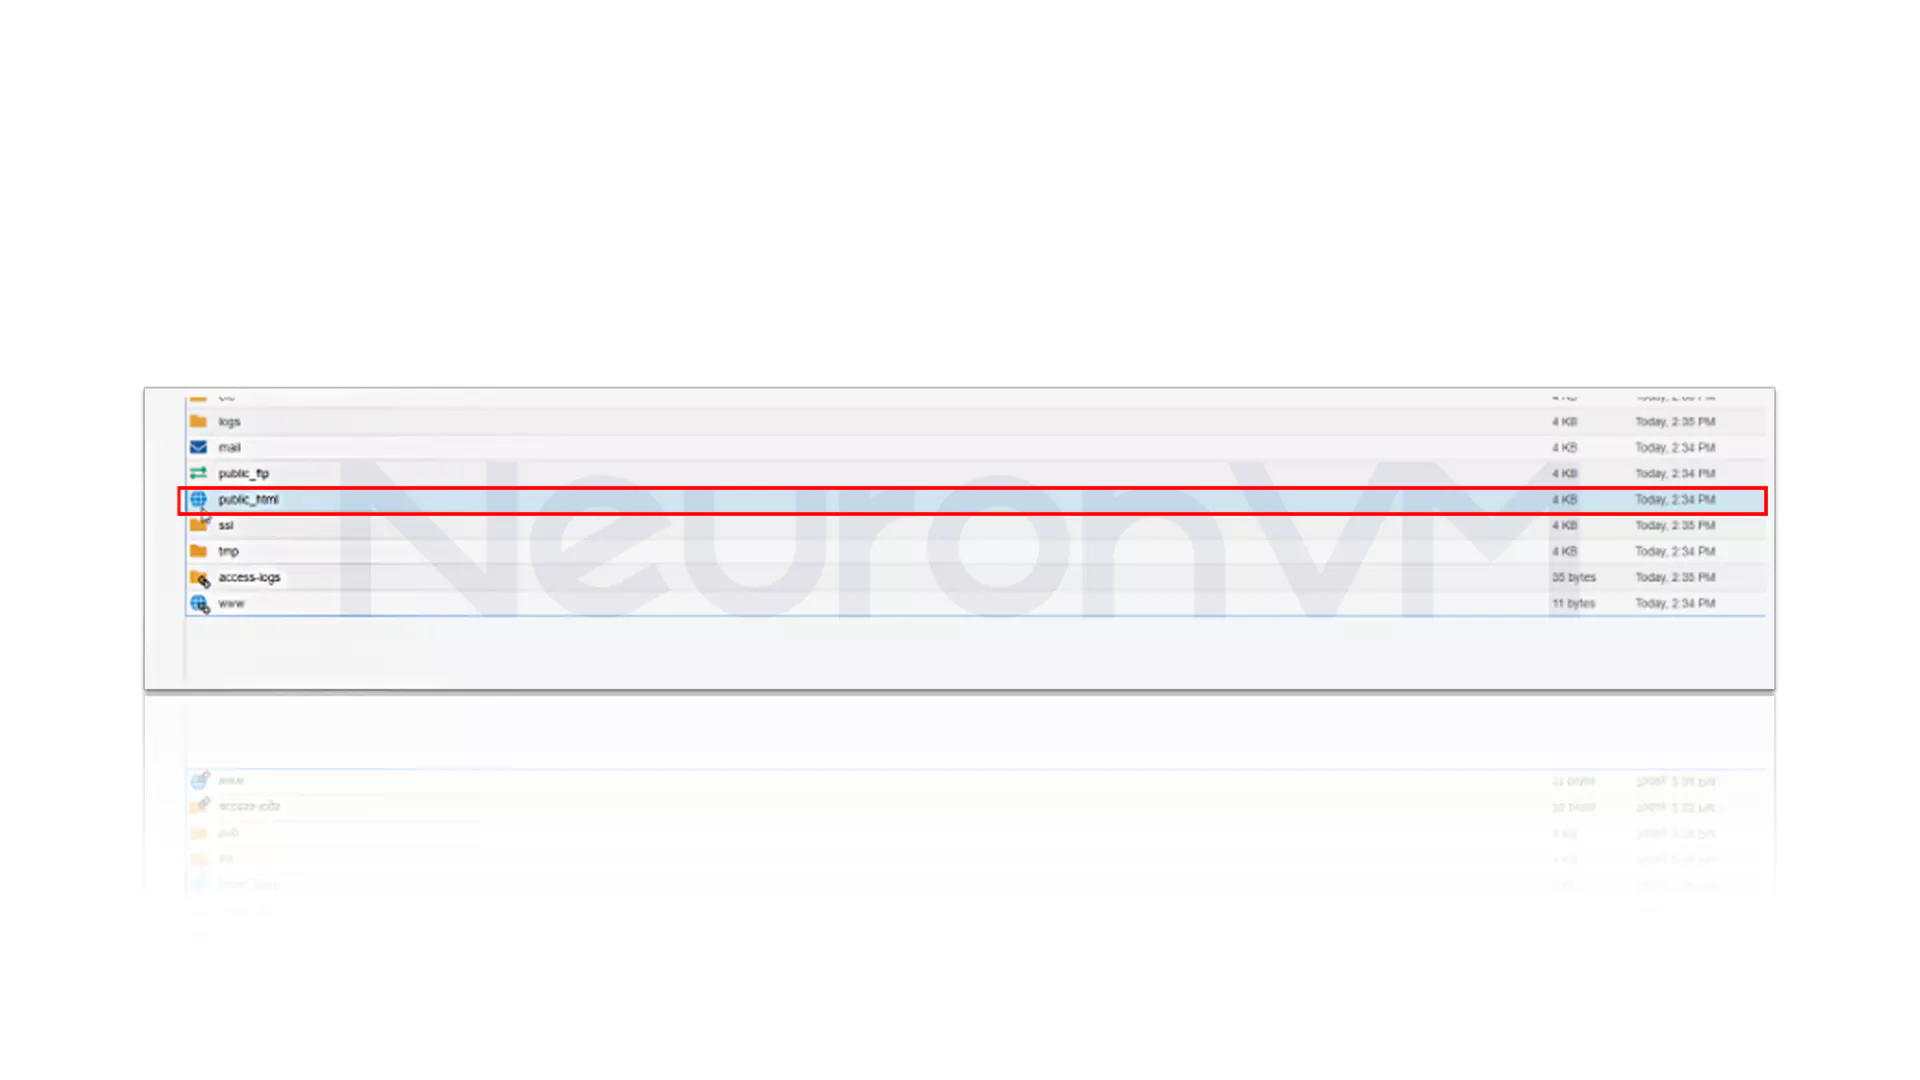
Double-click the folder to access your public_html directory:
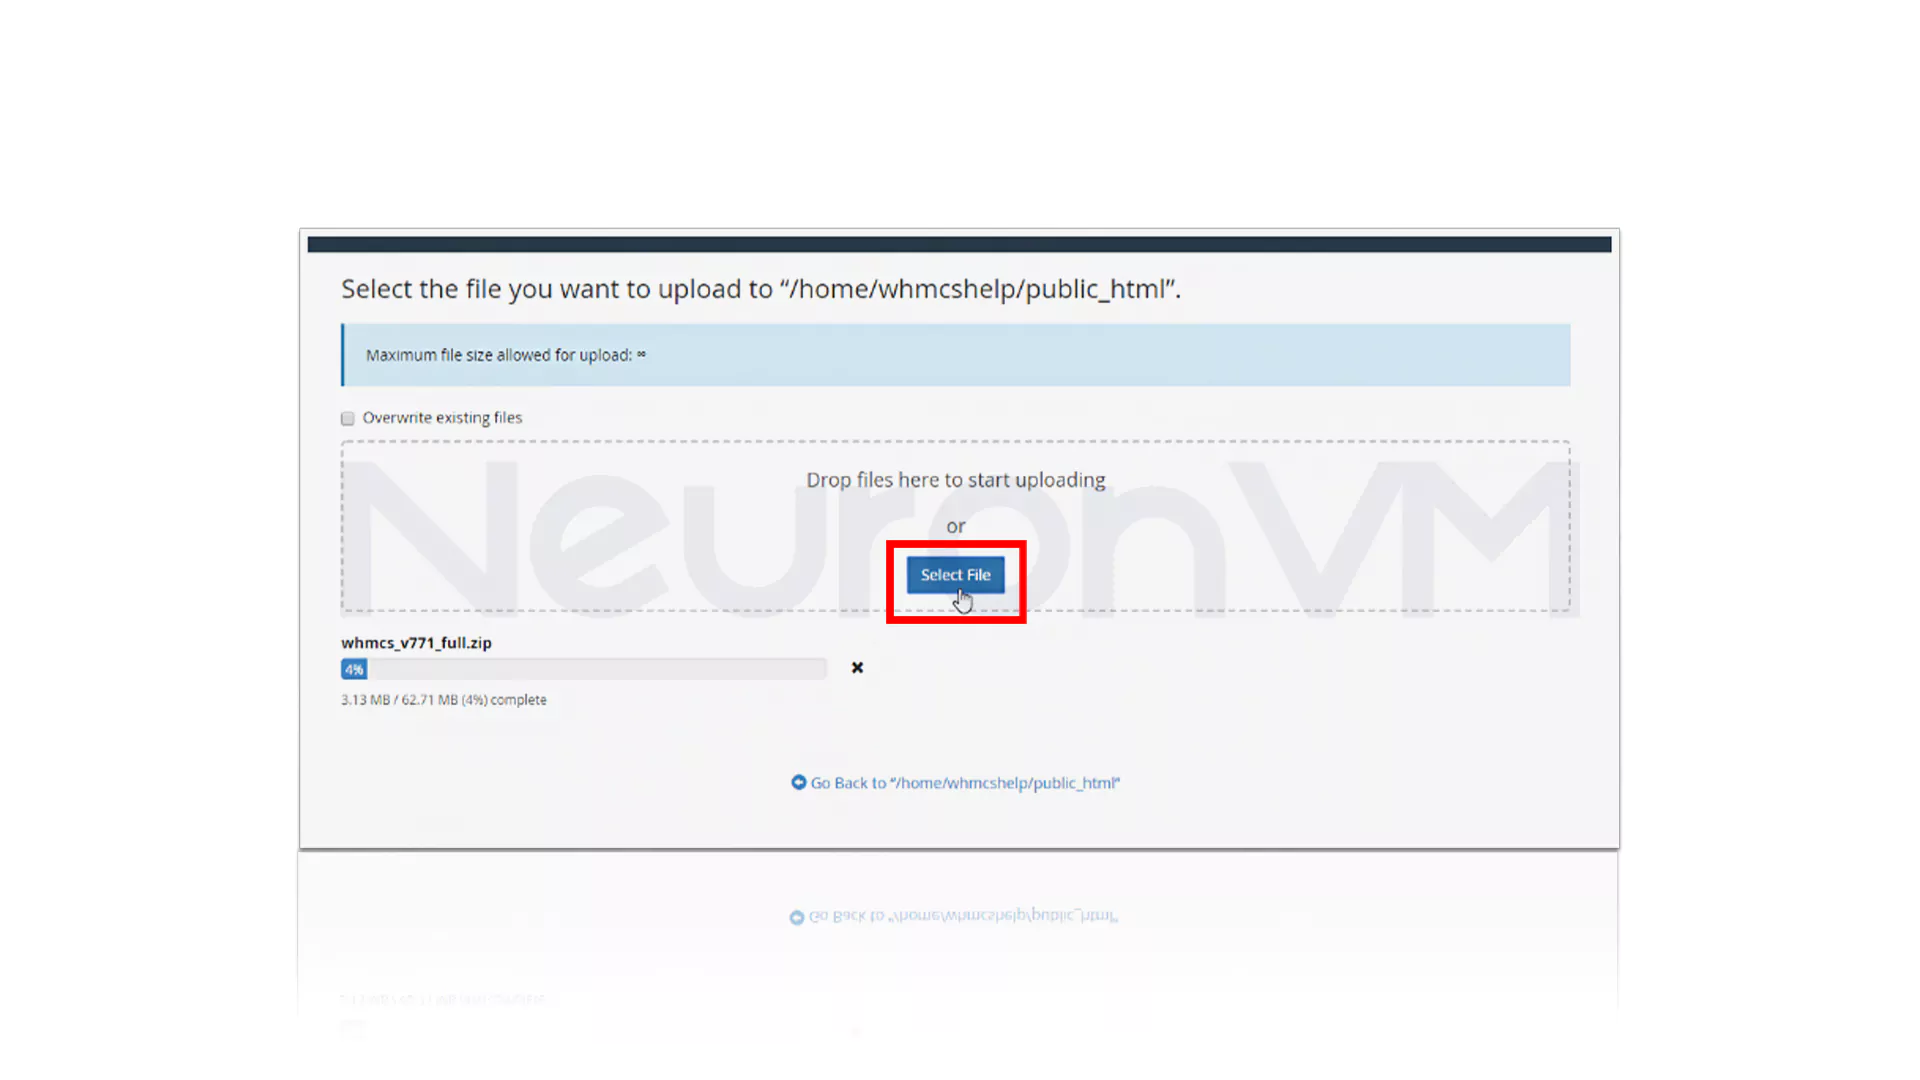
Now click on Upload. After you see this screen, choose Select File. Then browse the .zip file:
After uploading the .zip file, go back to your public_html folder to see it. A common mistake is extracting it somewhere else. Don’t do that! Make sure you extract into public_html and rename configuration.php.new to configuration.php. Follow the prompts, pick the destination, and hit Extract. Done! Let’s place it in the public_html folder:
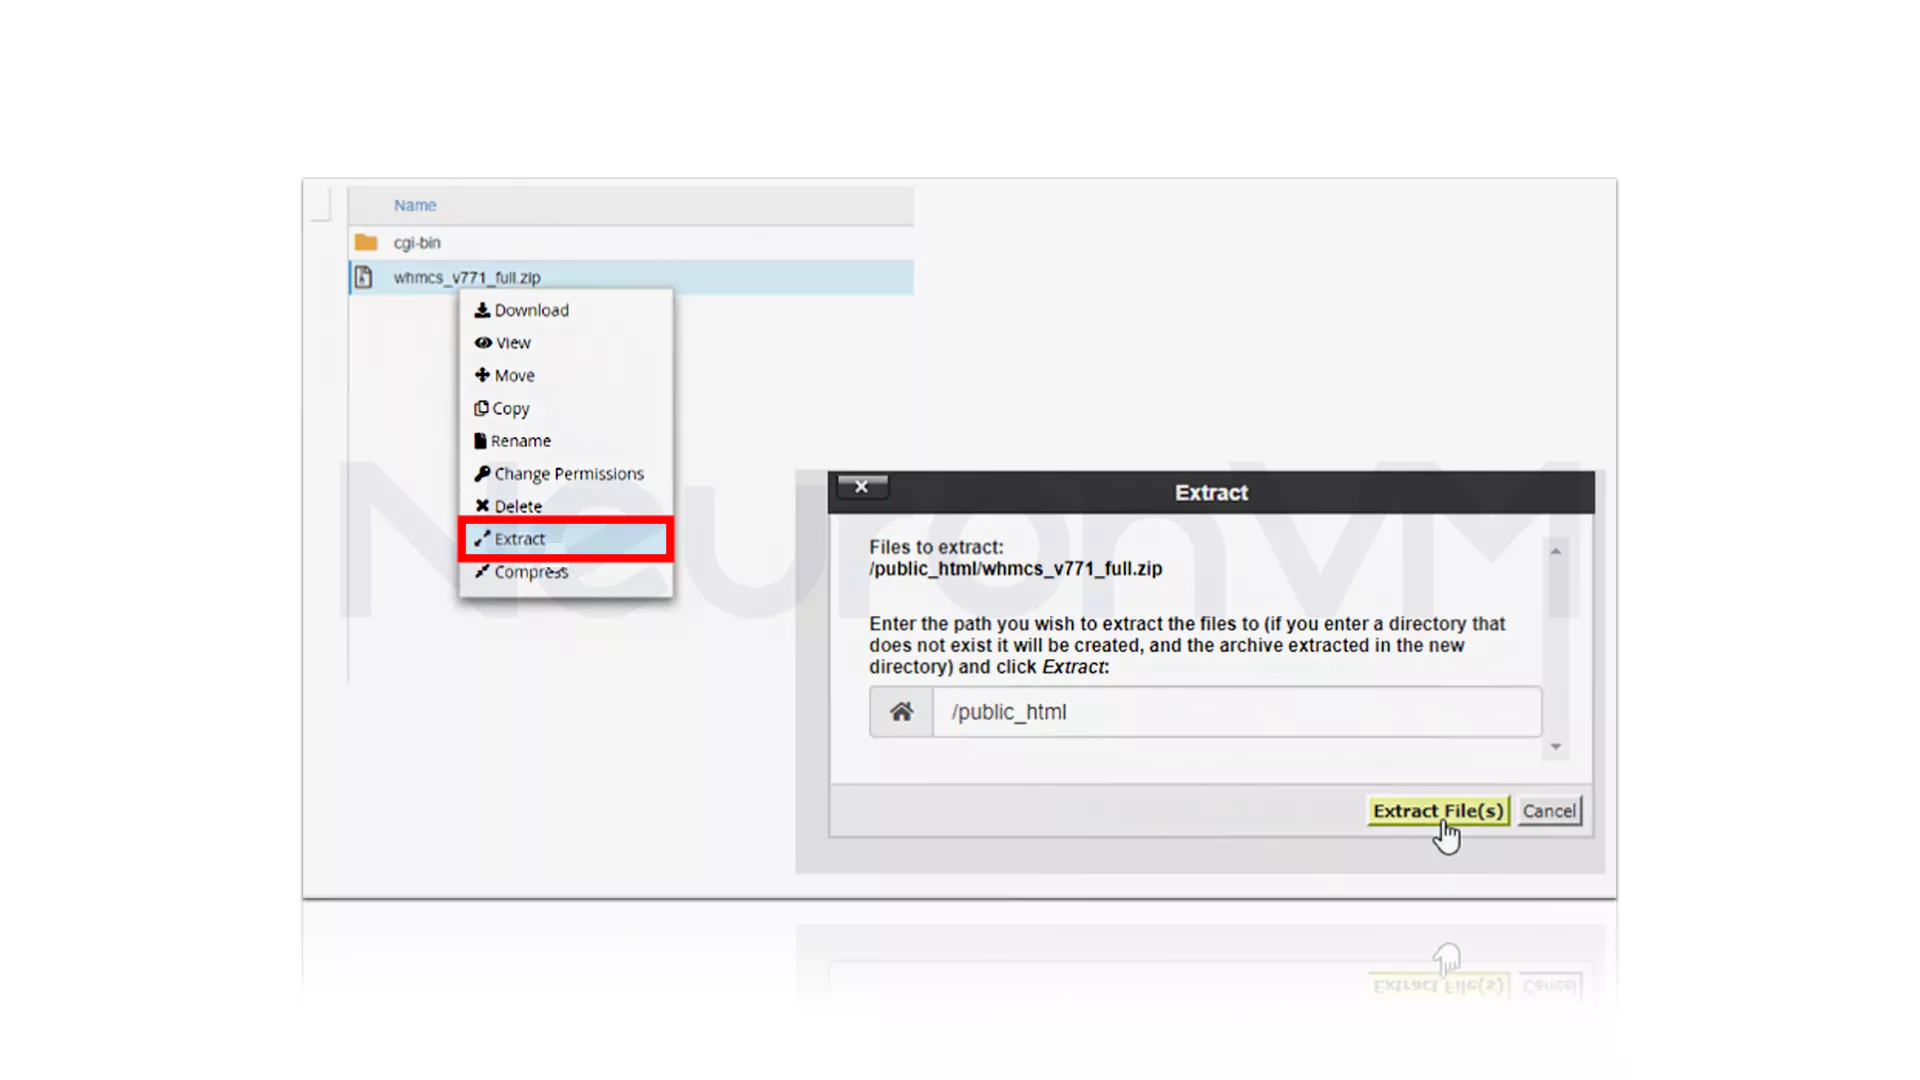
Rename the configuration.php.new file to the configuration.php.
Database Setup and Configure WHMCS on Your Dedicated Server
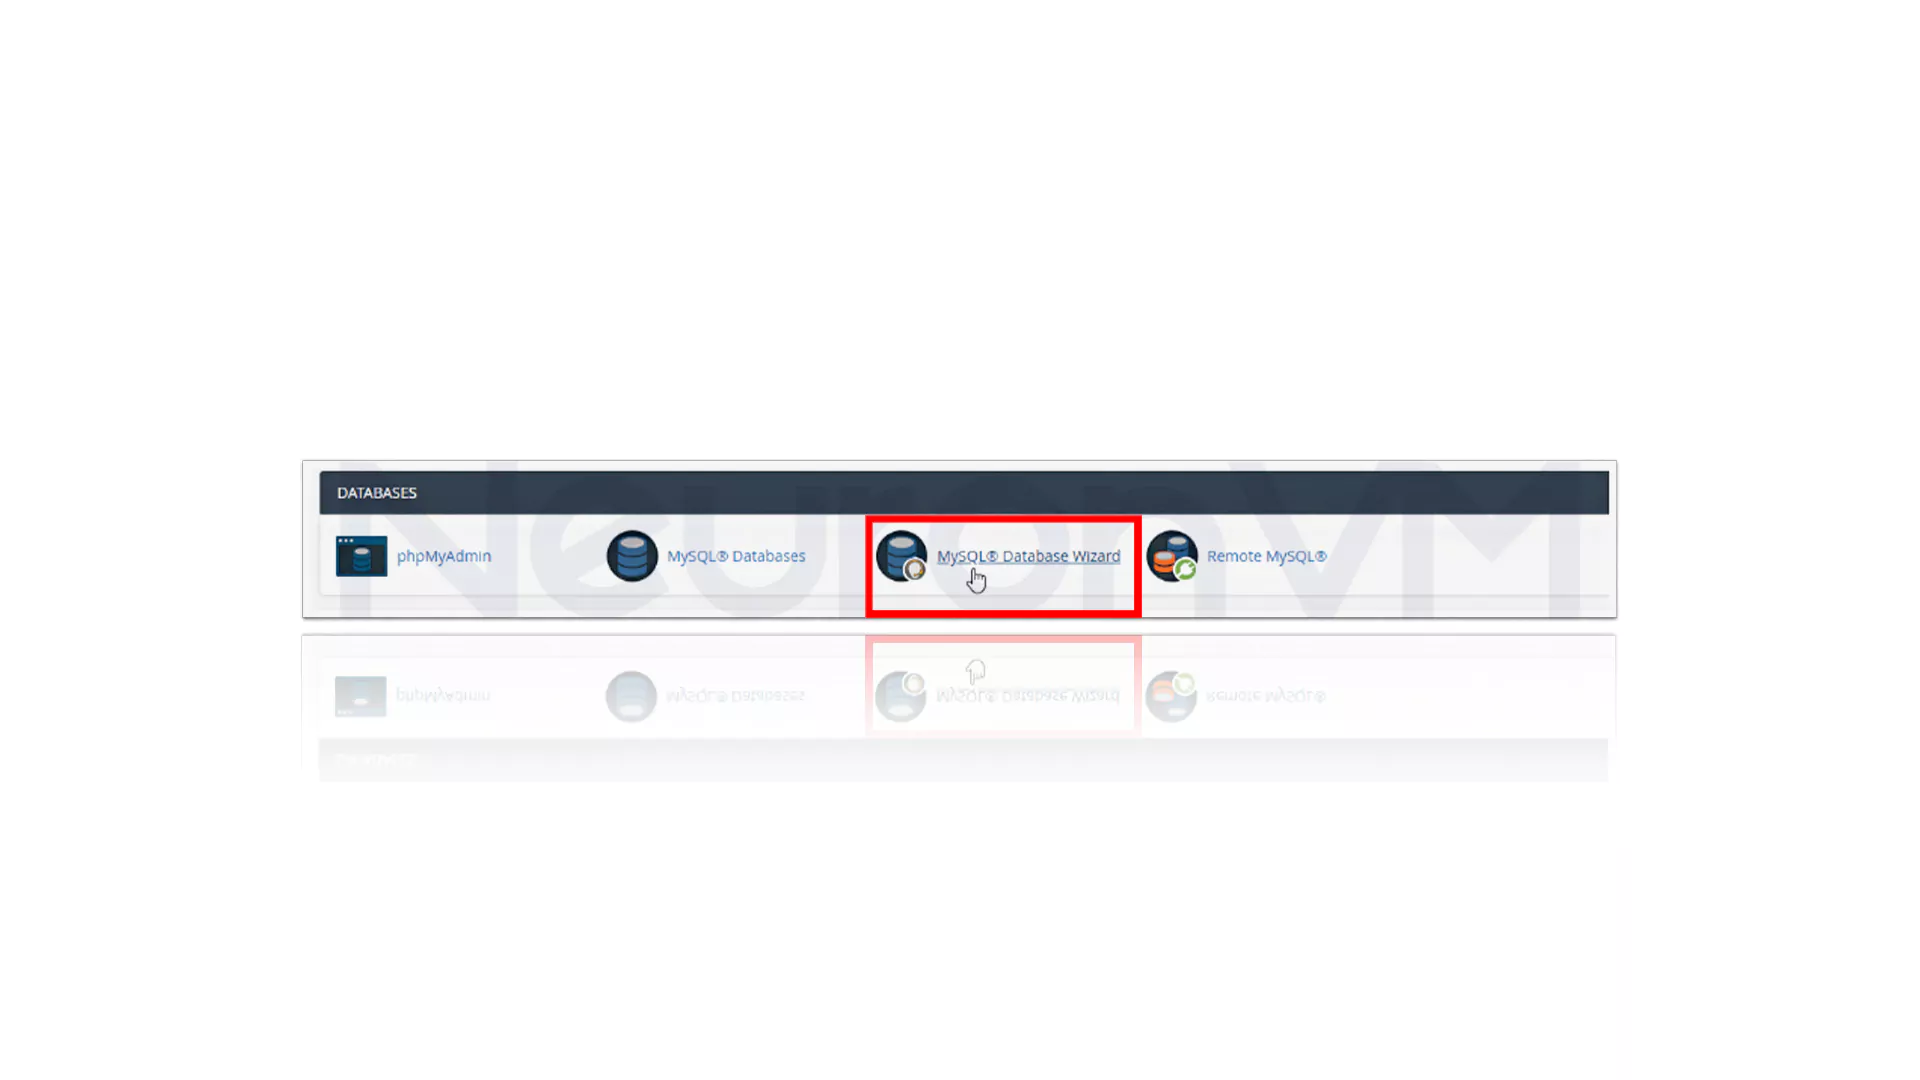
Before setting up WHMCS, start by creating a MySQL database. In cPanel, head to Databases >> MySQL Database to open the wizard.
Pro Tip: Give the right privileges, follow cPanel’s naming rules, and save your database credentials somewhere safe. Doing this correctly helps avoid setup errors and keeps your WHMCS running smoothly.
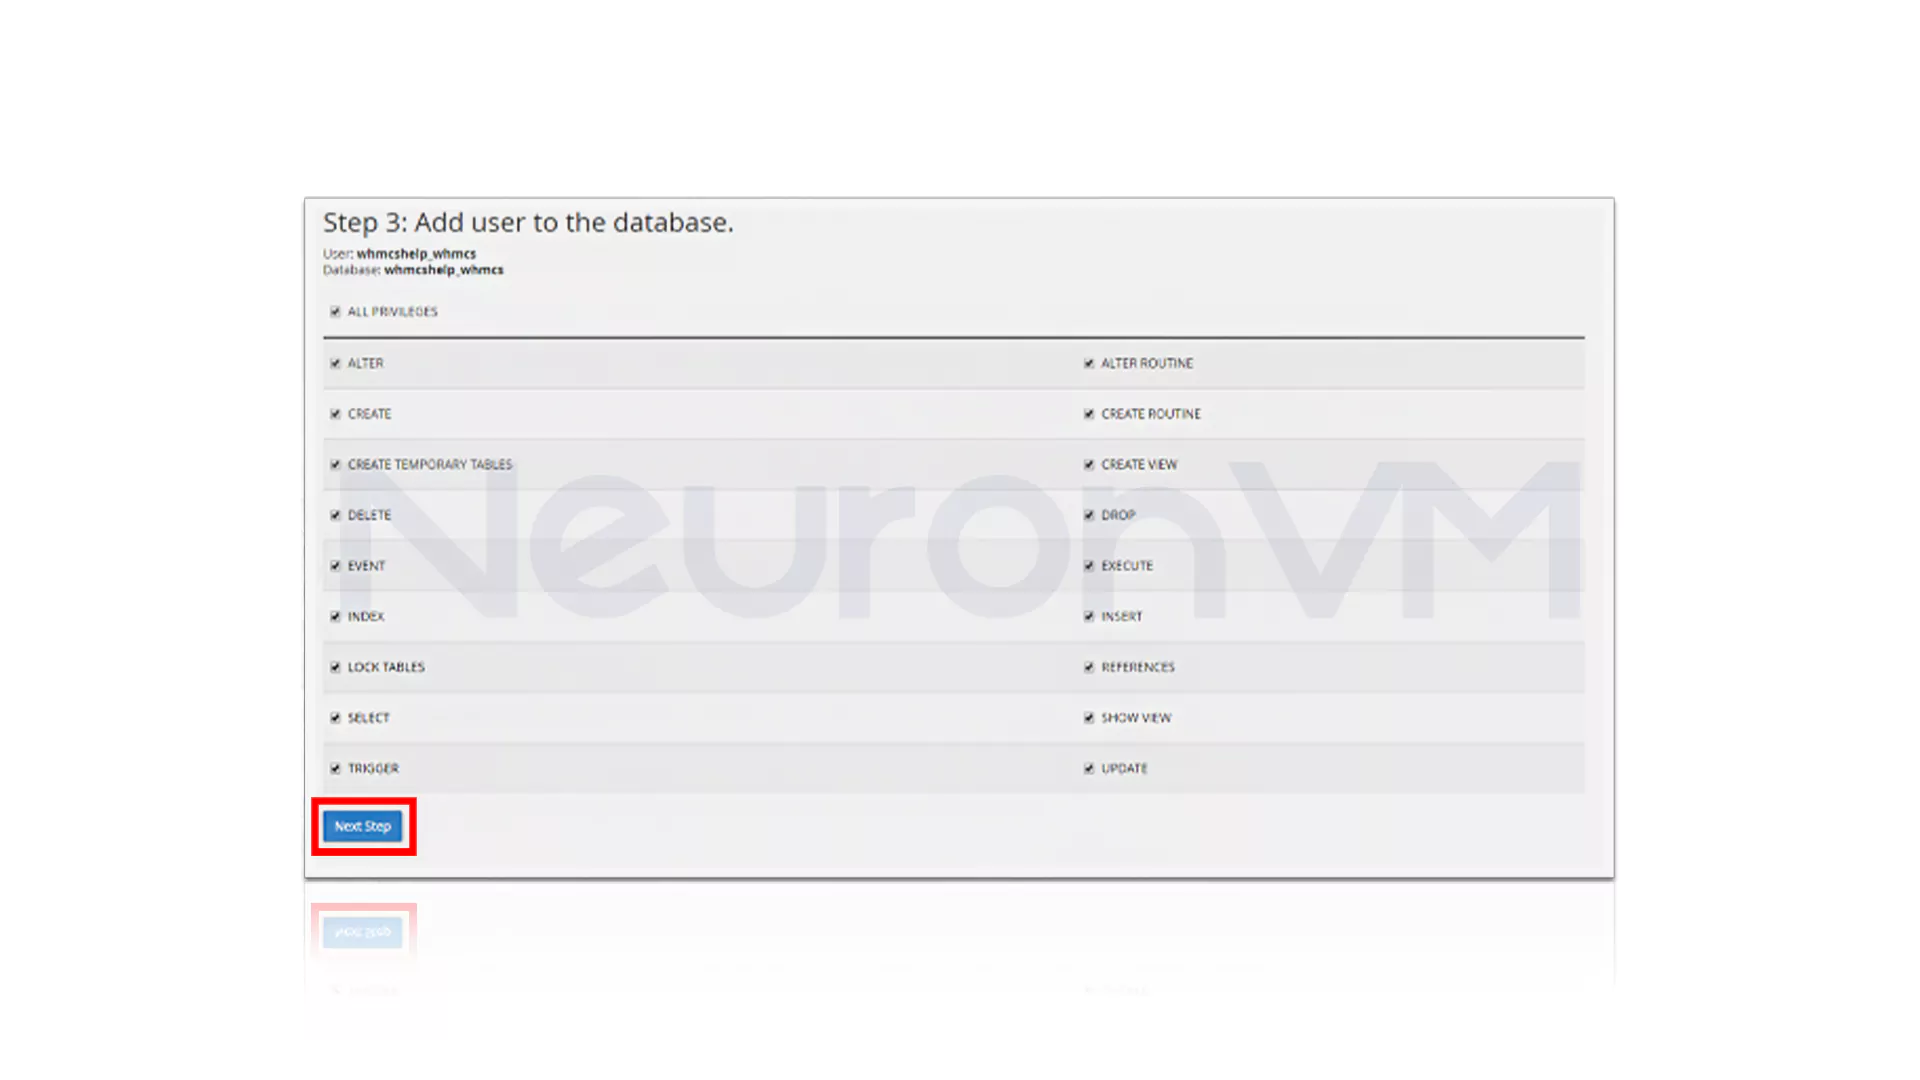
You can set the database name, username, password, and permissions directly from the interface. Remember to choose All Privileges in the Privileges section:
Remember to note down the database details. cPanel adds your account username and an underscore before your database name just a heads-up so you don’t get lost while setting things up. Now open a separate browser and navigate to the following URL:
https://www.example.com/whmcs/install/
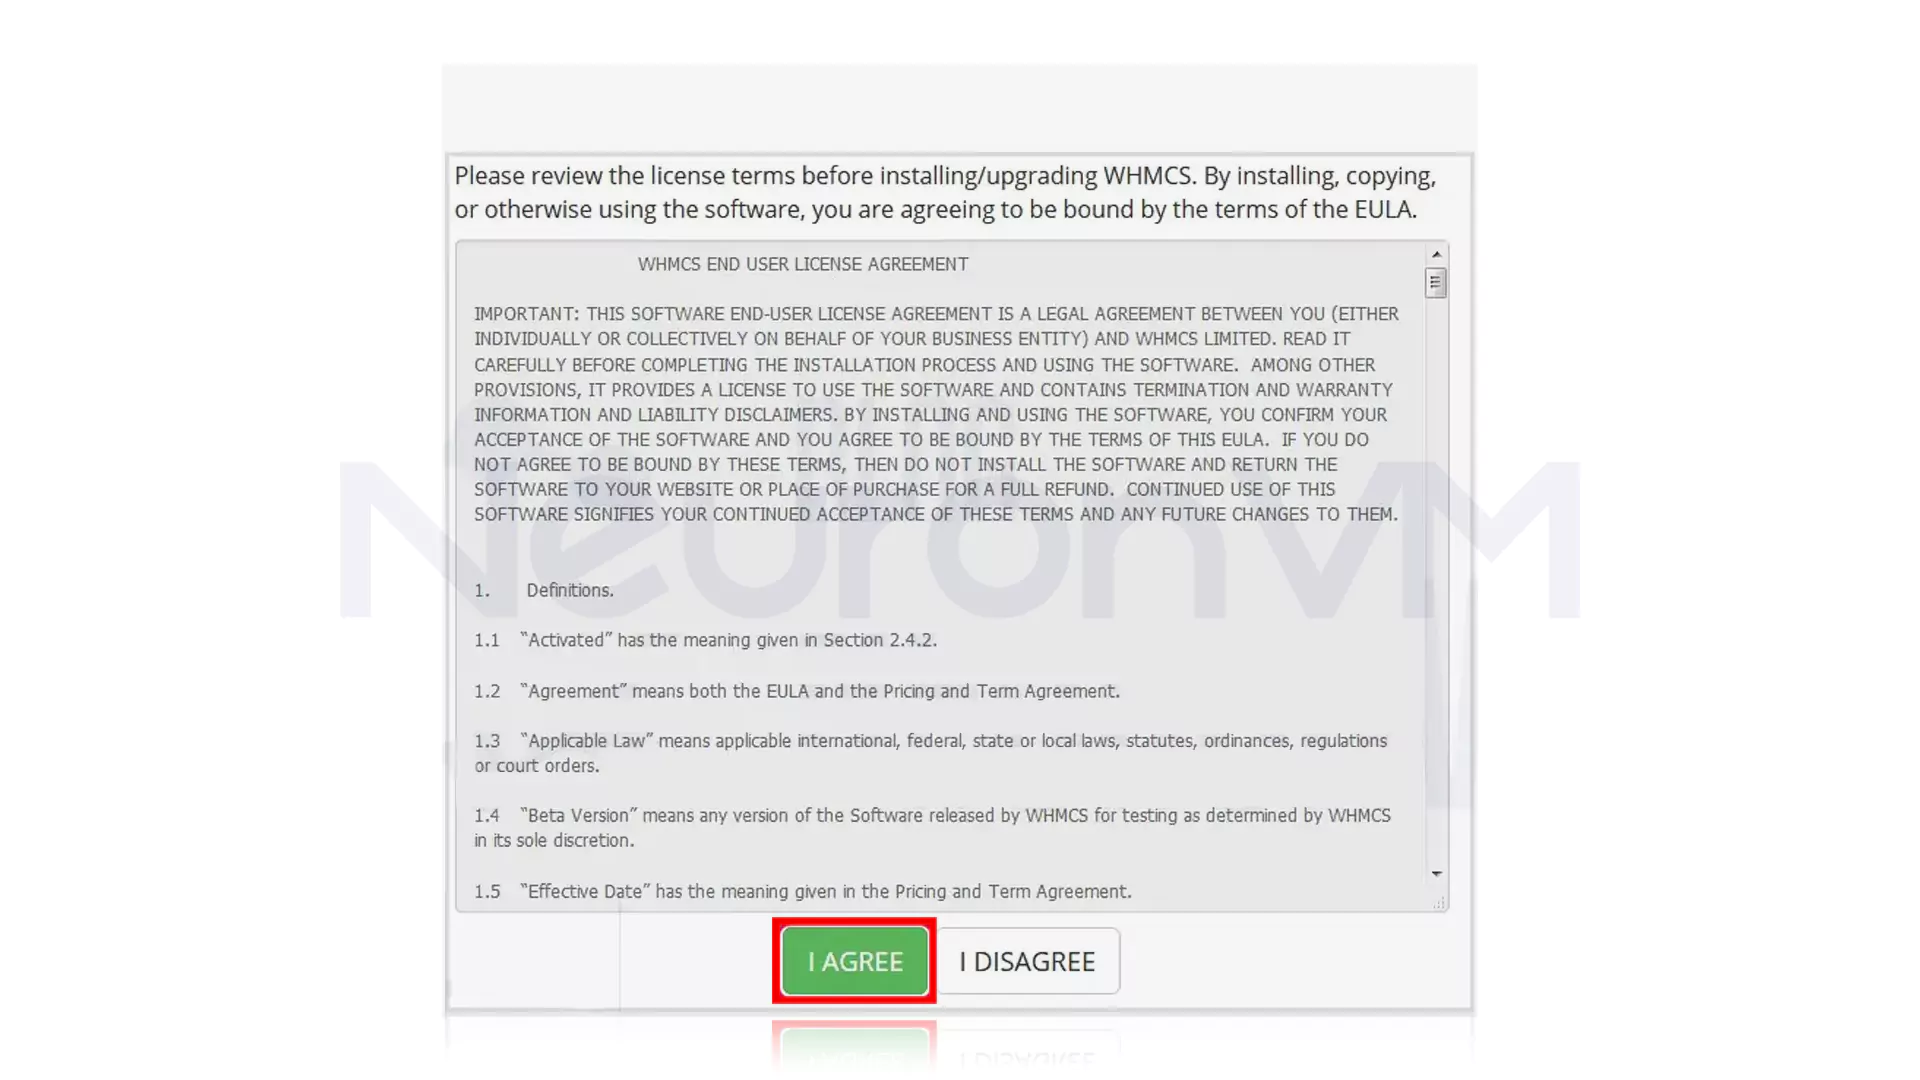
Replace example.com with your website address. Now, review the End User License Agreement and click I Agree to continue:
Follow the instructions and provide database information, license key, and other information when prompted:
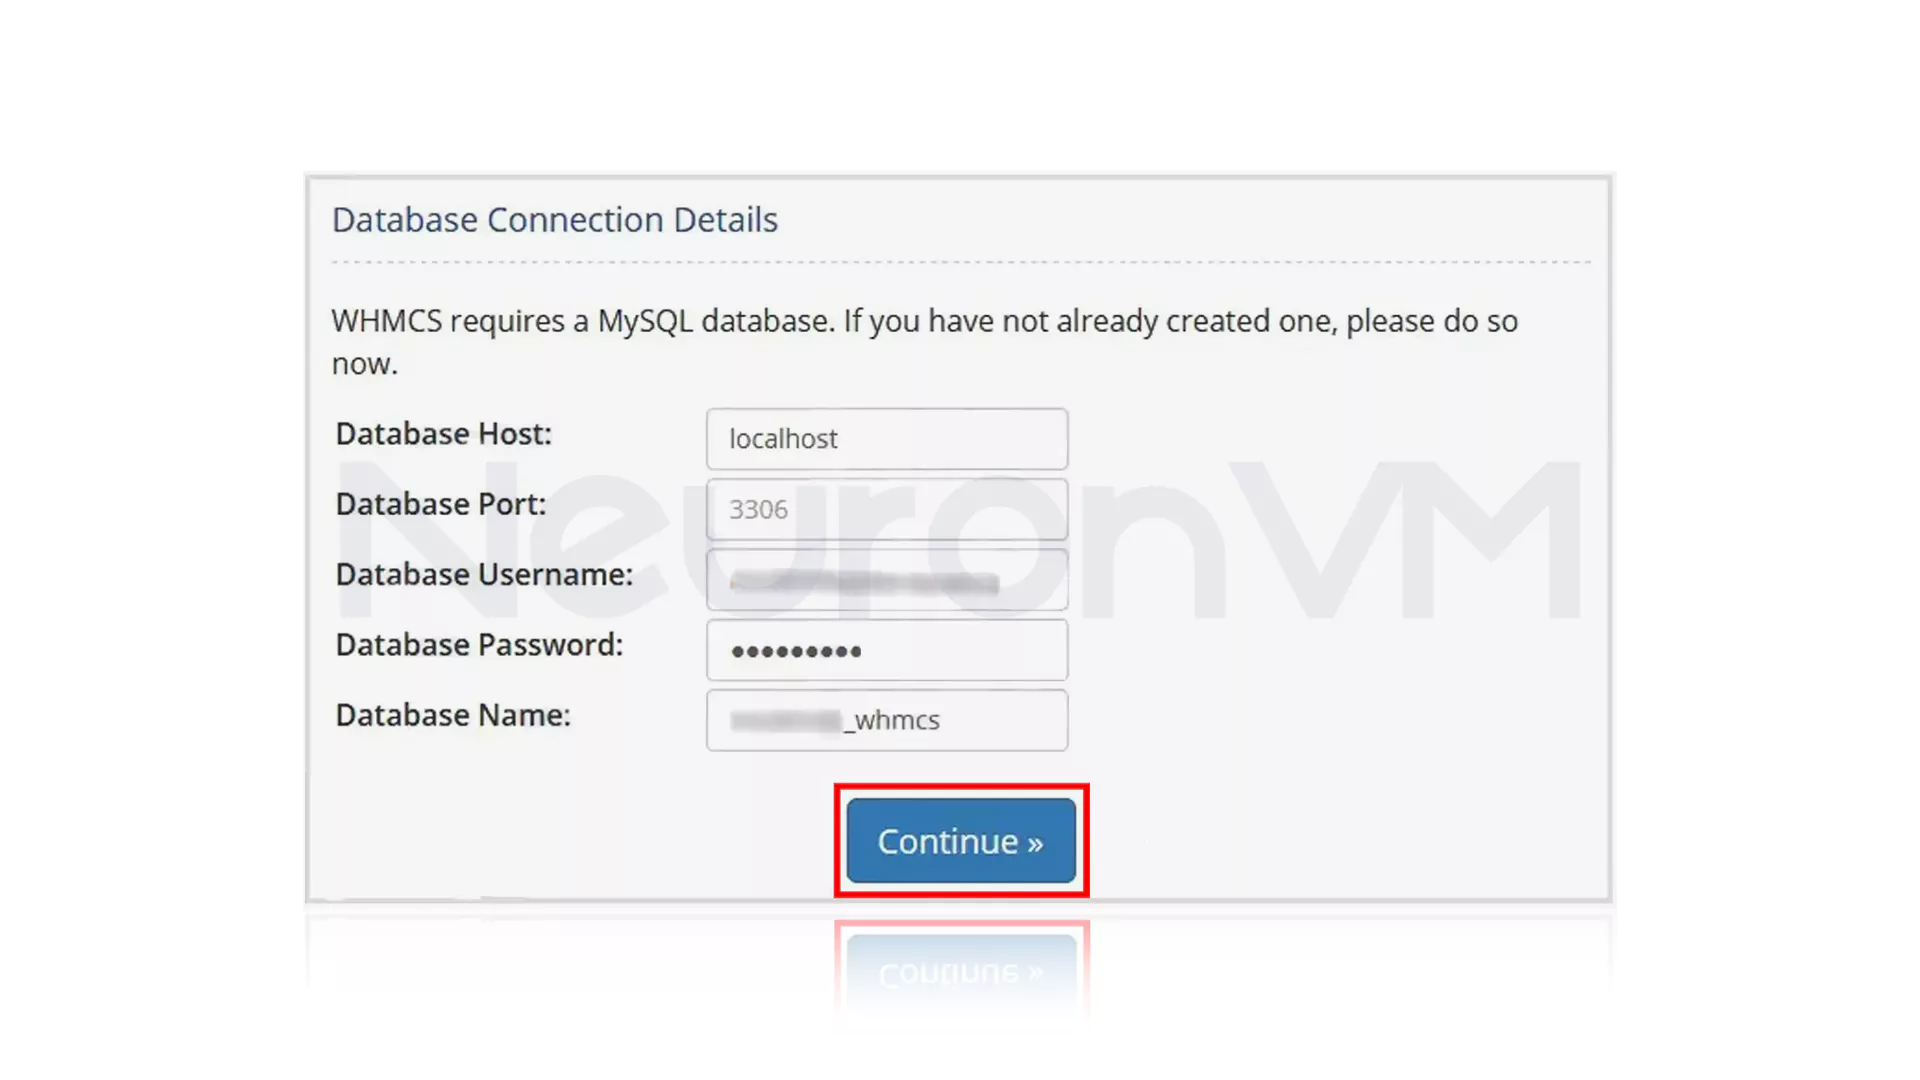
Final Steps to Complete! Once you’ve provided all the required information, click Complete Setup. Your daily cron job is unique to your server make sure to copy and save it for proper automation. For security, delete the install directory from your server by right-clicking it in cPanel’s File Manager and selecting Delete. All done! WHMCS is now prepared for action.
💡 See WHMCS in Action: Case Examples, Security Advice, and Quick Comparisons
Real User:
For example, one of our clients at NeuronVM initially ignored the correct configuration of cron jobs. Within a week, invoices stopped going out, and a few clients started asking, “Hey, why didn’t I get my payment reminder?” Fixing the cron settings took just a few minutes. After that, everything ran smoothly, and support requests dropped noticeably.
Security Insight:
Many beginners ignore database security by using weak passwords. Based on our observations, this is a frequent reason for WHMCS vulnerabilities.
Quick Comparison:
WHMCS combines billing and support in one interface, reducing errors and response times better than manual tools or spreadsheets.
Case Study:
In practice, we’ve seen that missing cron jobs can stop automated billing within a week.
More information link:
more information, you can visit the reference website WHMCS and read the authoritative documents and updates: https://www.whmcs.com/
Conclusion
Many hosting providers underestimate how crucial it is to configure WHMCS correctly. Many hosting providers skip important steps when setting up WHMCS, and it often comes back to bite them. One of our clients at NeuronVM ignored the cron job setup at first. Within days, invoices stopped going out, and clients started asking, “Hey, why didn’t I get my bill?” We’ve all had that “oh!” moment; one of our clients ignored the cron setup, and suddenly invoices weren’t sent. Clients were calling, tickets piled up, and panic set in. Fixing the cron job took just a few minutes, but it saved hours of headaches. Little things matter: check file paths, secure your database, and follow each step. Do this, and your hosting setup actually works, no surprises, fewer support calls, and smooth payments.