How to enable Virtualization Windows 11 AMD using command
 7m
7m
 0 comments
Enable virtualization Windows 11 AMD using command line tools is a crucial step for users looking to enhance their computing experience. Virtualization, a key technology in various fields of information technology and cloud computing, allows users to run multiple operating systems simultaneously on a single hardware and use system resources more optimally. Windows 11, one of the latest versions of Microsoft’s operating system, has provided this feature for users using AMD processors. In this article, we will review the steps to enable virtualization in Windows 11 using AMD processors and check the status of using the Windows Management Instrumentation Command-line (WMIC) tool. Follow us to learn more about the world of virtualization in Windows 11 and its features!
What is virtualization?
Virtualization is a process that allows multiple virtual machines to run independently on a single physical machine to increase resource efficiency and flexibility. It makes a digital duplicate of real resources including networks, servers, storage devices, and operating systems. This technology can be used on a variety of platforms, from personal computers to large enterprise data centers, and is essential in cost minimization, disaster recovery and software development, and modern advancements such as cloud computing.

The core of virtualization lies in the hypervisor. Hypervisor is a software layer that enables the dynamic allocation of physical resources to virtual machines by separating the hardware from the operating system. This isolation enables IT managers to run multiple operations systems and applications on the same infrastructure with increased resource efficiency, flexibility, and scalability. As such, virtualization is a critical component in IT departments as it lowers hardware costs and simplifies IT operations.
Enable virtualization in Windows 11 AMD
Here is the step-by-step guide to enable virtualization Windows 11 AMD:
Step 1: Launch Hypervisor
The first step to enable virtualization Windows 11 AMD is to launch and install hypervisor:
- Open the Start menu.
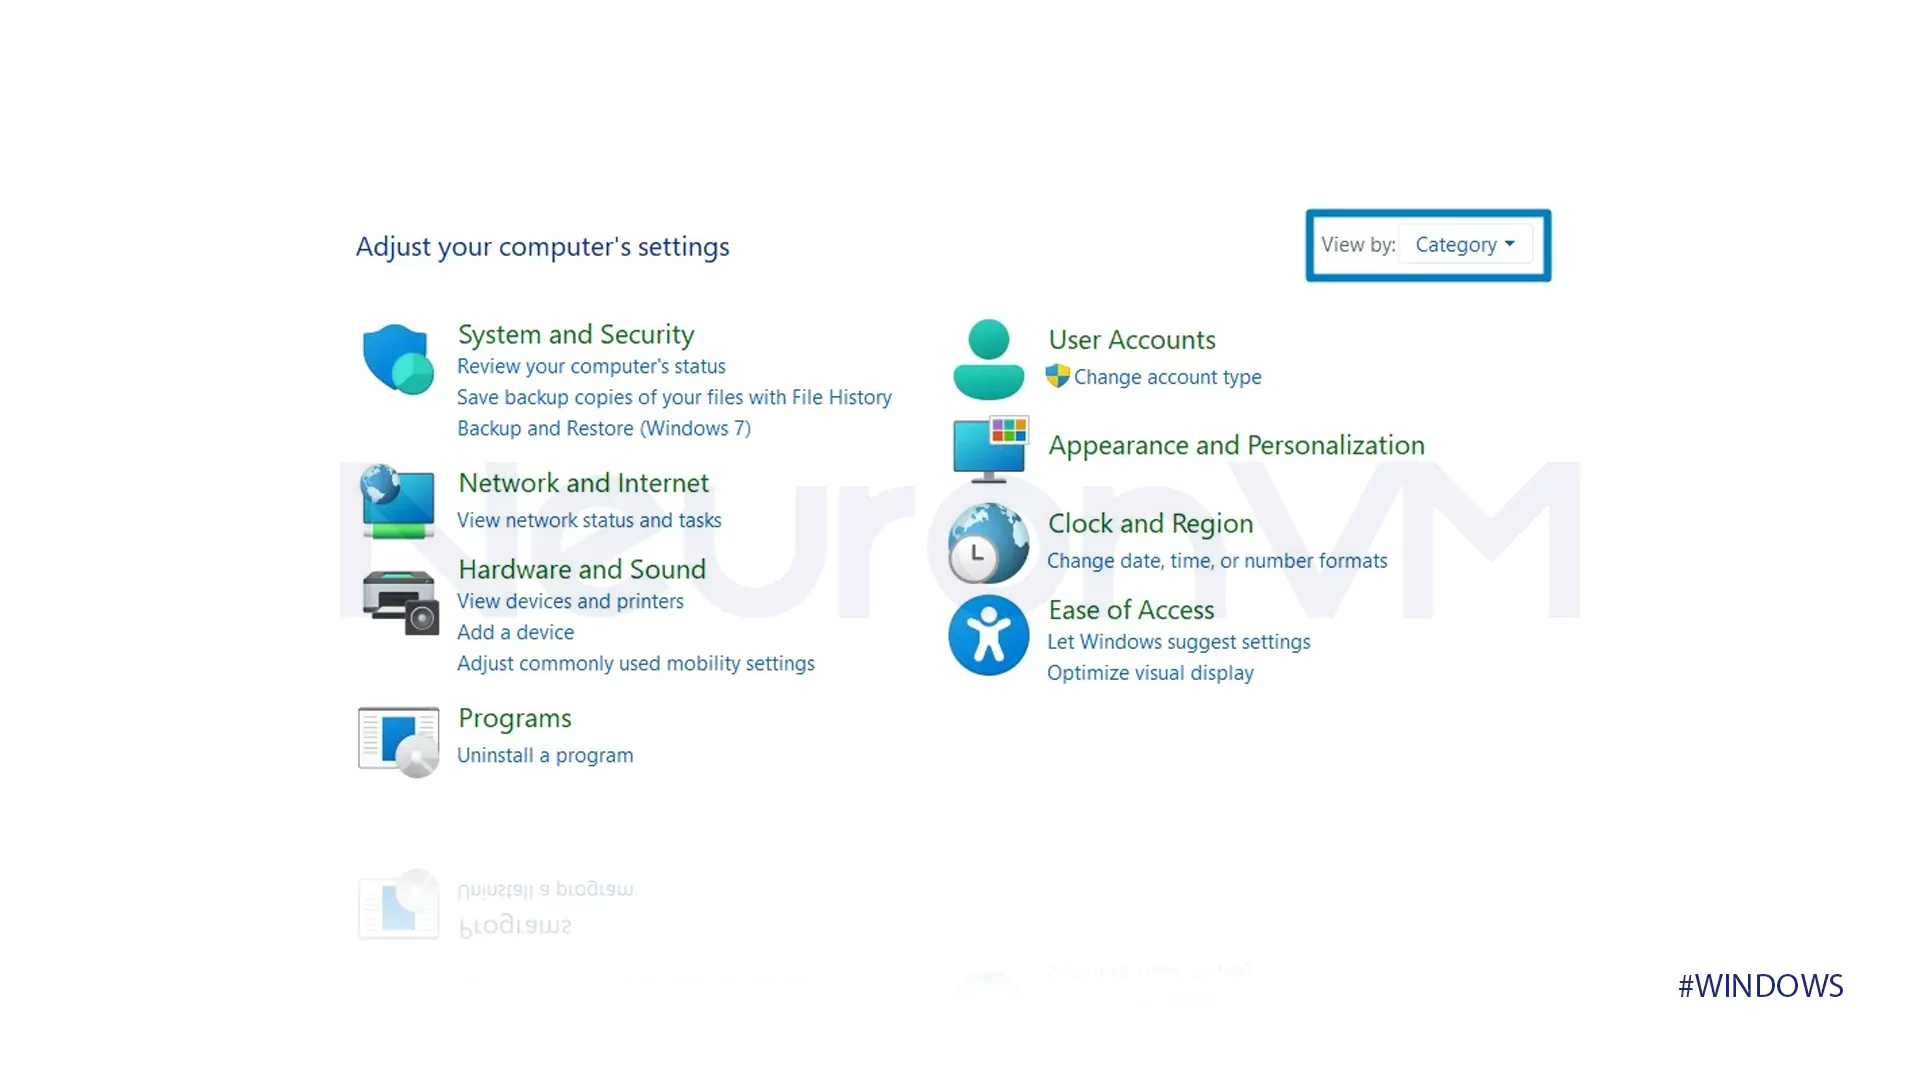
- Tap the Control Panel.
- Change the Control Panel View to Category.
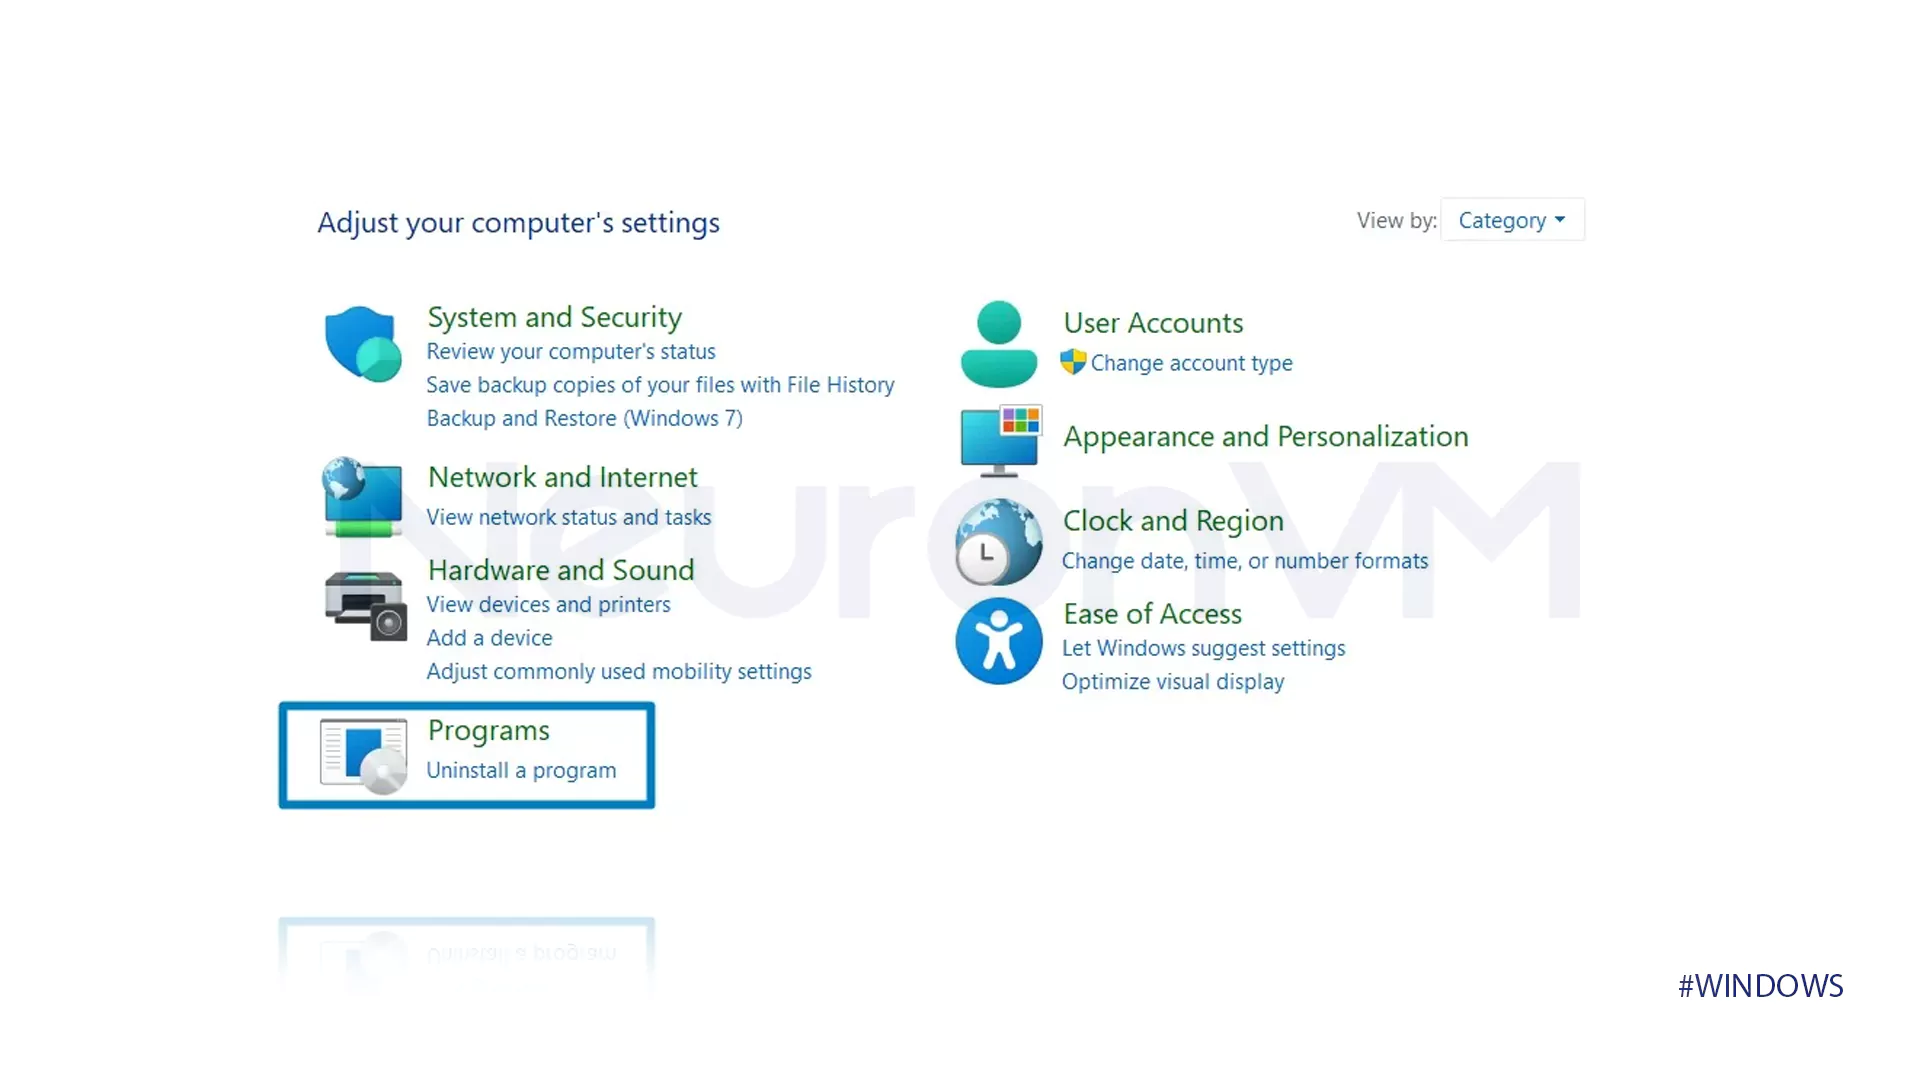
- Press on Programs.
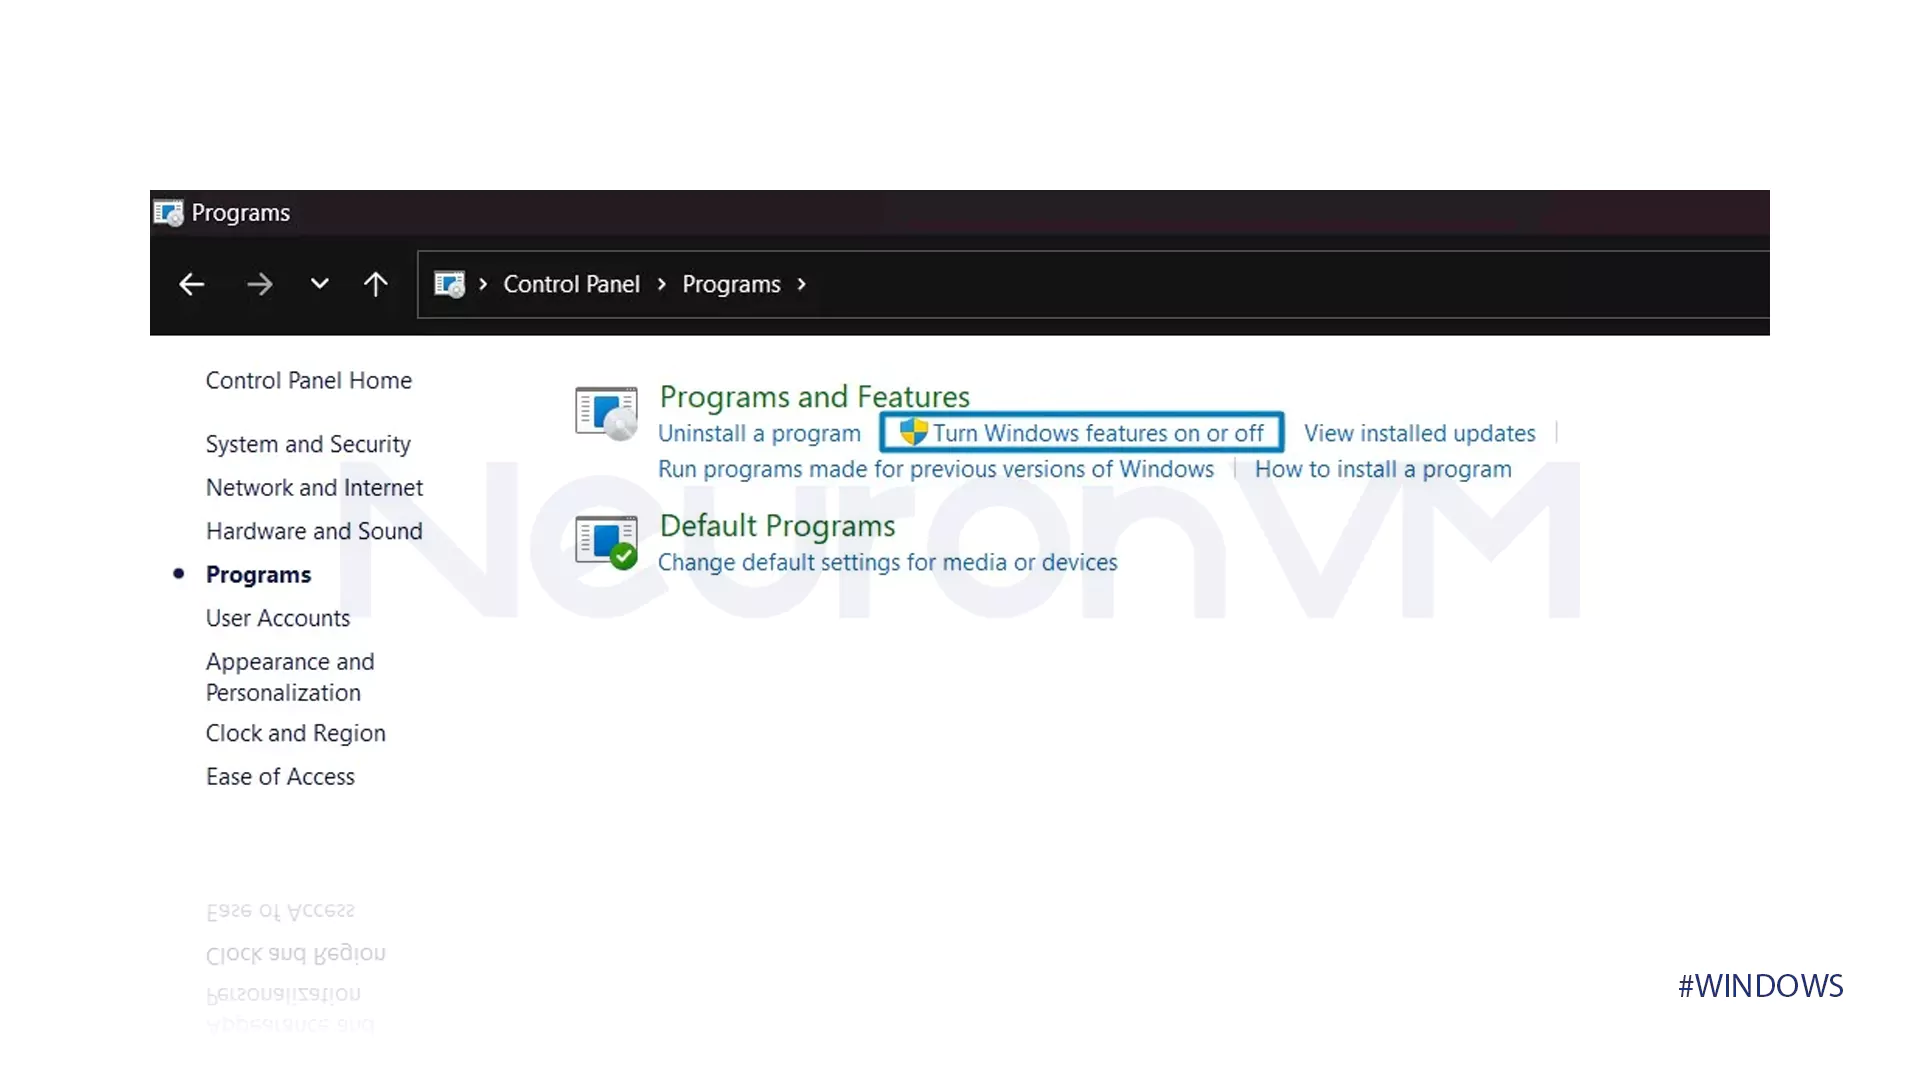
- Toggle Turn Windows features on or off by tapping on it.
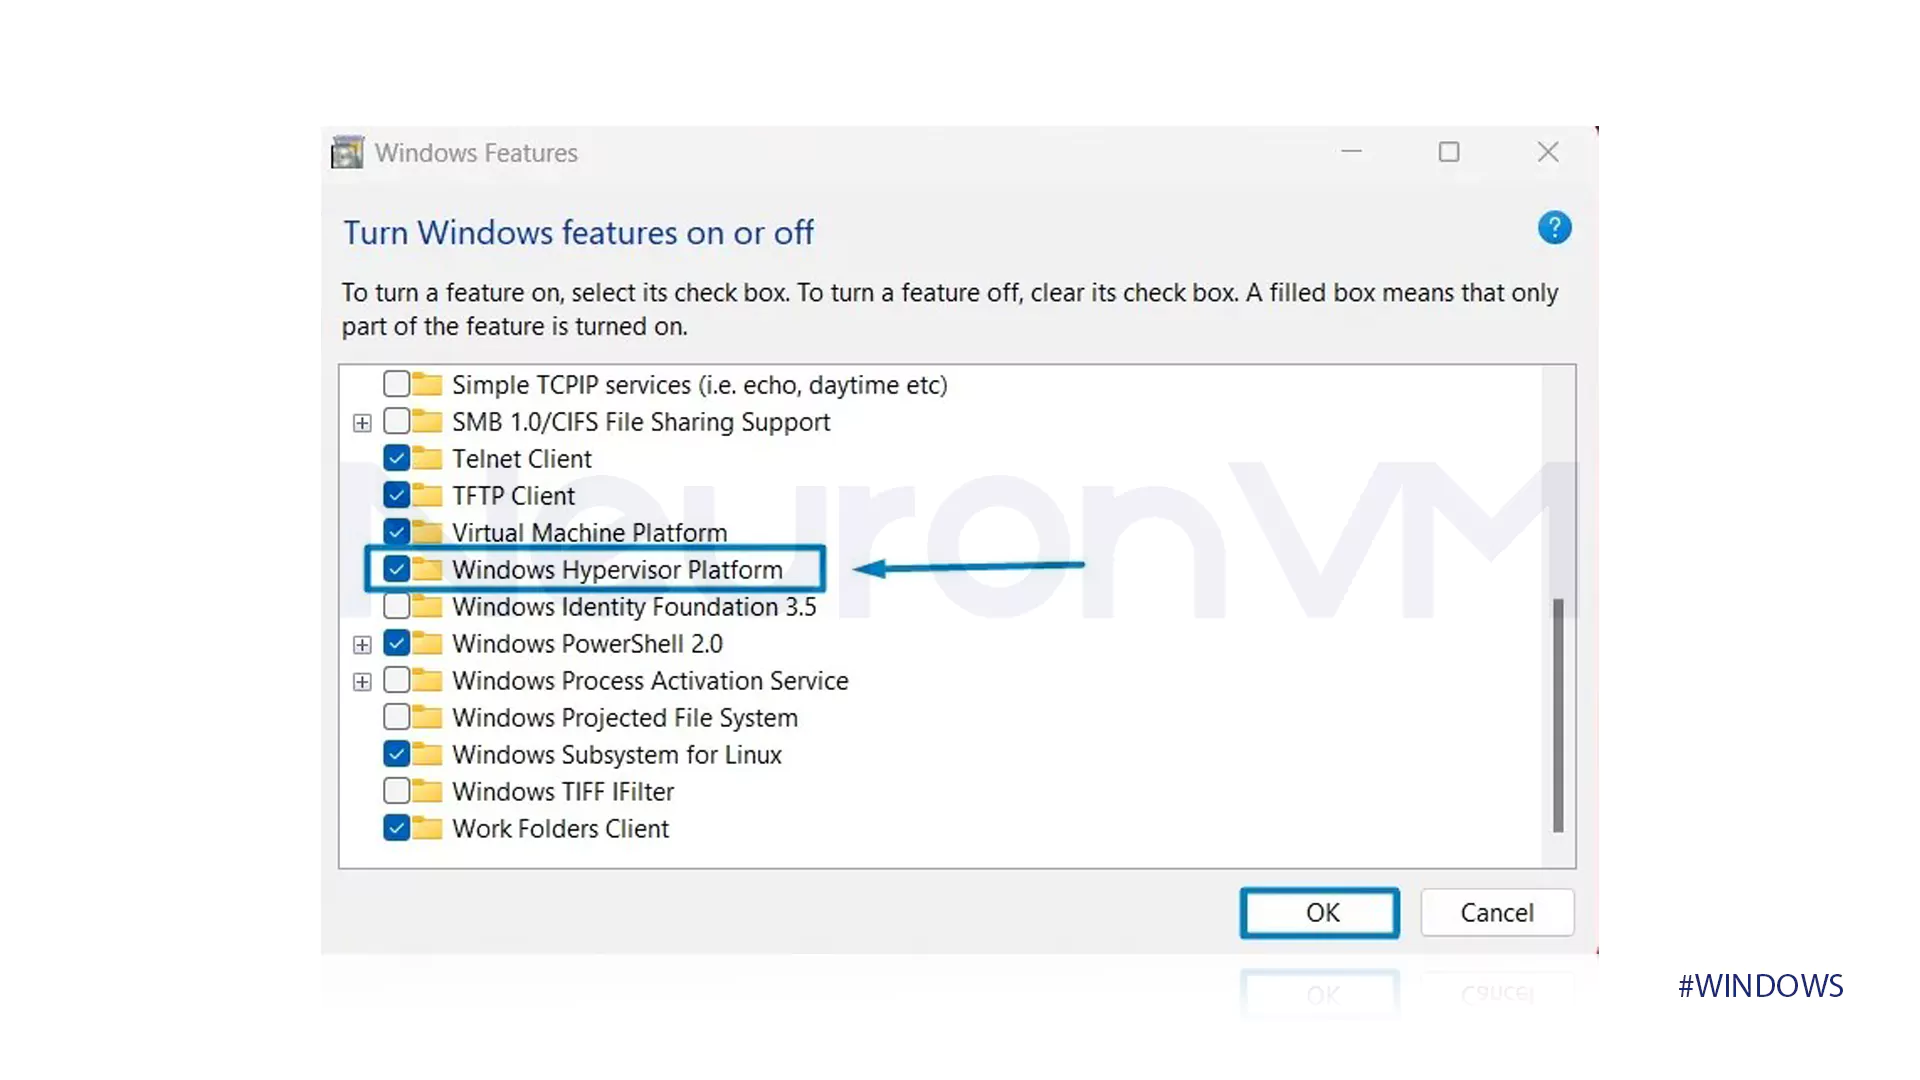
- When the Windows features dialog box opens, choose Windows Hypervisor Platform from available services and tap on OK.
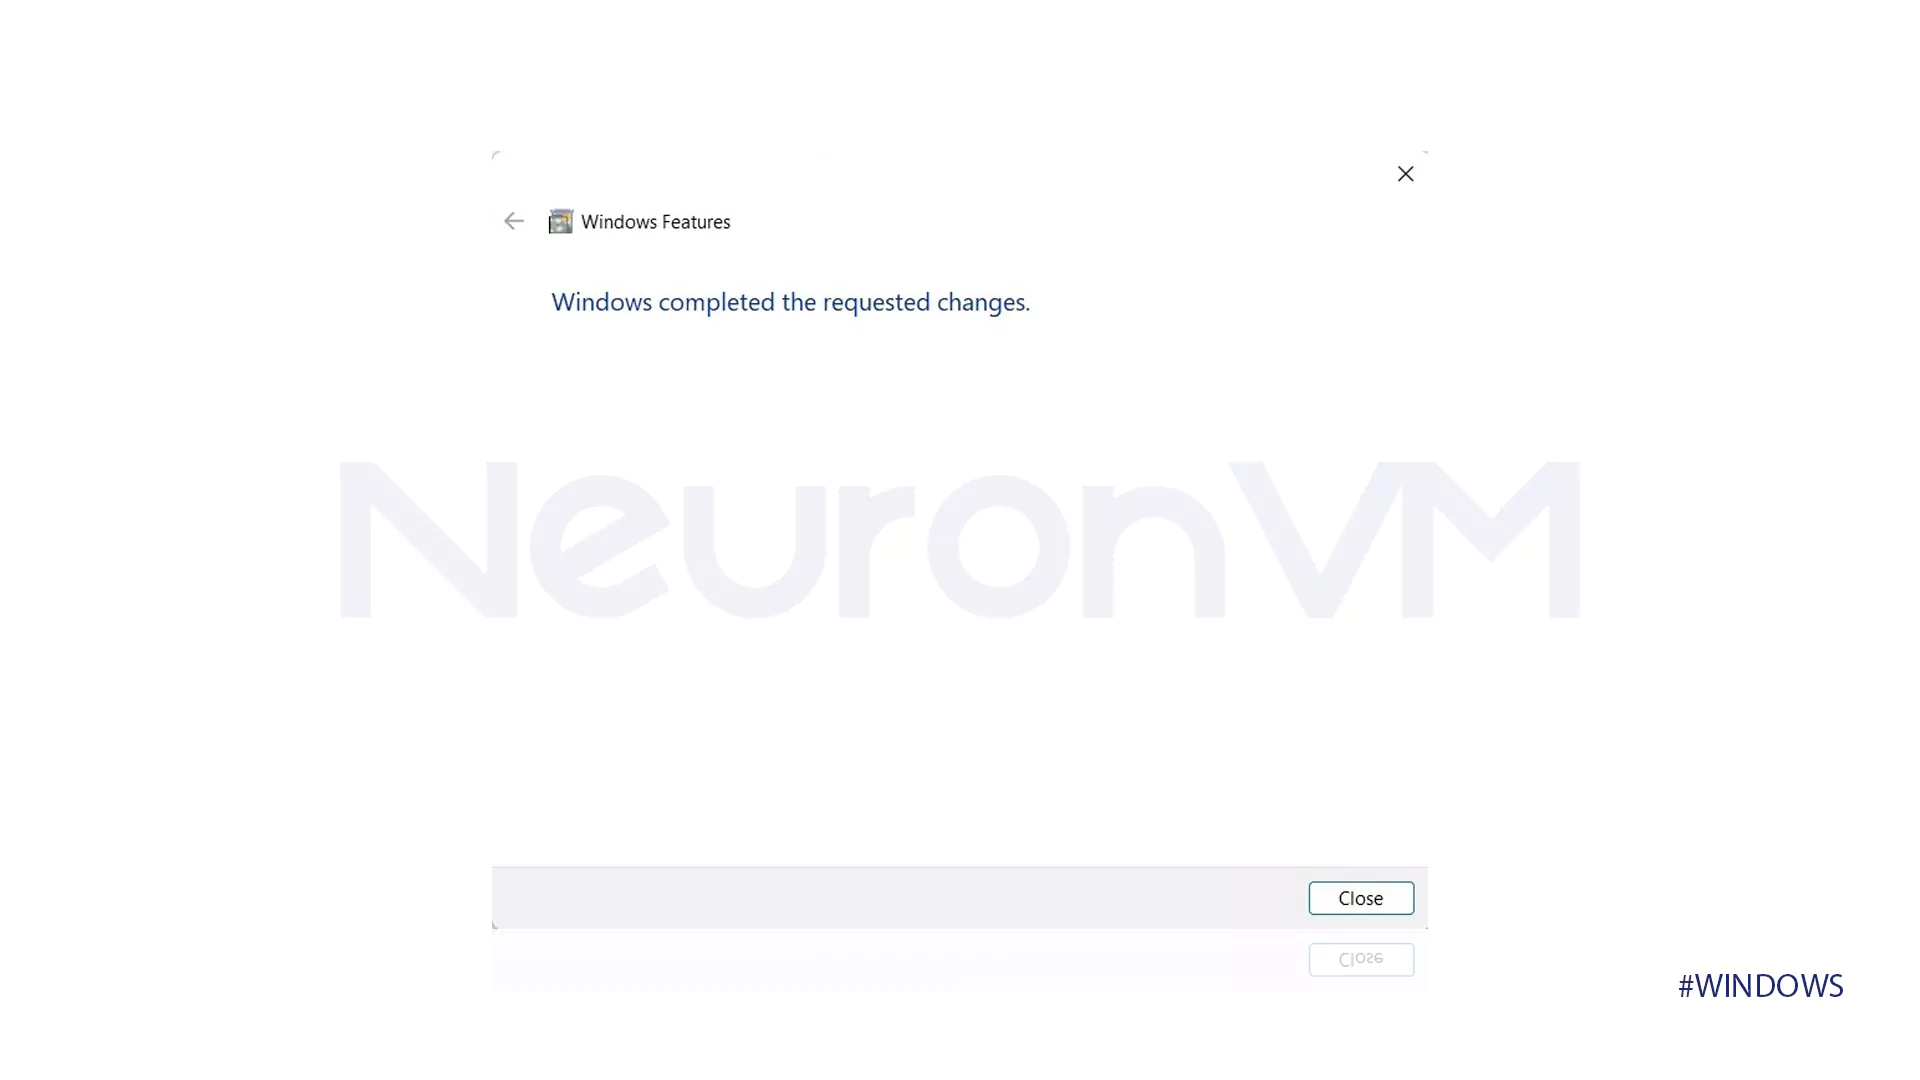
- After searching for the required files and applying changes, the Hypervisor is enabled.
Step 2: Verify Virtualization Support
The second step to enable virtualization Windows 11 AMD is to check virtualization support:
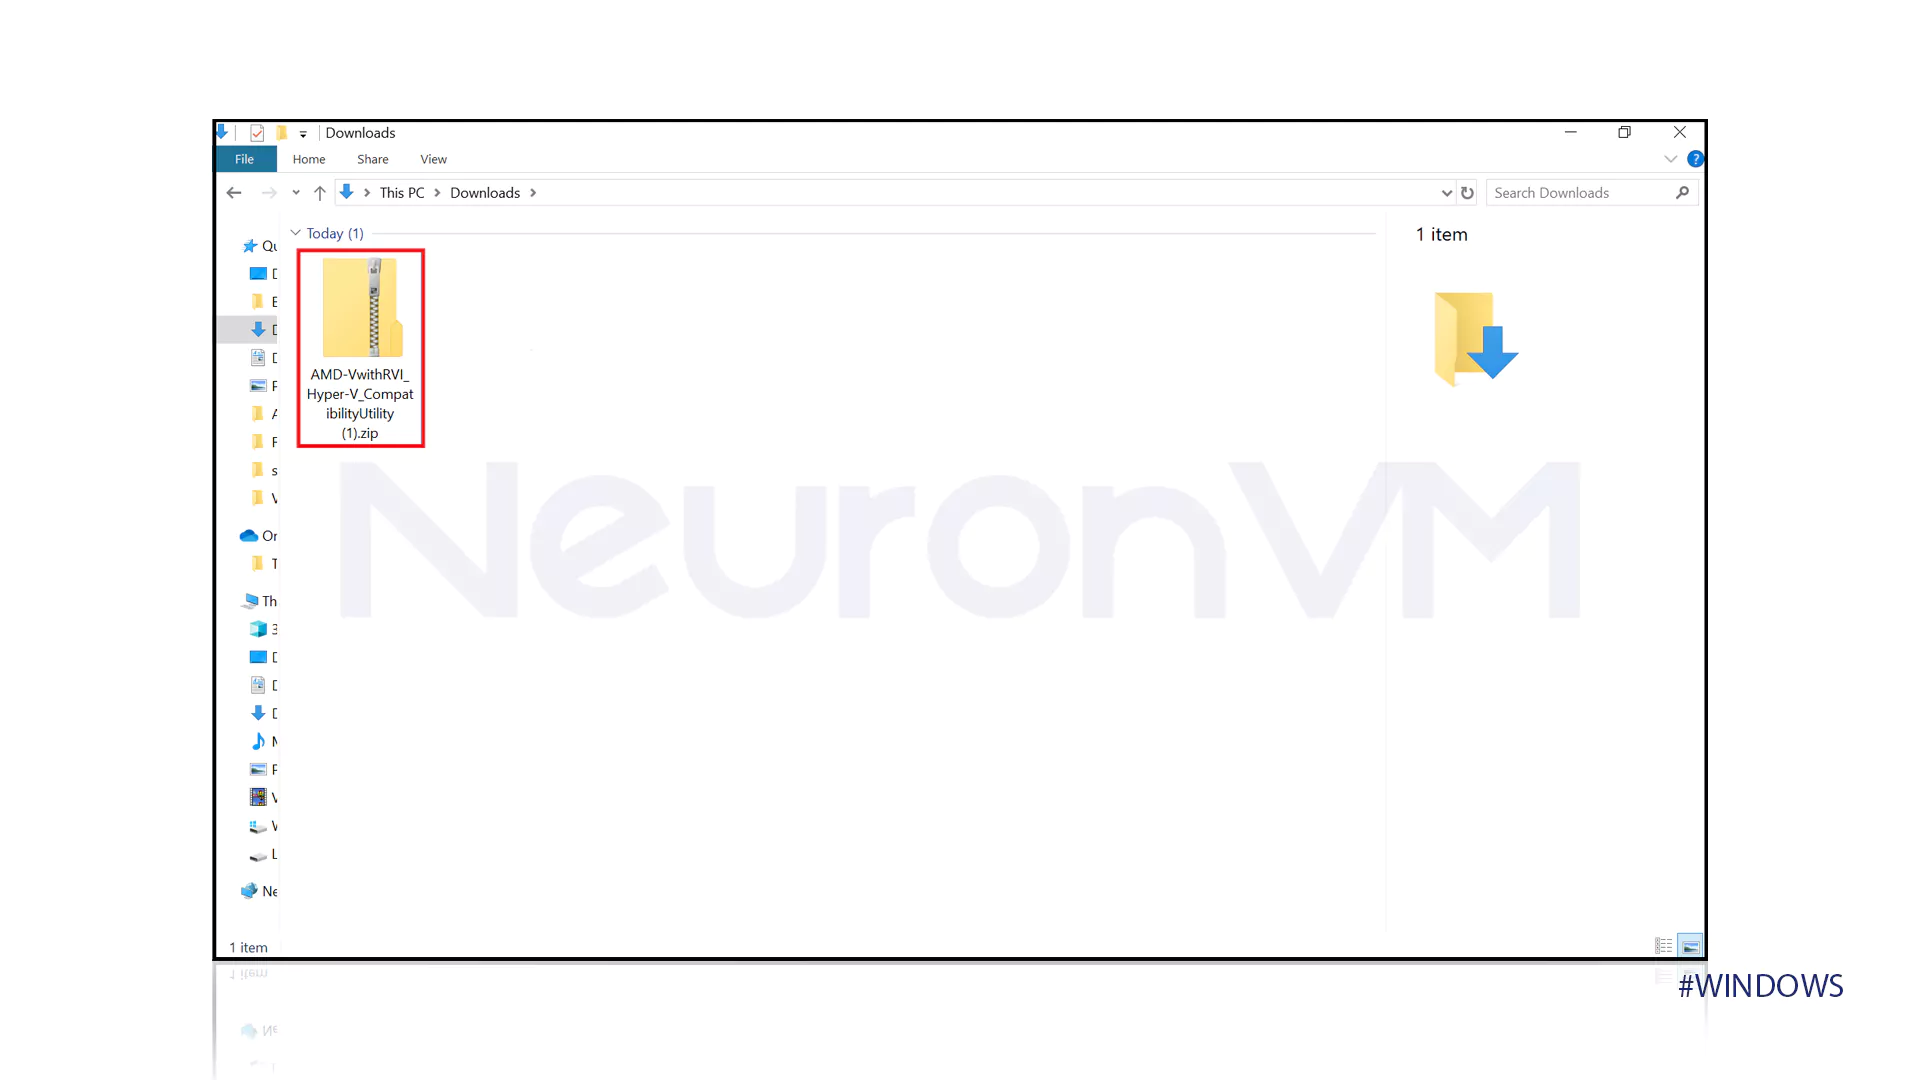
- Install the AMD-V Detection Utility.
- Right-click on the downloaded file and Extract all.
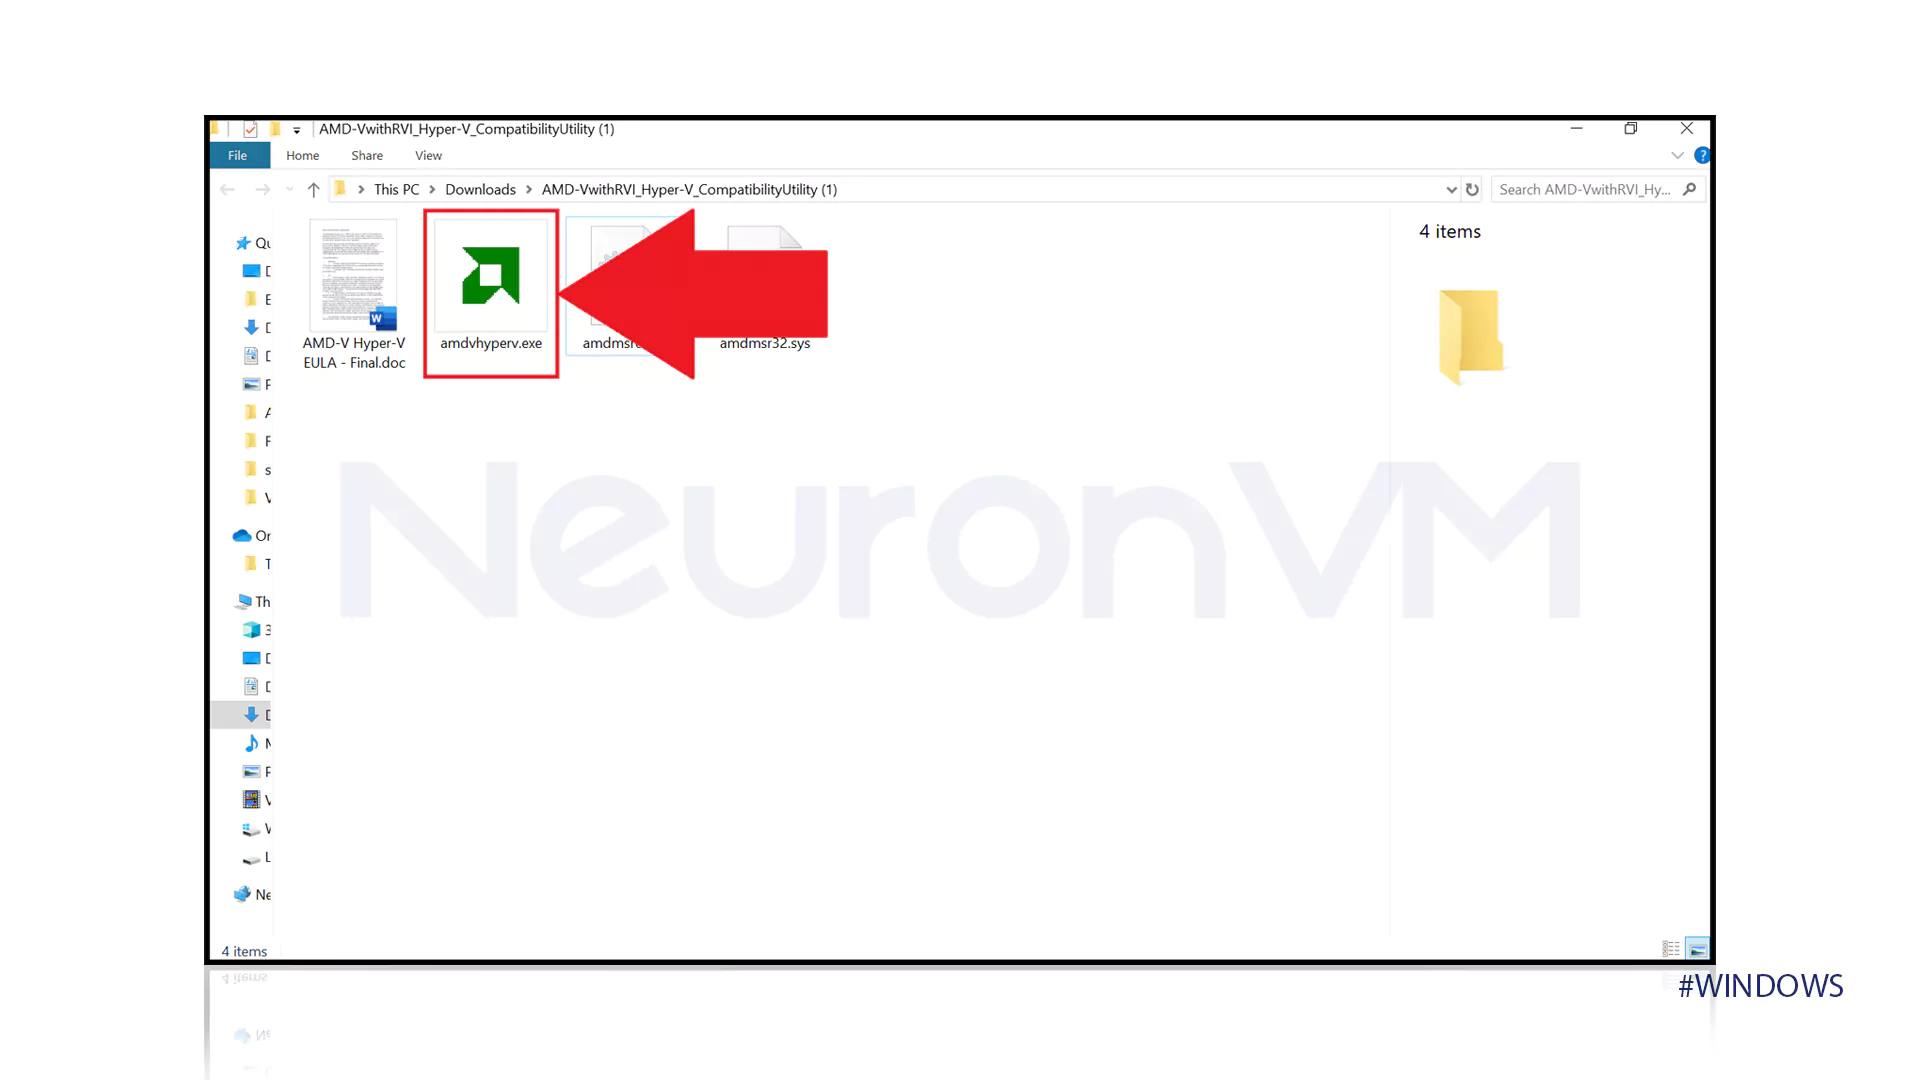
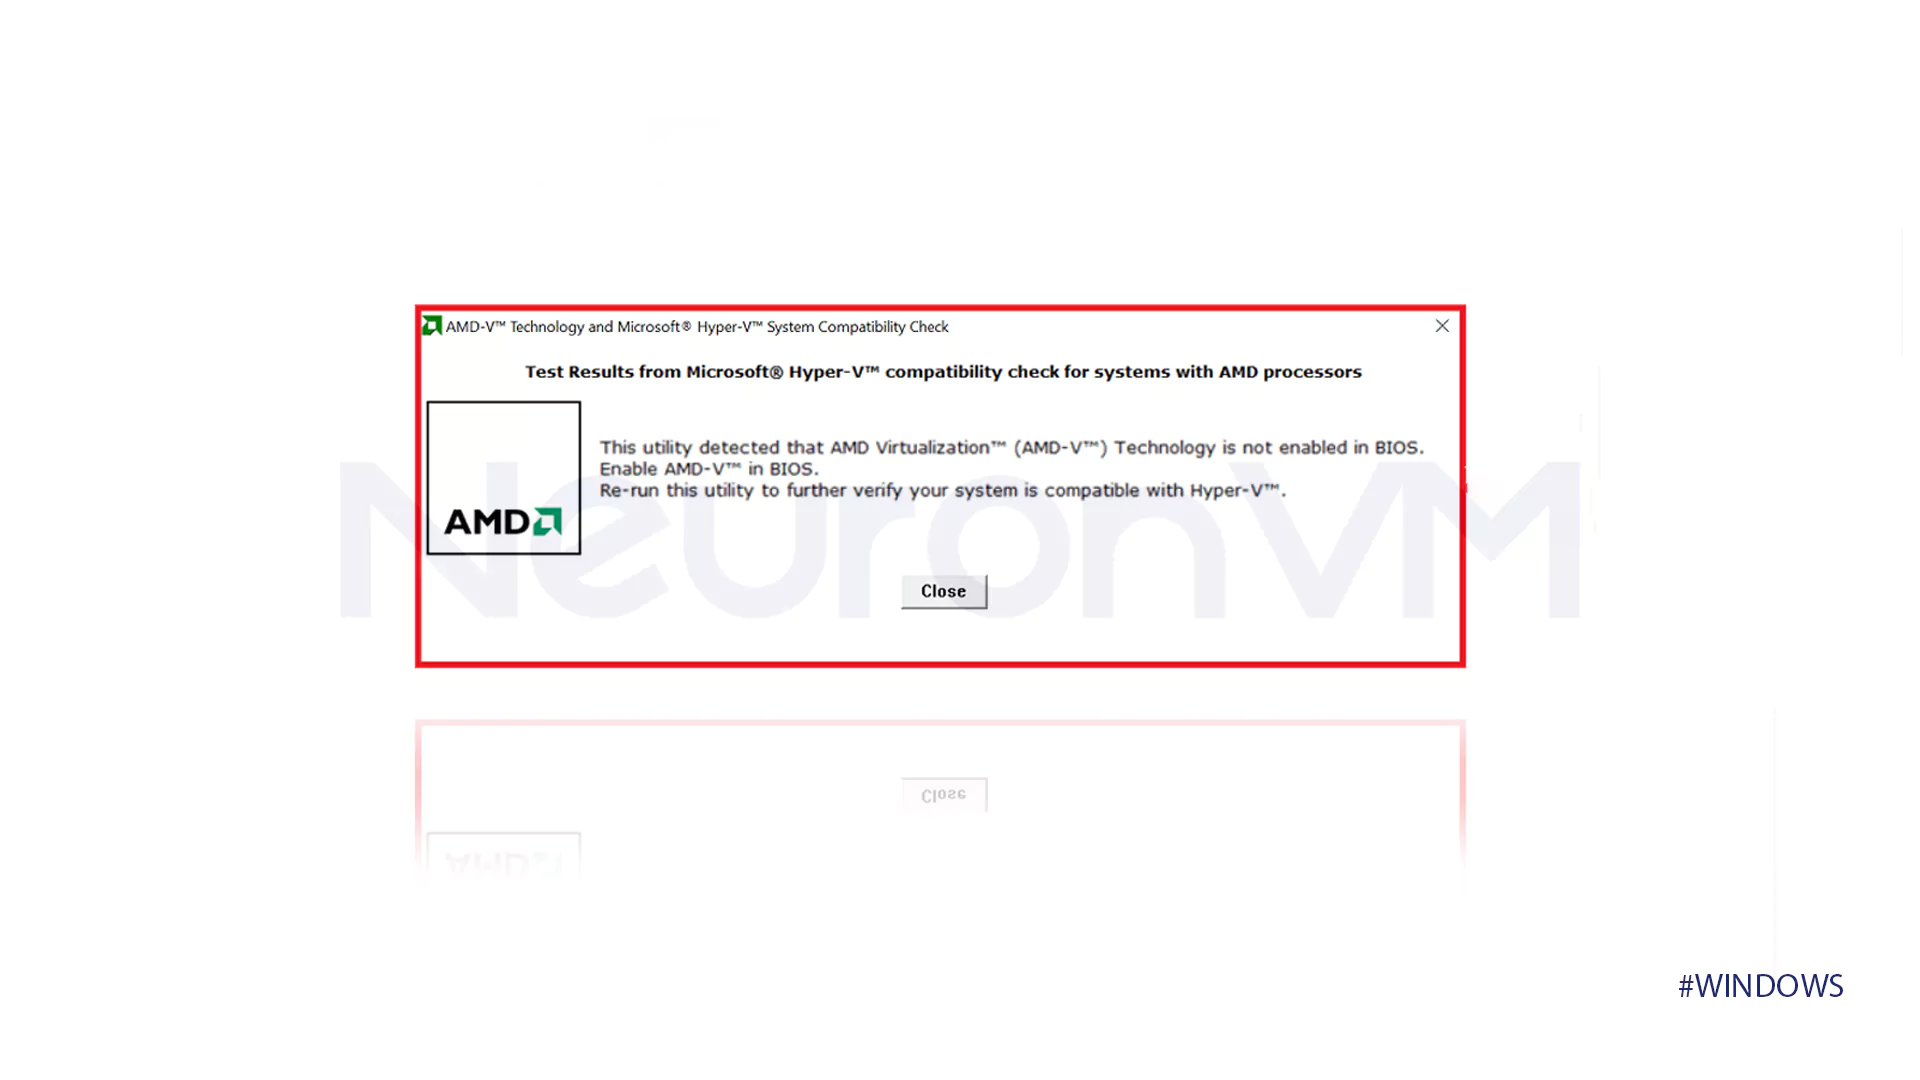
- Right-click on the exe. file which is shown in the picture below and tap on Run as administrator.
- The box below shows that the PC supports virtualization but it requires enabling.
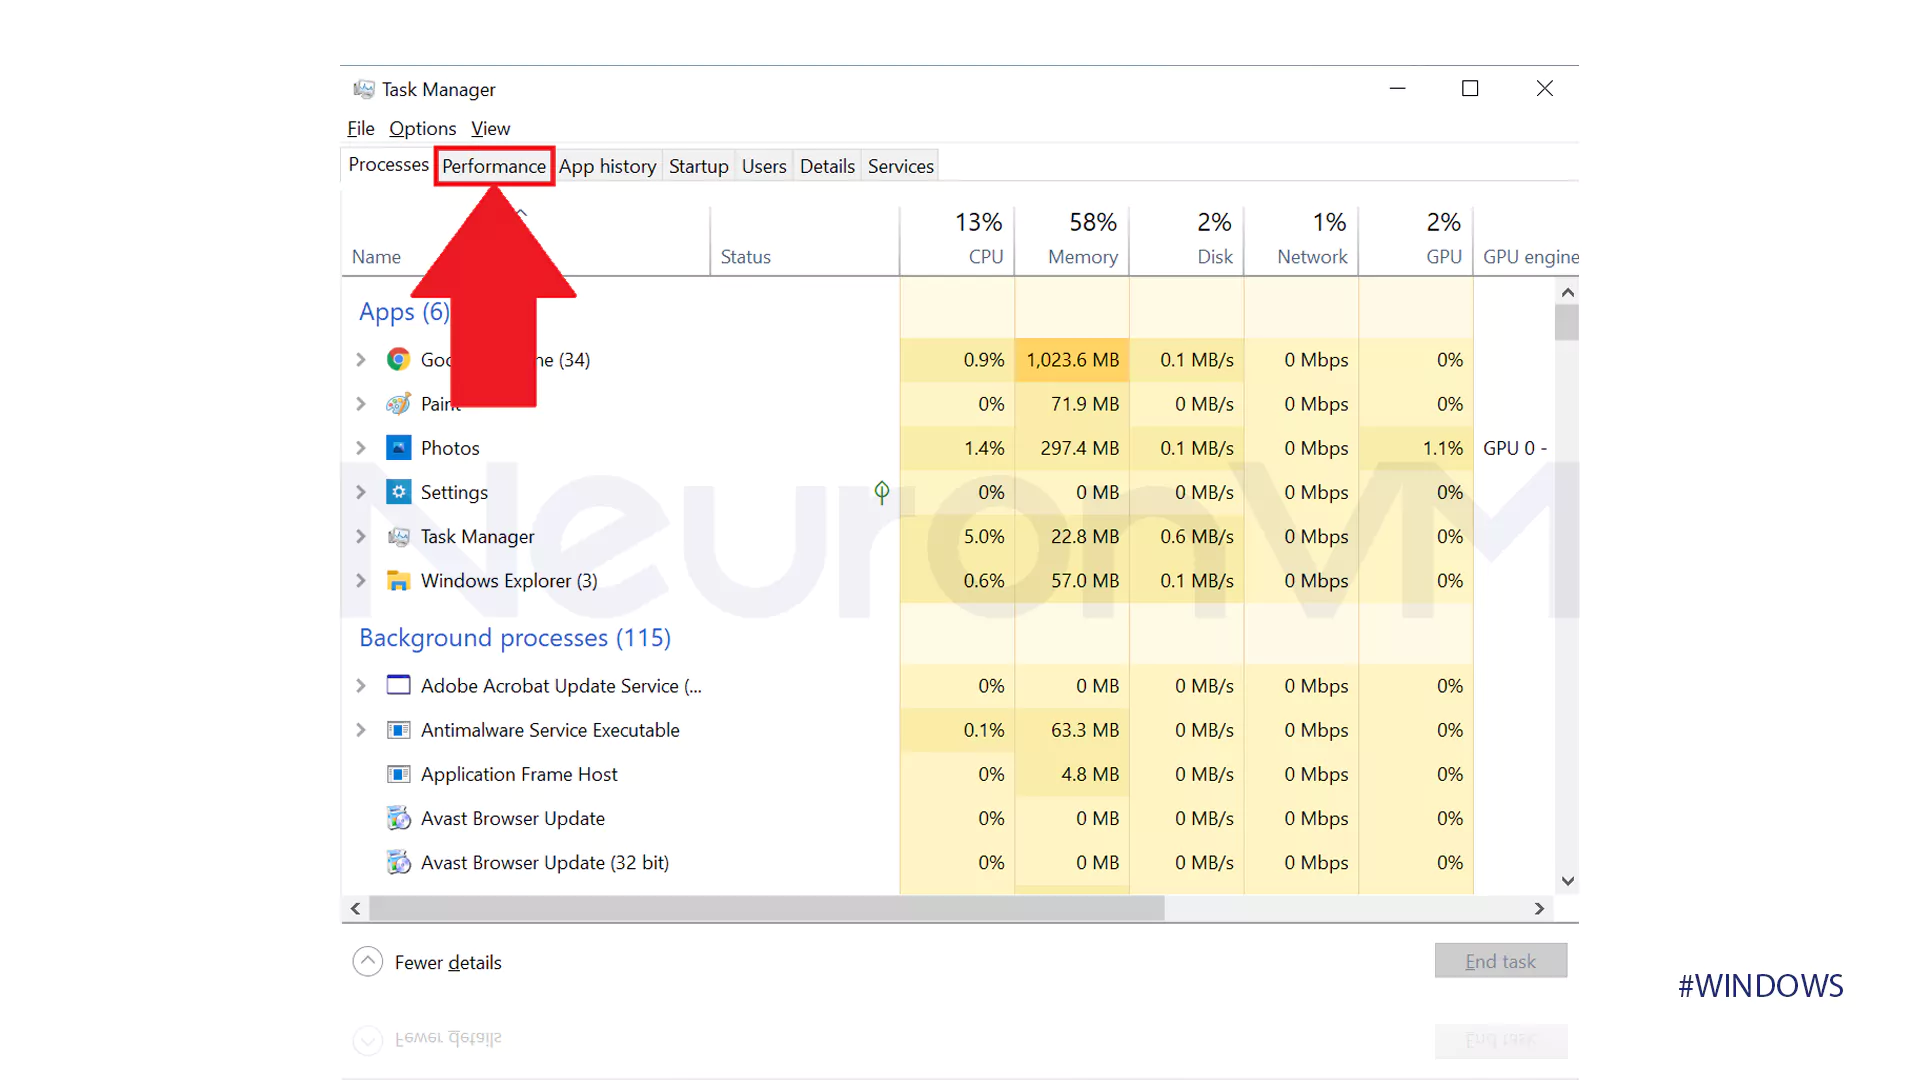
- Use the Ctrl+Shift+Esc keys to launch the Task Manager, then select the Performance tab to see the enablement status.
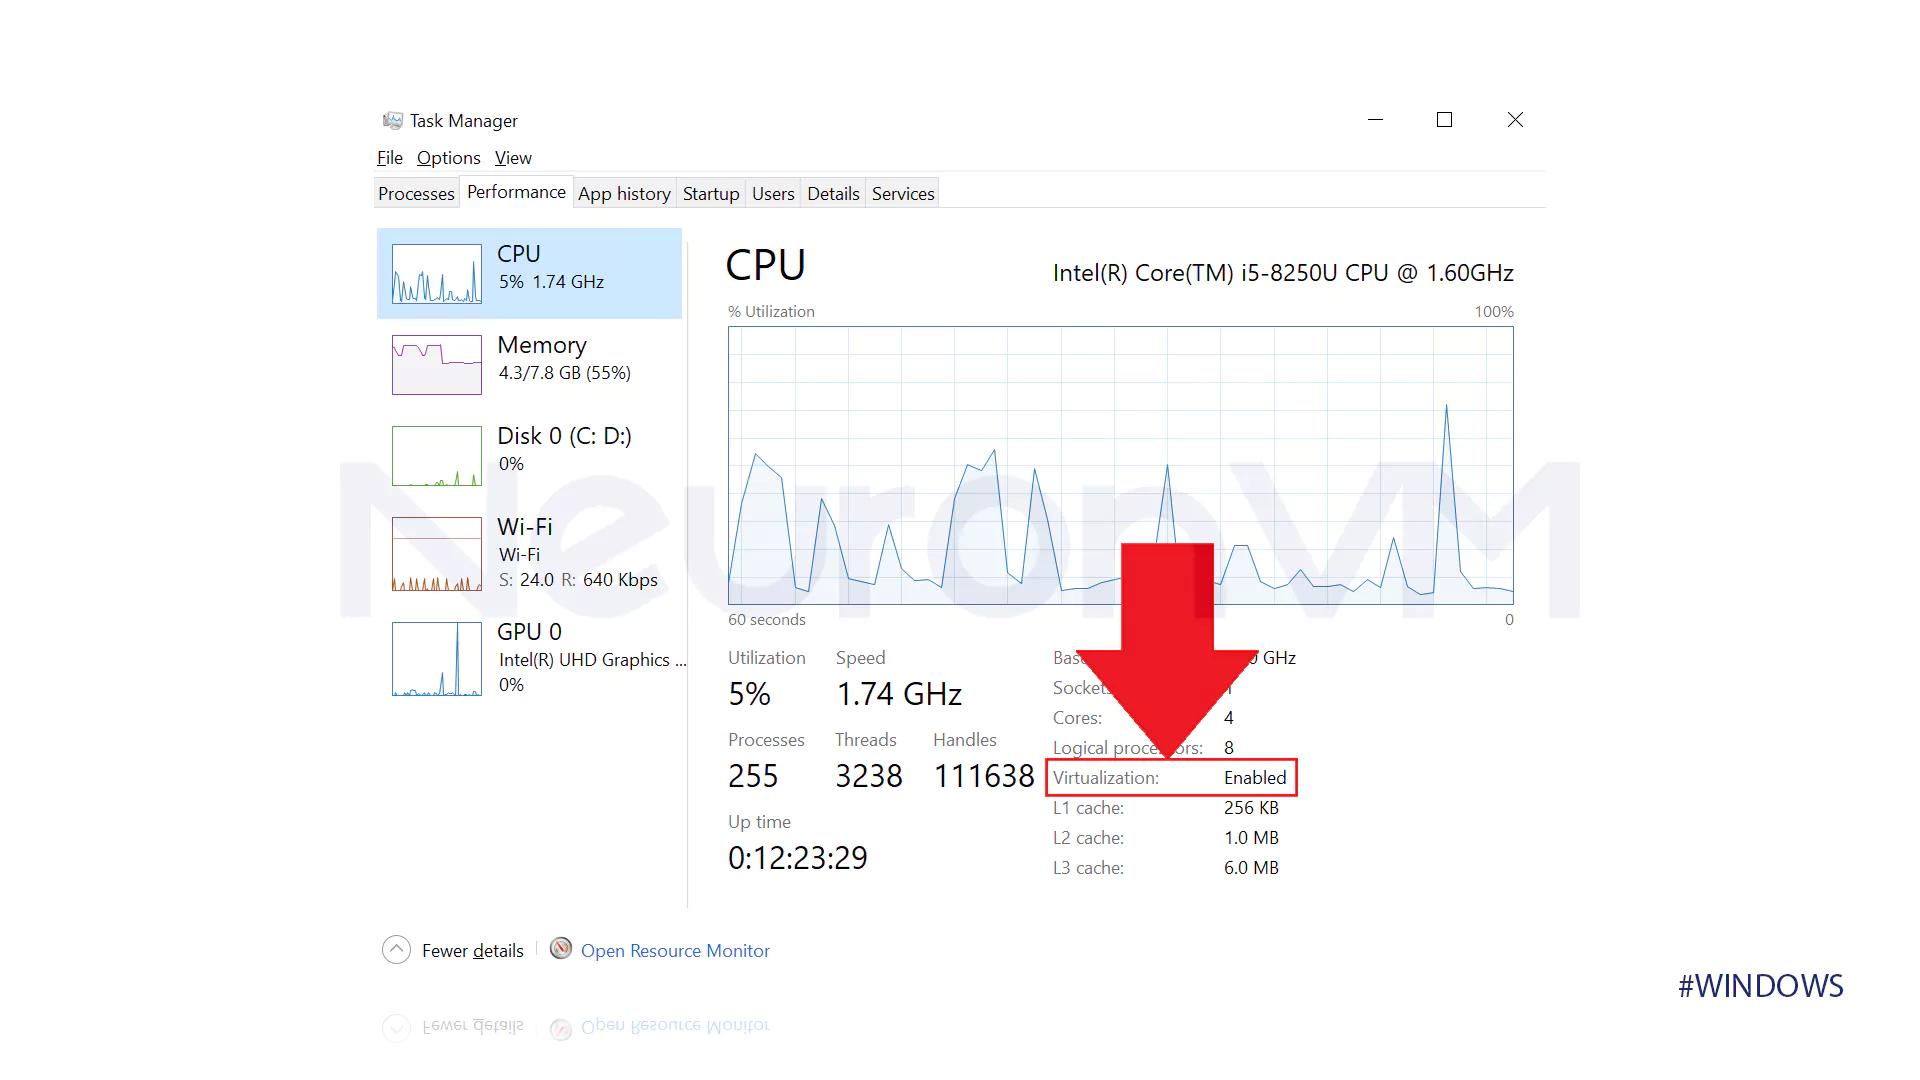
- You can check whether the virtualization of your PC is active or not from the specified part as shown in the image below.
Step 3: Launch BIOS
The third step to enable virtualization Windows 11 AMD is to Launch and install BIOS:
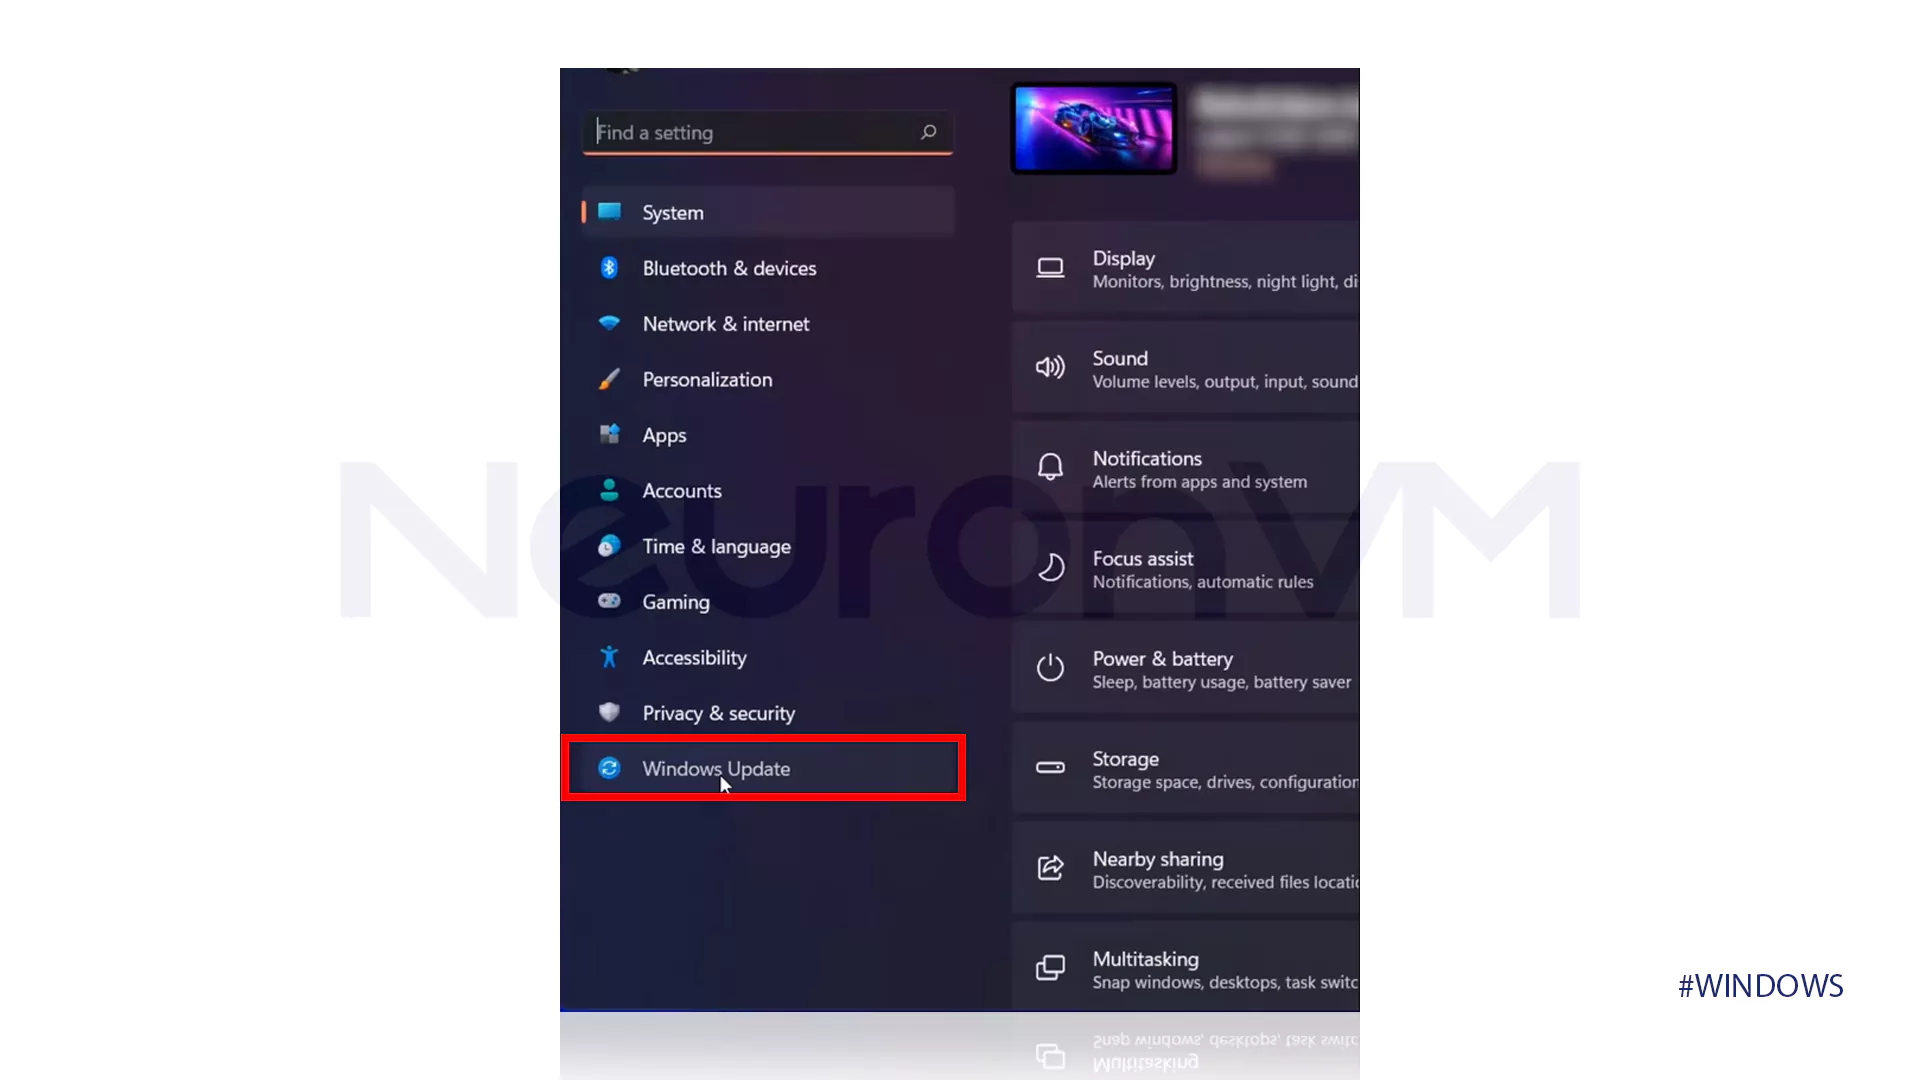
- Select the Settings option from the Start Menu.
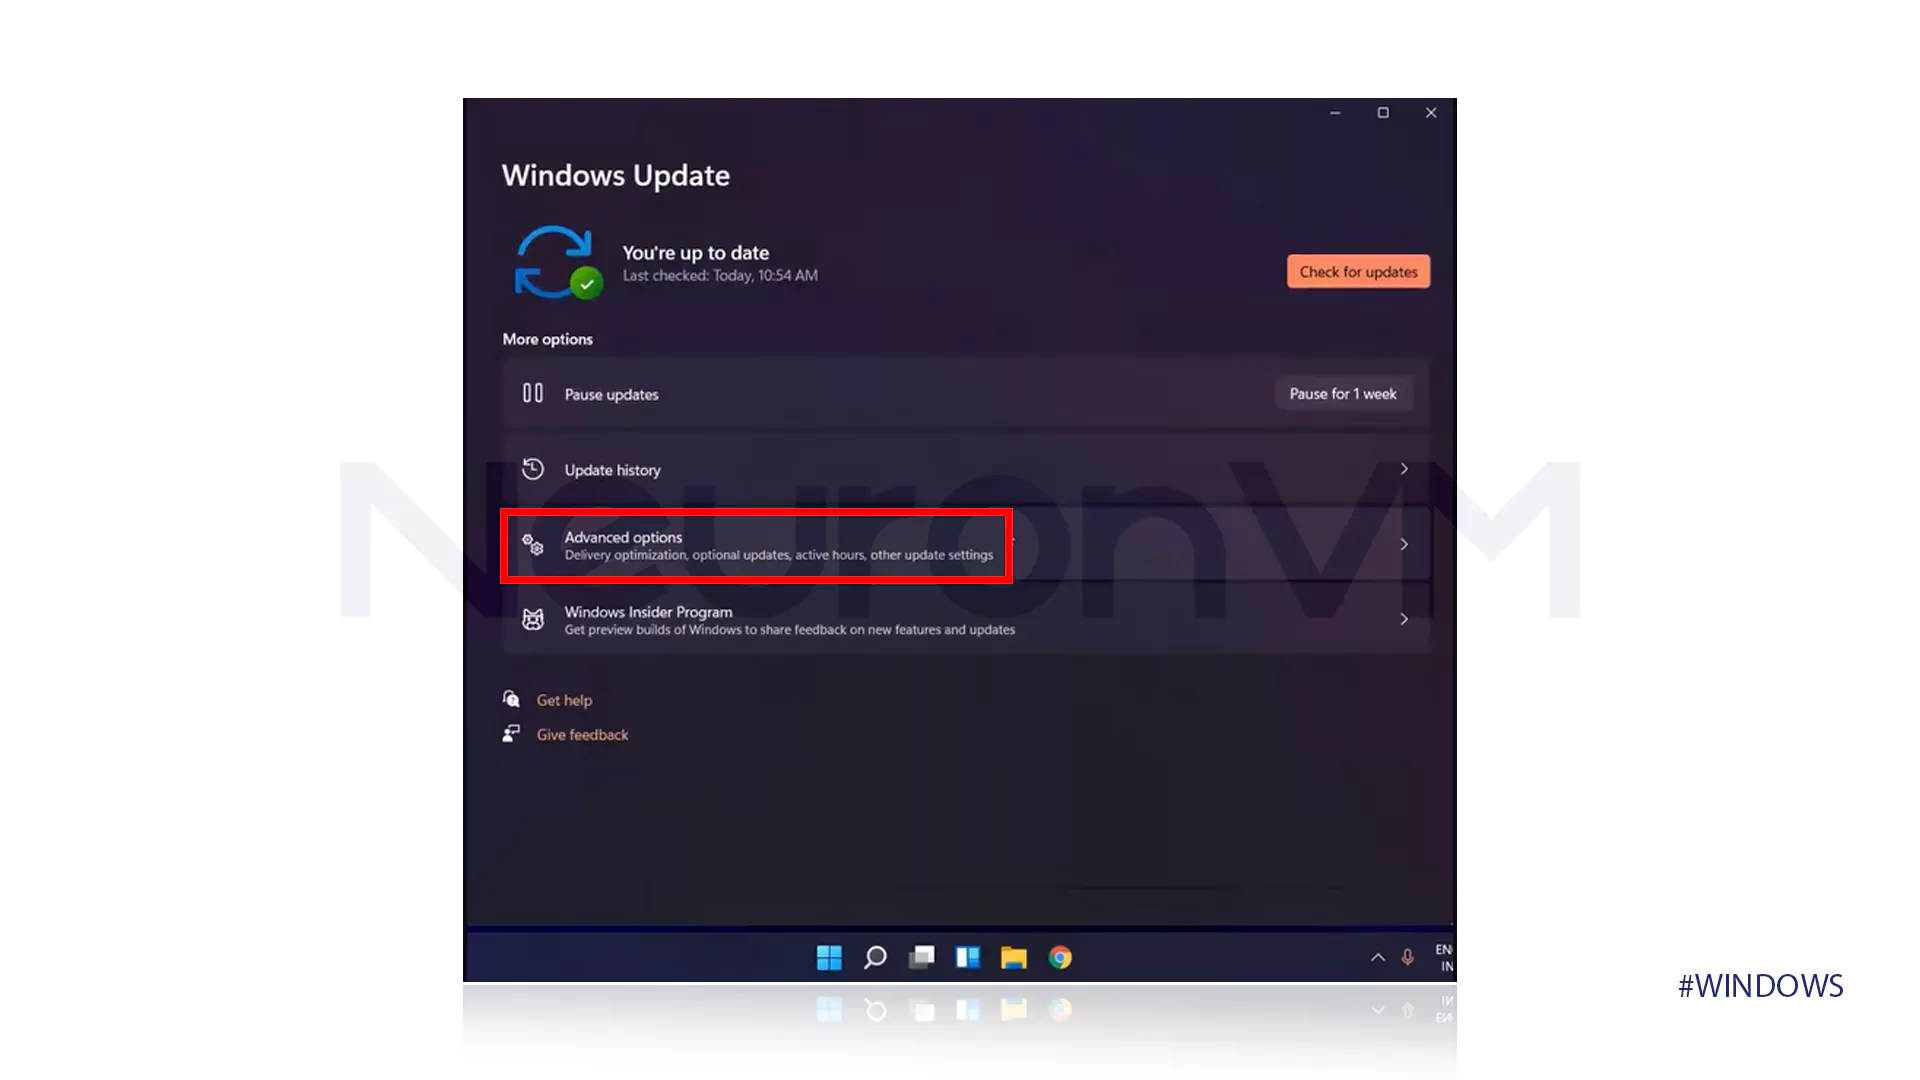
- Tap on the Windows Update option.
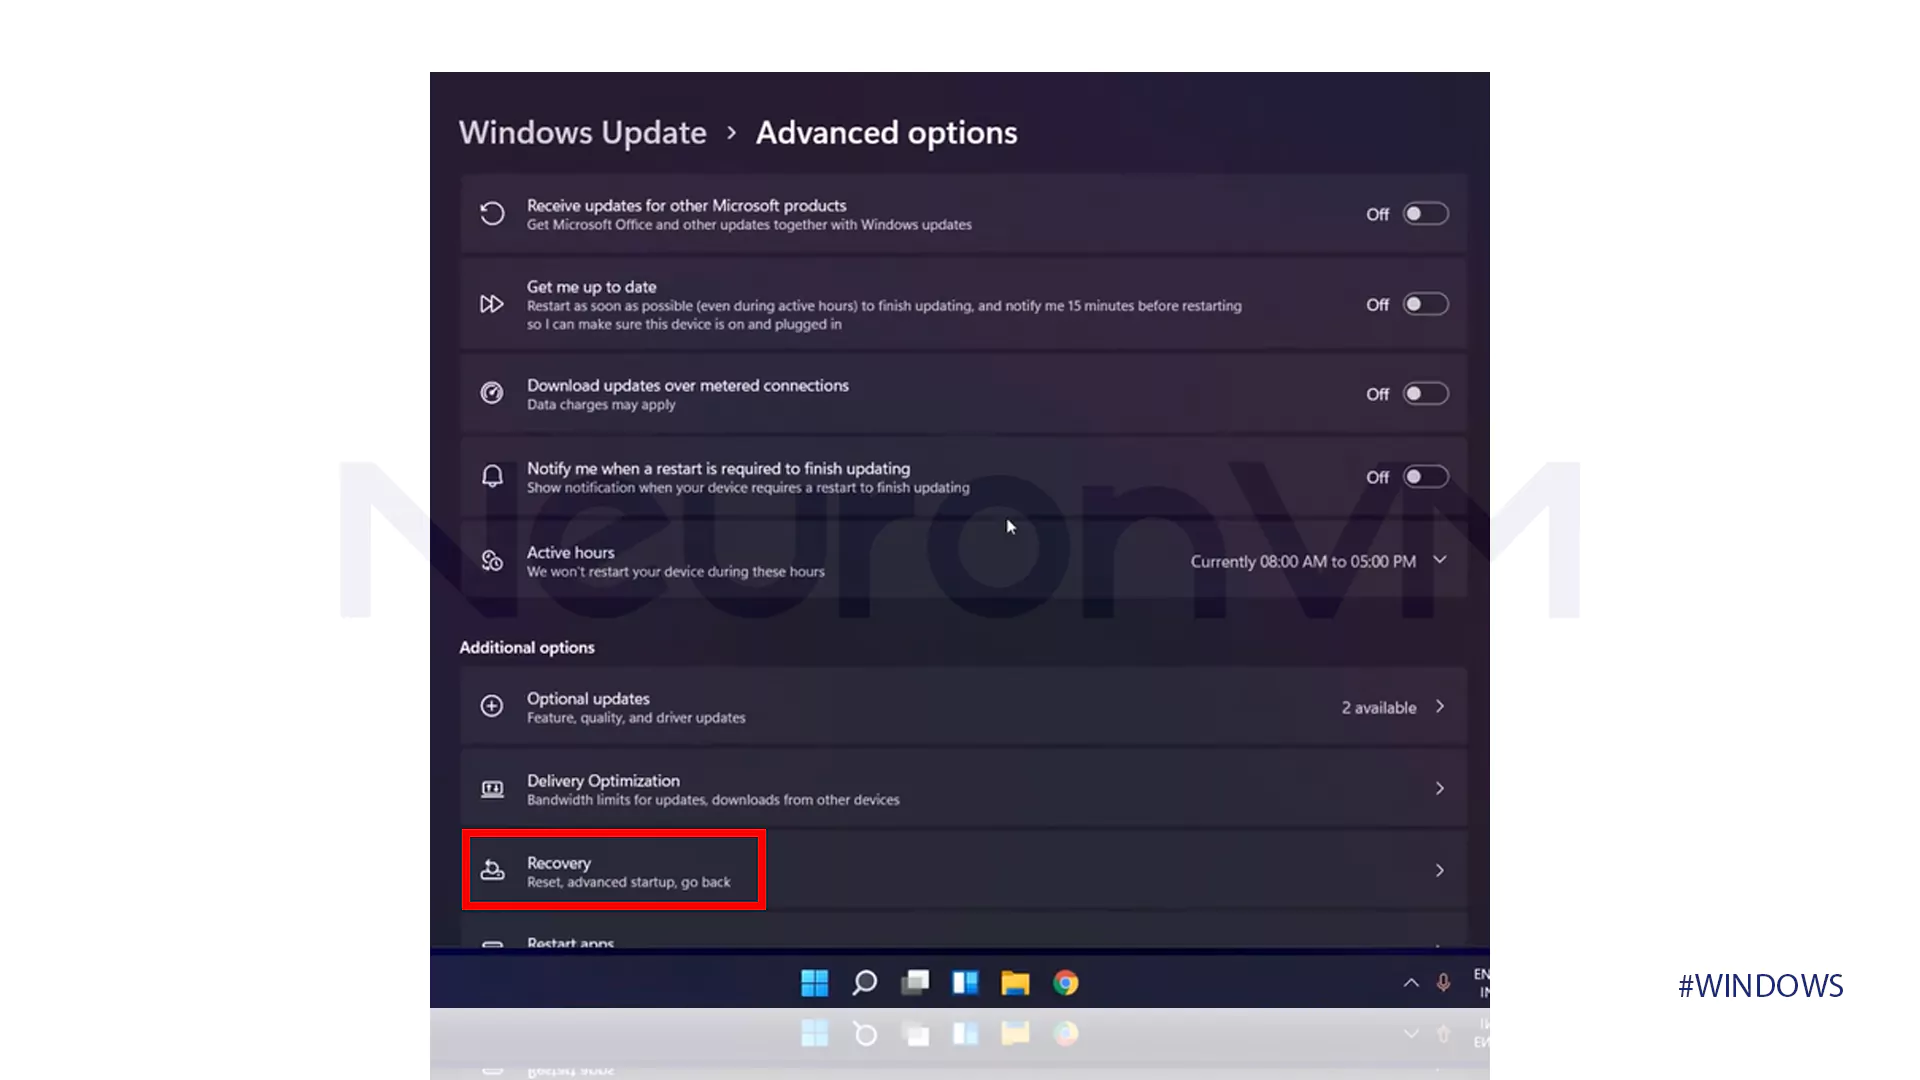
- Click on Advanced Options.
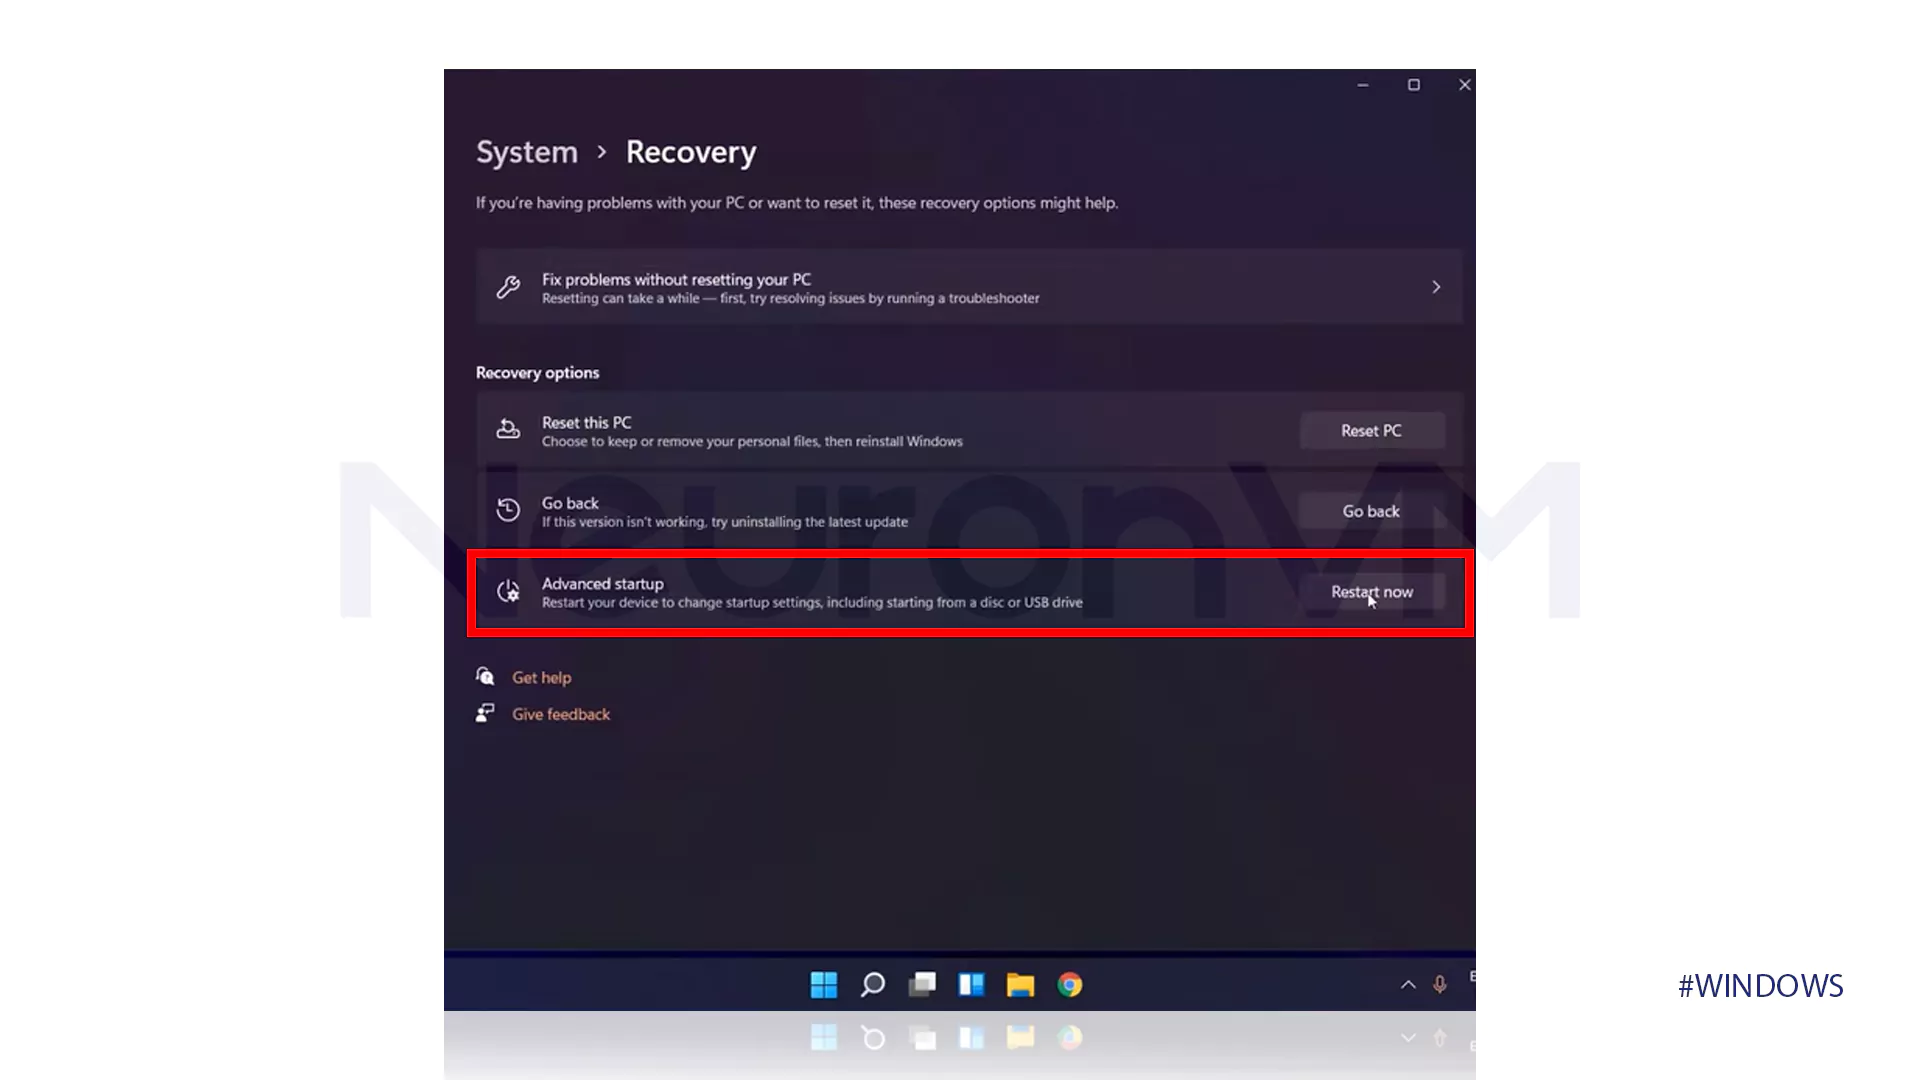
- Click on Recovery.
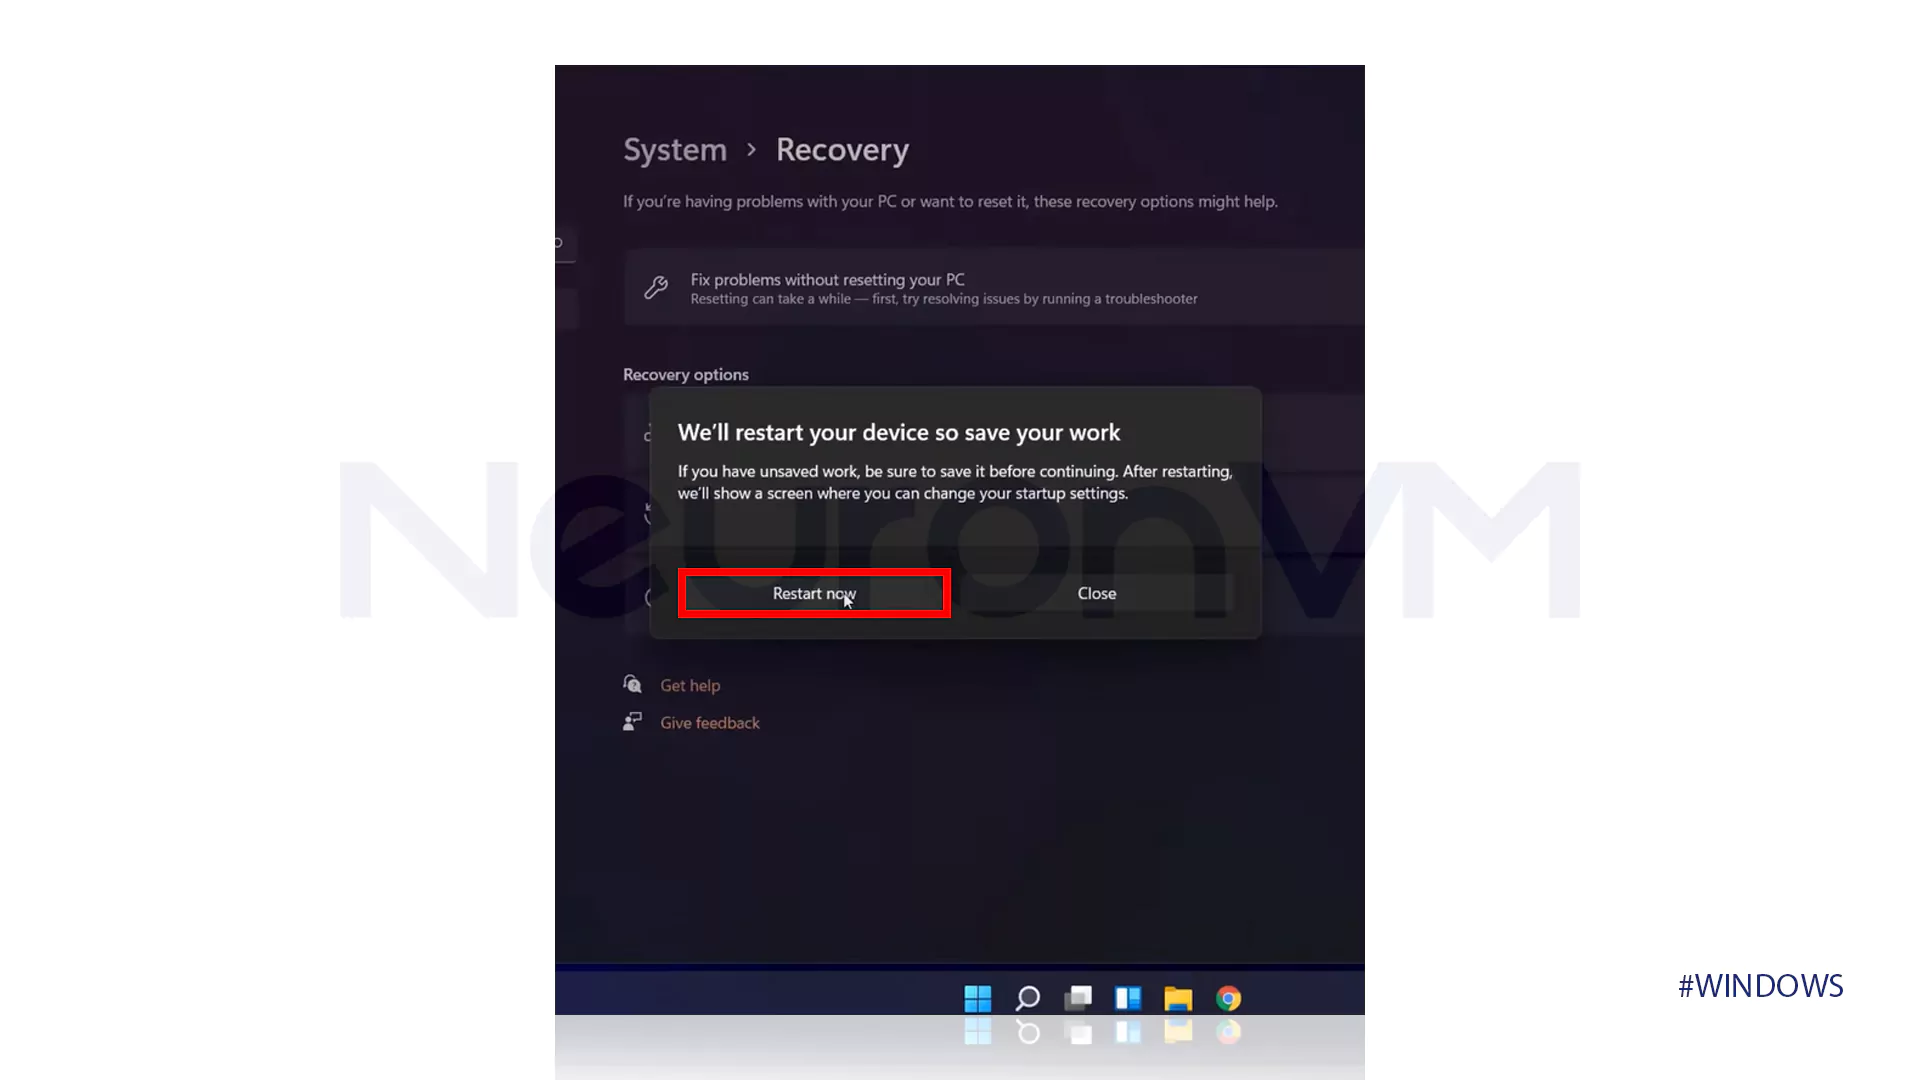
- Tap on the Restart Now option
- Click on Restart Now.
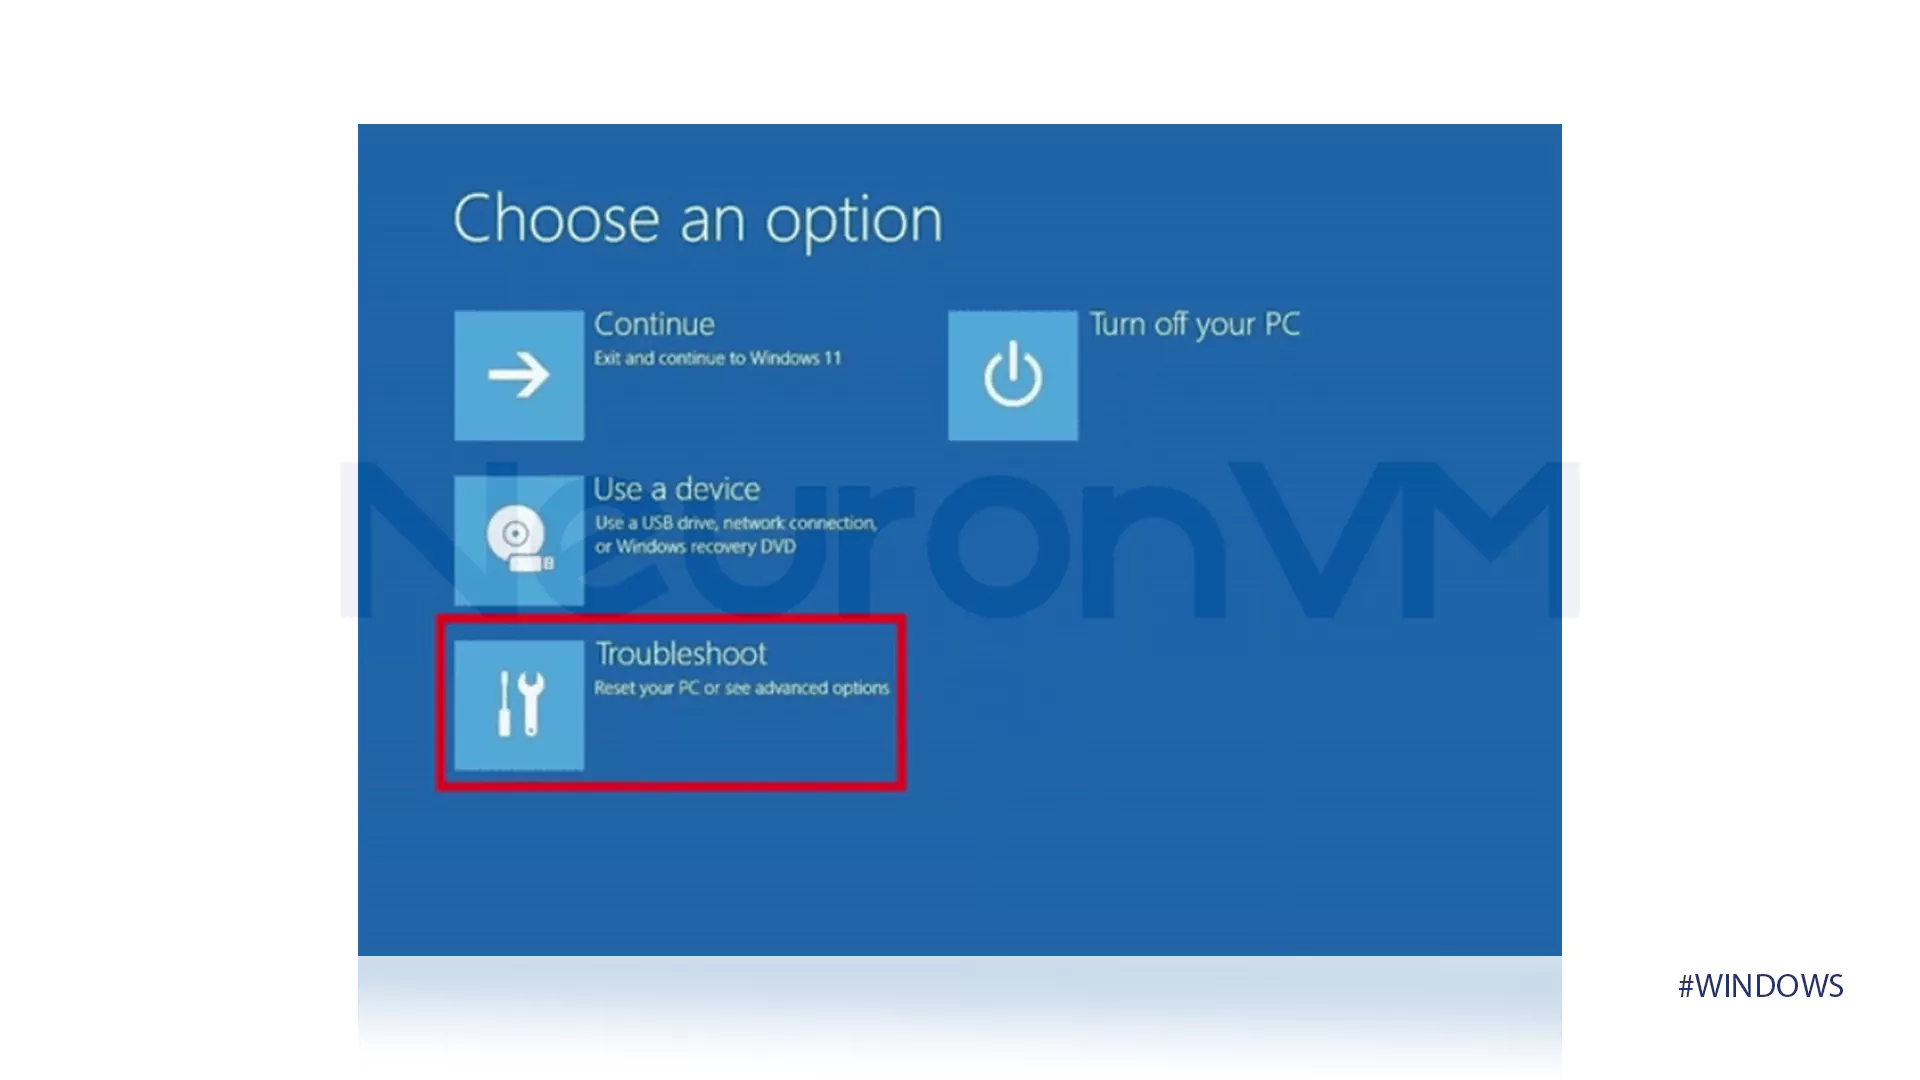
- Open on Troubleshoot.
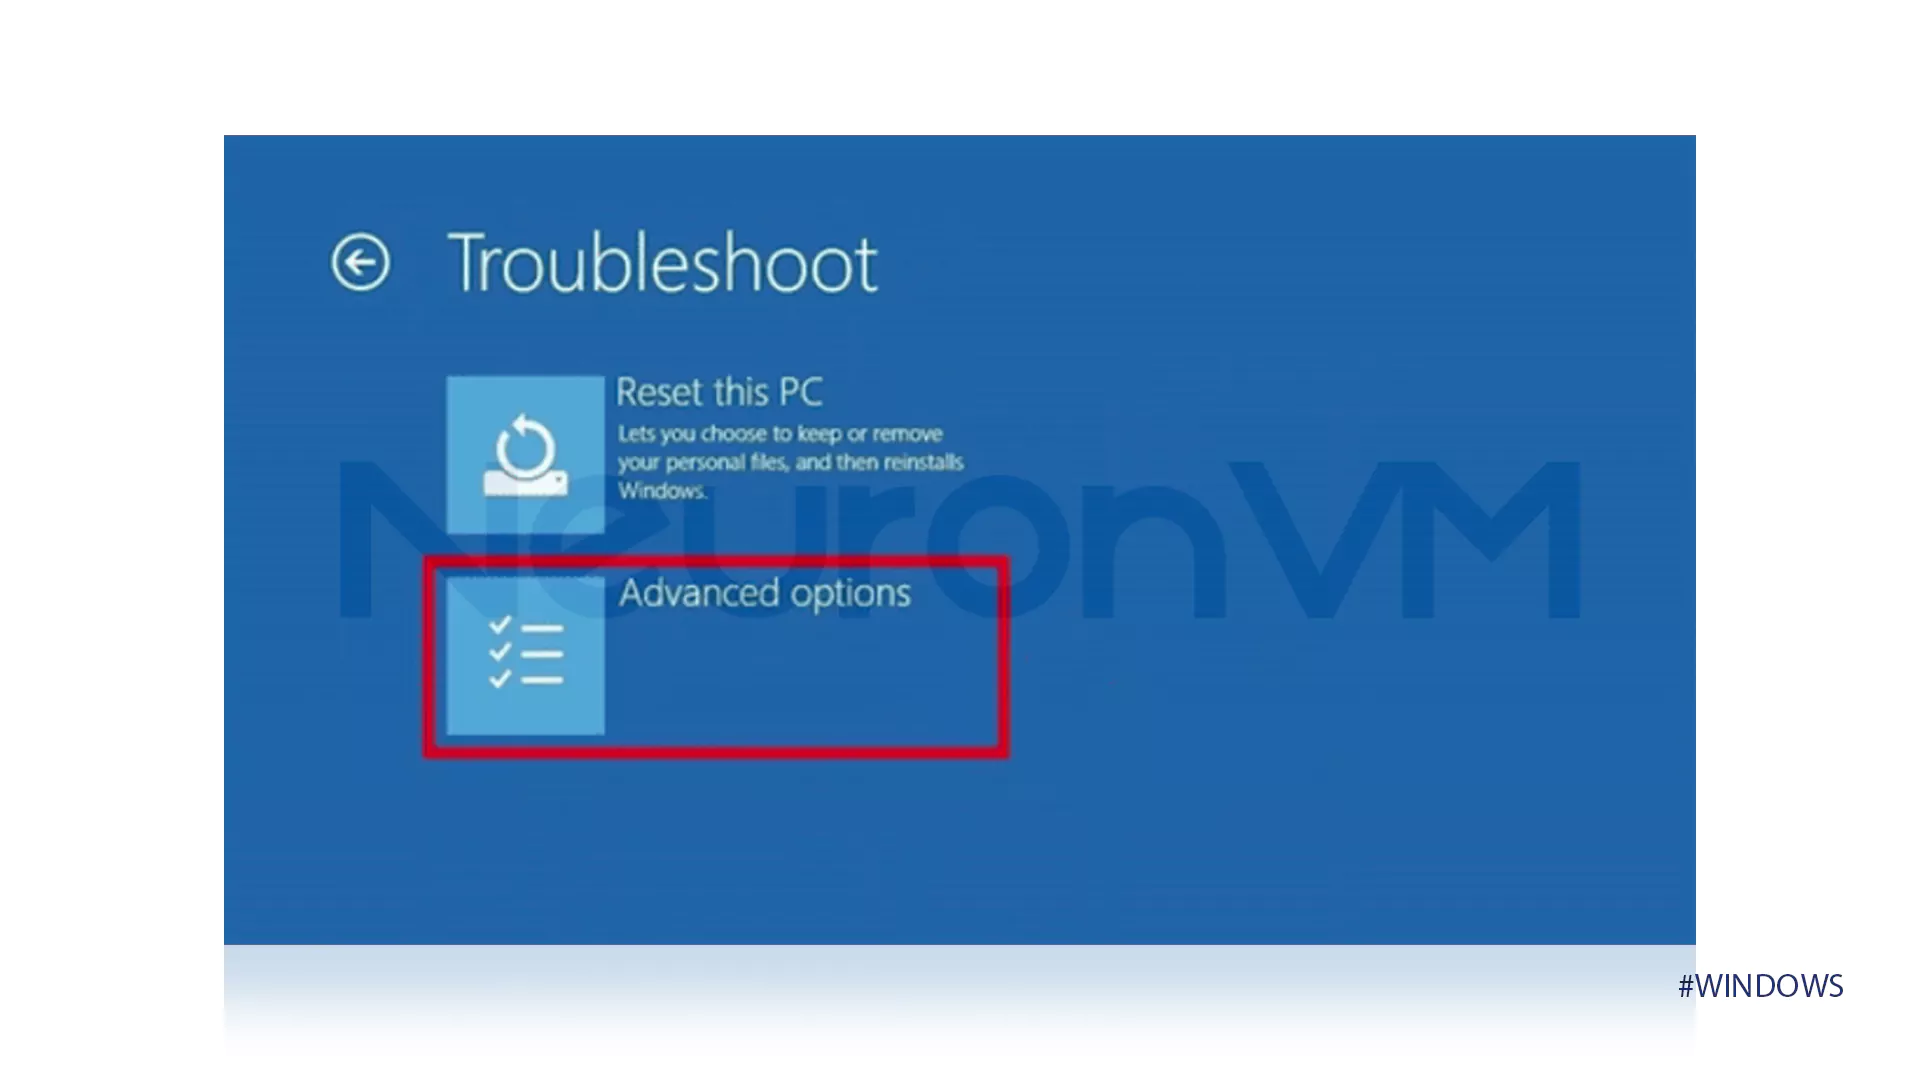
- Tap on Advanced Options.
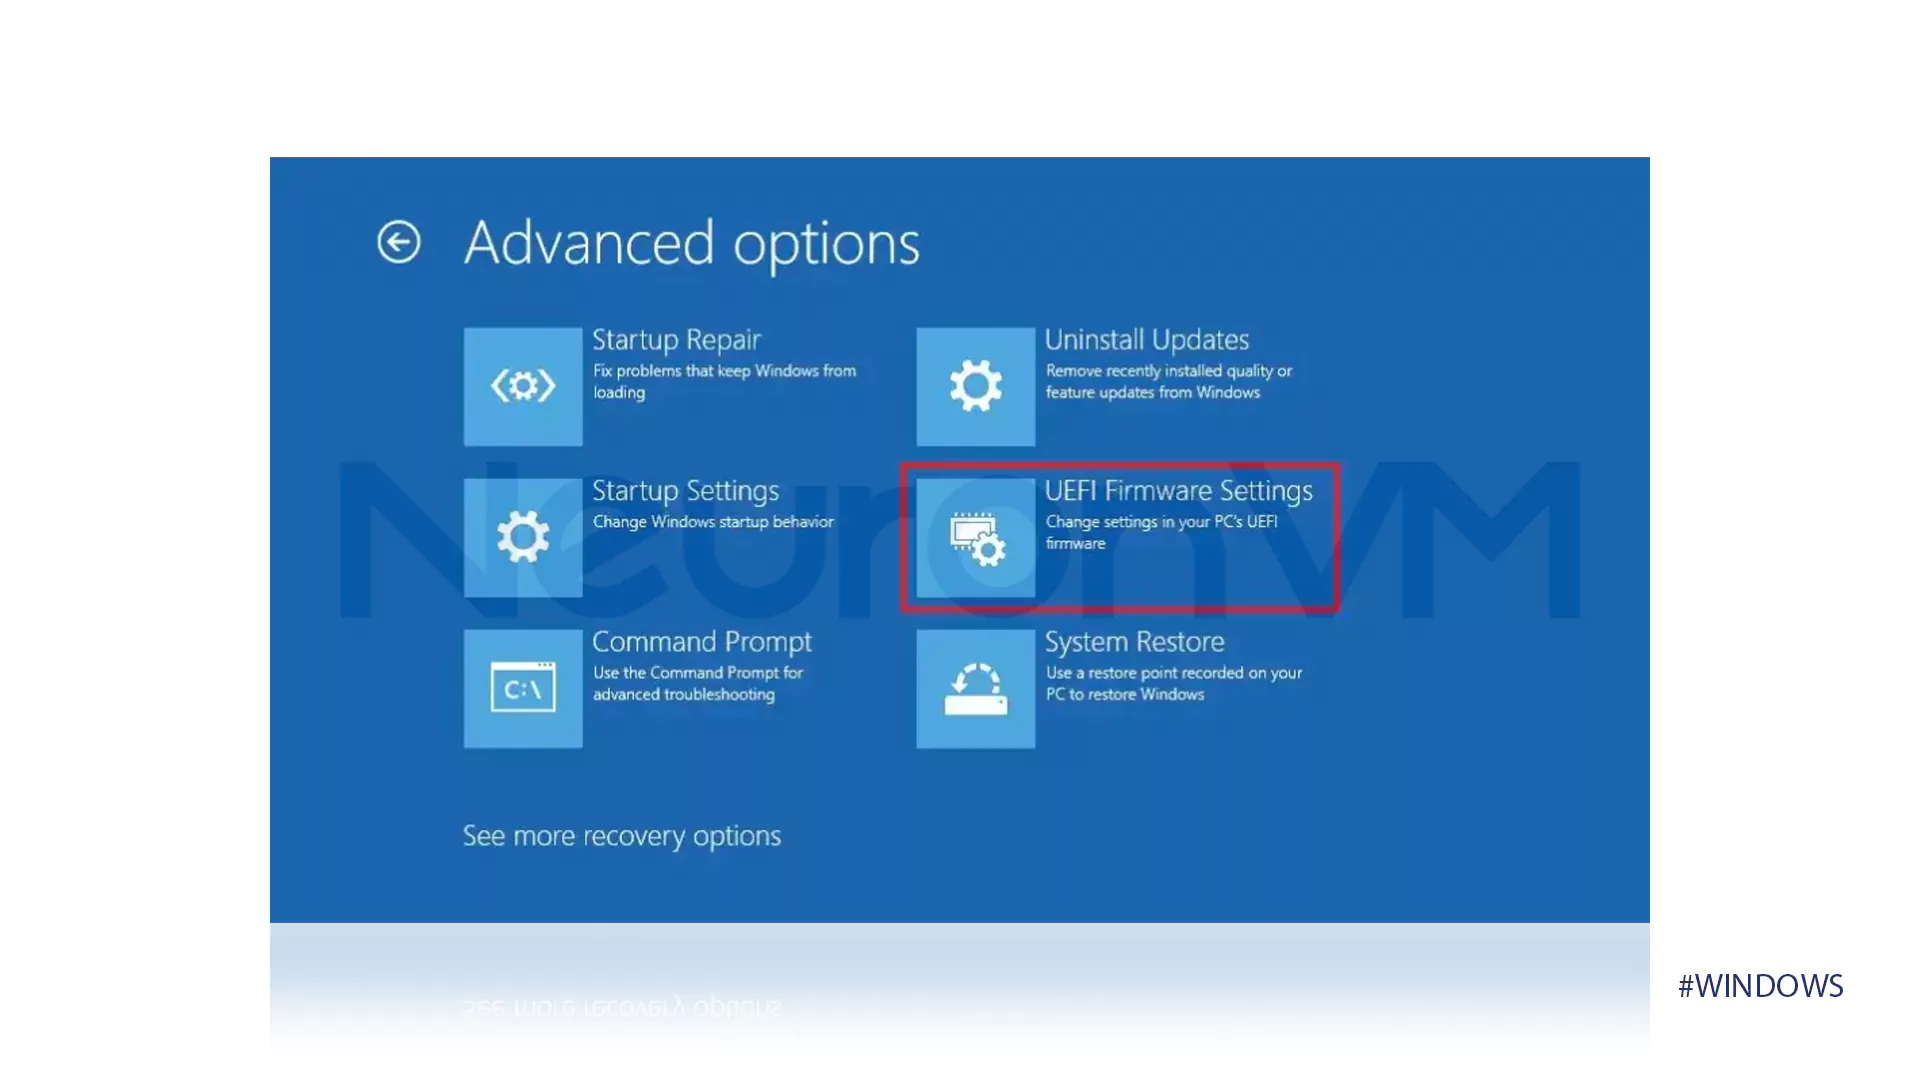
- Choose the option that is displayed in the image that follows.
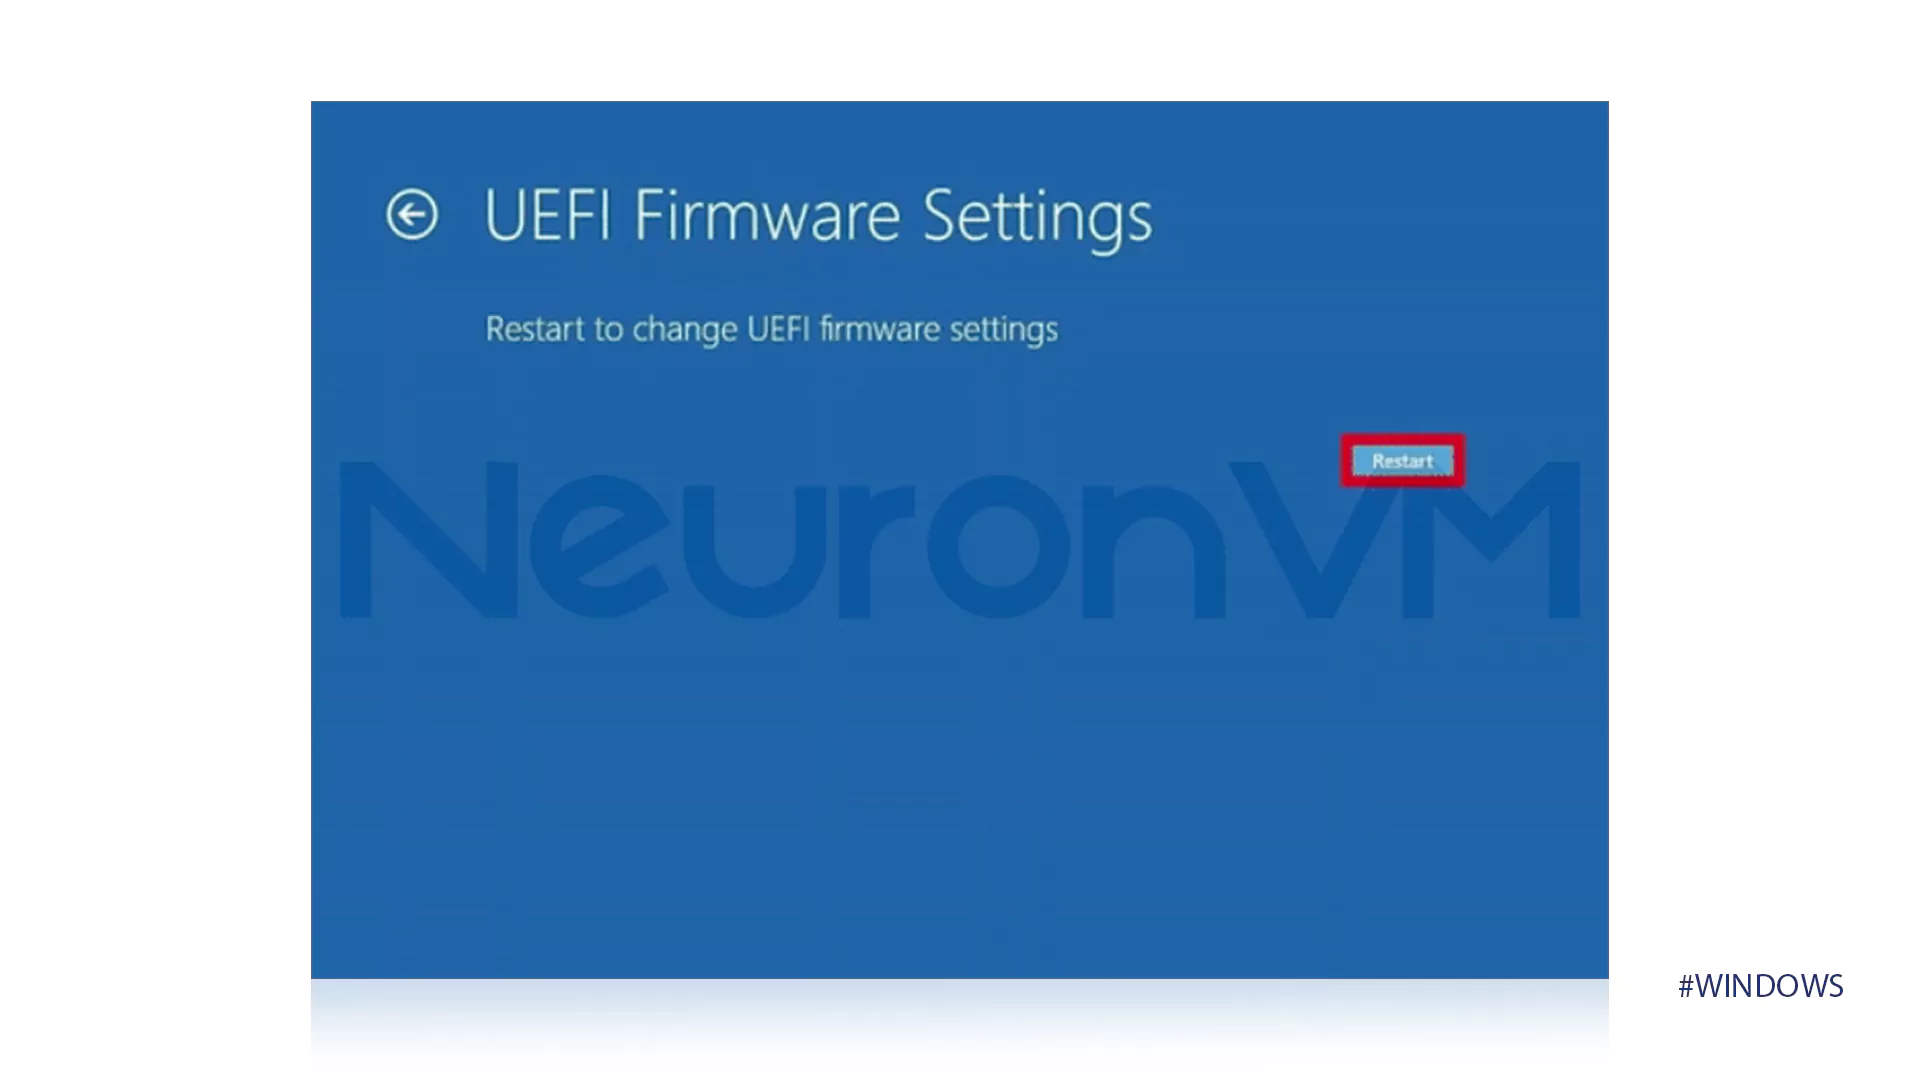
- Tap on Restart.
Step 4: Enable Virtualization
To enable virtualization Windows 11 AMD, the final step is then virtualization enablement.
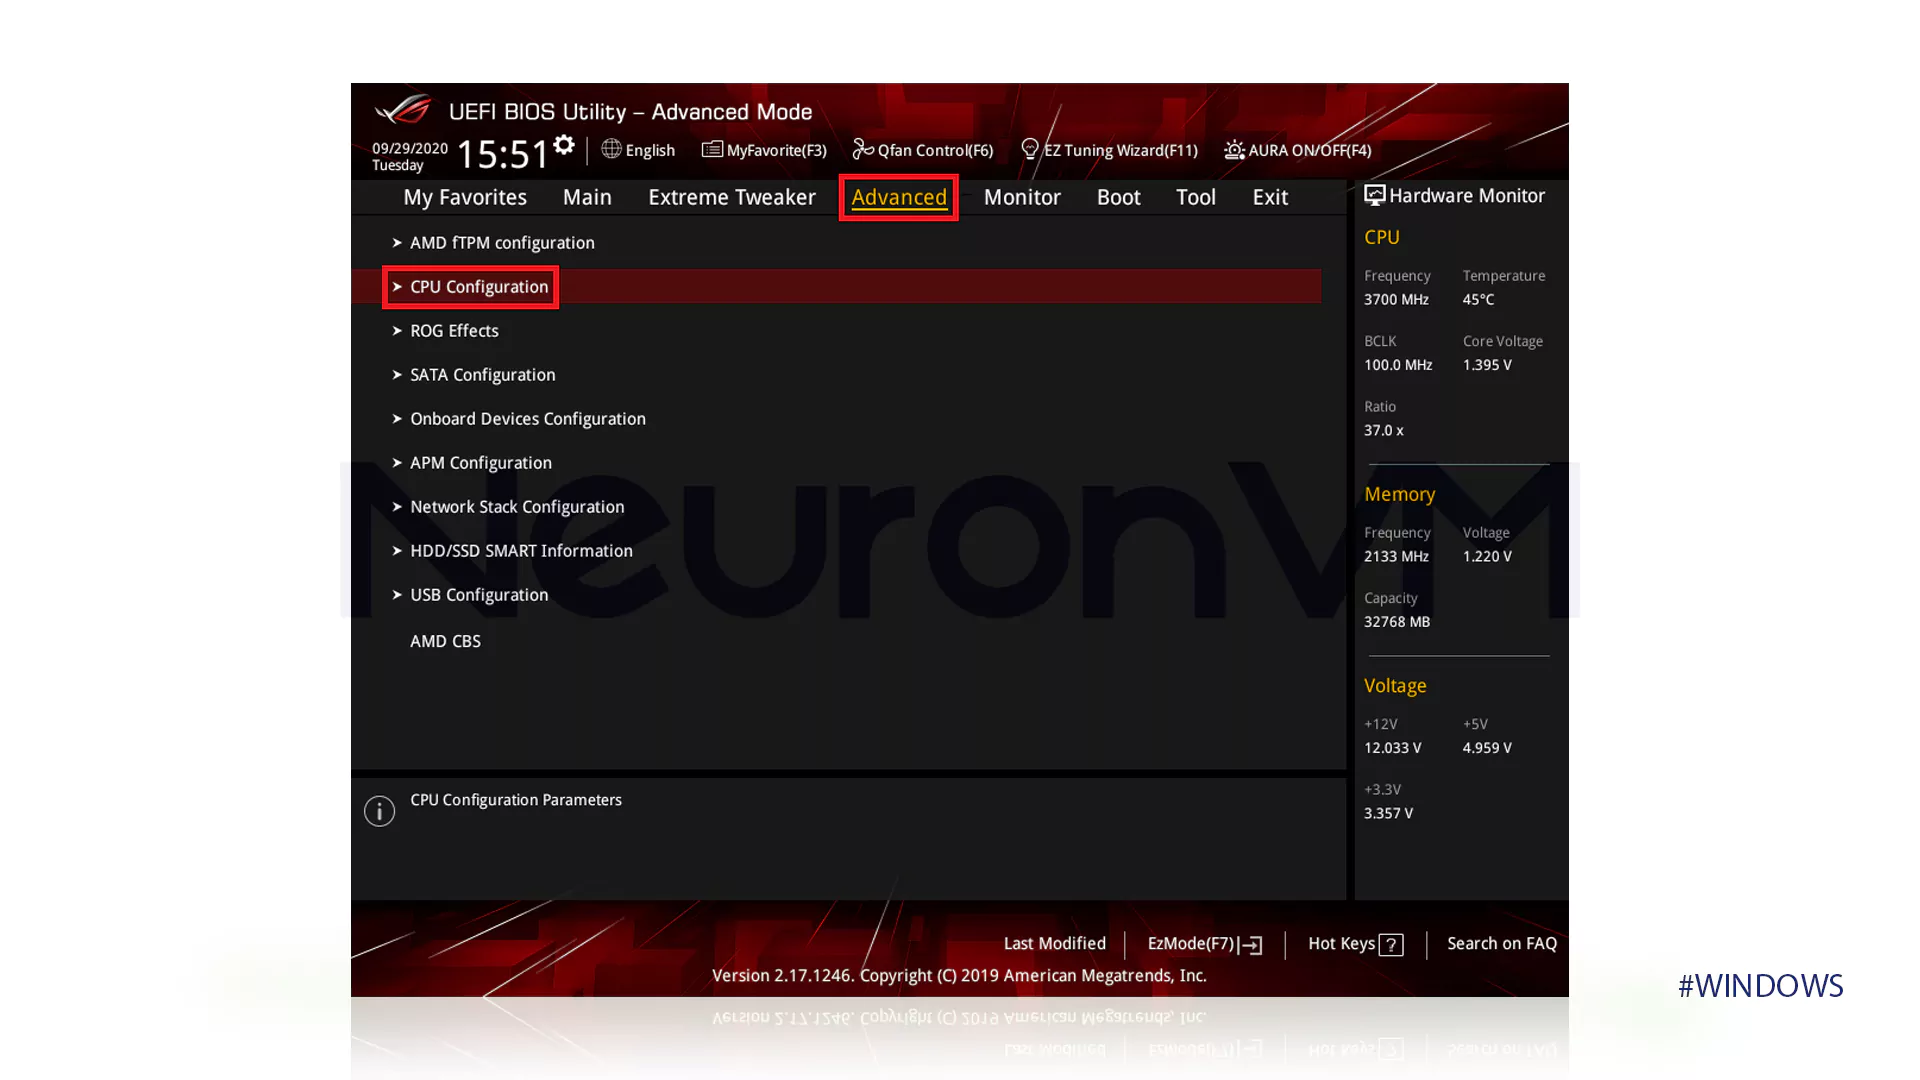
- Start the system and tap on Delete to access BIOS.
- Go to the Advanced tab and tap on CPU Configuration.
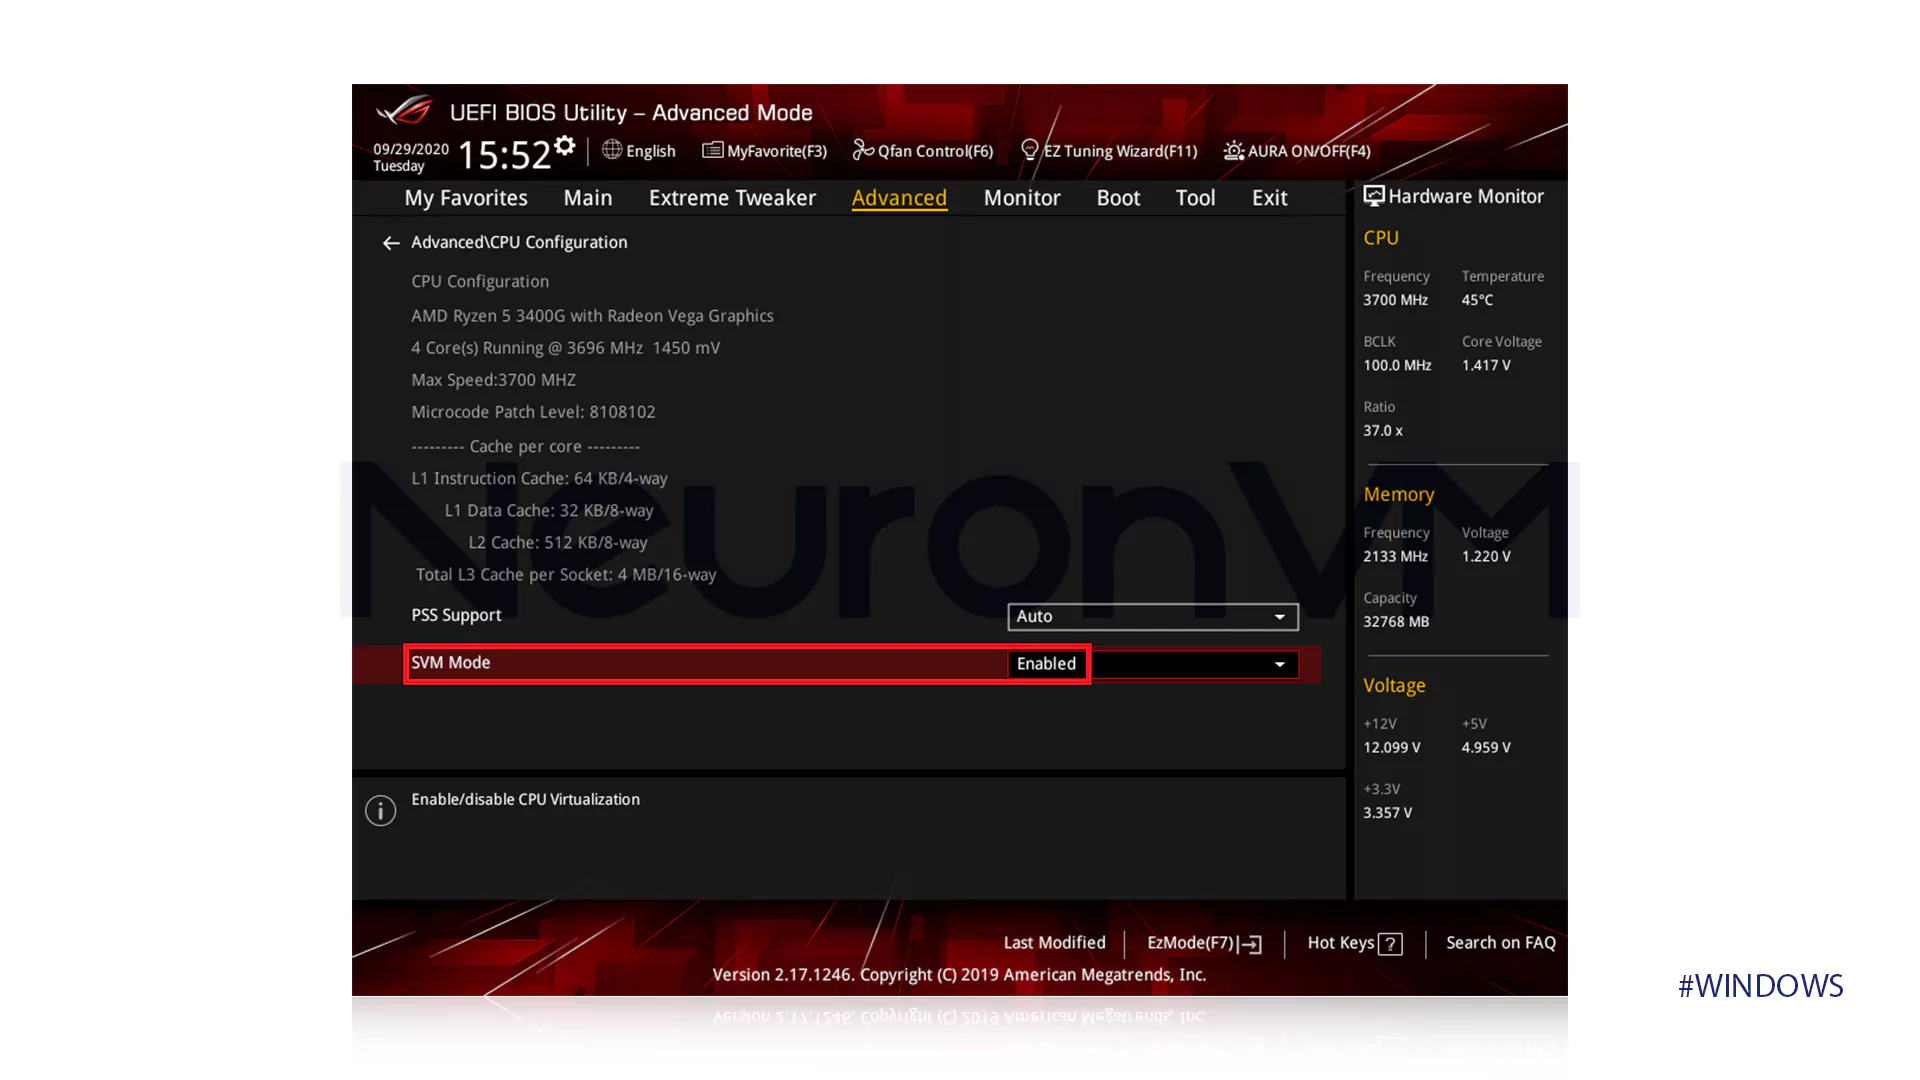
- Set it to Enabled in SVM Mode.
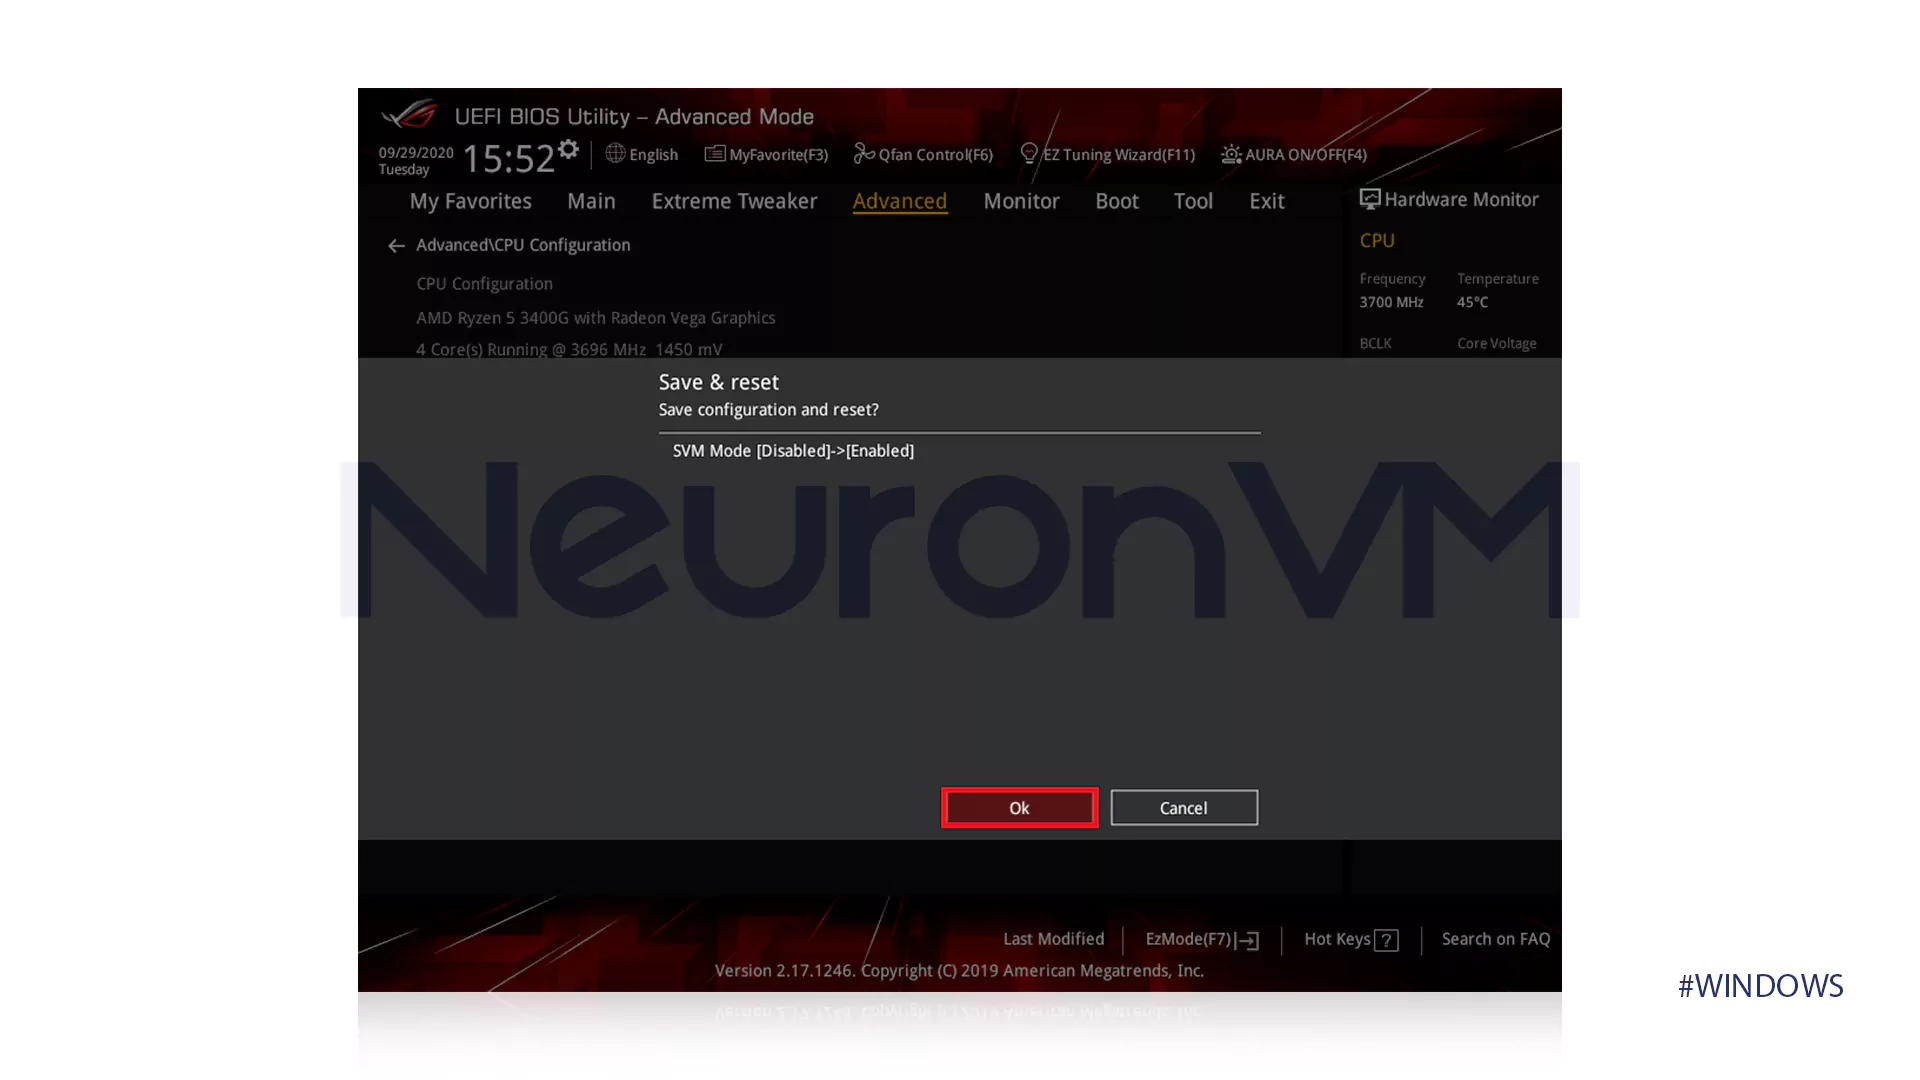
- To auto-reboot the system, press the F10 key and then tap on OK.
Conclusion
Virtualization is very important in improving system performance and running virtual software, and it is essential to know its activation methods. By following the steps mentioned above, activate this feature in your systems today and easily activate the virtualization feature in your systems to have a more optimal and effective use of your system and to gain access to a new realm of software and virtual facilities. We hope this article has guided you in enabling Windows 11 AMD virtualization.
You might like it

Ubuntu Tutorials
How to Install Ubuntu on Windows 10 (Step-by-Step with WSL)

Ubuntu Tutorials
How to Install and Configure Virtualizor on Ubuntu 20.04

Ubuntu Tutorials
How to Install Ubuntu 22.04 on Windows 10: Dual Boot or Repl...


