


How to Enable IIS in Admin RDP 2022

 10m
10m
 0 comments
 Print
Print
If you are using a Windows server, especially the RDP or Server 2022 versions, enabling IIS, or Internet Information Services, is one of the most important things you need to do. IIS is actually the main Windows web server that is used to run websites, web applications, and even APIs. By enabling IIS, you can easily manage and also run your websites locally or remotely, in this step-by-step tutorial, you will learn how to enable IIS in Admin RDP 2022 and enable remote management for it.
Introduction to IIS and Remote Management
IIS or Internet Information Services is a powerful feature of the Windows Server operating system that allows network administrators to host websites, applications, and online services on their servers. This service supports various protocols such as HTTP, HTTPS, FTP, and SMTP, and is natively integrated into Windows compared to other web servers.
In the Admin RDP 2022 version, IIS is not installed by default and must be enabled manually. In addition, enabling IIS remote management allows you to easily access the IIS control panel from another system and manage your websites without having to log in directly to the main server.
Step 1: Log in to the server and check the status
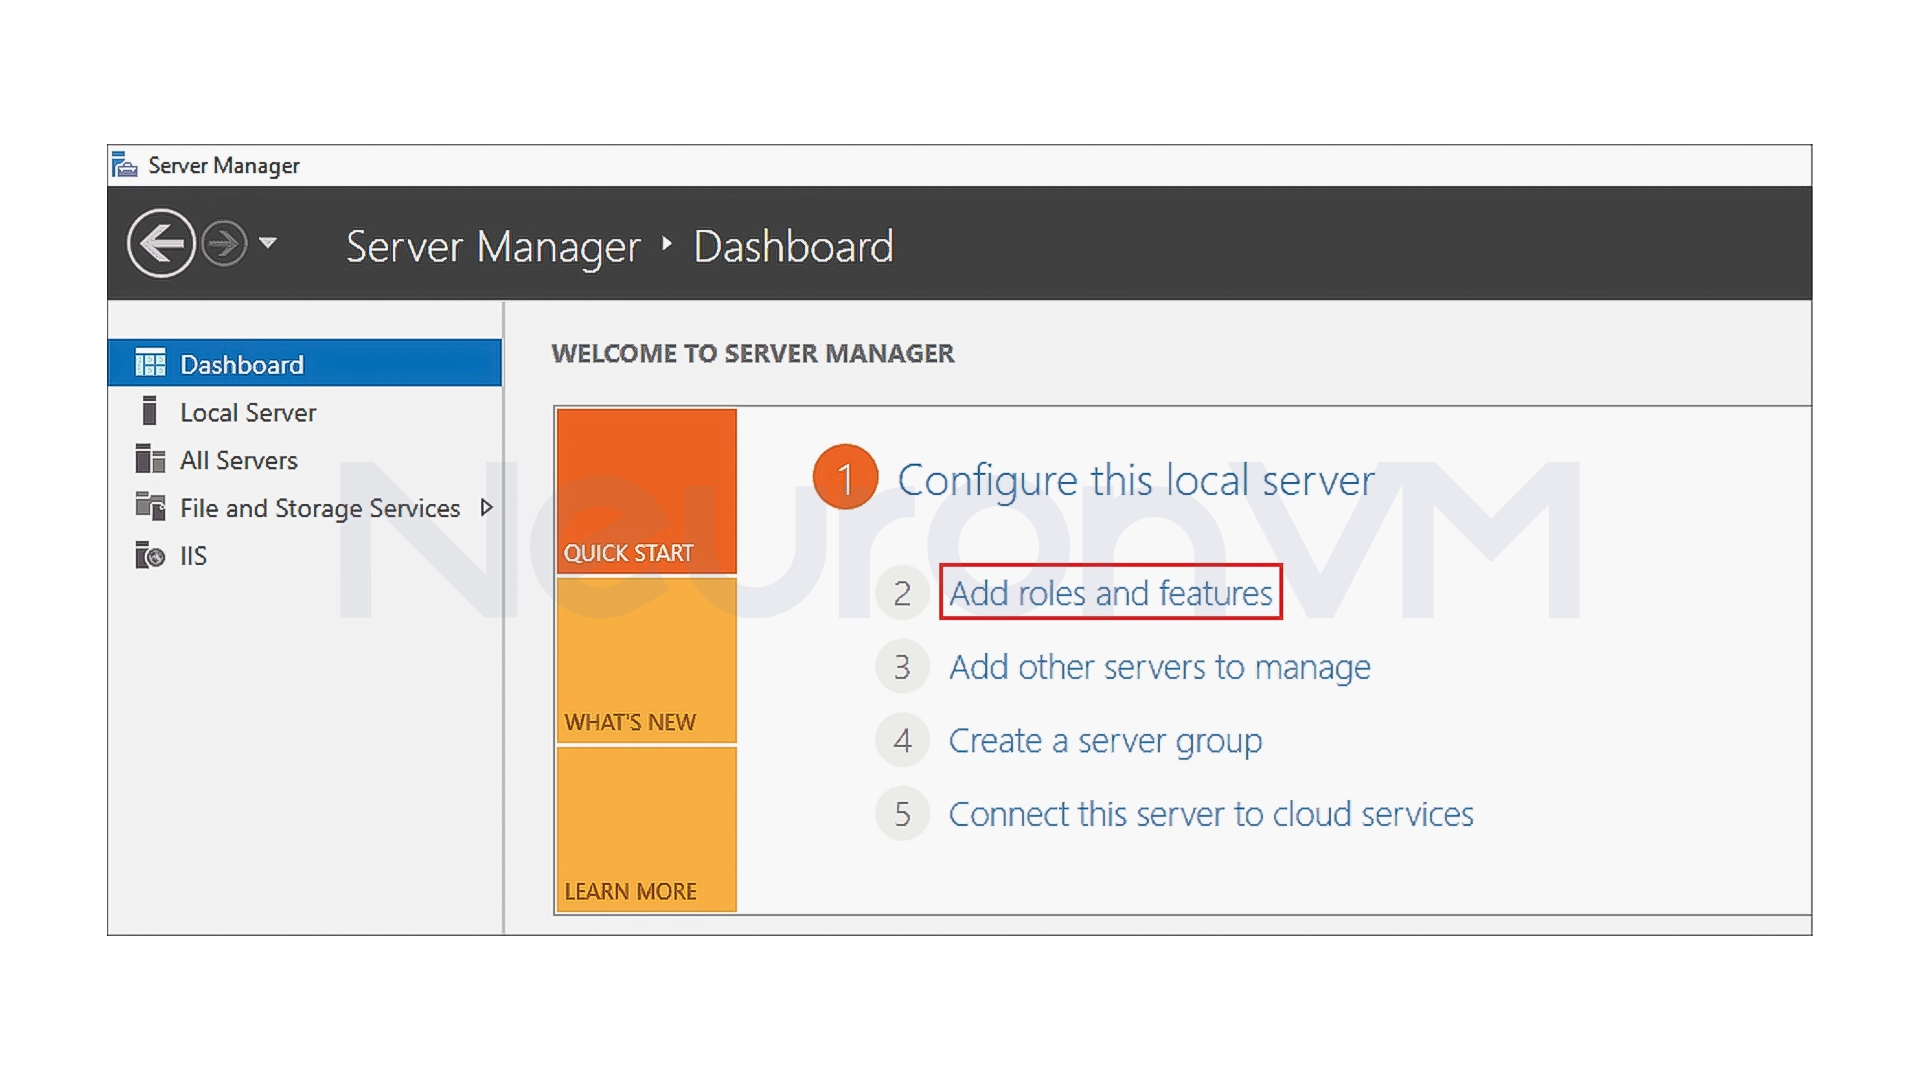
First, log in to the RDP server with Administrator access. After logging in, make sure that the latest system updates are installed. Then open Server Manager from the toolbar or Start menu. This is the central tool for adding new roles and features to Windows Server.
Step 2: Add Roles and Features
In the Server Manager window, click on the Add roles and features option to open the Roles and Features installation tool. On the welcome page, just click Next and in the next step, make sure the Role-based or feature-based installation option is selected. Then click Next again to enter the server selection page. In this section, select the current server from the list and click Next again.
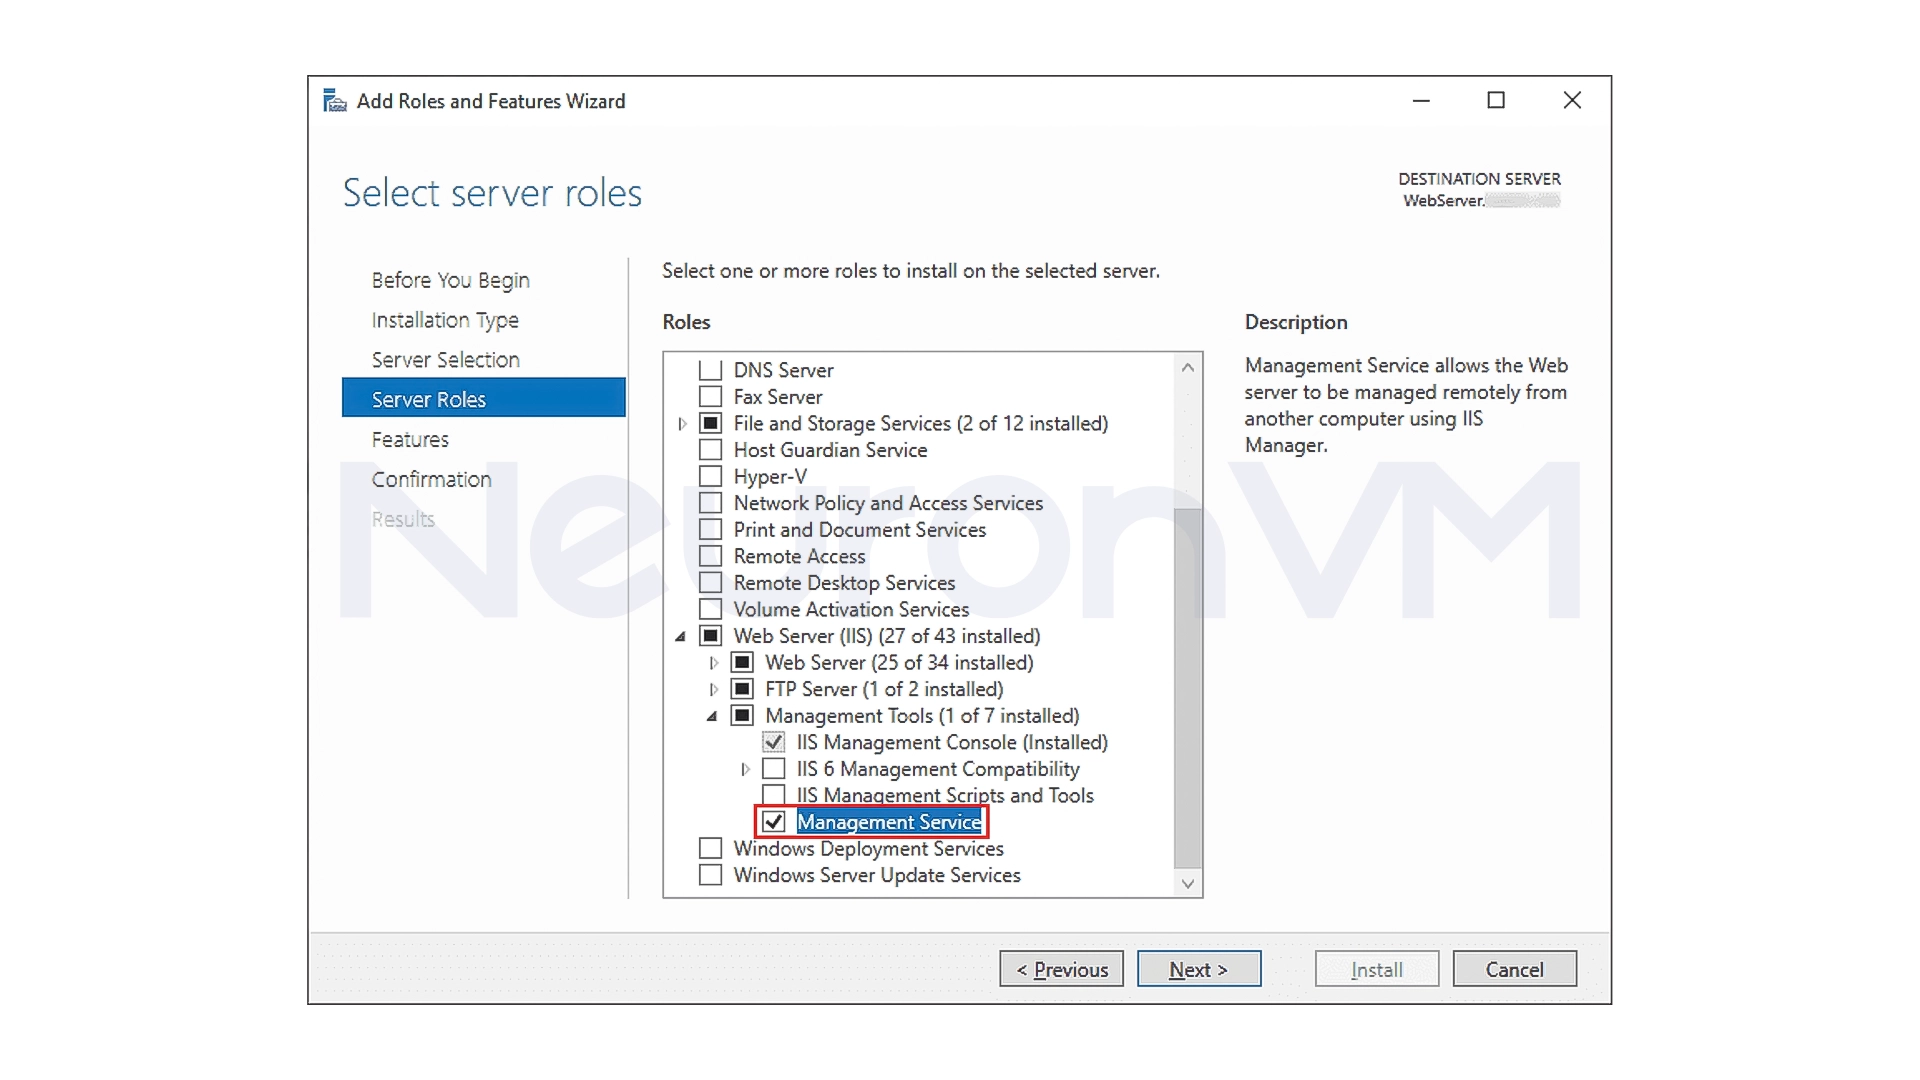
Step 3: Add the IIS role
On the Select server roles page, expand the Web Server (IIS) option and select the Management Tools section from its sub-category. Now check the Management Service option. This section is the feature that provides remote management of IIS. After selecting, click Next twice and then click Install to begin the installation process.
The installation process will take a few minutes. After the installation is complete, a message will appear stating that the installation was successful.
Step 4: Enable Web Management Service in IIS Manager
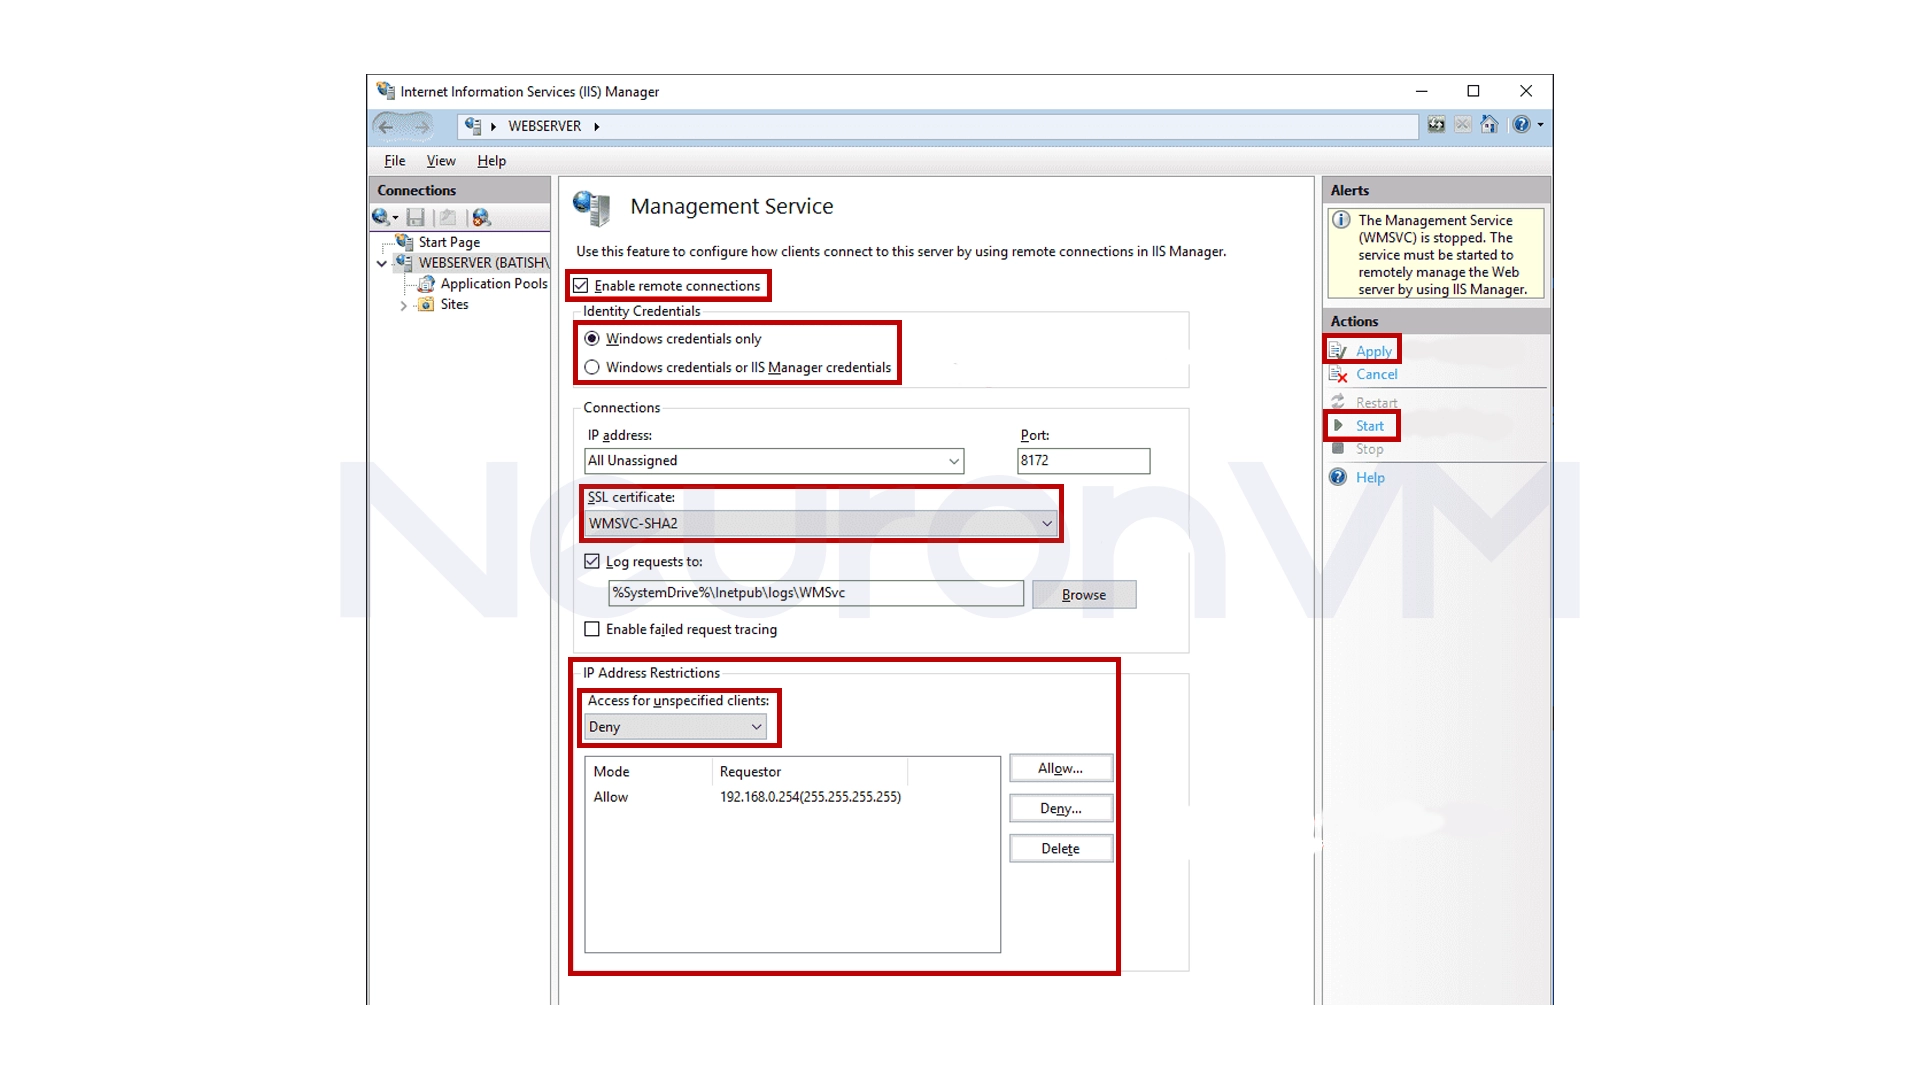
After installation, you now need to enable the remote management service, to do this, log in to IIS Manager from the list on the left, open your server name and double-click on the Management Service option in the Management section.

On the page that opens, enable the Enable remote connections option this will allow users to connect to IIS over the network you can also make other settings in this section.
Identity Credentials: You can select which users can connect to IIS by only allowing Windows users or creating dedicated IIS Manager users.
Connections: If you want to specify the port and IP that your service listens to usually the default port is 8172
SSL Certificate: To define a security certificate to encrypt communications, you can use an automatic certificate or a custom certificate
IP Address Restrictions: Allows you to allow only specific IPs to connect and increase security
After completing the settings, click Apply and click Start on the right to activate the Web Management Service.
Step 5: Set the service to start automatically
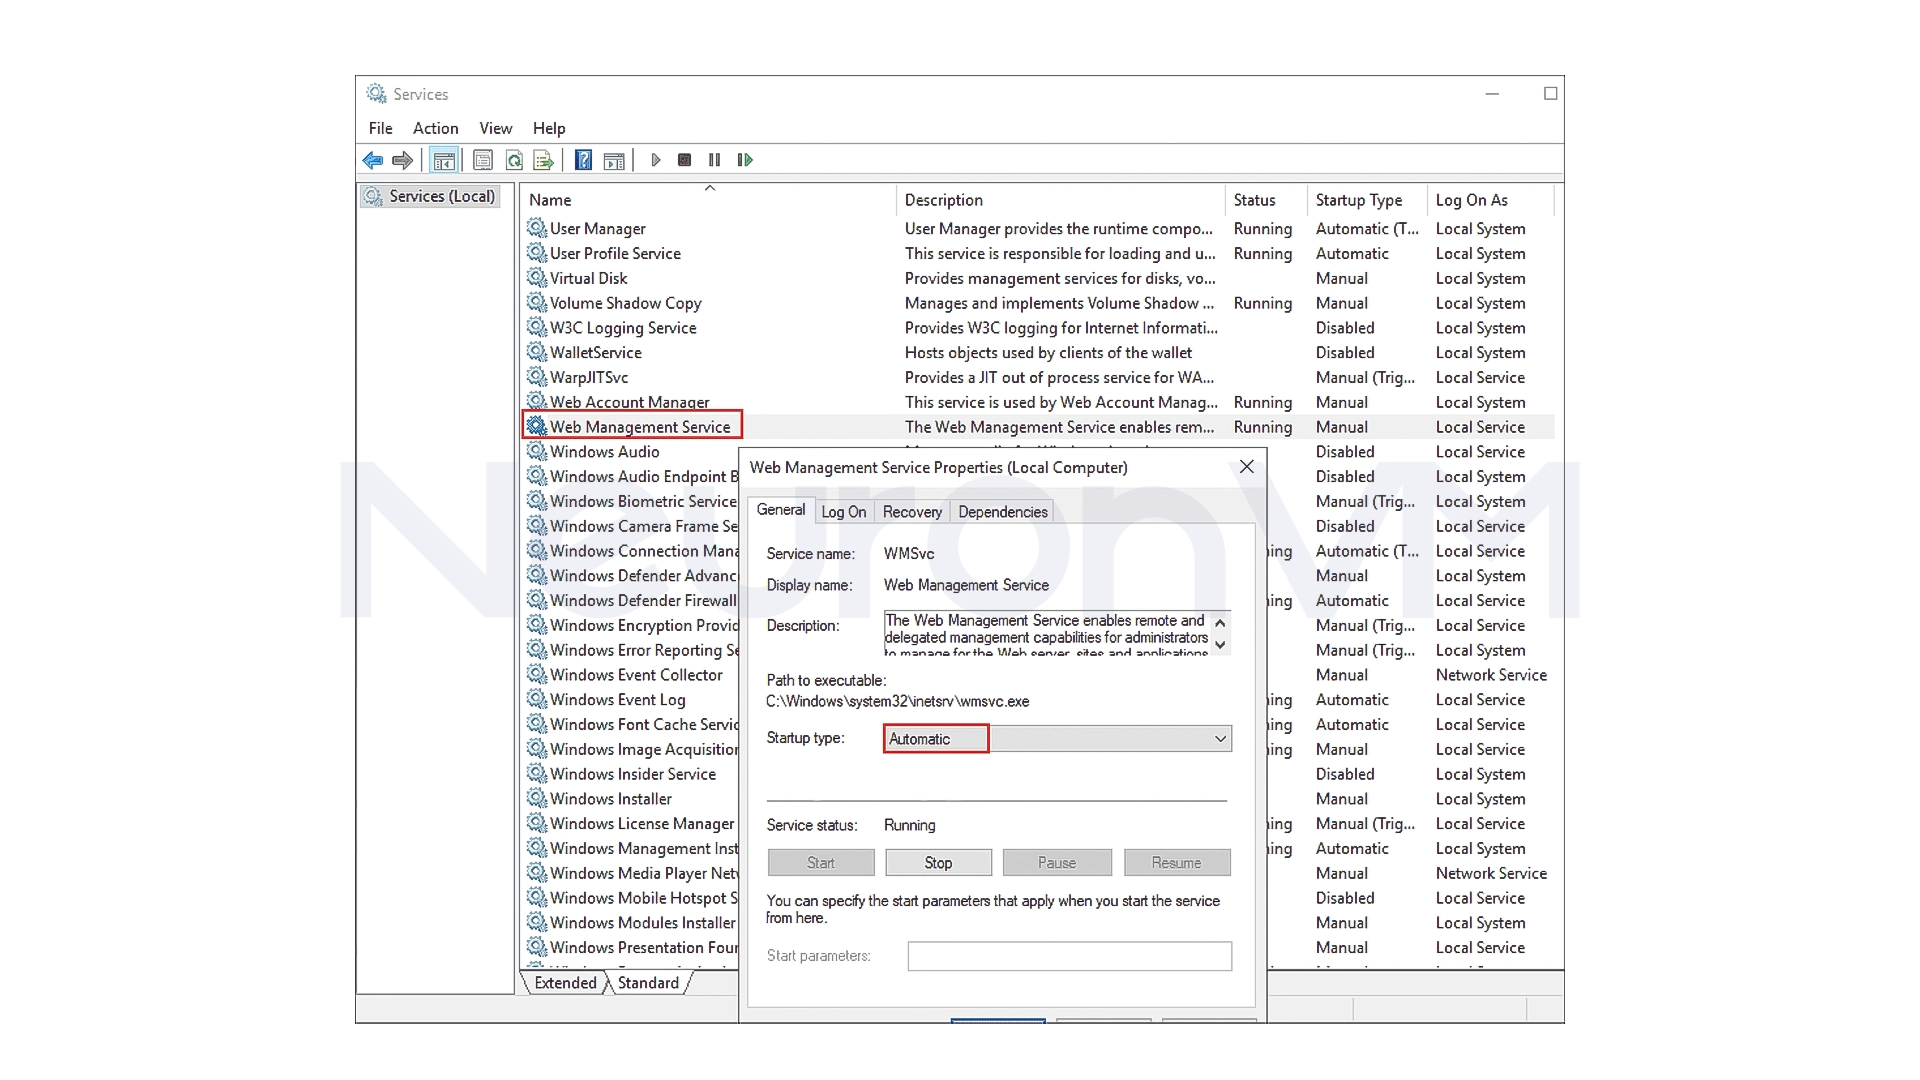
To enable the IIS Management Service to start automatically after each server restart, go to the Services tool, find the Web Management Service, right-click on it and select Properties. In the Startup Type section, set the value to Automatic, then click Apply and OK This way, the service will start automatically every time the system is started.
Step 6: Check the status of the IIS service
To make sure everything is enabled correctly, go back to IIS Manager and check that the service is in the Started state. You can also check the status with the following PowerShell command
Get-Service WMSVC
If the Status value is Running, the service has started successfully and is ready for remote management.
Important Security Tips for Enabling IIS
Enabling IIS remote administration can be very useful, but it can also be dangerous if done carelessly. To maintain security, be sure to follow these points
1- Always enable SSL to encrypt the communication between the system and the server
2- Only allow access to specific IPs and prevent public access
3- Choose strong passwords for administrative accounts
4- If possible, change the default port 8172 to prevent automated attacks
5- Check IIS logs to identify any failed login attempts
My personal experience with Enable IIS on Admin RDP 2022
When I first configured IIS on Windows Server 2022, I saw several errors in remote connections and after some testing, I realized that I had forgotten to enable the Enable remote connections option, which caused IIS to block external connections, after that by enabling it, and restricting IPs, I was able to safely manage IIS from my personal system this experience taught me to remember to always check the status of the service before each test.
Conclusion
IIS is one of the key tools in Windows Server, without which many web applications cannot be run, and by using Server Manager and enabling the Web Management Service feature, you can easily install and manage IIS remotely, so observing security tips and restricting IPs will always keep your system safe and stable, If you follow these steps carefully, your server will become a professional environment for hosting and managing web.
IIS or Internet Information Services is Microsoft's official web server used to host websites and web applications in Windows Server.
Yes, by enabling the Web Management Service option in IIS Manager, you can connect to the server securely from other systems.
The default port is 8172, but you can change it to any number you want to increase security.