


How to Create Partition in Windows 11 (Step-by-Step Guide)

 9m
9m
 0 comments
 Print
Print
Searching for a way to create Partition in Windows 11? Go through this guide to find out! Data management and storage space, with the increase in the volume of information and the need to better organize them, is one of the basic challenges of computer users, and the solution to this problem has been solved by creating different partitions on the hard disk. The primary or system drive is the single hard disk drive (HDD) or solid-state drive (SSD) that is included in the hardware configuration when you purchase a computer or laptop. Along with better data management, hard disk partitioning also has other advantages that we have reviewed and discussed.
How to create Partition in Windows 11?
To create Partition in Windows 11 there are 2 methods:
Method 1: Disk Management
This method may be used when you need to assign a certain drive letter, build a partition from unallocated space, shrink an existing partition to make room for a new partition or select among additional partition formatting choices. This approach may be used by users who need more control over drive letters, file systems, and partition sizes.

Disk management offers extensive disk management features that let you manage intricate partitioning situations like extending, resizing, and deleting partitions. This tool gives you more control over how drive letters appear in File Explorer by allowing you to manually assign drive letters to both new and existing partitions.
To create a partition in Windows 11 using disk management, follow the steps below:
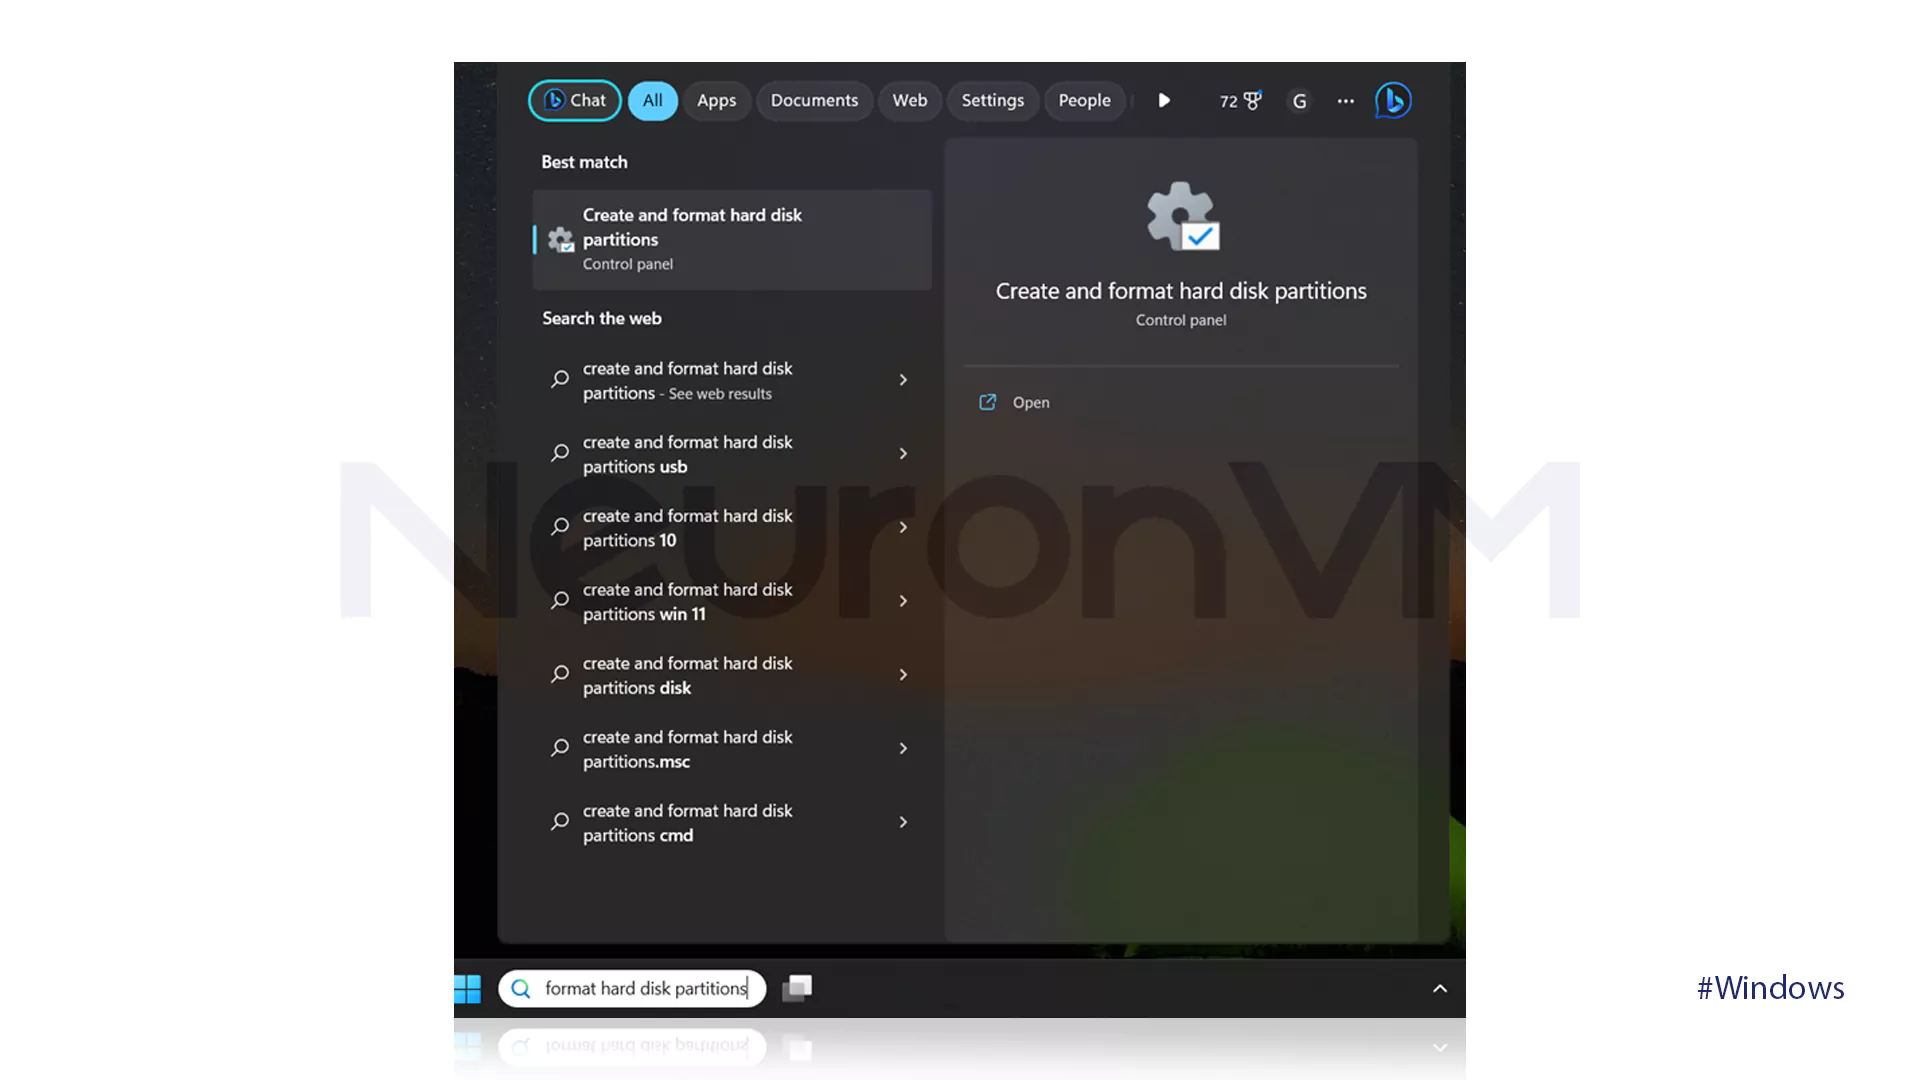
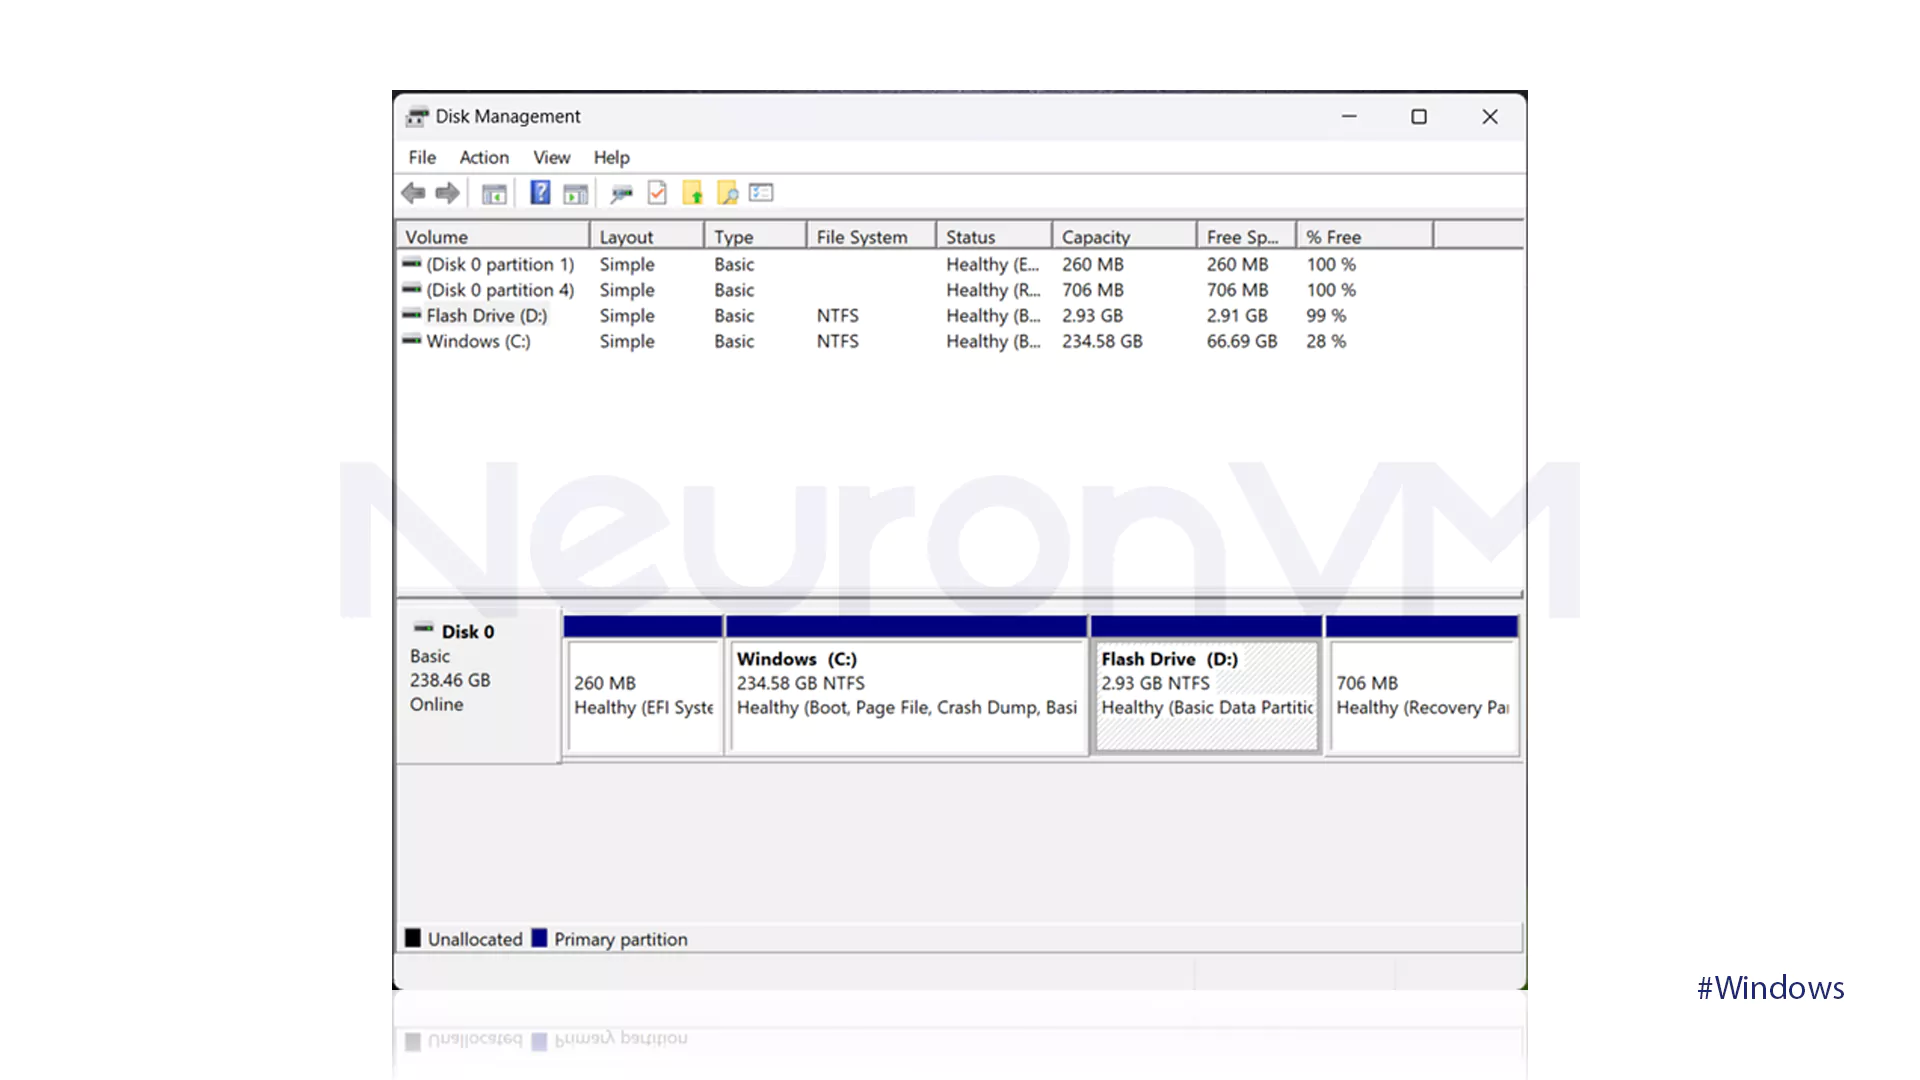
1- Go to the start menu and search Hard Disk partitions. Then Open the shown Panel in the image below.
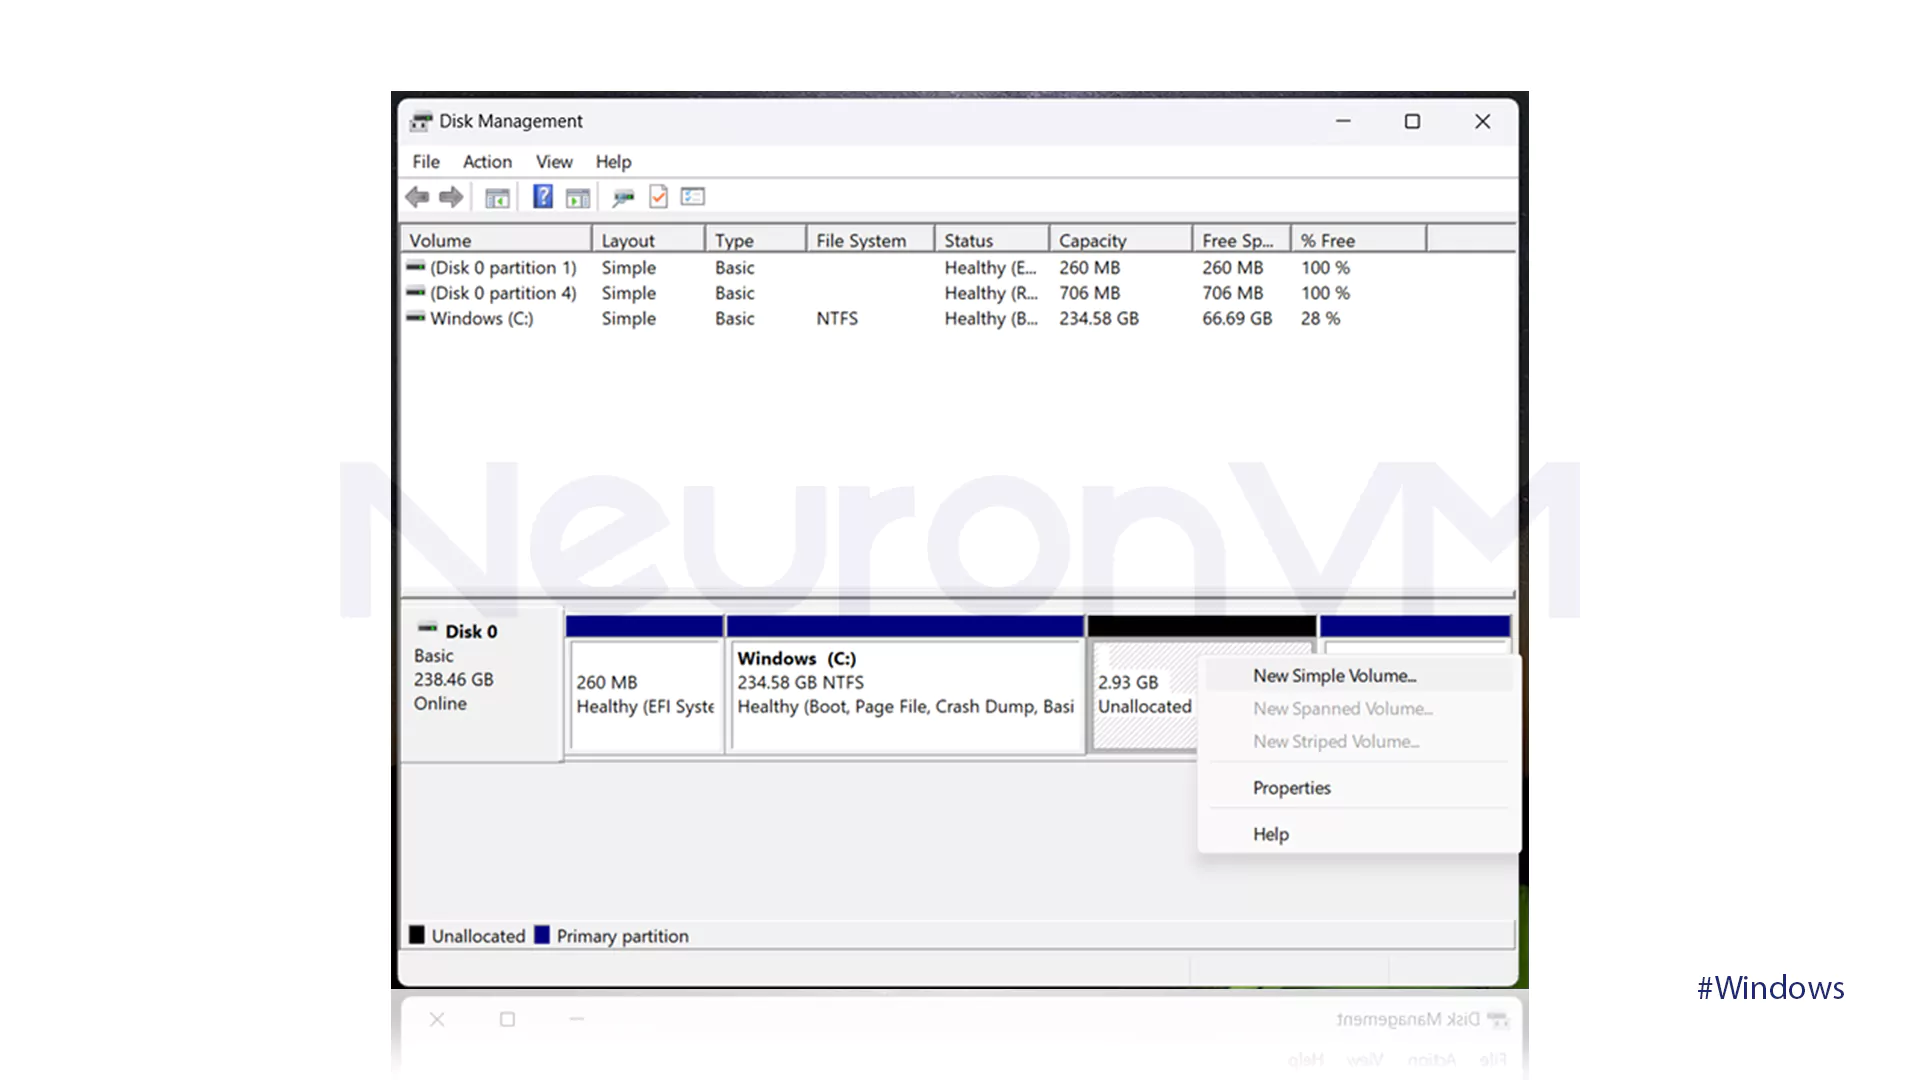
2- Go to the drive with Unallocated space and perform a double-click on it. Then from the drop-down menu, choose the first option shown in the picture below.
3- Set the new partition size, drive letter, file system, and volume label by following the next steps in the New Simple Wizard window.
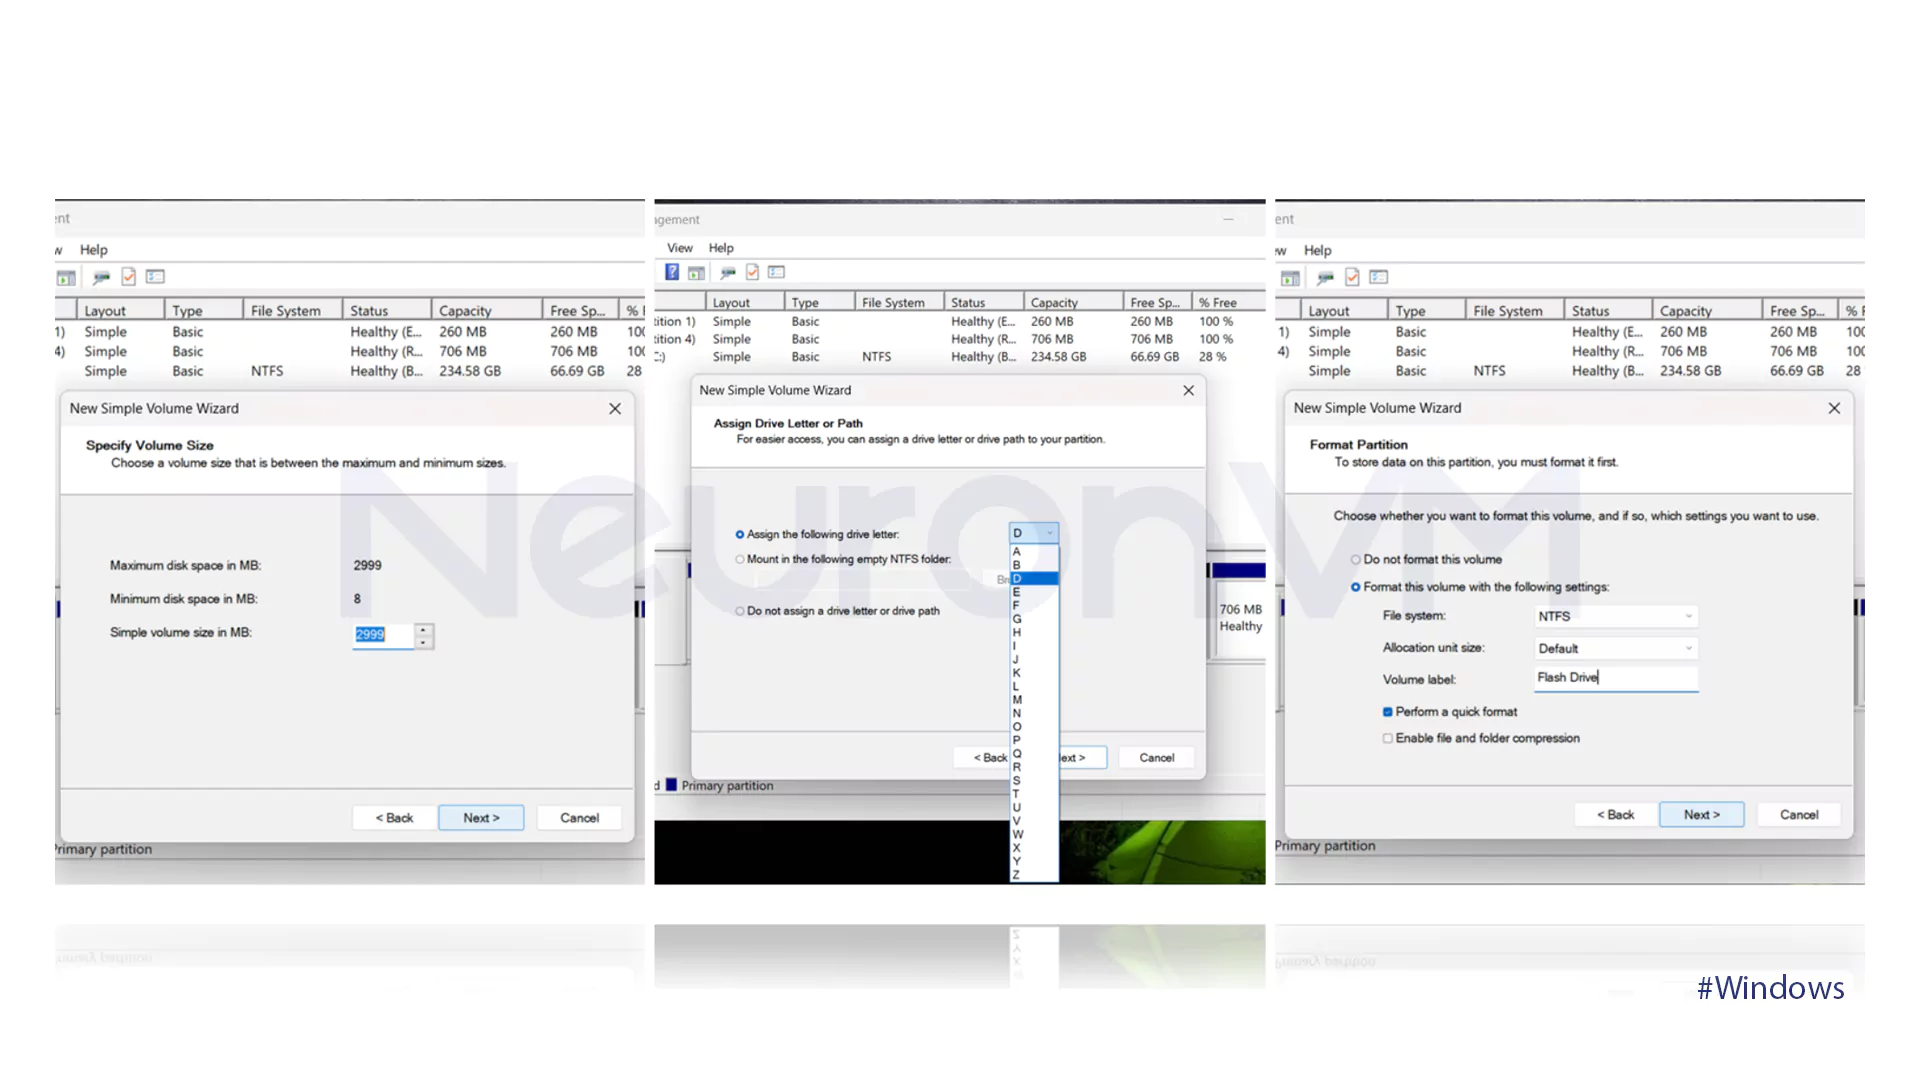
4- Click on Finish to complete the process.
Method 2: Settings App
For users who want to manage their storage space straightforwardly and efficiently, this strategy is perfect. You should use this method if you have free space on your hard drive and wish to quickly and simply build a new partition.
To create a partition in Windows 11 using Settings App, follow the steps below:
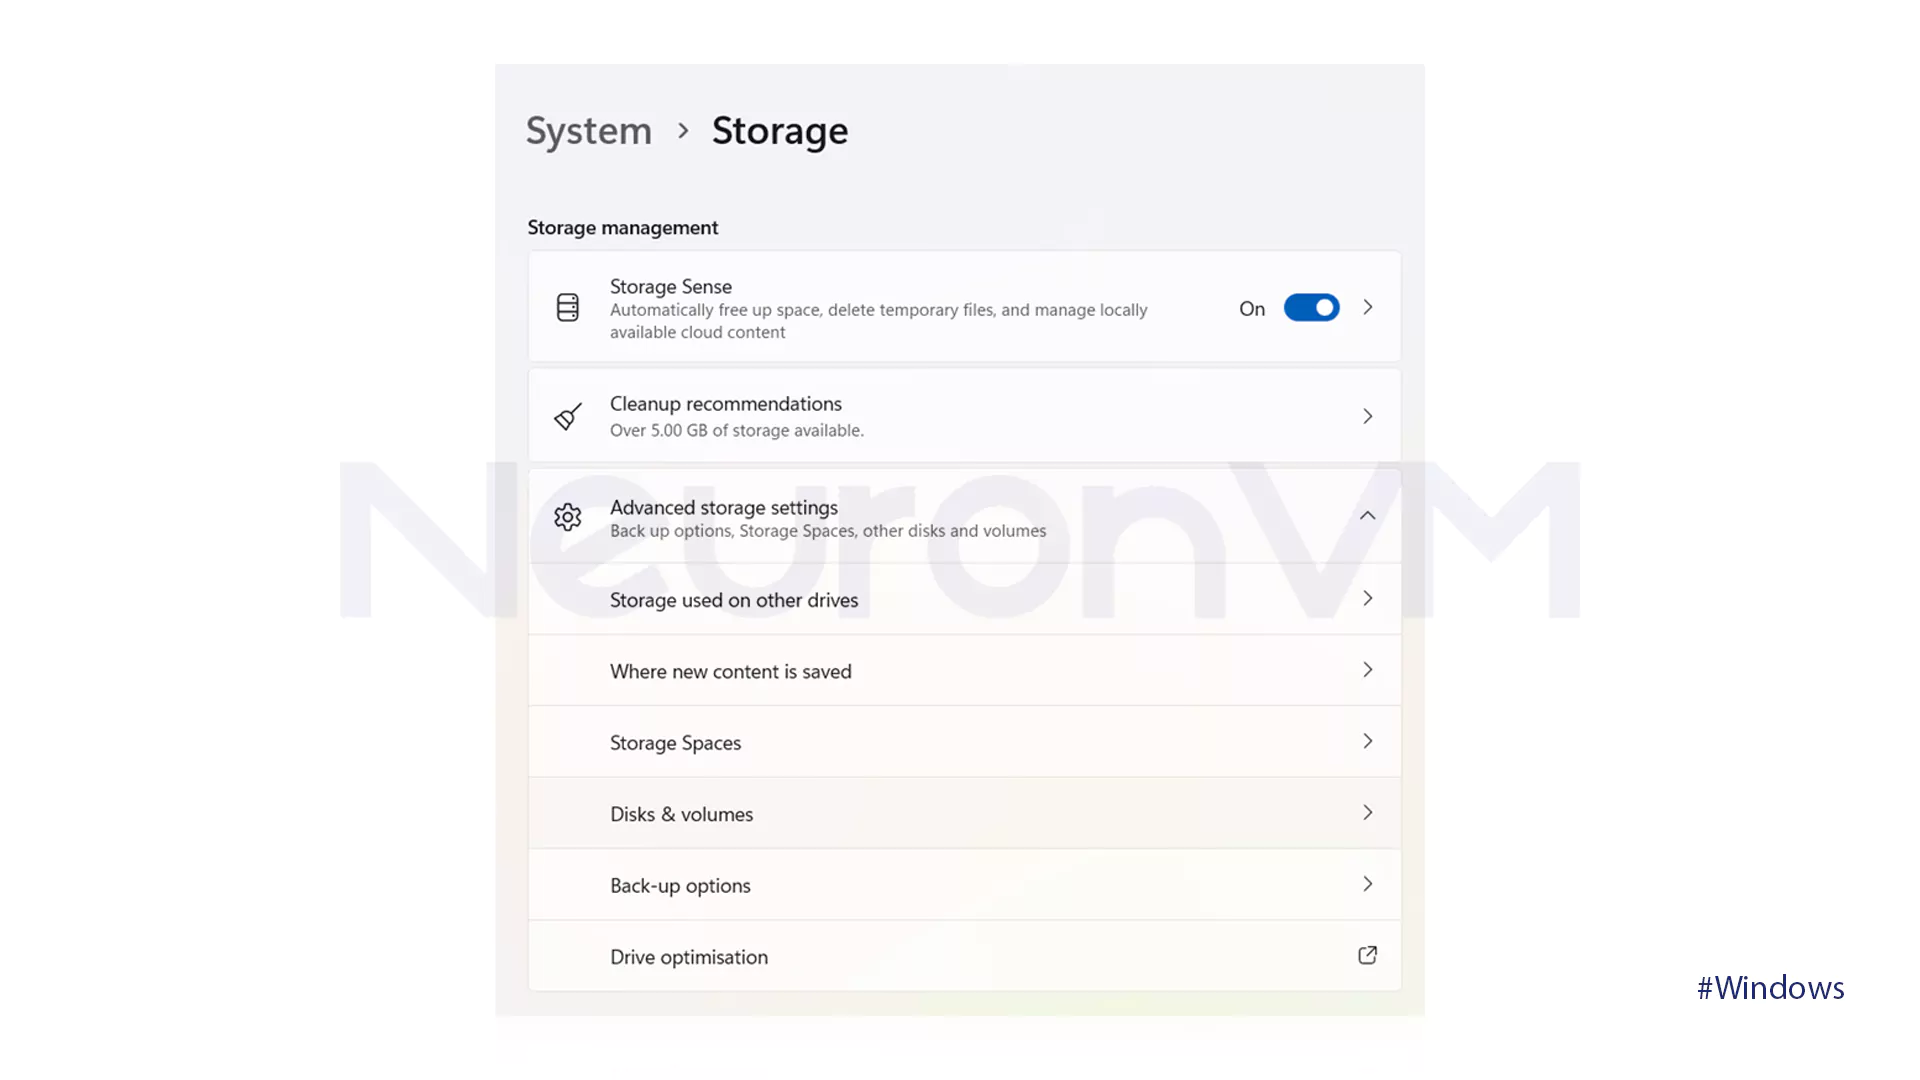
1- On Windows, launch the Settings App and select Storage from the sidebar. From the Advanced Storage Settings, choose the Disk & Volumes option.
2- To create a new partition, choose the HDD or SSD storage. Click Create Volume after locating the Unallocated space.
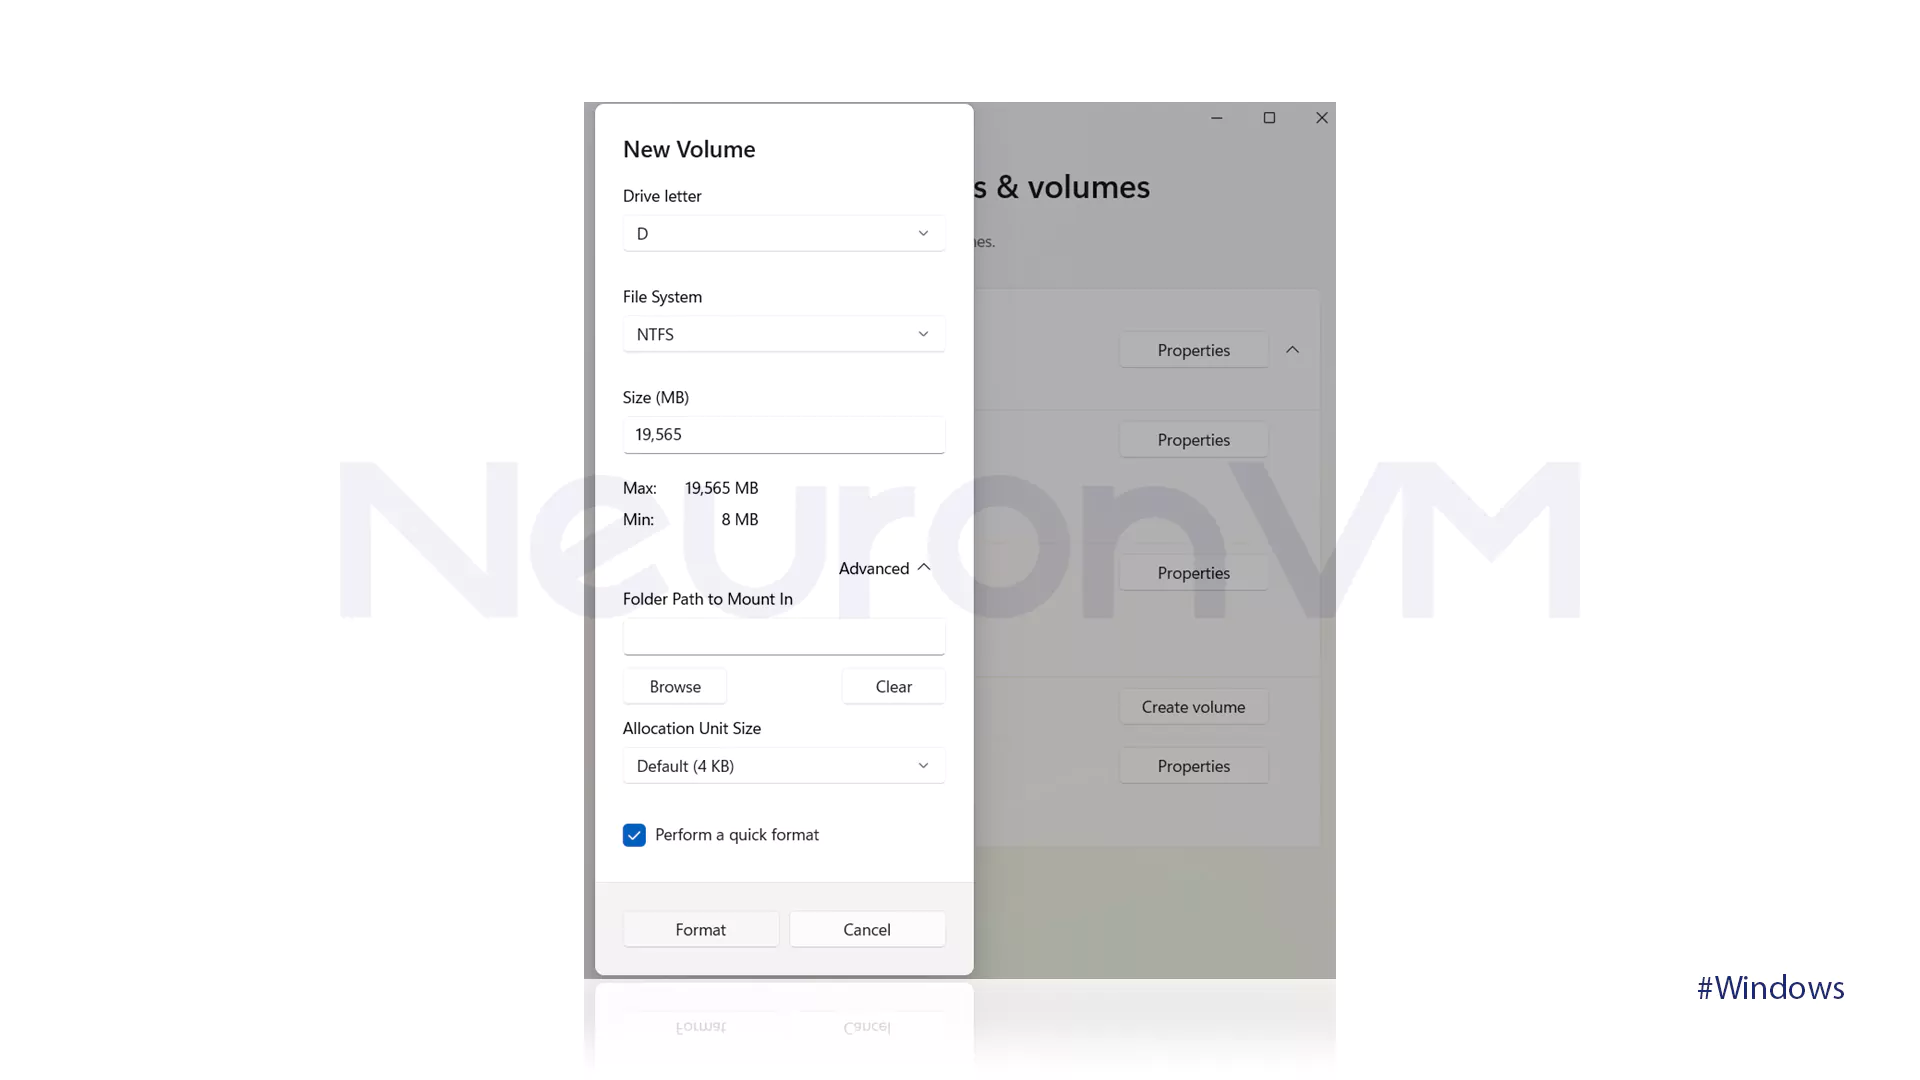
After giving the new partition a name, select a drive letter to enable the partition in File Explorer.
Choose the NTFS file system and indicate the partition’s desired size.
Make sure to check the Perform a quick Format after Selecting Advanced.
To build, format, and prepare the partition for file storage, click Format.
What is Disk Partitioning?
Disk partitioning is to create one or more regions on a hard drive. As a result, numerous separate zones are produced, each of which can be controlled separate zones are produced, each of which can be controlled separately, and the operating system perceives each partition as a separate logical disk. Information about the location and size of partitions is stored in a partition table, which the operating system reads before accessing the data on disk 1. There are two types of partitions:
- Primary Partitions
- Extended Partitions
Advantages of Disk Partitioning
Partitioning has several advantages:
- Advanced-Data Organization
Partitioning logically separates data into separate sections, and allows you to store your Windows operating system, programs, and personal files in different partitions. This prevents data corruption or loss in system crashes, viruses, or software bugs.
- Increased Efficiency
Backup and recovery are made easier by having separate partitions. By doing this, you can avoid data loss corruption due to viruses, software problems, or system crashes. Your important data is assumed to be secure, even if one of the partitions has problems, the other partitions will continue to function normally.
- Protection & Secrecy
When you separate sensitive data into separate partitions, you add a layer of security to your files. To prevent unauthorized users from accessing your personal information, you can define access permissions and encryption for your private partitions.
- Multi-Boot Systems
Partitioning is useful for developers, testers, and users who need to run multiple operating systems on the same computer. Each operating system is placed on its partition and will operate smoothly and independently.
Conclusion
In Windows 11, partitioning your hard drive is a basic procedure that improves your computer experience. The Settings is user-friendly and perfect for quick and simple partitioning but Disk Manager provides more accurate control over partition sizes and characteristics. With the help of this article, we hope you can quickly increase hard drive space, organize your data, and ultimately use Windows 11 without any issues.
You might like it

Centos Tutorials
How to Disable SELinux on CentOS (Best Practices)

Almalinux Tutorials
How to Install cPanel on AlmaLinux


cPanel Tutorials
1+0 Ways to Change max_execution_time in CPanel
