How to Connect to VPS on Windows 11
 8m
8m
 0 comments
One of the tutorials that can help you understand how to connect to a VPS on Windows 11 is this tutorial that is now in front of you. In this tutorial, we will explain why remote connection to virtual servers is important and why all users are looking for ways and methods to connect to a VPS on Windows 11. So if you are one of those people who have recently purchased a VPS service and do not know how to connect to it! Join the tutorial section of the NeuronVM website to talk about connecting to a VPS server via remote desktop and read the benefits of implementing this feature on Windows 11 systems.
What is a VPS and why should we use it for remote connections on Windows?
A VPS is actually a physical server for better resource management with acceptable security in a shared environment that, thanks to a virtualization technology, divides server resources (CPU, RAM, storage) between multiple virtual servers. Also, the following are some of the reasons that can make using a VPS on Windows 11 more attractive to us, which it is not bad to take a look at before starting the installation and connection steps:
1- A VPS on Windows 11 can easily allow you to remotely access your system and data on it and run your desired programs.
2- Having a VPS on Windows 11 offers users a lot of control and flexibility by giving them root access to the server, allowing them to install any software they need, set up custom firewall rules, and manage their server environment to its best advantage.
3- VPS is easily scalable and you can upgrade your plans without worry if you need more resources.
4- Compared to shared hosting, VPSs offer better performance and greater security, while at the same time keeping their service prices more affordable than dedicated servers.
5- Using a VPS on Windows 11 creates isolated environments for testing applications without affecting the live production environment, along with advanced configuration options that will meet your needs.
6- Organizations that install VPS on Windows 11 can create a Windows application environment for creating applications that easily take advantage of Windows-based software.

The simplest steps on how to connect to a VPS on Windows 11
On systems running Windows 11, there are two ways to connect to a VPS on Windows. But before you start with either, you need to have information like the IP address and connection protocol on hand:
Method 1: Using the Start icon in the menu
In this method, after entering the system space, first click the Start option in the lower left corner and search for the word Remote Desktop.
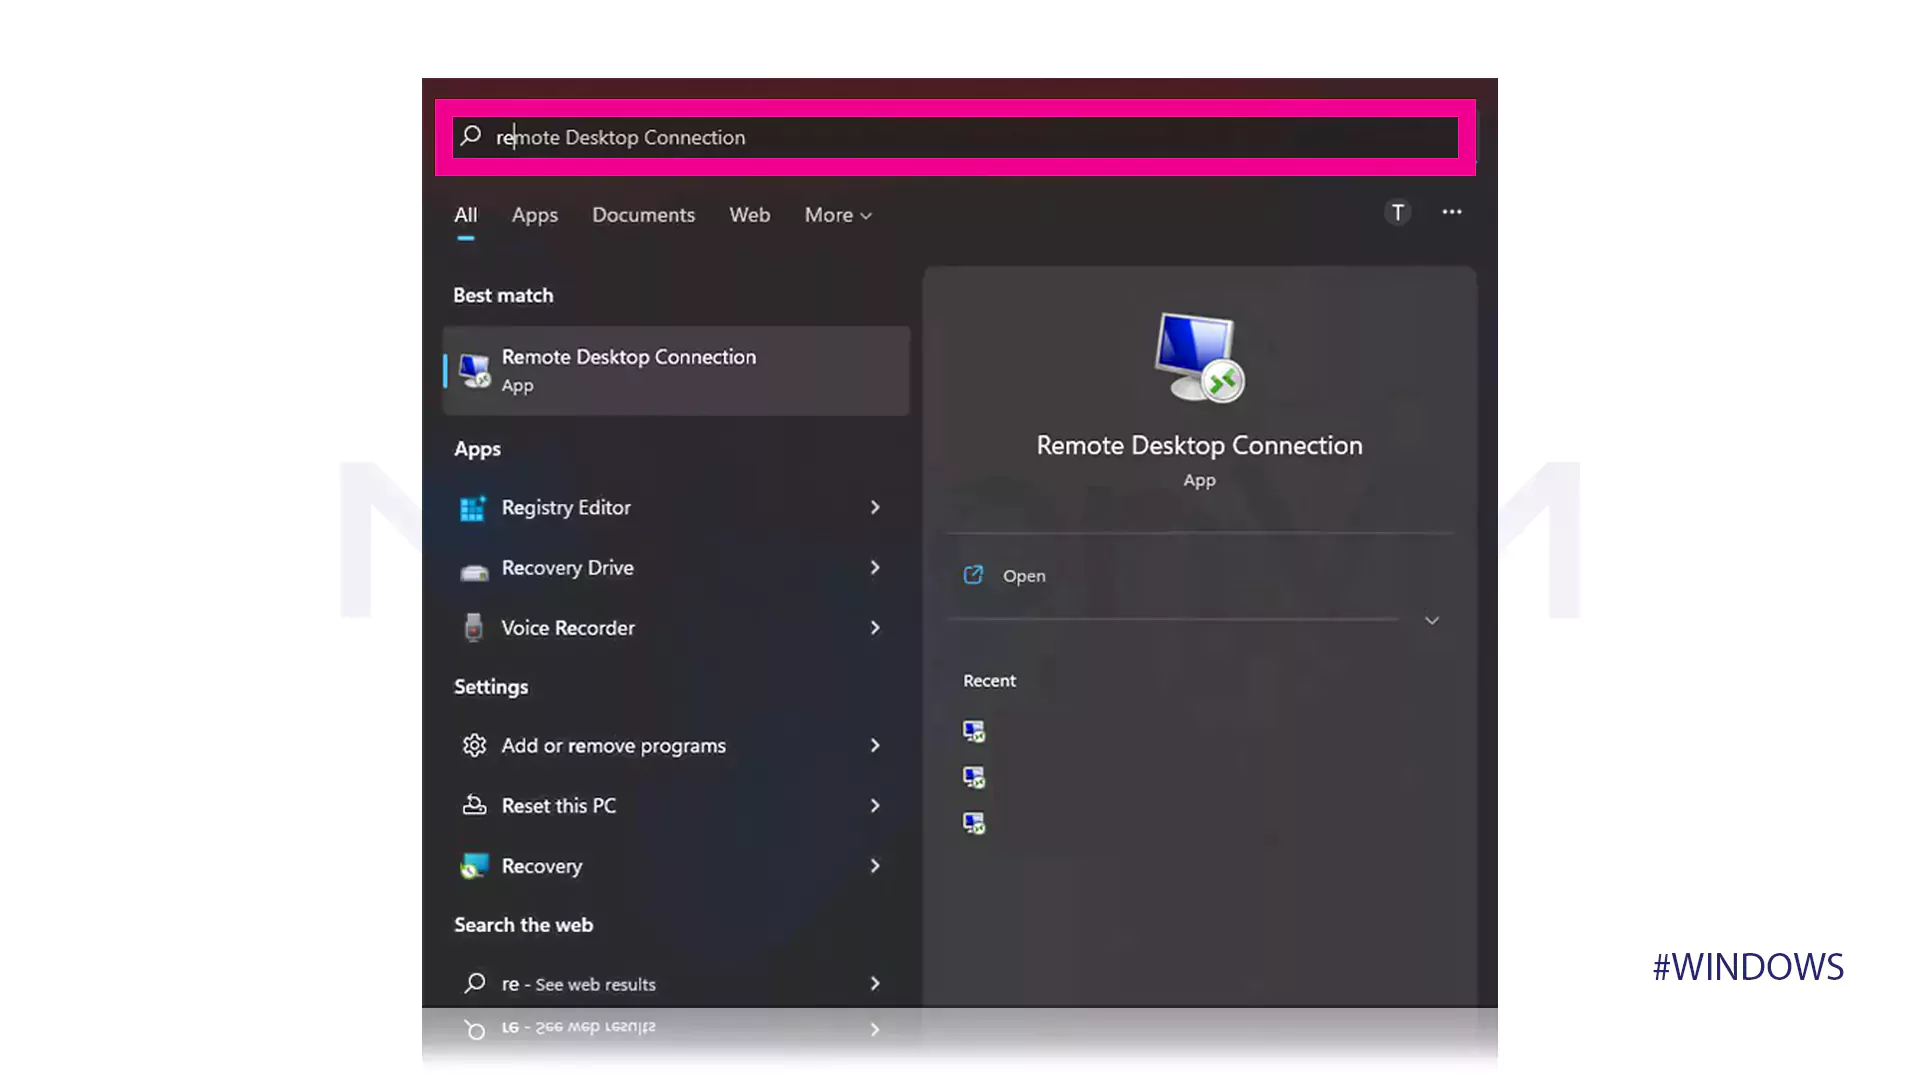
This will display a menu as shown below where you must enter the information and IP address of your VPN.
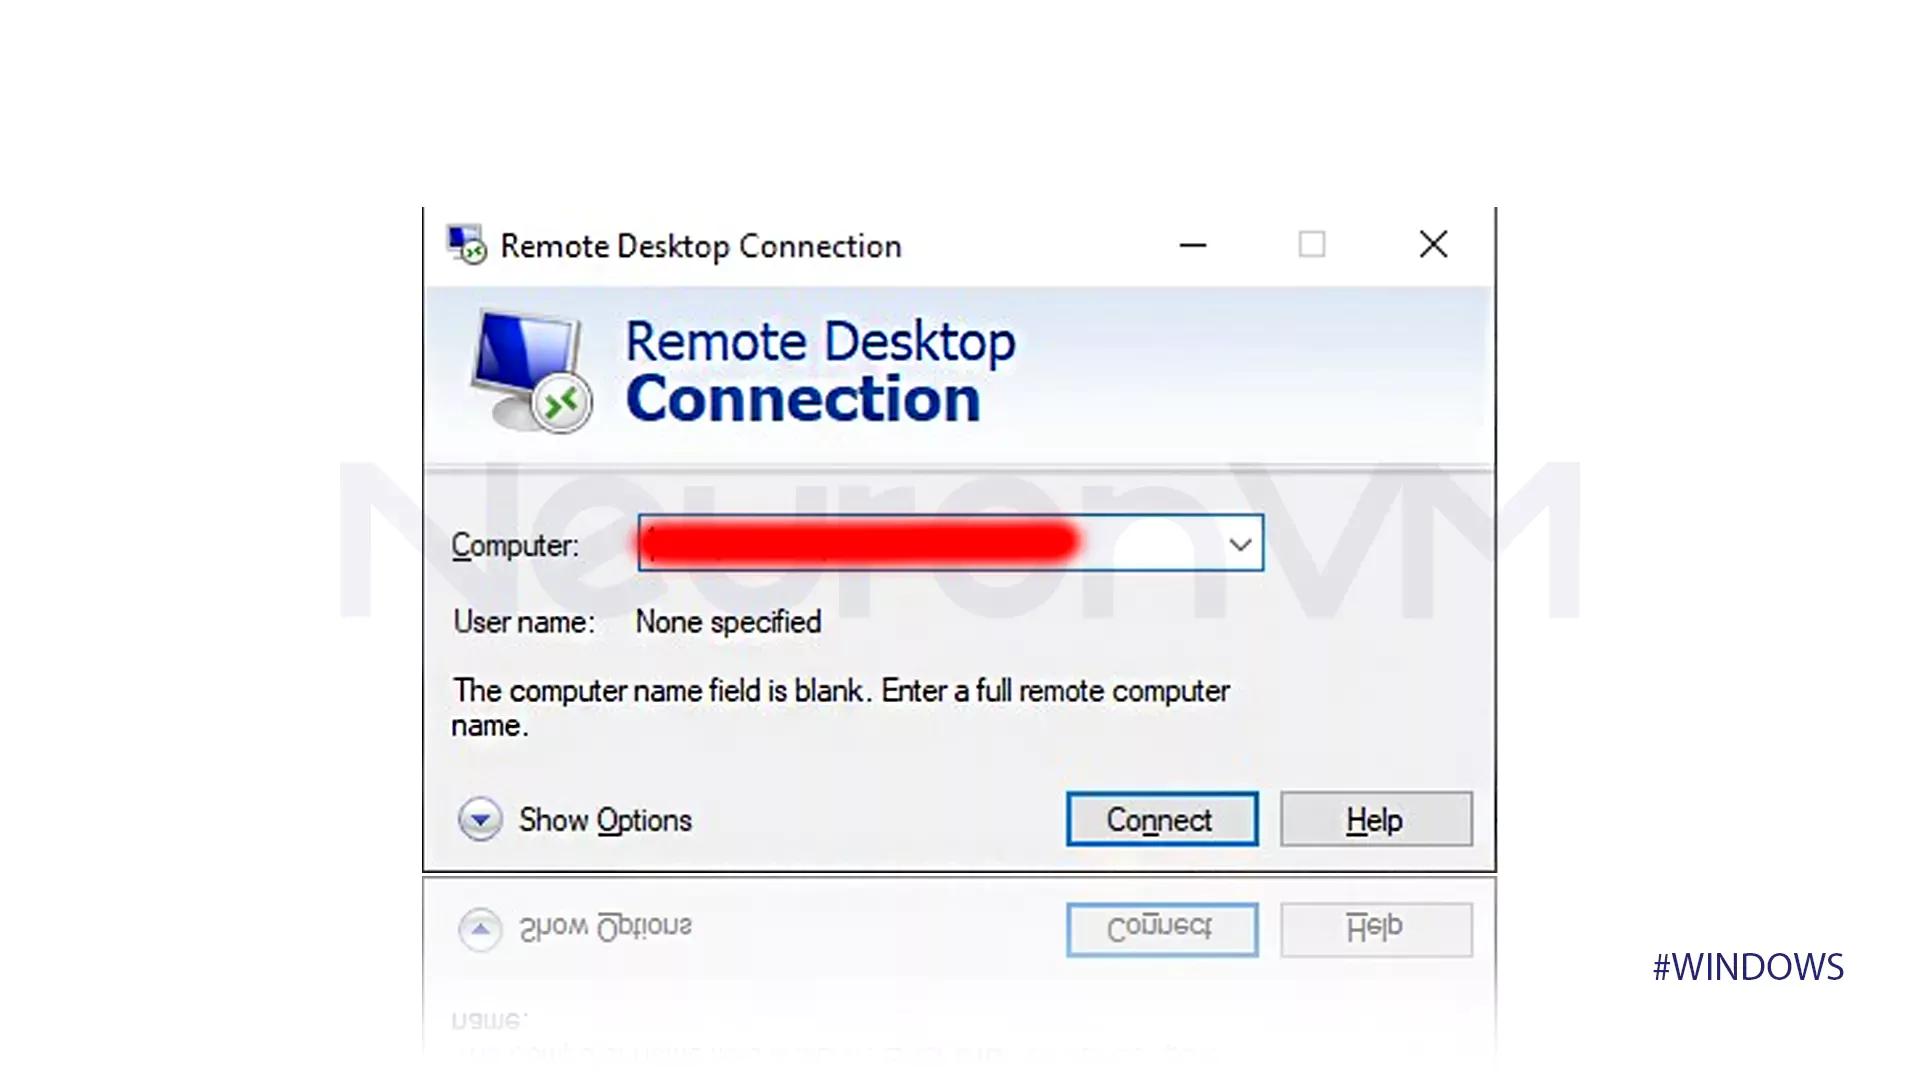
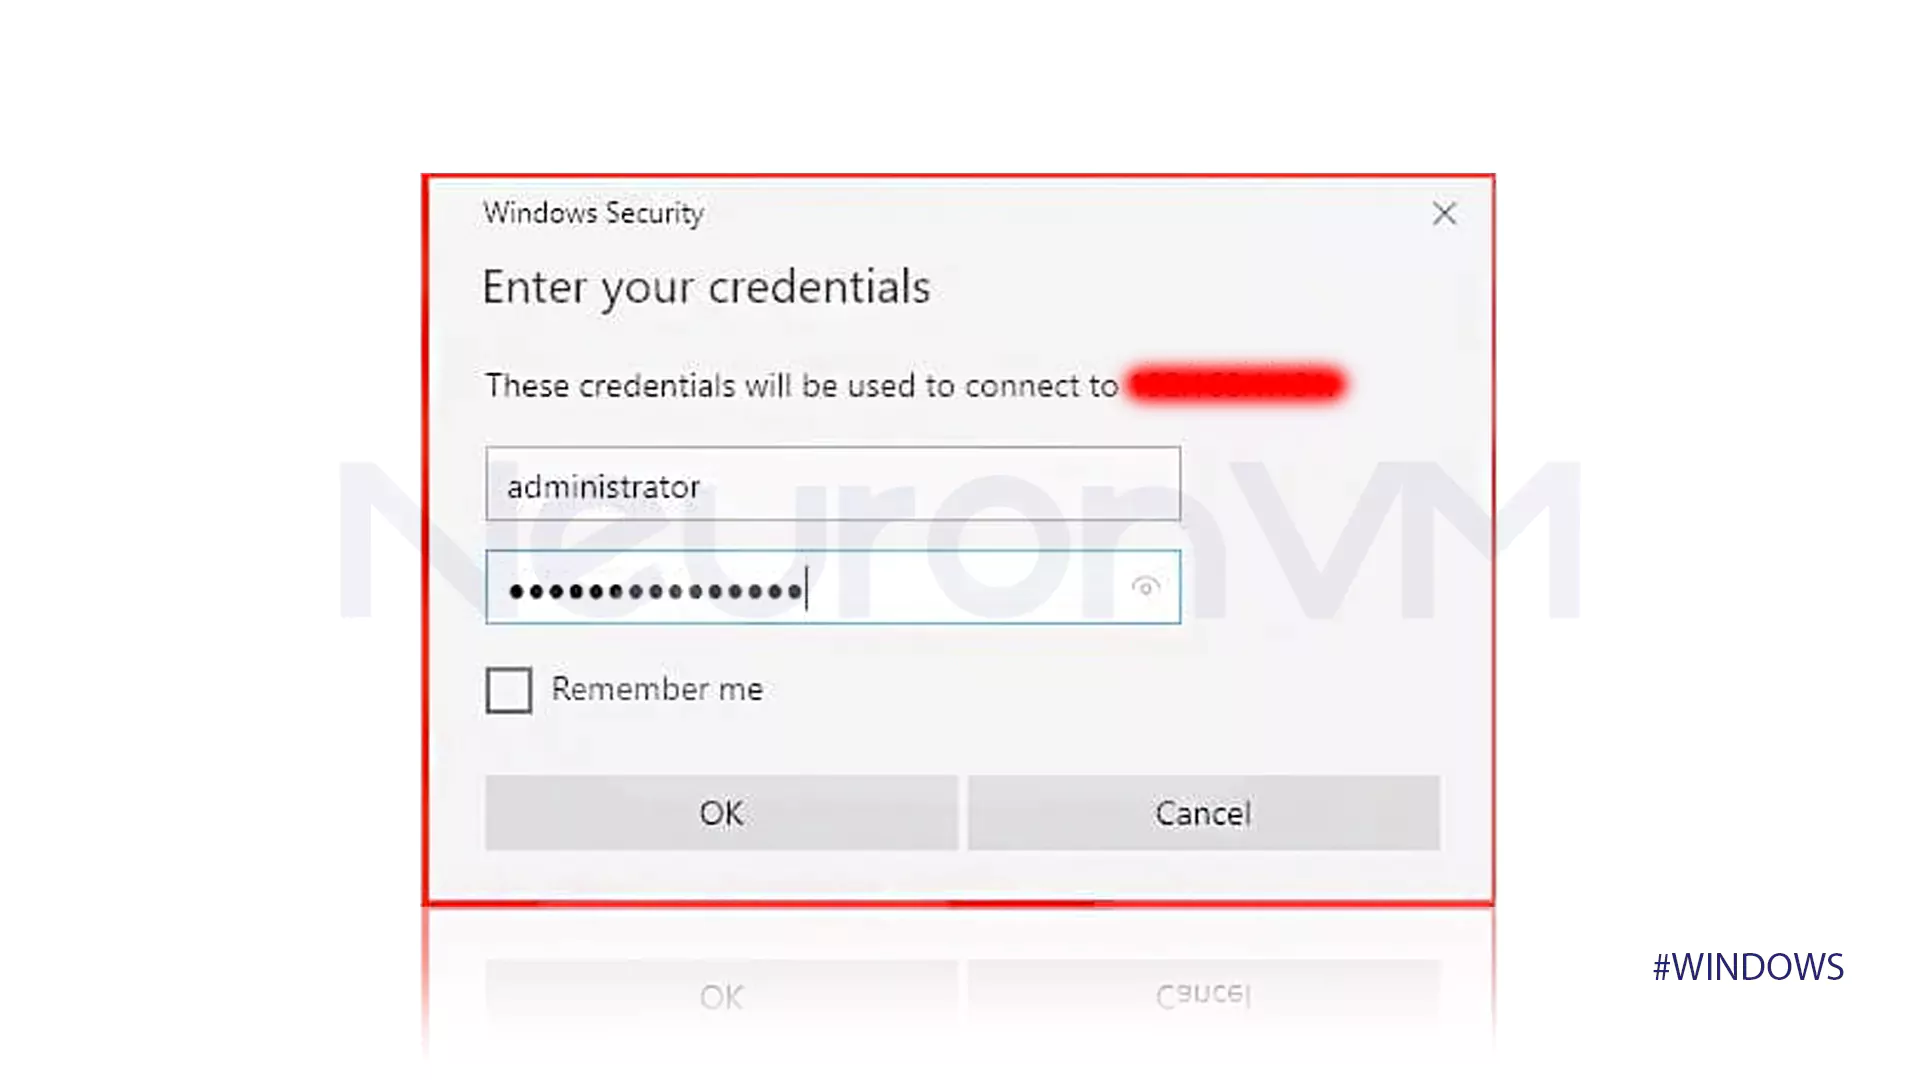
Once you have entered the IP address and port correctly, the following menu will appear. At this point, you need to enter the User name and password information, which in most cases is recommended to use Administrator for the User name, and finally click OK.
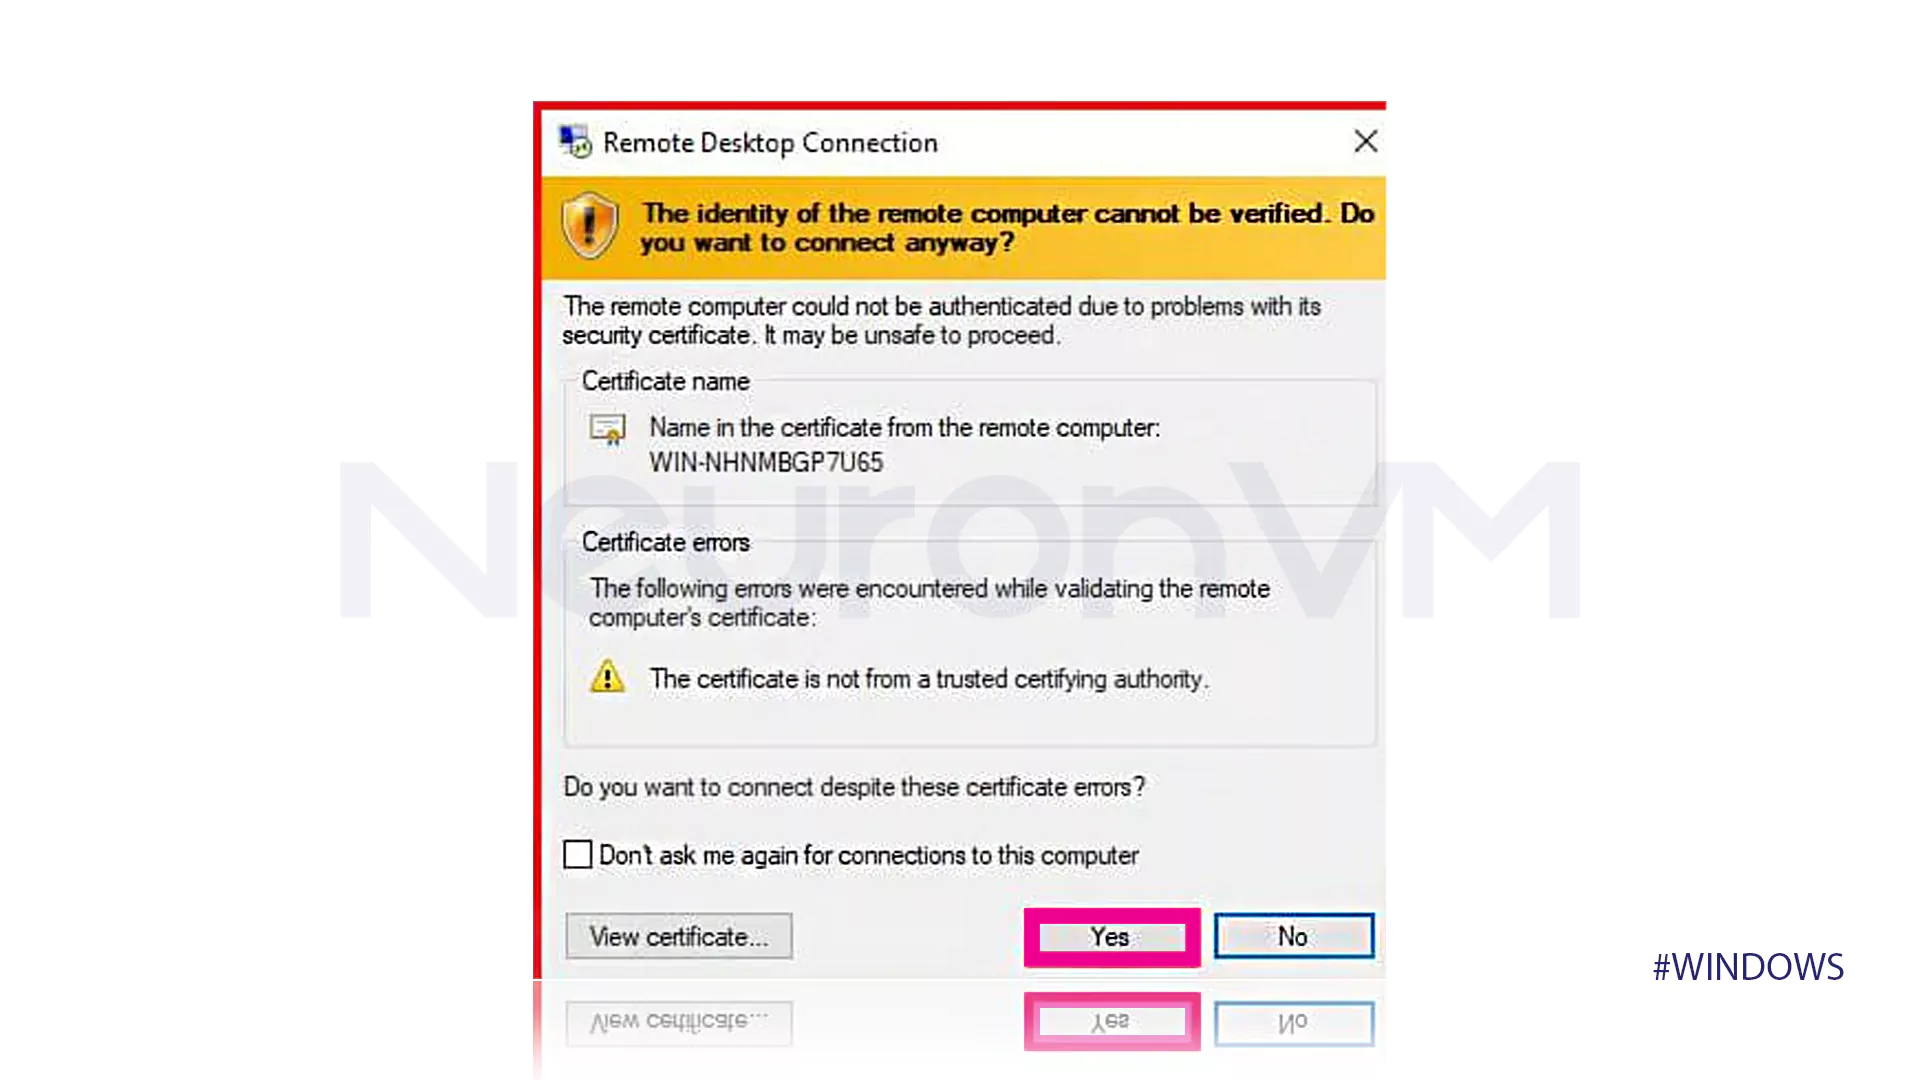
The following message is an SSL certificate warning message that you can read and check the box next to “Don’t ask me again to connect to this computer” and click the necessary confirmation to complete the VPS connection on Windows 11.
Method 2: Using Win+R keys
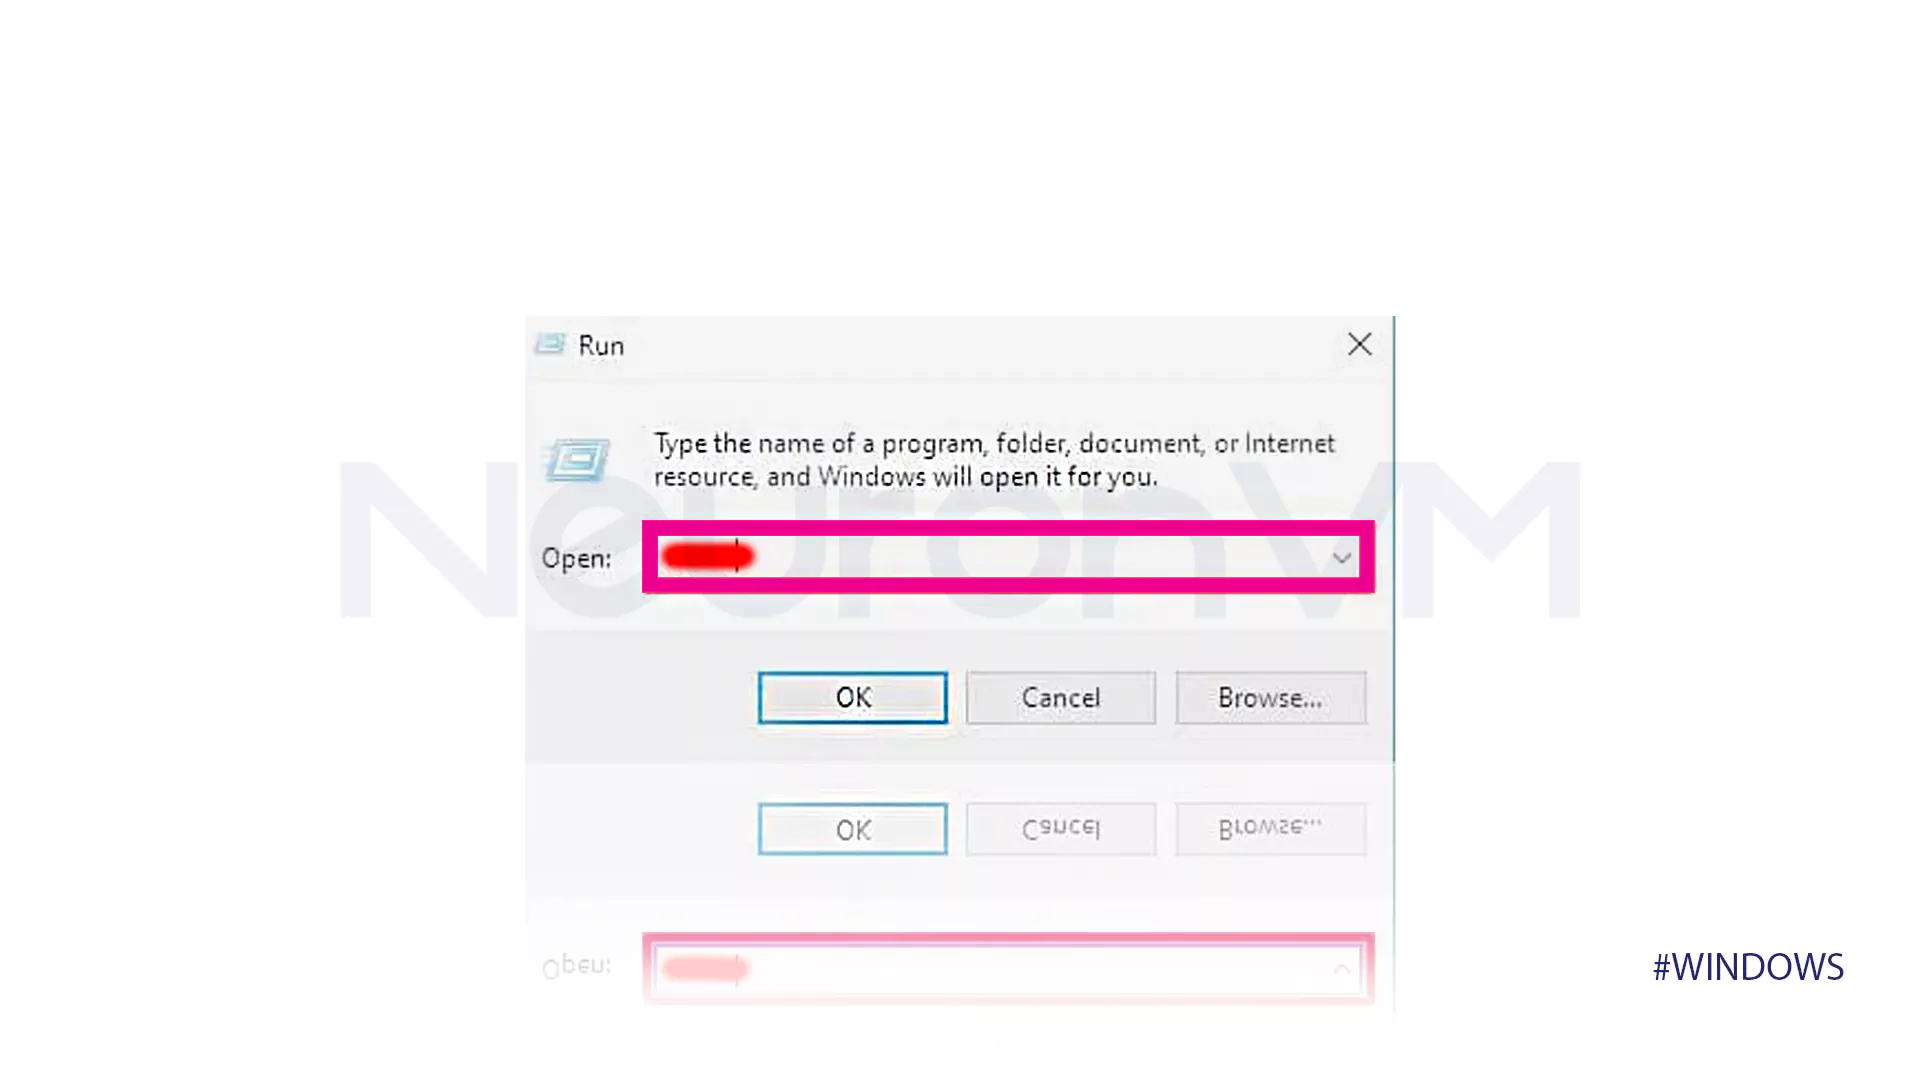
The only difference between the second method and the first method is its first step. In the method, you must press the Win+R keys simultaneously to write the phrase mstsc in the opened window and click OK. After that, you can proceed with the steps in method one in order.
Some important points to consider when choosing a VPS provider
Choosing the right VPS and having a good experience connecting Windows 11 to a VPS depends on many factors, the following can be some of these important points:
1- Complete and accurate evaluation of server specifications and data center capabilities.
2- Providing features tailored to your needs such as regular backups, security measures, and user-friendly interfaces or control panels, etc.
3- Reviewing the prices of VPS services due to their consistency with the features provided and their economic value.
4- The ability to scale and upgrade resources if needed to meet management needs after installing a VPS on Windows 11.
Conclusion
In this tutorial, we explained the concept of VPS along with the benefits it offers for managing systems remotely, and then we solved the problem of connecting to purchased hosting services by mentioning the steps on how to connect to a VPS in Windows 11. The importance of choosing a host in providing this type of service, here are some tips that you can use to choose the most suitable VPS provider and manage resources.
You might like it


