


How to Install Malwarebytes on Windows VPS (Step-by-Step)

 12m
12m
 0 comments
 Print
Print
In today’s world, where most businesses rely on virtual private servers (VPS) to host websites, online stores, and even conduct financial transactions, security has gone from being an option to a necessity. Any disruption to a VPS can mean lost customers and even serious financial losses. Many popular antiviruses are designed for personal systems and are not effective in VPS environments, where hardware resources are more limited and services are more sensitive. This is where Malwarebytes on windows sets itself apart because it’s lightweight, fast, and equipped with behavior detection technology for malware and zero-day threats. In this guide, we’ll walk you through installation and usage, as well as real-world experiences and expert tips to help you see why Malwarebytes can be the difference between a secure server and a vulnerable one.
Why Your VPS Deserves Malwarebytes Protection
Malware detection: It can detect many viruses and malicious tools that common antiviruses miss.
Sensitive data protection: Stops others from stealing your personal or work details.
A secure environment for business: It is a secure environment, especially if you use a VPS for financial matters or storing important information.
Get Your VPS Protected: Step-by-Step Malwarebytes on Windows Setup
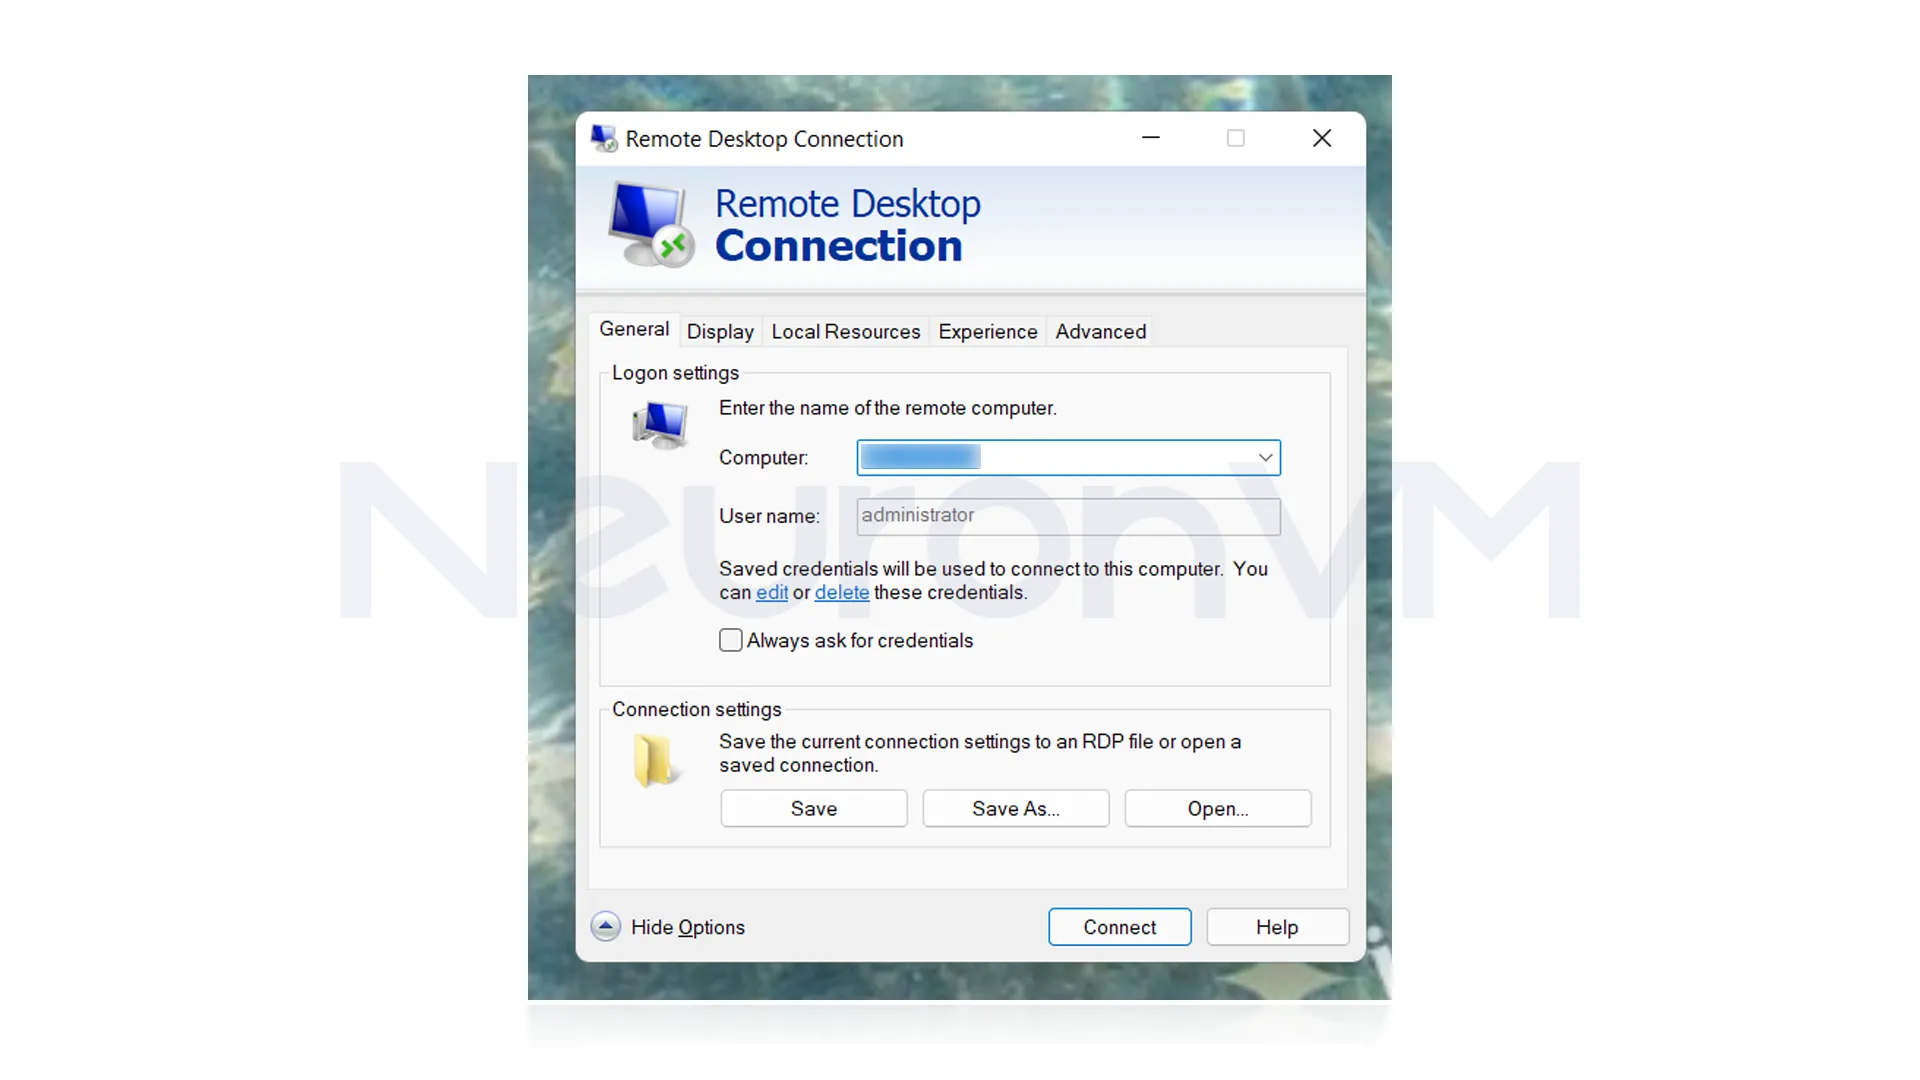
Step 1: Log in to Your VPS
Connect to your Windows server via Remote Desktop Connection, then simply search for this phrase in the Start menu.
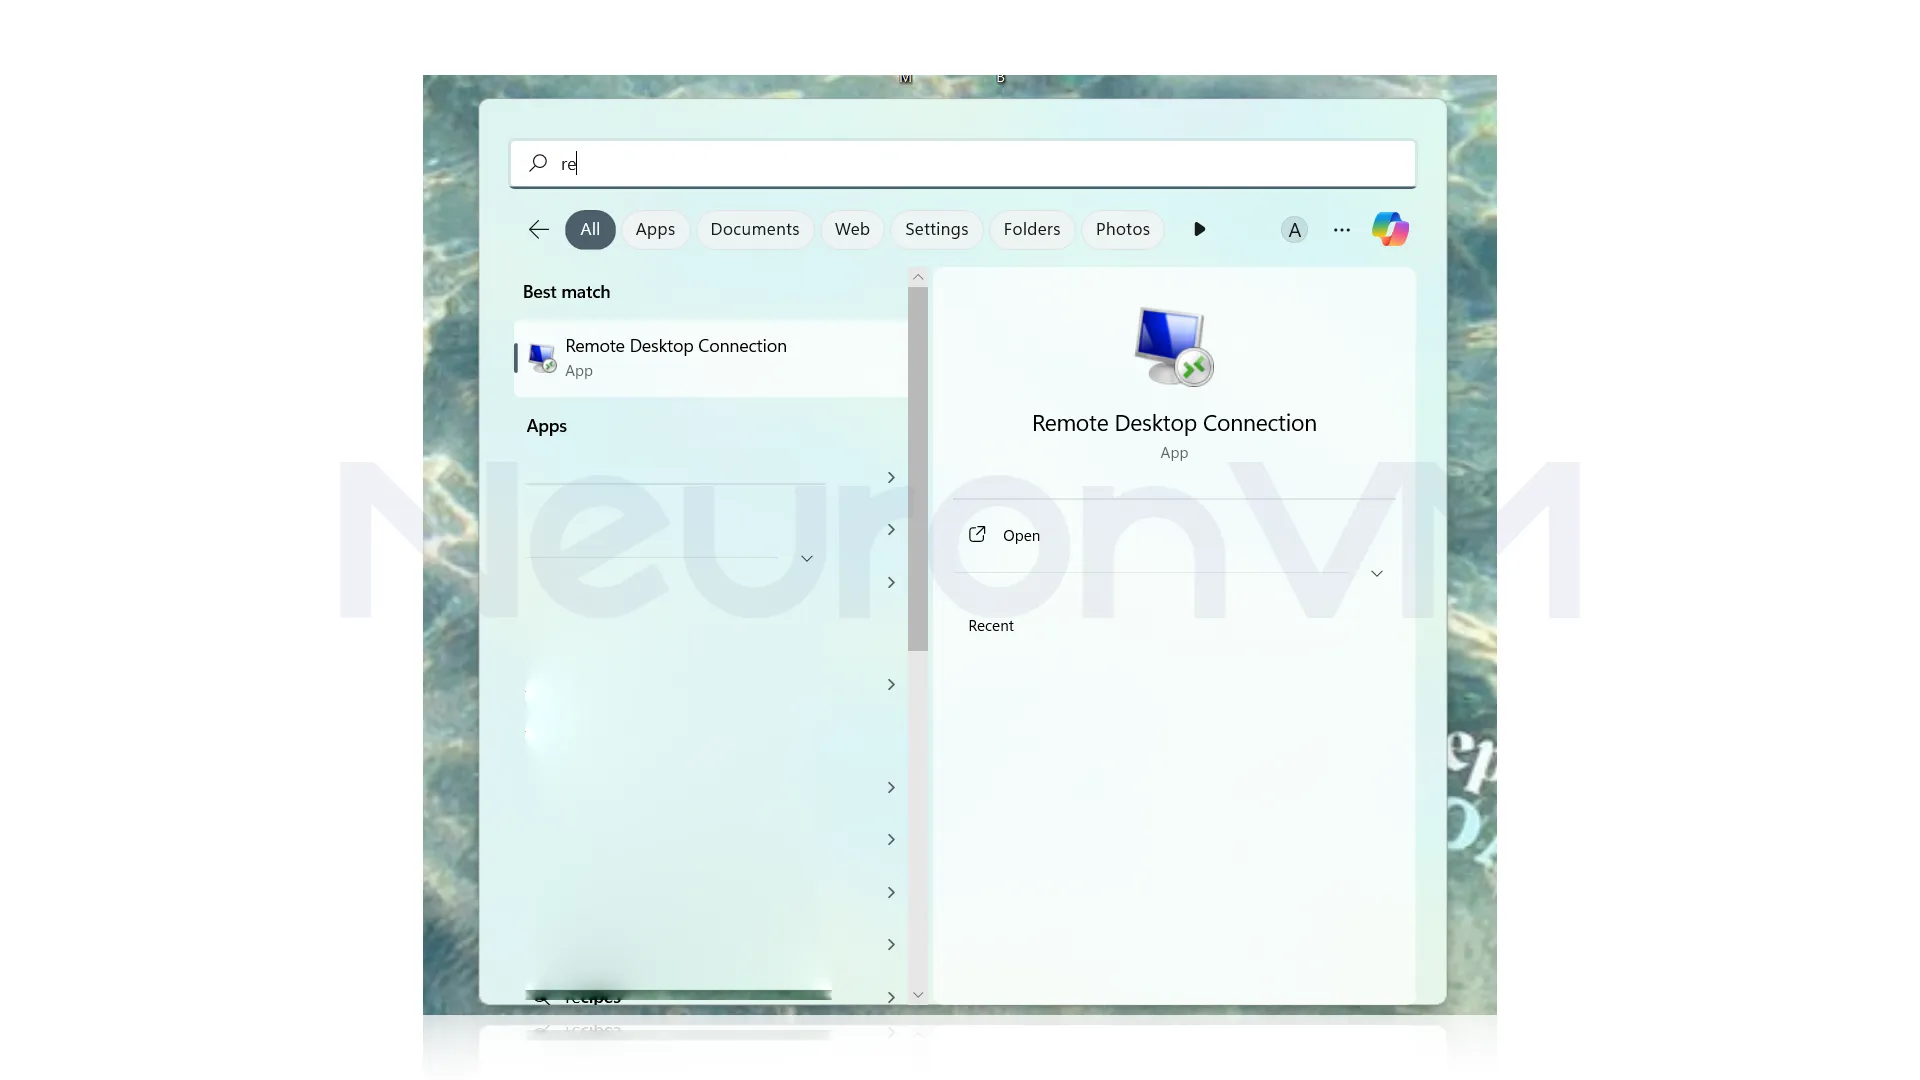
Then enter your desired IP along with the password to log in to the server:
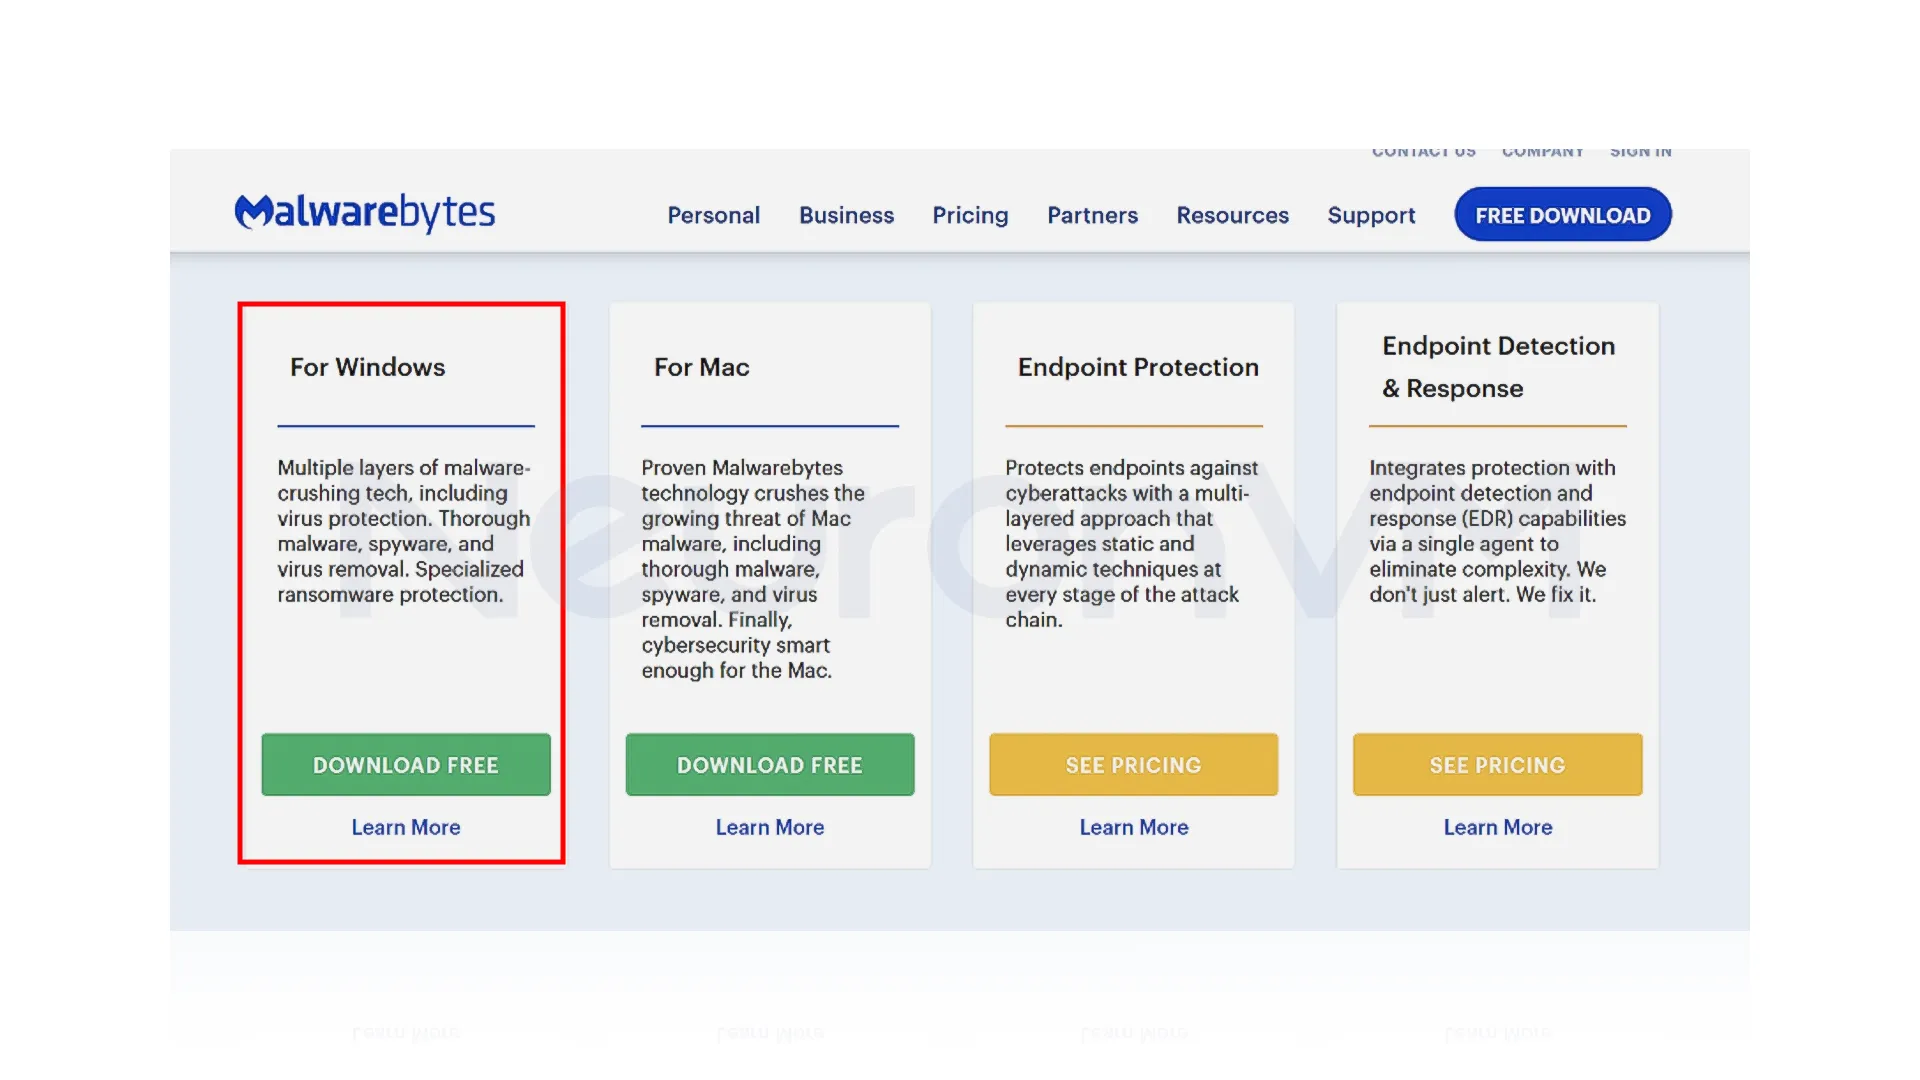
Step 2: Download Malwarebytes
Open your browser, go to the official Malwarebytes website, and download the latest version for Windows. Click on Download Free.
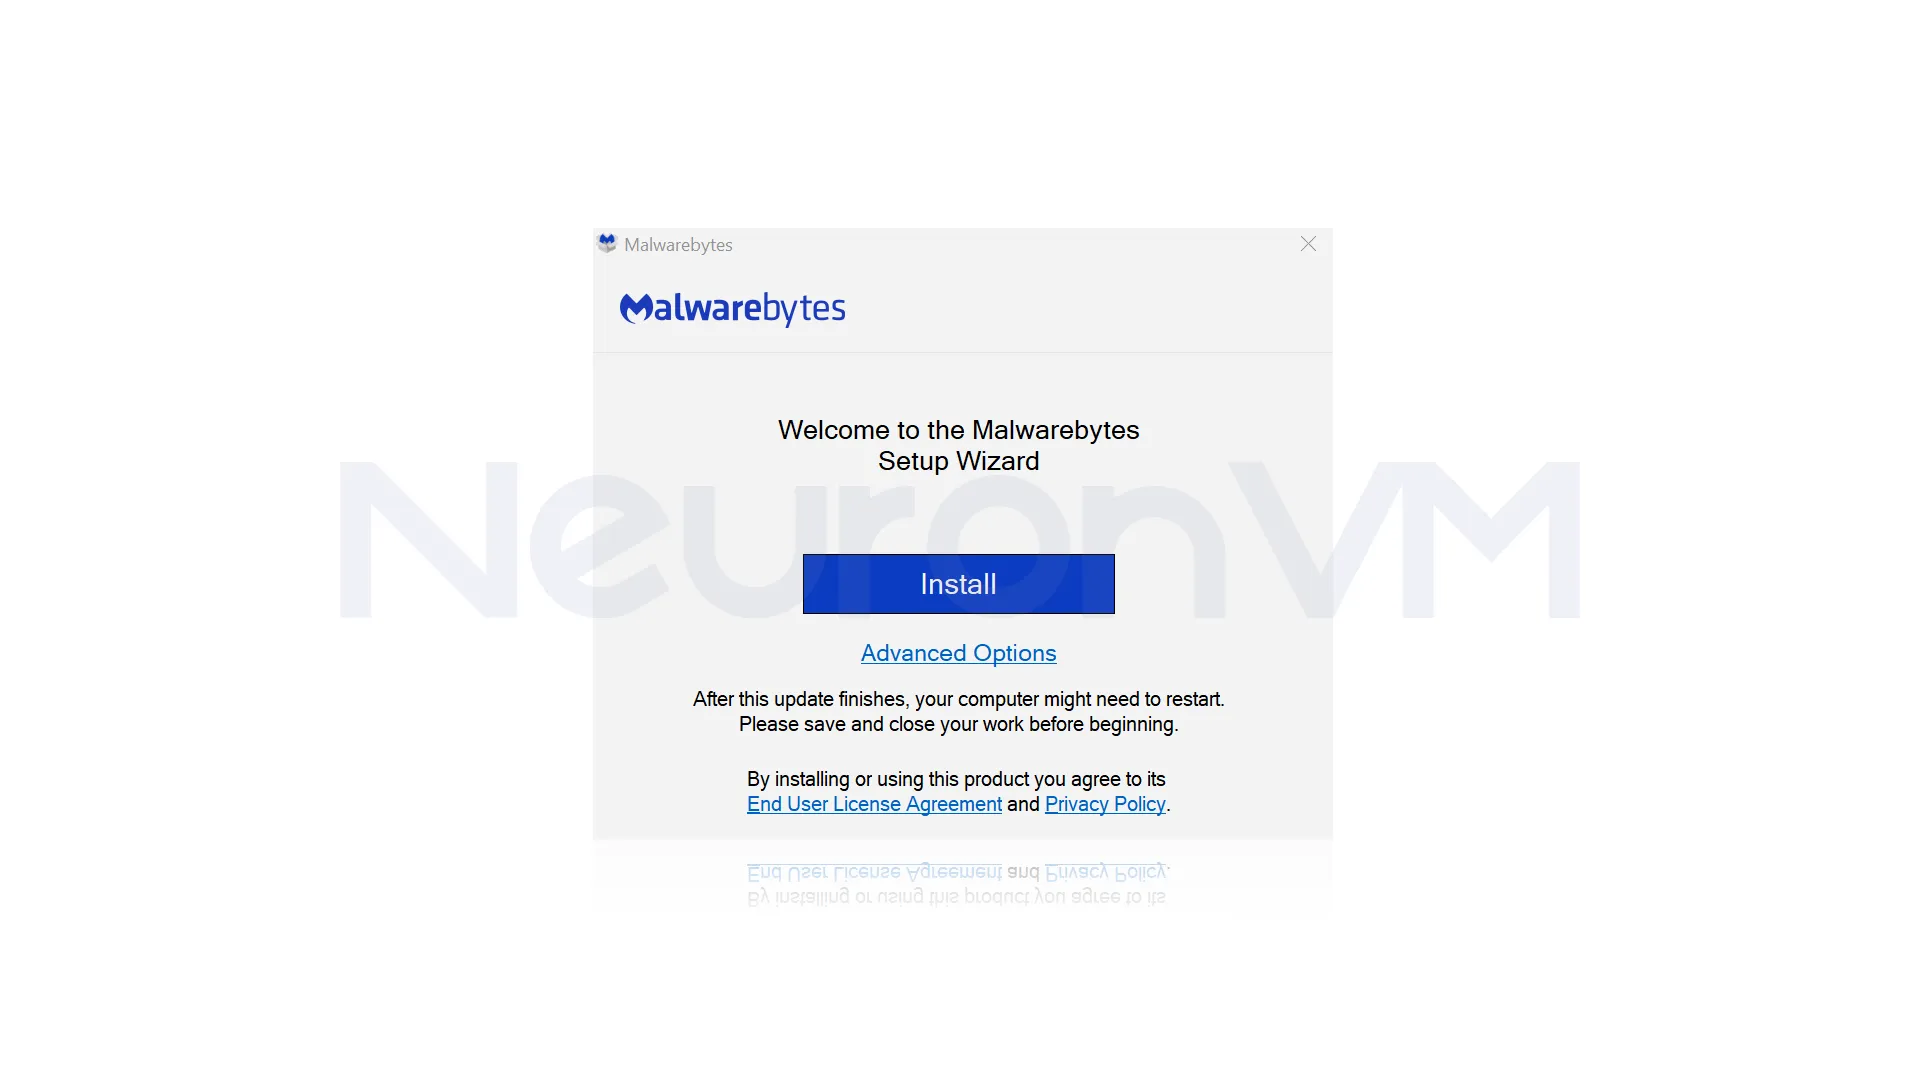
Step 3: Run the installer
Open the Downloads folder and double-click on the MBSetUp.exe configuration file. To install Malwarebytes after the User Account Control pop-up window opens, you must click Install:
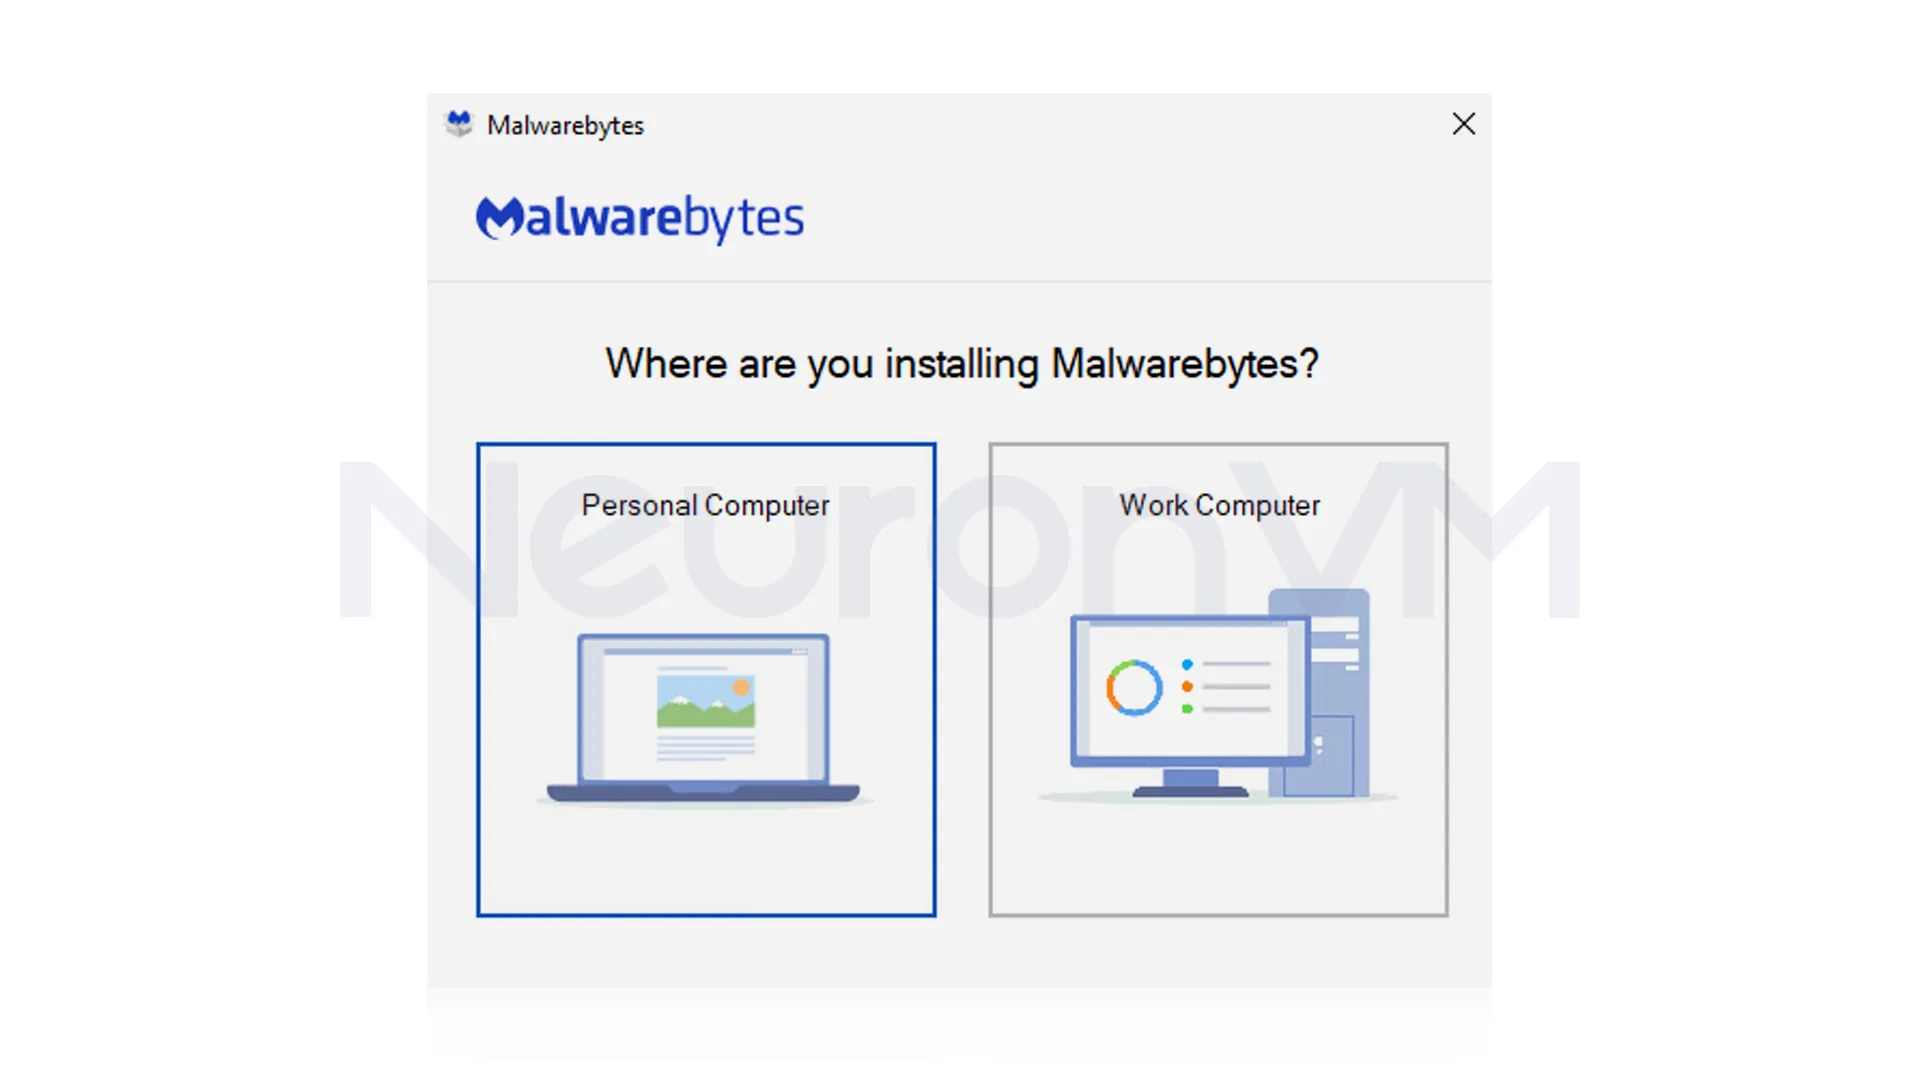
Step 4: Choose Your Setup
In the following window, you will be asked where you are installing Malwarebytes? If you are using your device in a non-business environment, select the Personal computer. But if you use your device in a business environment, choose the Work computer:
Agree to the User License Agreement and click on Agree and Install:
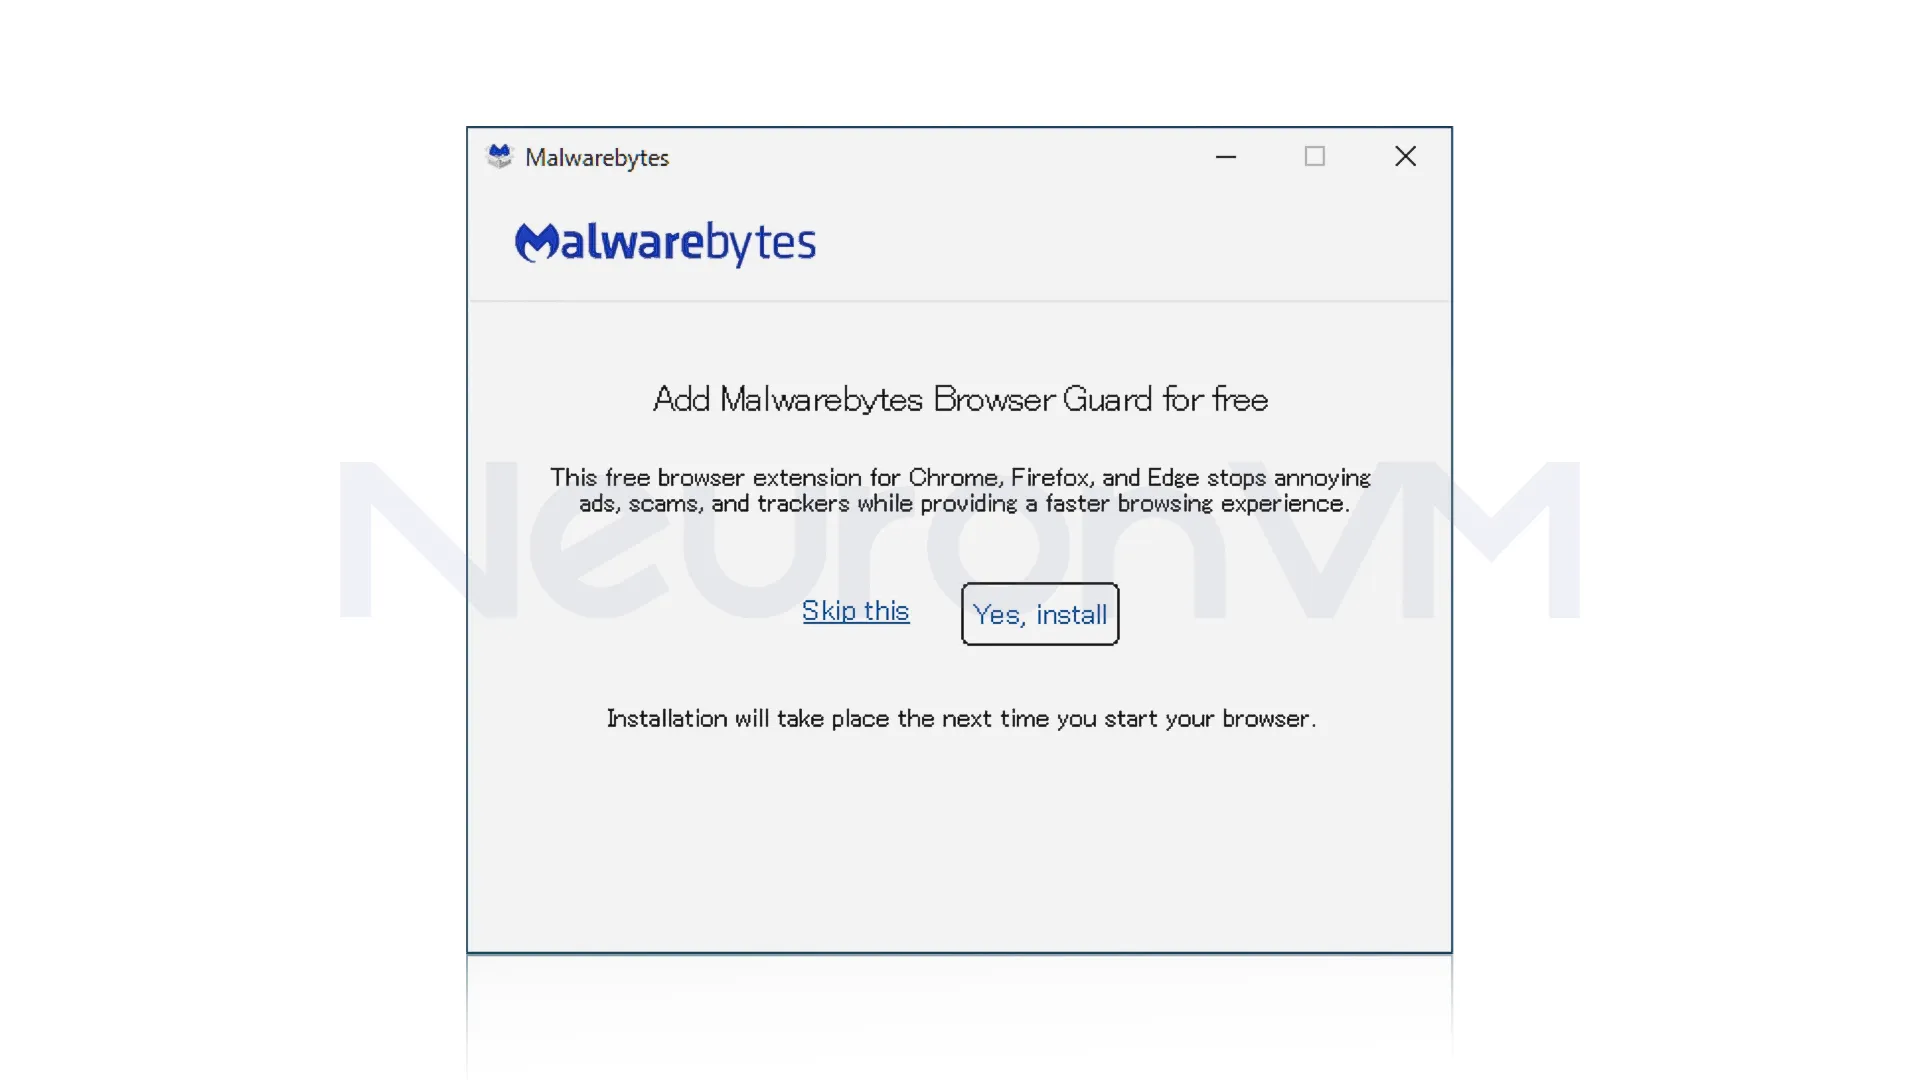
If you want to change the installation location, click Advanced Options.
Then click on start. If you have selected Work computer in the previous step, the Malwarebytes dashboard for Business will be displayed.
Step 5: Activate Malwarebytes
Choose one of the three options: “Buy now“, “Activate Subscription“, or “Maybe later“:
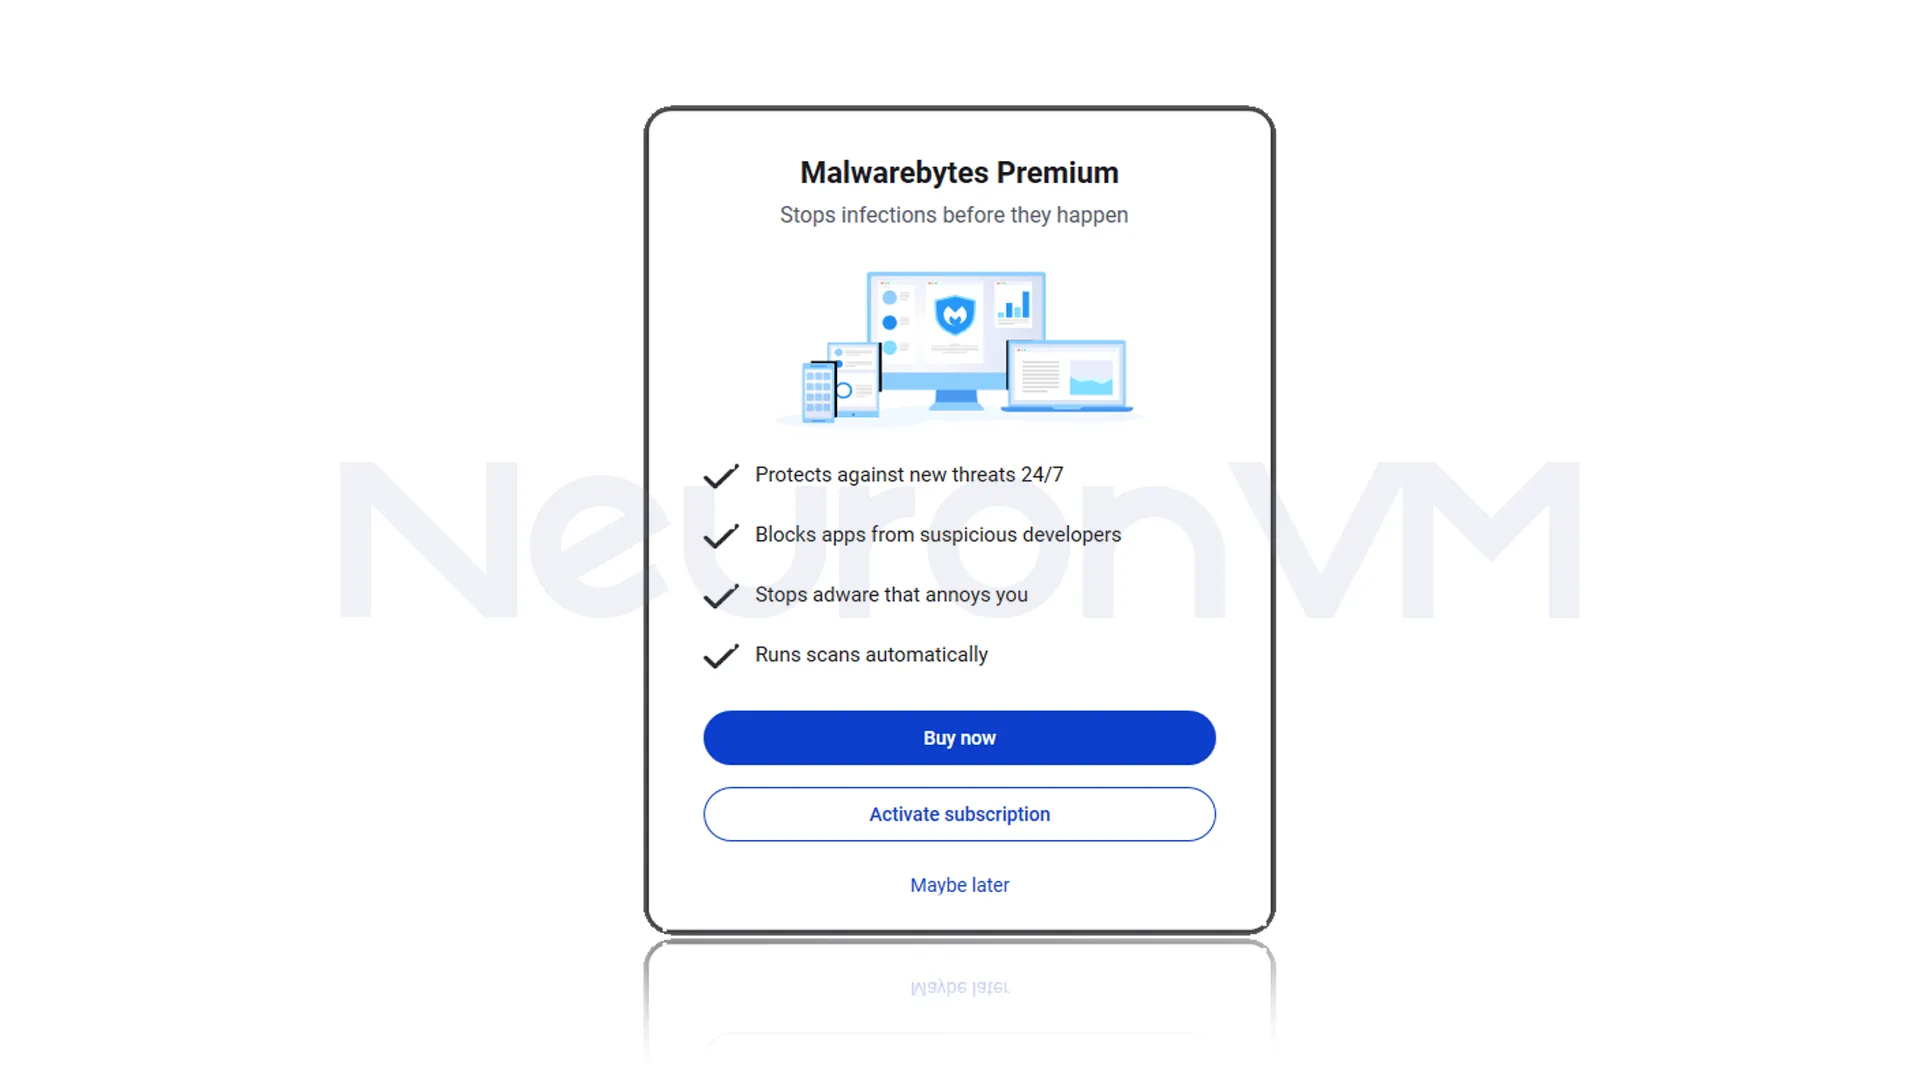
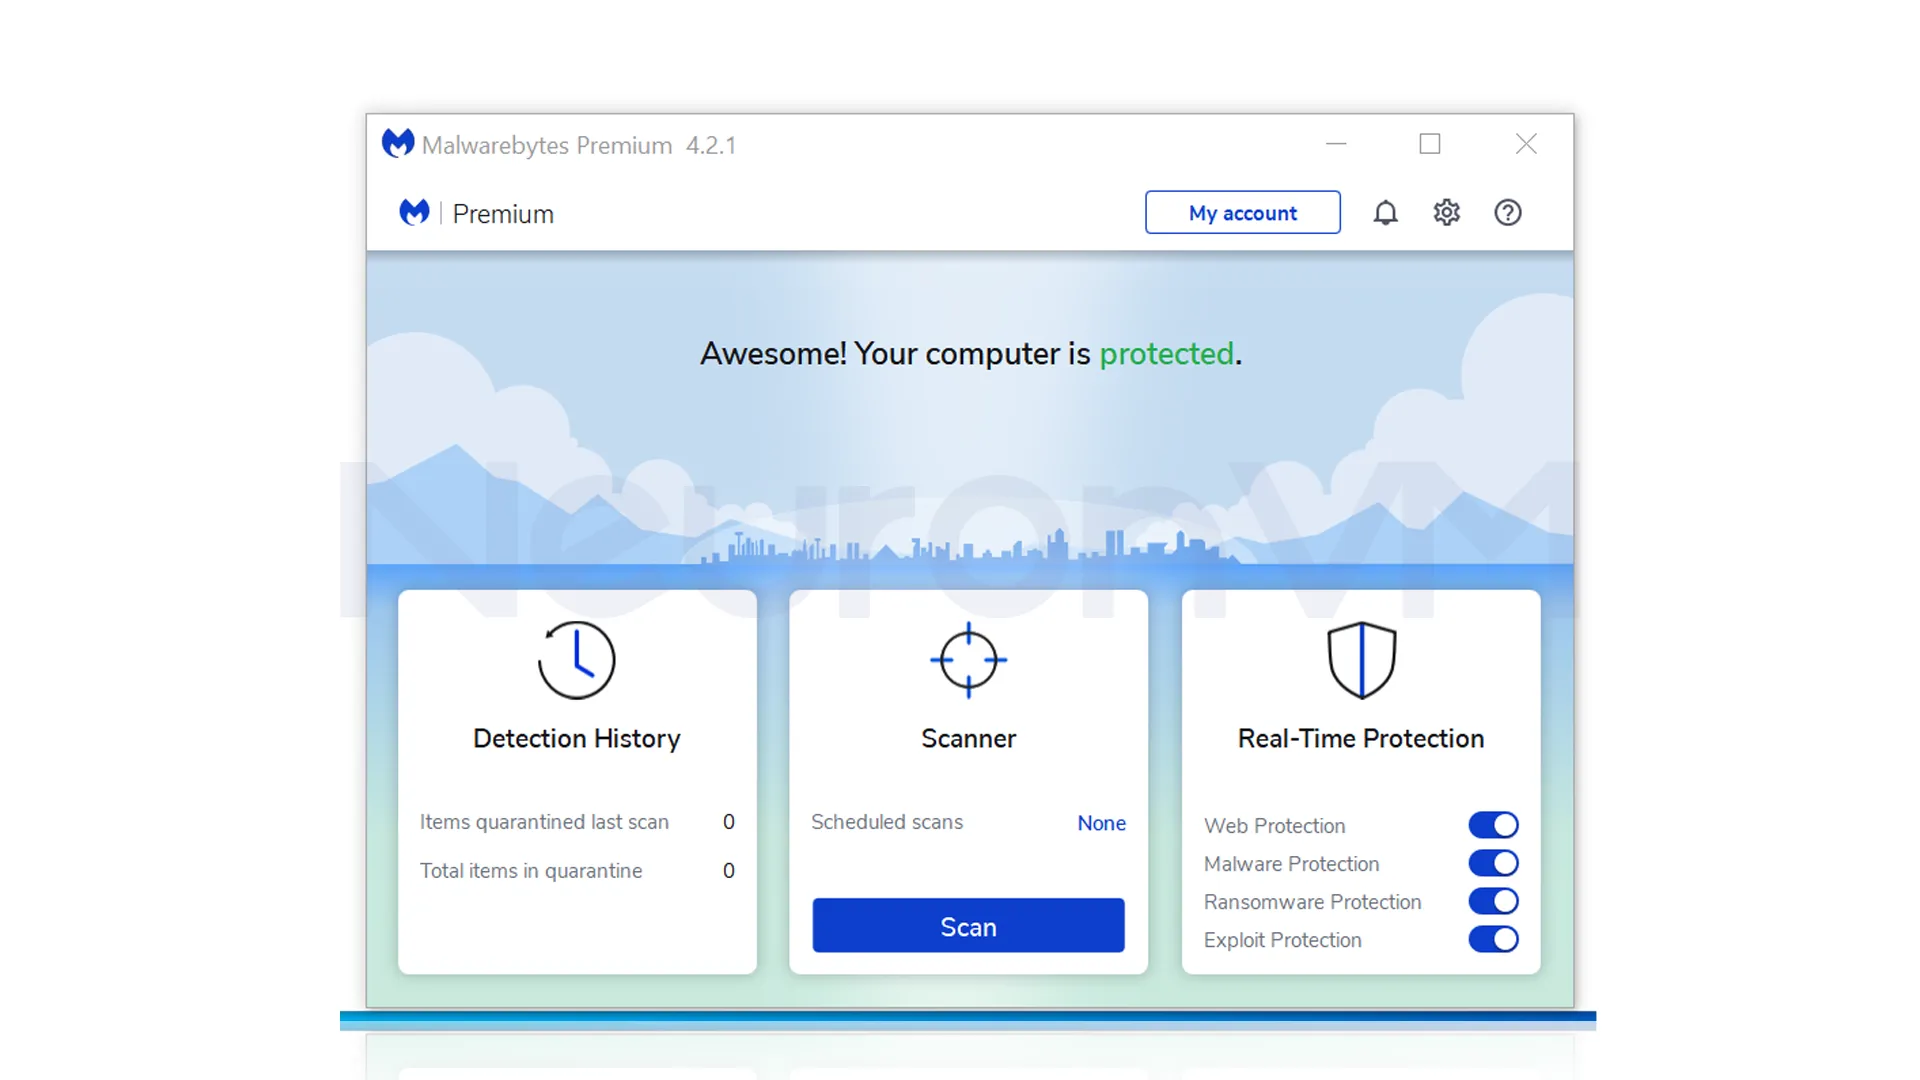
Eventually, Malwarebytes is successfully installed on your Windows VPS.
Easily Scan and Protect Your VPS with Malwarebytes
Now that we have successfully installed Malwarebytes on a Windows server, we now turn to how to use it by searching and running Malwarebytes from the Start menu. In the window that opens, click on Scan, doing so will start the scan:
Example: I tested the speed of Malwarebytes on a Windows VPS, and it took 7 minutes to do a full system scan, but other antiviruses took more than 20 minutes.
Boost Your VPS Security with These Expert Tips
1- Be sure to use the premium version to enable Real-Time Protection.
2- If your VPS is used to process sensitive data or conduct online transactions, combining Malwarebytes with a strong firewall can double the security.
3- If something happened that you had to remove the parts that need to be extra protected, you have to change the plan and use the paid version.
Expert Insights: Why Malwarebytes Stands Out in VPS Environments
In my experience managing multiple VPS servers for hosting projects was the biggest challenge. Heavy antivirus software often slows down services like databases, which increases the risk of downtime or slowdowns, But unlike many tools, Malwarebytes is able to provide security without increasing the risk of downtime, which makes it an ideal choice for VPS, where responsiveness is essential.
Malwarebytes vs. Other Security Tools
Detection of unknown malware: Malwarebytes’ biggest advantage over many antiviruses is its ability to detect unknown threats.
Advantages over Windows Defender: Windows Defender works pretty well against the viruses that are known, but Malwarebytes can also detect suspicious software behavior.
Suitable for VPS environments: Servers are more likely to be targeted by attacks, so Malwarebytes makes VPS a more secure option.
Advice for advanced users: It is best not to use Malwarebytes alone. Combining it with a strong firewall and network security tools creates a more complete, multi-layered security.
Real-World Use Case: Malwarebytes Saving a Business VPS
One of my clients had a problem with his e-commerce VPS server being compromised, even though Windows Defender was enabled. Upon investigation, Malwarebytes was able to detect a hidden Trojan in Scheduled Tasks that Defender had completely missed. After cleaning, turning Exploit Protection on stopped similar attacks, this example clearly shows that Malwarebytes is not just an extra layer of security, but can be the difference between losing customer trust and having a secure business.
Common Mistakes and How to Avoid Them
Using the free version in sensitive environments: The free version only removes existing malware and does not have Real-Time Protection; always install the Premium version for VPS or commercial environments.
Ignore automatic updates: If Malwarebytes isn’t updated, it will lose its ability to detect new threats. Make sure updates are enabled.
Incorrect firewall configuration: Many users forget to open the ports required by Malwarebytes in the firewall, which can cause the software to malfunction.
Not paying attention to advanced security settings: Additional features like scheduled scans or protection against exploits are often overlooked, while they play an important role in increasing security.
Hidden Features in Malwarebytes You Should Enable
Scan Scheduling: With this feature, you can schedule a specific time for a full or quick scan of your VPS. This ensures that your system is always safe without reducing the performance of your services.
Exploit Protection: This is the name of the feature that protects your applications and also your services, and blocks common attacks.
Real-Time Notifications: This feature will help you to be notified if something happens or security changes, so you can react quickly.
Combining features for more complete security: If you want a better result, you can enable all these features together to get a better result.
Conclusion
Choosing a security tool for your VPS doesn’t just end with installing and running an antivirus; The main issue is striking a balance between security, performance, and server stability. With its combination of fast scanning, low resource consumption, and ability to detect unknown threats, Malwarebytes is the choice of many server administrators on sensitive projects, but to achieve the most security, you should use the premium version and use it alongside a firewall, VPN, and other security layers. Experience has shown that these few simple steps can prevent attacks that can easily take an online business out of business. If managing a VPS is part of your job or business, investing in security with Malwarebytes is not an expense, but a necessity.
No. The free version is only able to detect and remove existing malware and does not offer any real-time protection.
Unlike many antiviruses, Malwarebytes is designed to be lightweight, and this feature allows services to continue on VPS without slowing down.
You might like it

Almalinux Tutorials
How to Install Cloudlinux on Almalinux 9


How to Use Nmap on Linux for Network Scanning and Security

Almalinux Tutorials
How to Install AlmaLinux on VirtualBox
