How to Dual Boot Debian 12 and Windows (Step-by-Step)

 Study duration :
15 Minutes
Study duration :
15 Minutes
 0 Comment
Are you thinking about running a dual boot of Linux and Windows on your Debian 12 system? This is the way that many users, from developers to gamers, prefer to do it, and thus have access to both operating systems on the same computer. Because experience has shown that Linux offers unparalleled stability, security, and control, while Windows has wider compatibility with commercial software and games, and this may be what you need. With dual boot, you can benefit from the strengths of both without the need for a second machine. In this guide, you’ll learn everything needed to set up a smooth dual boot Debian 12 and Windows: preparation steps, installation instructions, plus essential tips to avoid common problems. So don’t worry about your needs in this regard.
Why Choose Dual Boot Debian 12 Instead of a Virtual Machine?
You may wonder!! why not just use VirtualBox or VMware? While virtualization is convenient, it has limitations such as reduced performance and hardware restrictions. Dual booting. on the other hand, lets each OS use your hardware natively, which means:
- Better gaming performance under Windows.
- Full system resources when compiling code or running Linux based servers.
- Flexibility to switch OS at startup depending on your needs.
- The only requirement is careful disk partitioning and attention to the bootloader setup.
Preparation Checklist!!
Before starting the installation, it is important to prepare:
- Back up your files: make sure to secure important data before making any partition changes
- Free up disk space — leave enough unallocated space for the Debian installation
- Create a bootable USB: download the Debian 12 ISO, then use tools like Rufus or BalenaEtcher to set it up
- Update Windows → install pending updates and turn off Fast Startup to avoid boot issues
- Know your system’s boot key (often F12, F9, or Esc, depending on the manufacturer)
With these preparations complete, you’re ready to begin.
Dual Boot Debain 12 and Windows Installation Progress
The steps to install Linux dual boot with Windows are as follows:
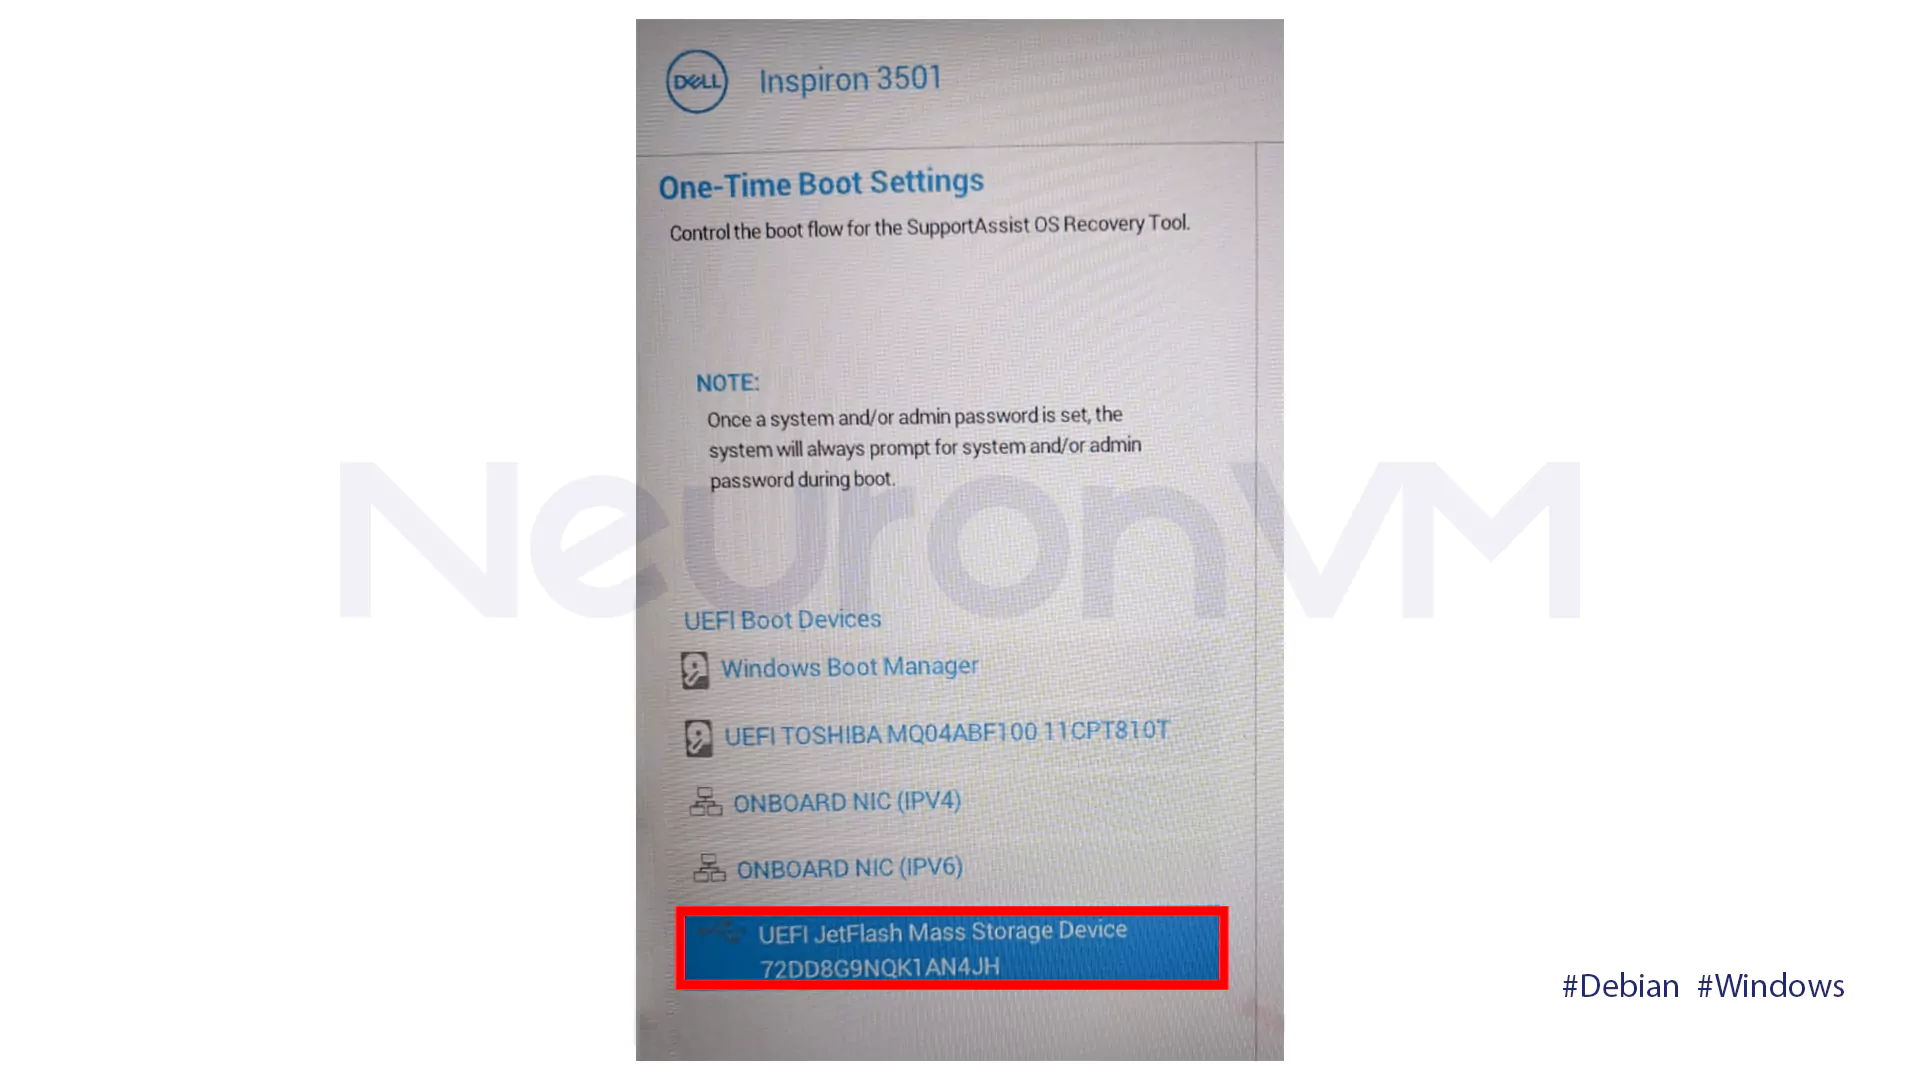
First, you need to insert a USB device that contains the Debian ISO image into your computer and then reboot your computer. During the boot process, you need to press the shortcut key of the boot loader(e.g., F12, F9) to access the boot menu. Afterward, you must use the arrow key to select the USB device.
You will be presented with an installation menu with two main options:
1- Graphical Install: Suitable for new users who would like to use a graphical interface.
2- Text-Based Install: Suitable for experienced users who would like to use a non-graphical interface environment.
Choose the Graphical Installation option.

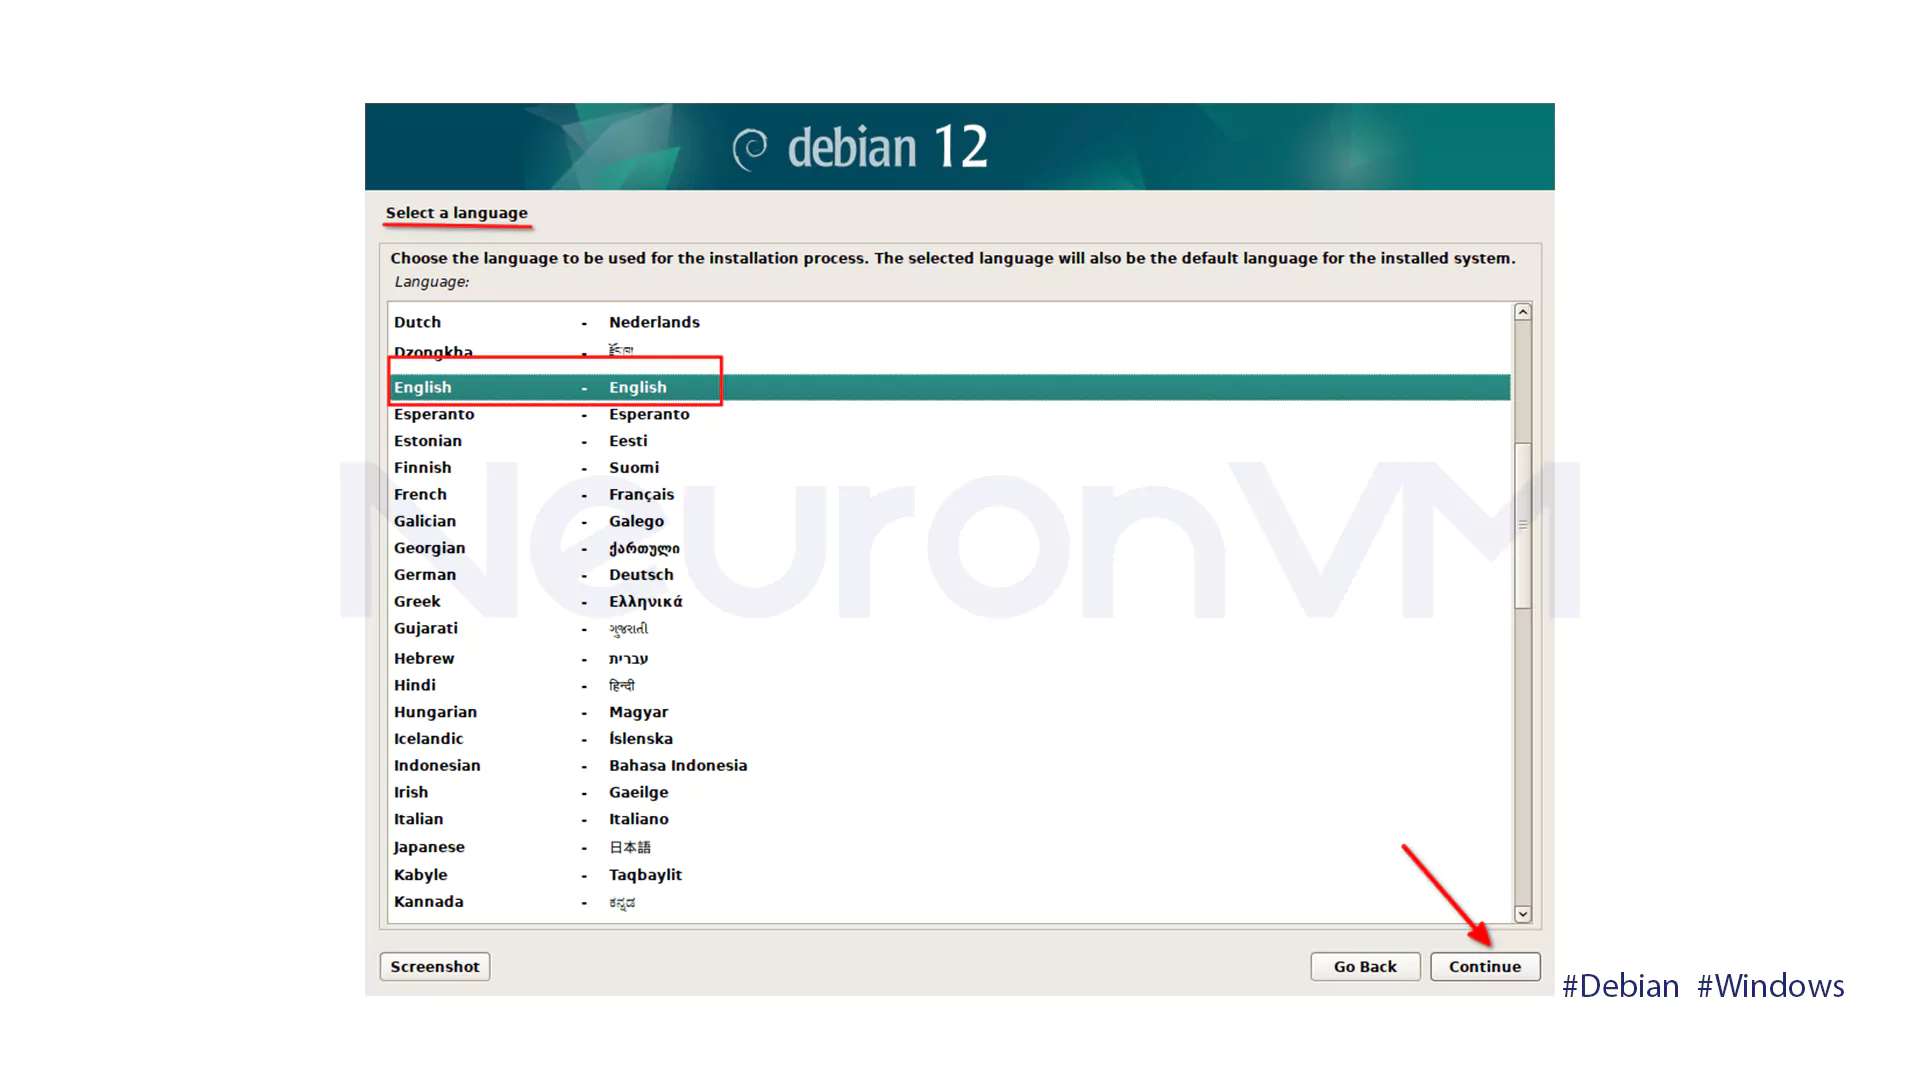
Select the language of your preference for the installation process from the drop-down menu and then click on Continue.
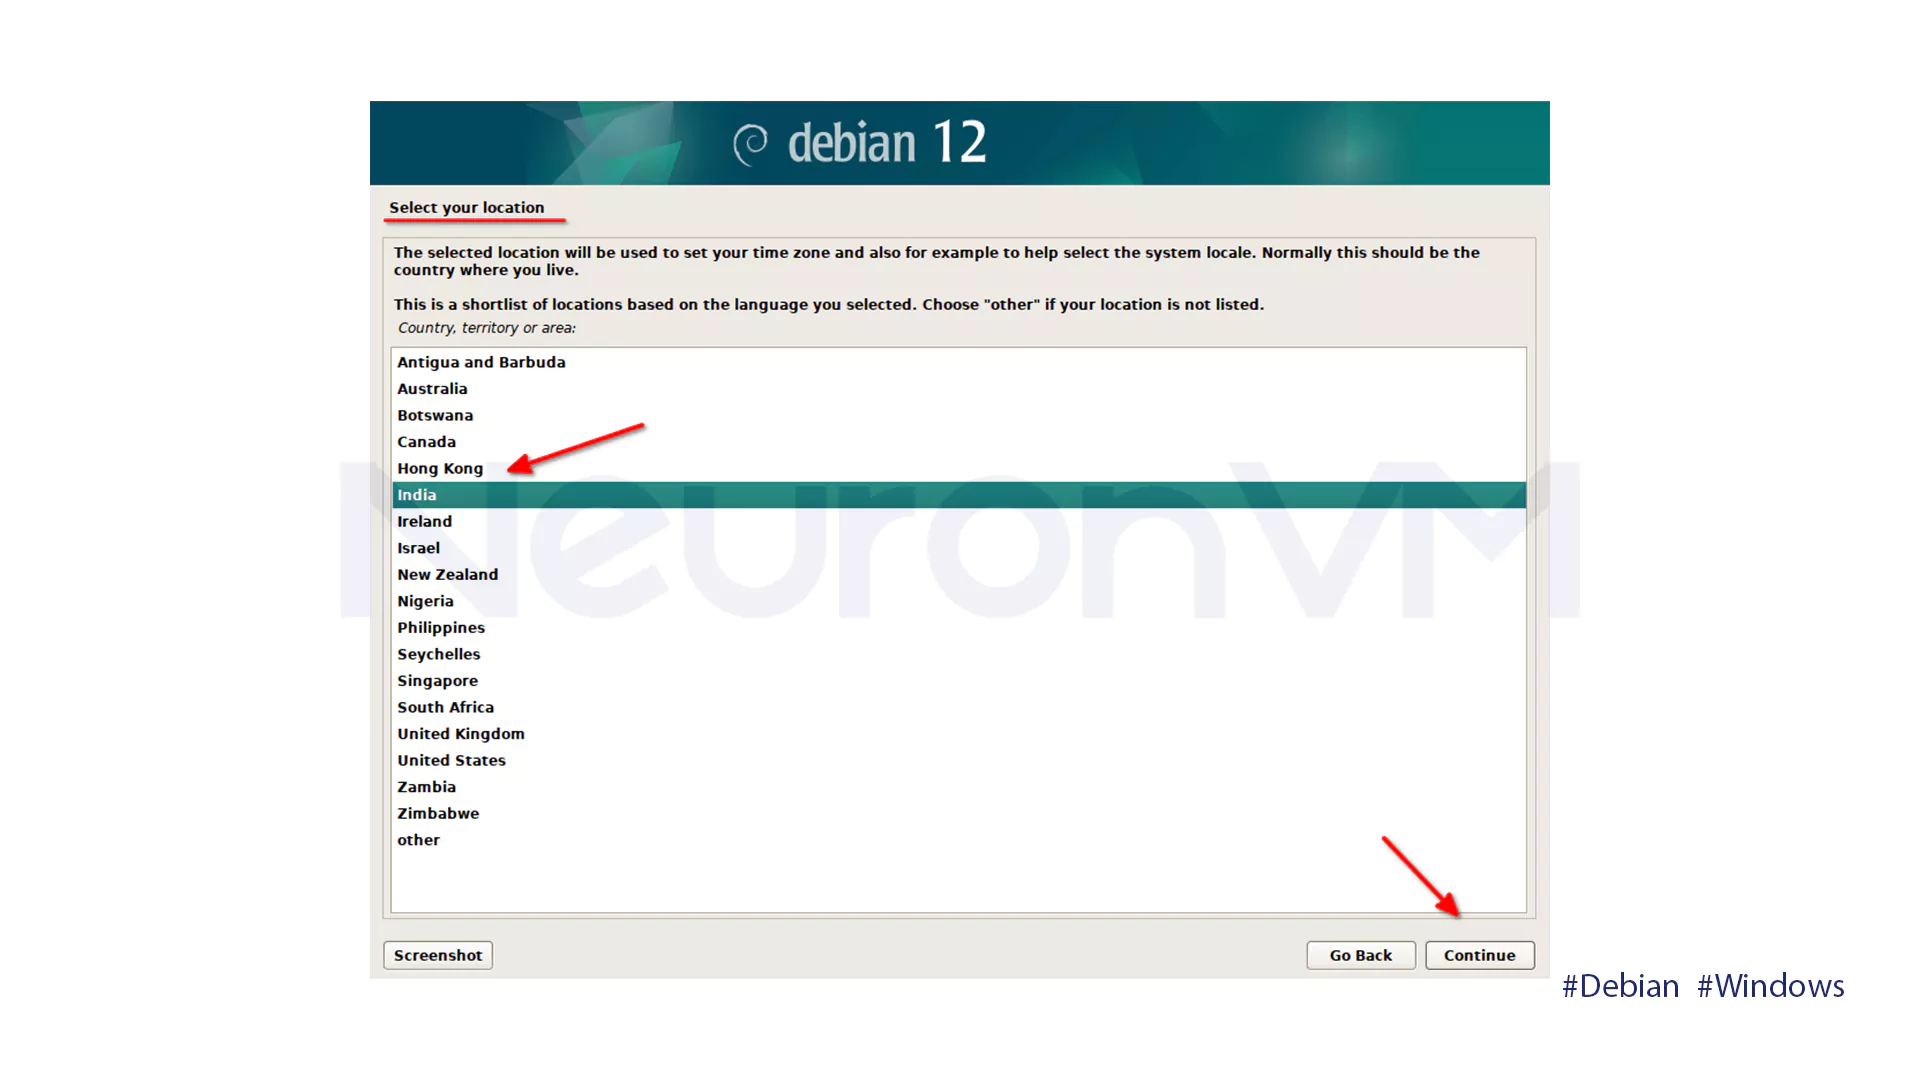
Select a location from the map to the list of cities and countries to allow the system to automatically detect and configure the correct time zone.
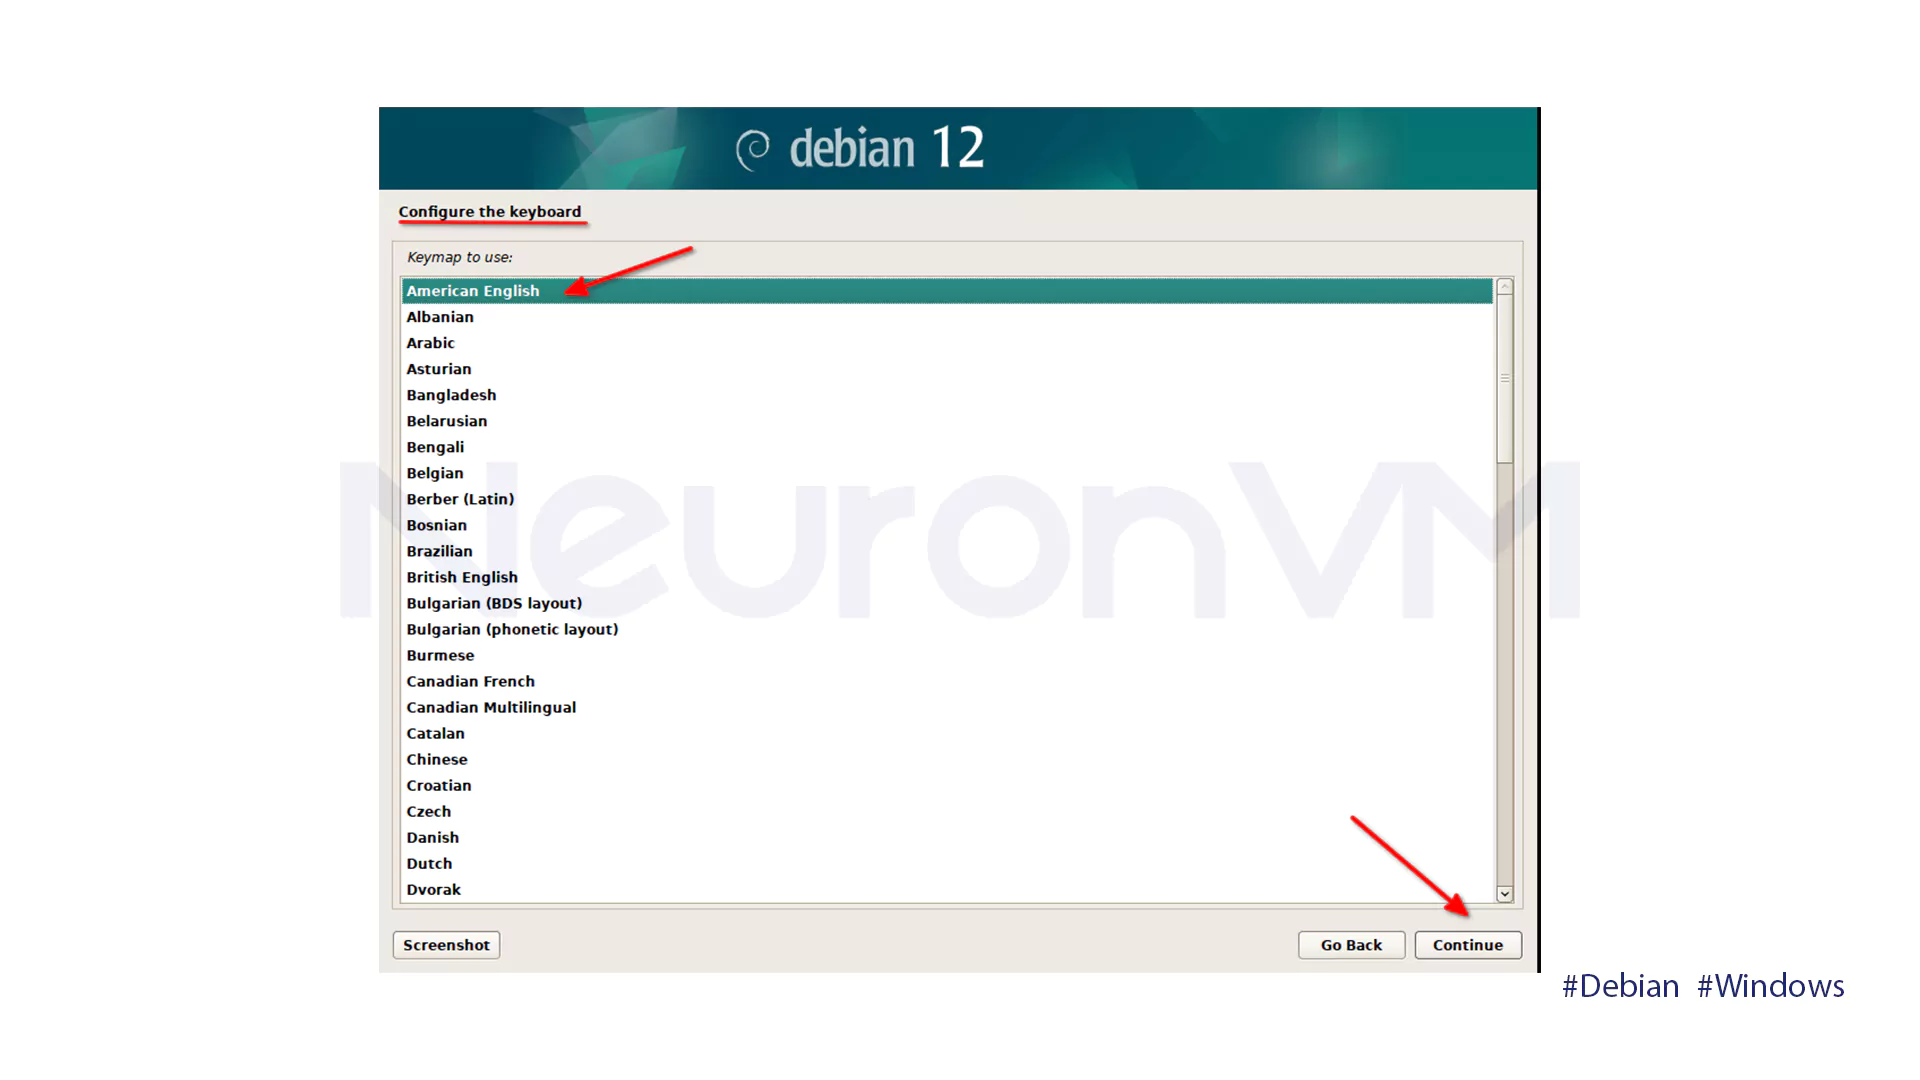
Choose your keyboard layout and click on Continue to advance to the next screen.
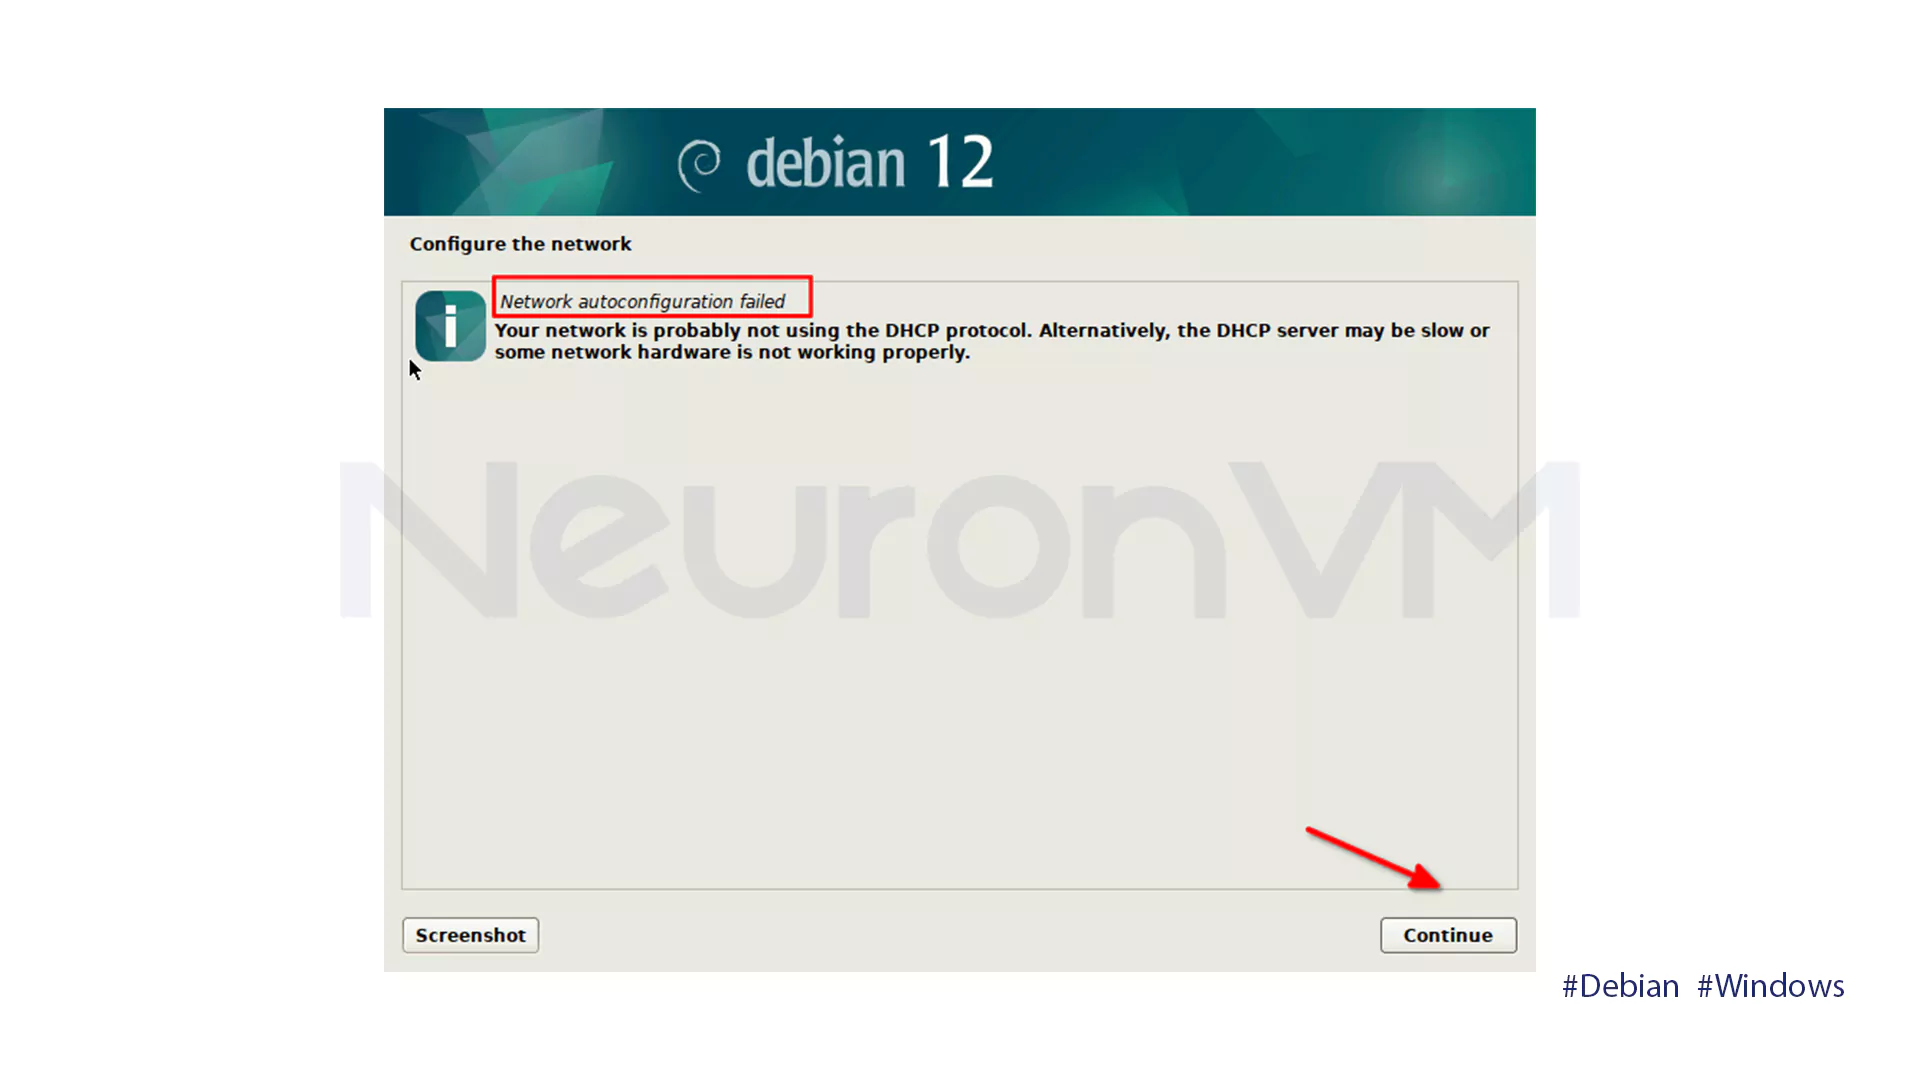
Configure network parameters automatically or manually. The installer will try to obtain an IP address with DHCP. If that is not available, you can set the IP address manually.
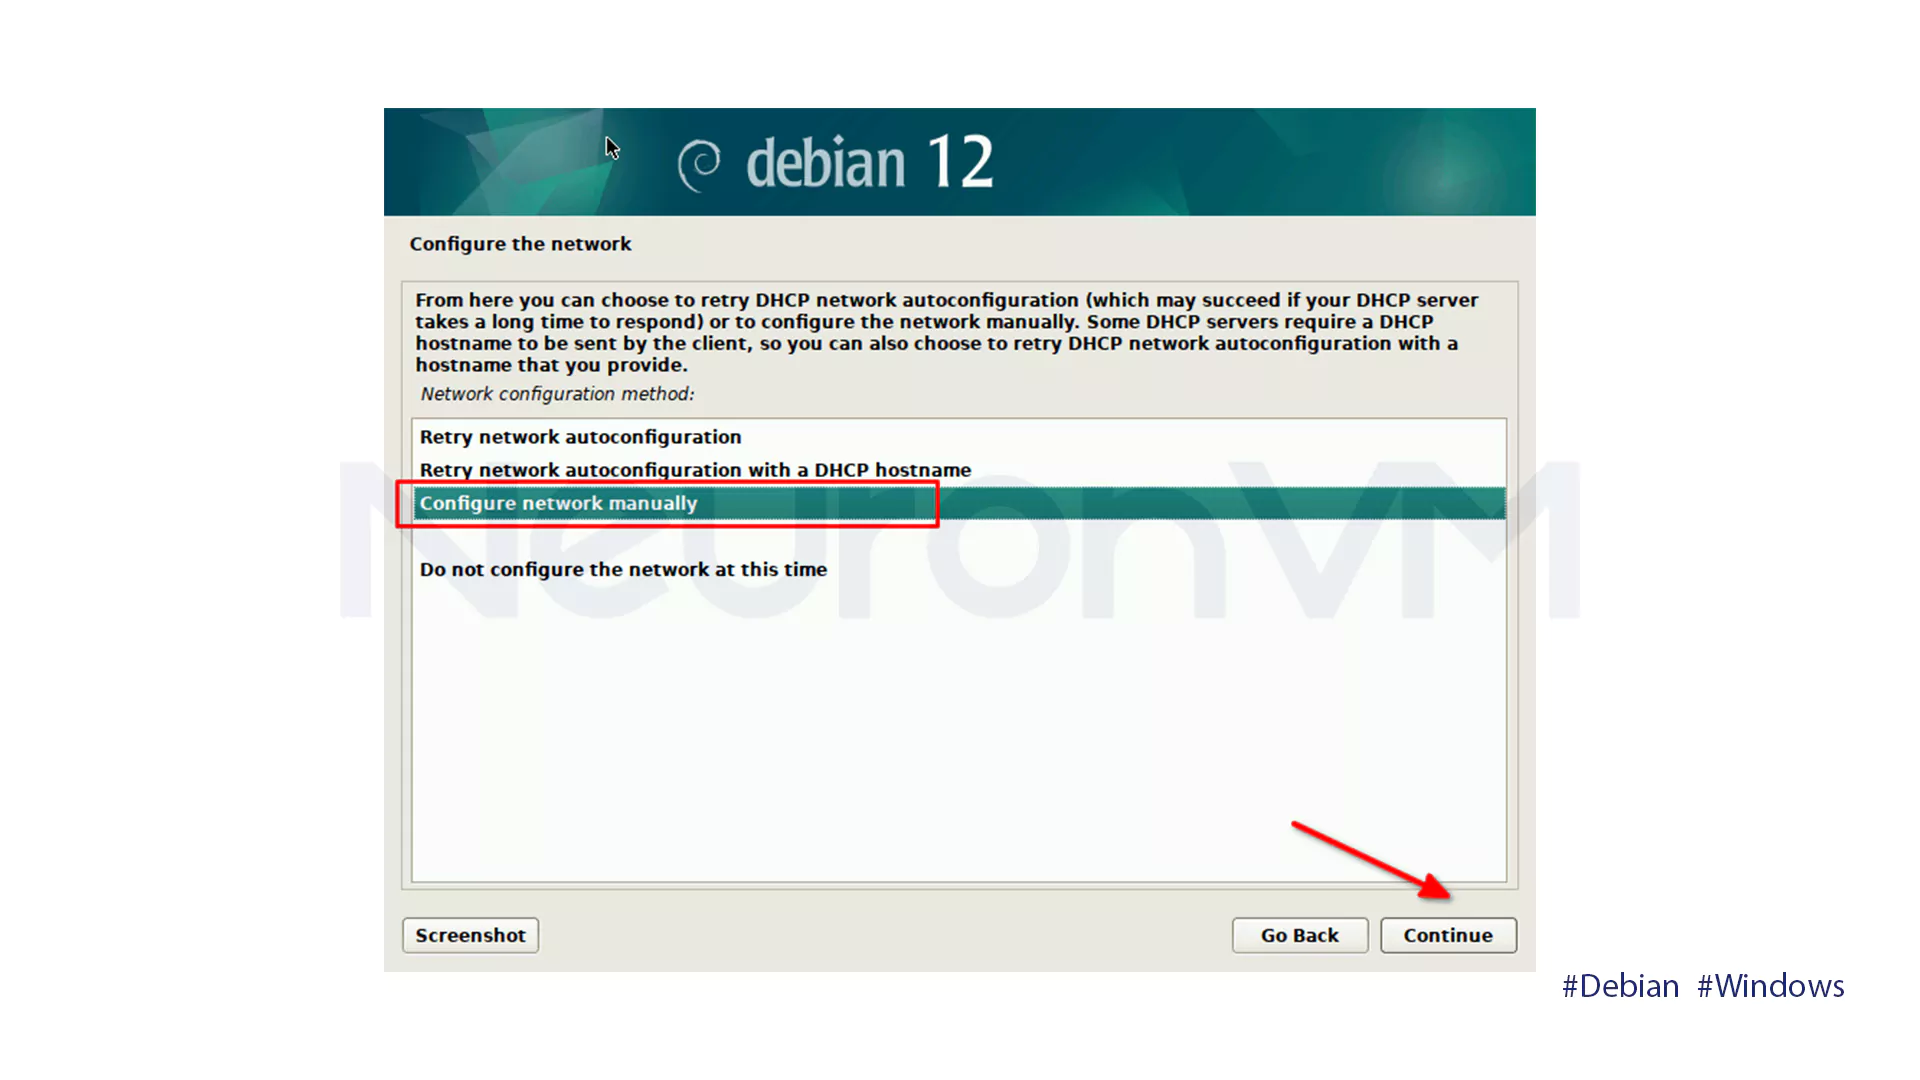
Fout network configuration options are provided to you:
1- Retry network configuration: Try the network auto configuration and connect to a DHCP server.
2- Retry network auto configuration with DHCP hostname: Similar to option 1 but with the use of DHCP hostname.
3- Configure the network manually: Allows you to manually configure the IP address and subnet mask for special use.
4- Don’t configure the network yet: Bypass the configuration step and go to the next step.
You should select the third option for manual IP address configuration.
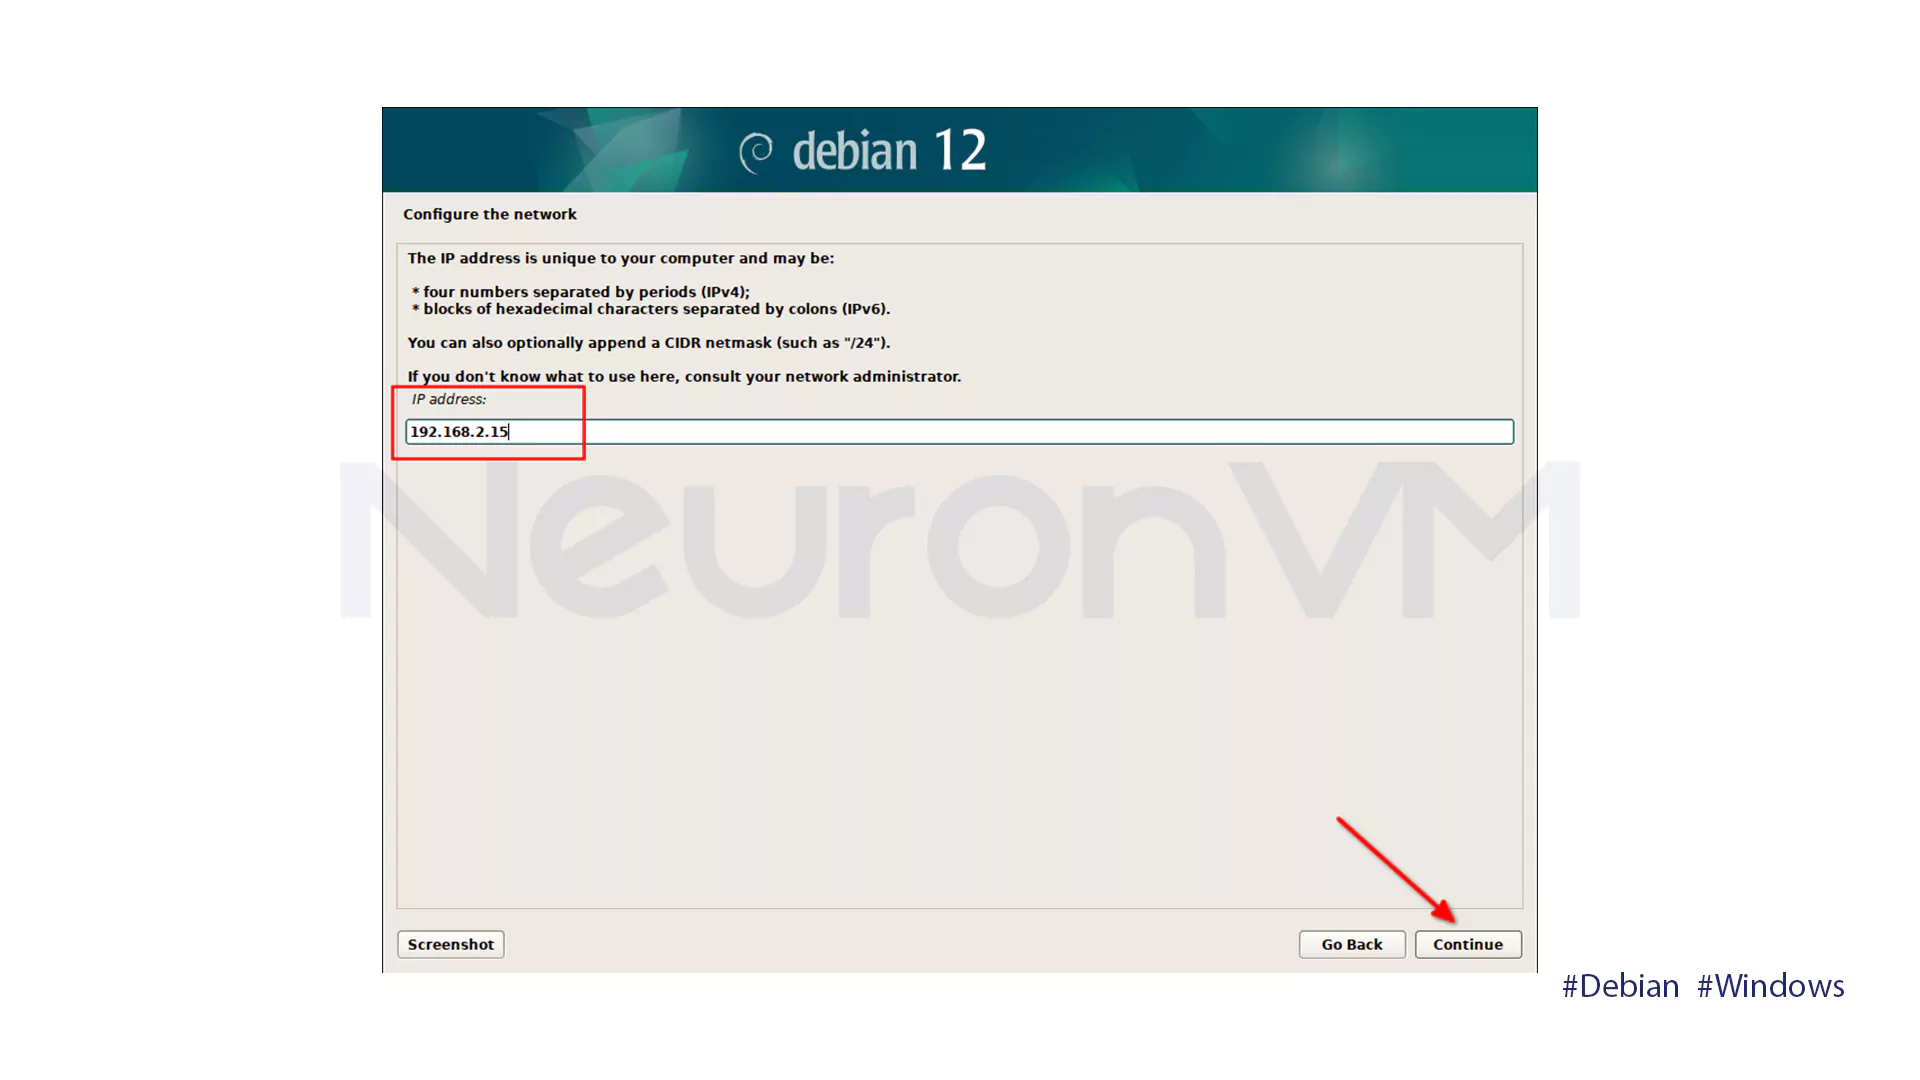
Put the IP address and click continue.
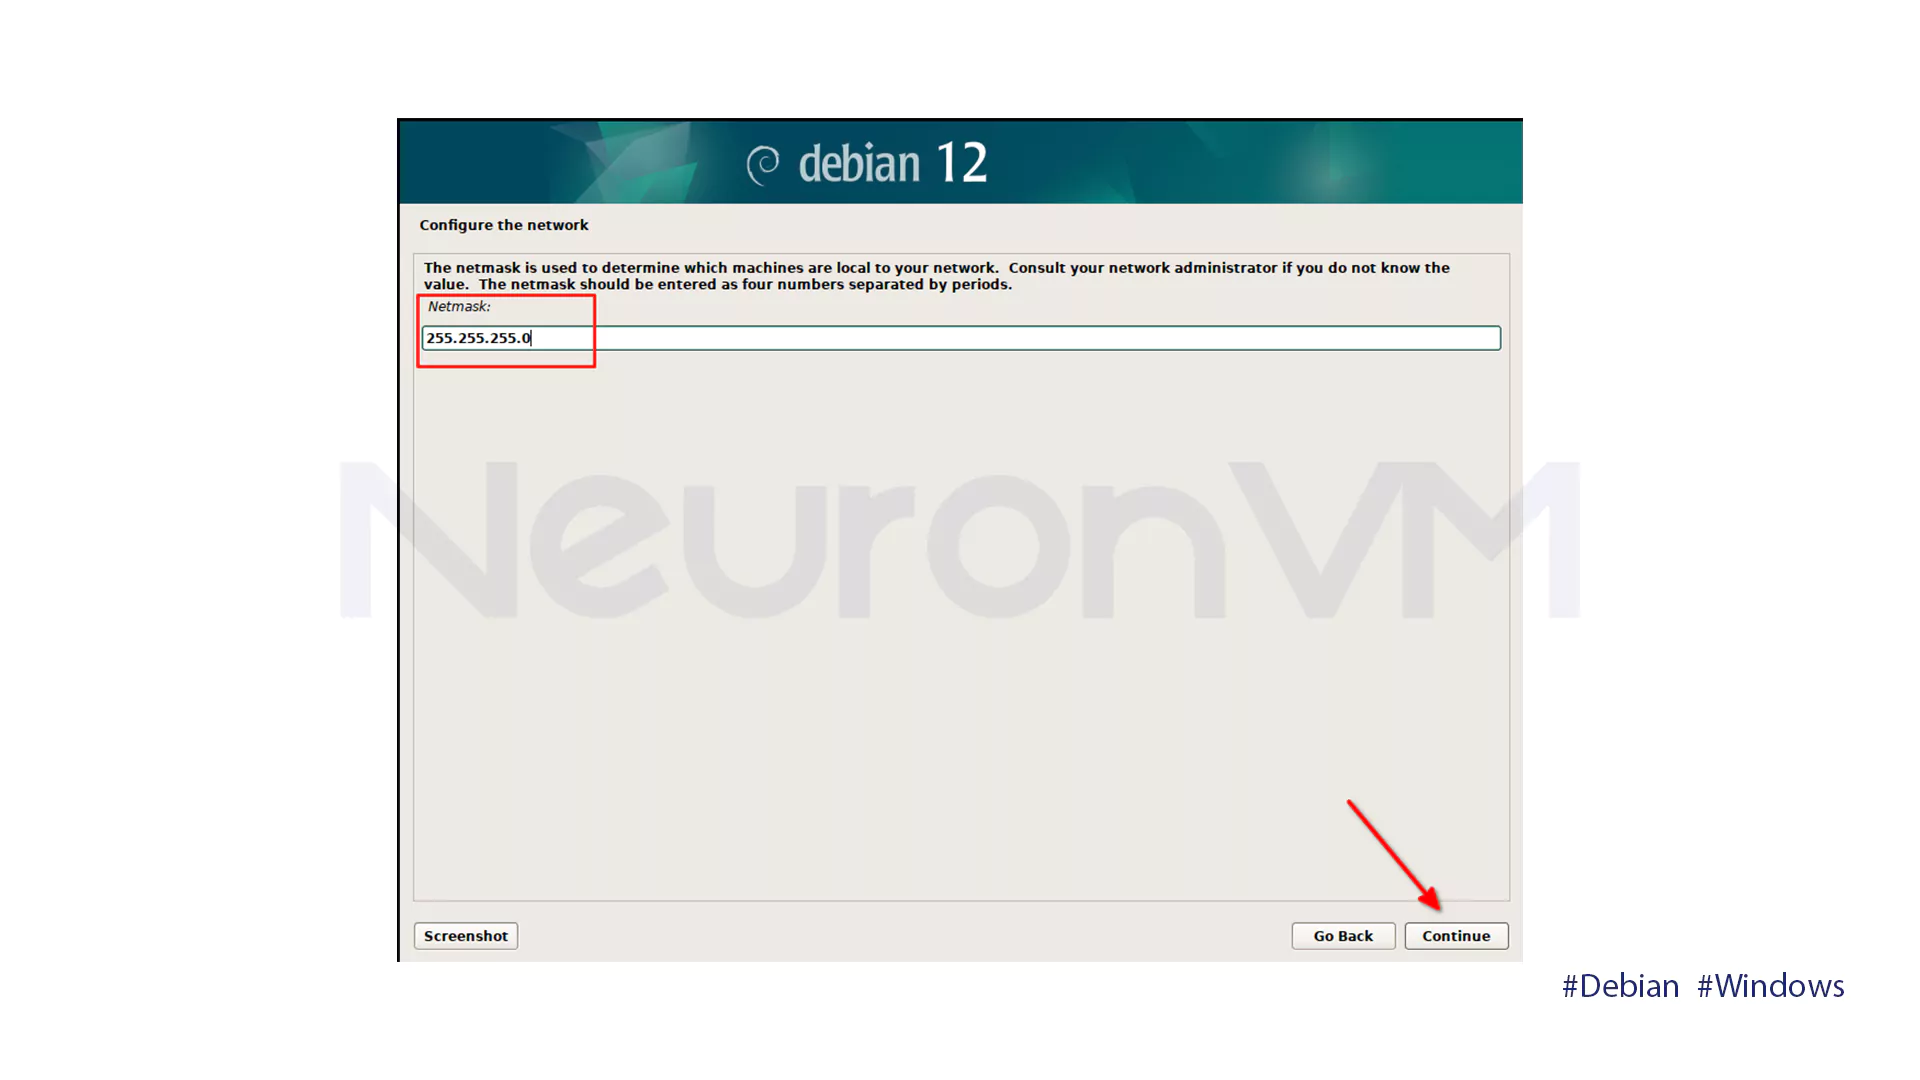
Put in the netmask and continue.
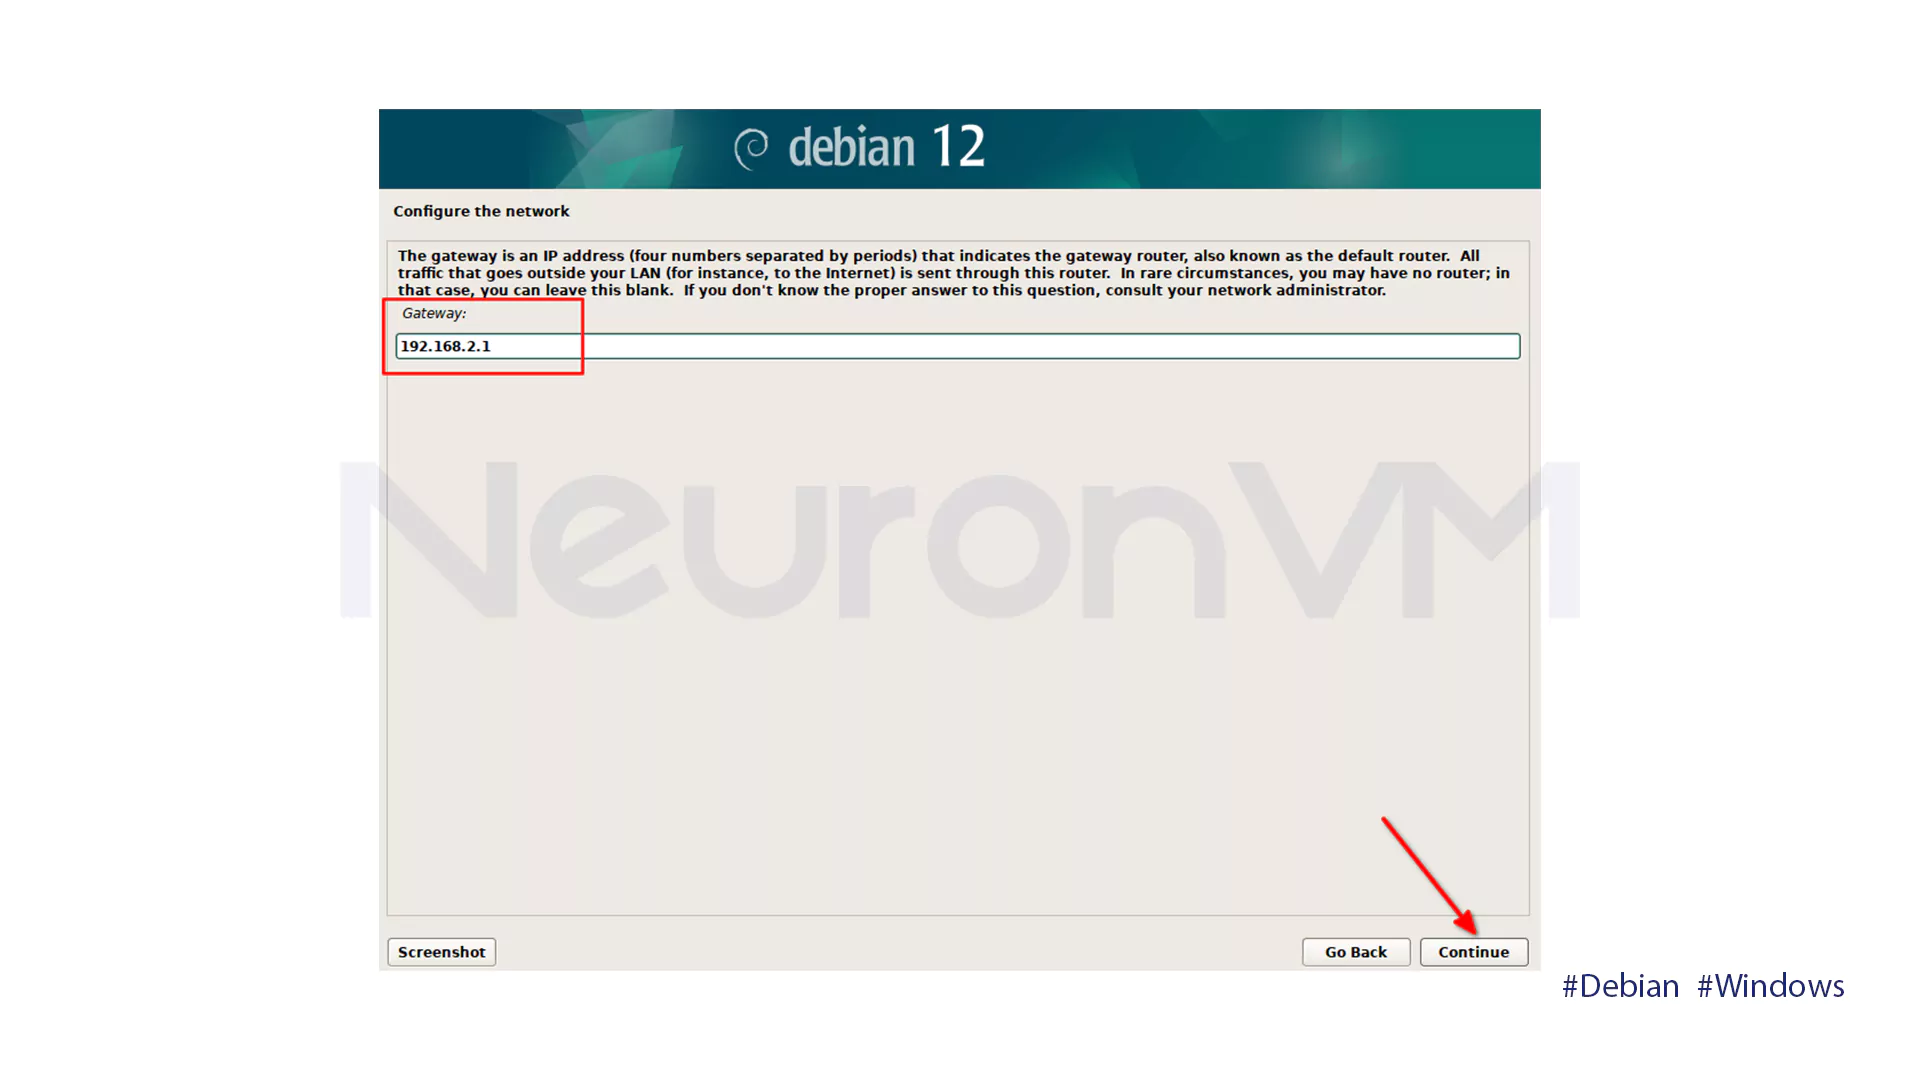
Enter the network gateway IP address and click Continue.
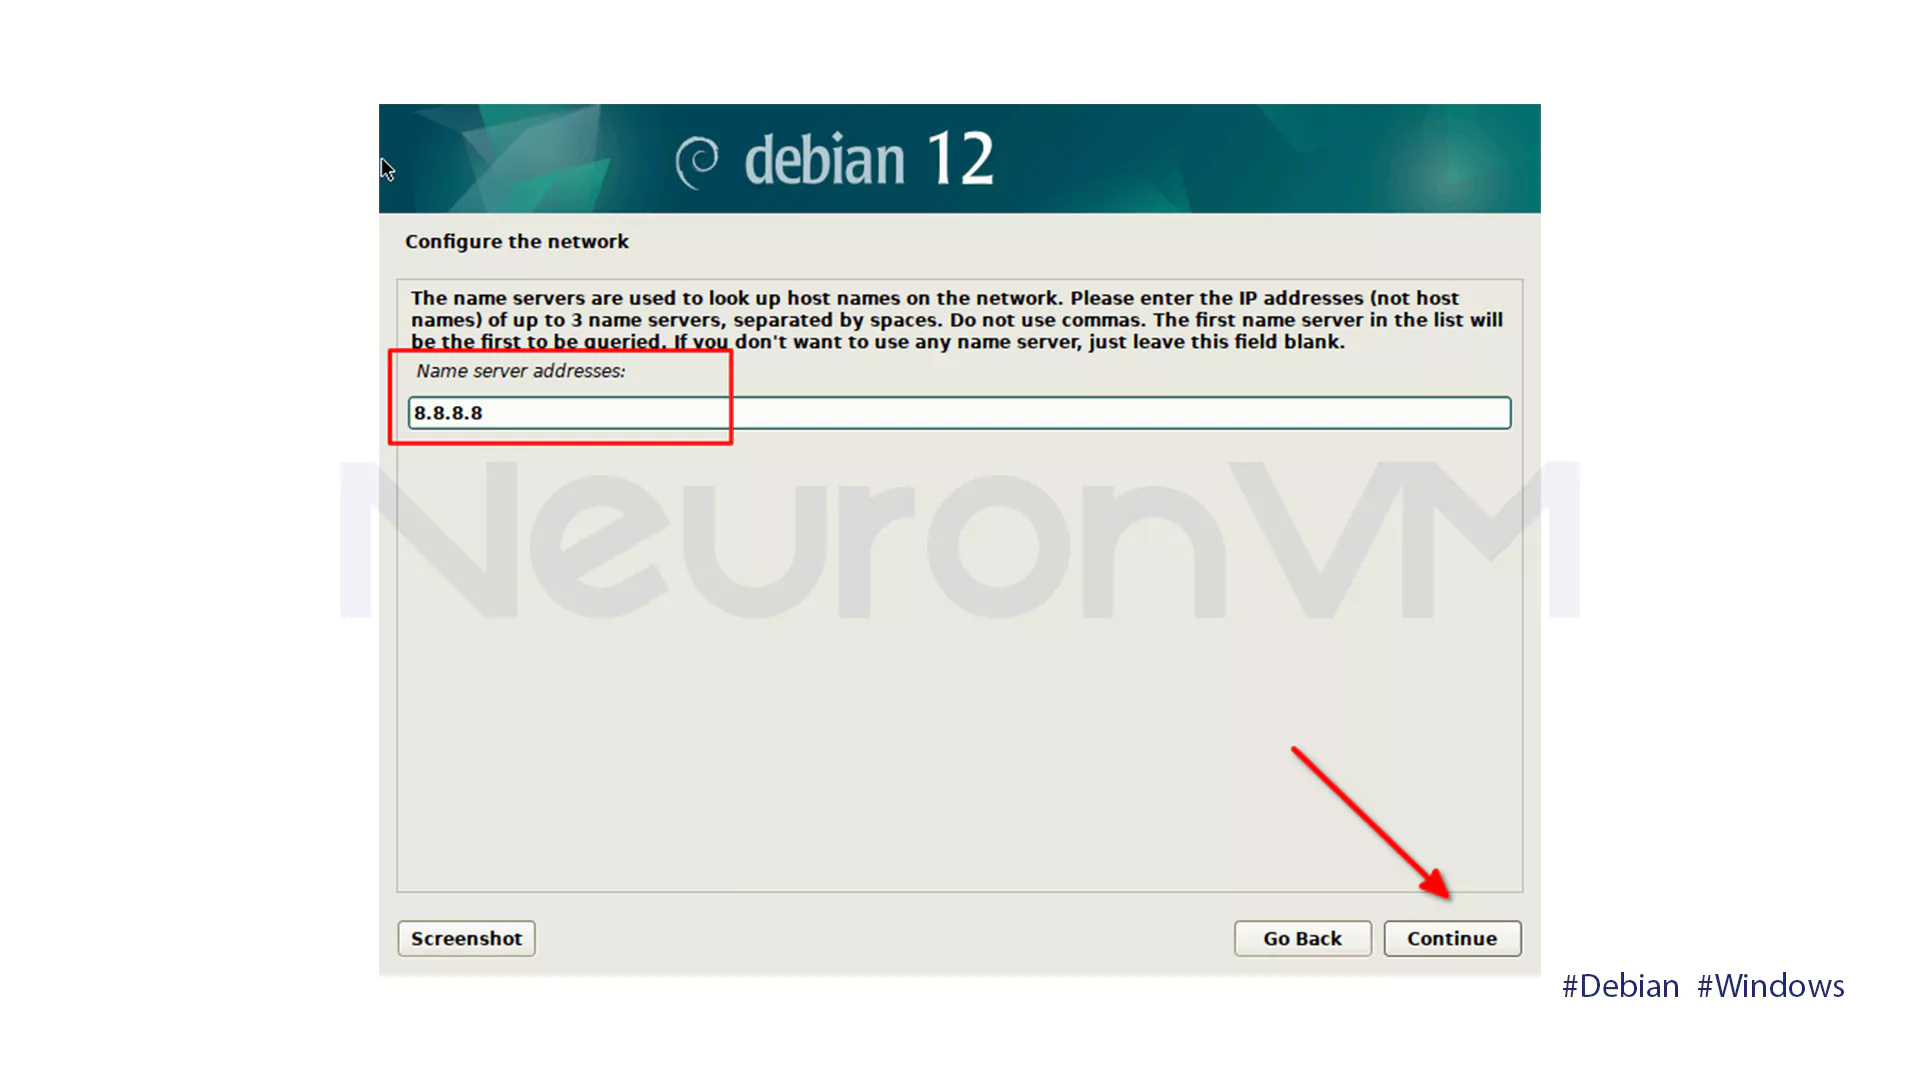
Enter the DNS IP address. You can use Google’s public DNS, 8.8.8.8.
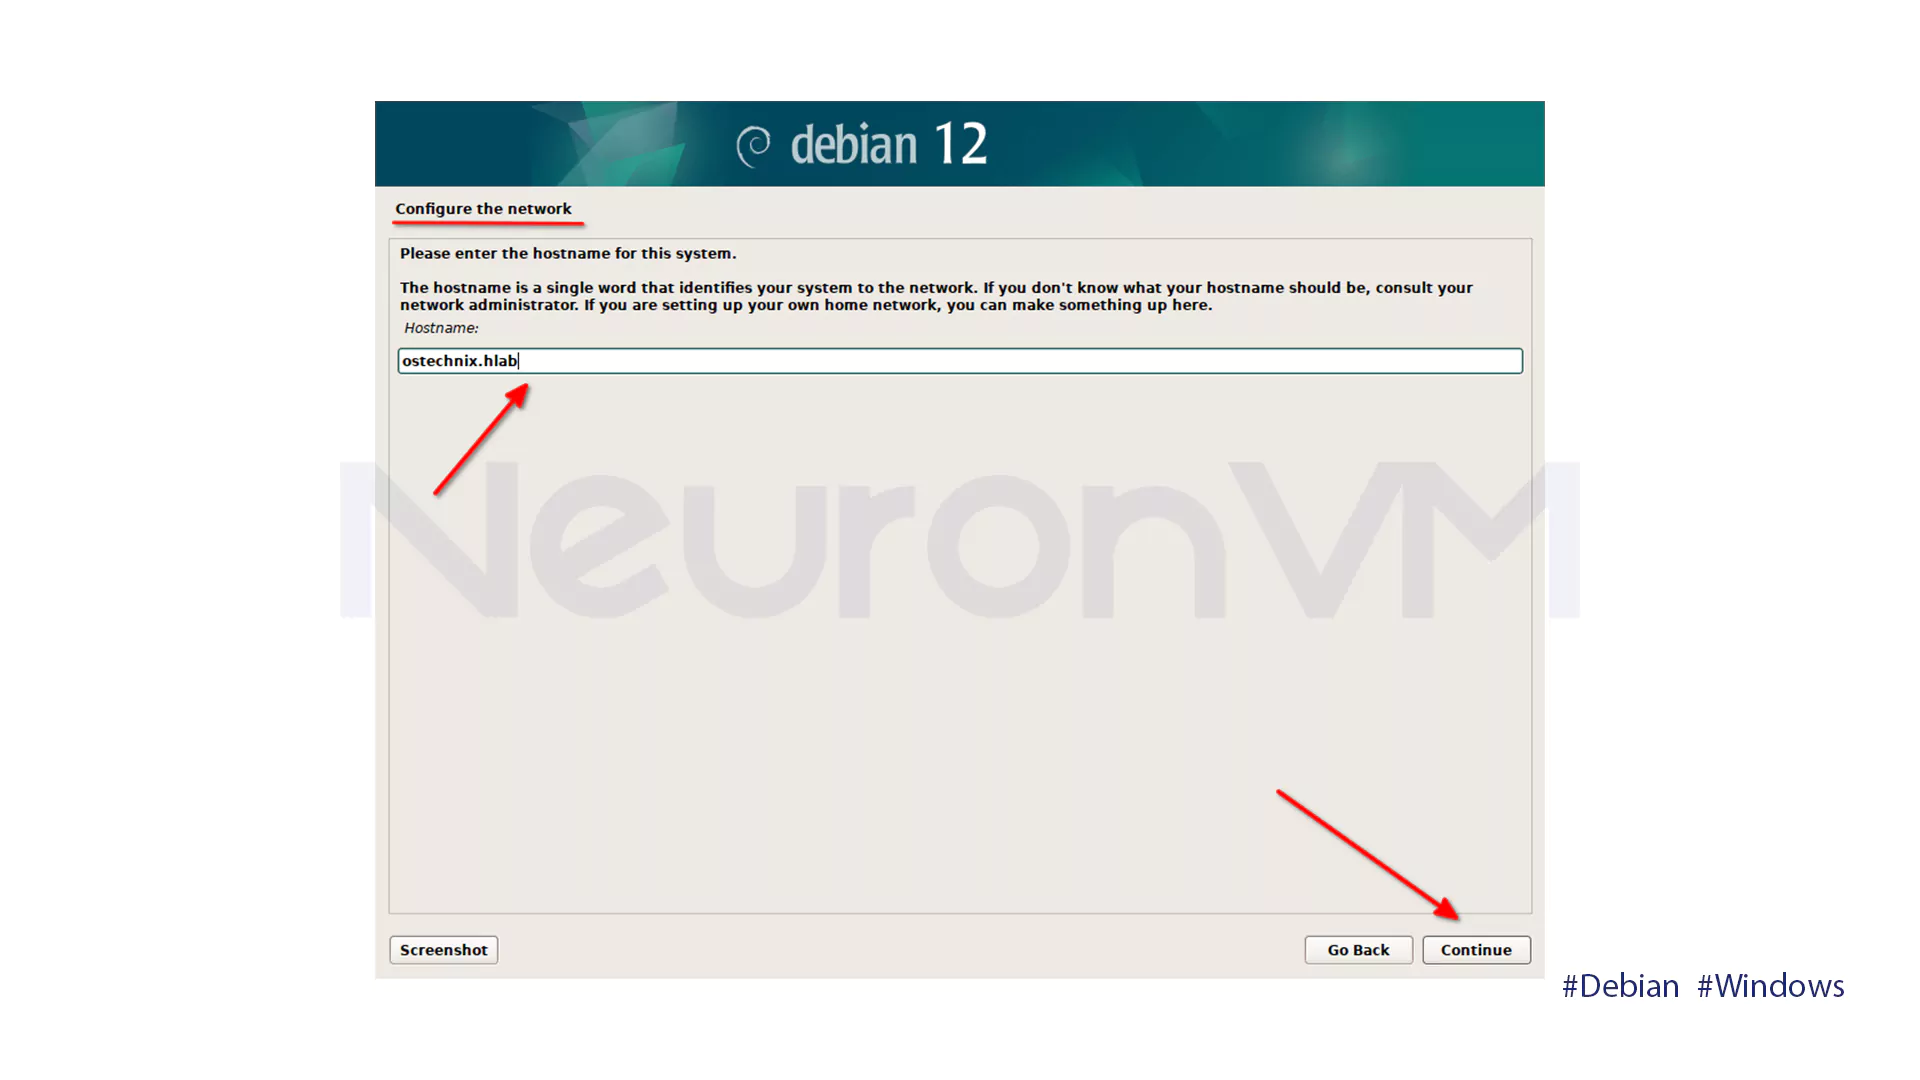
Type in the hostname, with or without domain. If you omit a domain name, the system will ask you to type it in a new window. In our example, we typed the domain name hlab in the same window here.
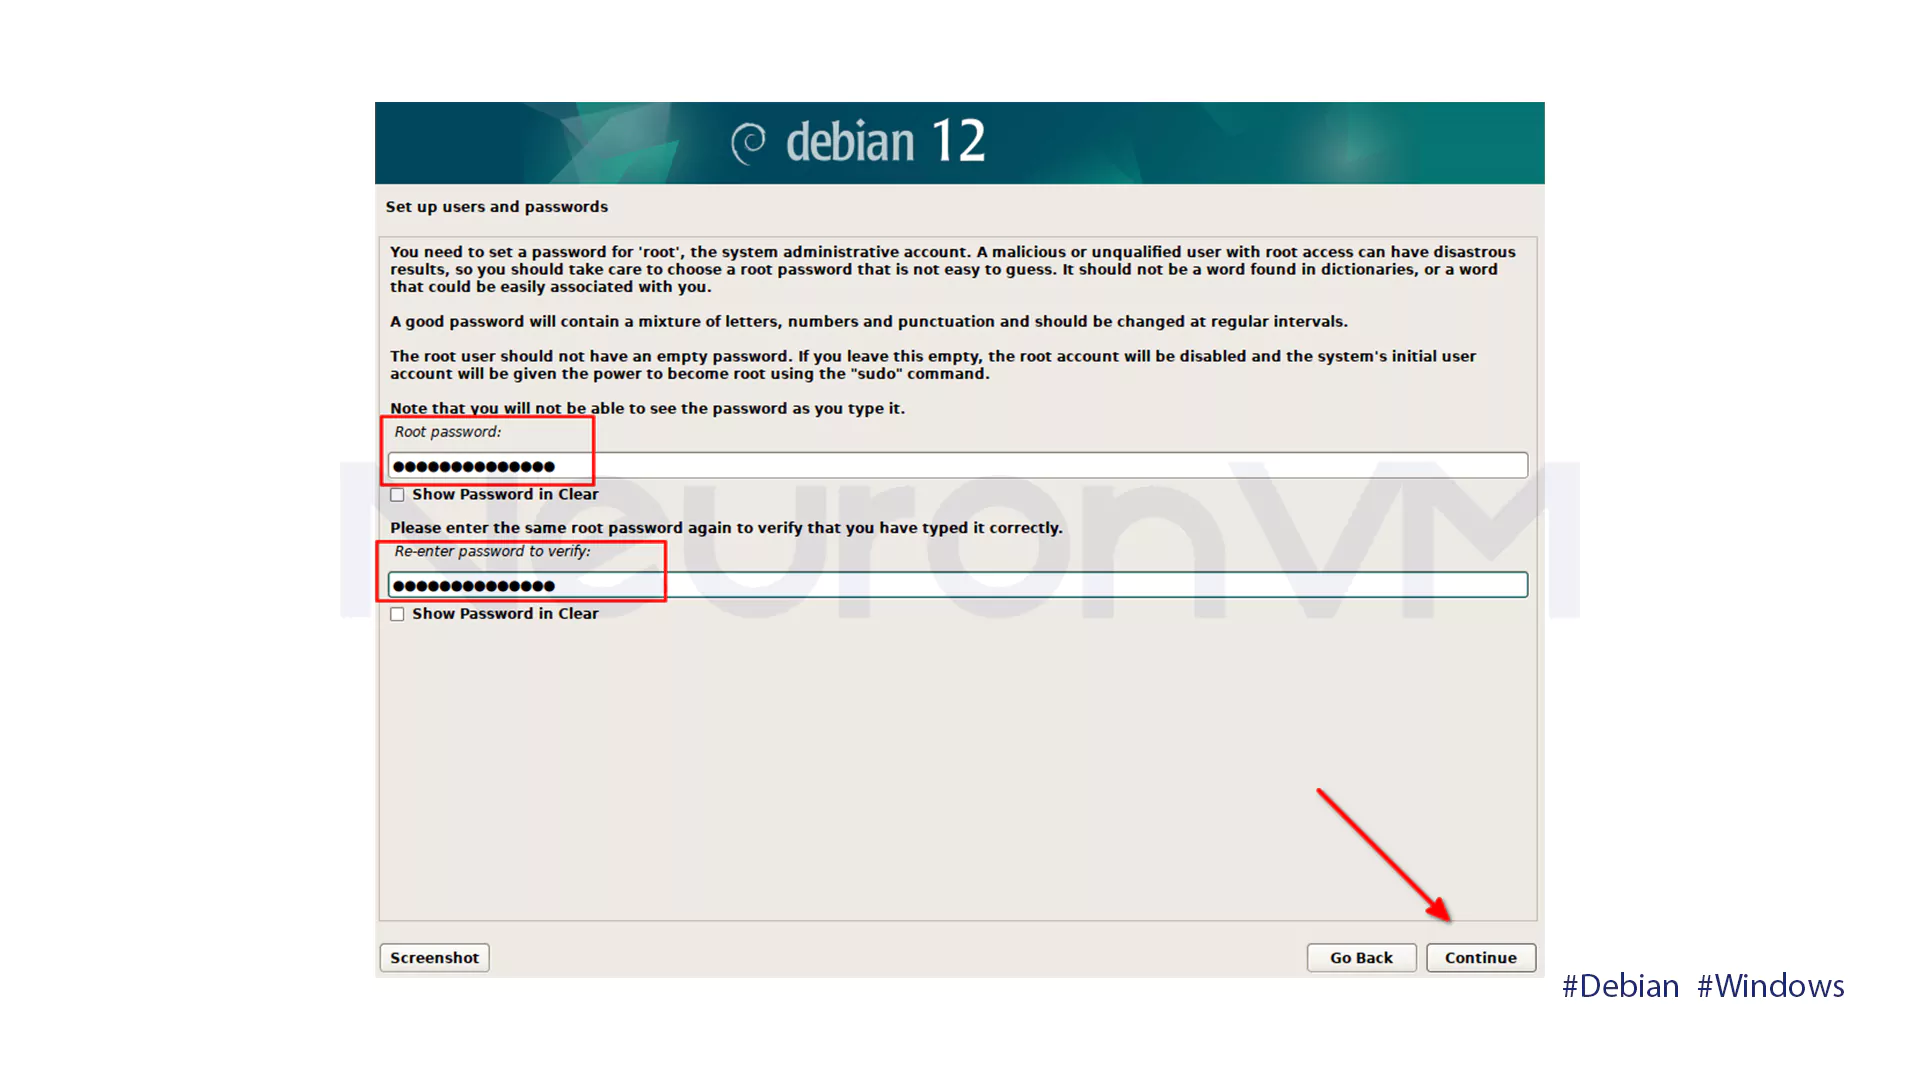
Set a good root password (uppercase, lowercase, numbers, special characters) for system security.
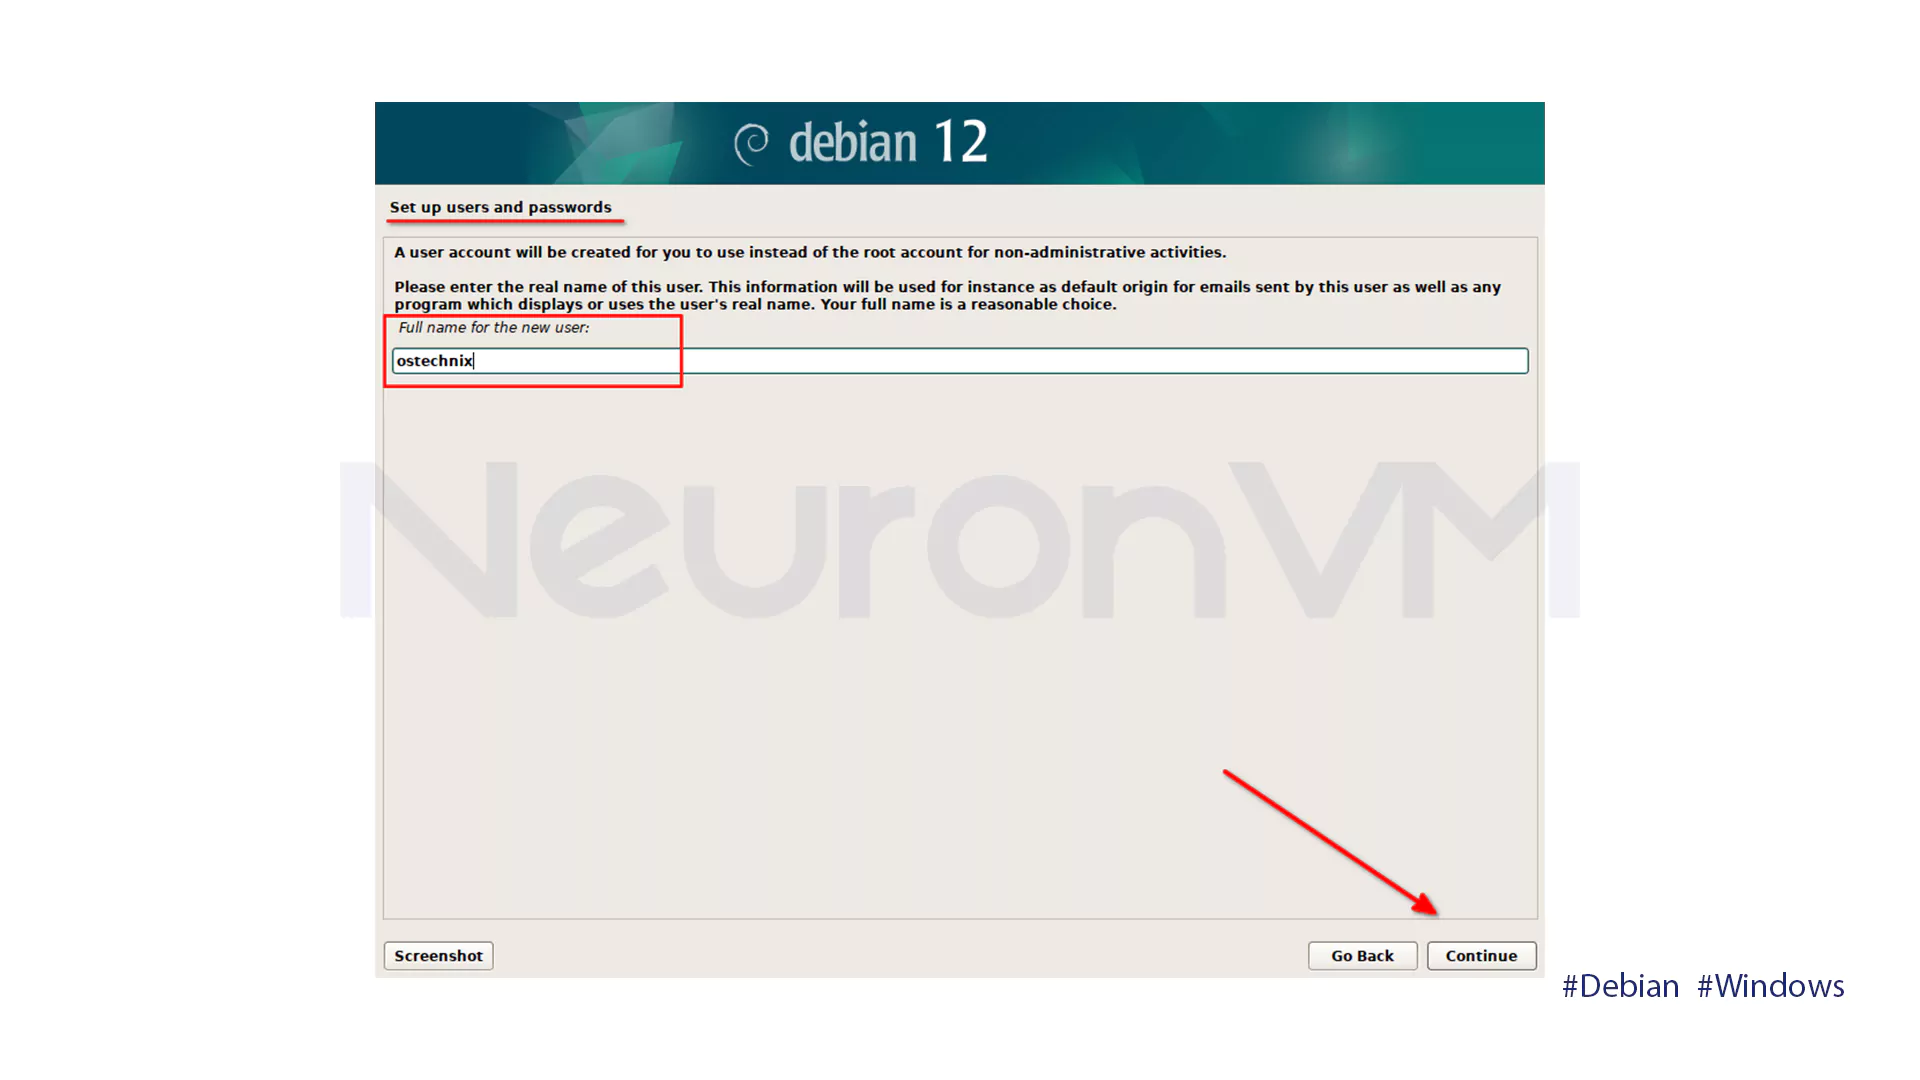
Type in your full name to create a user account and personalize your profile.
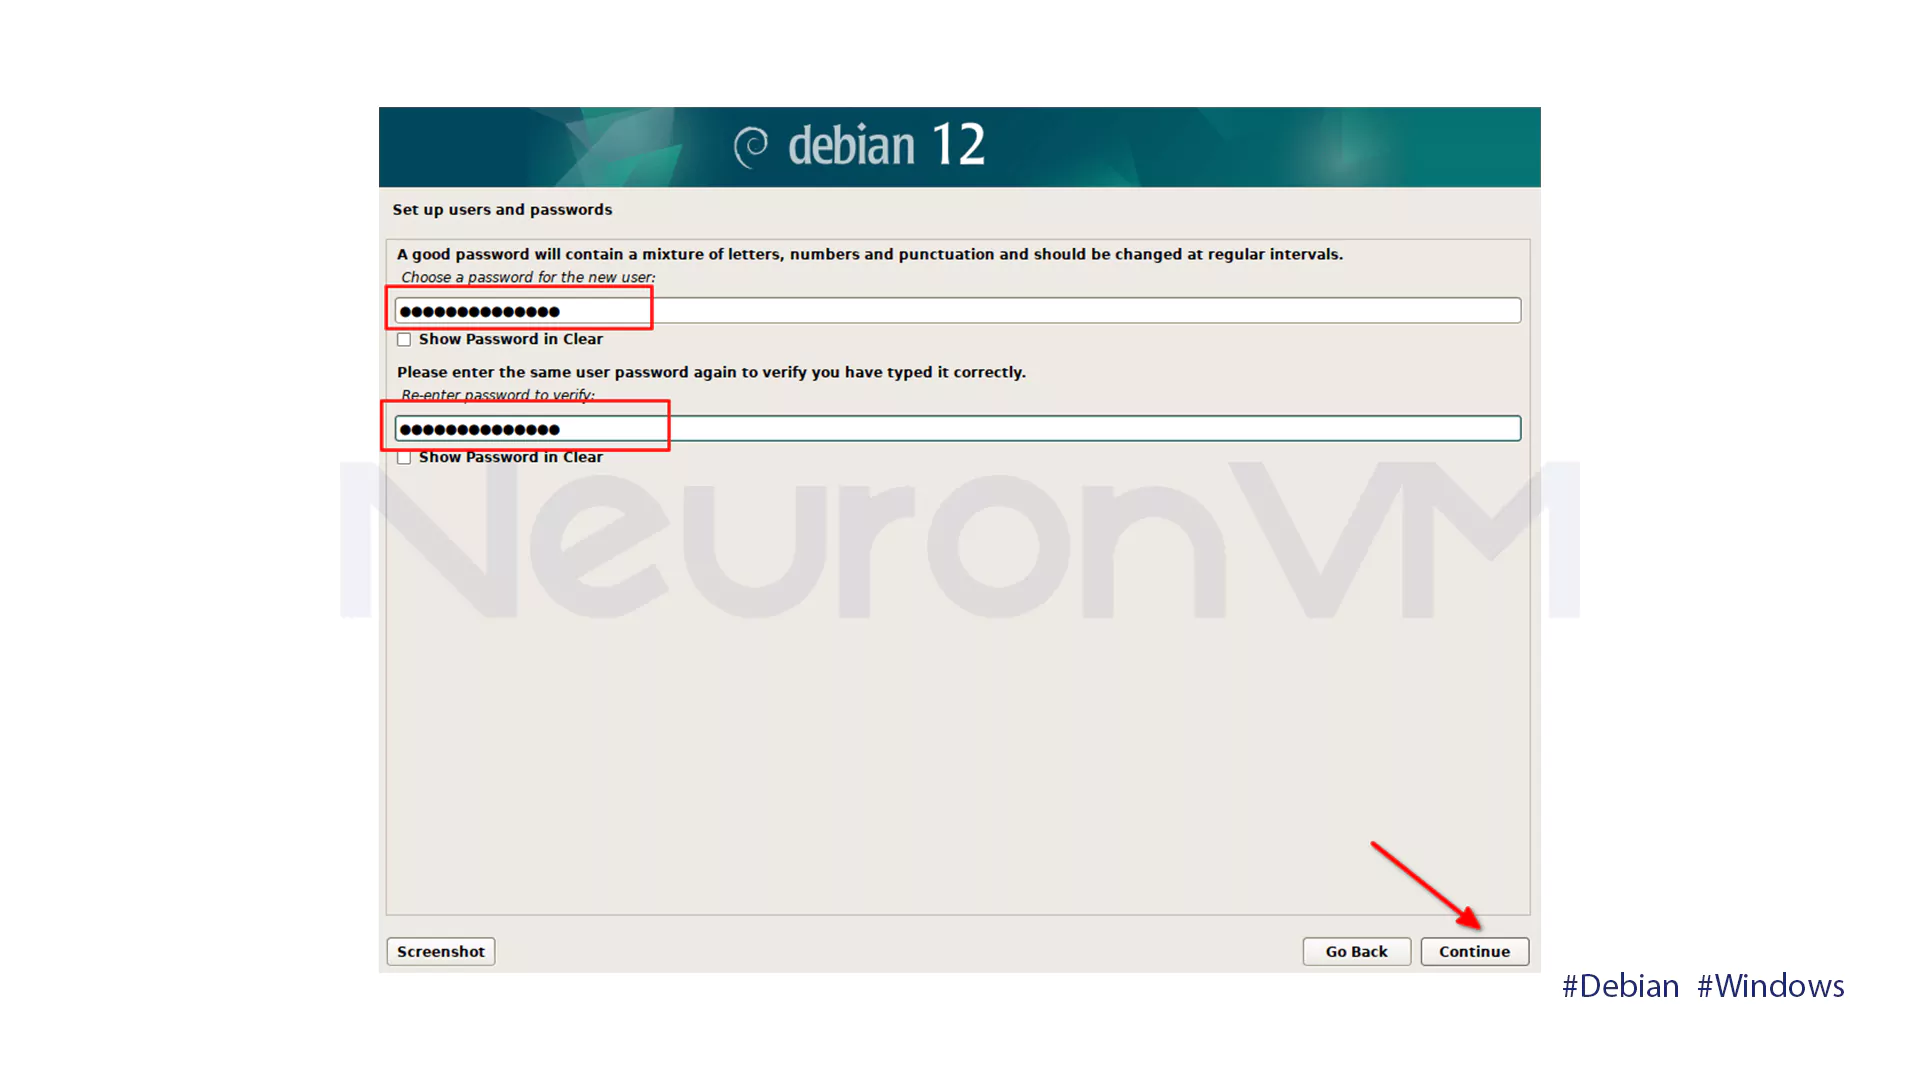
You will choose a username to help provide security and stop unauthorized access to the account. This account is not for administrative use and lacks administrative rights.

Type in the password of the former account. The user and root password must be different for security.
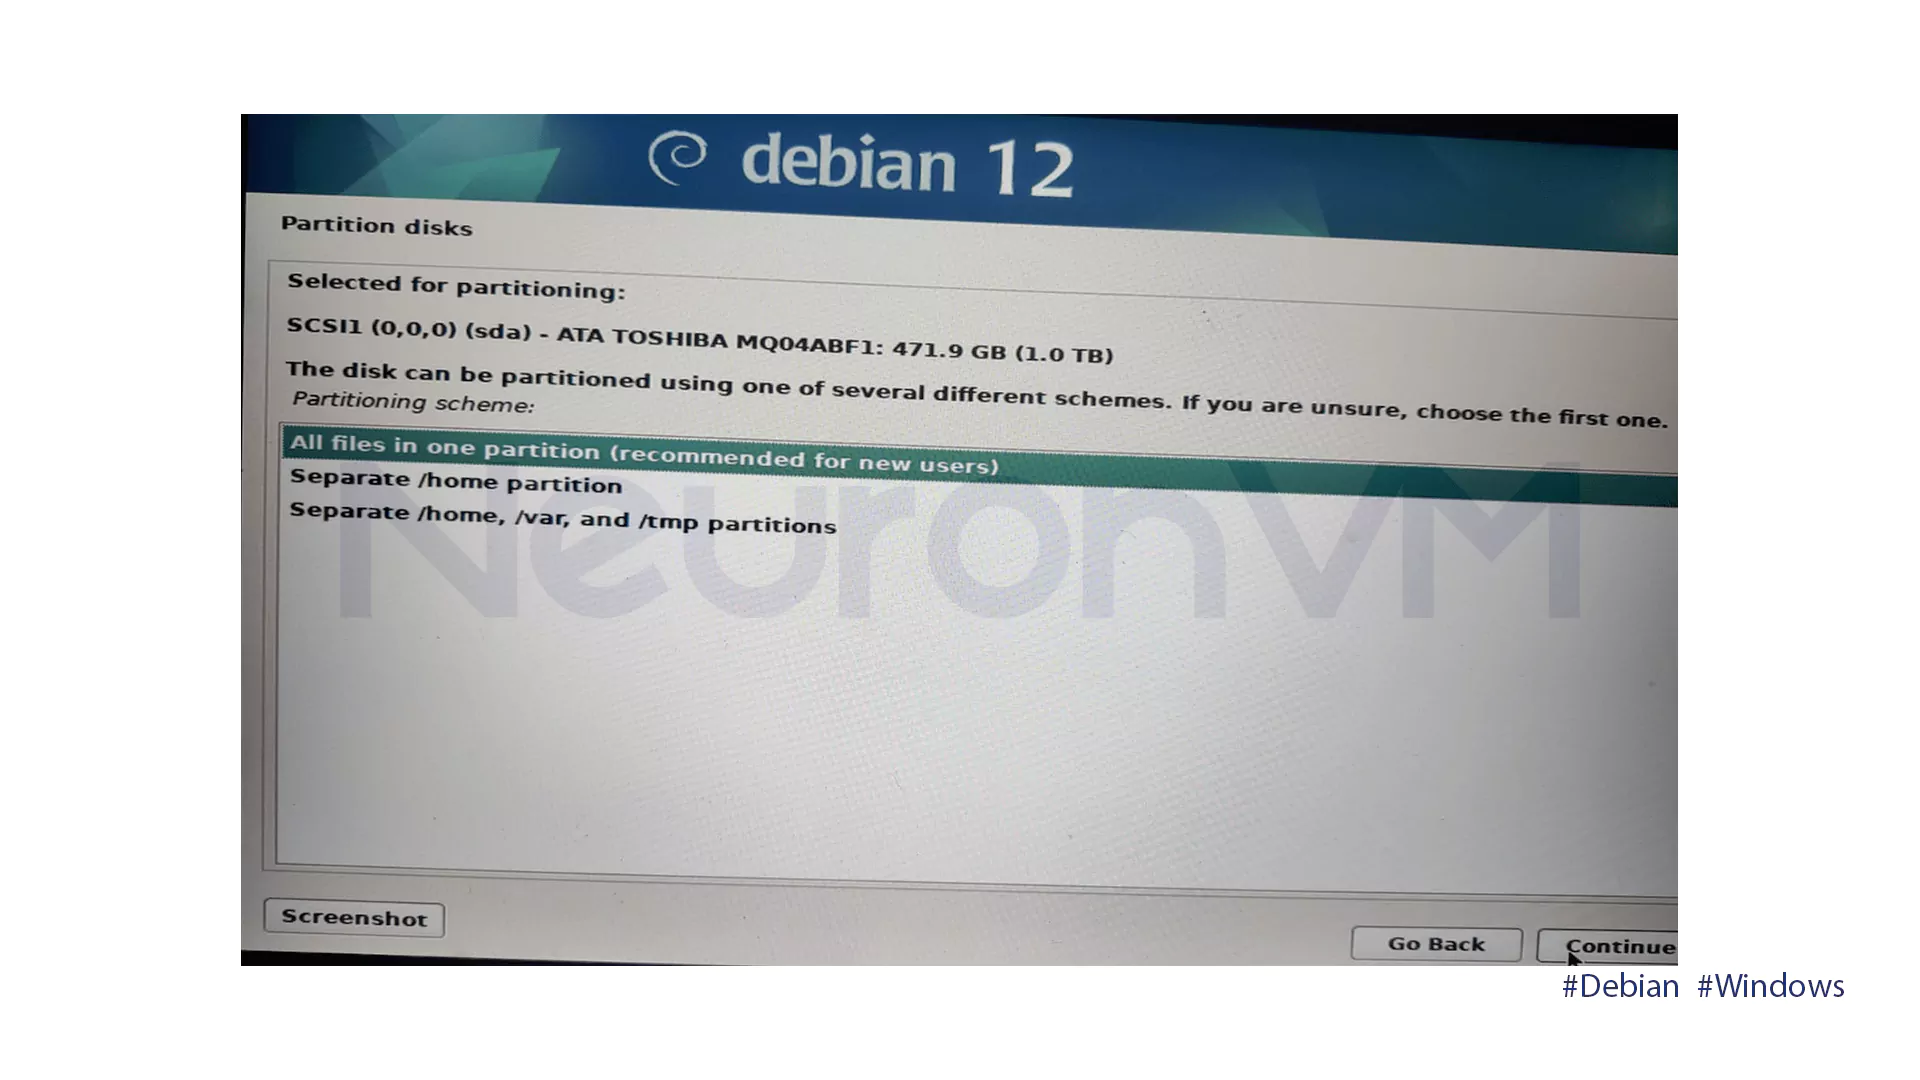
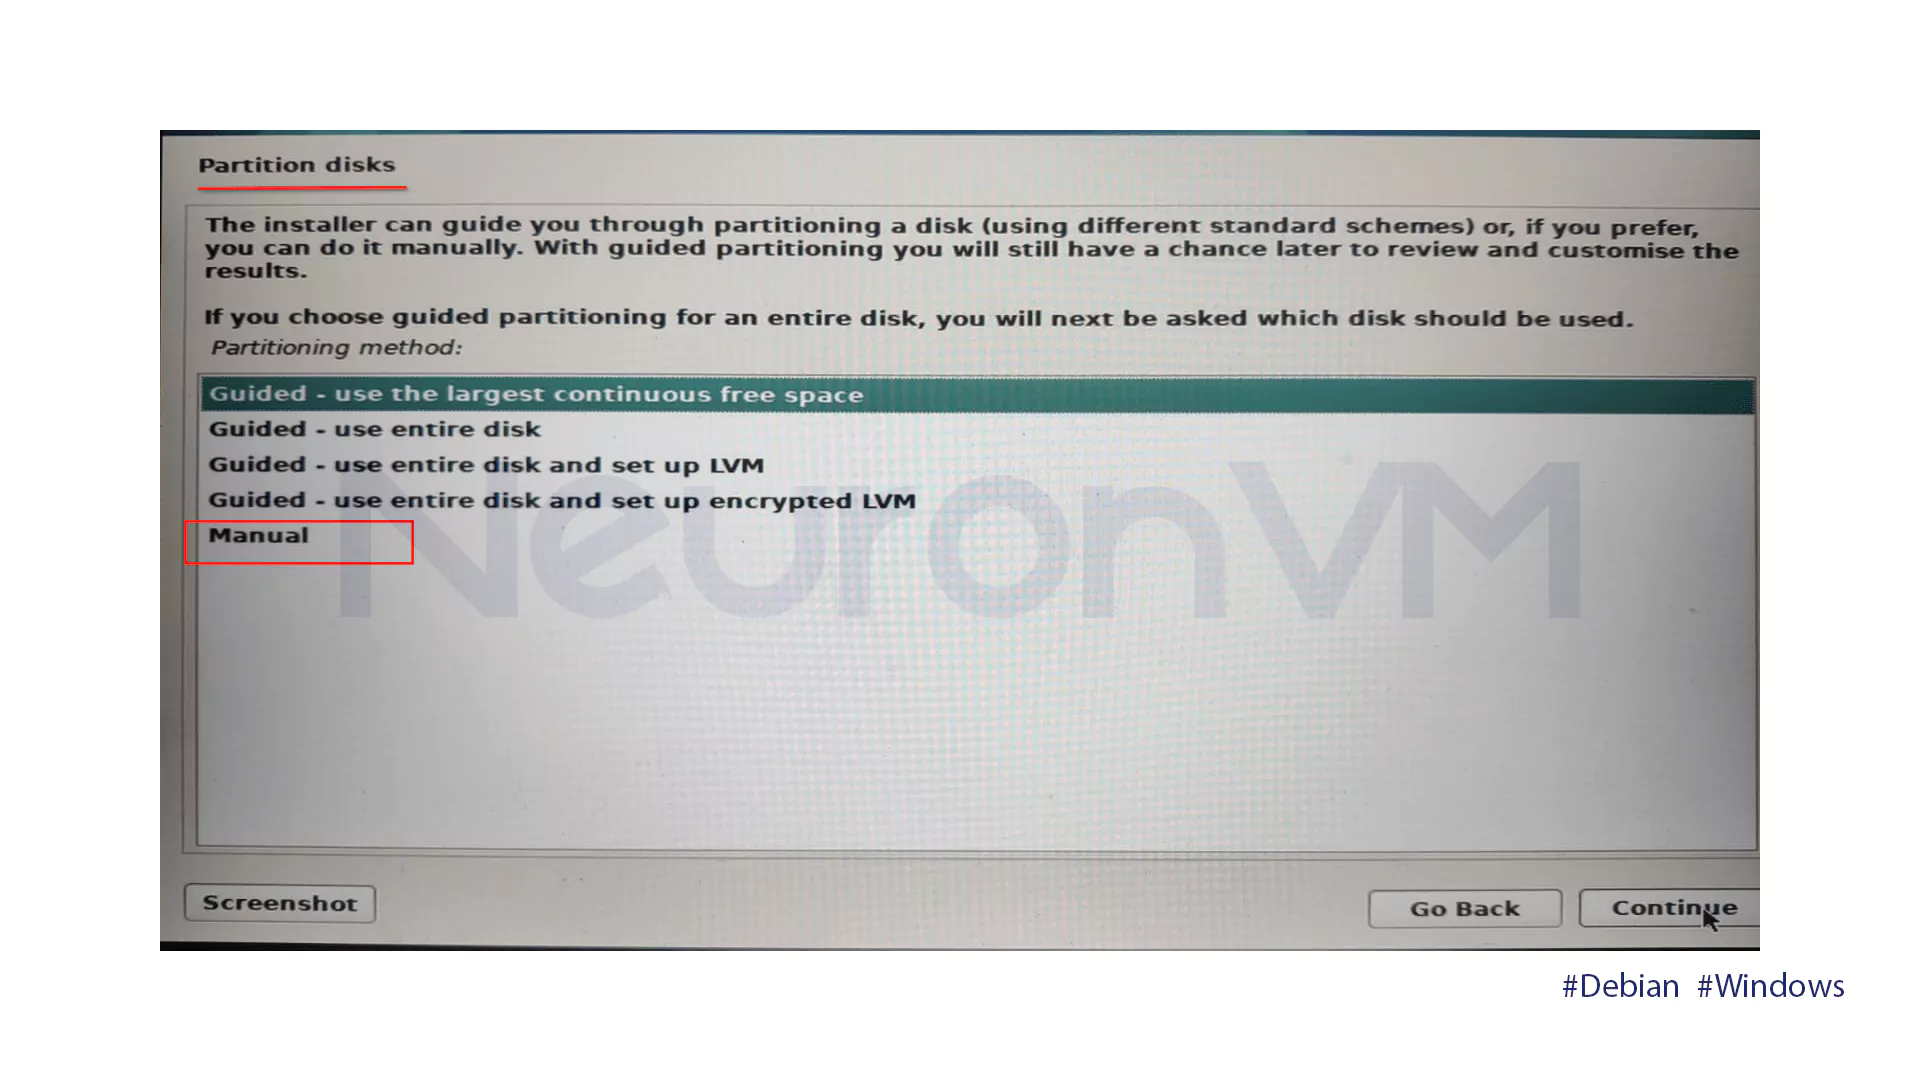
Partition the drive carefully. Choose a dual boot option to avoid deleting Windows and causing startup issues. Below is an explanation of the options and differences that one finds on this page.
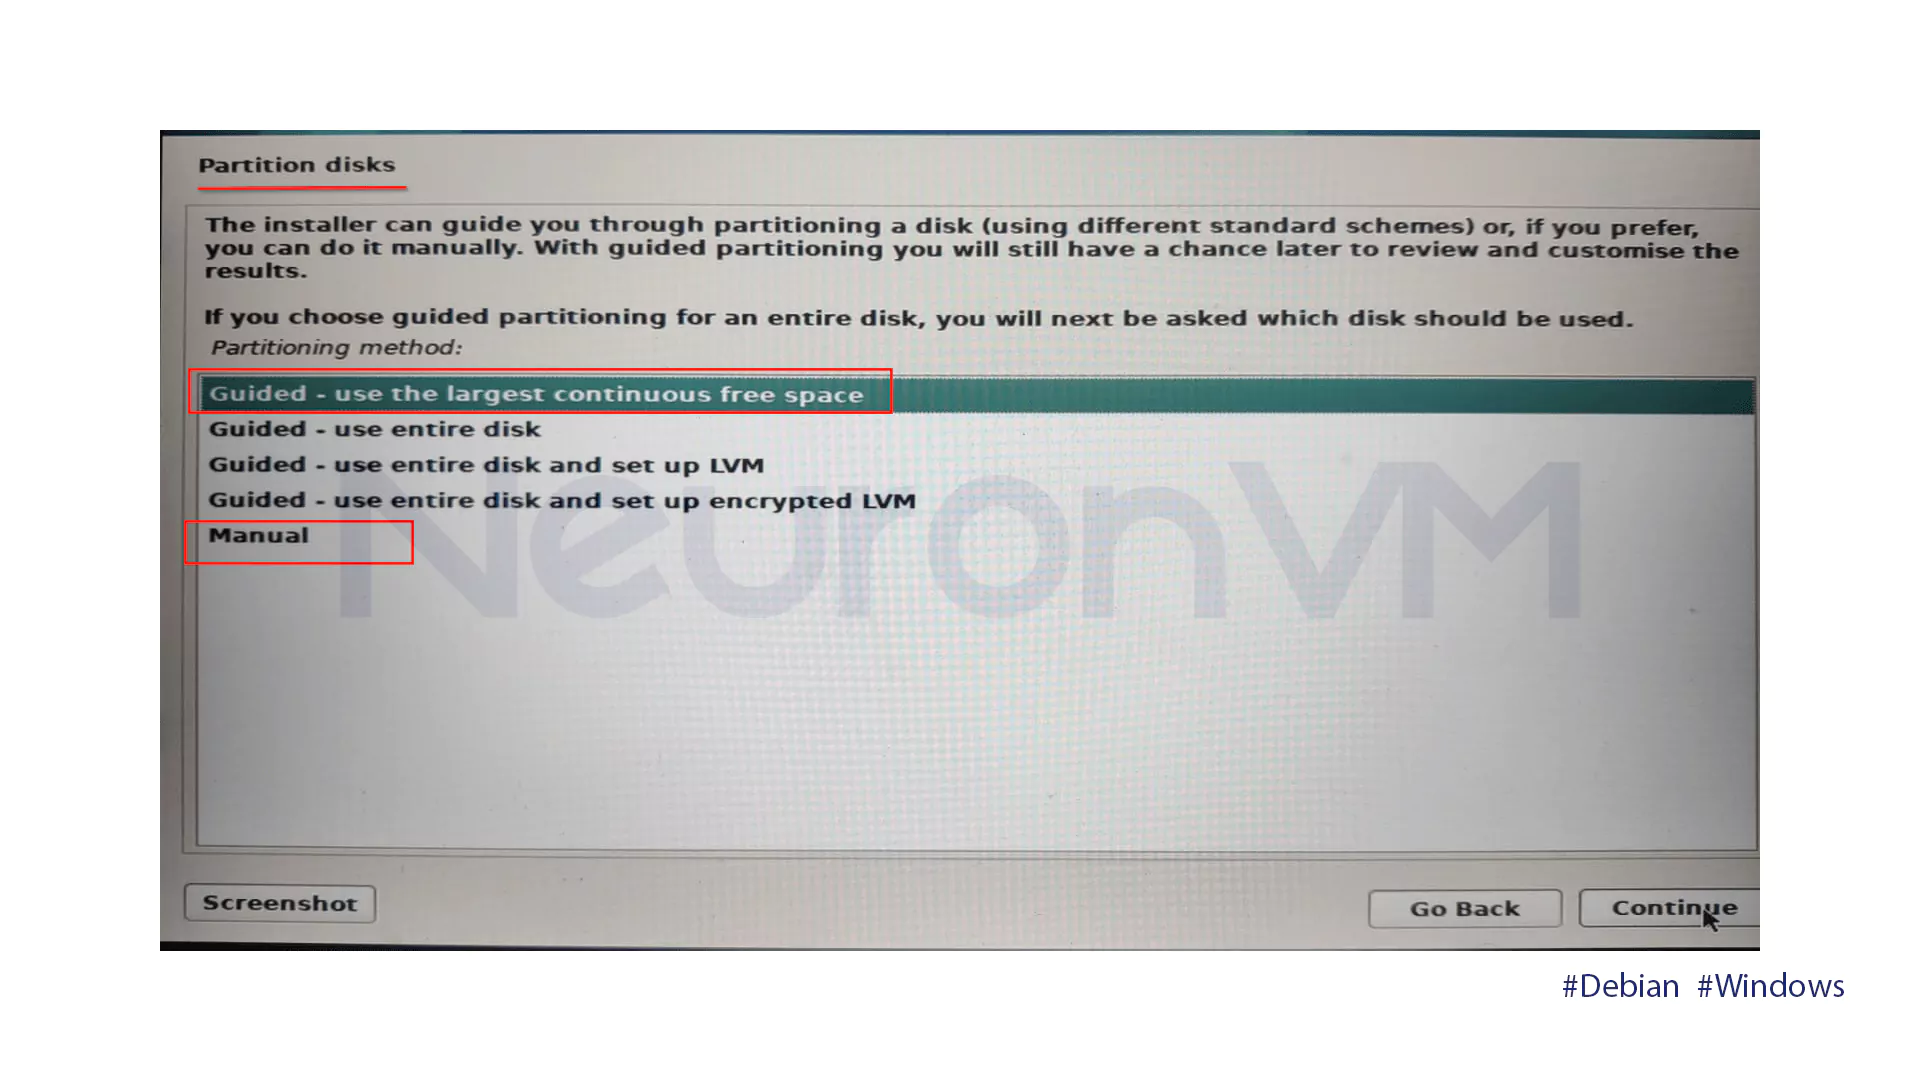
Guided Partition Option: This method allows new users to easily create disk partitions without requiring advanced technical knowledge. It automatically detects the free disk space and offers three options for creating partitions.
- Create all partitions in a single partition.
- Create a separate partition for the home directory (/home).
- Create separate partitions for different directories such as /home, /var, and /temp.
Select the option that will generate a separate partition for the home directory )/home) only. The installer automatically creates root, swap, and a large home partition for user files.
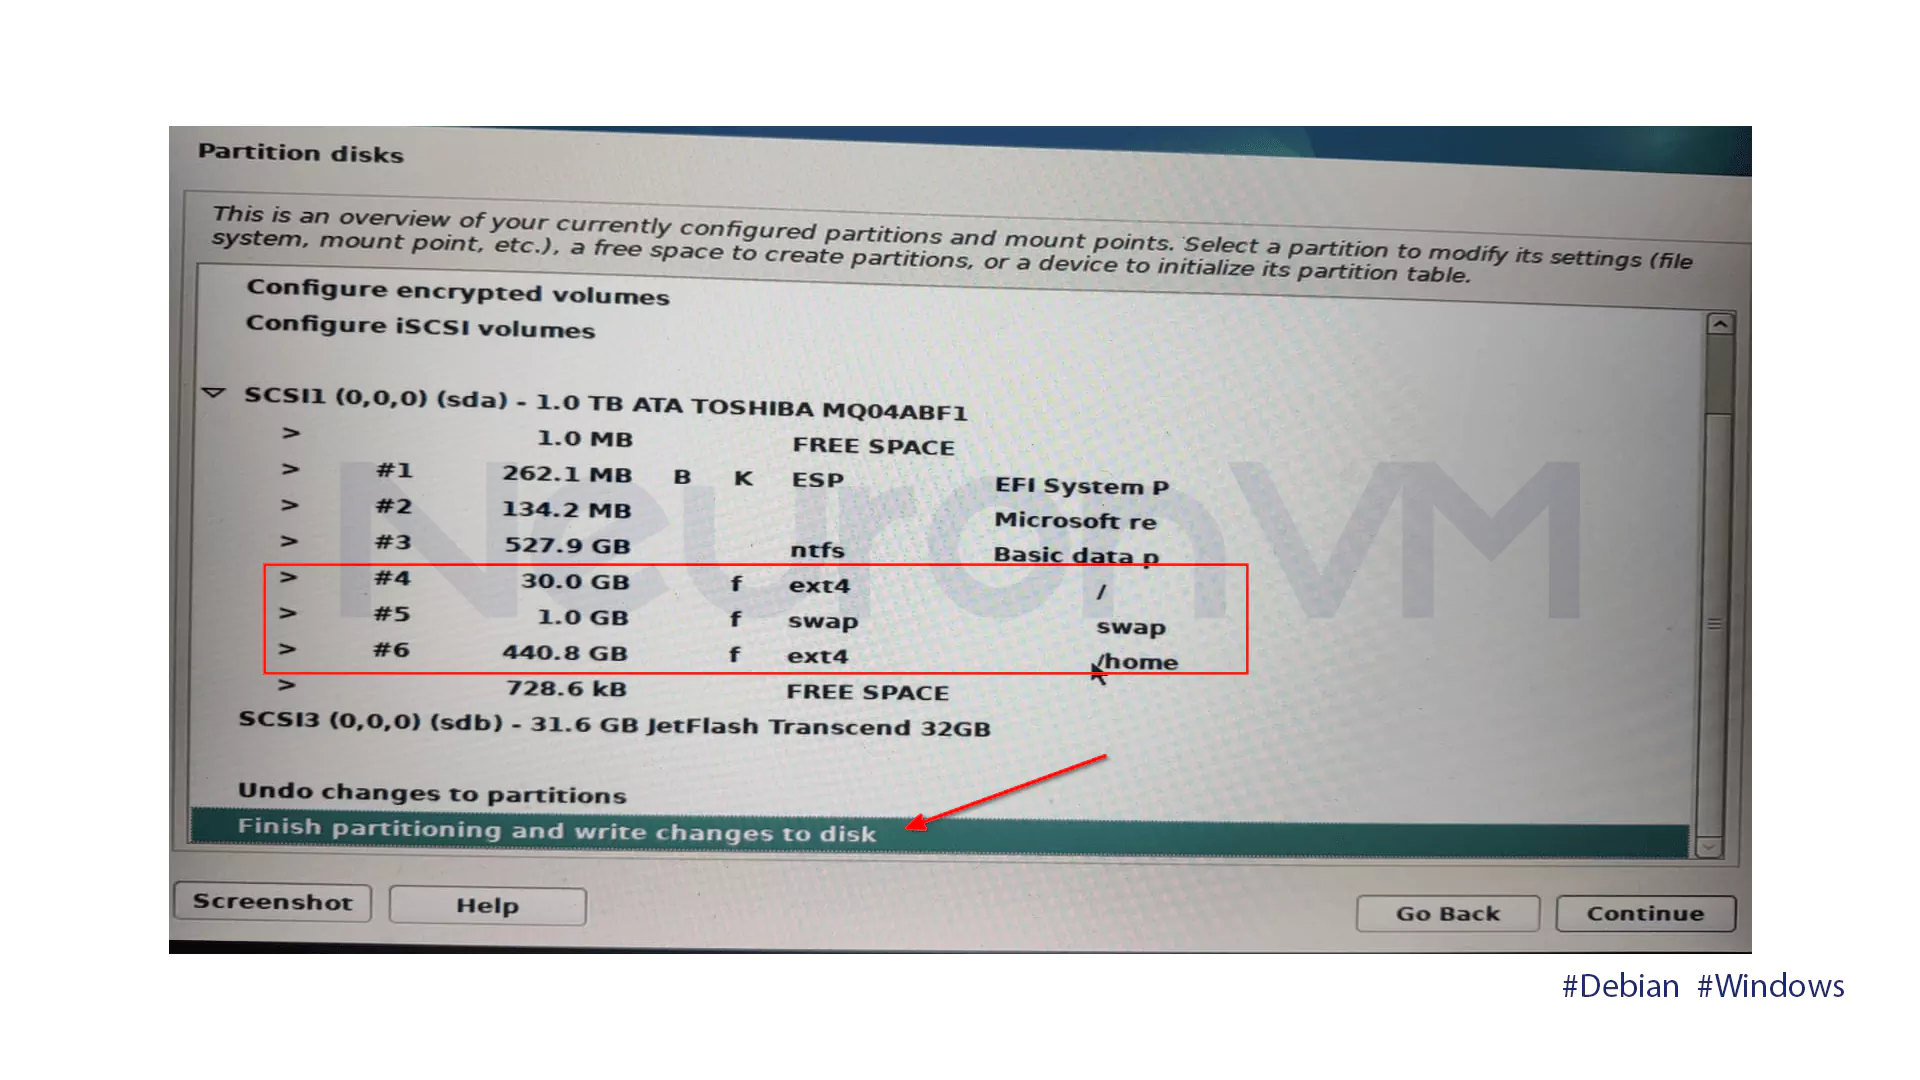
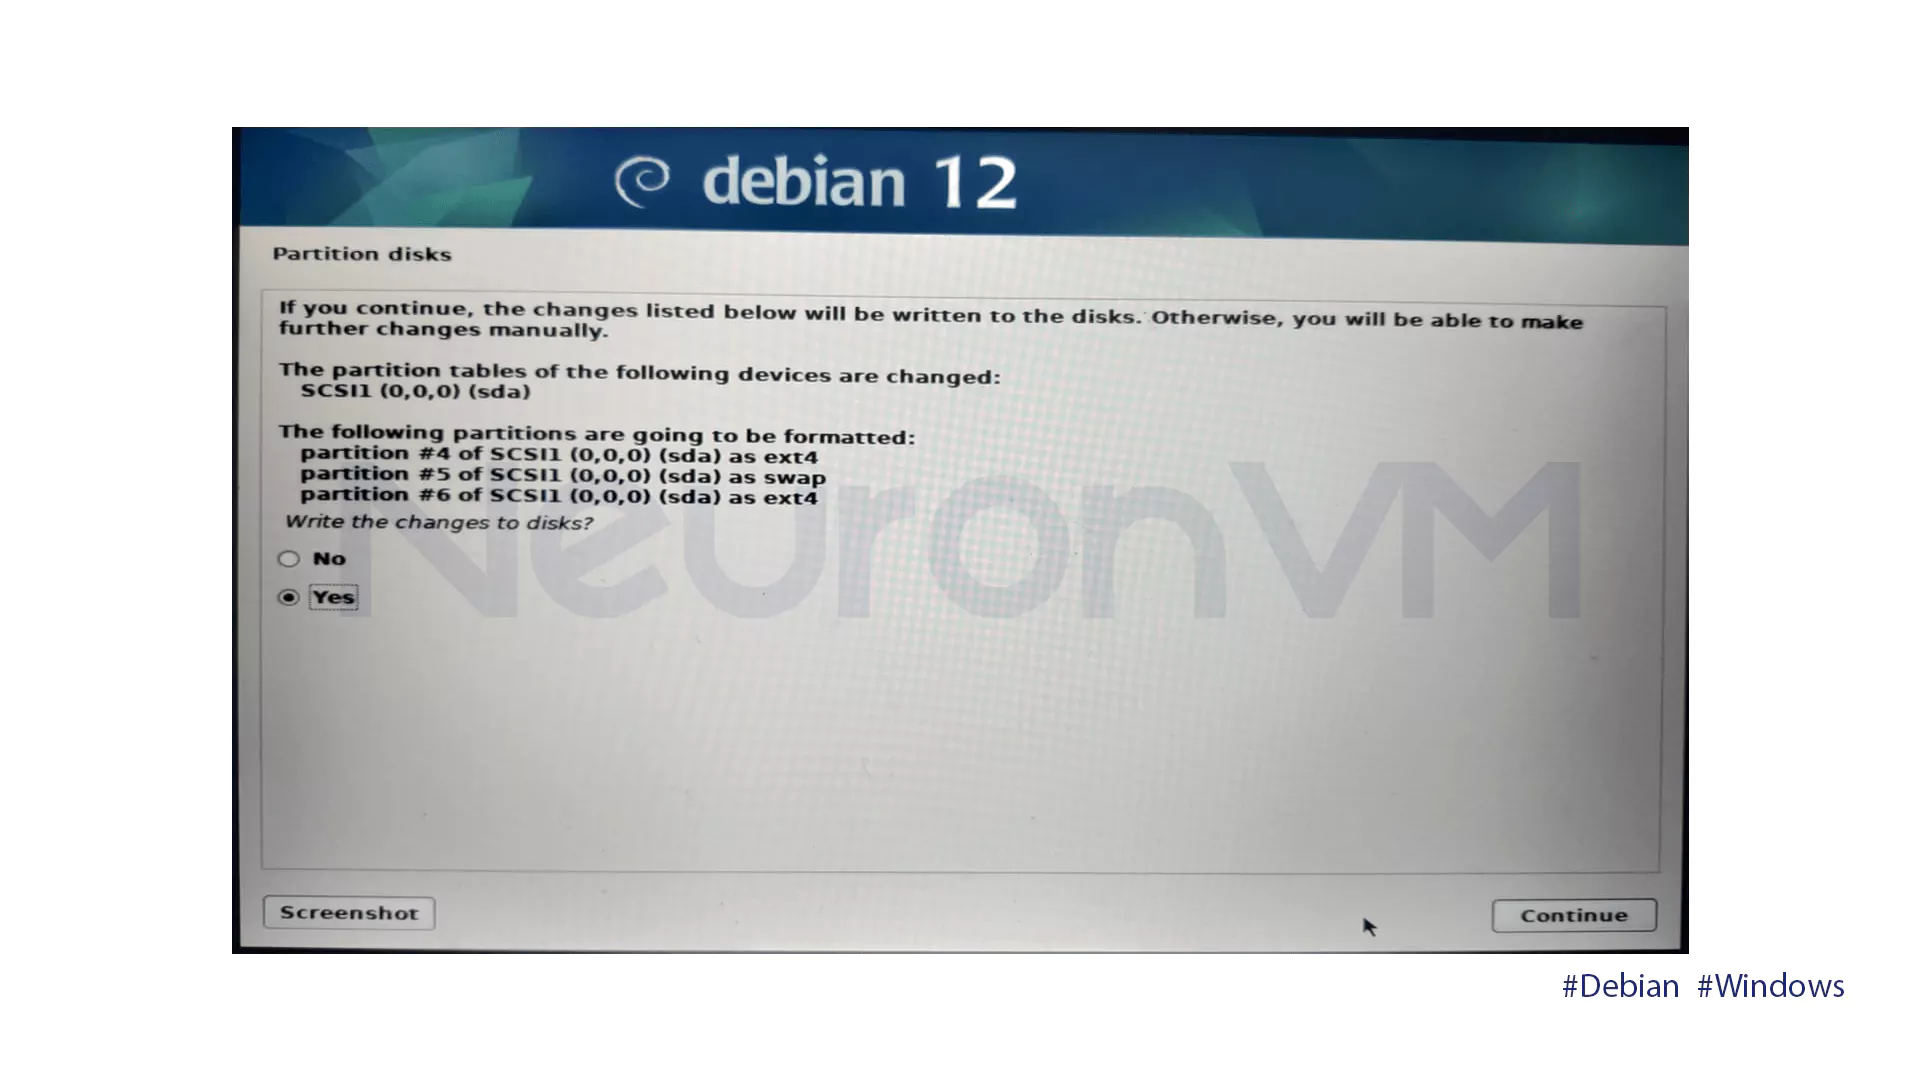
Select Finish partitioning and write changes to disk to finish the changes. Then select Yes to confirm that you are making these changes.
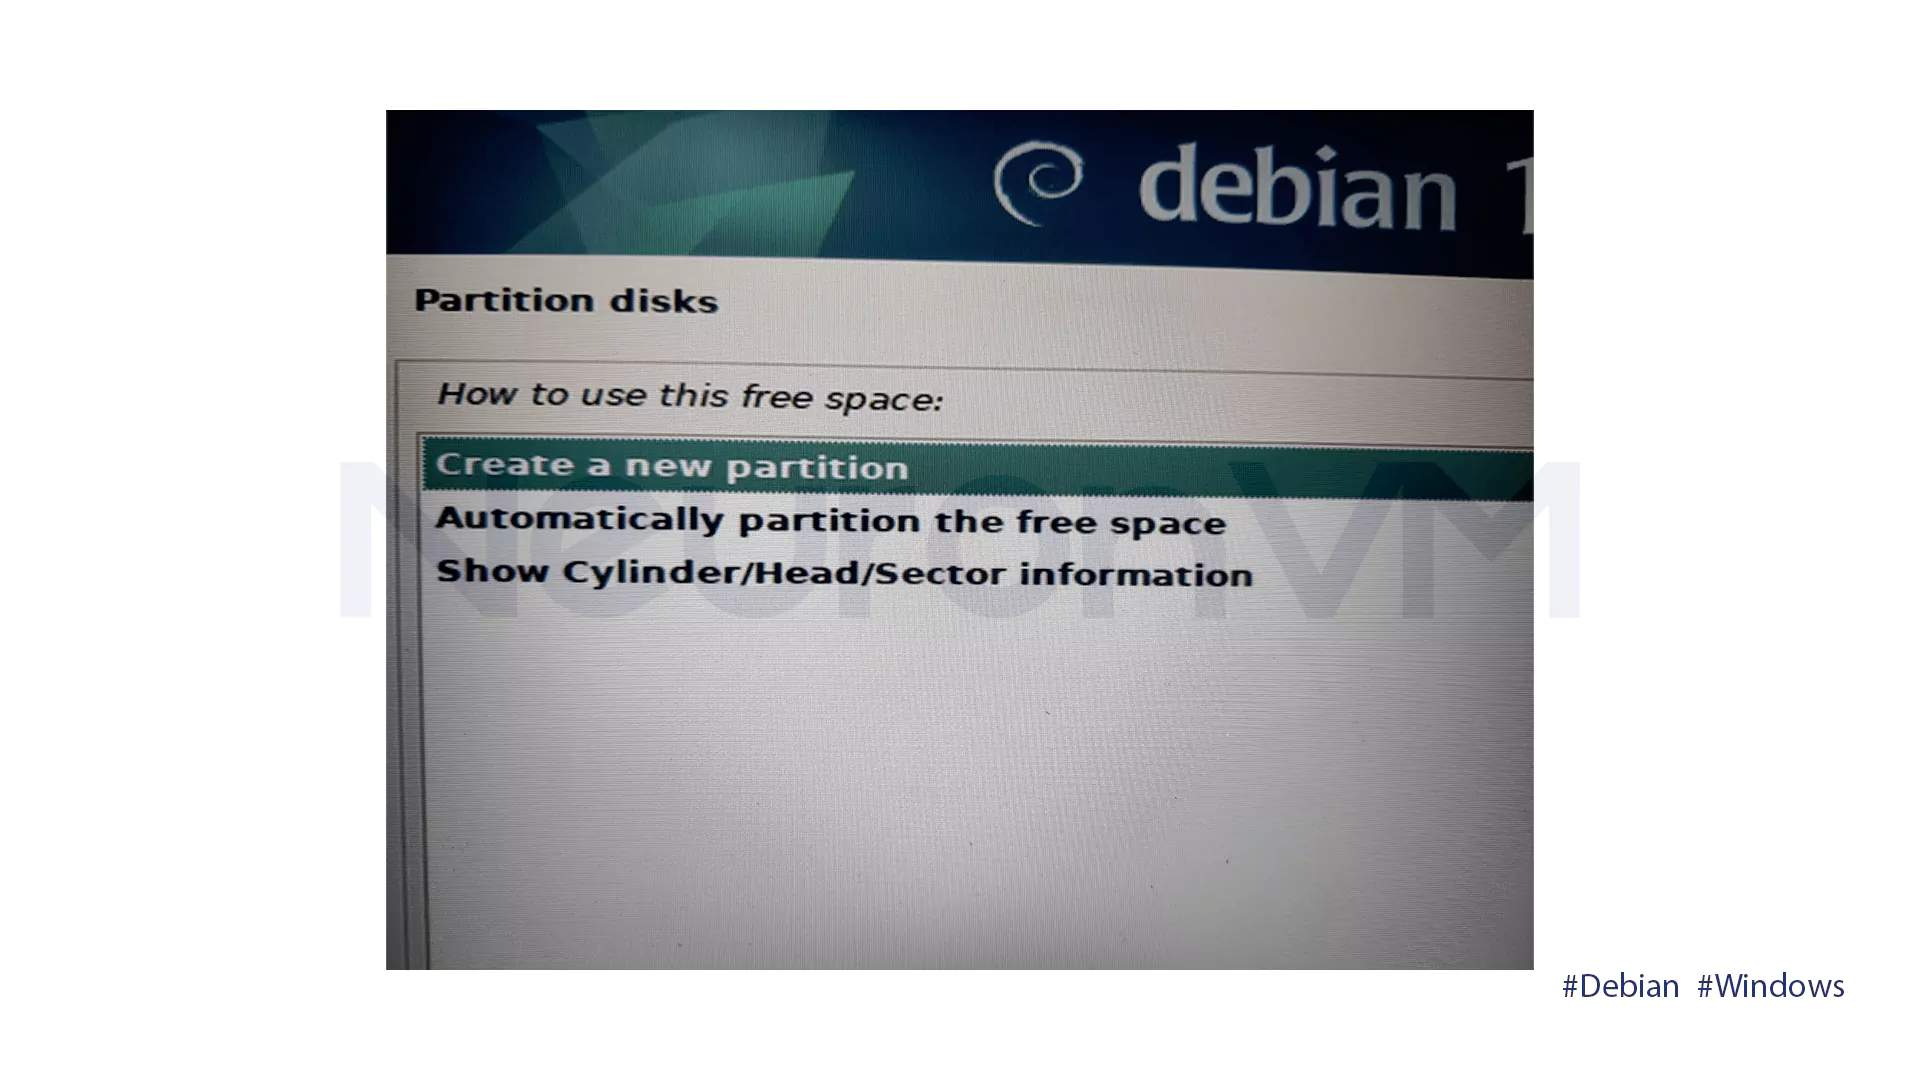
Manual Partition Option: You can manually set up partitions and their sizes by selecting Manual in the partition window.
To create a new partition on your hard drive, click on Create a new partition.
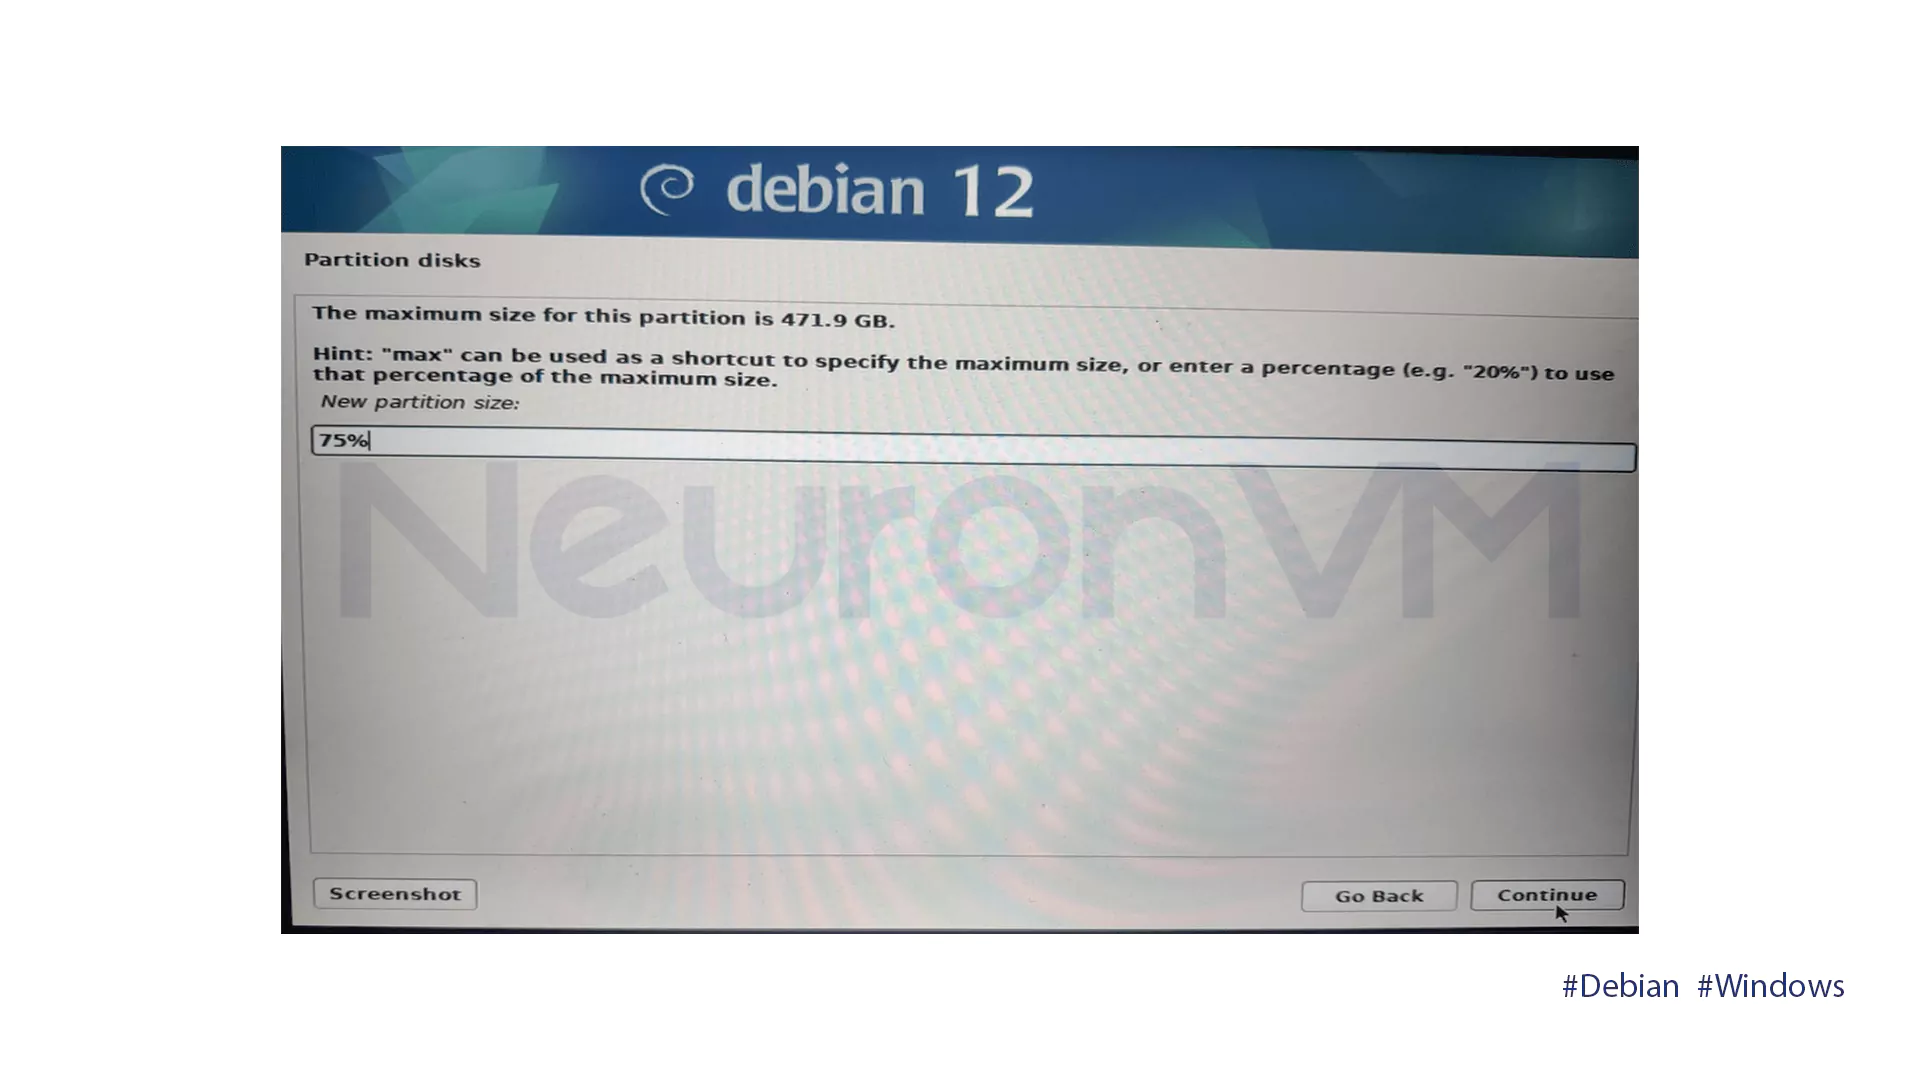
Select the new partition size as a percentage of available space (e.g., 75%). It will be mounted under /home for user data.
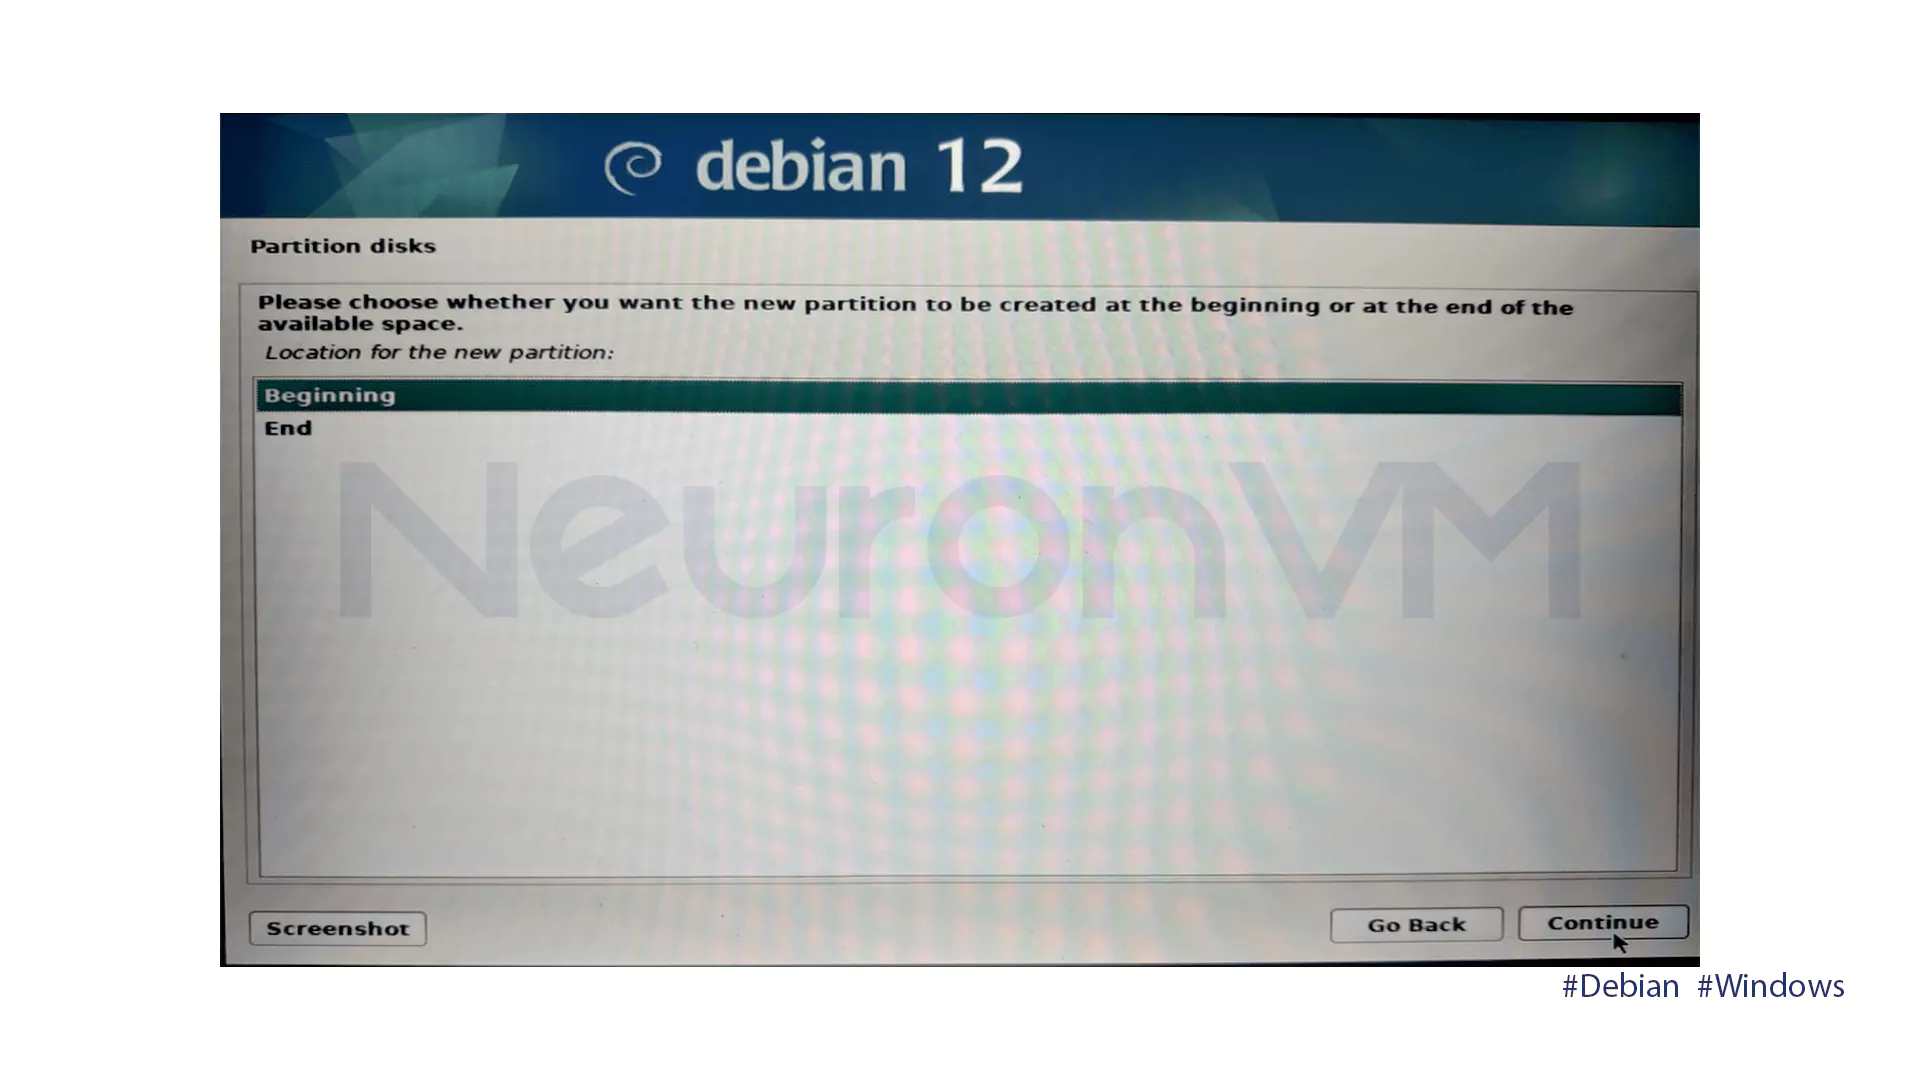
Next, select where on the disk to place the partition, i.e. start or end.
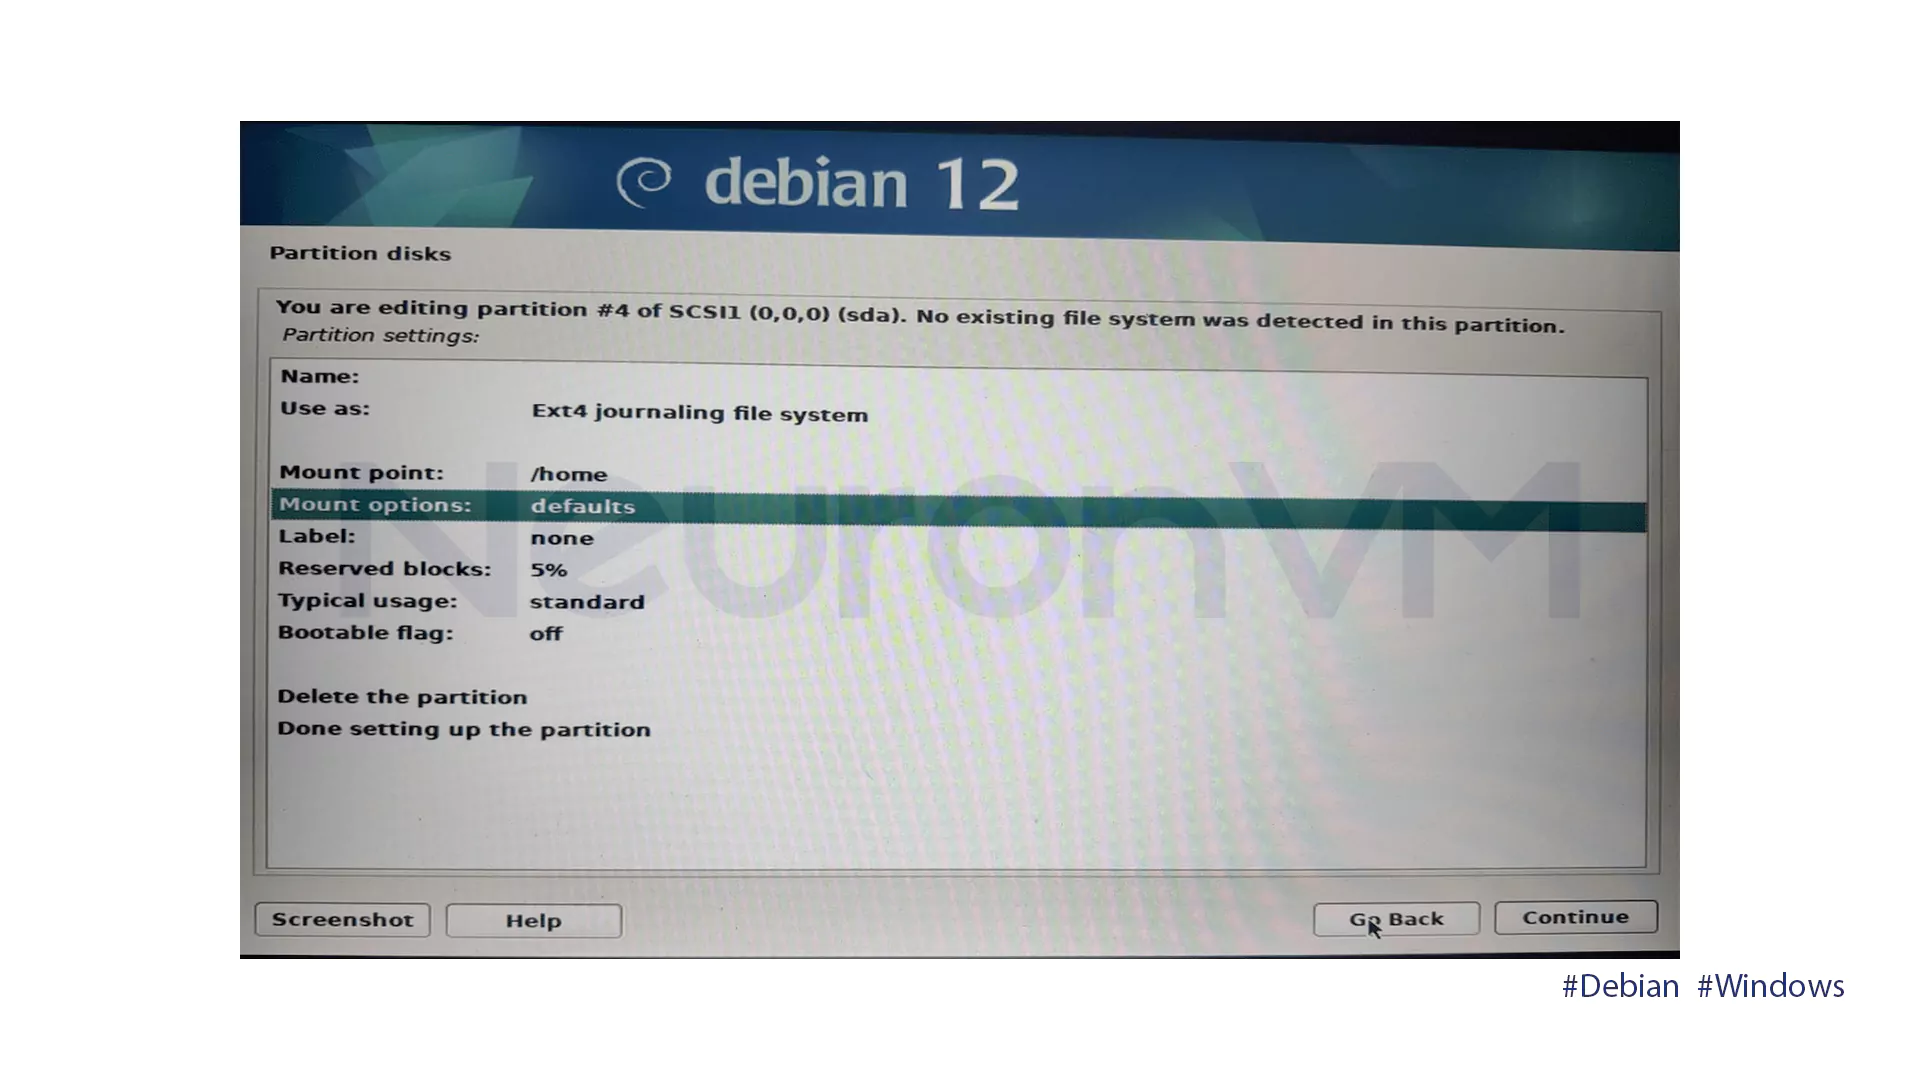
You will then be presented with a configuration window that includes the following options:
- Use as: Select the file system type, such as Ext4.
- Mount point: Select a point to mount the partition, such as /home.
- Mount Options: Select various settings for how the partitions are mounted, such as async and sync.
Finish each partition set up to save, then write all changes to the disk permanently.
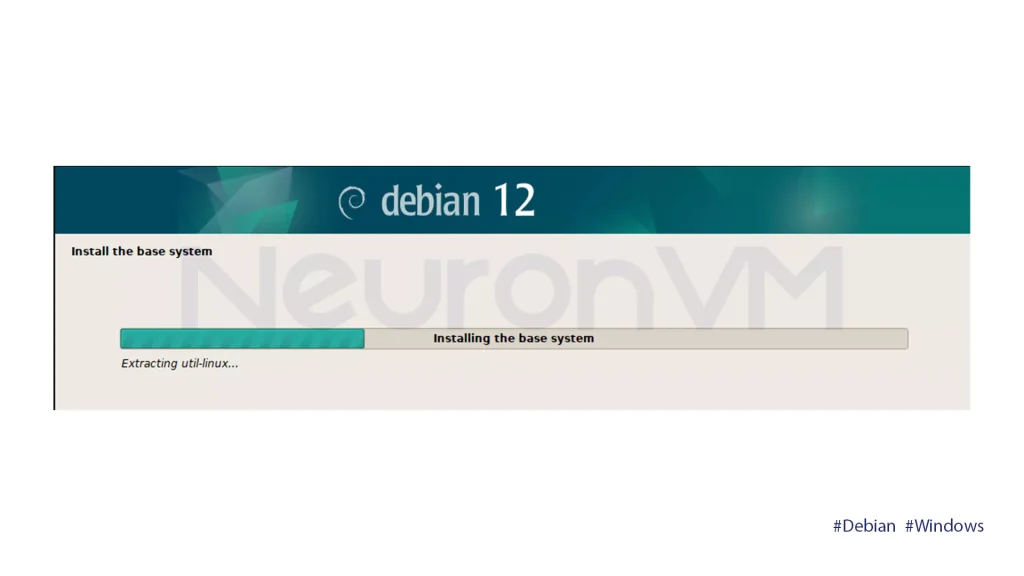
The installation of the base system will begin.
Choose No when installing with the Debian ISO alone.

Choose Yes to install from a network mirror, and No to install from the ISO.
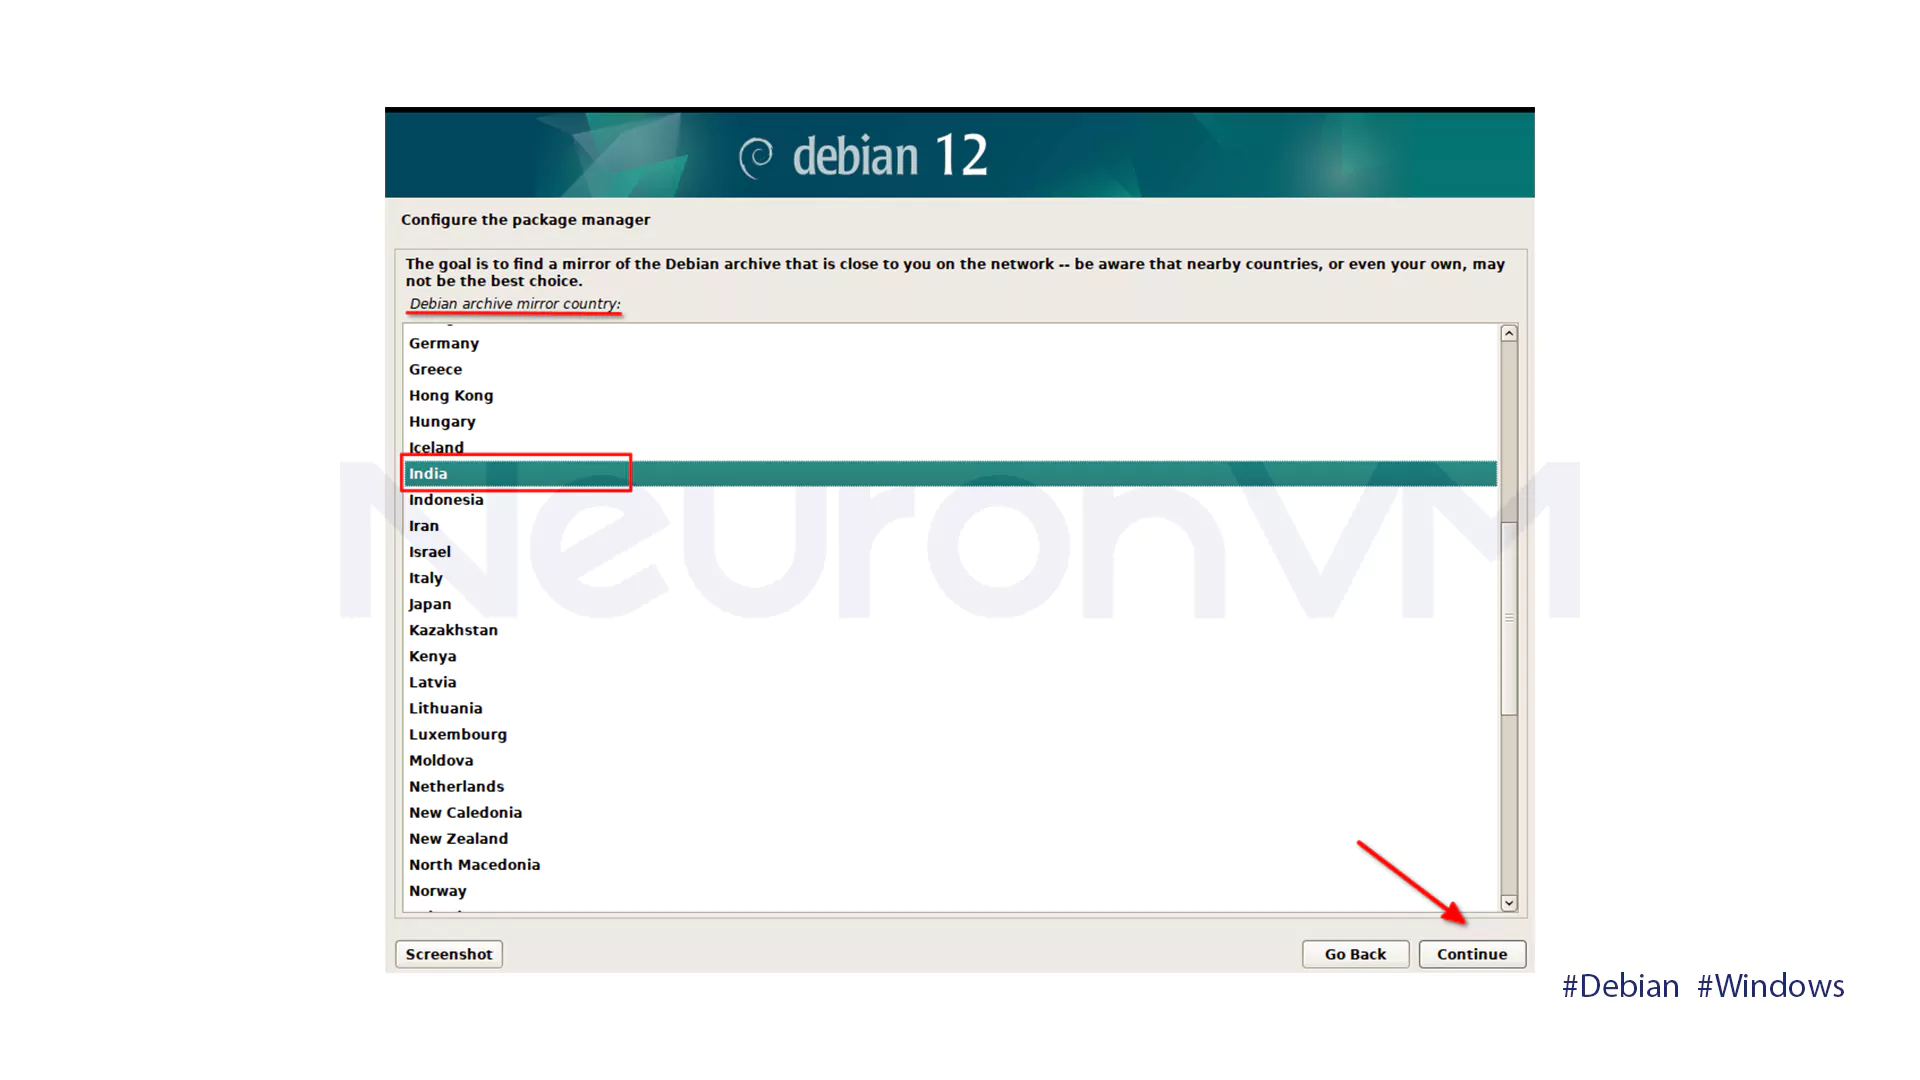
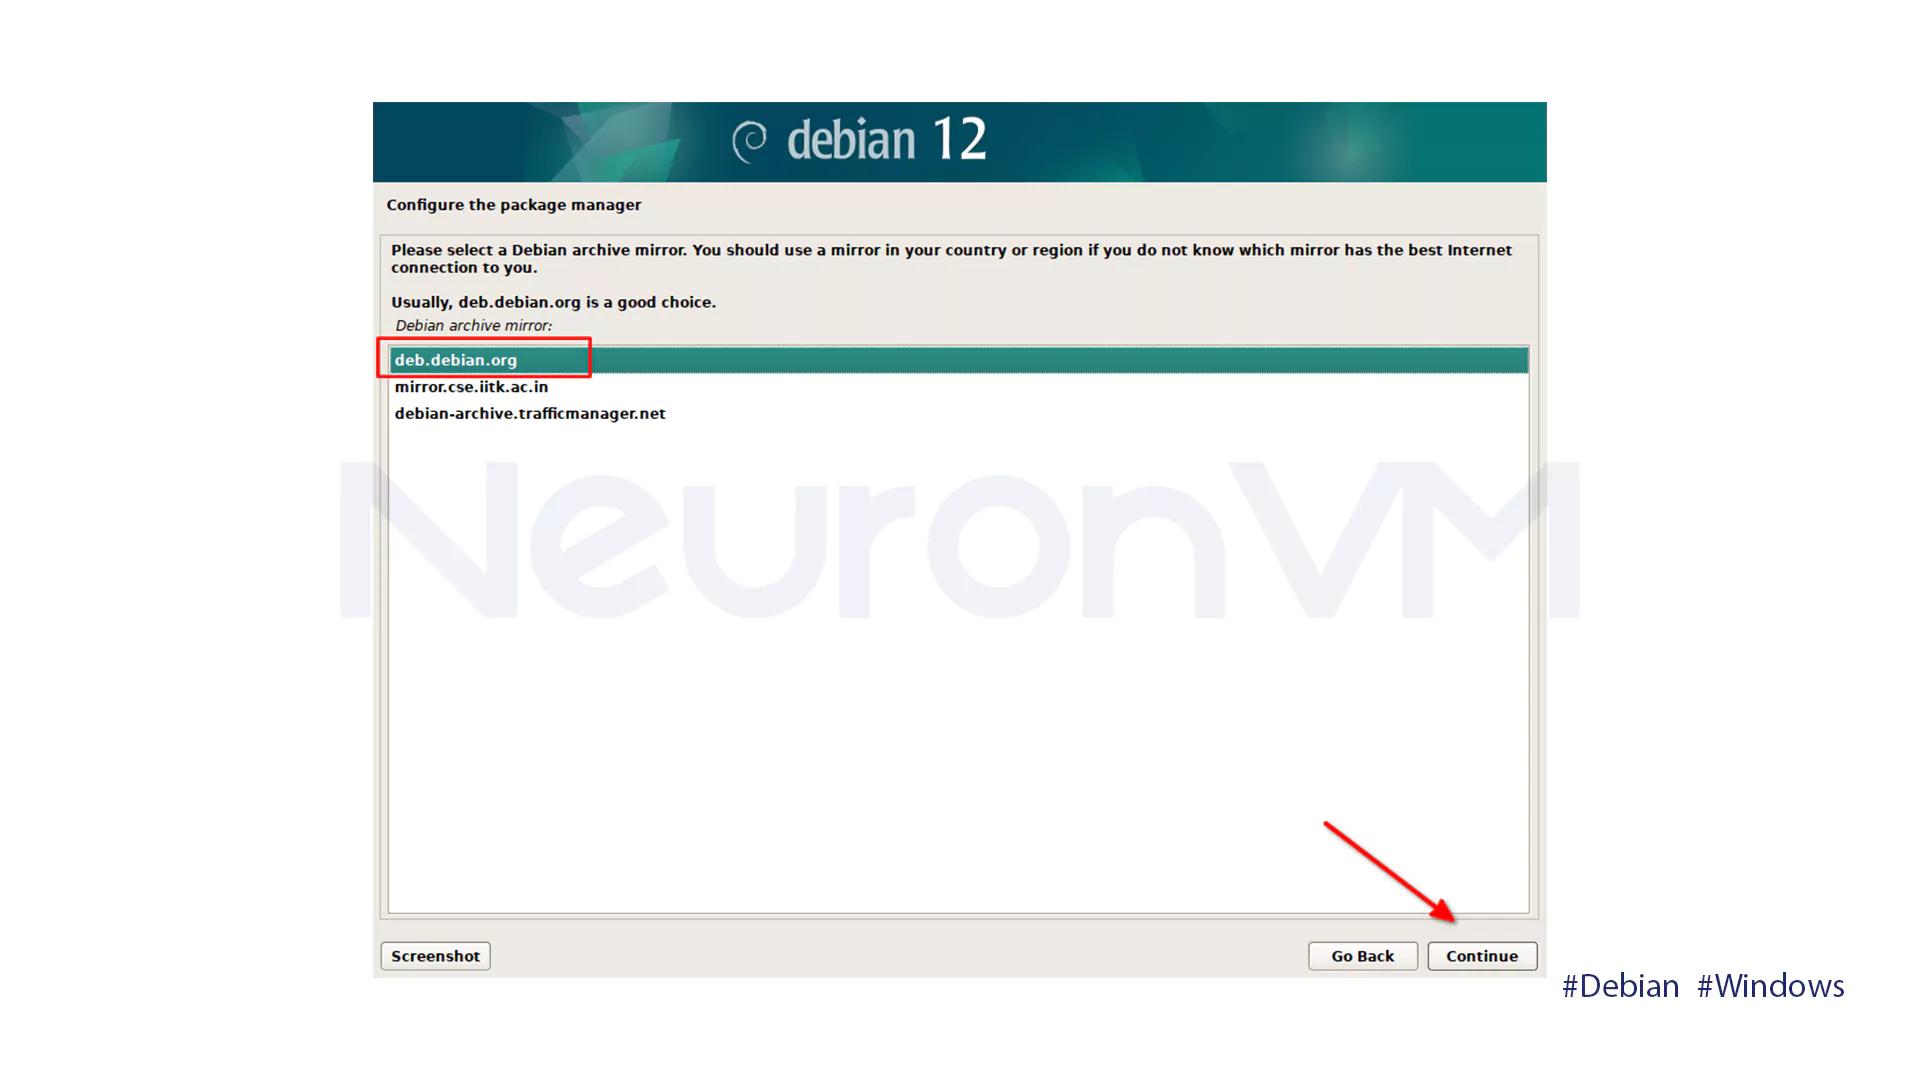
Choose a Debian archive mirror. deb.debian.org is the recommended default.
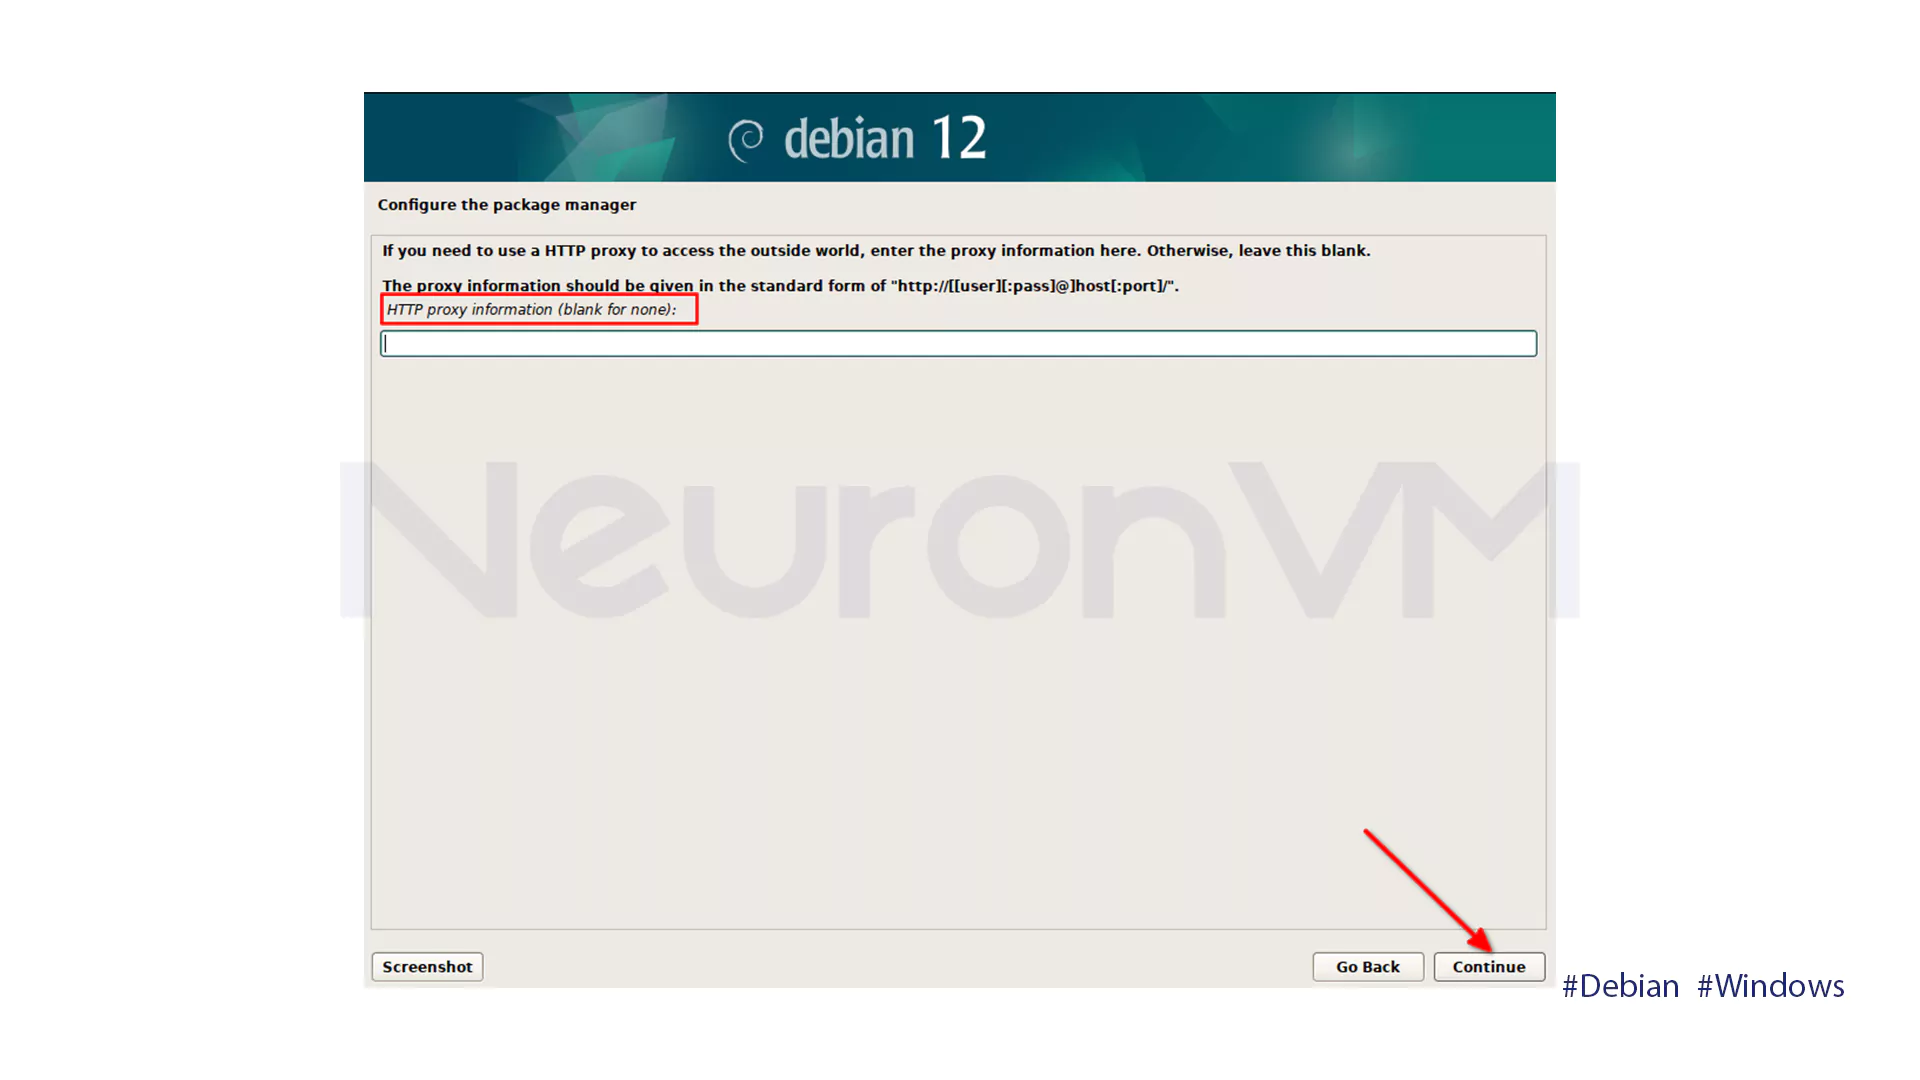
If you are using a proxy, meter the details now. Otherwise, proceed to the next step.
To help make the software improved, you can choose to send anonymous statistics about the packages used. Click Yes to send, or No to proceed without sending.
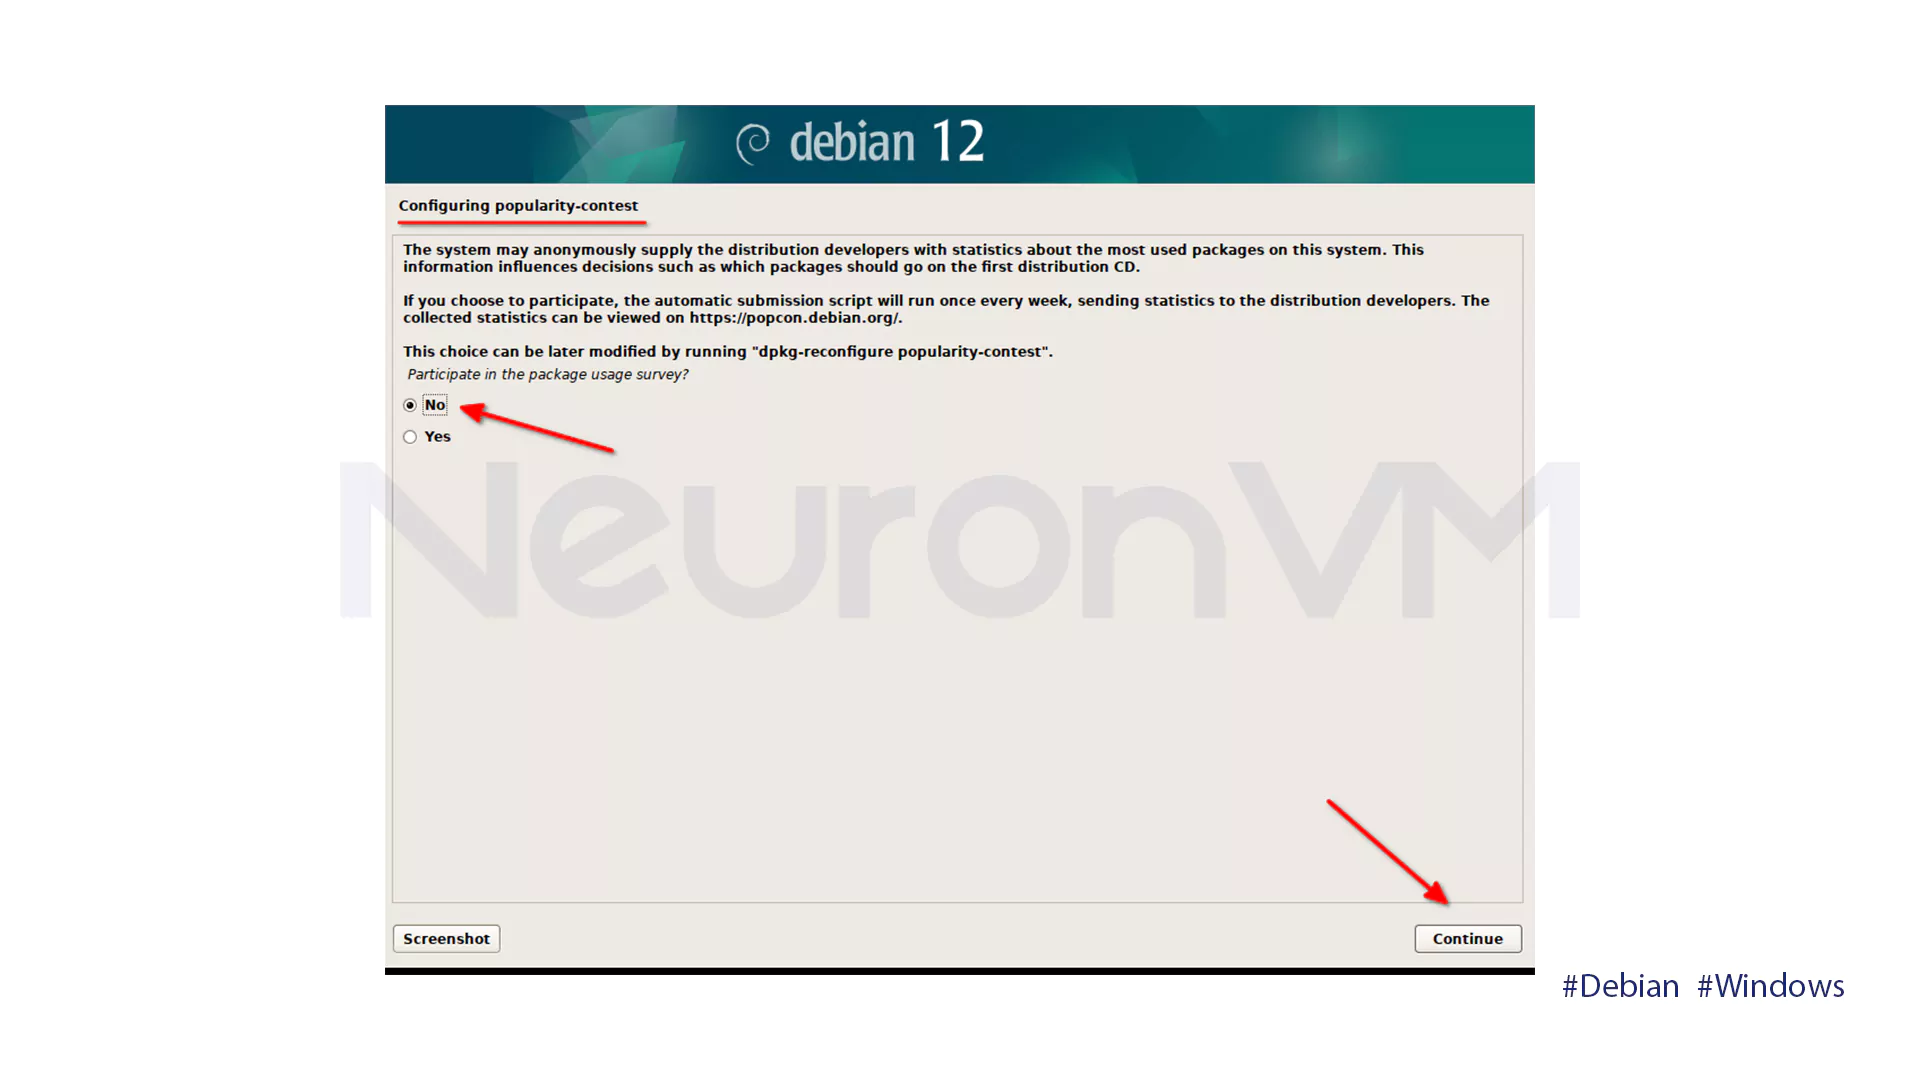
This option can be altered from Yes to No in your operations system itself using the following command:
dpkg-reconfigure popularity-contest
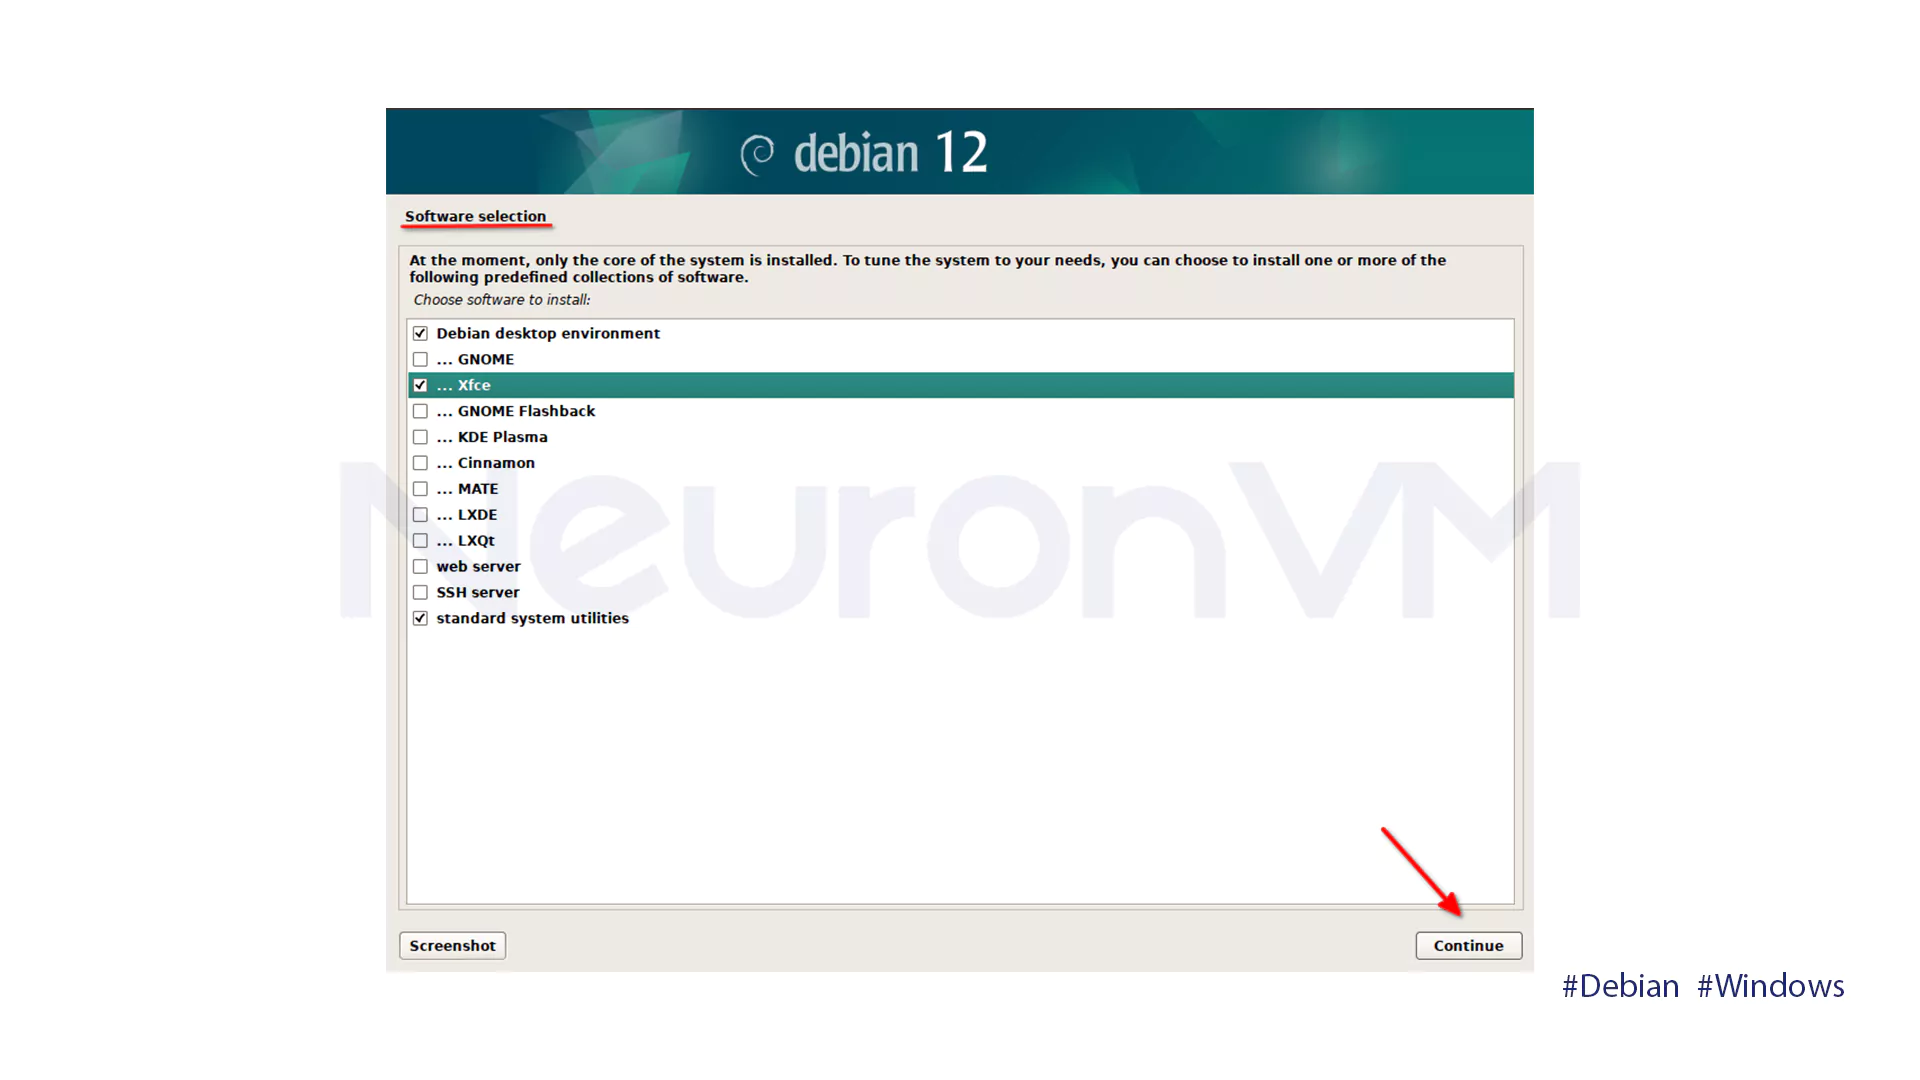
Choose Xfce as your desktop and Standard System Utilities as your tools. The installer will then install them automatically.
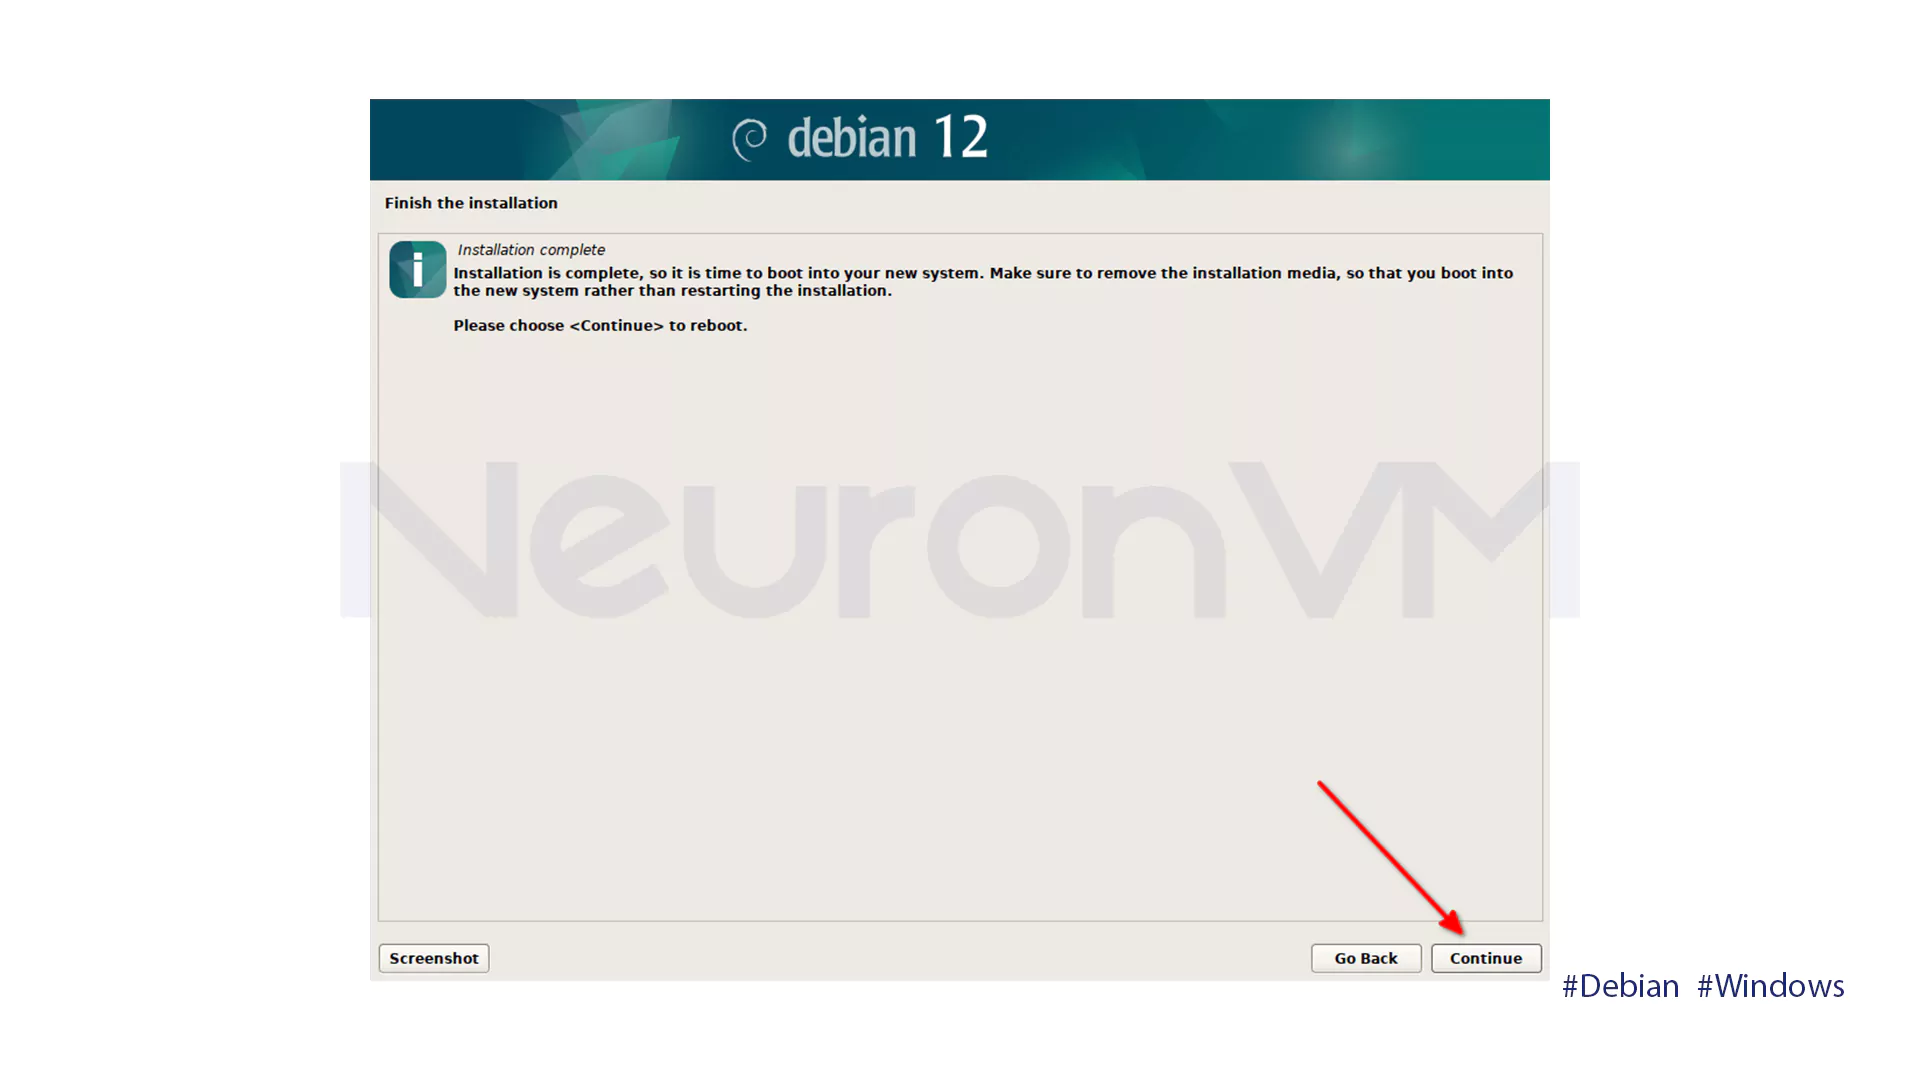
The installation will install GRUB automatically, which will hunt around and add any operating systems it finds, including Windows, to the boot menu.
To restart your computer automatically after installation, click Continue.
You can choose Windows or Debian from the GRUB boot menu after the system reboots.
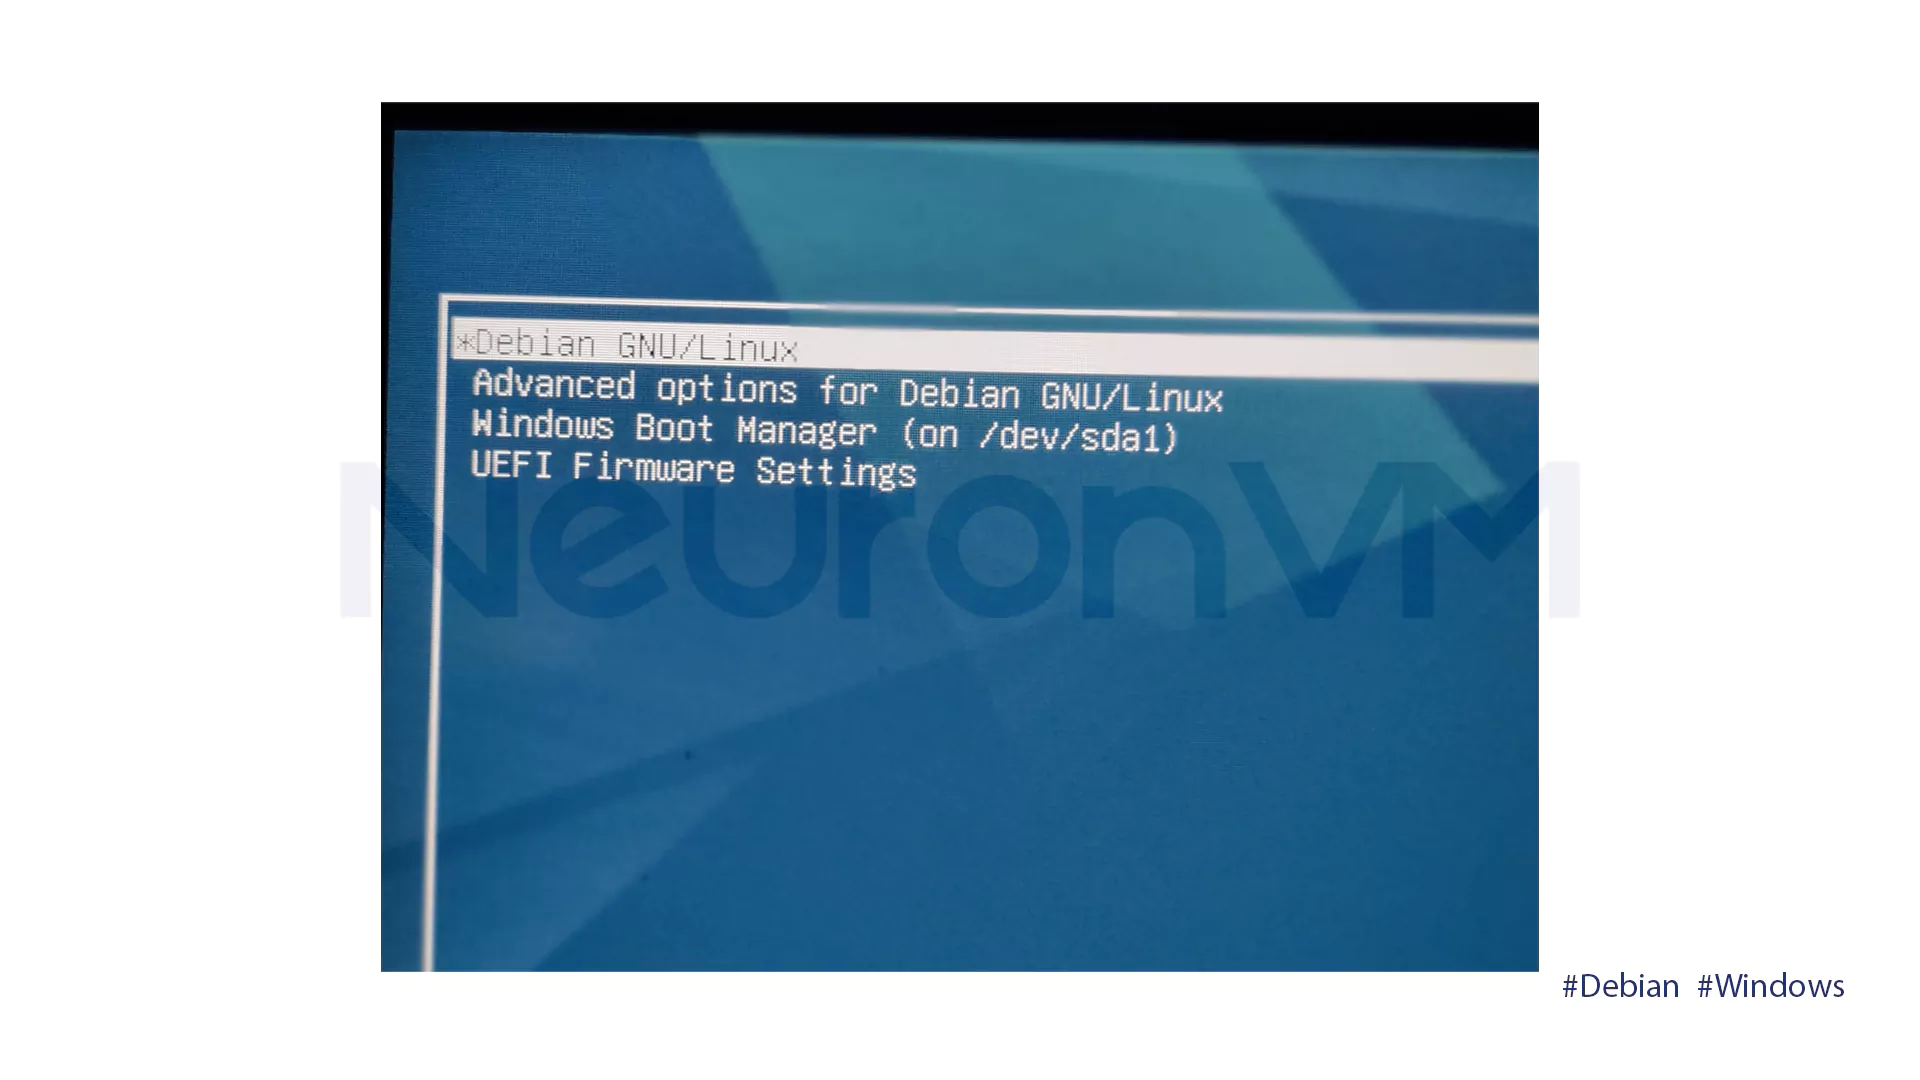
Click Debian GNU/LINUX to boot into Debian, then log in as your non root user.
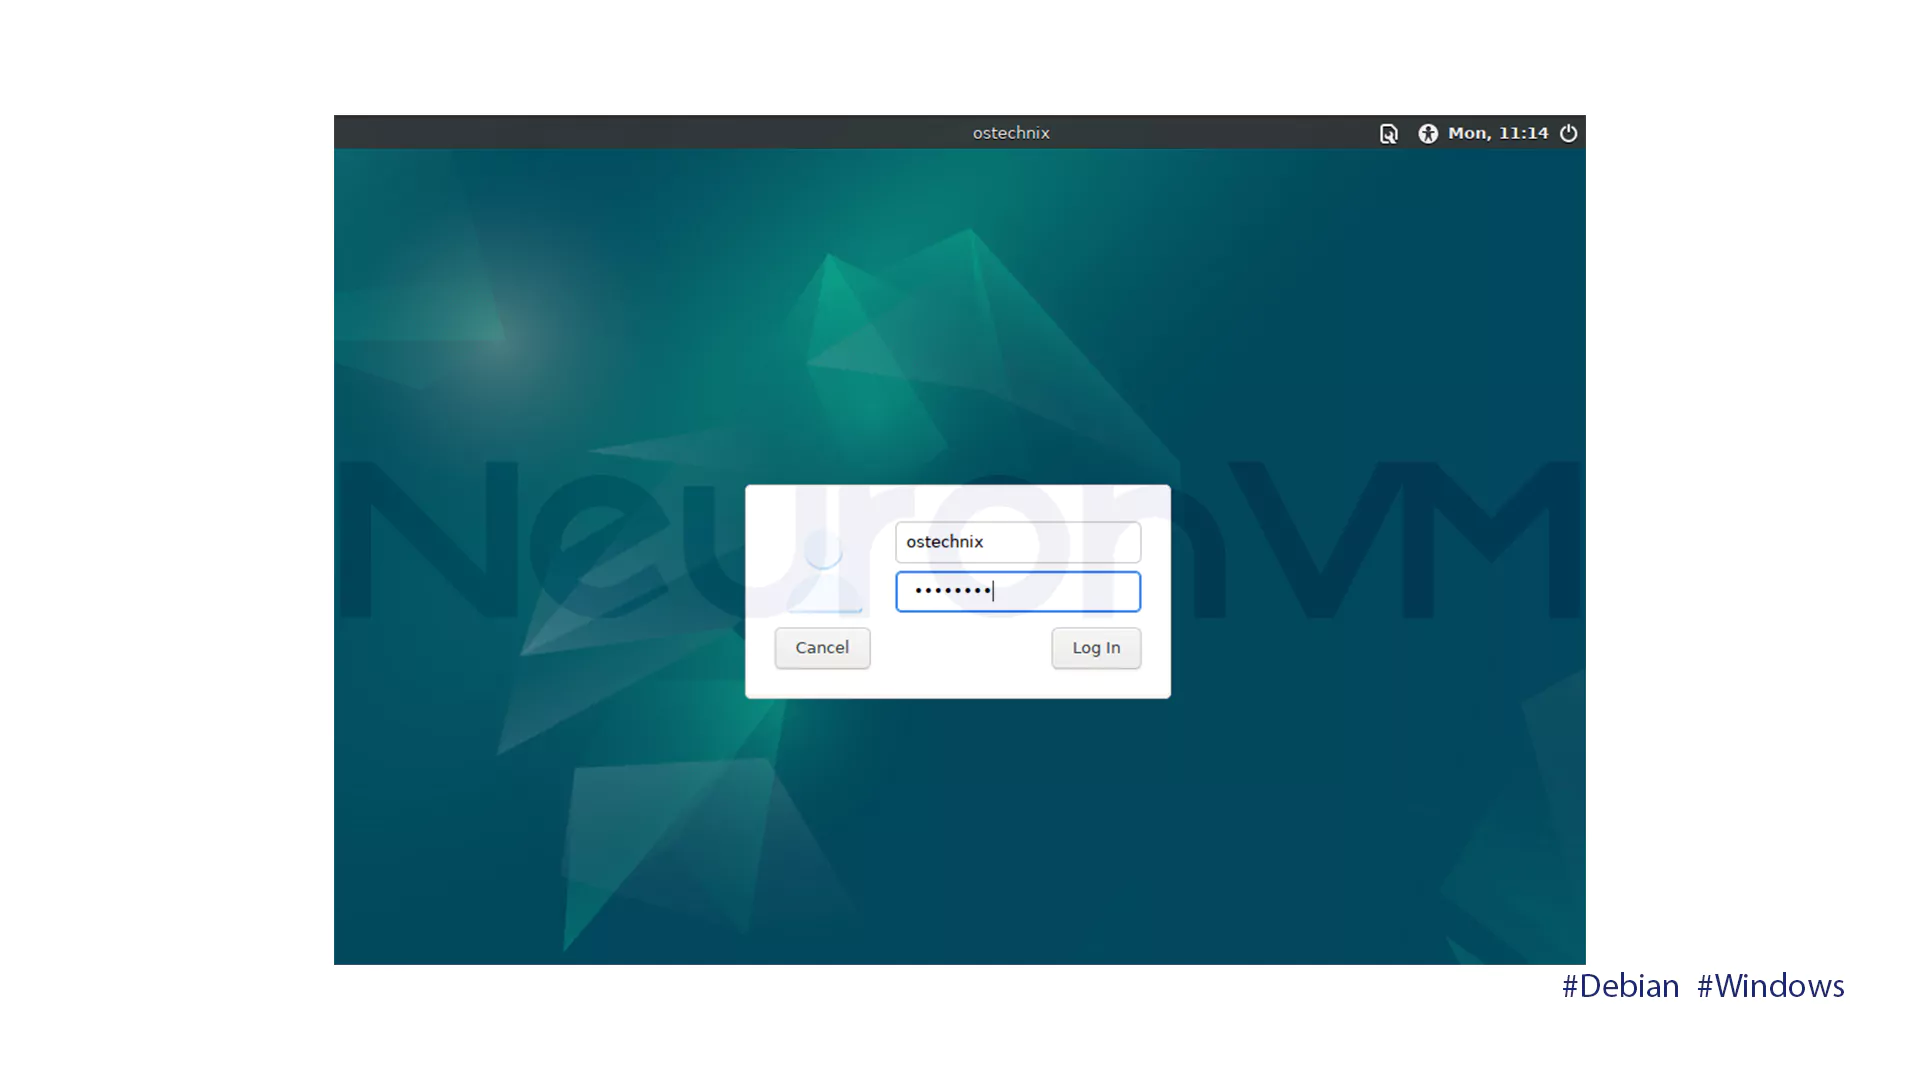
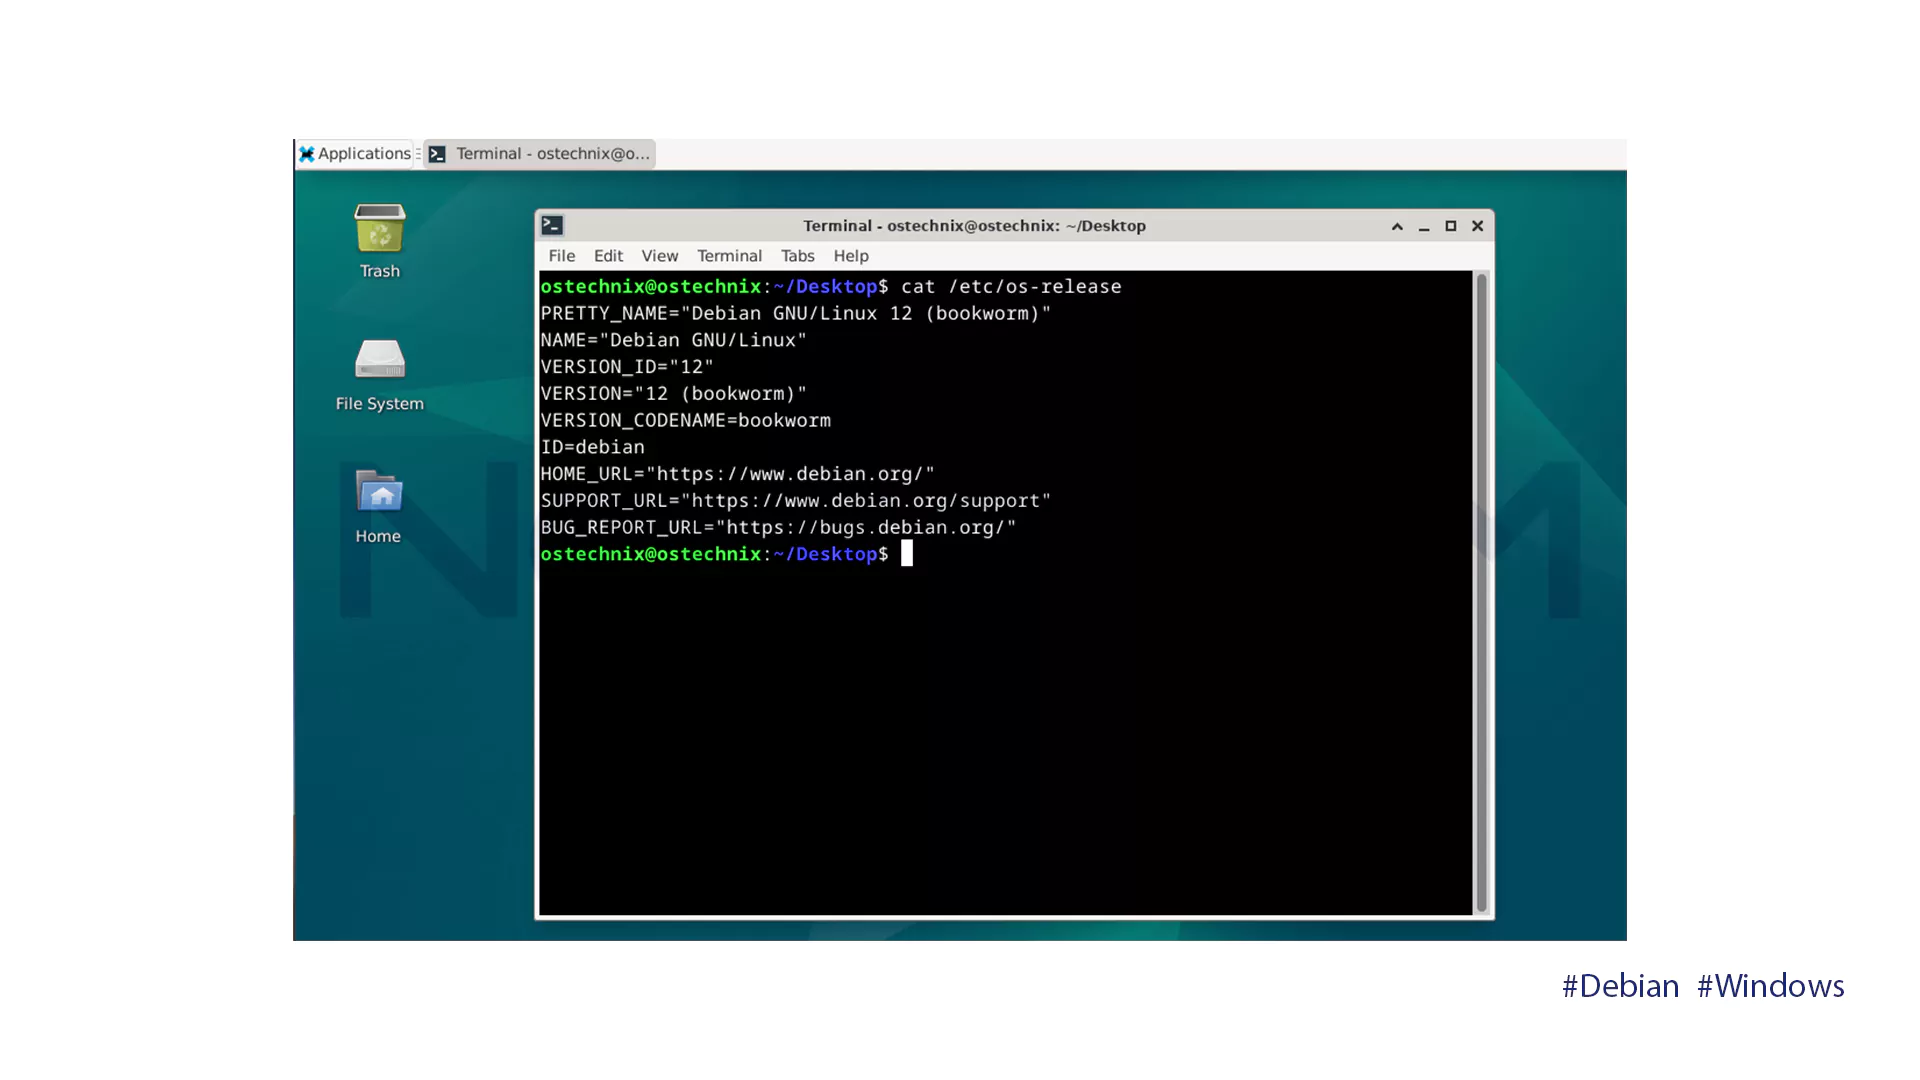
Welcome to Debian 12 XFCE!
Troubleshooting Common Issues of
Even after a successful installation, you may encounter some problems. Here are some common ones and quick solutions for each:
- Windows is not showing up in the GRUB menu: Log in to Debian and run the command sudo update-grub.
- GRUB is missing after Windows update: Boot from a Debian live USB and reinstall GRUB.
- Partitioning error: Use the GParted tool (included in most live CDs) to manually repair the partitions.
Tips for a Stable Dual Boot Linux and Windows
- Turn off the Fast Startup option in Windows!!
- Keep both operating systems current to prevent compatibility issues!!
- Create a separate partition for the /home directory so your personal files stay safe if you reinstall Debian!
- If you mostly use Windows for gaming, install Windows first and then Debian to reduce bootloader problems!
Conclusion
Dual Boot Linux and Windows installation on Debian 12 allows you to enjoy the best of both worlds. You get the stability and security of Linux, along with the wide selection of Windows software and games. Careful partitioning and proper GRUB management are important; however, the result is a flexible and powerful system tailored to your needs. Always remember to back up your data before making changes, keep both systems updated, and monitor your bootloader. This will help ensure a smooth and hassle-free experience with both operating systems.


Yes! By carefully partitioning your disk and choosing the dual boot option, you can keep your Windows installation and personal files safe while adding Debian 12. Always back up important data before making any changes.
It is recommended to install Windows first, then Debian. This approach reduces potential bootloader conflicts and ensures a smoother dual boot setup.rn
Boot into Debian and run the command sudo update-grub. If GRUB is missing after a Windows update, use a Debian live USB to reinstall GRUB.