How to Upgrade Windows 7 to Windows 10

 7m
7m
 0 comments
 Print
Print
If you want to Upgrade Windows 7 to Windows 10, follow this step-by-step guide, we provided an effortless guide to you. There are many reasons for updating Windows 7 to 10, performance, security, and features. To use the benefits provided by Windows 10, read till the end of this article.
Should you upgrade to Windows 10?
Yes, you should because Windows 10 offers so many new features but besides this fact, it brings back joy to those who like nostalgia, and makes it easy to work with.
Benefits of Windows 10
One of the key reasons for upgrading your Windows 7 to Windows 10, is because of its built-in features it is really secure and it will protect you and your family from threats.
It is connective meaning that you can have access to your apps, photos, and videos anytime anywhere, this version is really fast making it an ideal choice.
Also, it is really adaptable meaning you can personalize your computer based on what you are using it for.
Upgrading Windows 7 to Windows 10 (easiest method)
Requirements
- Processor: 1 GHz
- RAM: at least 1 GB
- Hard drive space: 32GB or more
18 Steps to Upgrade Windows 7 to Windows 10
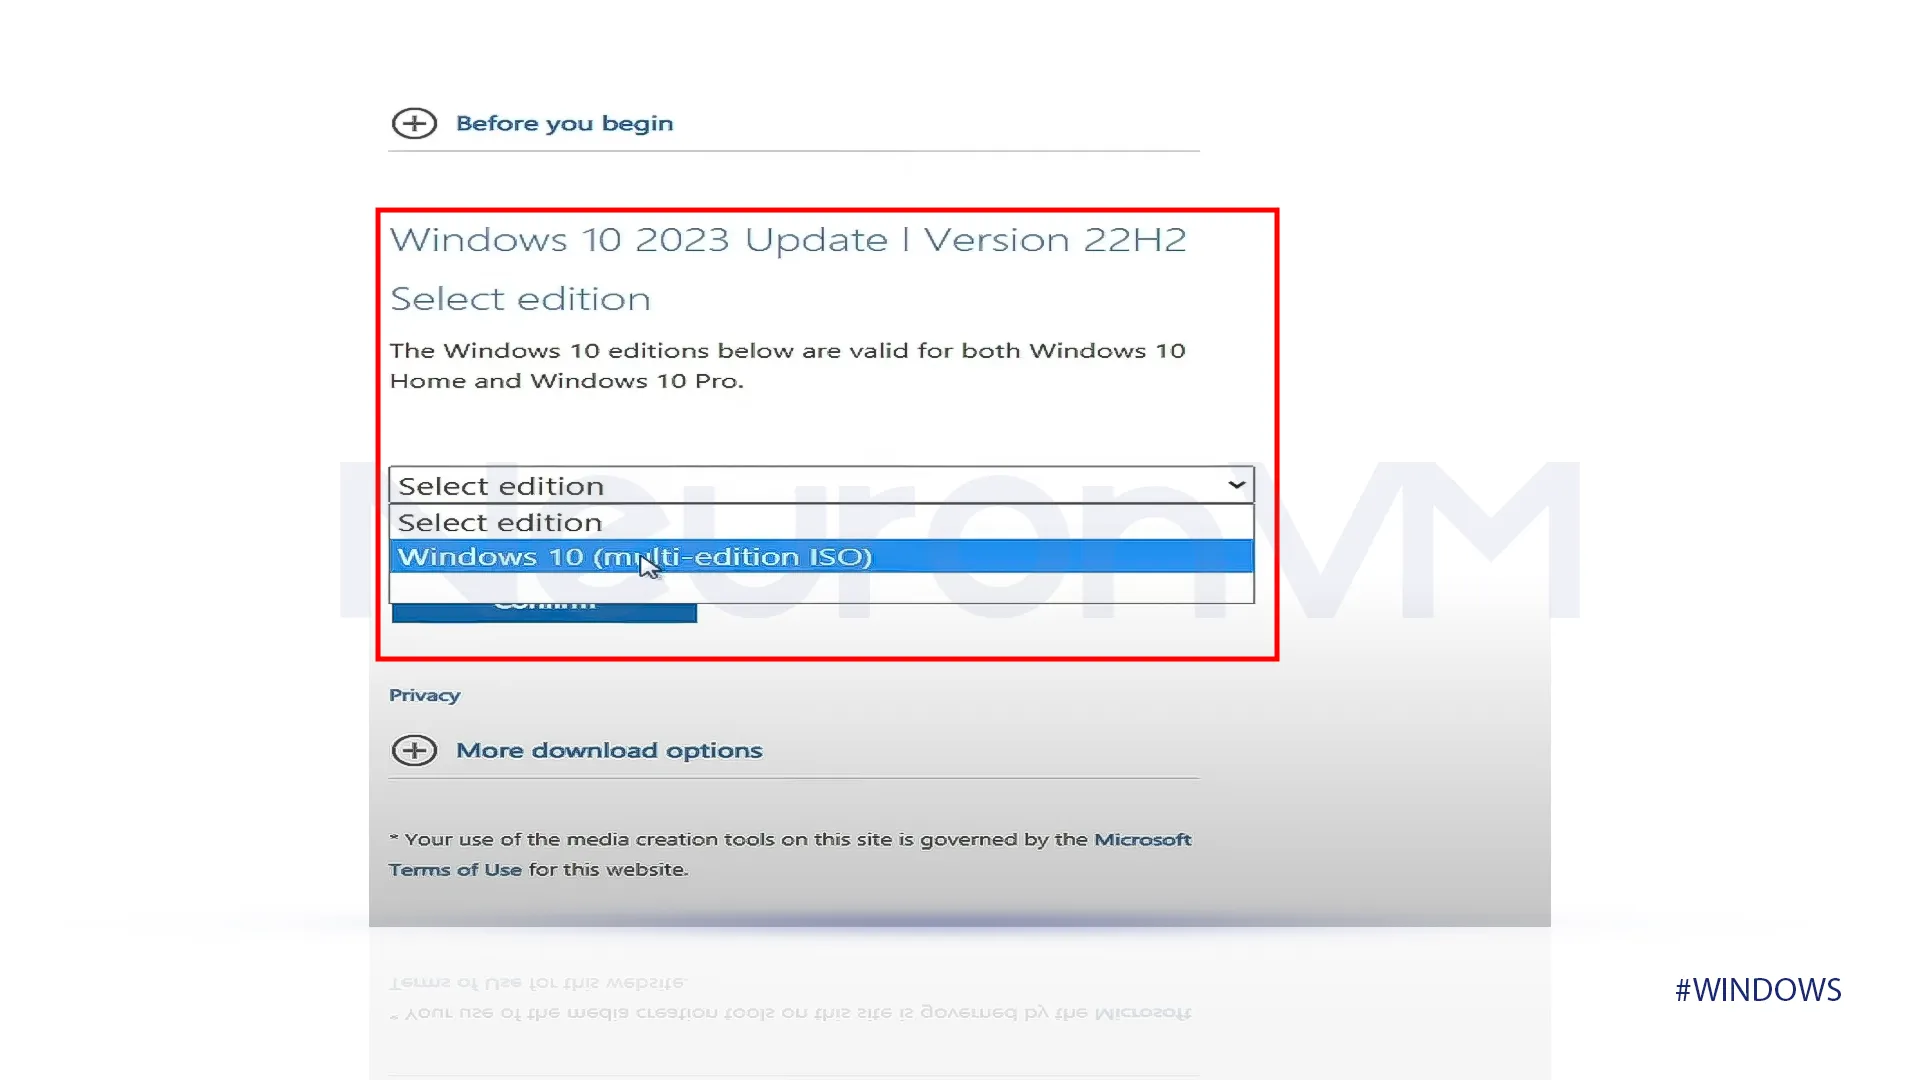
1- For the first step go to your favorite browser and search “Download Windows 10 ISO,” and go to Microsoft’s main website to download it.
2-Then select Windows version, and click on confirm to continue.
3- It will ask you to choose the language, and you will need to select 64-bit or 32-bit download as you prefer.
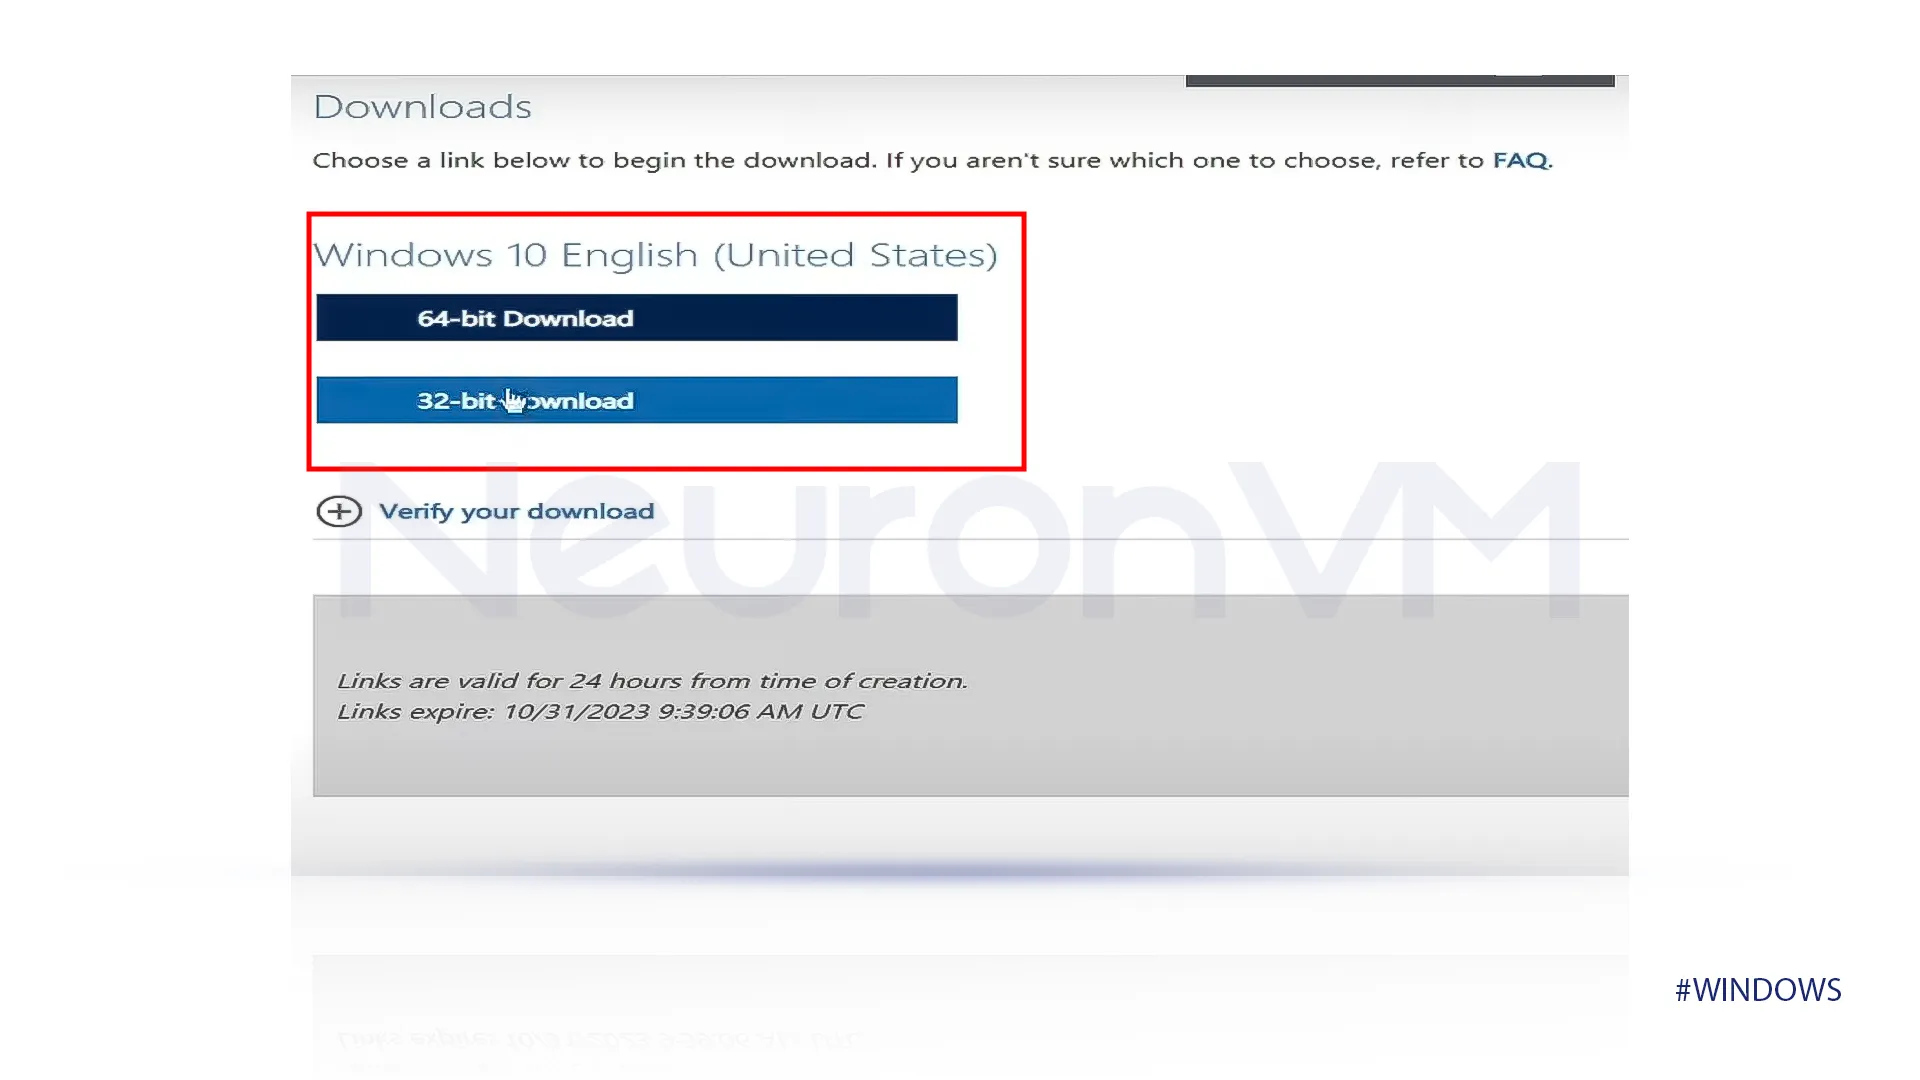
4-Download will begin after this, you need to be patient it will take a few minutes to download.
5-After our download was completed, open the downloaded file, right-click on “winCEDmu -4.1” and click on “Run as Administrator.”
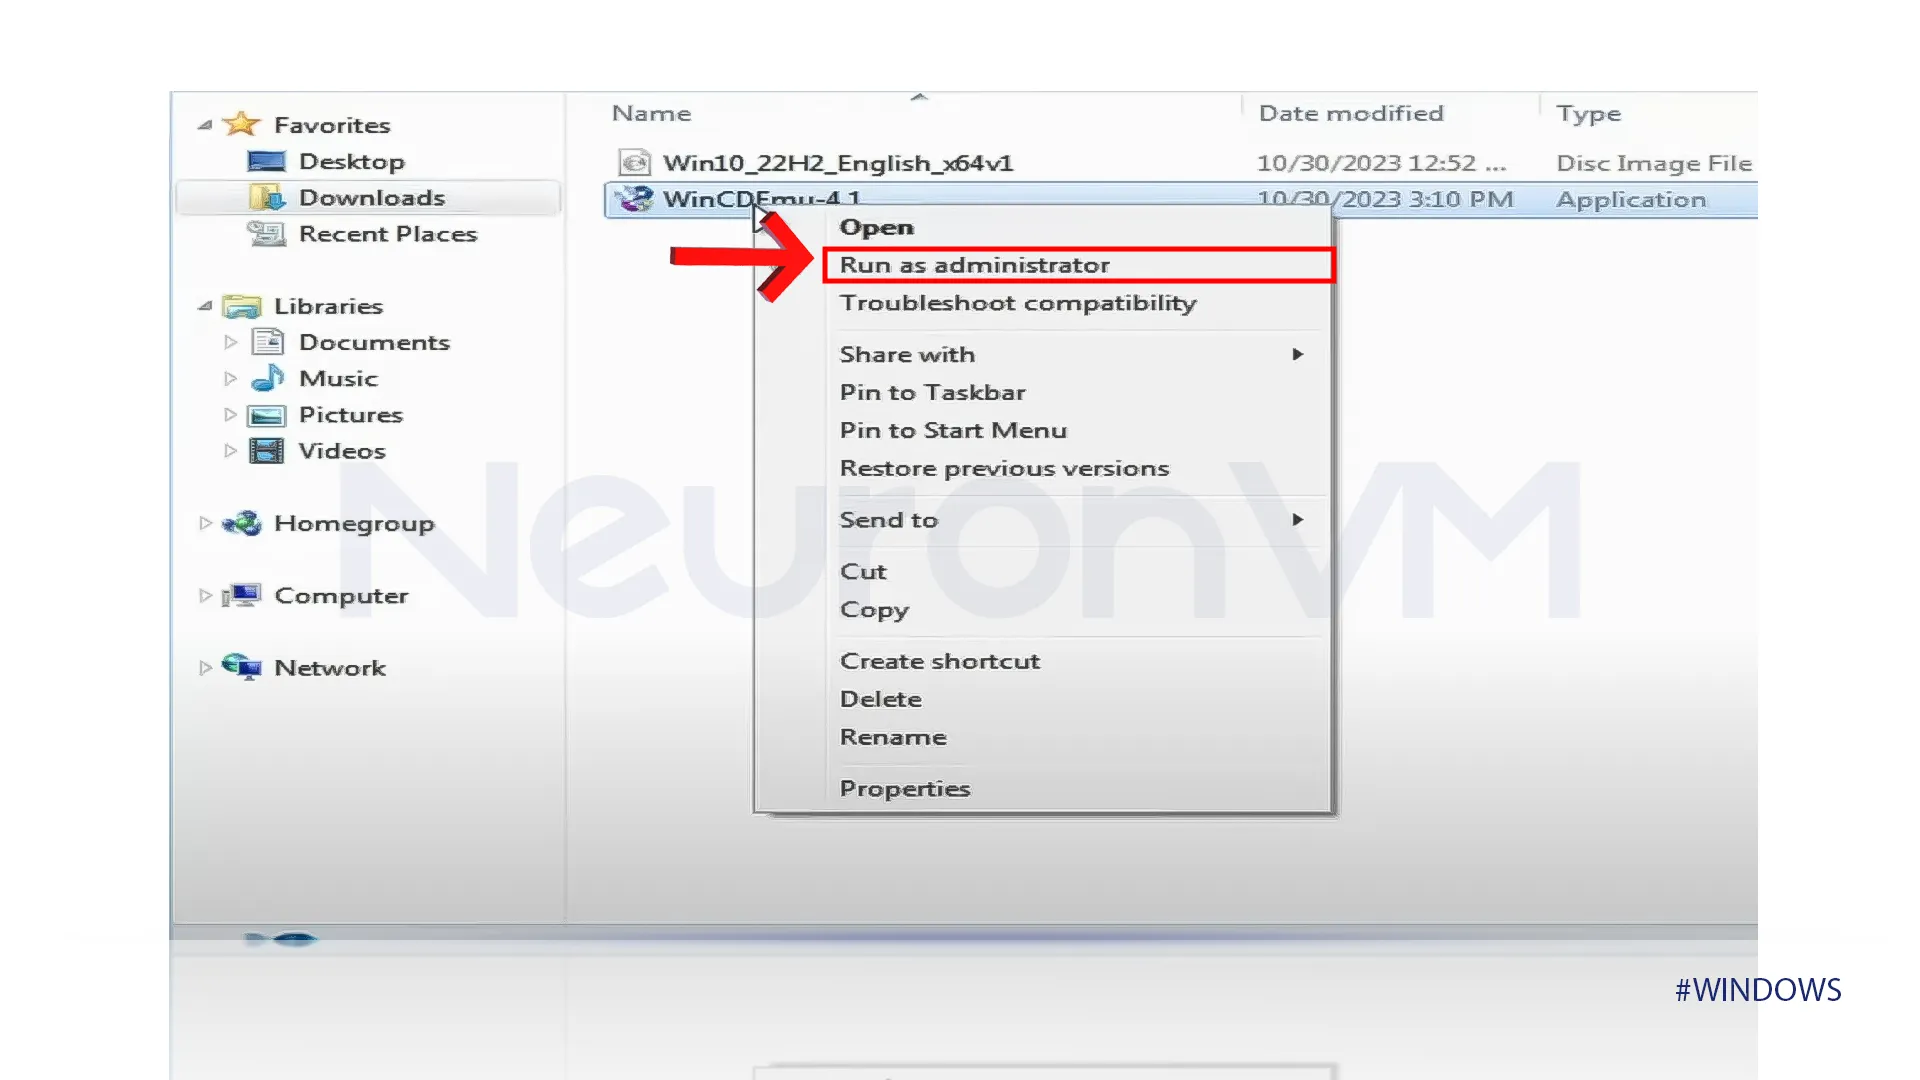
6-Check the customize installation option turn Administrator rights on and install it.
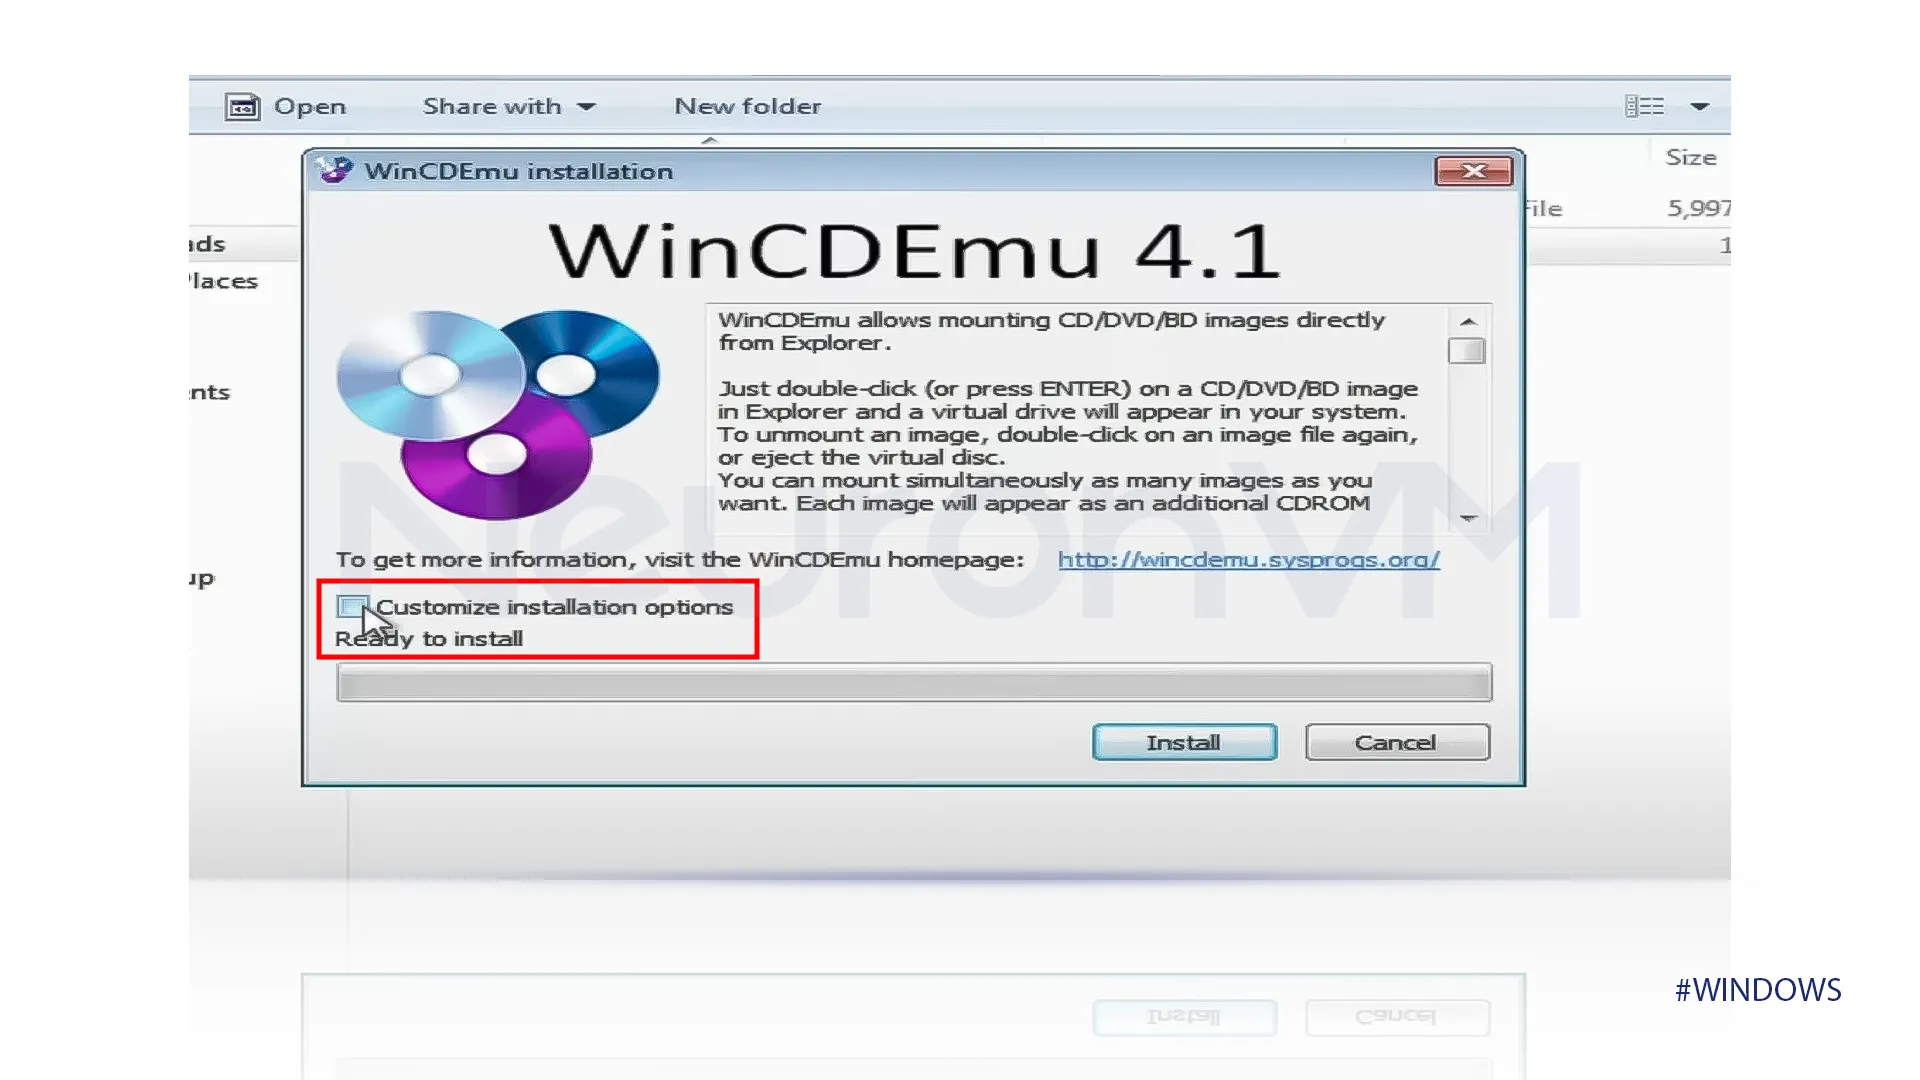
7-Then a new tab will open that says installation is done, click on OK to complete the installation.
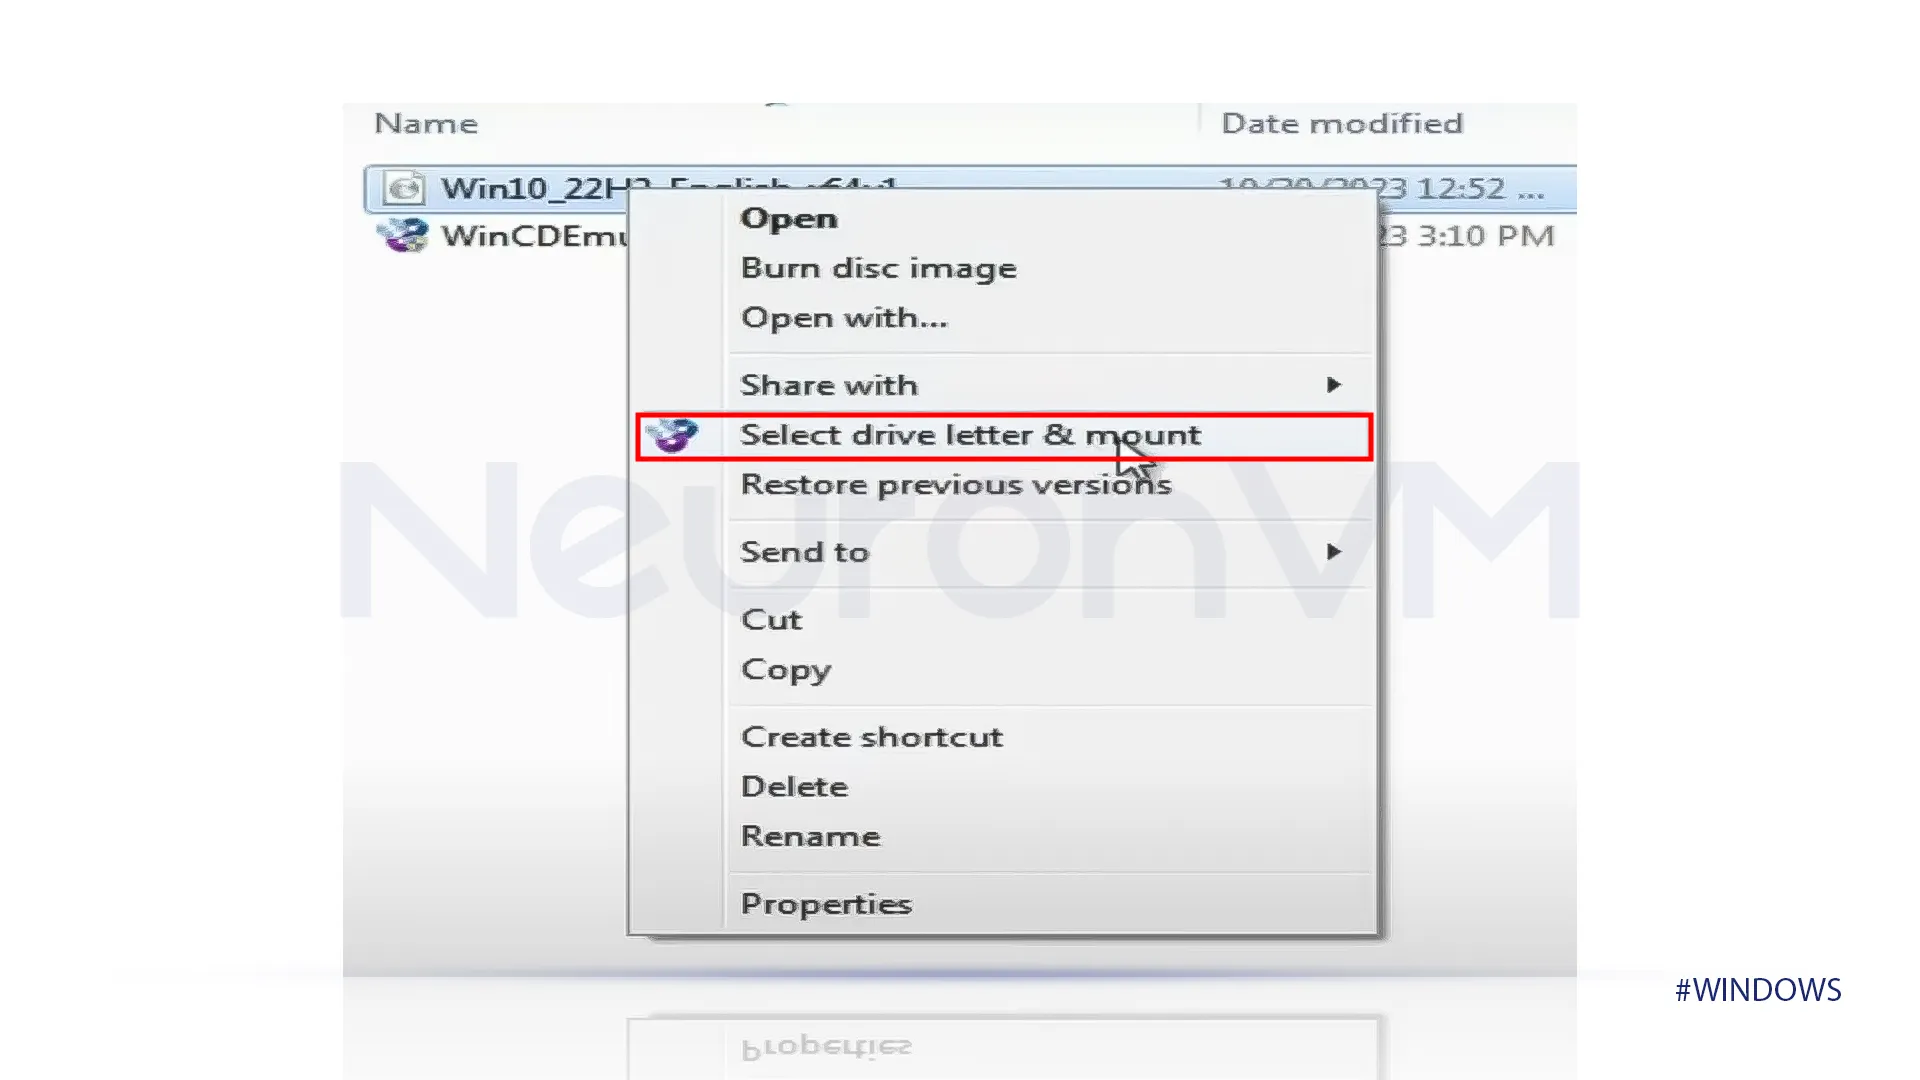
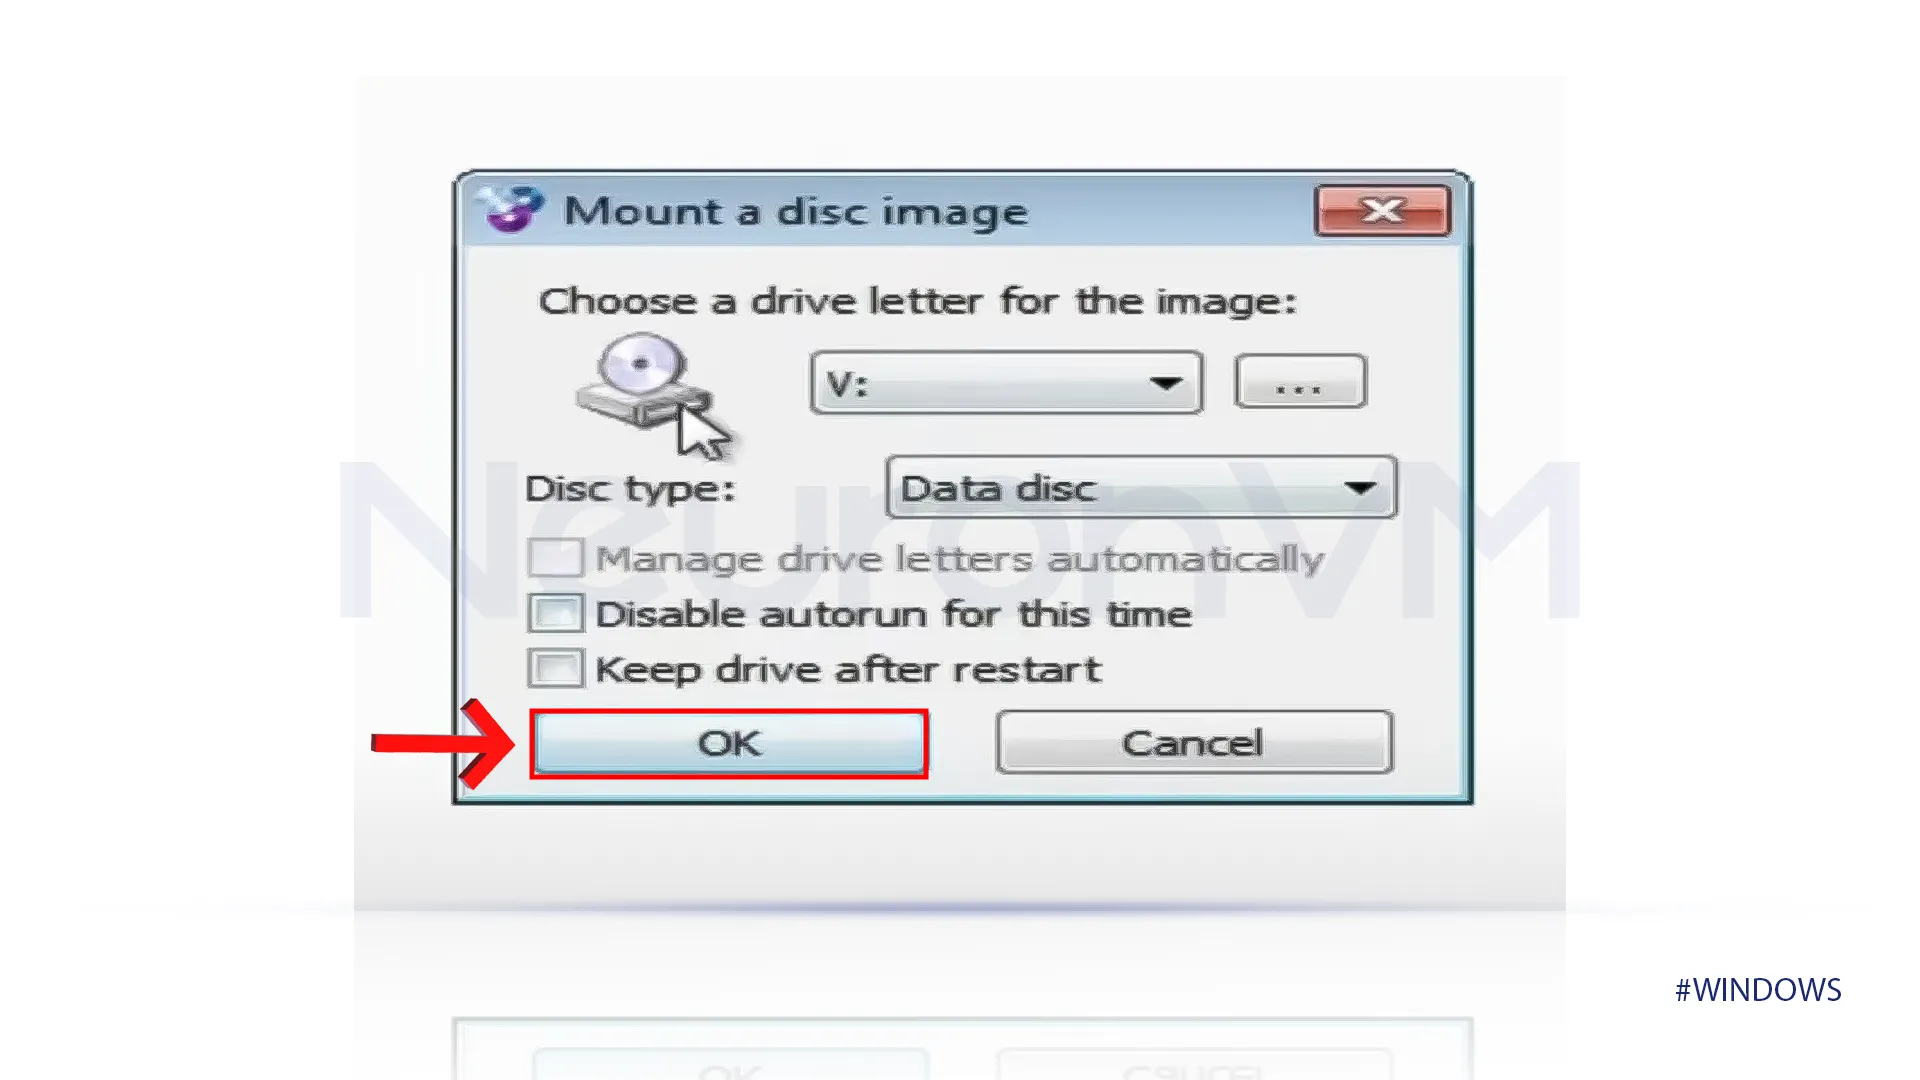
8-Then right-click on “Win10-22H2” then click on “select drive letter & mount” and click on yes.
9-In this step we don’t have to make any changes, so click on OK.
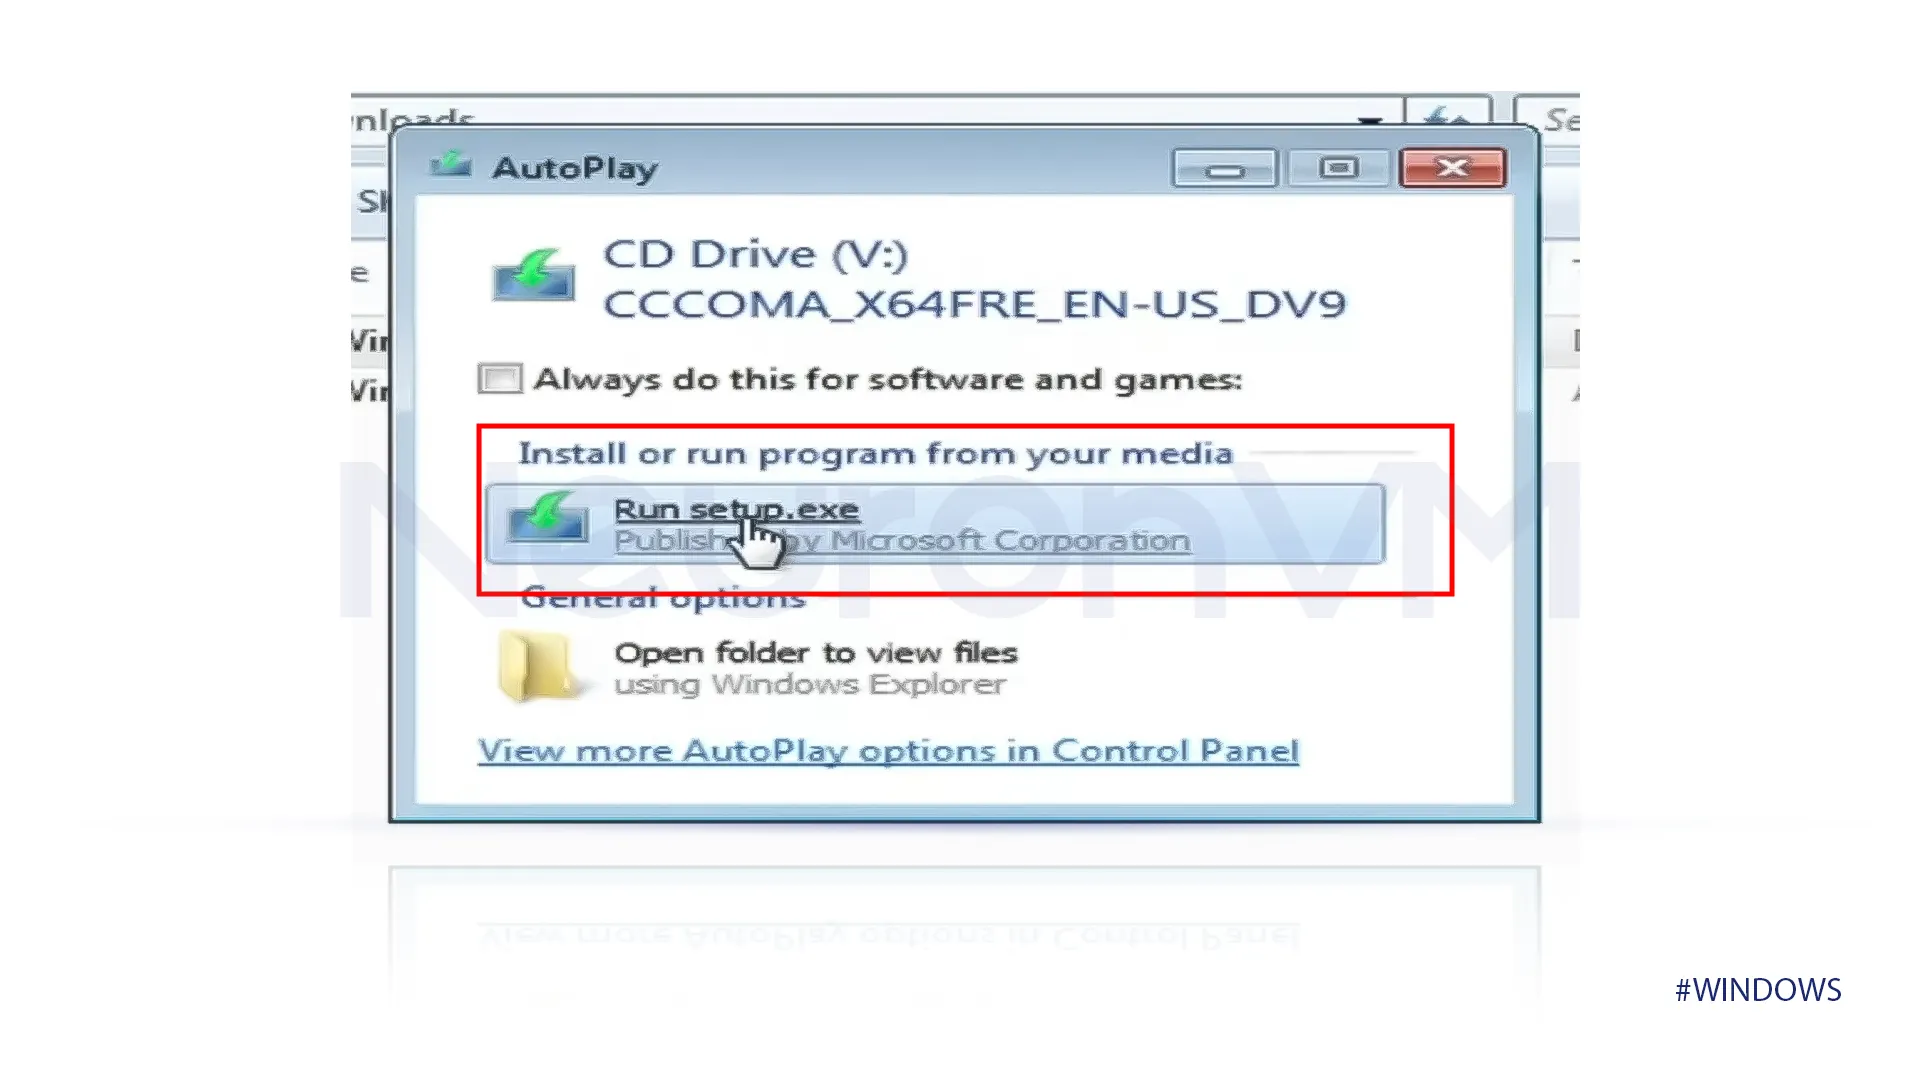
10-In the new tab named AutoPlay, select Run setup.exe.
11-You will get a box that says preparing, and it will show how many percent your Windows is prepared.
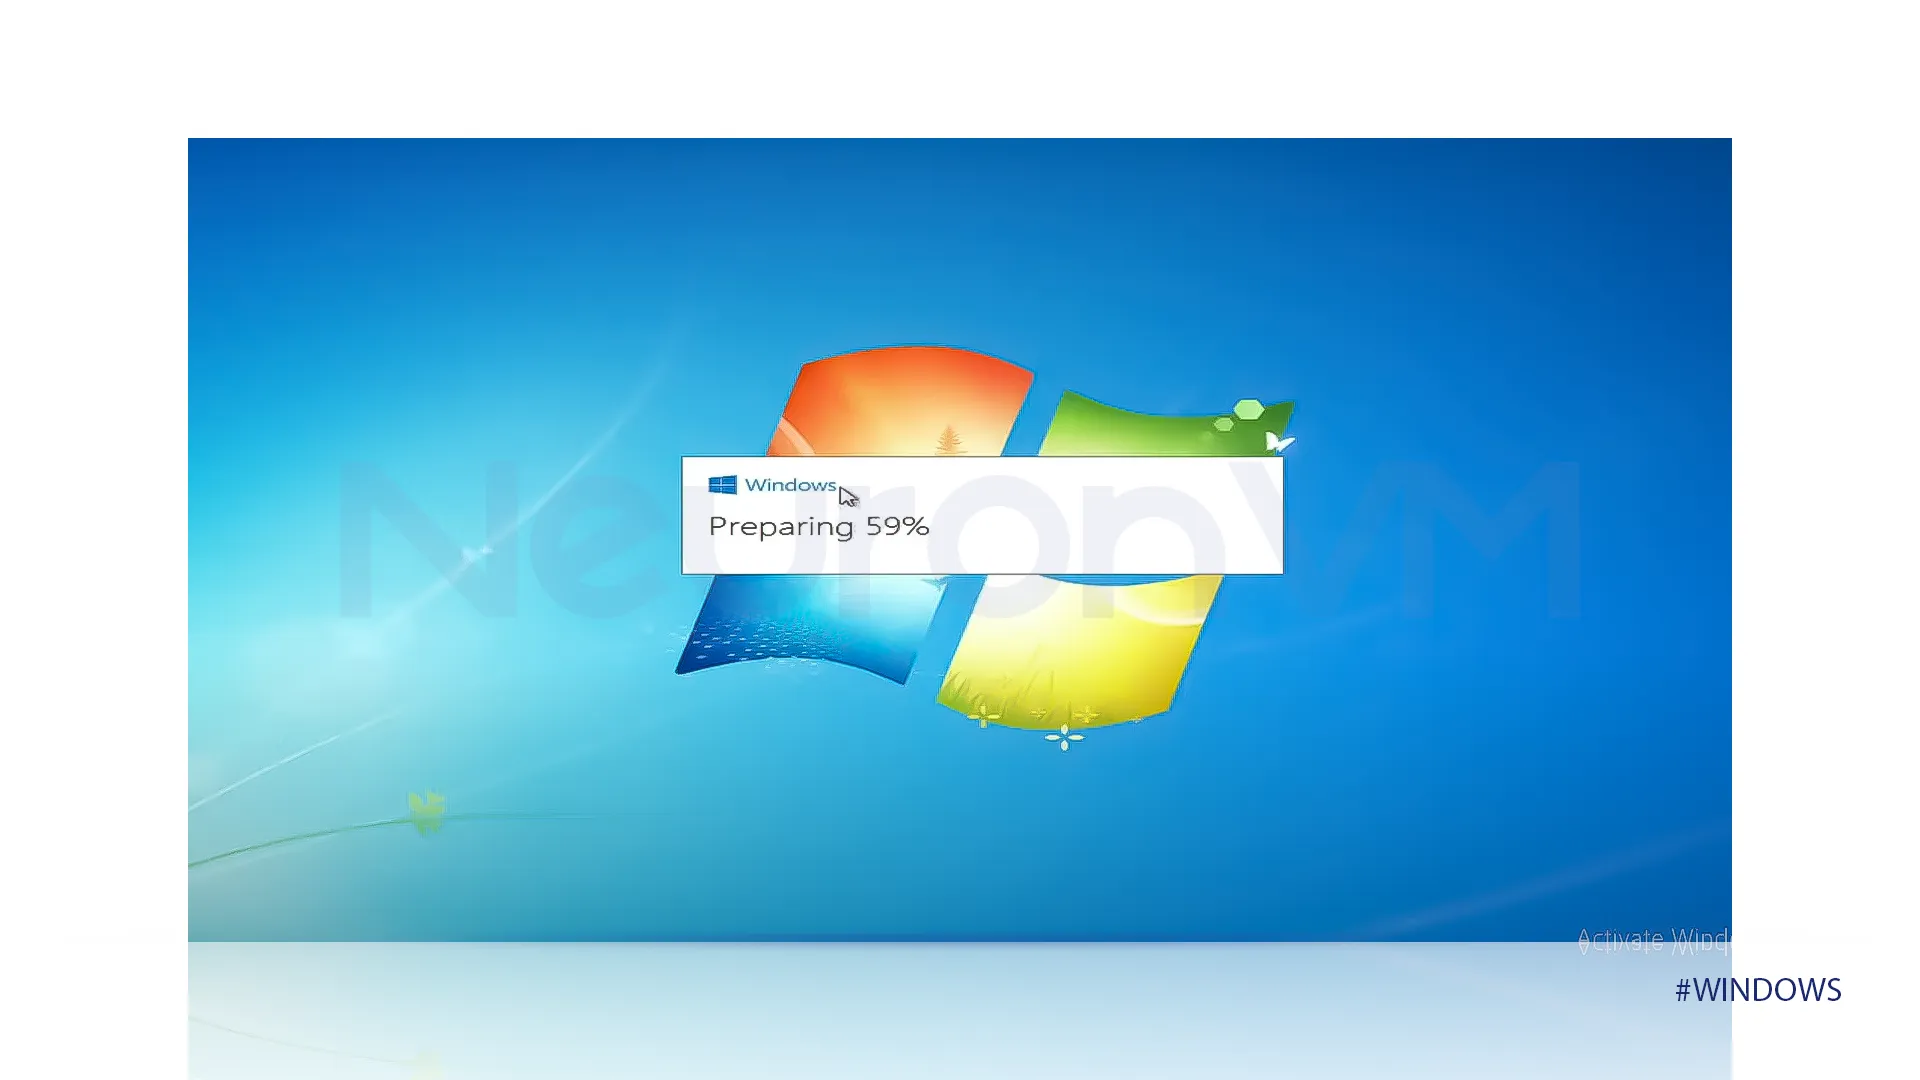
Note: We recommend you do not do any other work while Windows is being prepared.
12-You have to wait until preparation is done, then a Windows 10 setup page will open, check the privacy statement in the left bottom.
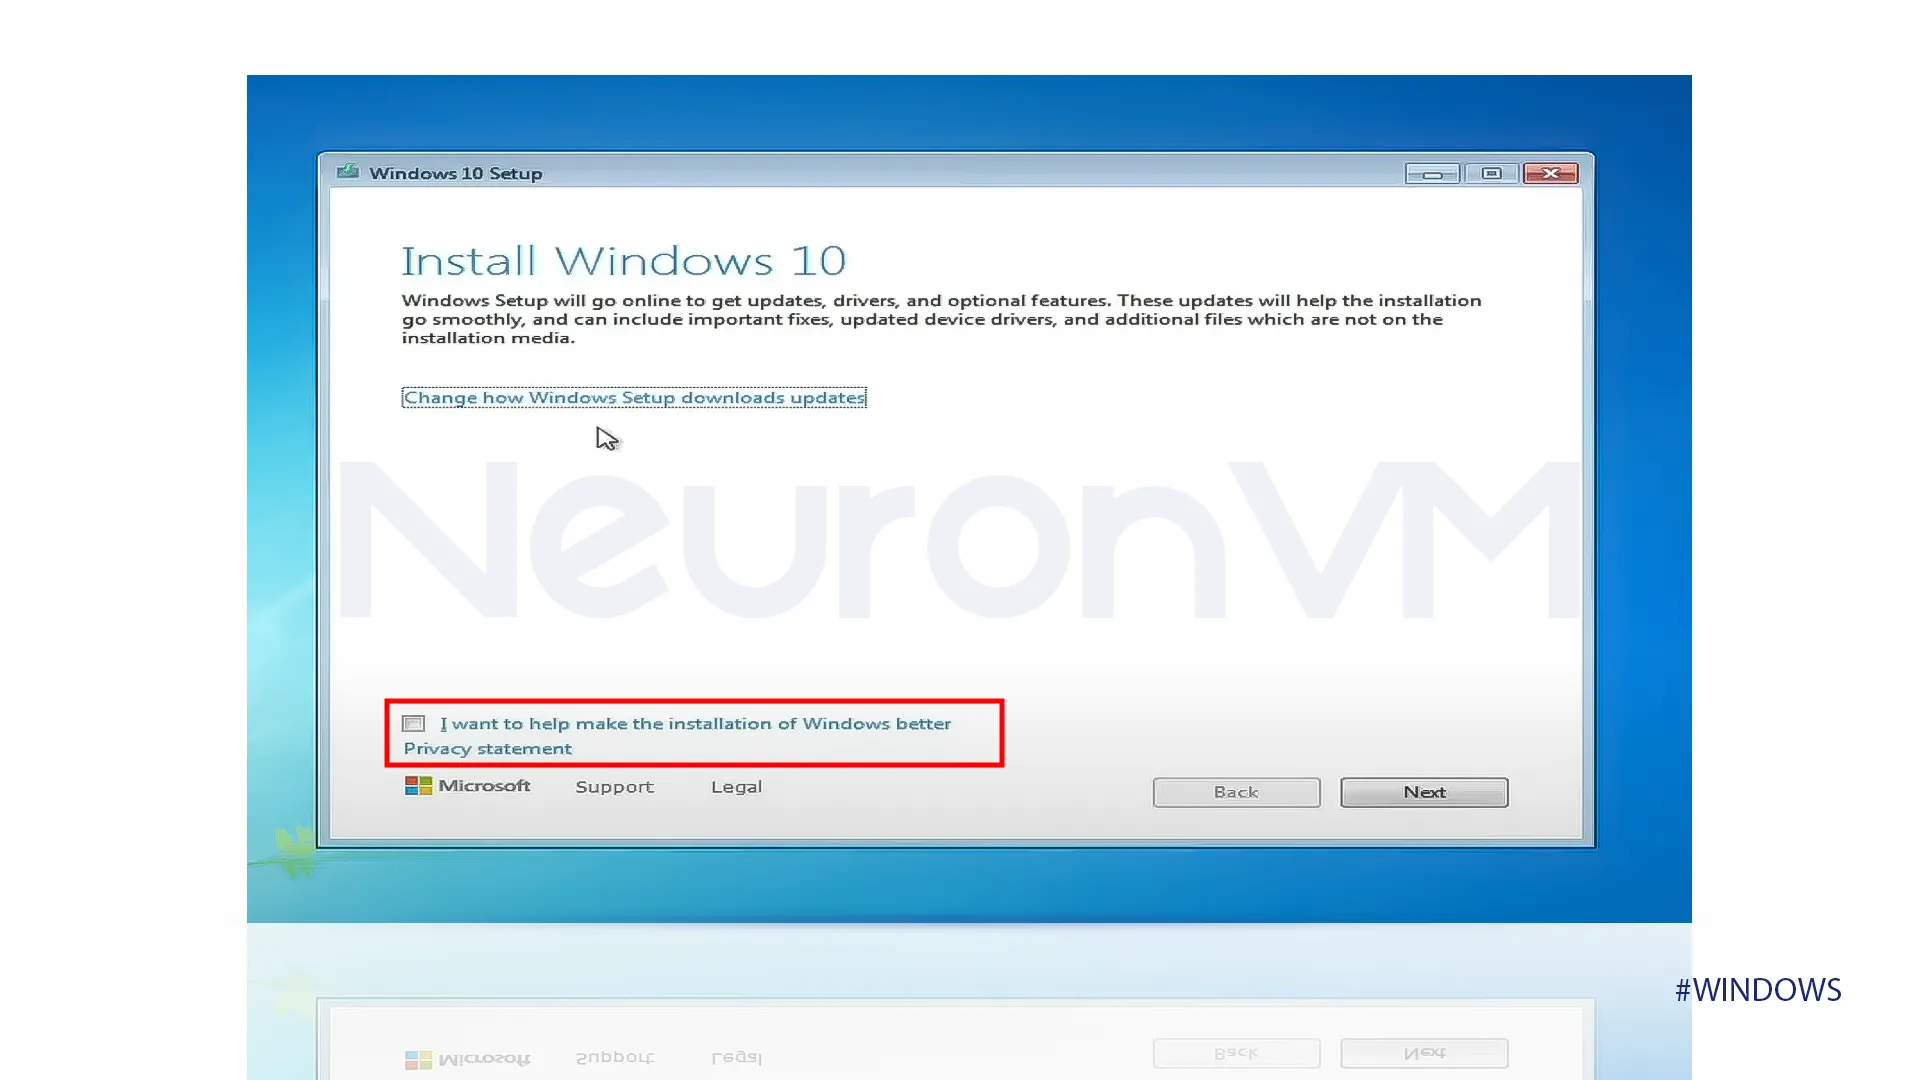
13-Click on Next, it will get updates, and check the system for the updates.
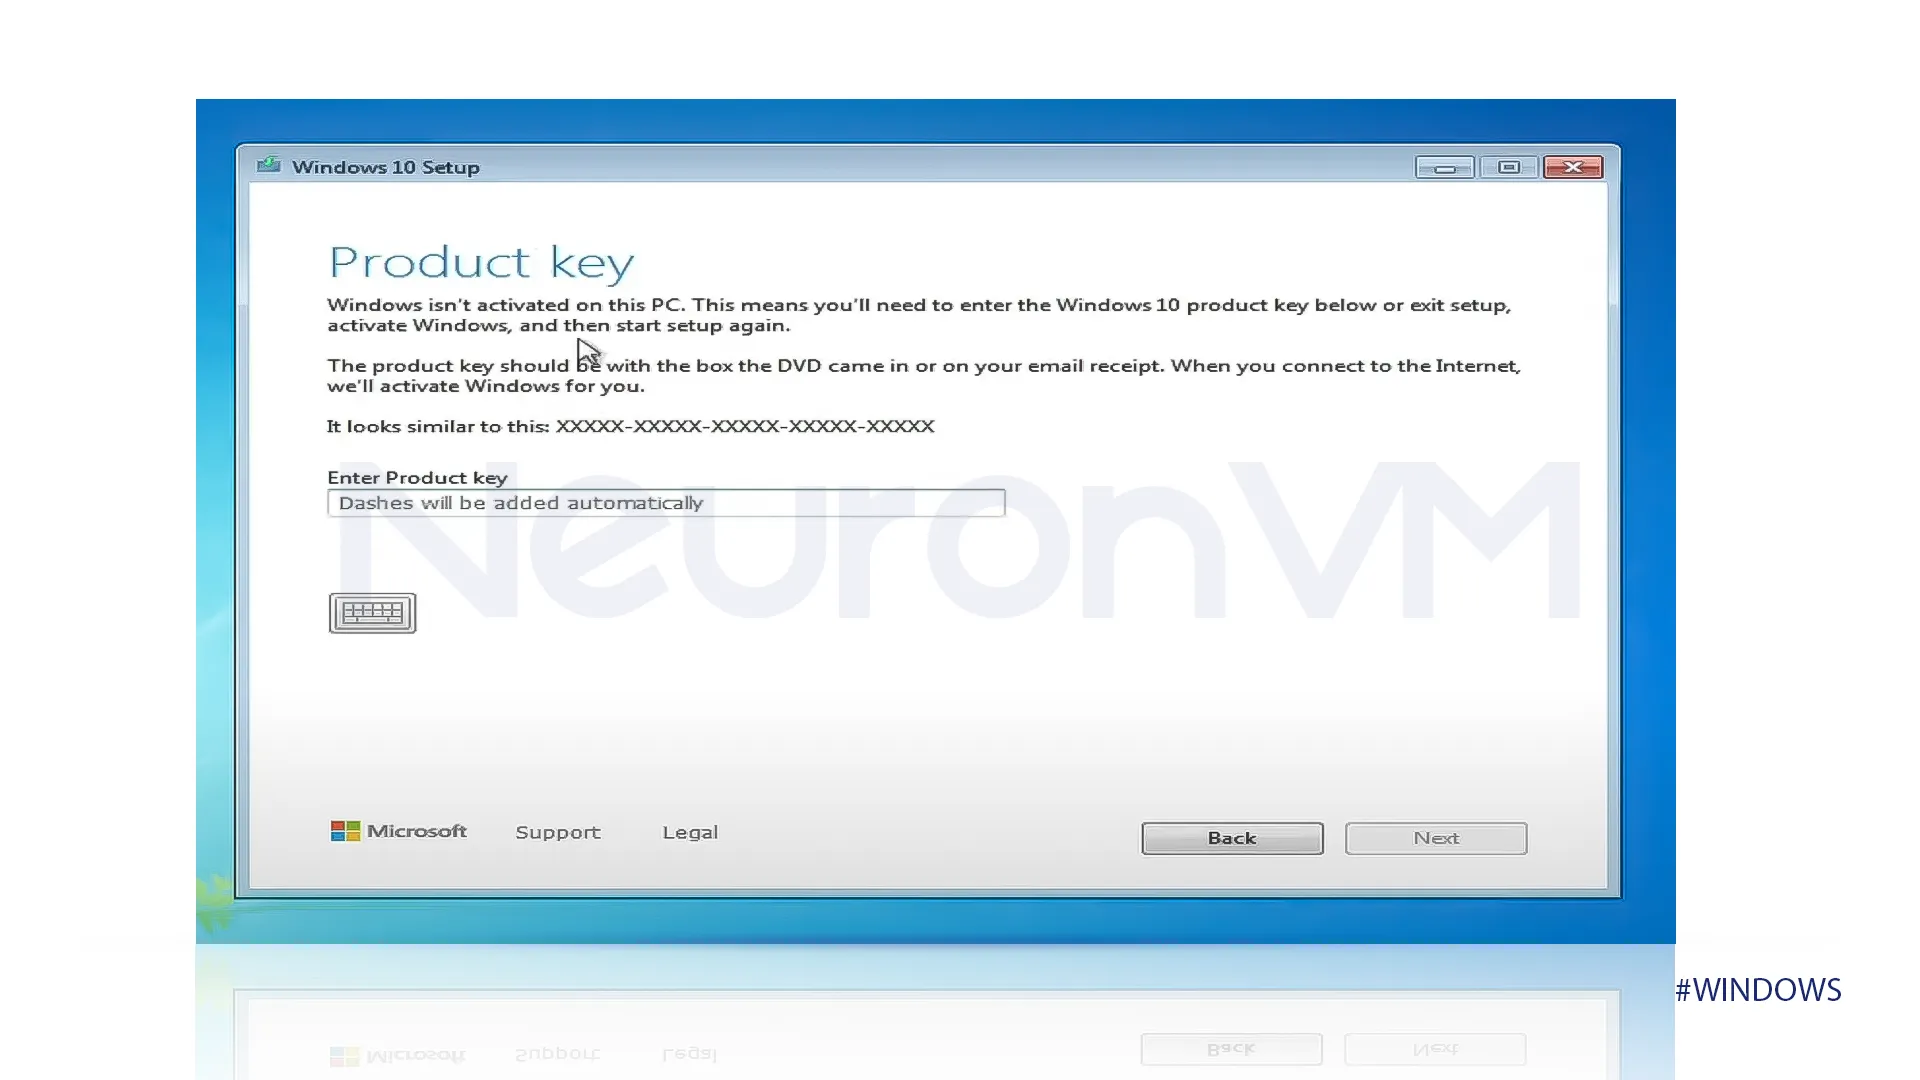
14-You have to enter the product key in the product key, I will put the generic key in below.
W269N-WFGWX-YVC9B-4J6C9-T83GX
Then it will say that your product key works continue when you’re ready, click on next.
15-Accept the license terms and wait until Windows gets prepared.
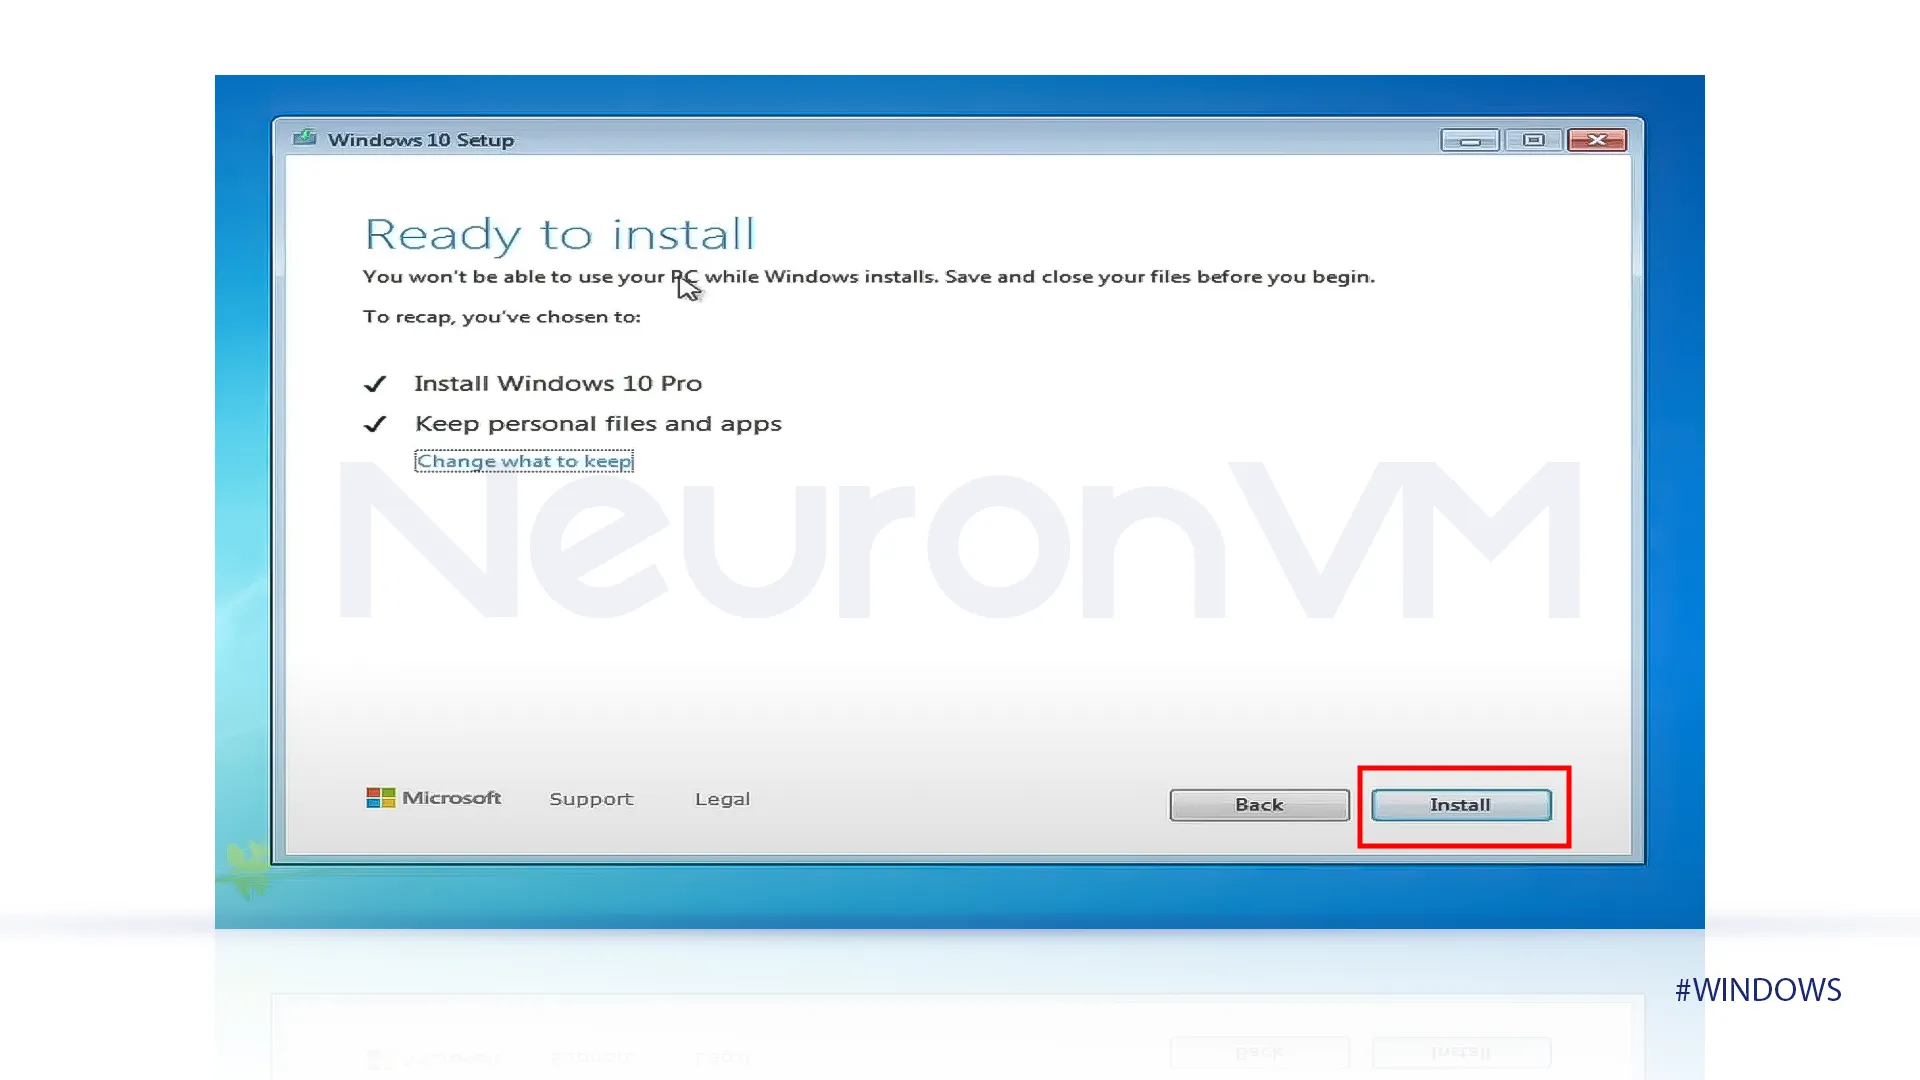
16-Then a tab will show that it is ready to install, click on install.
17-The installation will be started.
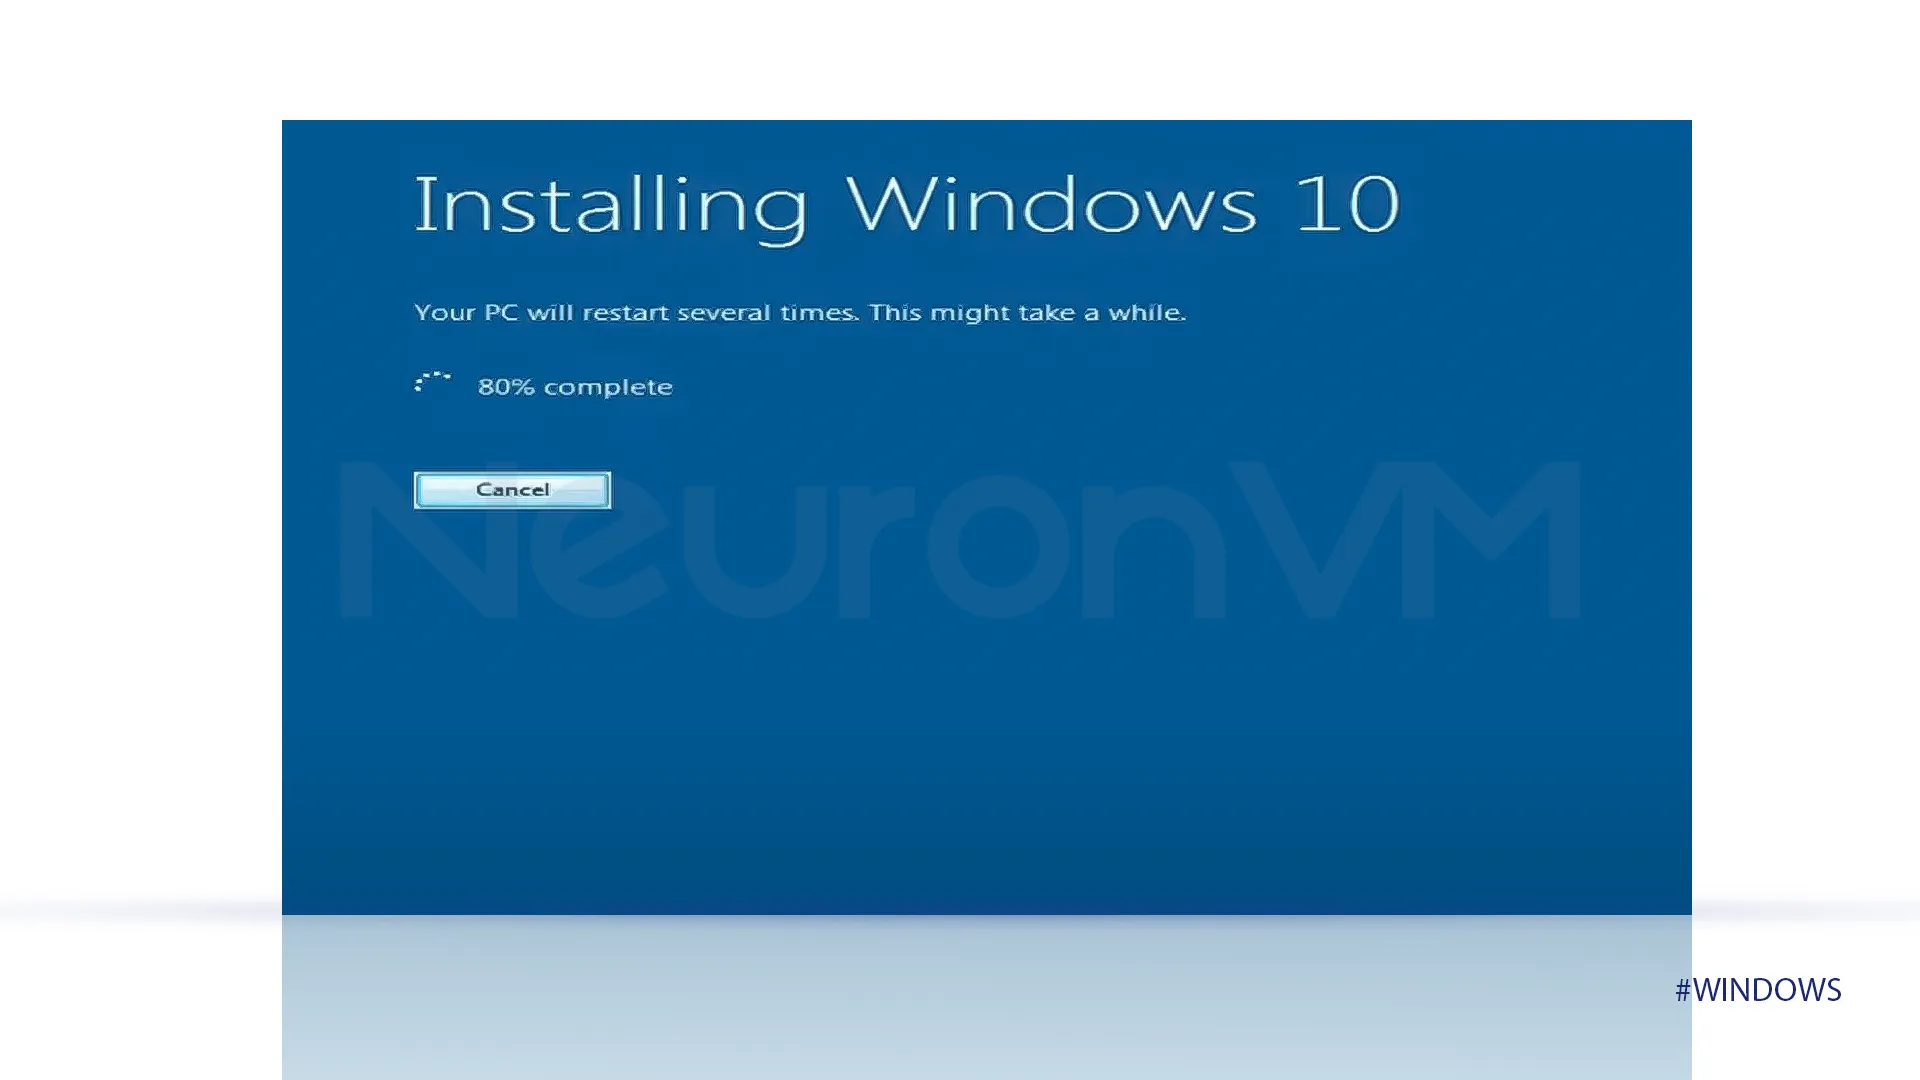
18-After a few minutes your installation will be completed and you will be able to enjoy Windows 10 experience.
Note: All the data you had in Windows 7 will be transformed to Windows 10, so you will be able to access all of your data without any loss.
Conclusion
Upgrading from Windows 7 to Windows 10 is a smart move, with this move you can enhance your security and add new features. By following this step-by-step tutorial provided, you can easily transit to Windows 10 effortless and enjoy its benefits.
For more Security and performance tutorials, visit our website and if you face any problem let know in the comments.
You might like it