How to Install Helm on Windows 10 (Step-by-Step Guide)

 Study duration :
10 Minutes
Study duration :
10 Minutes
 0 Comment
Introduction
Managing applications on Kubernetes, Helm simplifies this process by providing a clean way to package, configure, and deploy applications. In this guide, we will show you exactly how to install Helm on Windows 10. this guide, we will show you exactly How to Install Helm on Windows 10 (Step-by-Step Guide). Helm packages Kubernetes resources into a single unit called a “chart,” Windows 10 installed on your device is essential for this tutorial.
You can get a reliable and fast Windows VPS from NeuronVM with full admin access to start managing your Kubernetes setup with ease.
 What is Helm?
Helm is like a package manager for Kubernetes, making it much simpler to deploy and manage applications on your Kubernetes clusters, It is like apt on Linux, or Homebrew on macOS, but especially for your Kubernetes clusters, it provides a way to easily find, share, install, upgrade, and manage applications running on kebernetes.
Quick Definition of Helm Charts:
Helm charts are packages containing pre-configured Kubernetes resources; they bundle essential YAML files into versioned units for simple deployment and offer templating for tailored configurations.
Why Helm is Essential for Kubernetes Workflows:
- ● Instead of typing lots of complicated commands to get an application running, Helm does it with one simple command.
- ● Helm makes sure your applications are set up the same way every time, which means fewer mistakes.
- ● It keeps track of different versions of your applications, so when you want to update, it is easier, and you can easily go back to the older version that worked.
- ● Helm is like a big library of ready-to-use applications, where you can install popular software easily.
- ● If your application needs other software to run, Helm can manage it all for you automatically.
Requirements
- ● Windows 10 (64-bit)
- ● PowerShell or Command Prompt
- ●Kubectl installed and configured
- ● Internet access
Step-by-step Installation Guide
To install Helm on Windows 10 smoothly and enjoy its benefits, follow our step-by-step tutorial on NeuronVM.
Download the Helm Binary
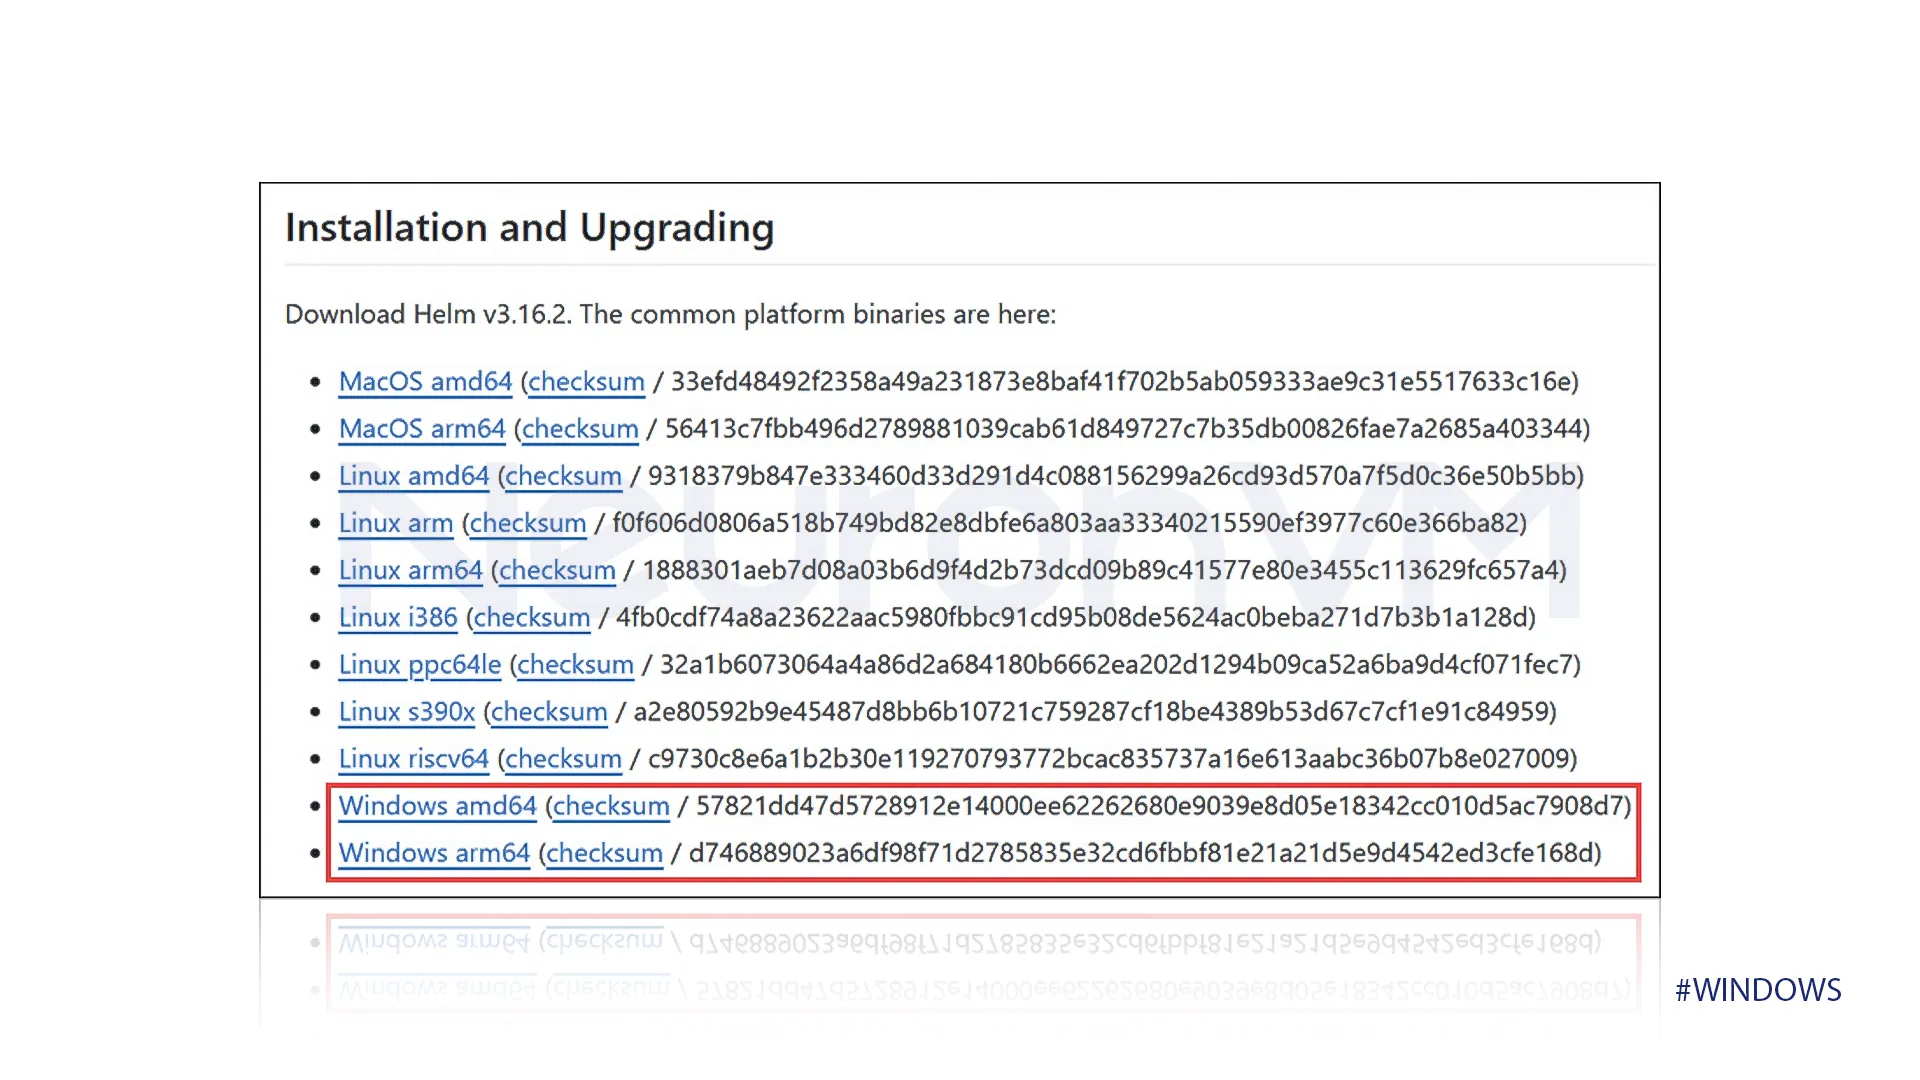
First, open your web browser and go to the official Helm releases page on GitHub, This is where they keep all the versions of Helm you can download.
On that page, look for the section for downloading Helm for Windows, where there will be different links depending on your computer, you need to click on the link that is right for your computer and wait for the download to finish.
 Extract and Move the Binary
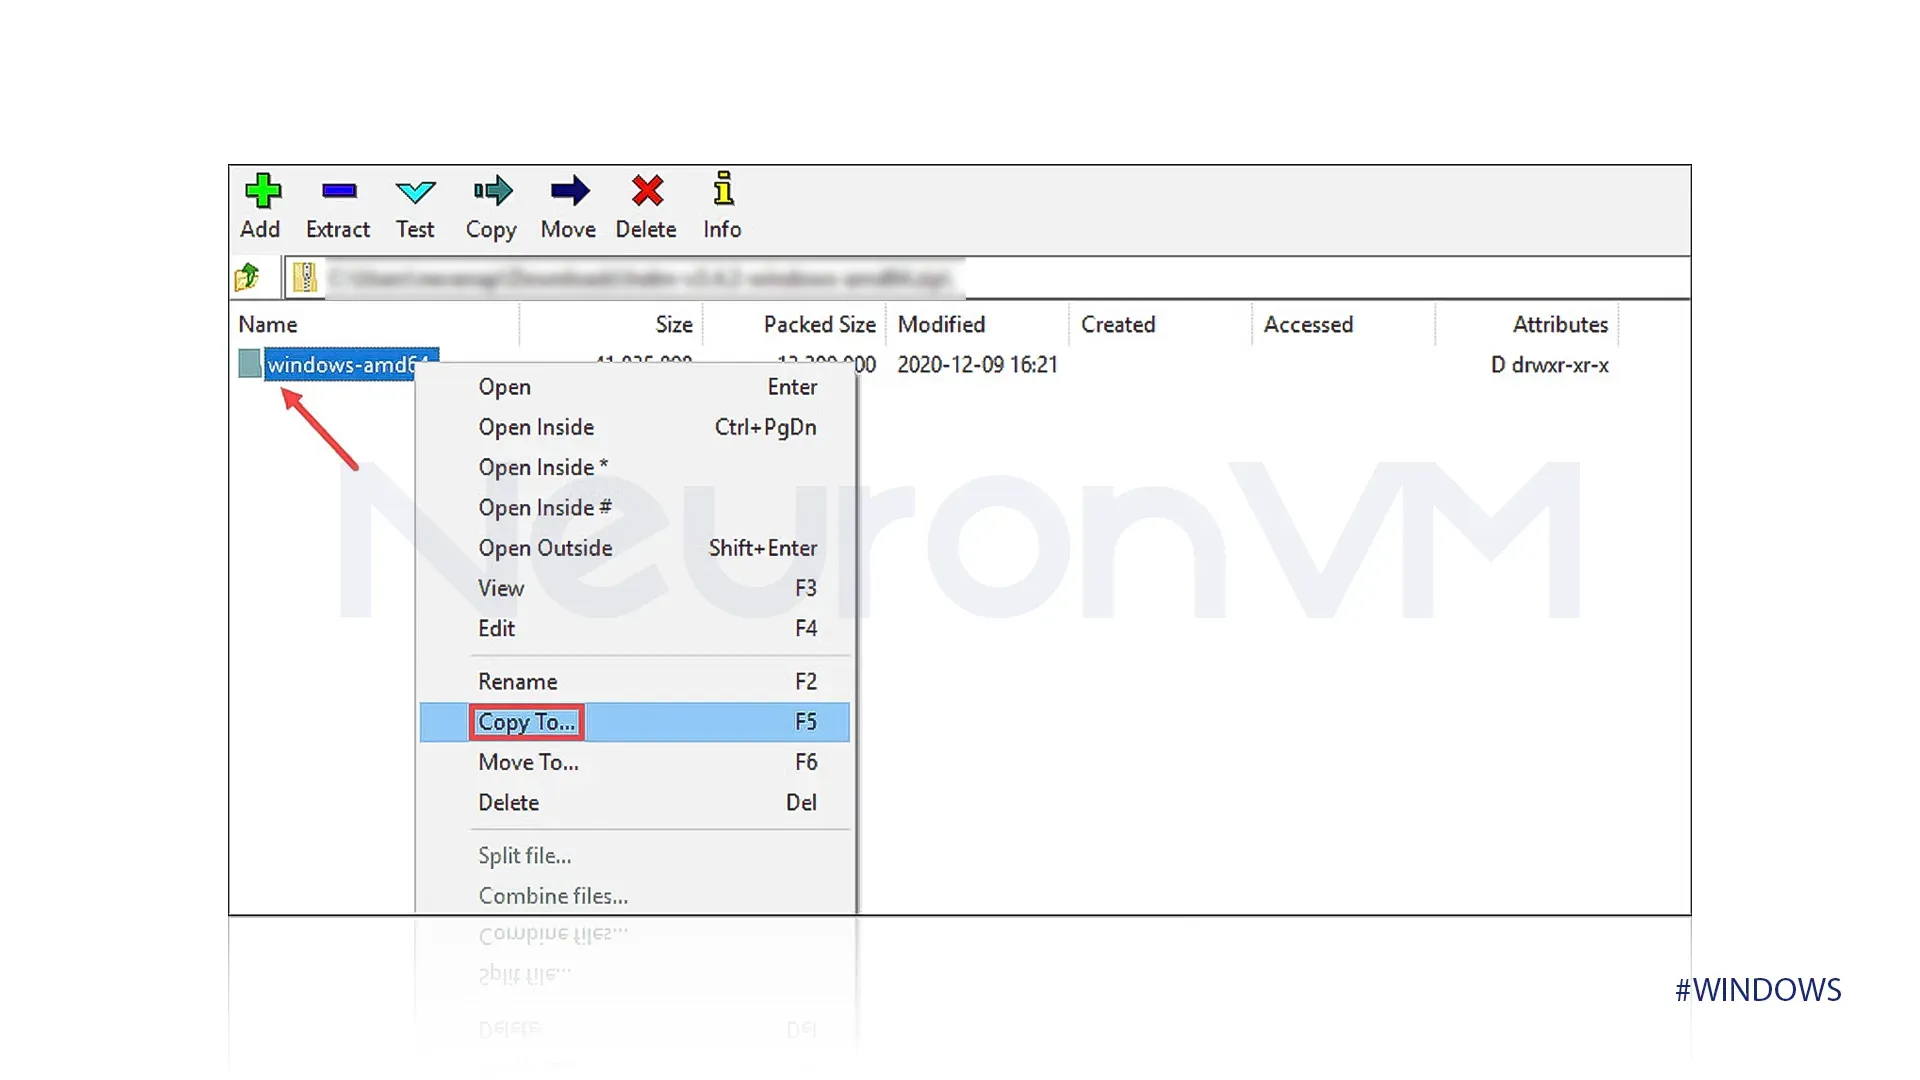
Once the download is done, find the ZIP file on your computer and open it, and extract its contents to a folder you choose.
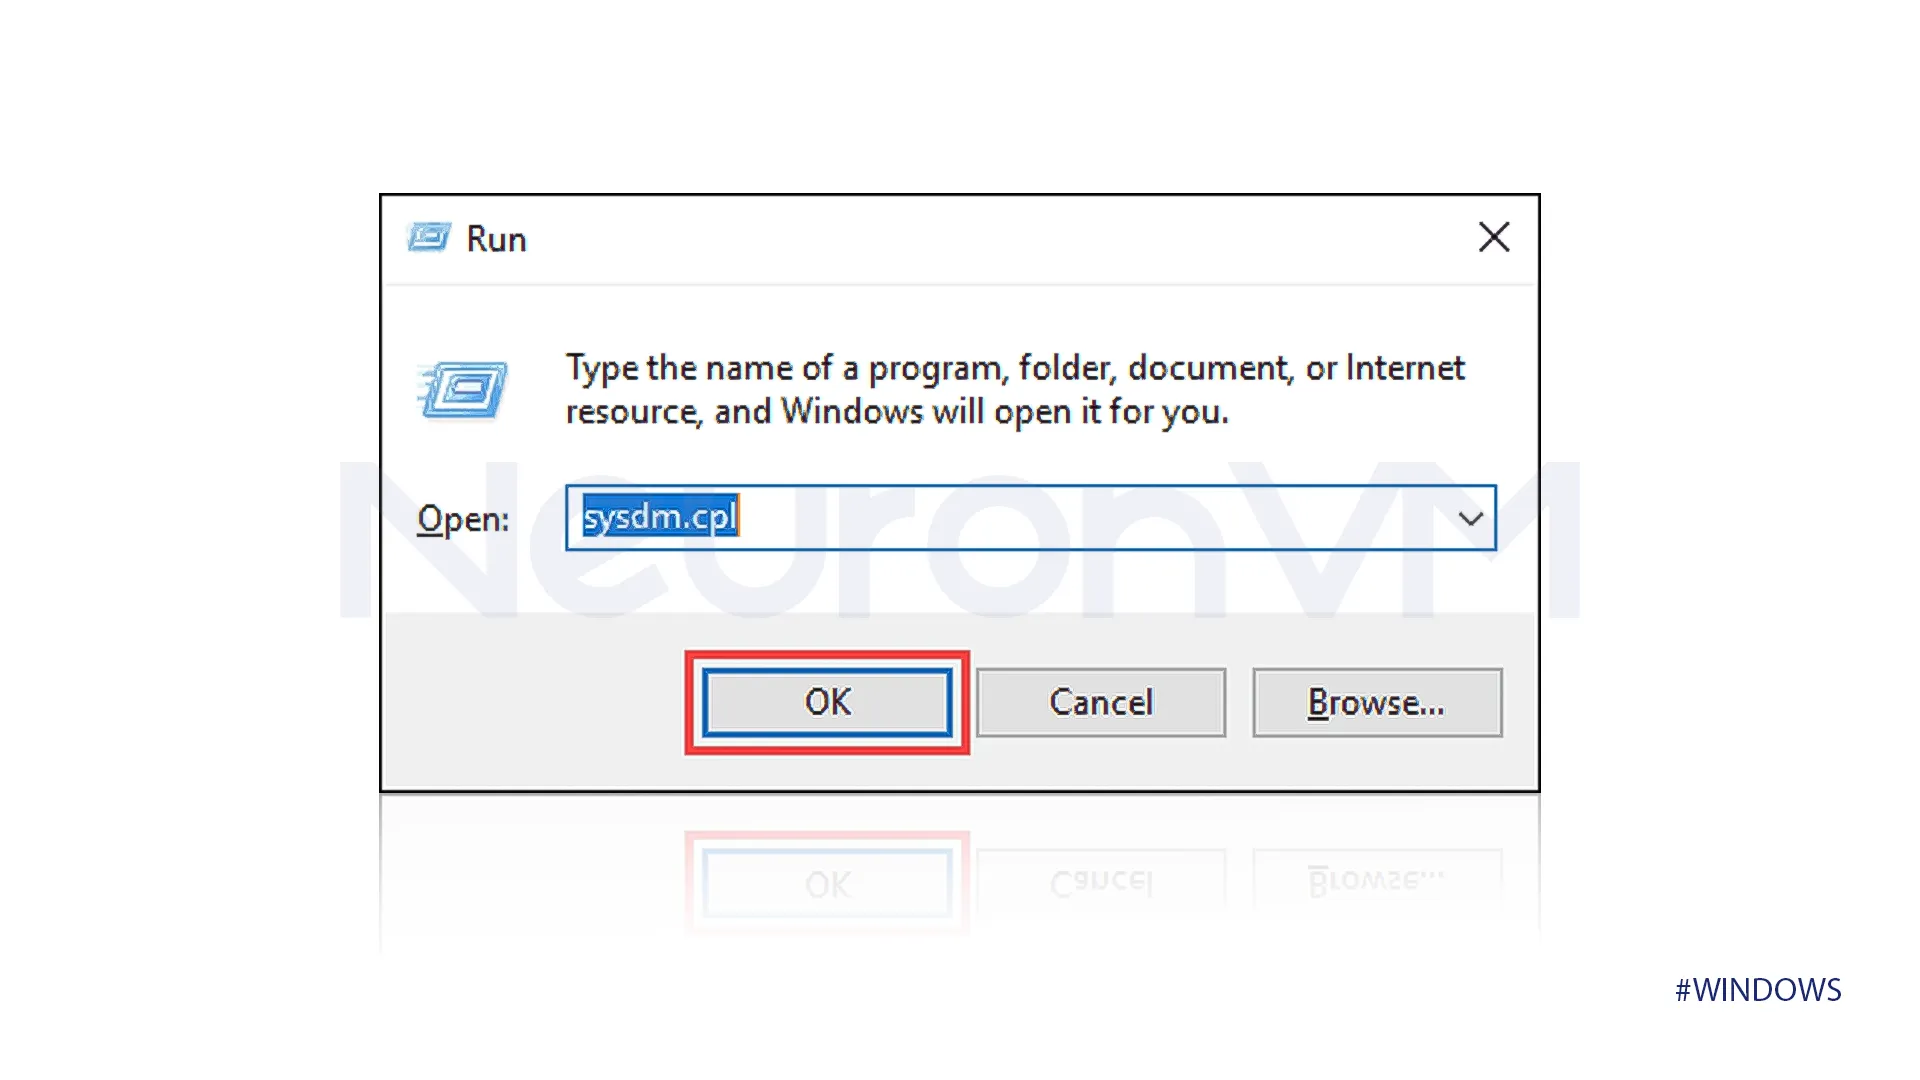
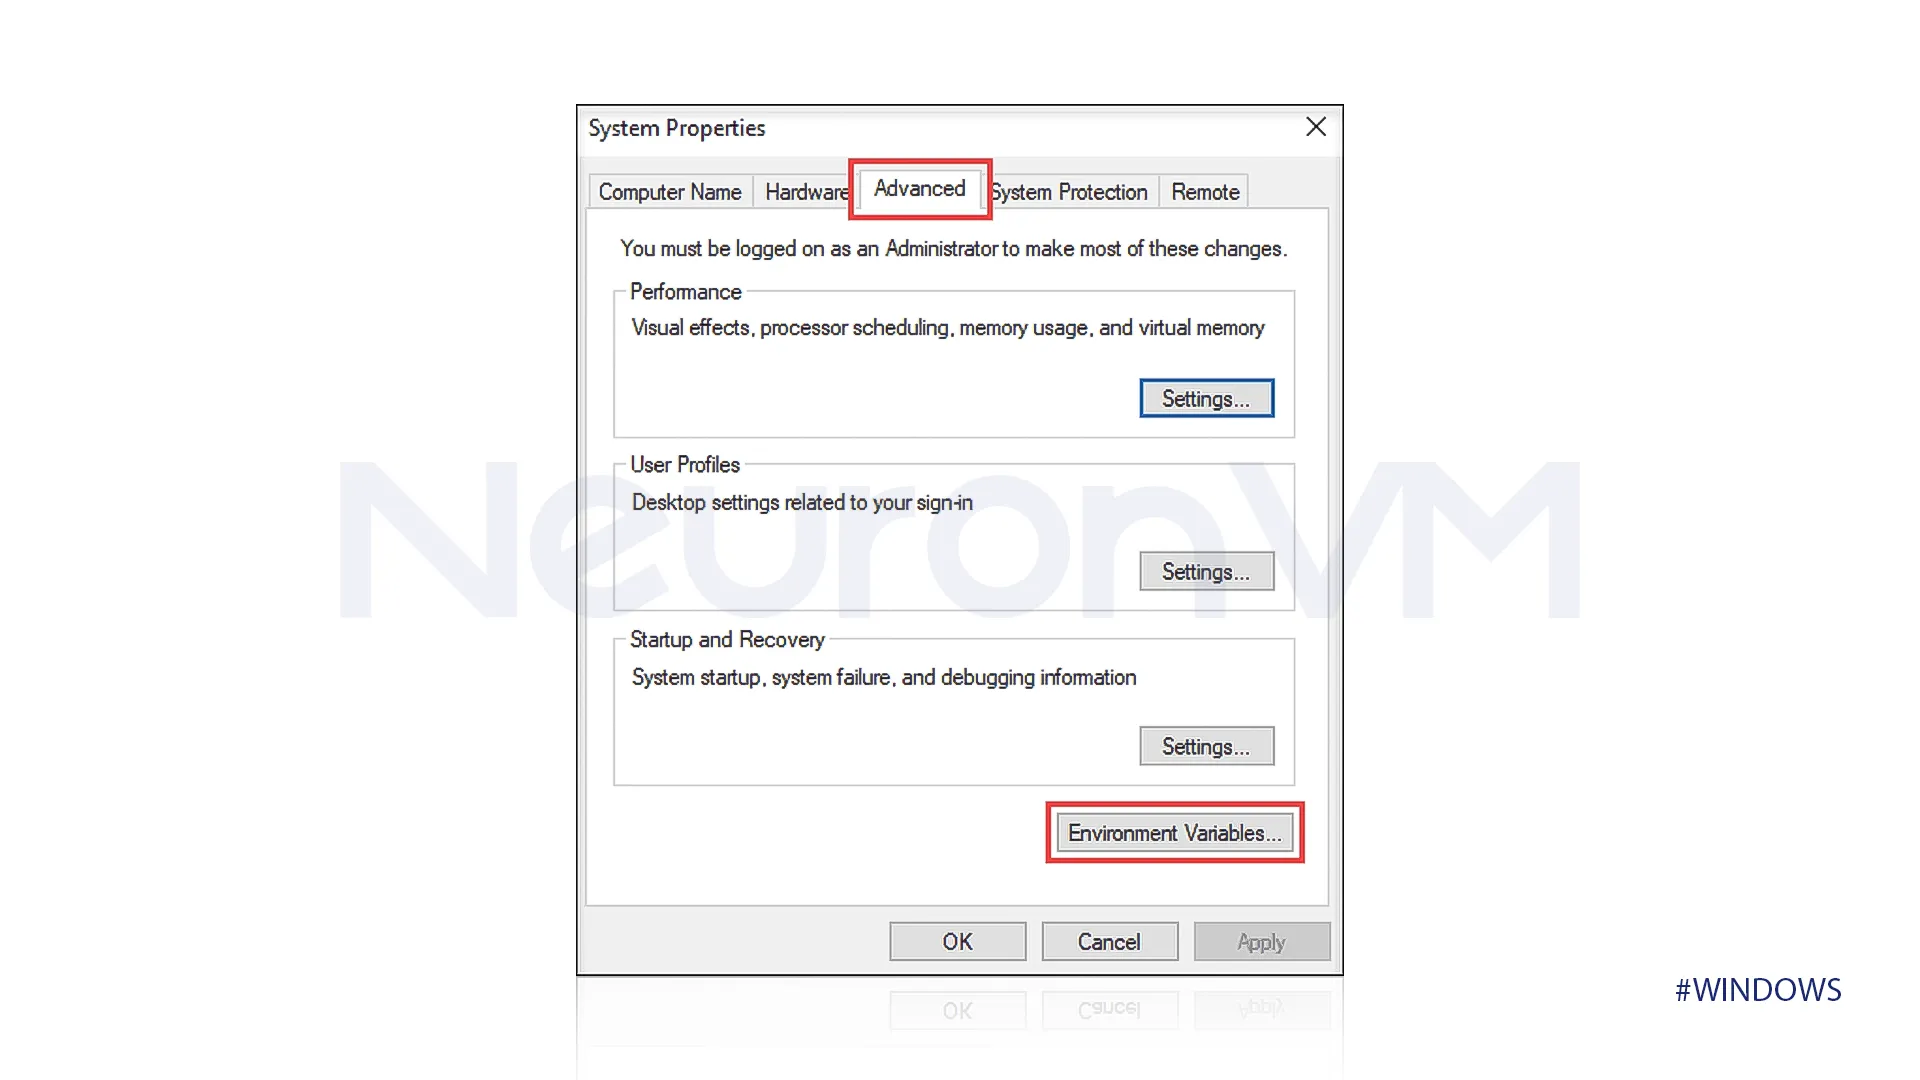
Press the Windows key on your keyboard and the “R” button at the same time, a small window named “Run” will pop up, enter the command below in that.
sysdm.cpl
Add to the System Environment Variables
In the “System Properties” window, go to the “Advanced” section, and you need to find and click the “Environment Variables” button.
 On the “Environment Variables” window, you have to find the variable named “Path” in the lower section, click on it to select it, and then click the “Edit” button.
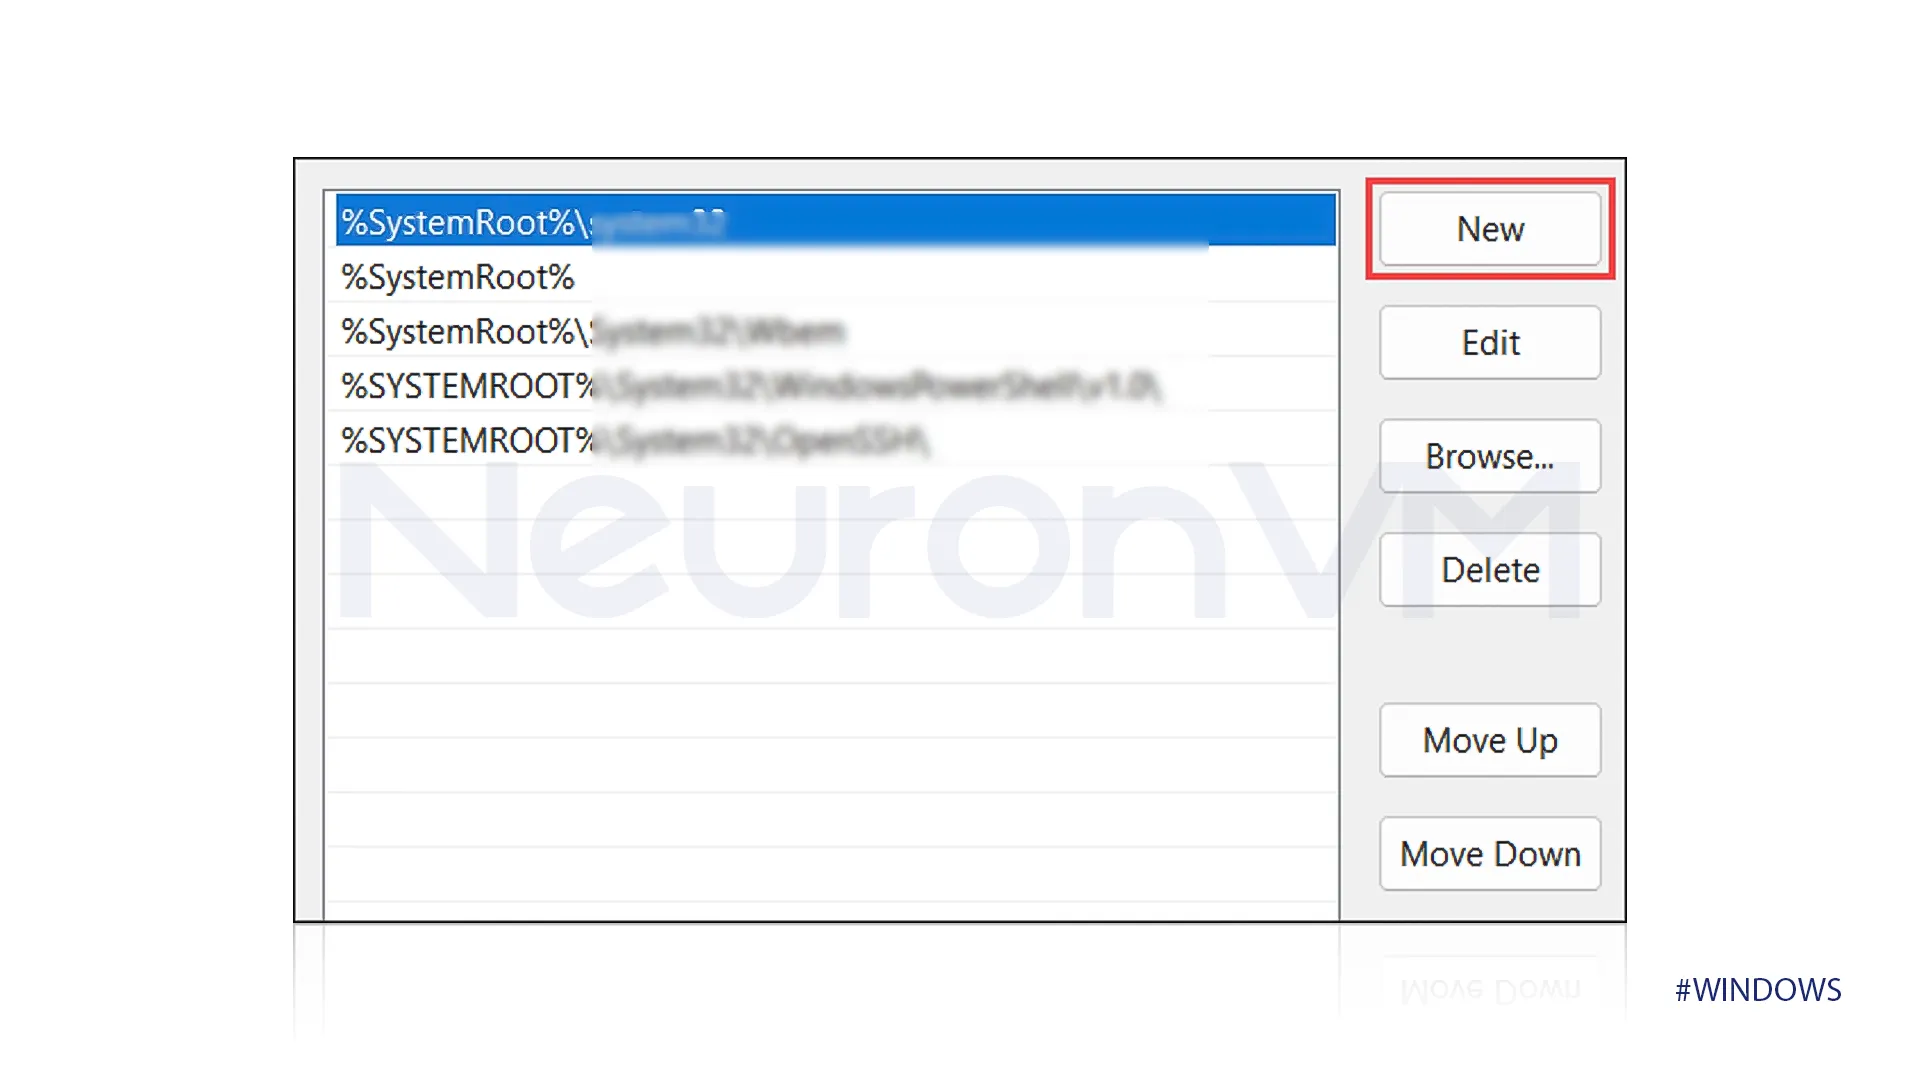
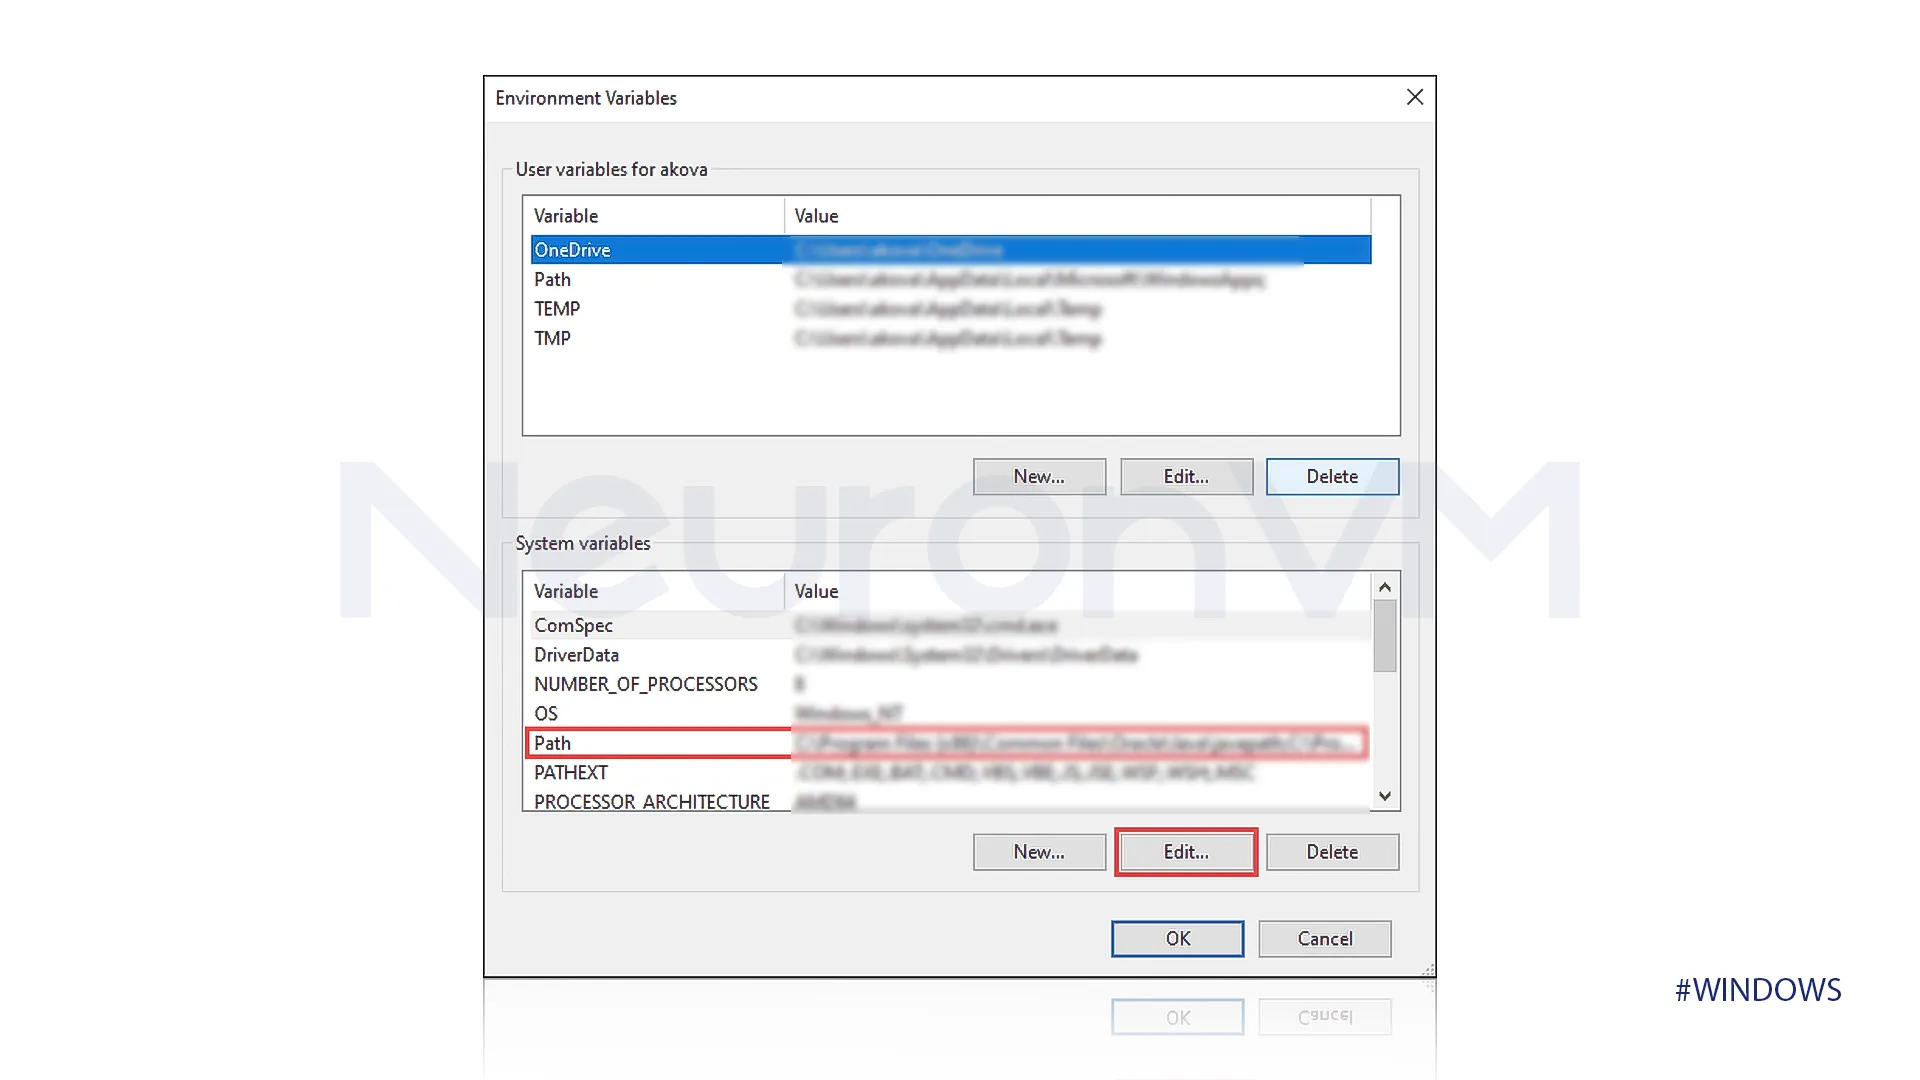 In the “edit environment variable” window, click the “New” button, then type the full path to your Helm folder in the new entry, and press the Enter key to save it.
 Verify the installation
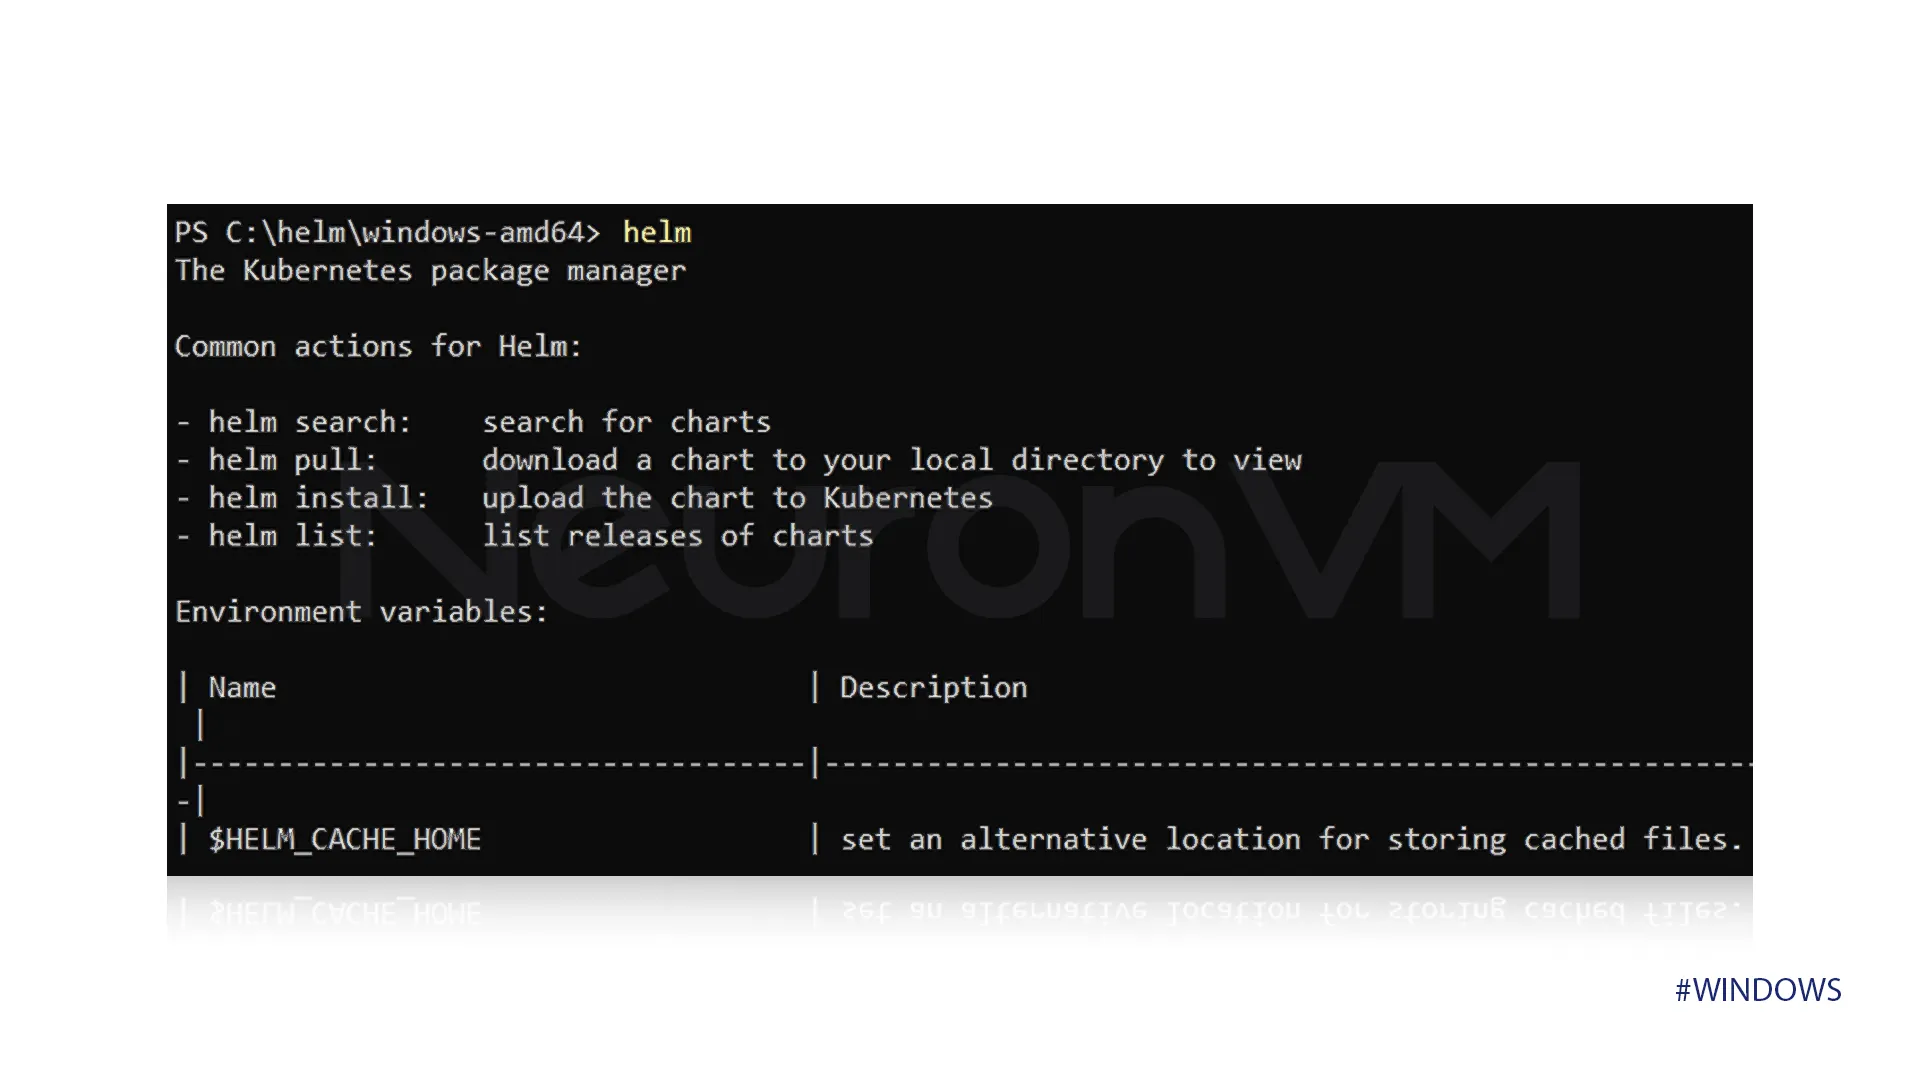
To check if Helm is working, you need to open the command prompt and type Helm and press Enter, if Helm is installed properly, you will see a message that shows how to use Helm and a list of available commands.
helm
 Configure Helm
After installing Helm, you can add repositories to access more charts, use the command below to achieve this goal, this will add the “stable” repositories, a common source for many applications.
helm repo add stable http://charts.helm.sh/stable
The command below fetches the latest information about available charts from the repositories you’ve added.
helm repo update
Test Helm with a Sample Chart
Install Nginx:
If you want to see if the Helm is working, you can do it by installing a simple app, which we will use, Nginx, which is a popular tool for running websites.
helm install my-nginx bitnami/nginx
Clean up:
To remove the “my-nginx” app that we installed, clean up your Kubernetes cluster.
helm uninstall my-nginx
Common Installation Issues
We provided a solution to the common problems you might encounter when installing Helm:
Permission issue:
You might see errors saying that Helm can’t save files or install properly, this is what you need to do:
You can try installing Helm again, but this time, right-click on the setup file or the command prompt, and choose “Run as Administrator.”
Path Not Recognized:
If your computer causes errors when typing “Helm” in the command line, you have to check the Path Variables and make sure you typed the folder address correctly, after changing the “Path” setting, close the command line and open it again to make the computer recognize the changes.
Kubectl Not Found:
Helm needs another tool called “Kubetl” to talk to your Kubernetes system; if it is not set up right, Helm won’t work, to solve this problem, make sure it is installed well on your computer.
Conclusion
In this guide, we have walked you through the process of installing Helm on Windows 10, enabling you to easily manage applications on your Kubernetes clusters and providing an ultimate answer to How to Install Helm on Windows 10 (Step-by-Step Guide), Ready to install Kubernetes deployments? Try it on a VPS from NeuronVm.

