How to Change WSL Ubuntu from NAT to Bridge Mode


 Study duration :
11 Minutes
Study duration :
11 Minutes
 0 Comment
Once, when I was trying to set up a small web server on my system, I found that WSL’s default NAT sometimes caused problems. Projects would run without a problem, but when I wanted to access the server from other devices on the network or test Docker, its limitations became apparent. Many have experienced the same path. NAT is fine for simple tasks, but when it comes to real-world networking and communication with other devices, it falls apart. This is where bridge mode can be a lifesaver. By enabling it, WSL sits on your local network just like a real computer, making everything transparent and controllable.
NAT VS. Bridge: What’s the real difference?
Many users ask themselves, ” What’s wrong with NAT? ” when they first try to bridge WSL . The truth is, NAT is perfectly fine for simple tasks like installing packages or running small projects. But when I wanted to make a real service, like a web server or database, available on the network, the limitations of NAT became clear to me.
| Feature | NAT Mode (Default) | Bridge Mode |
|---|---|---|
| IP Addressing | Shared/virtualized (via NAT) | Direct LAN IP |
| Access from LAN | Limited, requires port-forward | Full, direct communication |
| Server Hosting | Possible, but less stable | Seamless hosting & access |
| Use Case | Lightweight dev, single-user | Advanced dev, production simulation |
Some real-world situations where Bridge has come in handy
- 1- Personal experience: The first time I wanted to set up a web server on WSL so my colleagues could test it on their internal network, I got really stuck with NAT. After fiddling around with port forwarding, I realized that Bridge solved everything in one place.
- 2- Team scenario: If you’re working with Docker or Kubernetes, Bridge makes services behave exactly like a real server on the network.
- 3- Hardware work: People testing on IoT devices or network printers can’t really get anywhere without Bridge.
How to Configure Bridge Mode
Follow these steps to change WSL Ubuntu from NAT to bridge mode:
Step 1: Configure a bridged Hyper-V adapter
- Open Hyper-V Manager.
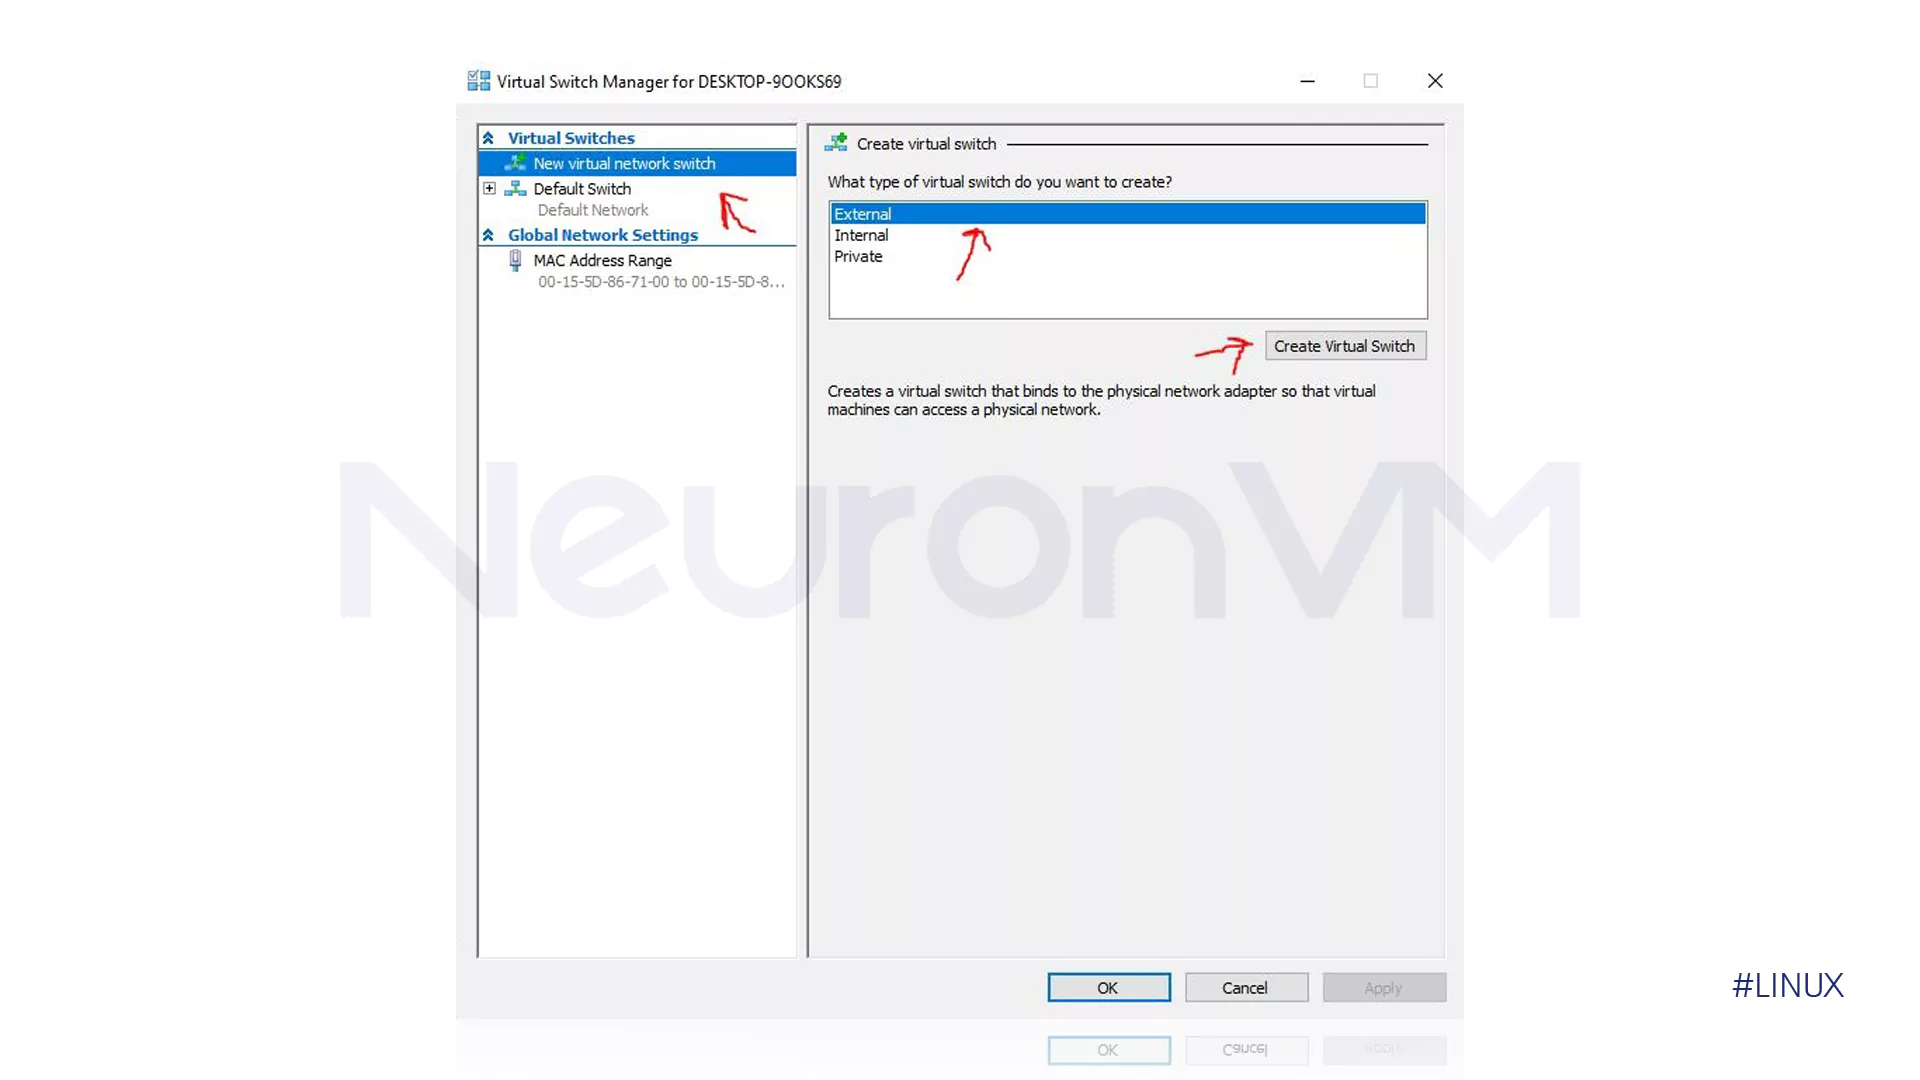
- Select the Virtual Switch Manager option.
- Click the “New virtual network” switch in the following window.
- Then choose the External.
- Finally, click on the Create Virtual Switch button.
- Set a name for your new virtual switch in Hyper-V in the name field.
- After selecting your host adaptor, click on the OK button.
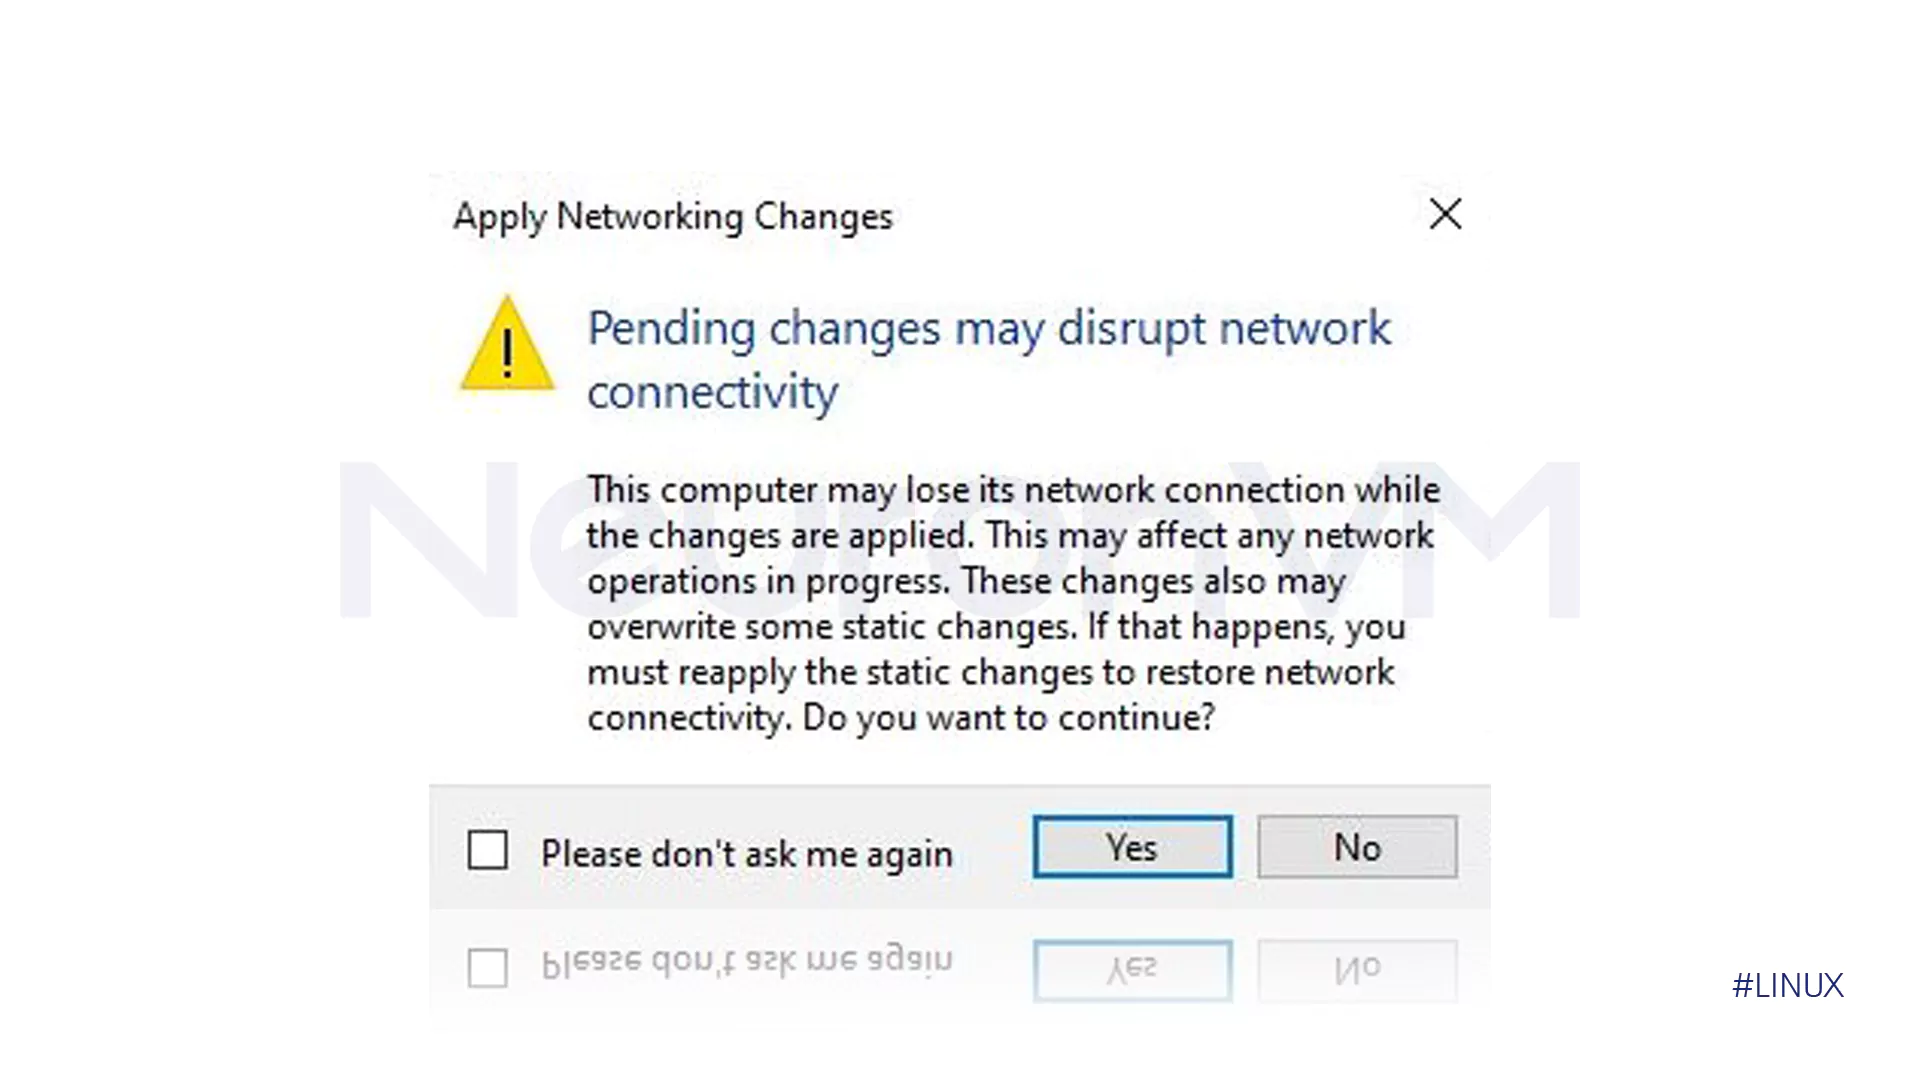
- The following window asks you to disconnect the host and reconnect it. Click on Yes.
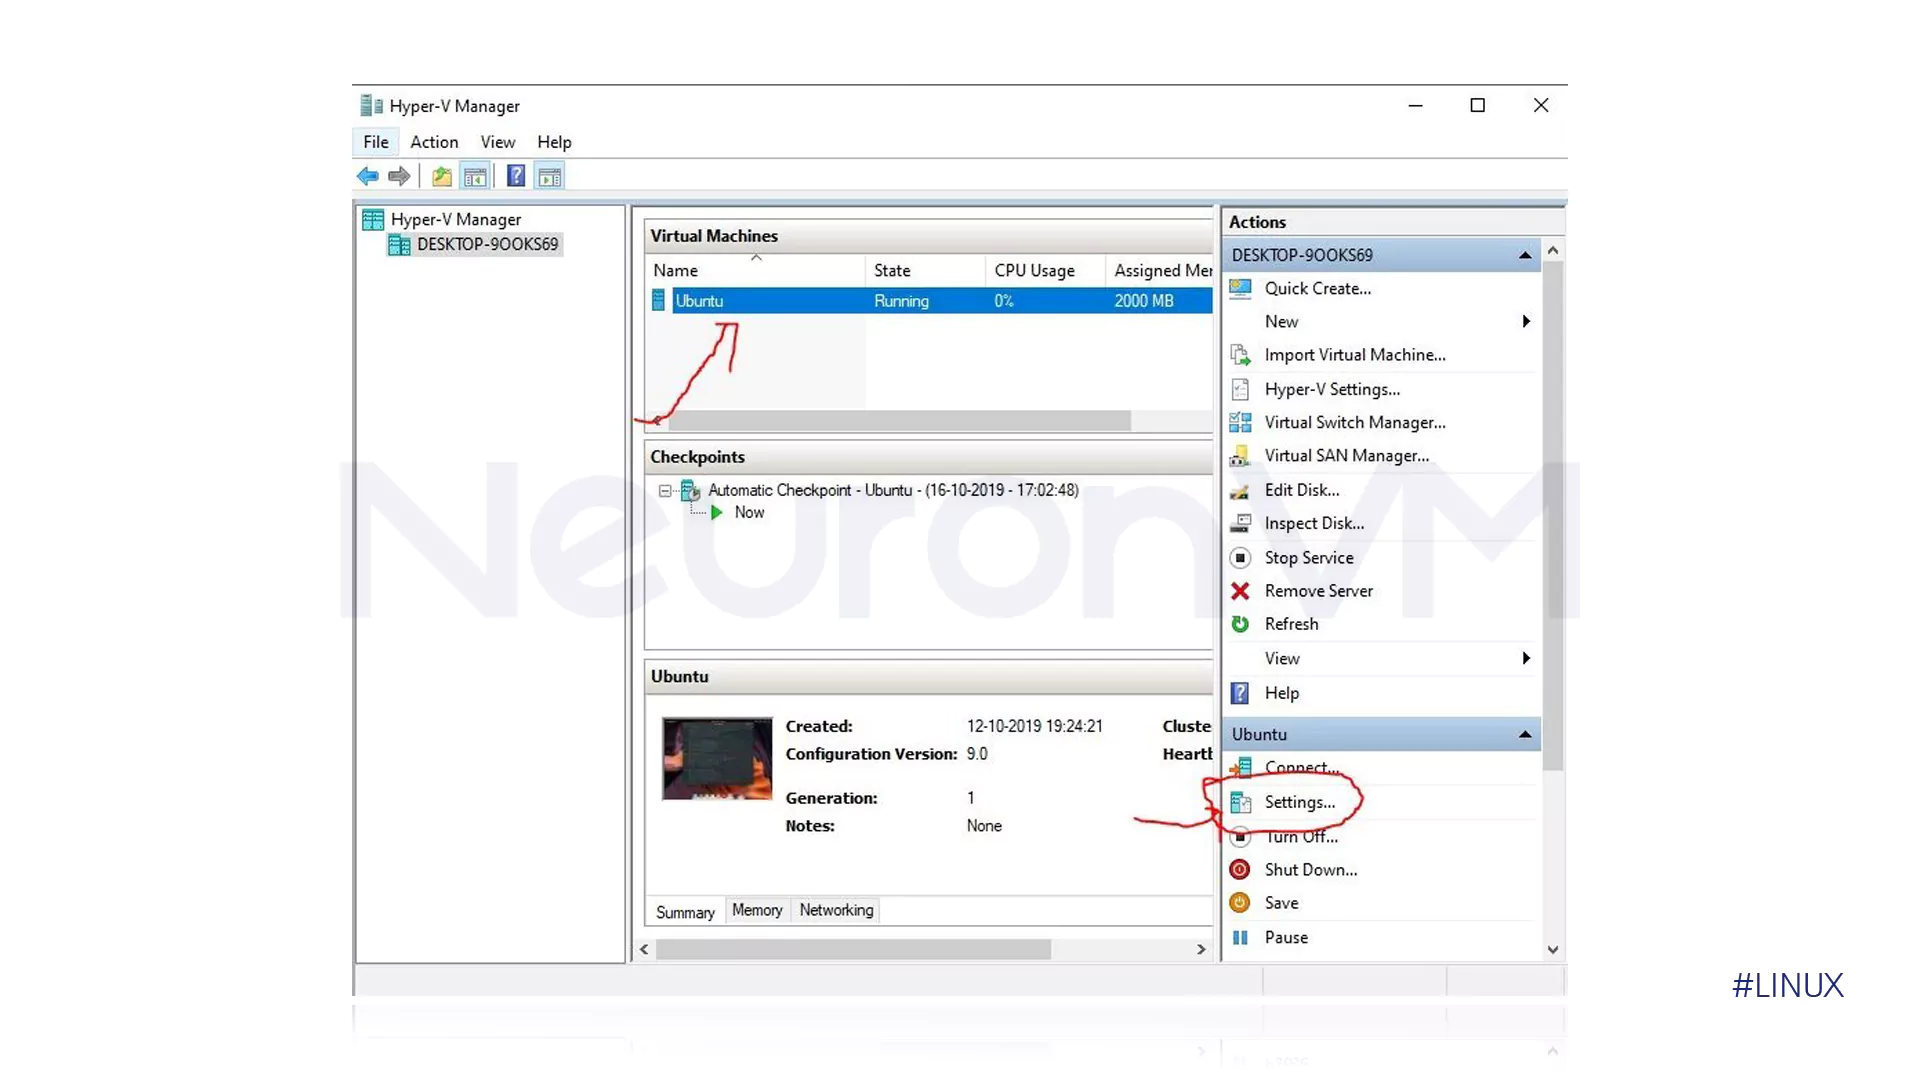
- Go to your virtual machine, and click on Ubuntu.
- Then from the three available options, select external.
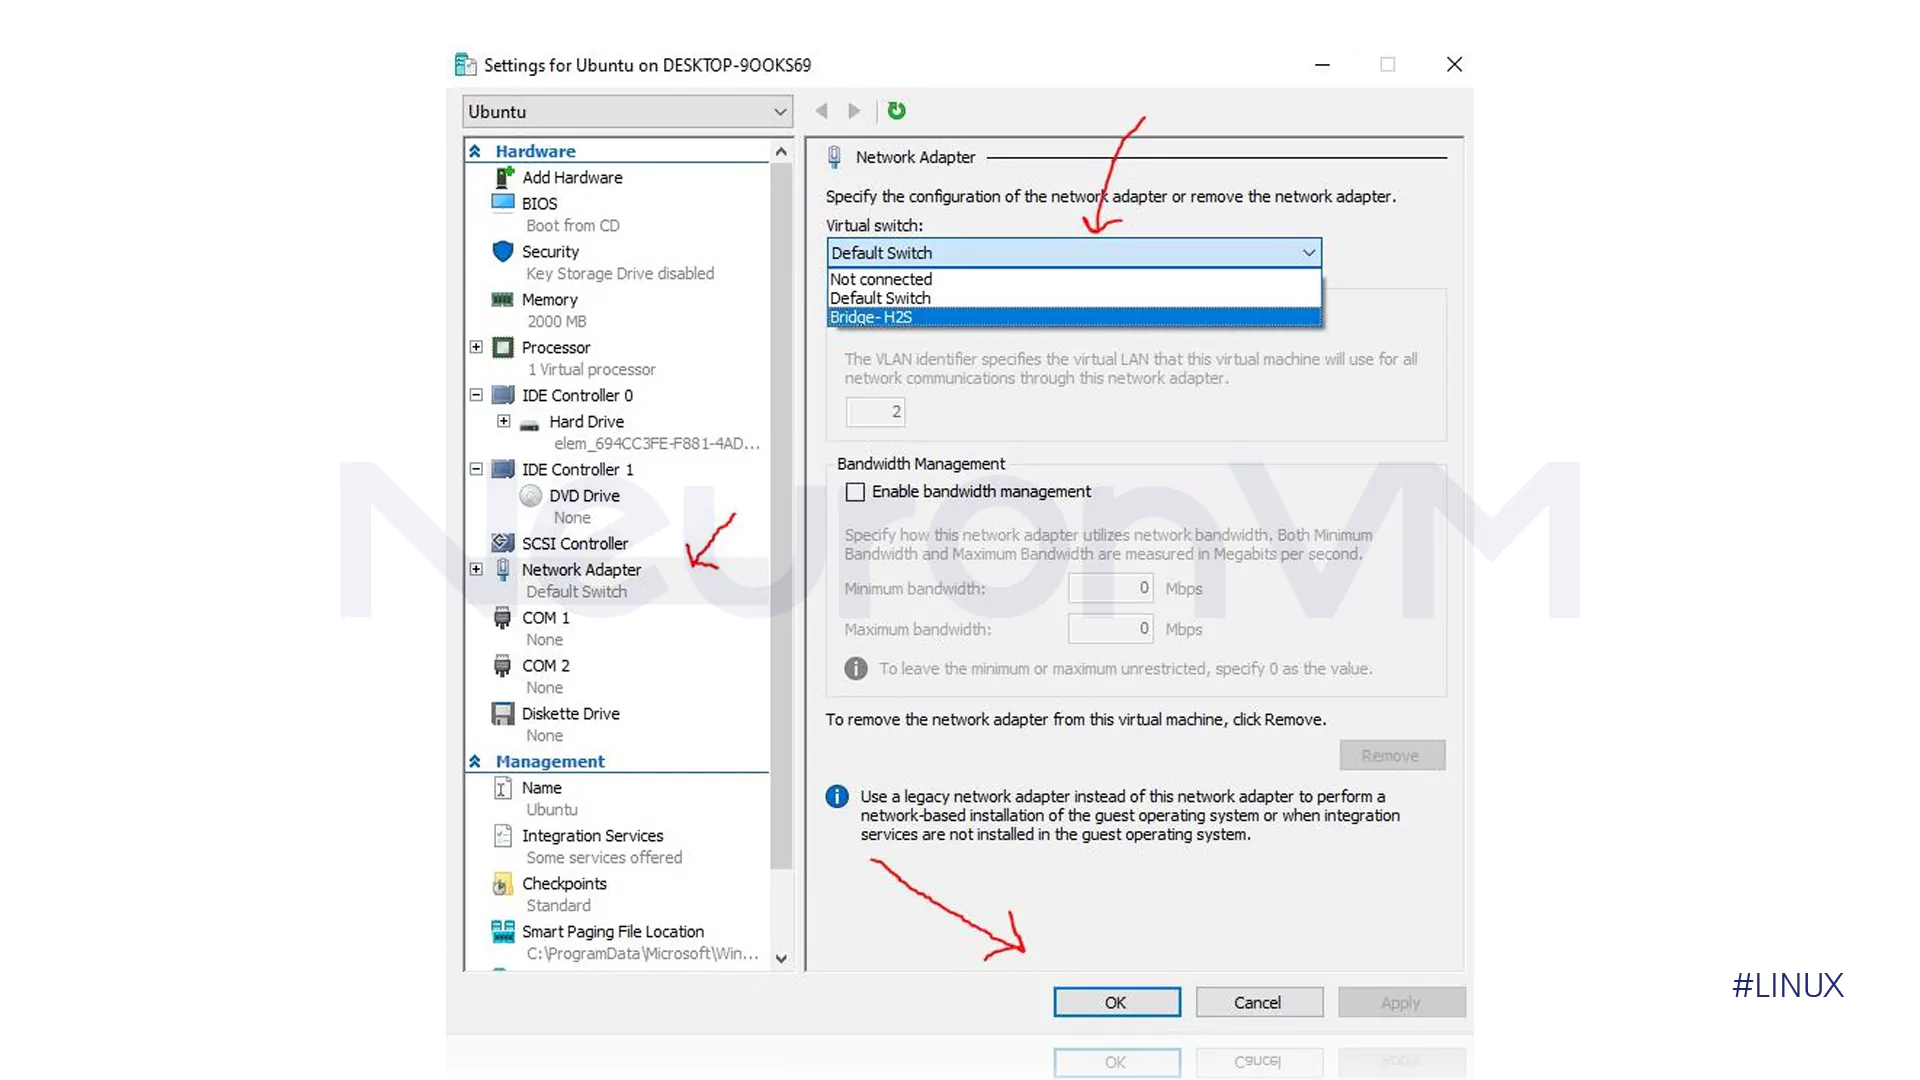
- Go to the Network adapter tab.
- Click on the Virtual Switch drop-down box, click on the name of the adapter you created, and tap OK.
- Launch your virtual machine.
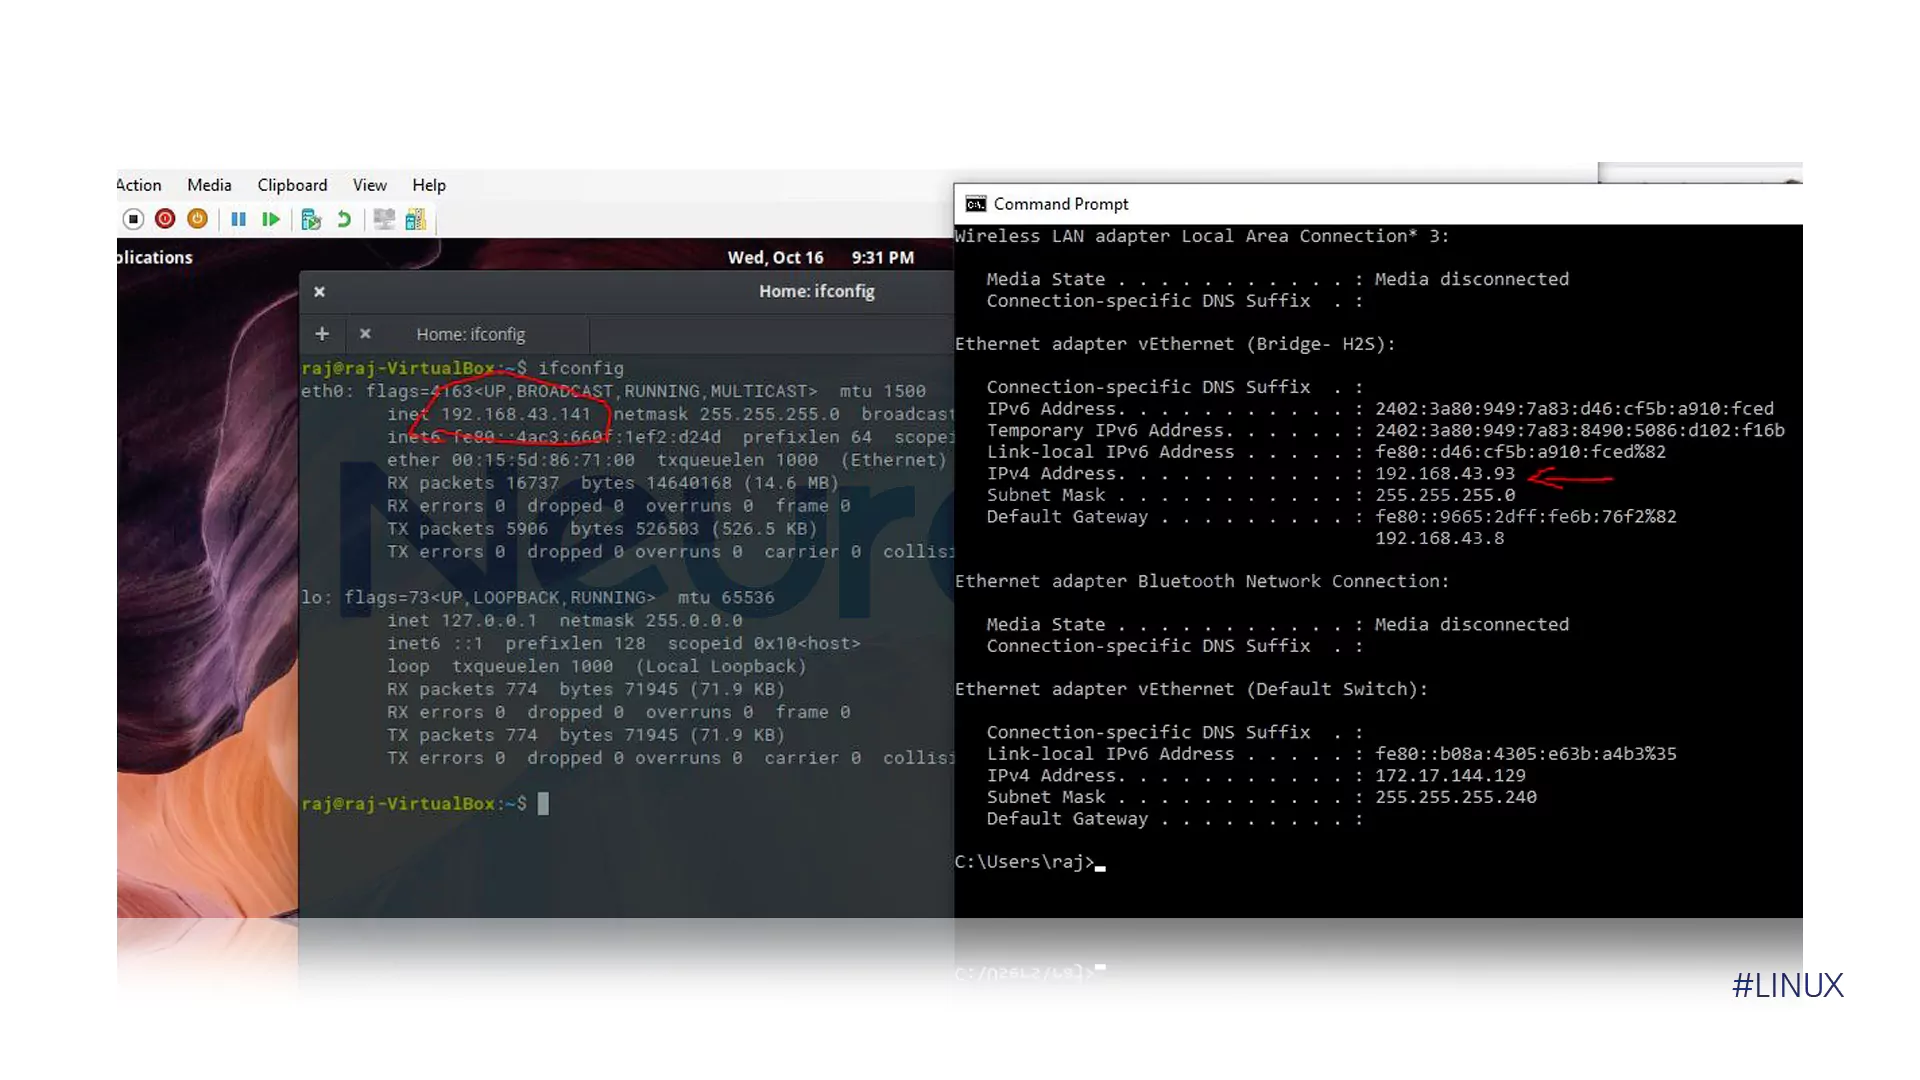
- In the command terminal, type “ipconfig”.
- If Linux indicates that the command is not available, install the net-tools:
sudo apt-get install net-tools
- In the picture below, you can see that the host and virtual machine operating systems are on the same IP address range on the subnet.
Step 2: Reconfigure WSL Settings
- Now it’s time to tell WSL to use the new bridged switch.
- Open a text editor (like Notepad) with administrator rights.
- Navigate to your user directory and locate the .wslconfig file. If it doesn’t exist, create it.
- Add the following configuration:
[wsl2]
networkingMode=bridged
vmSwitch=WSL-Bridge
Replace WSL-Bridge with the exact name of the switch you created in Hyper-V.
Step 3: Restart WSL
Open Command Prompt and run:
wsl --shutdown
This stops all running WSL instances and applies the new networking rules.
Step 4: Re-run WSL and check network settings
After applying the changes, it’s time to restart WSL. In the Command Prompt, type the following command to shut down all instances:
wsl -- shutdown
Now, restart your Ubuntu distribution. To make sure WSL is installed correctly, type the following command in PowerShell:
wsl -- install
Restart the system if necessary. Then you can see the list of all available distributions:
wsl --list -- online
Check the status and version of the installed distributions with the following command:
wsl -l -v
Now it’s time to check the Ubuntu IP address:
ip addr show eth0
If you want to have a static IP for the server or more serious tests, you can manually enter these settings:
sudo ip addr flush dev eth0
sudo ip addr add <YourDesiredIP>/24 dev eth0
sudo ip link set eth0 up
sudo ip route add default via <YourGatewayIP> dev eth0
Step 5: Check the Network Status
- To check the connectivity of your network, ping an external address:
ping google.com
Why do so many developers turn to Bridge?
Switching WSL from NAT to Bridge is not just a simple configuration change; it really makes a difference in the developer’s workflow. Common experiences show:
- 1- Direct communication with devices: When Bridge is enabled, your Linux applications can seamlessly connect to printers, servers, or even IoT devices on the same network.
- 2- More stable hosting: Running a web server or Docker containers on multiple machines is much easier, and you don’t need to do weird port forwarding.
- 3- Real world environment emulation: Bridge gives you almost the same experience as you would experience on a real server or cloud environment; this is especially useful for DevOps and CI/CD.
- 4- Easier debugging: When working with APIs or microservices, direct access to the IP makes problems easier to find and resolve, and the troubleshooting process smoother .
Common Problems and Solutions (Troubleshooting)
Even if everything goes well, sometimes you may encounter problems like these:
1- DHCP Conflict: If your network does not support multiple virtual machines, addressing may be disrupted.
2- VPN Interference: Some VPN clients are not compatible with Bridge.
3. Need a static IP: Especially when you are using WSL to host or test servers, having a static IP address makes everything more stable and predictable.
Conclusion
NAT mode is simple and suitable for lightweight development, but for developers who want a realistic, production-like environment, bridge mode is the better choice. By switching to bridge mode, you unlock direct connectivity, stronger network performance, and fewer configuration headaches. In short, if you want your WSL Ubuntu to act like a real server on the network and have full control over the connections, the best thing to do is switch from NAT to Bridge.

