
How to Install Proxmox on Ubuntu 20.04


 13m
13m
 0 comments
 Print
Print
Proxmox is not the best solution for creating a virtual server, but if cost is very important to you, it is a convincing tool. This tool is based on Debian and the significant point is that you can create a new server with it instead of installing it on another server. This tutorial is going to show you the top way to install Proxmox in Ubuntu 20.04 without having to create a new server. Note that you can not install Proxmax on Ubuntu directly. The correct way to make it possible is to install it on disk or as a package on Debian, and the only way to make it possible on Ubuntu is to run it on a virtual machine. I know this method is unusual but if you want to save your Ubuntu server, but can’t install Proxmox, it is the only solution.
The Best Way to Install Proxmox on Ubuntu 20.04
It may be wisest to install this platform on a bare-metal server as it is an essential tool that should not be applied as a package to an existing operating system. Still, the important thing is that it is based on Debian and does not work on other systems. But if you plan to install Proxmox on the existing Ubuntu server, then keep following this tutorial.
Requirements
Here are the prerequisites:
– A Linux VPS Server with the Ubuntu operating system
– Installing Virt-manager to host Proxmox
– Creating a new virtual machine
– Using Proxmox web interface
Installing Proxmox on Ubuntu 20.04
Note that first of all, you need to get a full backup of your system. it is better to use the desktop version of Ubuntu.
Step.1: Updating the Current Operating System
Now let’s start by updating your current system. You can use the command below:
sudo apt update
sudo apt full-upgrade
Step.2: Installing Viet-Manager on Ubuntu
One of the easiest ways to create a virtual machine is to use Virt-manager on your Ubuntu desktop. So, use the command below:
sudo apt install virt-manager
After the installation, you will have this tool in your application list. Reboot your system to make it work correctly. If you received an error, it would be something like this:
unable to connect to libvirt qemu ///system
If rebooting the system is not possible for you, You can run Virt-manager as root by:
sudo virt-manager
This way you will fix the problem.
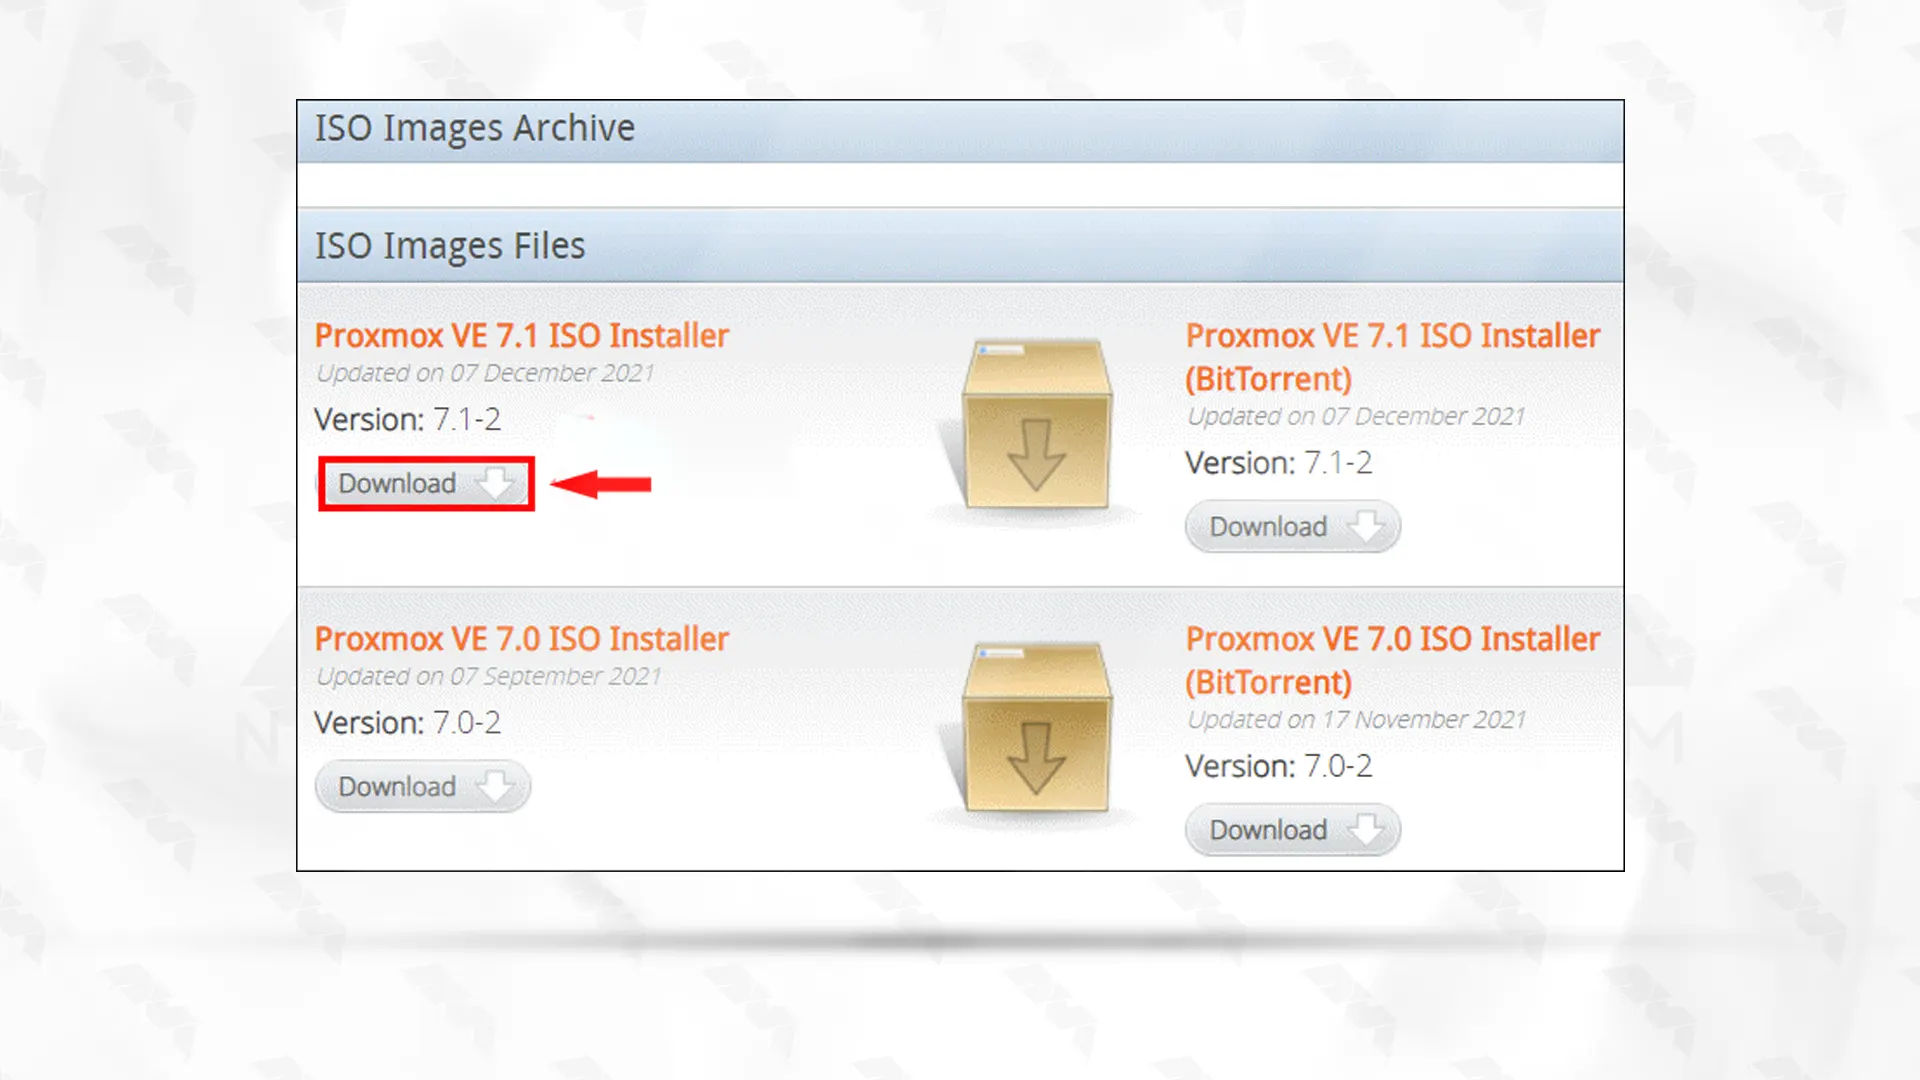
Step.3: Downloading Proxmox
As you finished the steps above, it is time to download the Proxmox website and then the latest ISO file. Here is the link to get the ISO file:
Click on the download button and wait a few minutes. The latest version would be the first one on the list.
Step.4: Creating a Virtual Machine to host Proxmox
Now open the virtual machine you installed before and follow the steps below to create a virtual machine running Proxmox:
– On the VM click on the first icon Create a new virtual machine:
– Leave the defaults as it is and go on with Local install media.
– Find the ISO file you downloaded and choose Debian in the operating system list.
– Modify the CPU and memory settings.
Mention that Proxmox needs 2 GB for the main system, so you can add as much memory as you need for the virtual machine. Also, 1 GHz is enough for the CPU.
– It is time to create a disk image for the virtual machine (the default is 20 GB which is enough for you)
We recommend you add extra disks for your VM.
– Copy your downloaded file on a USB flash and plug in the USB. Copy the ISO image there.
– The best way is to create a bootable USB by the following command:
dd bs=1M conv=fdatasync if=./proxmox-ve_*.iso of=/device/name
You can run the command below to find the name of the USB stick:
lsblk
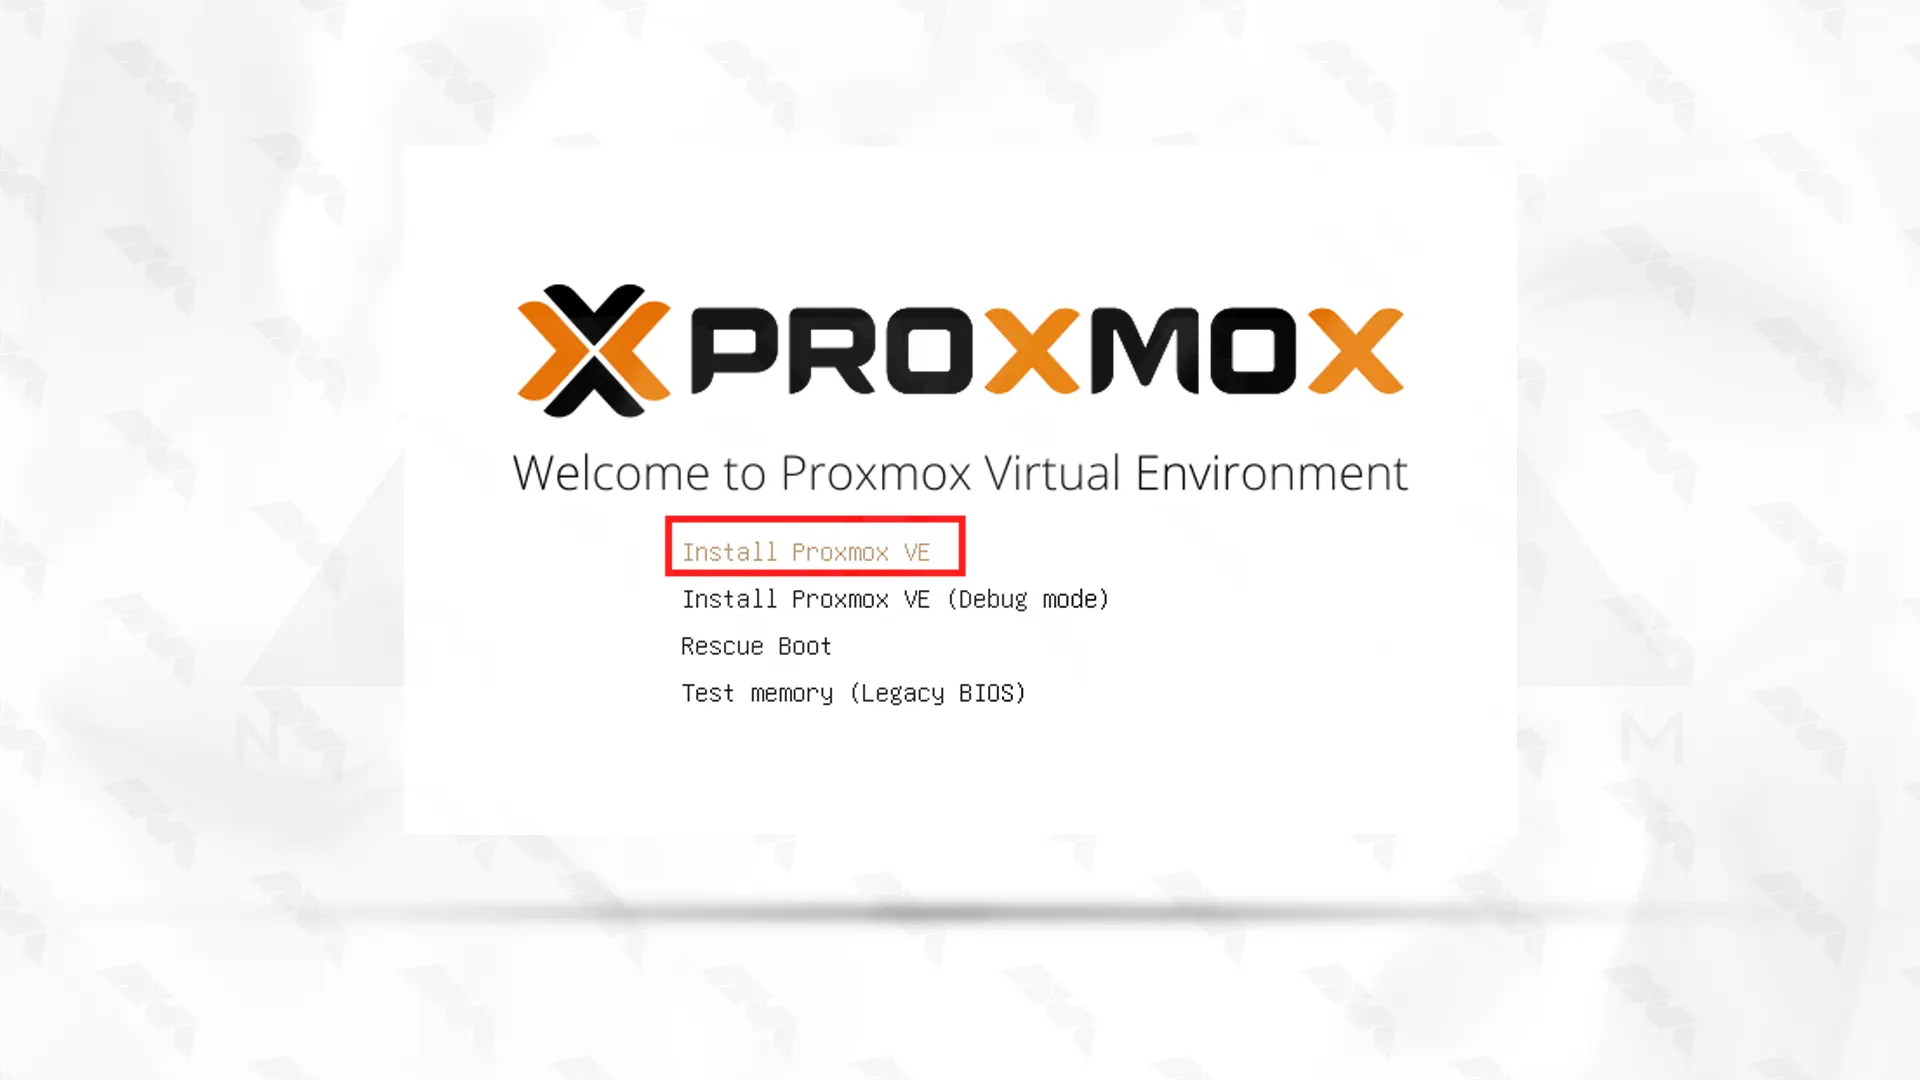
Step.5: Launching Proxmox Installer
Start by going to the server or machine and continue with the installation process. You will encounter the following boot menu.
– You can use the keyboard keys like Esc, F2, F10, F11, and F12, to access the boot menu.
– To see the Proxmox VE menu, choose the installation medium with ISO image and boot from it:
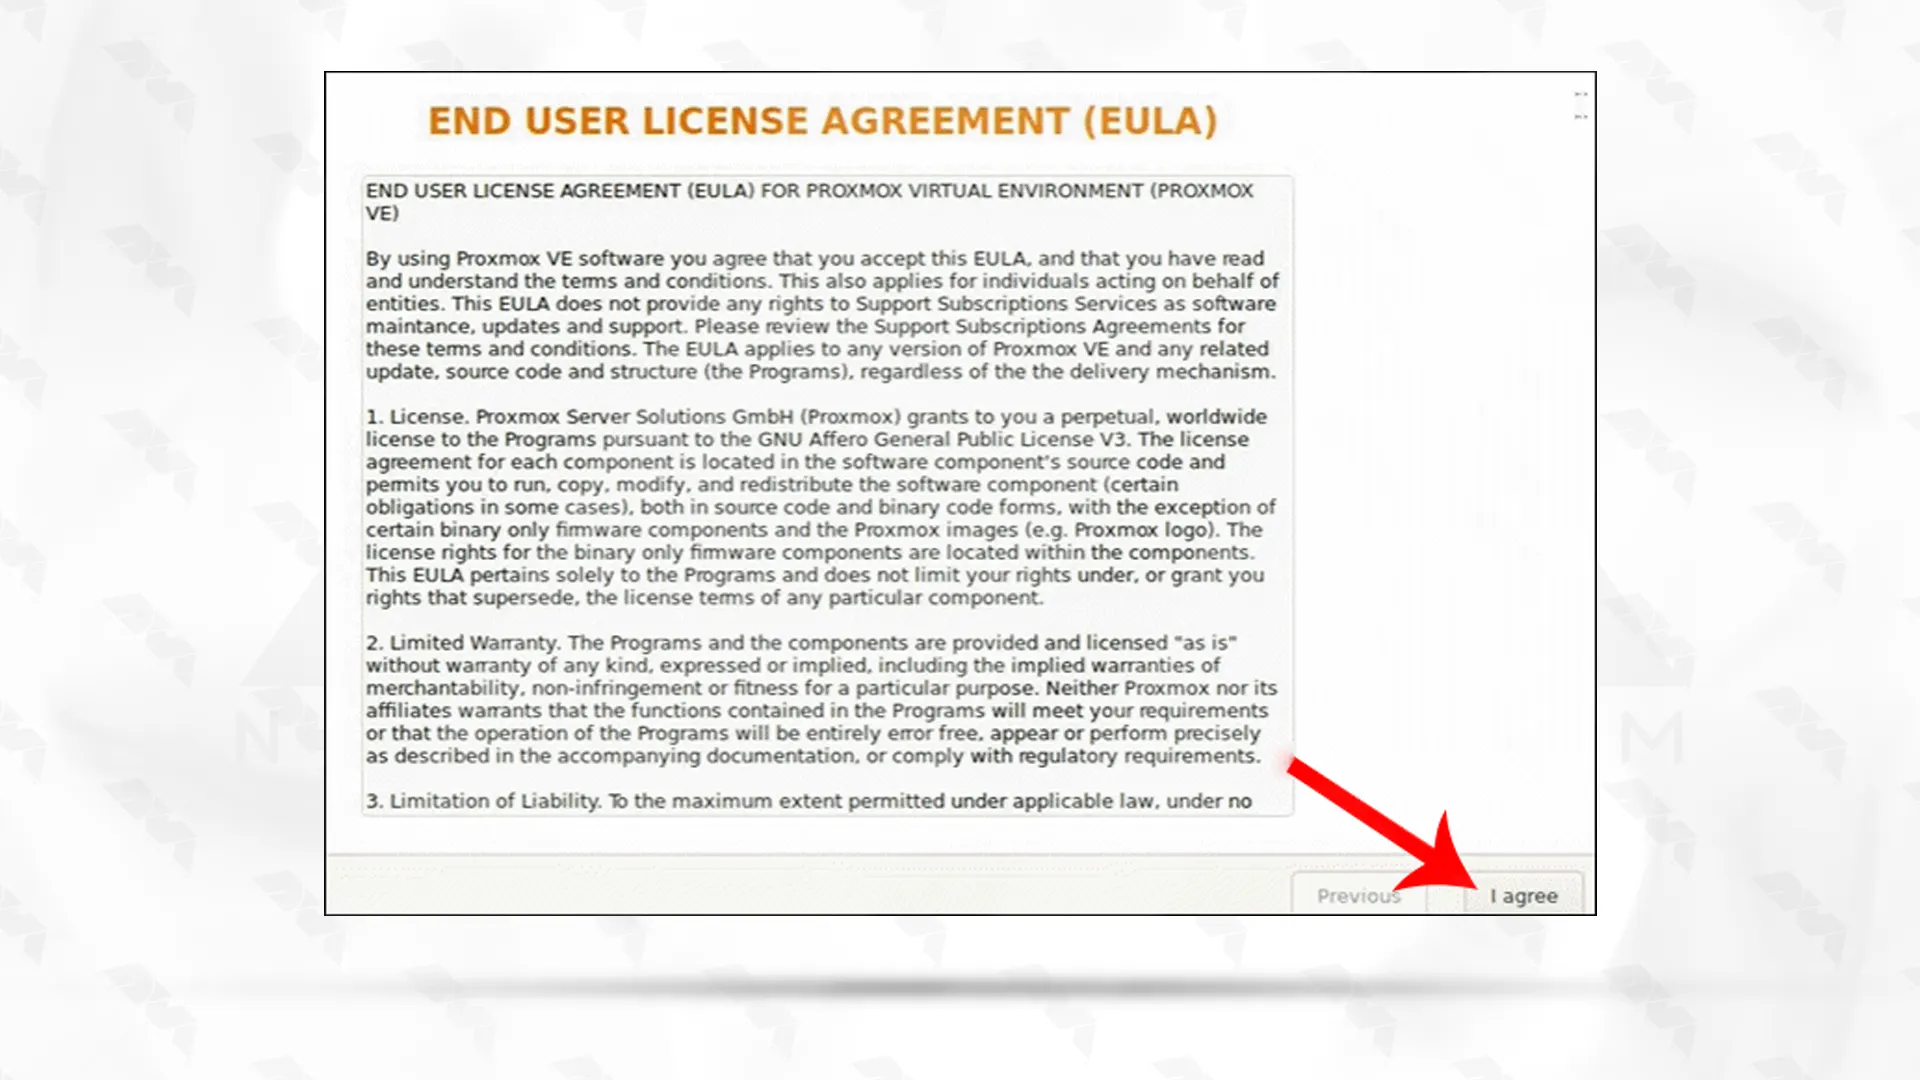
You will see the EULA section and accept it to continue:
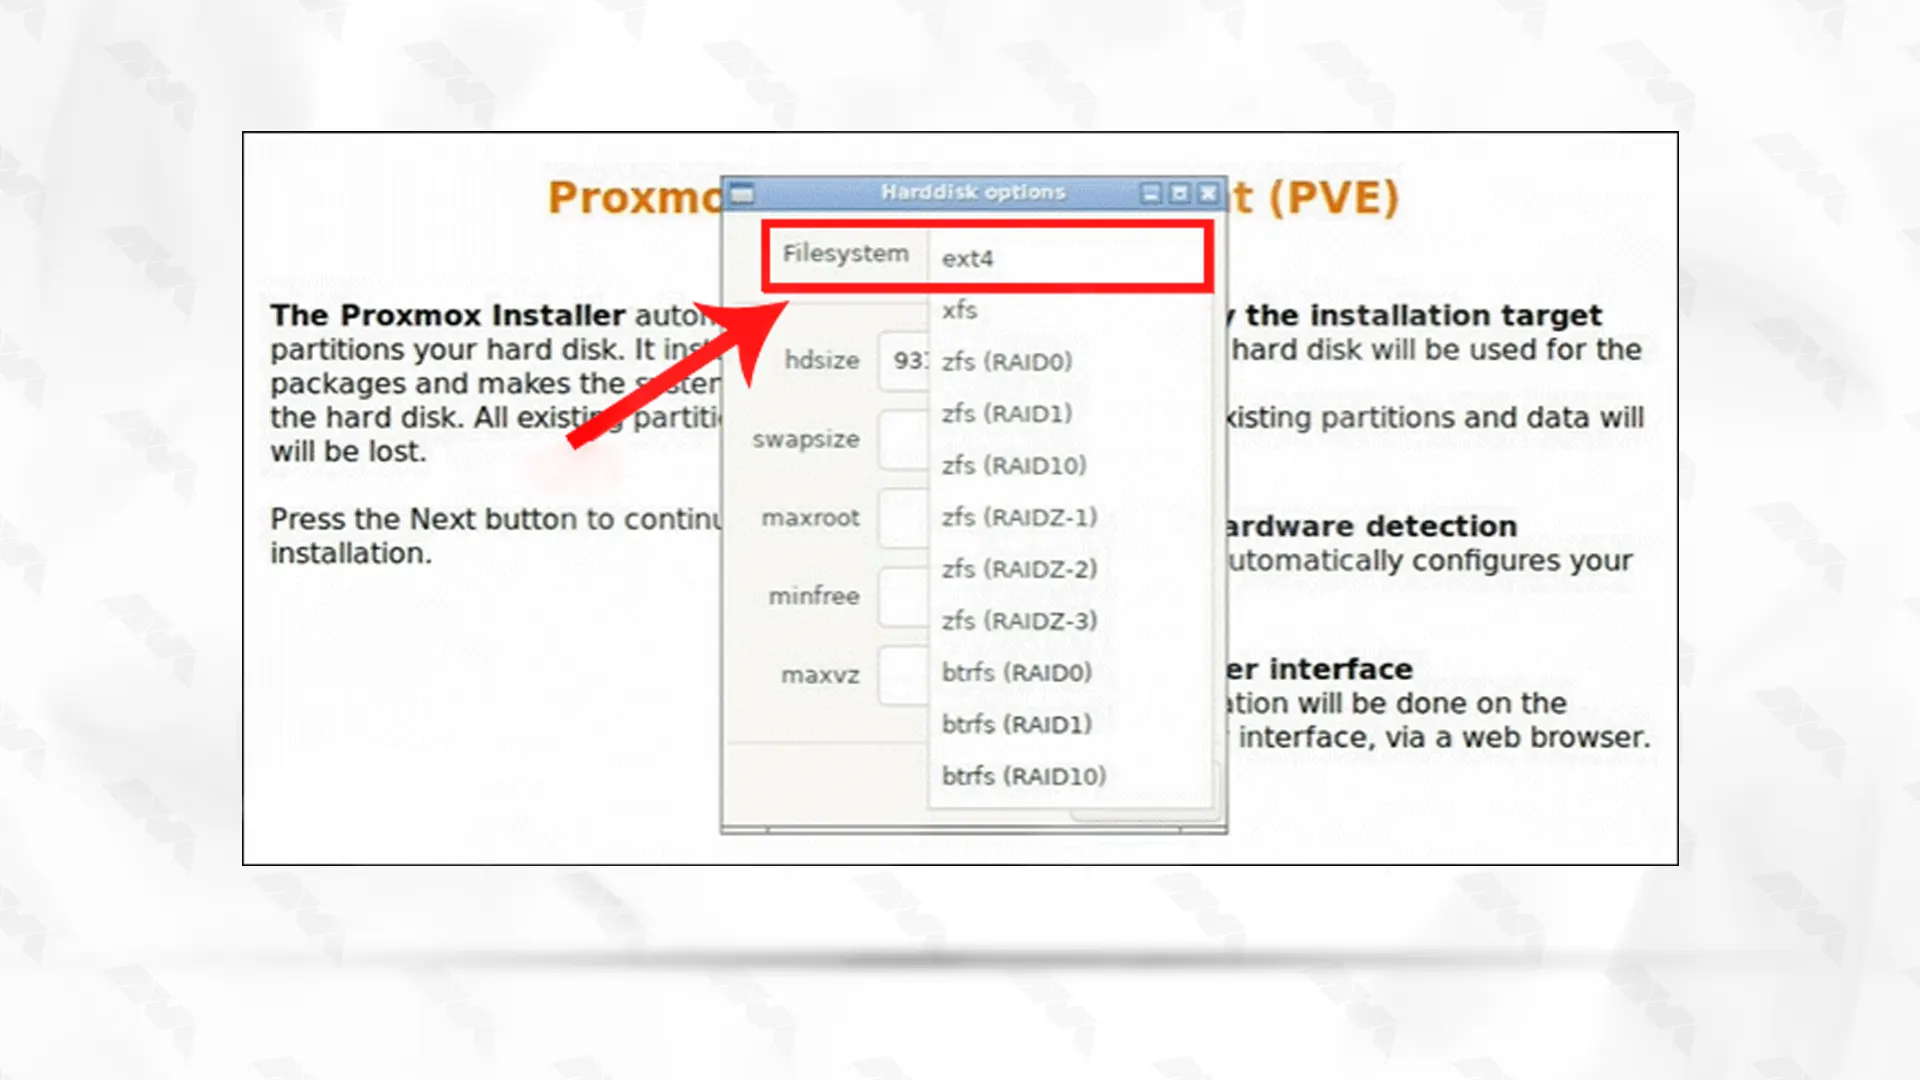
Select the proper hard disk for the installation and open the options section to determine additional parameters like the filesystem. It named ext4 by default:
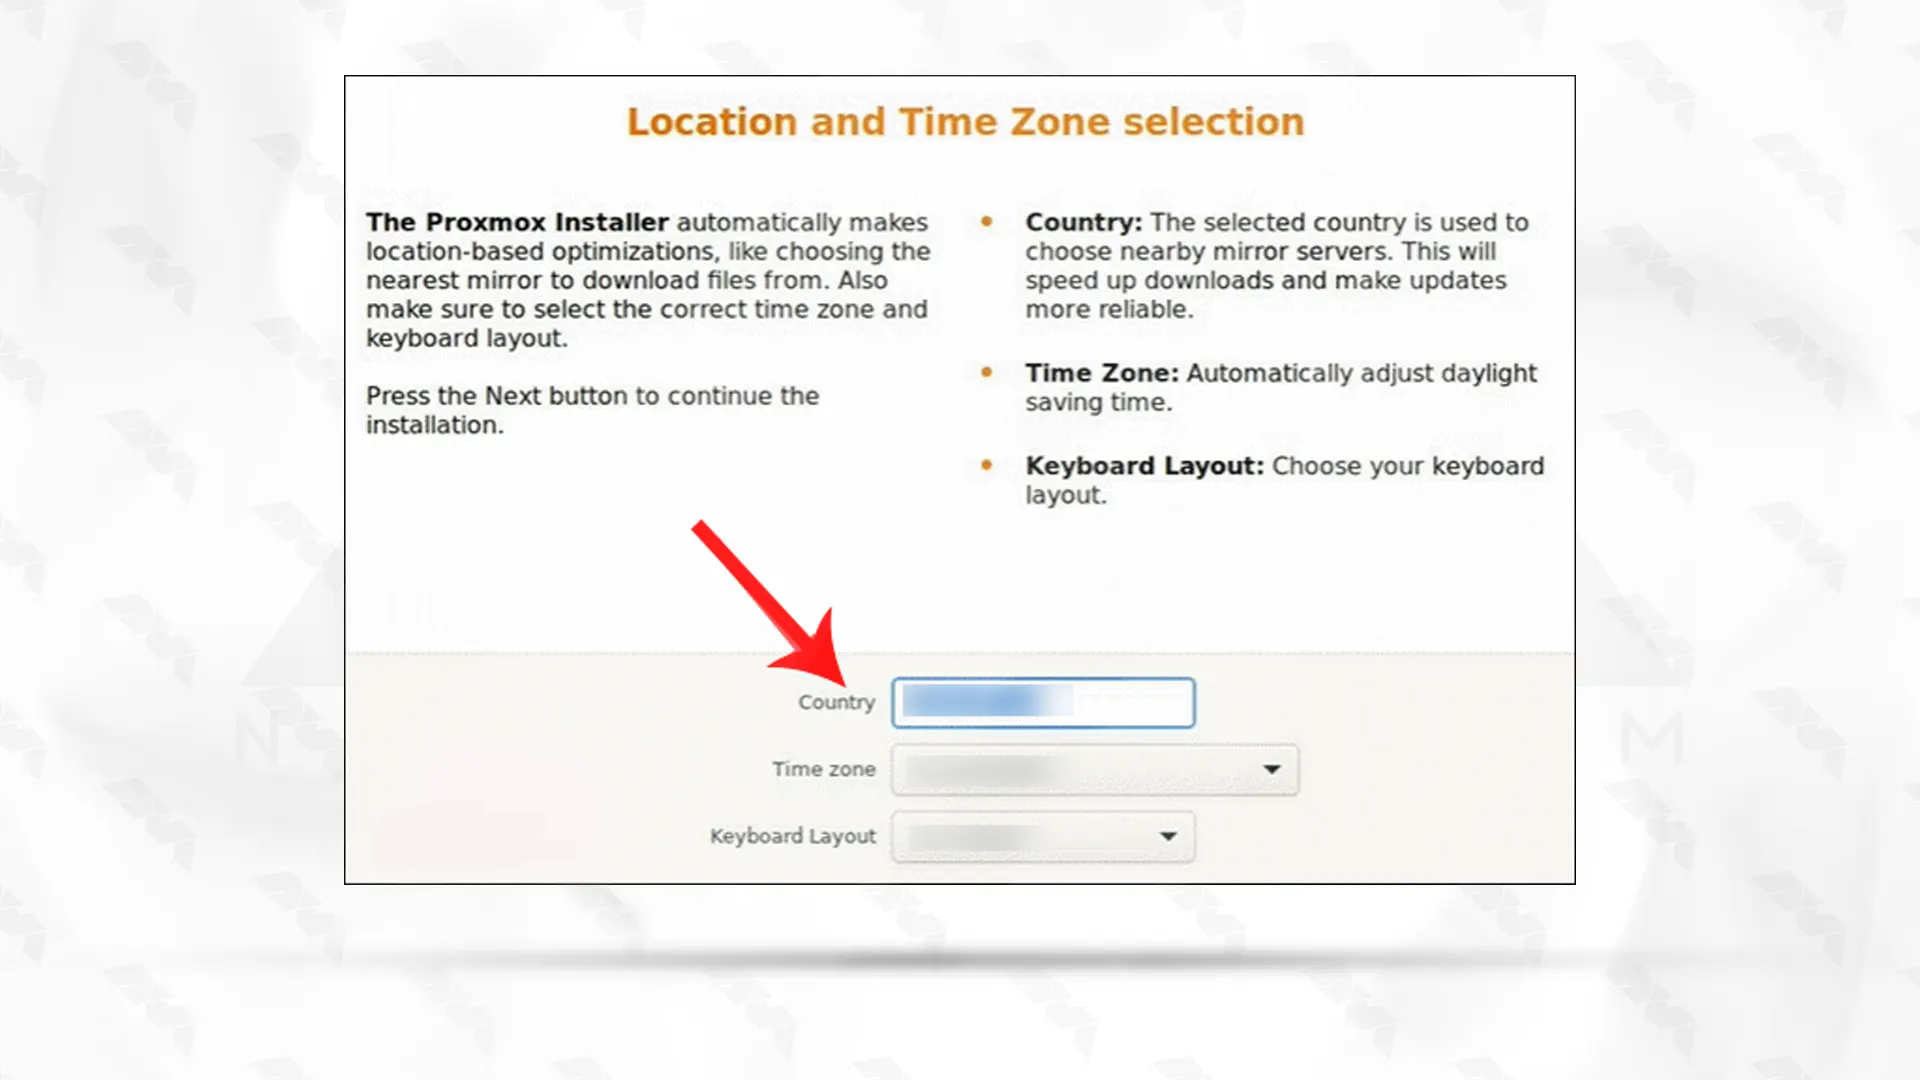
Choose the proper location, time zone, and keyboard layout. Notice that the installer will do most of them automatically:
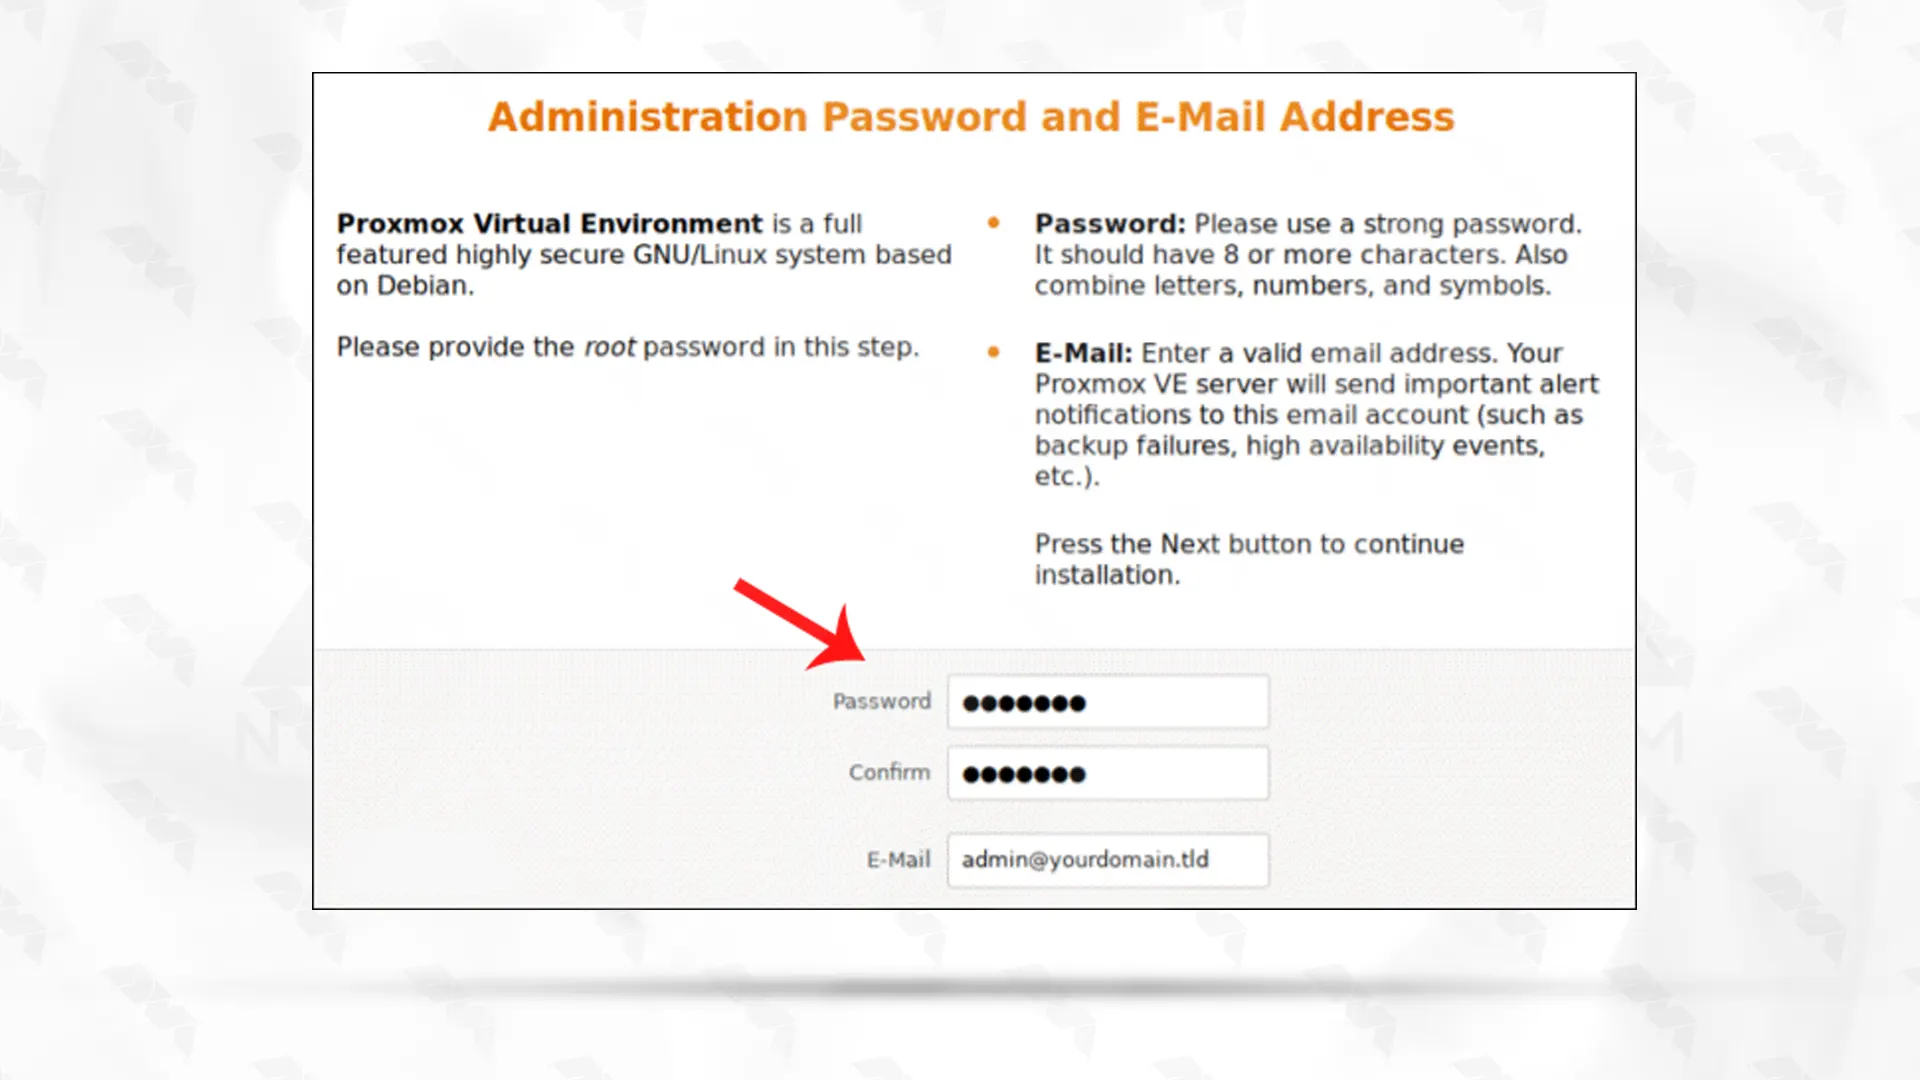
For admin credentials, you have to determine a strong password and confirm it. Give an email address for system administrator notification:
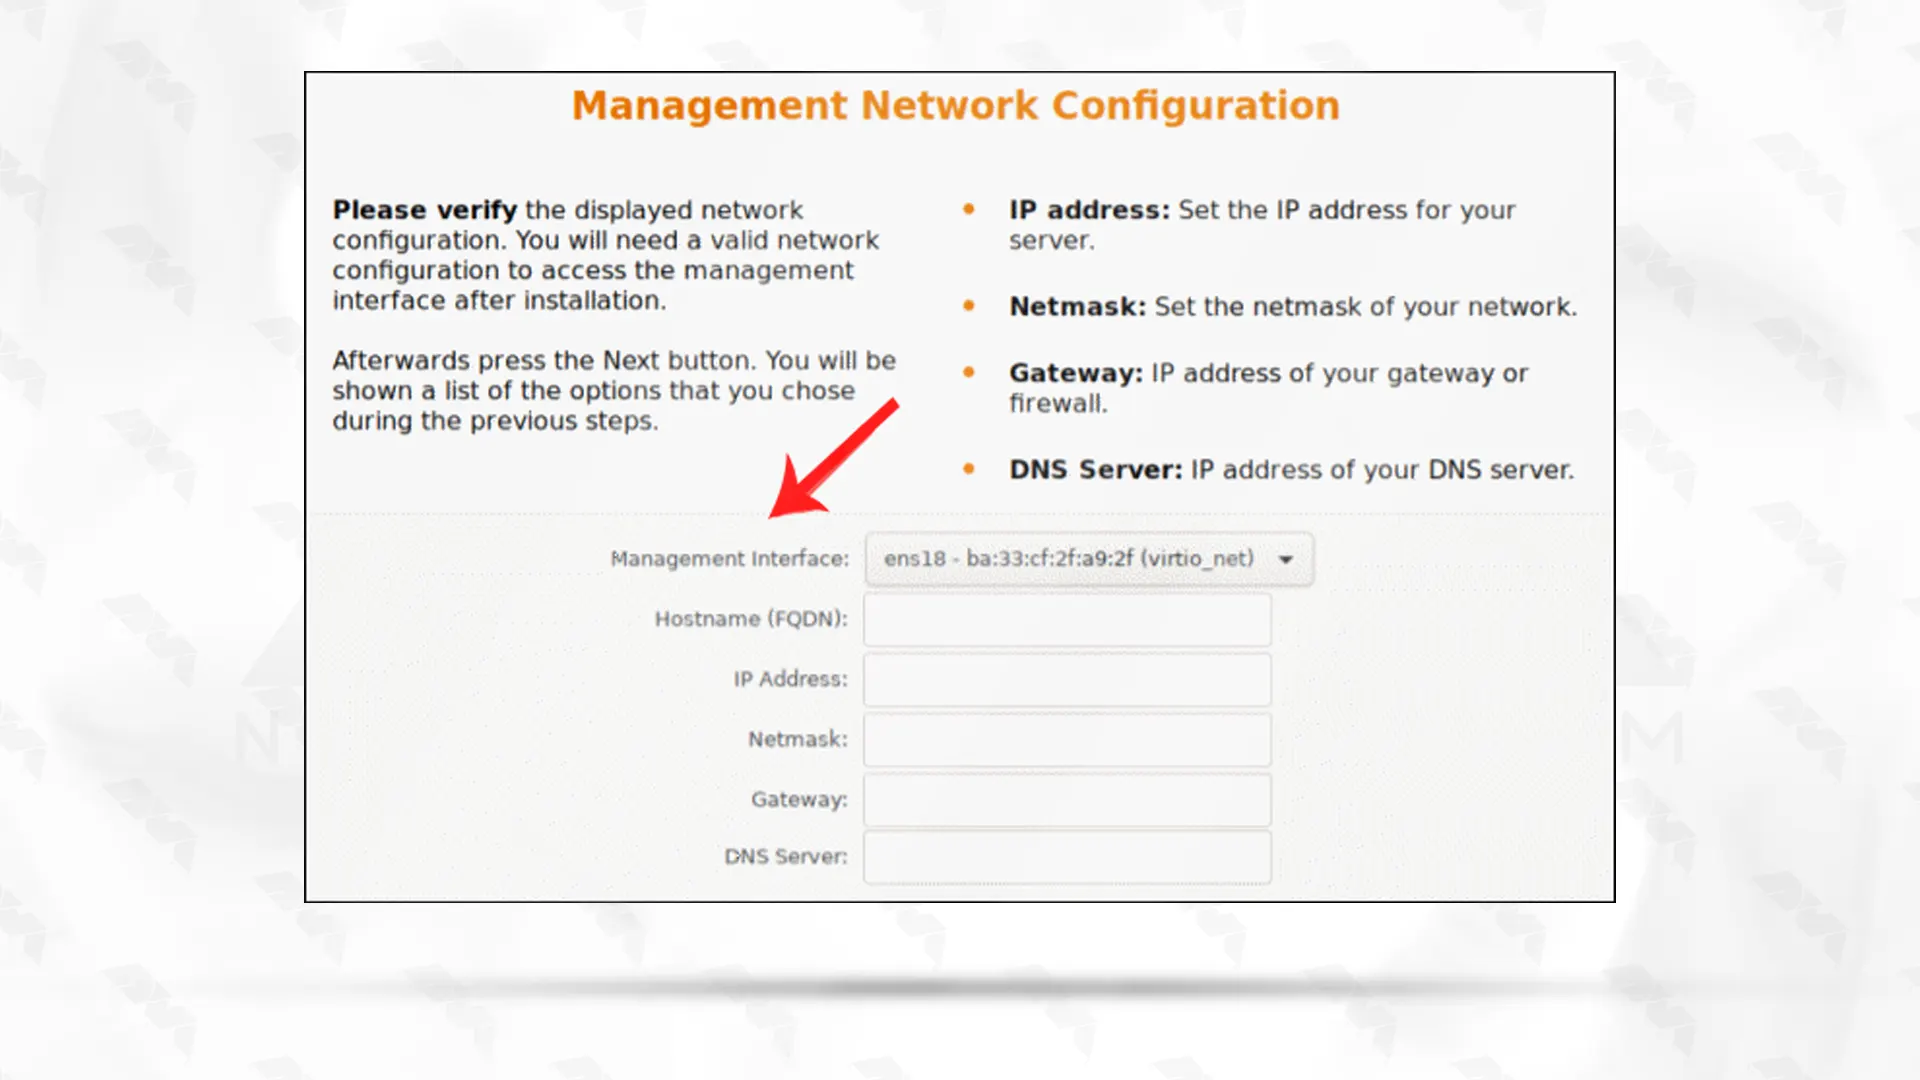
Finally, you have to setup the network configuration. Select hostname and available IP address, gateway, and DNS server:
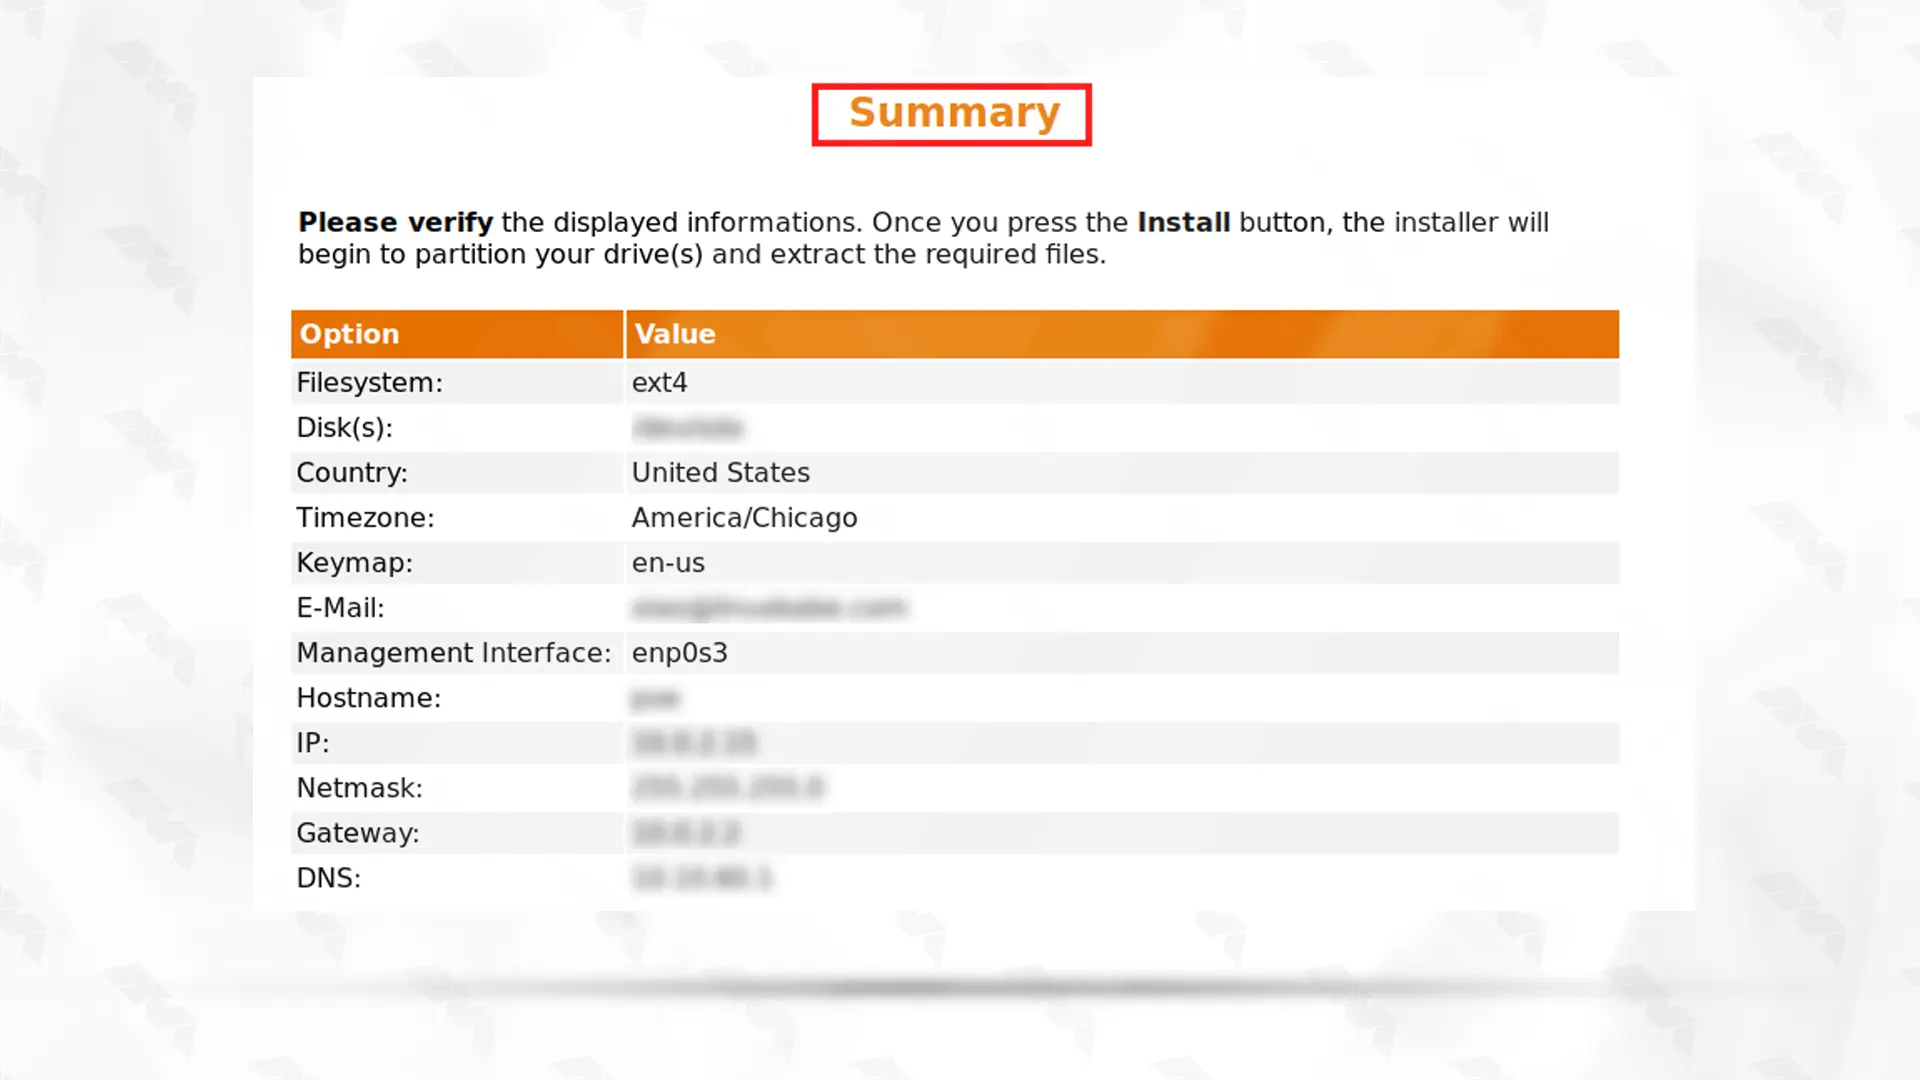
You will encounter a summary of the given information to create your account. Press the Install button and finish the process. Be careful to save them because you will need them for the web server.
Note: When you finish installation, remove the USB drive.
Reboot your system again to apply the changes.
Step.6: Running Proxmox on Ubuntu
As you complete the installation process, and reboot the system, You will see that the Proxmox GRUP menu loads. Choose Proxmox Virtual Environment GNU/Linux and click on Enter.
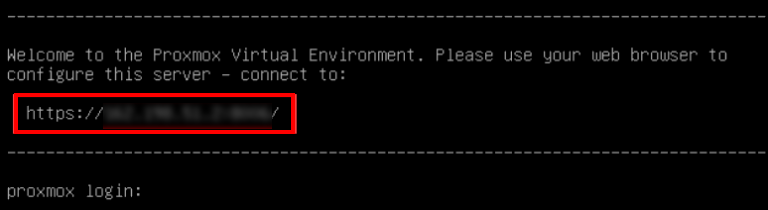
Now, you will encounter a Proxmox VE welcome massage. There is an IP address. Search it on a desired web browser:
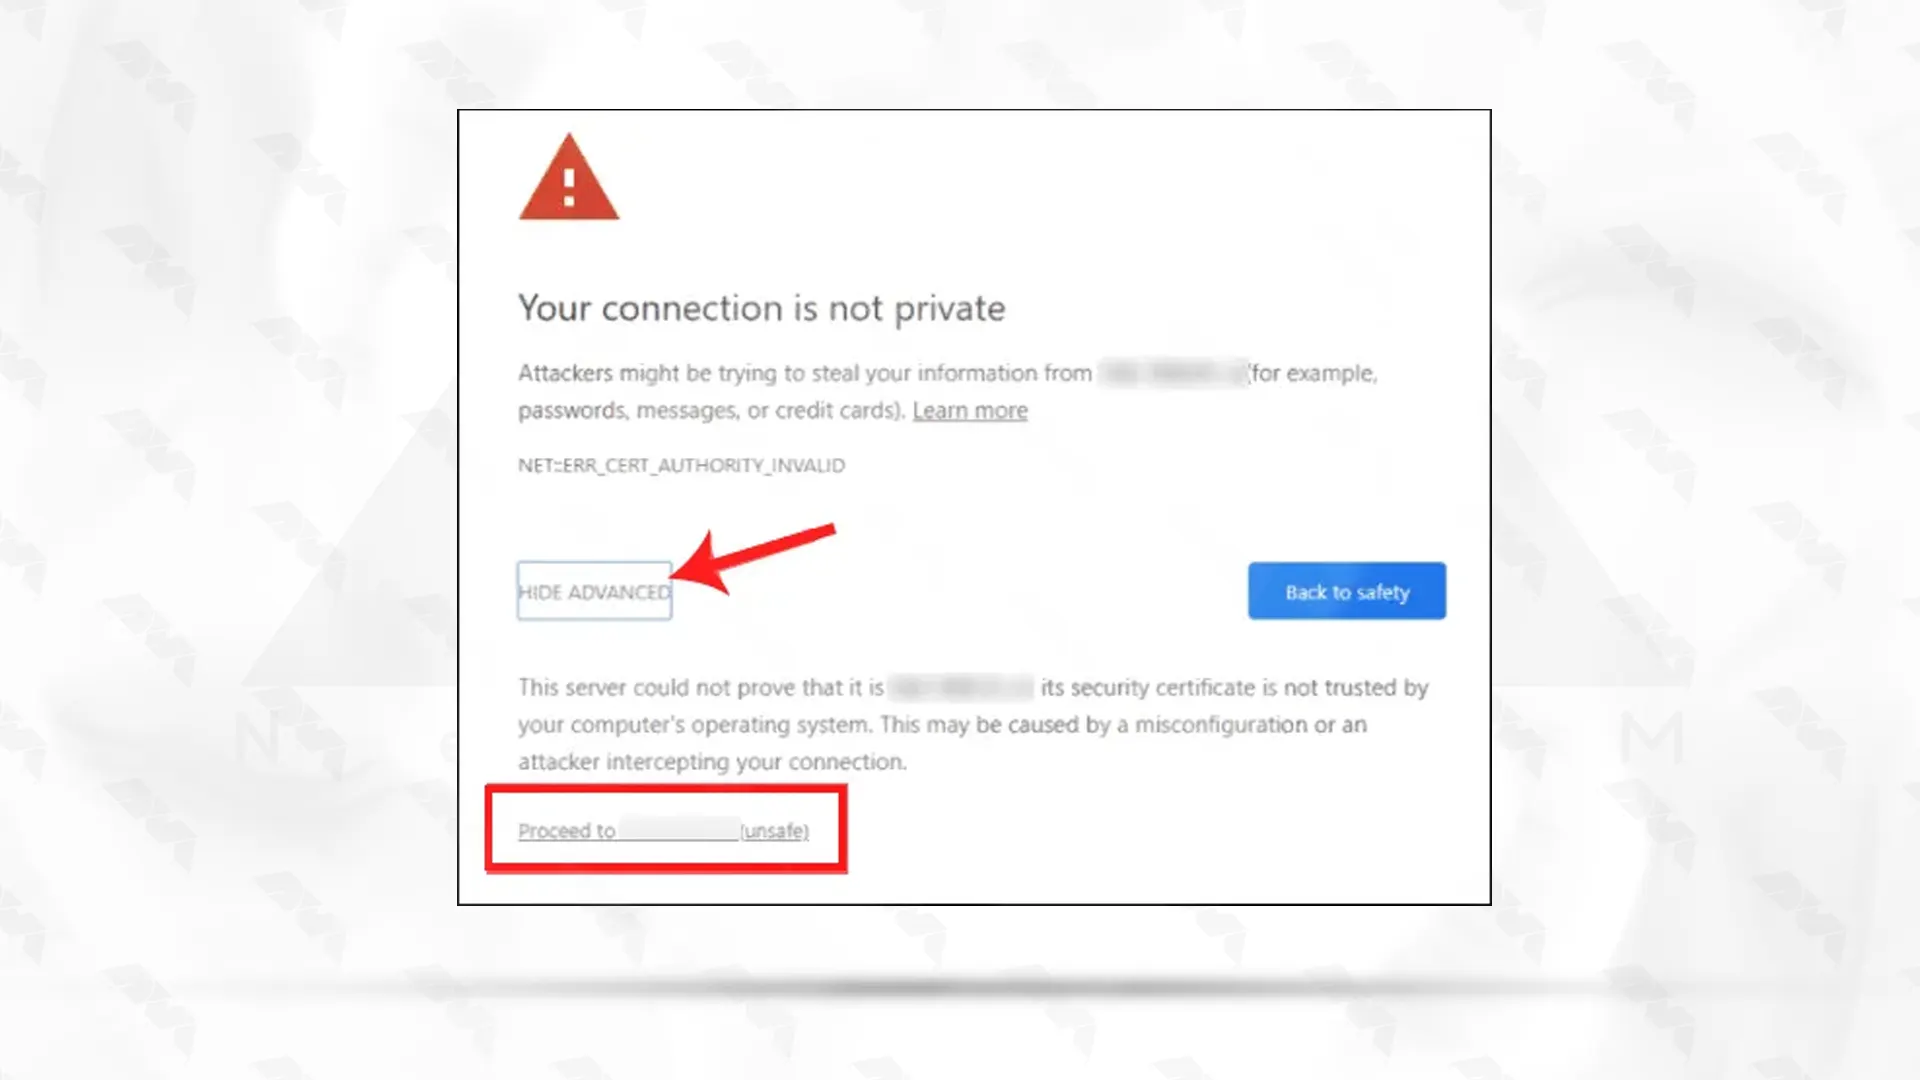
The message below will appear. It is a warning message that the page is unsafe. Go down the page and choose Proceed to the Proxmox web interface:
Step.7: Accessing the Proxmox Interface
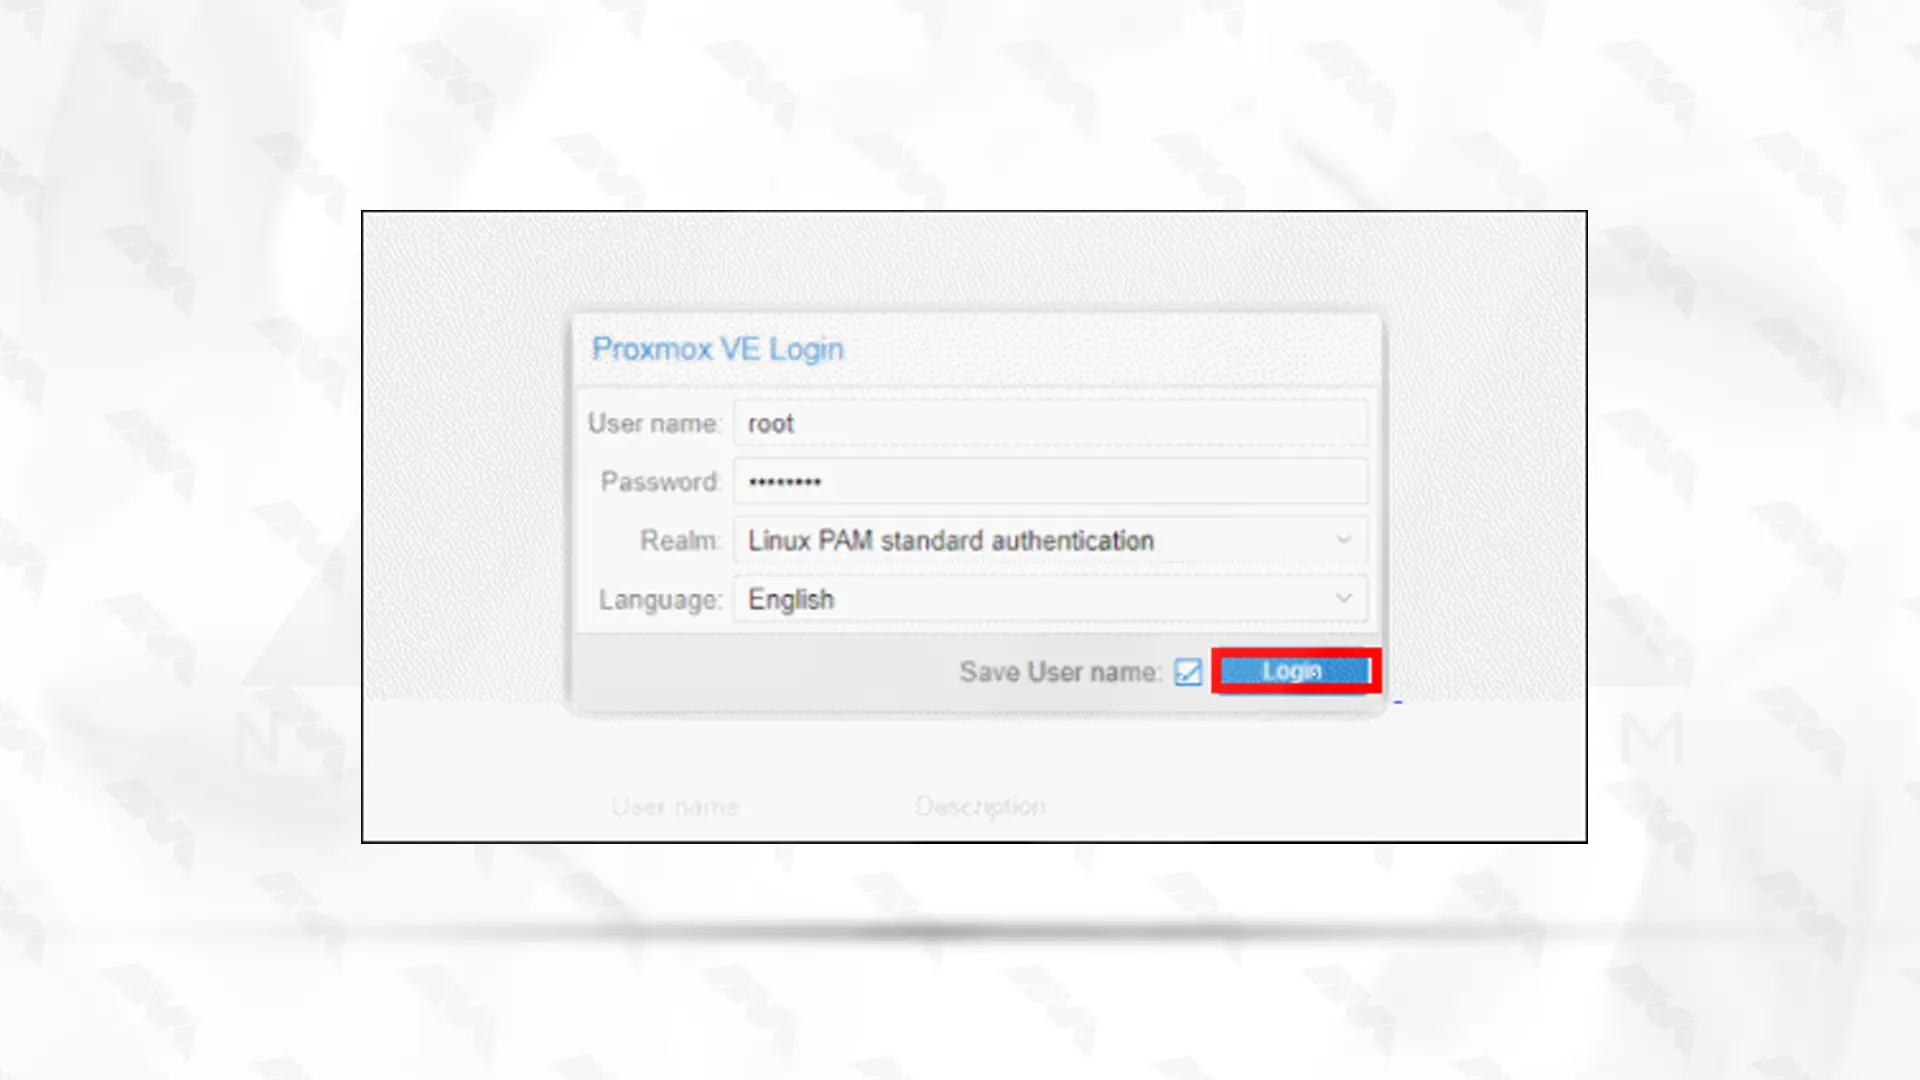
Well done! Now Login and provide the password as a root user and provide a proper password set when installing Proxmox:
A dialogue box will appear, press OK and ignore the message.
Step.8: Creating A Virtual Machine
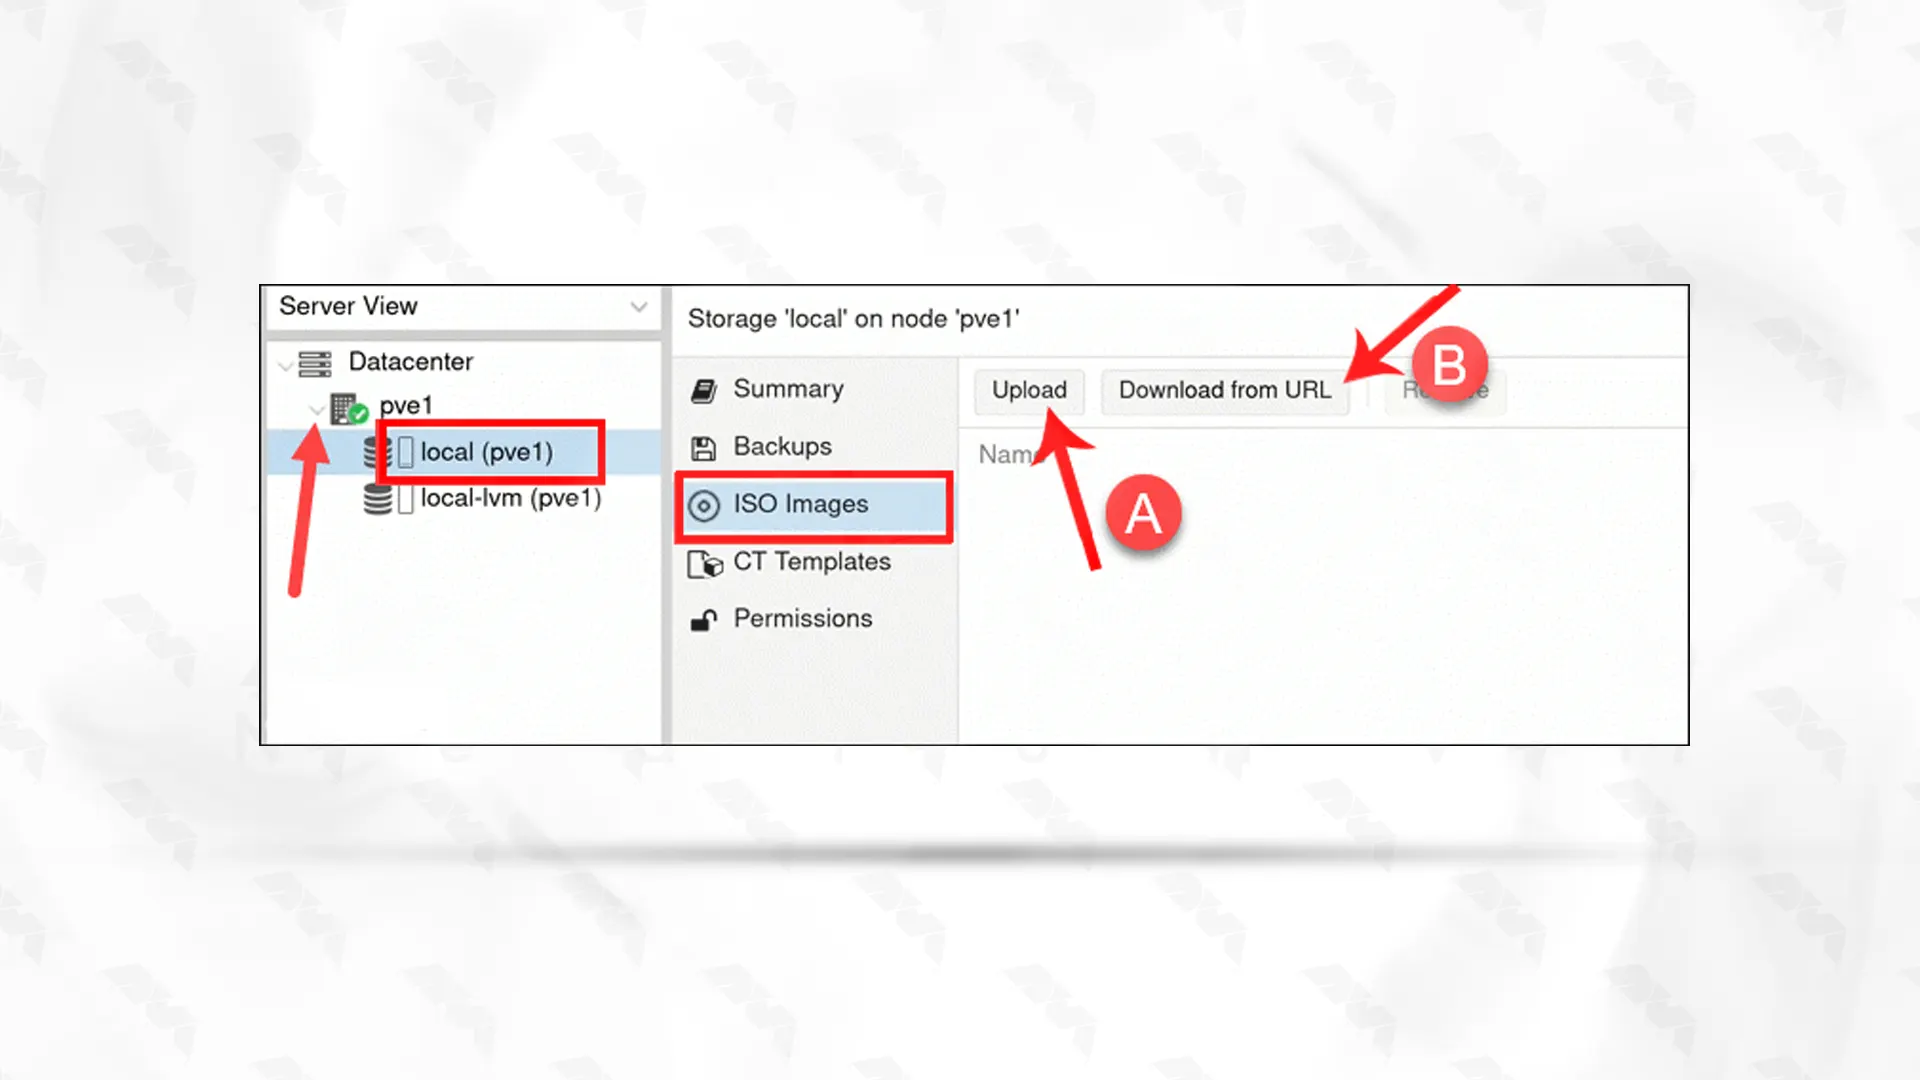
It is time to create a virtual machine. On the GUI go to the left side, select the server you are already running, and click on Local pve1. Choose ISO images from the list. Then, select the upload option or download from the URL:
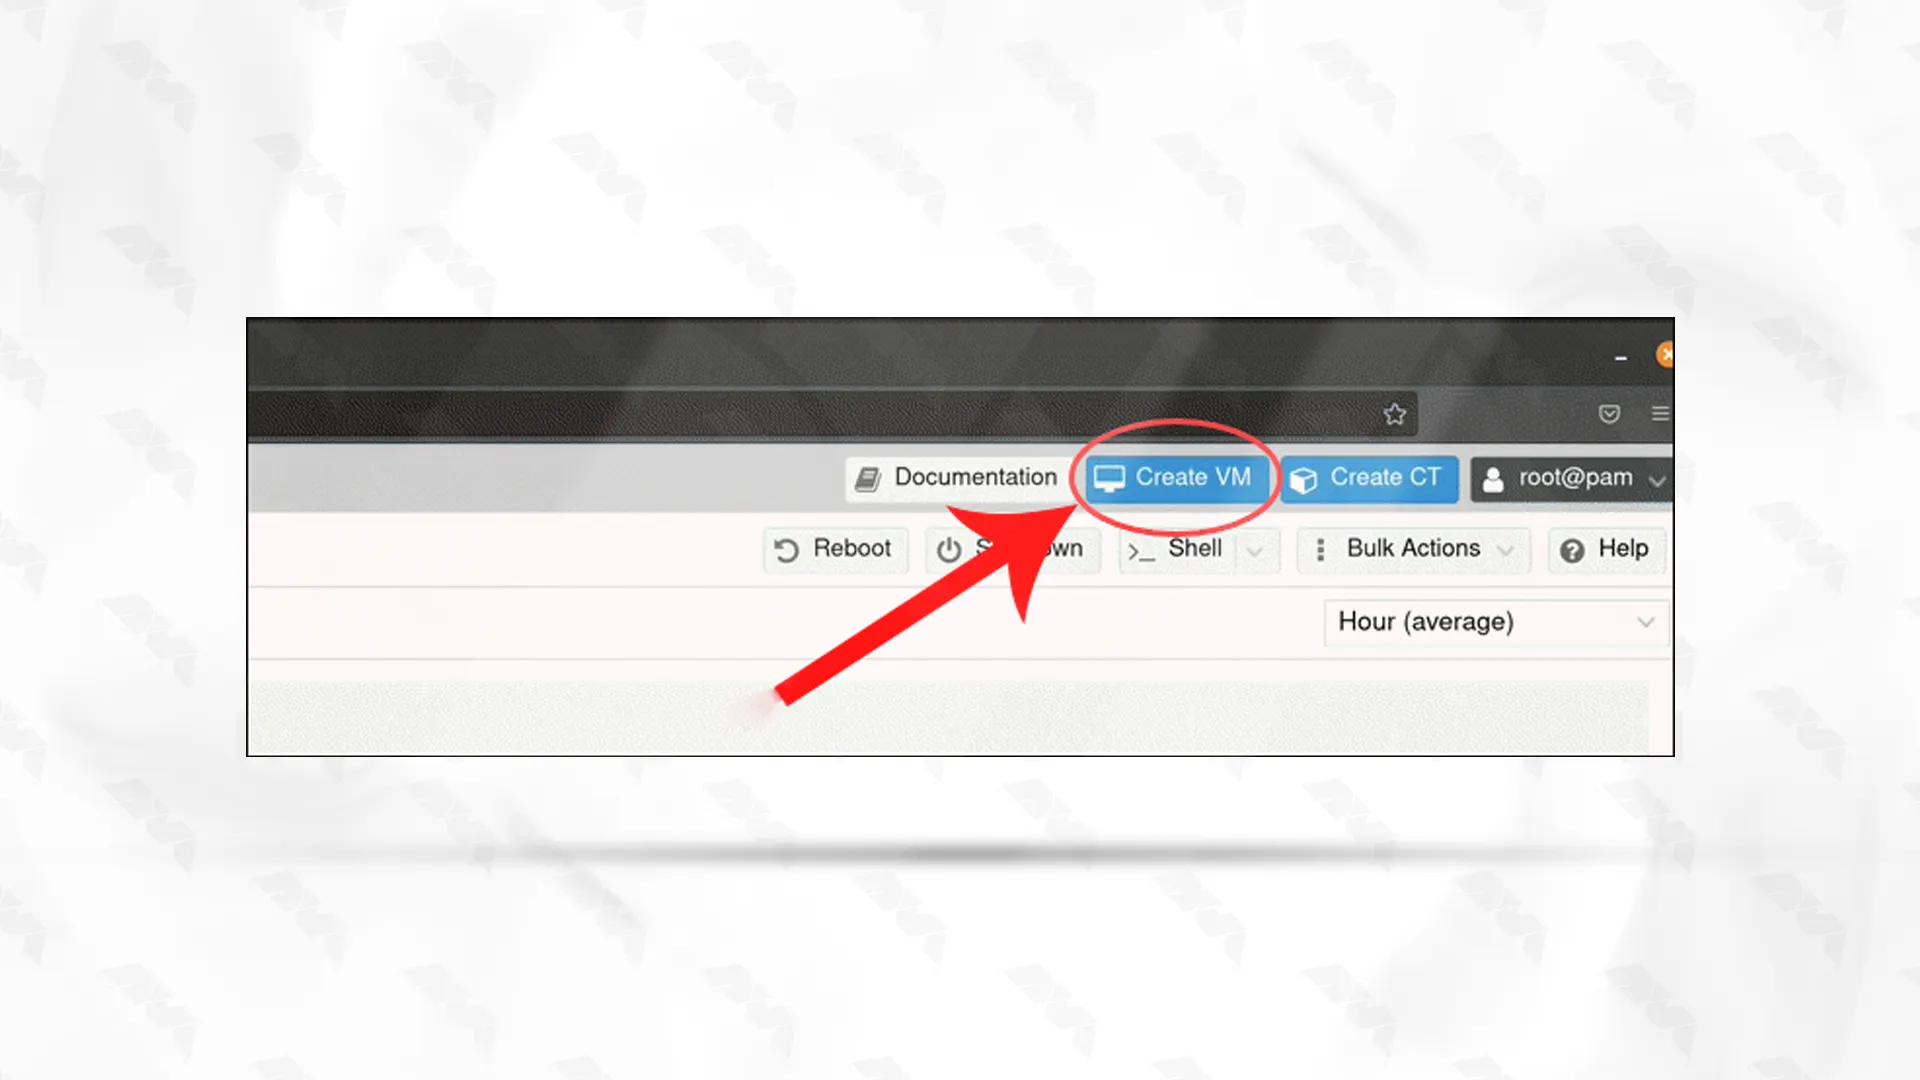
After adding an ISO image, you can create a VM. Click on the Create VM option on the right side of the header:
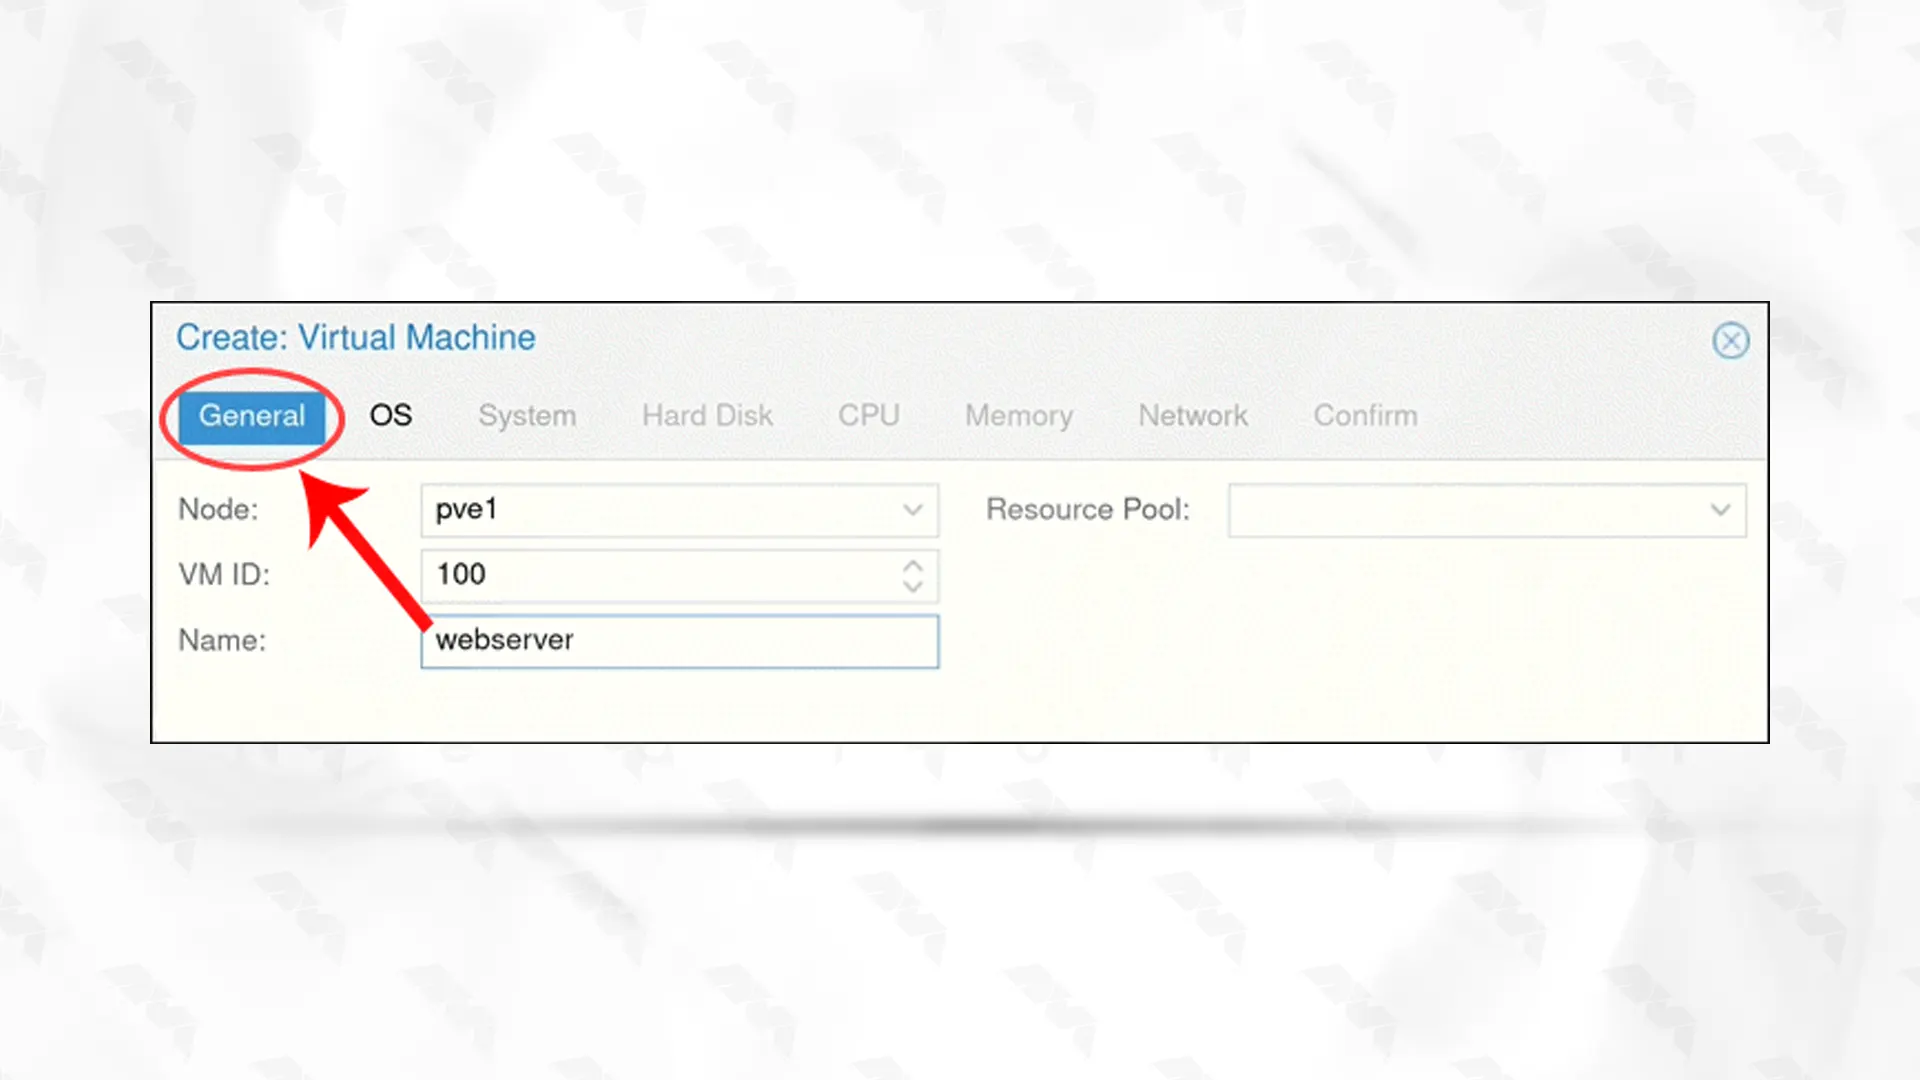
Give the general information here:
Do the setting like the image below:
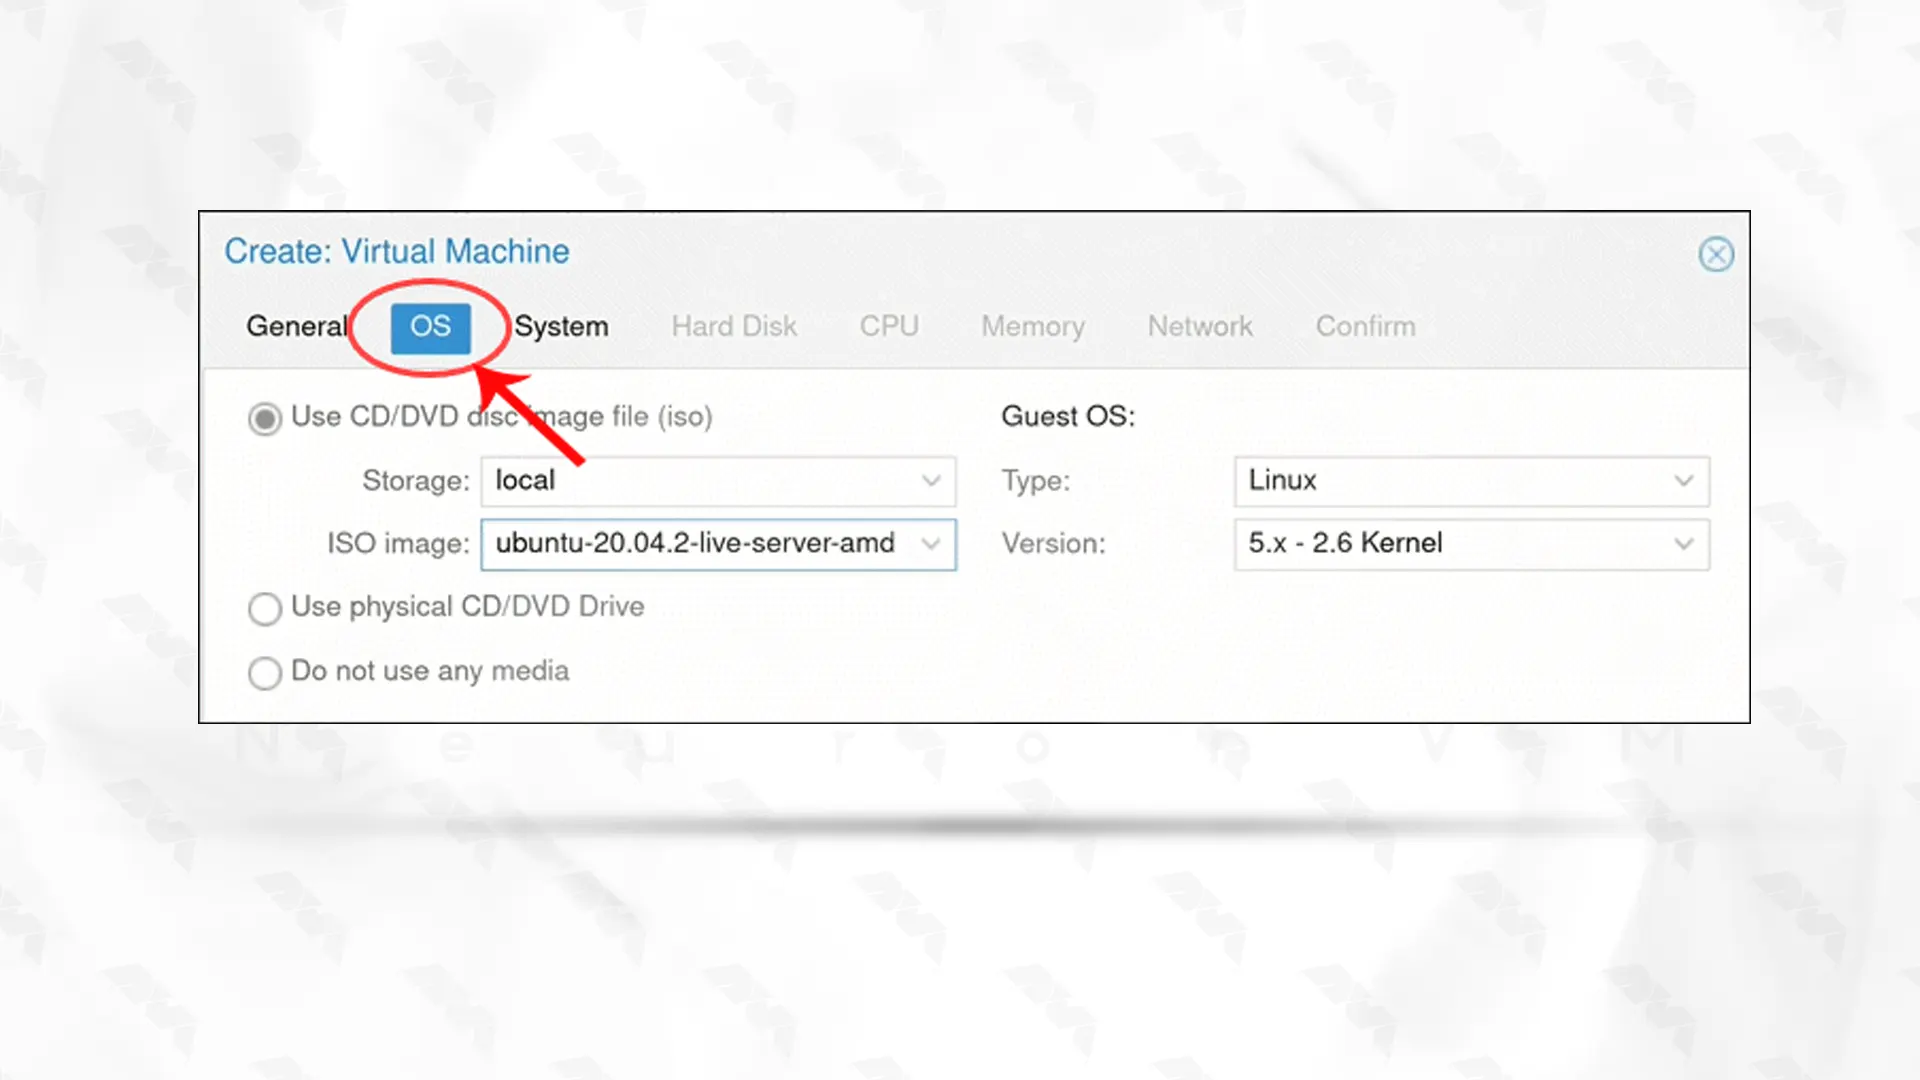
To define the type of operating system, choose the OS option and make the proper settings like this:
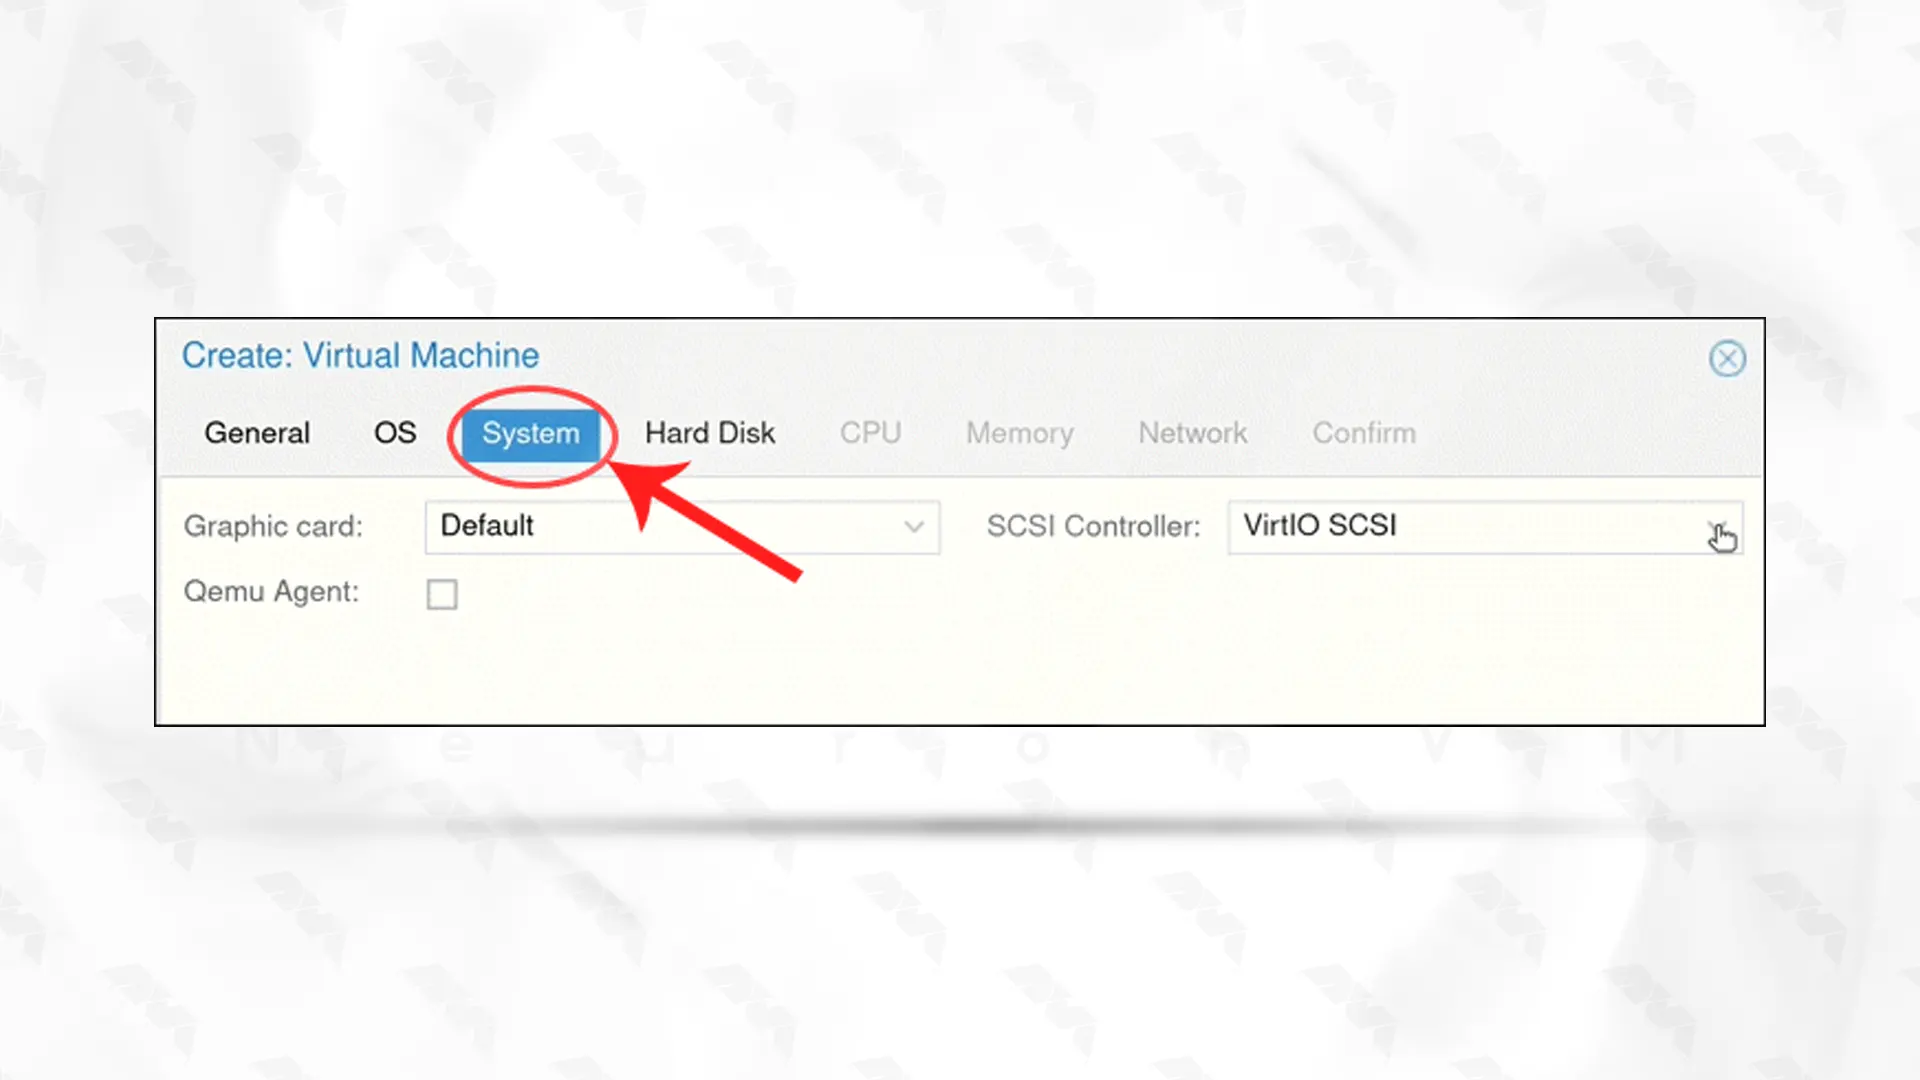
Go to the system options and follow the instructions below image:
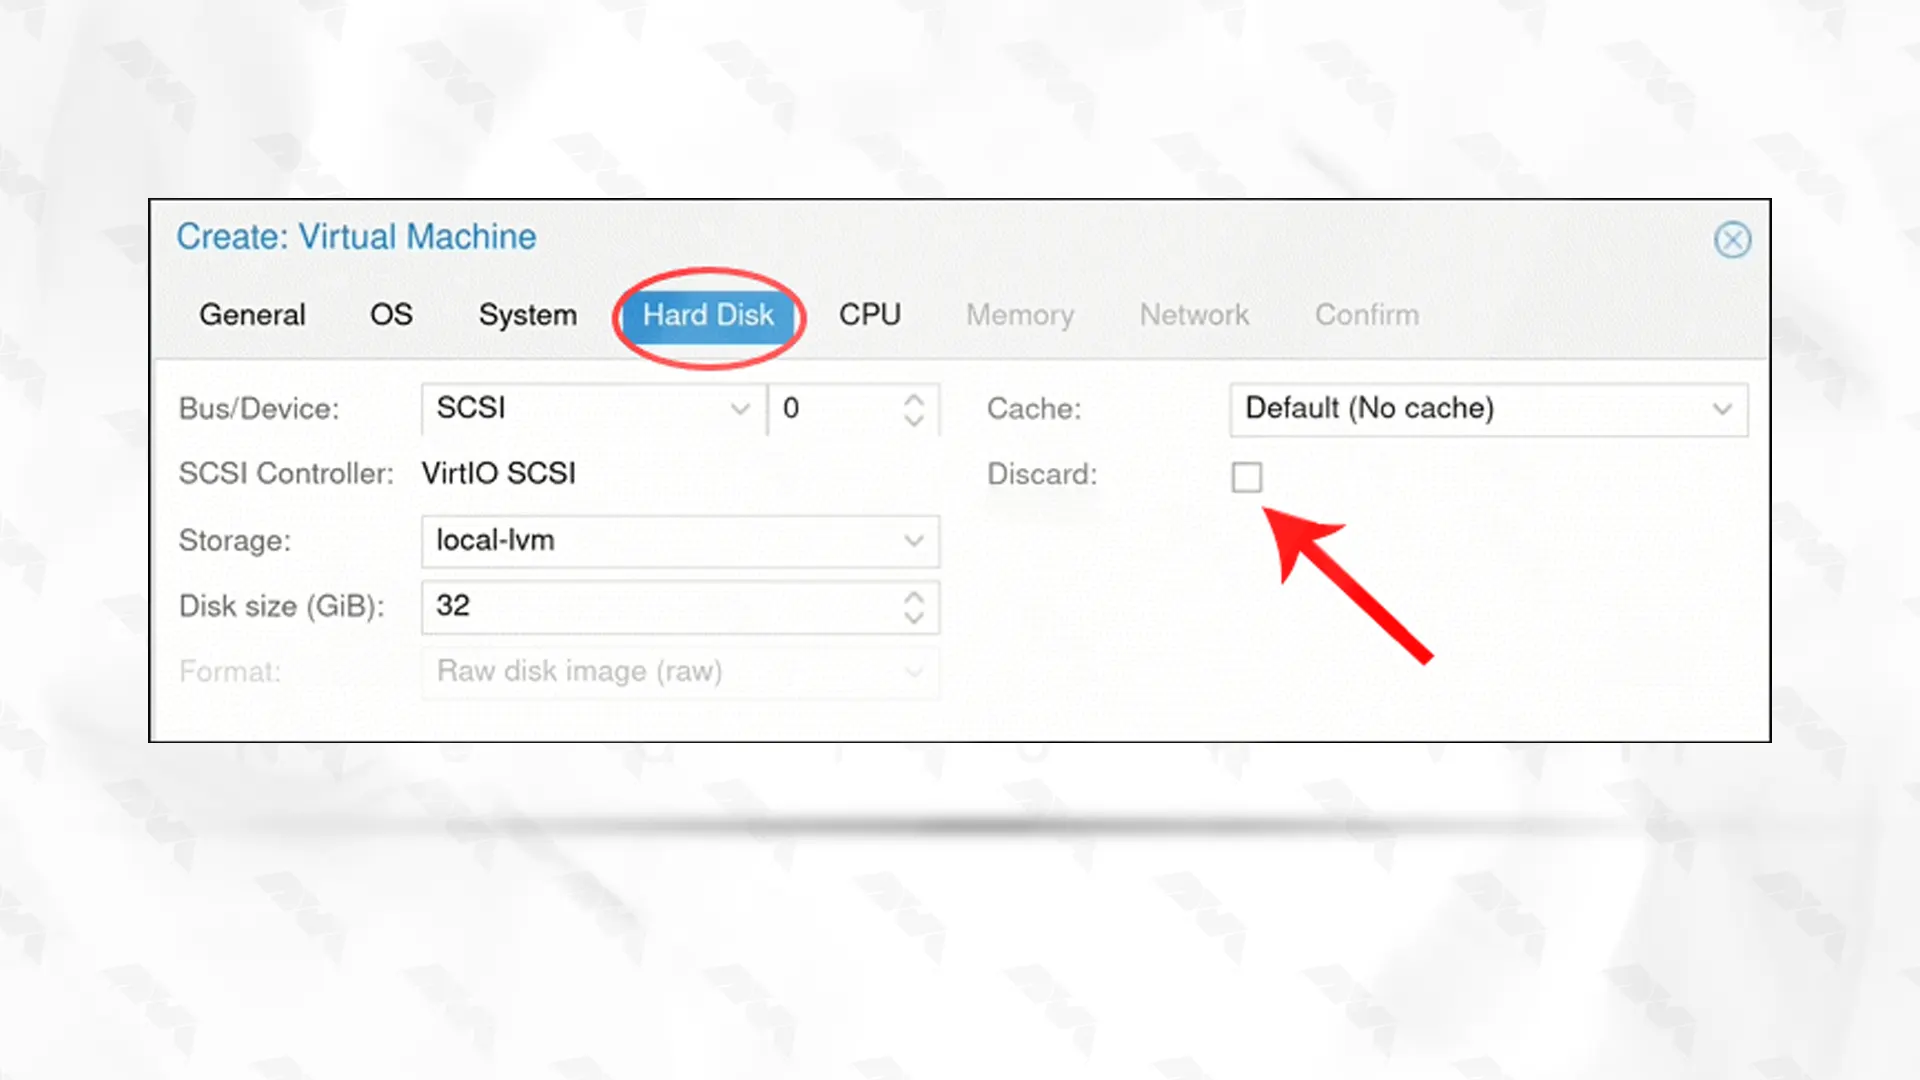
The next step is configuring the hard disk options you want. You can leave the default setting intact. If an SSD is used in a physical server, enable the discard option:
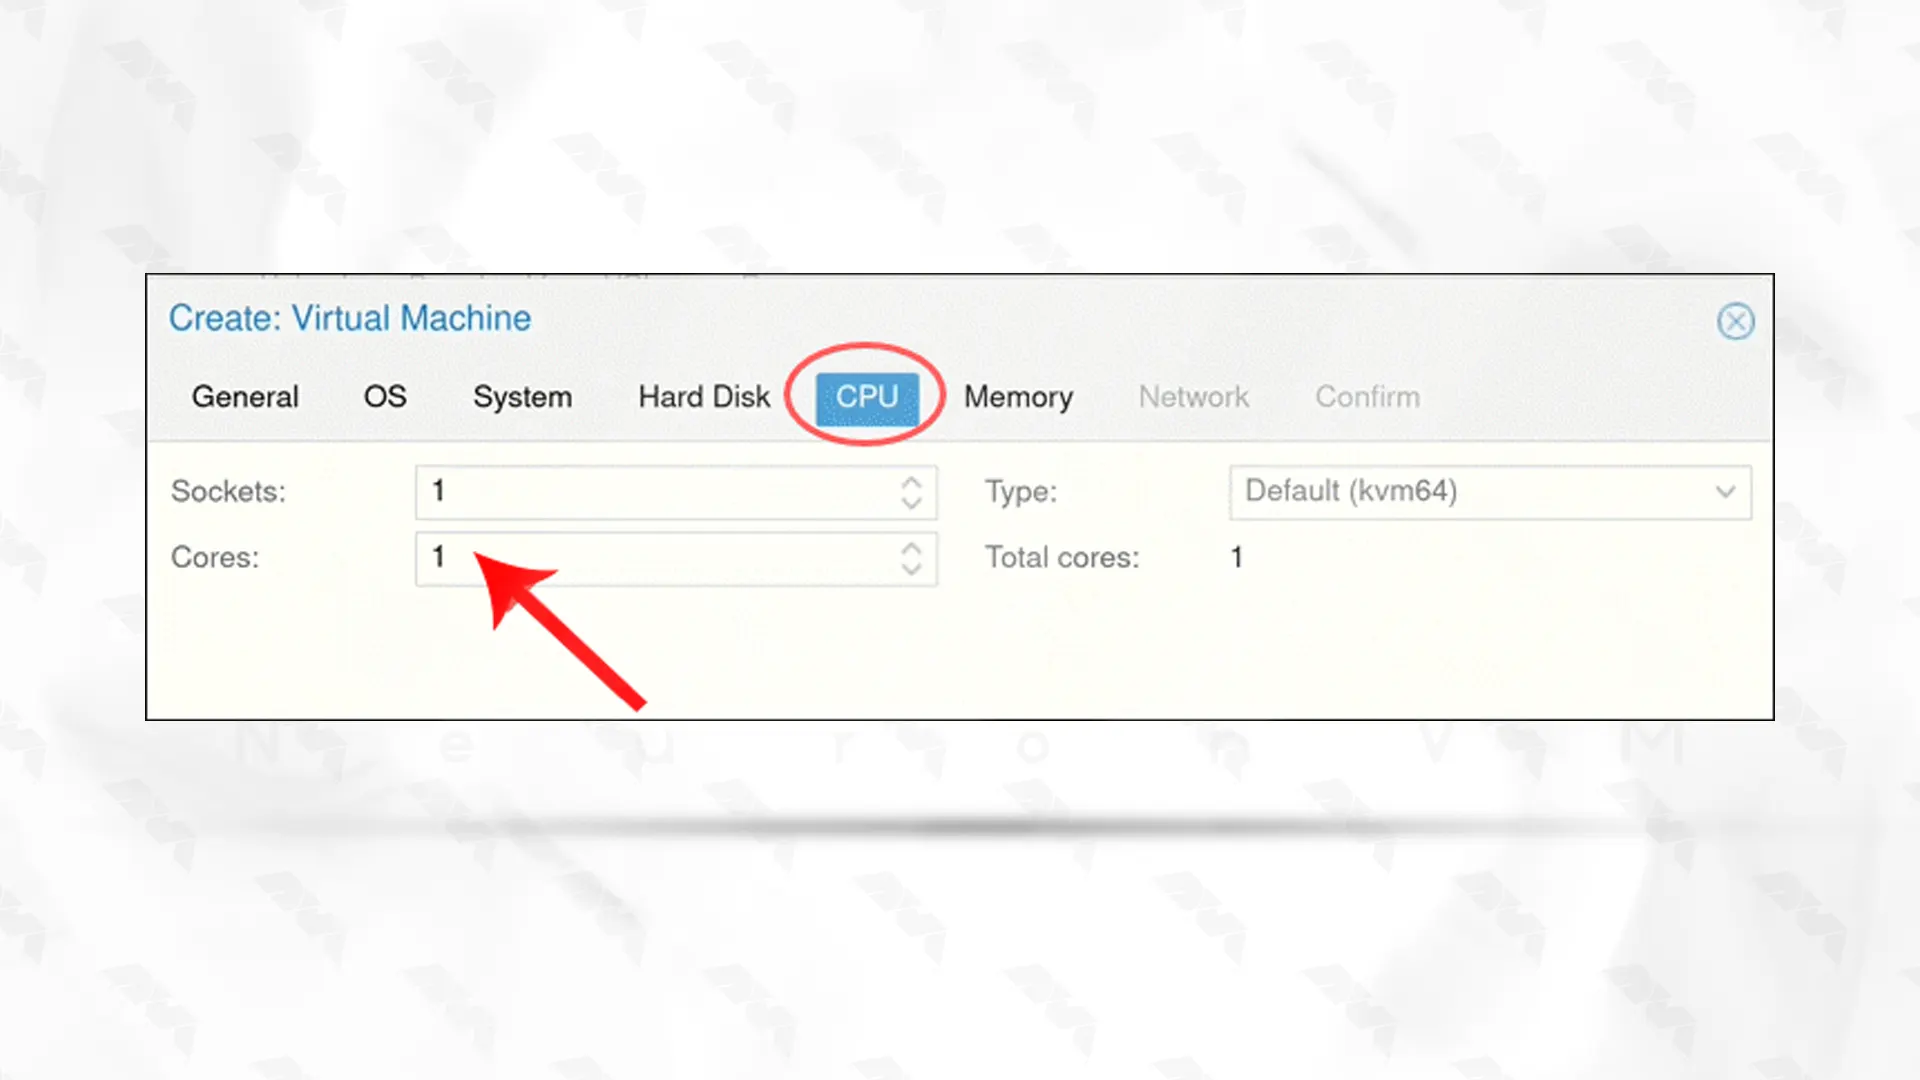
On CPU options determine the number of Cores:
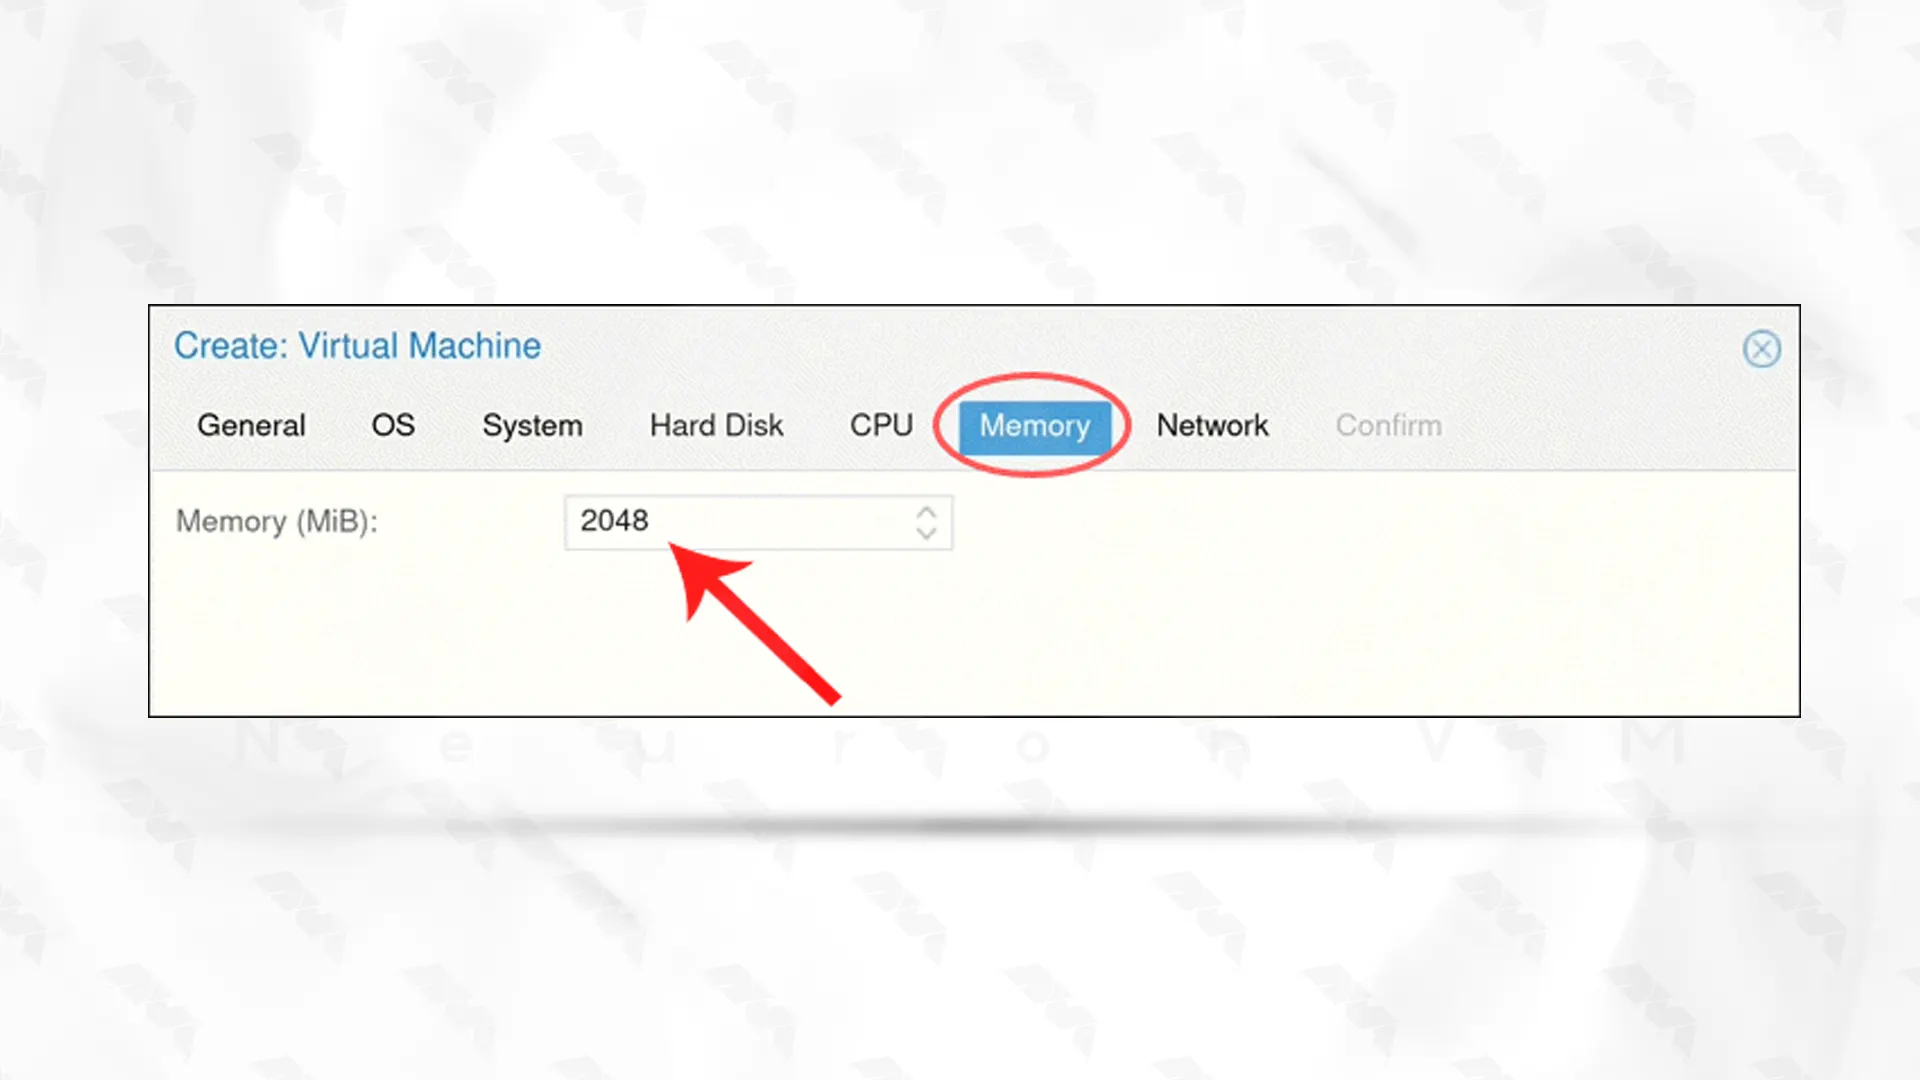
Choose the memory size:
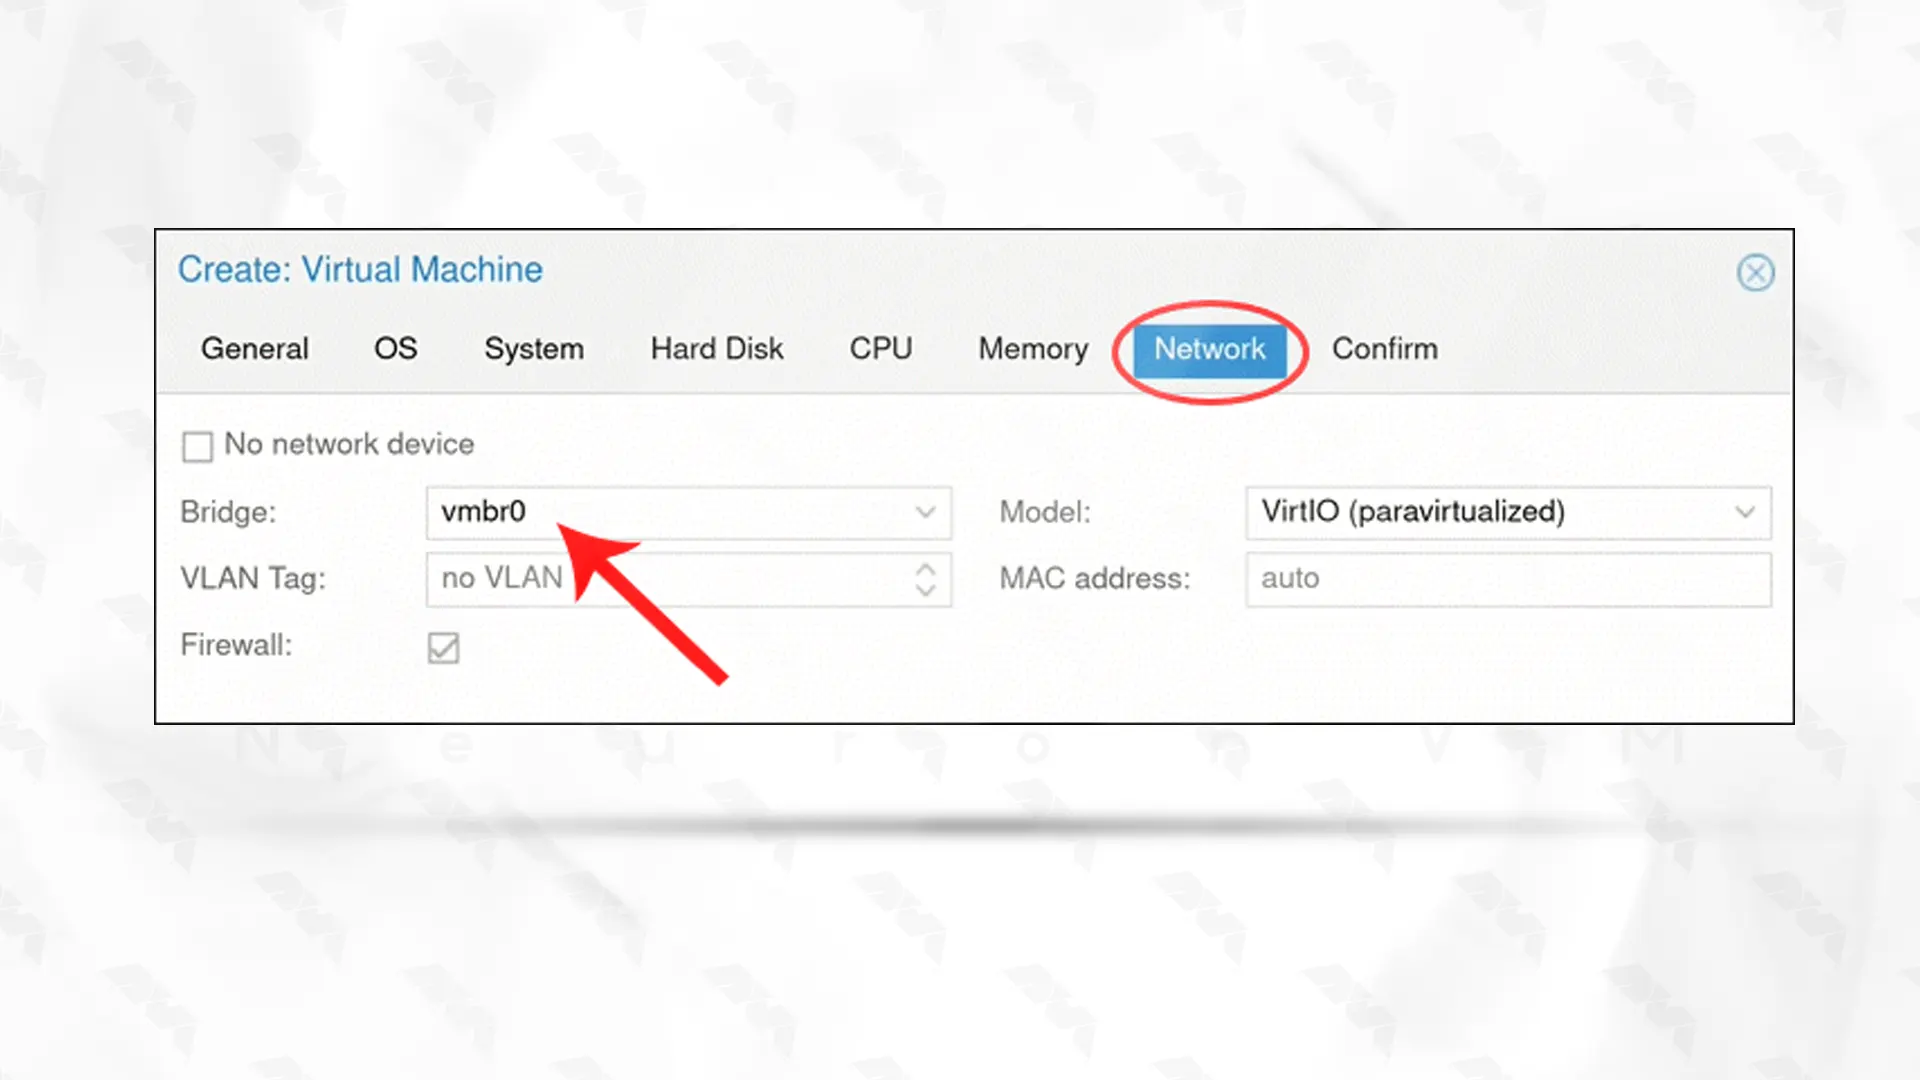
In the network option, We recommended to separate the management interface and the VM network:
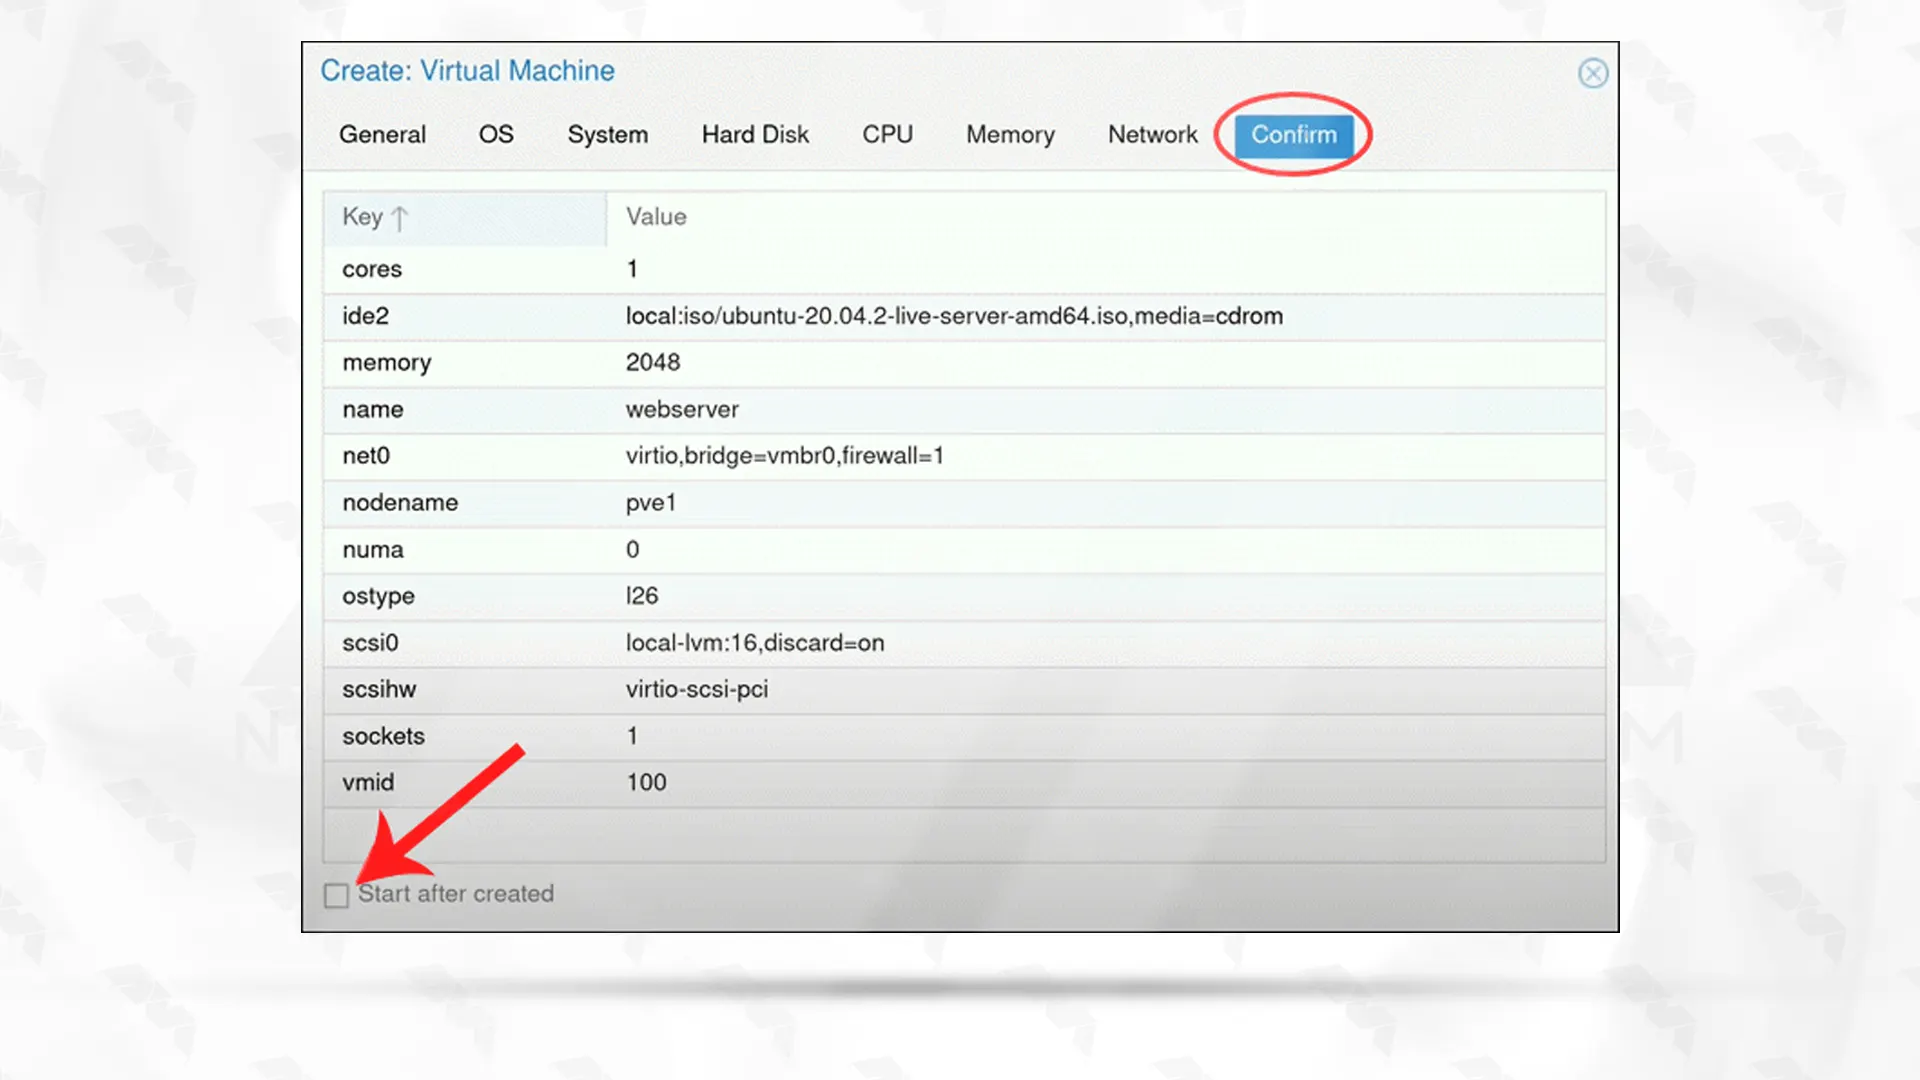
Click next and load the confirm tab. Check the box under the listed information and start the VM manually. At last, click Finish.
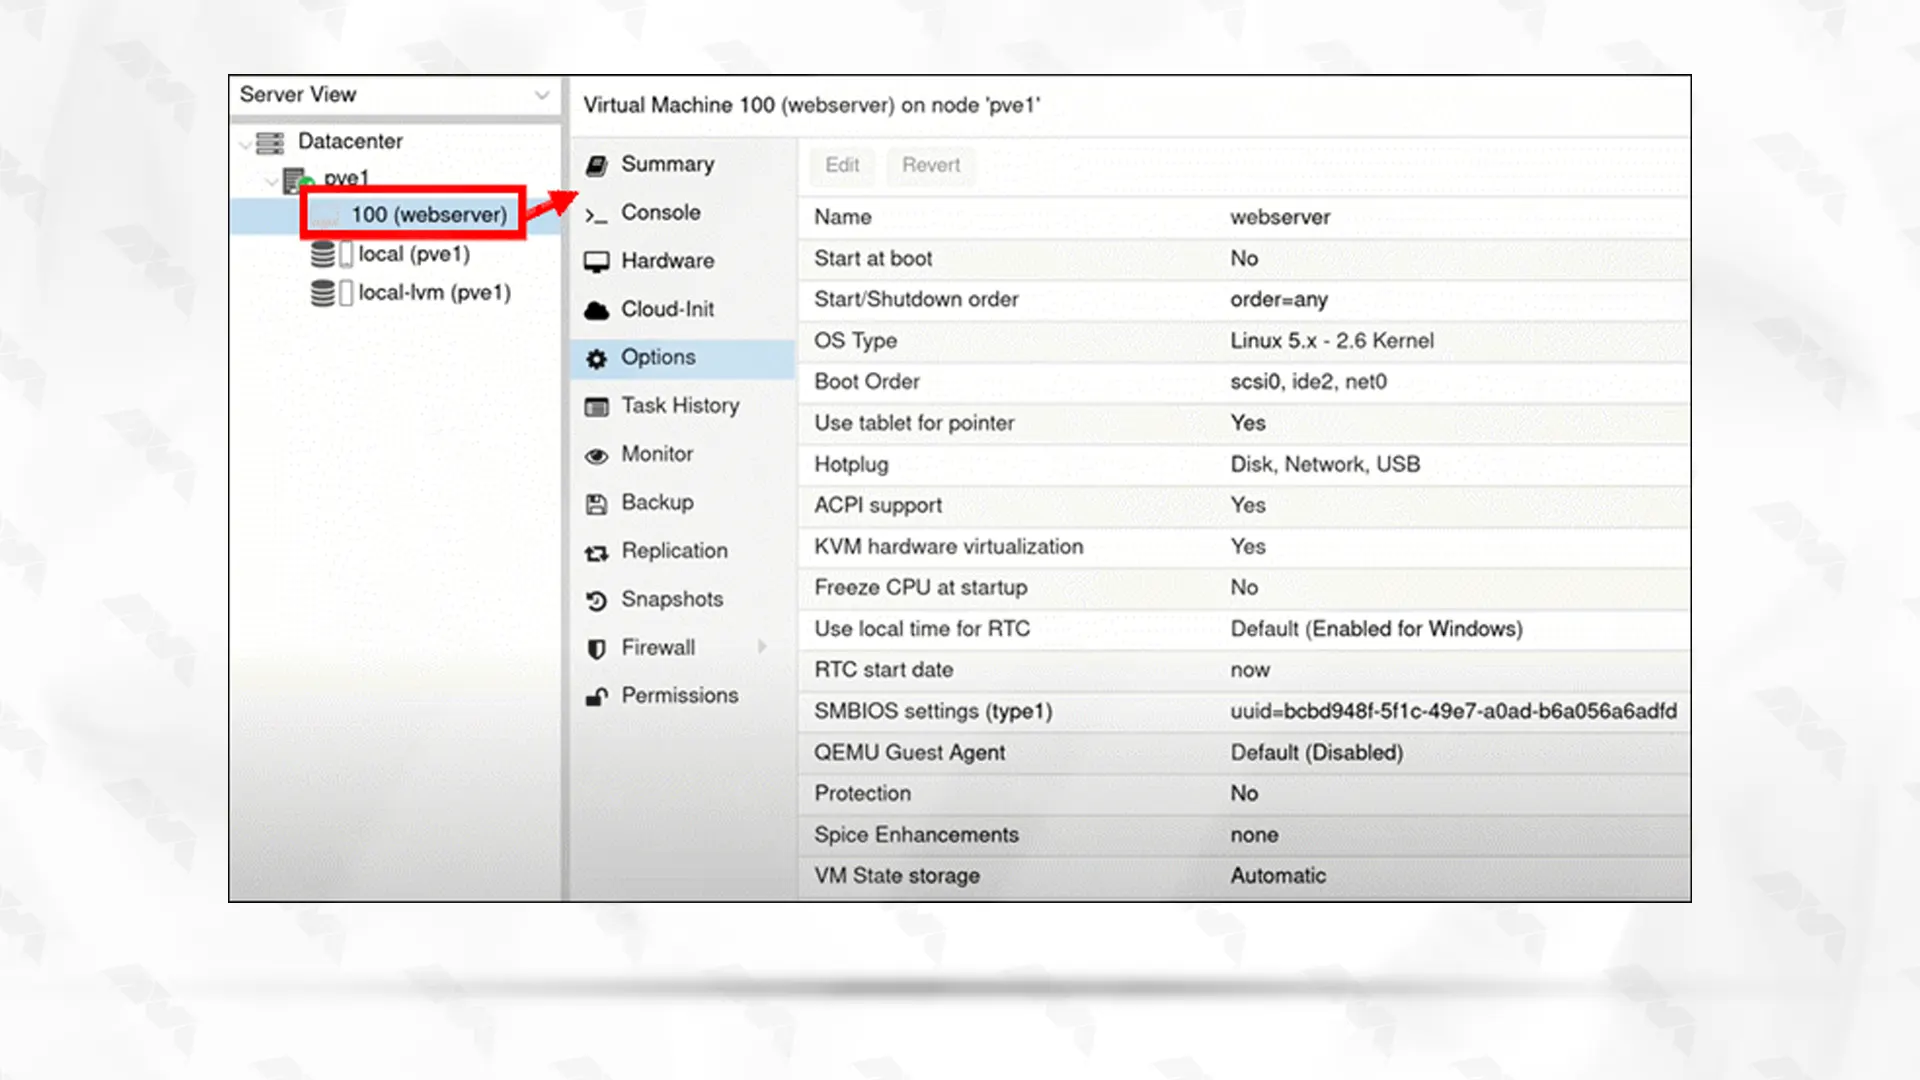
Now you can see the newly created VM:
Be careful to reboot your server and don’t forget to restart the virtual machine, because it’s possible not to start automatically.
Conclusion
Proxmox is a great and powerful platform that you can use to have multiple virtual machines in a single system. But the point is that you can install it on Debian because it is Debian-based. Here, we represent the best method for using this tool on Ubuntu 20.04. You learned how to install Proxmox and the steps that are required for a successful installation. if you have any questions or ideas, please share them with a comment.
FAQ
It depends, but for Proxmox itself you need 16 to 32 GB SSD.
You might like it

Linux Tutorials
How to Uninstall Steam Games on Ubuntu


Kali Linux Tutorials
How to Connect a Bluetooth Device in CLI Kali Linux


Ubuntu Tutorials
How to Install LLVM System on Ubuntu 22.04

