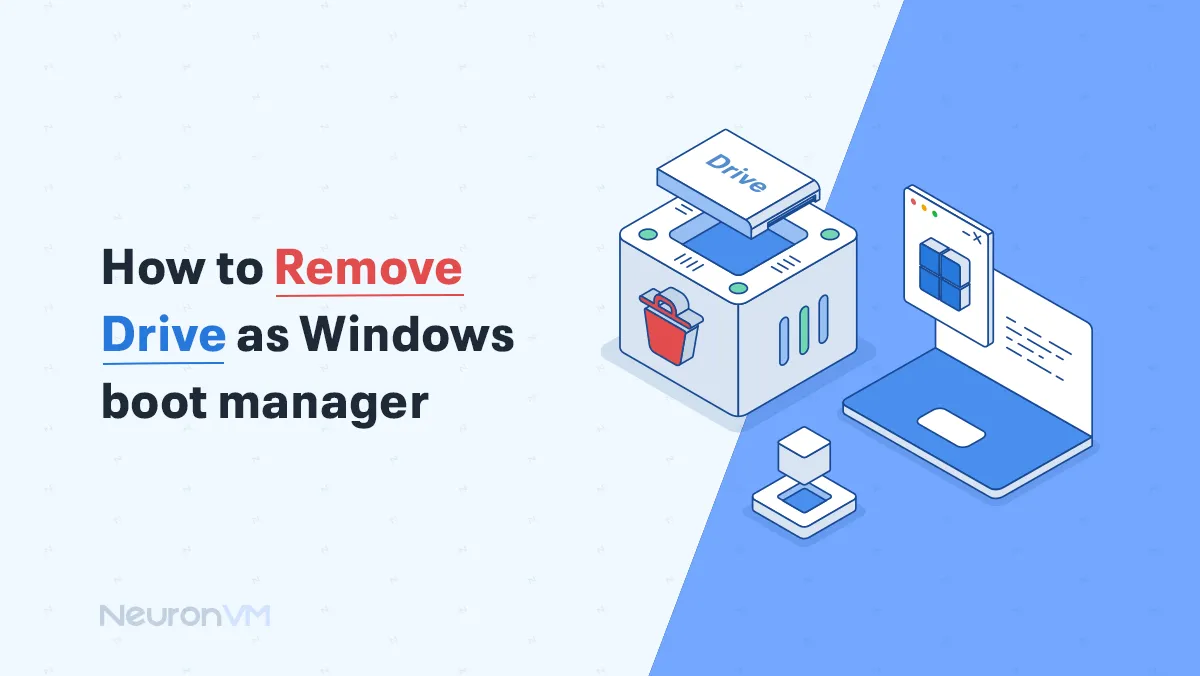
How to Remove a Drive from Windows Boot Manager Safely

 15m
15m
 0 comments
 Print
Print
Why would you ever need to remove a drive from Windows Boot Manager? Windows Boot Manager is a boot loader that simply manages the loading of the Windows operating system, it not only displays available entries, but also controls the boot order and also the priority, dependencies, and interactions with other software, deleting an entry can result in inaccessibility to the main operating system or damage to the boot order, so it is necessary to check the boot path and dependencies before proceeding.
What is Windows Boot Manager?
Windows Boot Manager is a bootloader that loads the Windows operating system. It:
- Boots essential system components.
- It creates a chain of bootloaders that ultimately ends up in the main Windows bootloader (Kernel).
- Once loaded, control is transferred to the bootloader to complete the boot operation.
Mistakenly removing a drive can result in an inaccessible operating system or corrupted boot path, so you need to be careful before taking action.
Why Should We delete a drive?
Removing a drive from the Boot Manager can have several benefits:
- Reduce complexity and quickly resolve boot issues
- Focus on the core operating system and avoid user confusion
- Increase security by removing outdated or unnecessary systems that may create a potential attack surface
Also, analytical tips: Removing redundant entries not only simplifies the user experience but can also improve boot speed and reduce the risk of malware running on unnecessary operating systems.
How to Remove a Drive from Windows Boot Manager?
You can remove the Drive as Windows Boot Manager by using each of these two methods:
Method 1: By using Command Prompt
- Press the Windows + R keys.
- Enter cmd in the box, and then press the Ctrl + Shift + Enter keys together.
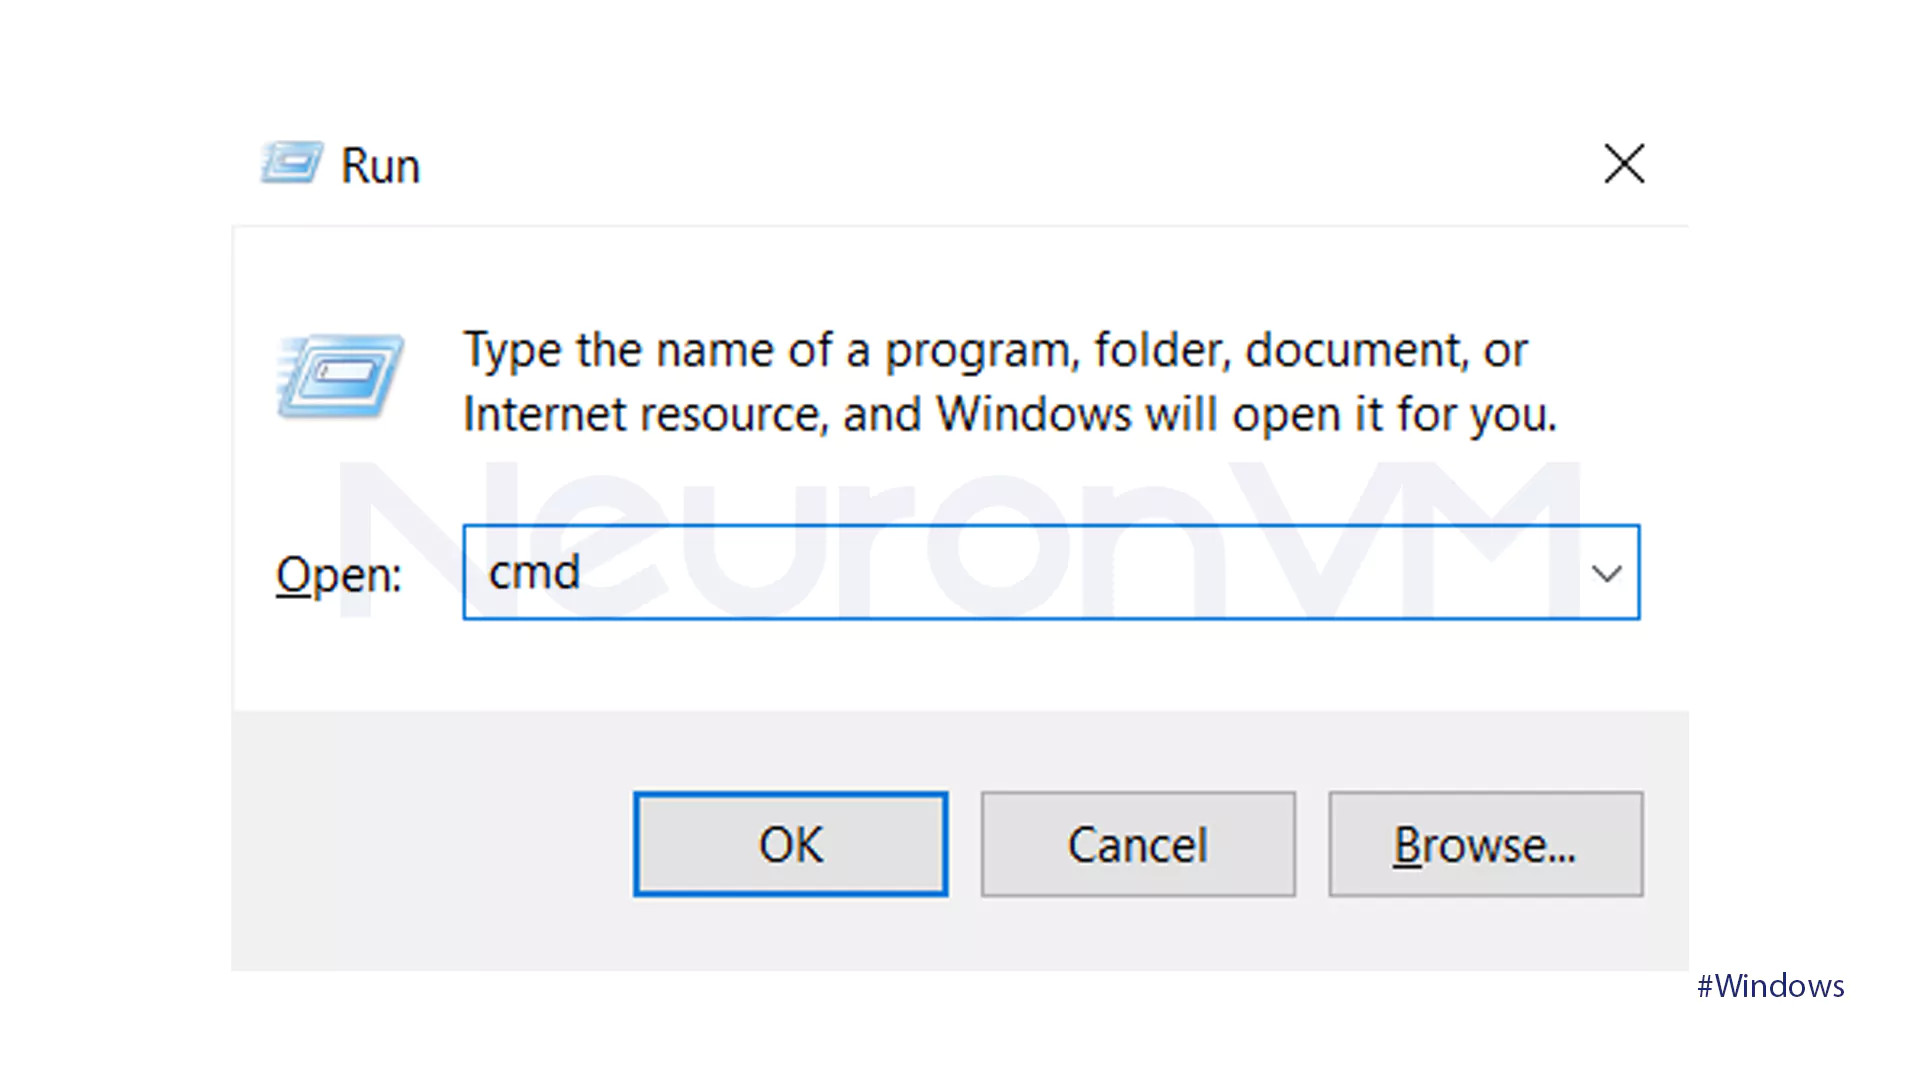
- Type the command below to list all available boot entries and their identifiers:
bcdedit /enum
- Determine the entry you wish to remove and use its ID in the next command:
bcdedit /delete {identifier}
- Replace identifiers with the identifier of the boot entry that you want to delete.
- Restart your computer to apply the changes.
Tip: Before deleting, make sure you have already selected the correct identifier, as deleting your files incorrectly can stop the original operating system from starting, we recommend that you back up the BCD before making any changes.
Method 2: BIOS/UEFI
- Restart your computer and go into the BIOS/UEFI settings (Press F2, Del, or another key during restart).
- Search for a section named Boot or Boot Order.
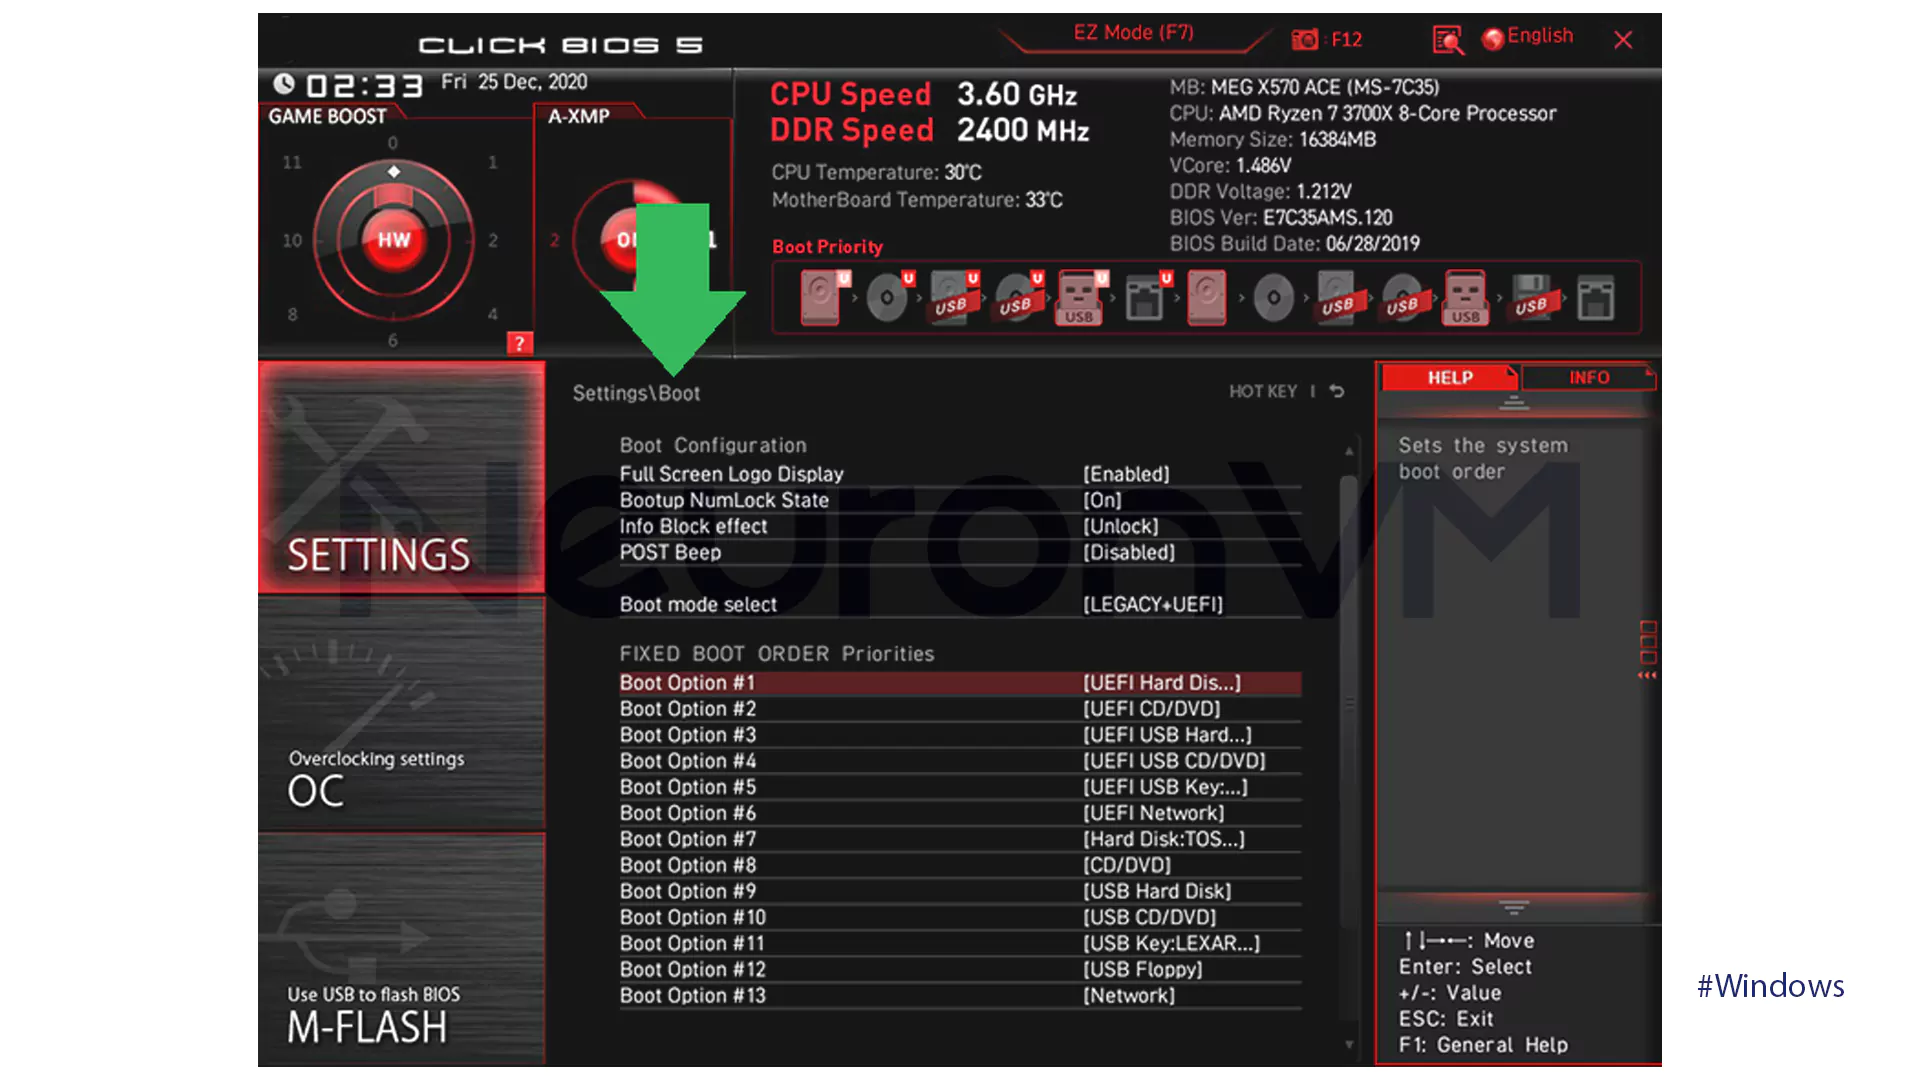
- If Windows Boot Manager is present, choose it and determine if you can delete or disable it. Based on the manufacturer, but most likely, when you choose the boot entry, you will have a Delete option.
- Be sure to save your changes before you exit BIOS.
Analytical Note: Direct removal from BIOS may provide more options for managing entries and allow the user to set the boot priority and order as desired.
Why does Windows keep extra Boot Manager entries?
Windows usually keeps old entries in Boot Manager after reinstalling or upgrading hardware (such as replacing an HDD with an SSD), this is because Windows, by default, doesn’t want to take the risk of removing entries that might be related to other systems, so this design allows for all of them to be available if a user has multiple operating systems, However, this same feature, if not managed, can result in unnecessary entries being displayed, increasing boot times, and even causing confusion for the user.
Advantages of Removing the Drive as the Windows Boot Manager
Reduce complexity and user confusion
When there are multiple unnecessary entries in the Boot Manager, the user is presented with additional options during boot, so in that situation, removing these entries simplifies the environment and also allows the user to access their main system much faster.
Improve boot speed and stability
Each additional entry makes Boot Manager take longer to scan and display the list, so removing old drives or entries can shorten boot times and make the startup process smoother than before.
Increase system security
Old or removed operating system entries create an additional attack surface for malware, and by removing these entries, the attack surface is reduced, and the risk of malware executing through unused entries is greatly reduced.
Focus on the main operating system
Many users still see the old entry after upgrading to an SSD or installing a new Windows, and removing it allows the user to work only on the main system and avoids errors or mistakenly logging into an unusable system.
Ease of Troubleshooting
When Boot Manager only contains the necessary entries, troubleshooting boot problems becomes easier, so the system administrators or power users can find the source of the problem faster, and they don’t need to examine additional entries.
Better resource and partition management
By removing duplicate entries, the user is less likely to accidentally enter unnecessary partitions or use incomplete operating systems, so this makes the management of storage resources and operating systems more transparent.
Common problems and solutions
Mistakenly deleting an entry can cause the system to fail to boot, so to avoid this problem, first back up your system and BCD, if the original entry is deleted, the “bootrec /rebuildbcd” command can be used to rebuild the Boot Manager, also, checking the boot order in BIOS and removing old partitions or unnecessary entries can prevent confusion and errors later.
Real User Experience
Upgrading to SSD: A user needed to delete the old HDD entry after upgrading to an SSD and installing a new Windows, he first tried with CMD, but the original entry was deleted by mistake, and the system would not boot, the system was restored using bootrec /rebuildbcd, so in this experience we see that removing entries is useful, but without sufficient care and knowledge, it can also be dangerous.
Dual Boot with Linux: A user who had installed Linux and Windows side by side, after removing Linux, still had its entry in Boot Manager, and there, he was only able to clean the boot environment with the bcdedit command.
OEM systems (Dell, HP, Lenovo): Many laptops have a recovery partition, and mistakenly deleting this entry will result in loss of access to factory recovery tools, therefore, it is important to check what the entry refers to before making any changes.
Security tips and recommendations
- Make a backup before making any changes.
- Removing unnecessary entries can reduce the potential attack surface.
- Verify that the boot order of the main system is correct after any changes.
Advanced security and recovery
If the main entry is accidentally deleted and the system no longer boots:
- System Restore can restore the system to the actual point before changes were made.
- The Event Viewer tool also helps the user better understand the cause of Boot Manager errors and fix the problem faster.
Methods Comparison
Command Prompt
This method provides the user with the greatest level of control; using the bcdedit command, specific entries can be easily identified and deleted. The main advantage of this method is its high accuracy and flexibility, but at the same time, it requires enough accuracy and also knowledge, A small mistake, like entering the wrong ID, can disable the entire main operating system, so which is why it’s mostly recommended for advanced users and system administrators.
BIOS/UEFI
Entering BIOS or UEFI settings is a simpler and actually more graphical way to manage Boot Manager. so in this mode, the user can change the boot order or disable certain entries, the advantage here is that it doesn’t require complicated commands and is more suitable for casual users, but depending on the motherboard, the options and features can be really limited, and it’s not always possible to completely remove the entry.
PowerShell Script
For more advanced users or network administrators, using PowerShell scripts is a powerful option, because this method allows multiple entries to be managed or deleted at once, which is very useful for environments with a large number of systems, Its main disadvantage is it is very complicated and the need for specialized knowledge, so it is not recommended for ordinary users, only try this if you are an expert.
Conclusion
Removing a drive from Windows Boot Manager is simple, but requires care, so here are our important points:
- This can reduce boot issues and increase system security easily.
- Using CMD or BIOS is a safe method if it is done correctly.
- It is always essential to back up and identify entries before making any changes.
After following the tips provided by NeuronVM in this article, you can keep your Boot Manager environment cleaner and more organized.
To reduce complexity, increase boot speed, focus on the core system, and improve security.
The system does not boot or an important entry is deleted; backup and caution are required.
For power users, BIOS/UEFI for regular users, PowerShell for enterprise environments.
You might like it