


How to Reinstall Windows 10 from USB

 9m
9m
 0 comments
 Print
Print
Why do you need to reinstall Windows 10? If your system is running or crashing, you need to reinstall it. Sometimes, the solution is a fresh start. To get rid of old problems and have a smooth operating system, we recommend reinstalling Windows 19 using a USB drive. Whether you’re a tech novice or a seasoned professional, this comprehensive guide will help you manage and control your system and get it up and running again.
Advantages of Reinstalling Windows from USB
The following points are the reasons we need to reinstall Windows 10 from USB:
- Fast & Clean Installation
Using a USB drive to install the OS is a good option because of its faster read and write speeds. This method allows for a clean installation of Windows by removing unnecessary and unwanted programs and improving and updating the system’s performance.
- Control on Partitions
Reinstalling from USB allows you to manually manage disk partitions to create and delete them.
- Non-dependant on OS
By reinstalling from USB, you can bypass obstacles to the PS booting properly because this method does not rely on the functionality of the current OS.
- Preventing Problems
A clean install via USB ensures that you can perform a reinstall without carrying over problematic configurations.
- Flexibility
You can have different versions of Windows on just one USB drive.
- Backup & Recovery
Bootable USB helps troubleshoot and resolve issues without the risk of losing data if problems arise during or after installation, by providing recovery options.
- Reusable
With a bootable USB drive, you can use it for installation and repair multiple times without having to download installation files.
Reinstall Windows 10 from USB
When you notice that your Windows operating system is not booting, you need to know that you can’t access built-in repair tools like Command Prompt, System Restore, or Startup Repair. You need to create a bootable Windows 10/11 installation USB and use it to repair. Installing Windows 10 from USB involves the following 3 steps:
Step 1: Bootable USB
To create a bootable USB, follow these steps:
- Insert a USB drive with 8 GB of space.
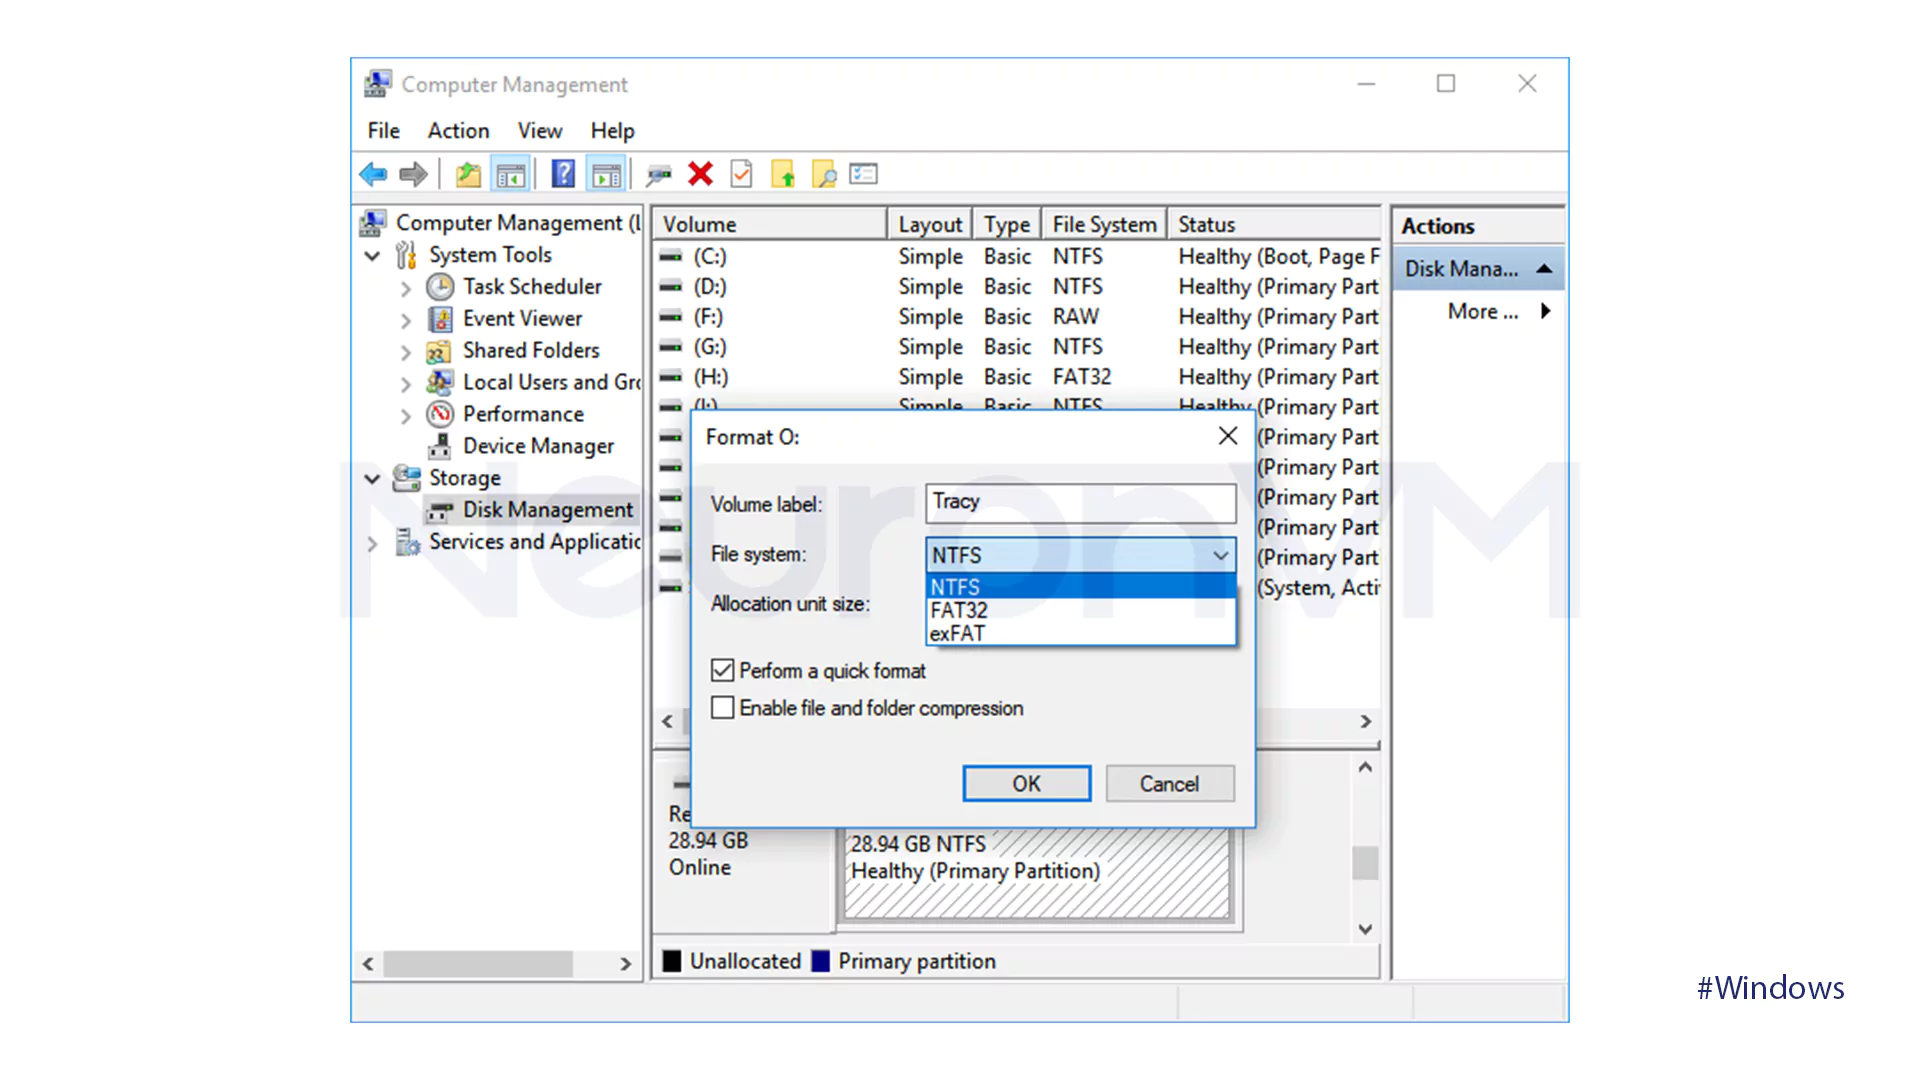
- Right-click on your Windows icon and click on Disk Management.
- Once you see your USB drive, right-click on it and select Format.
- In the menu that appears as shown in the image below, click on the FAT32 option and then click OK.
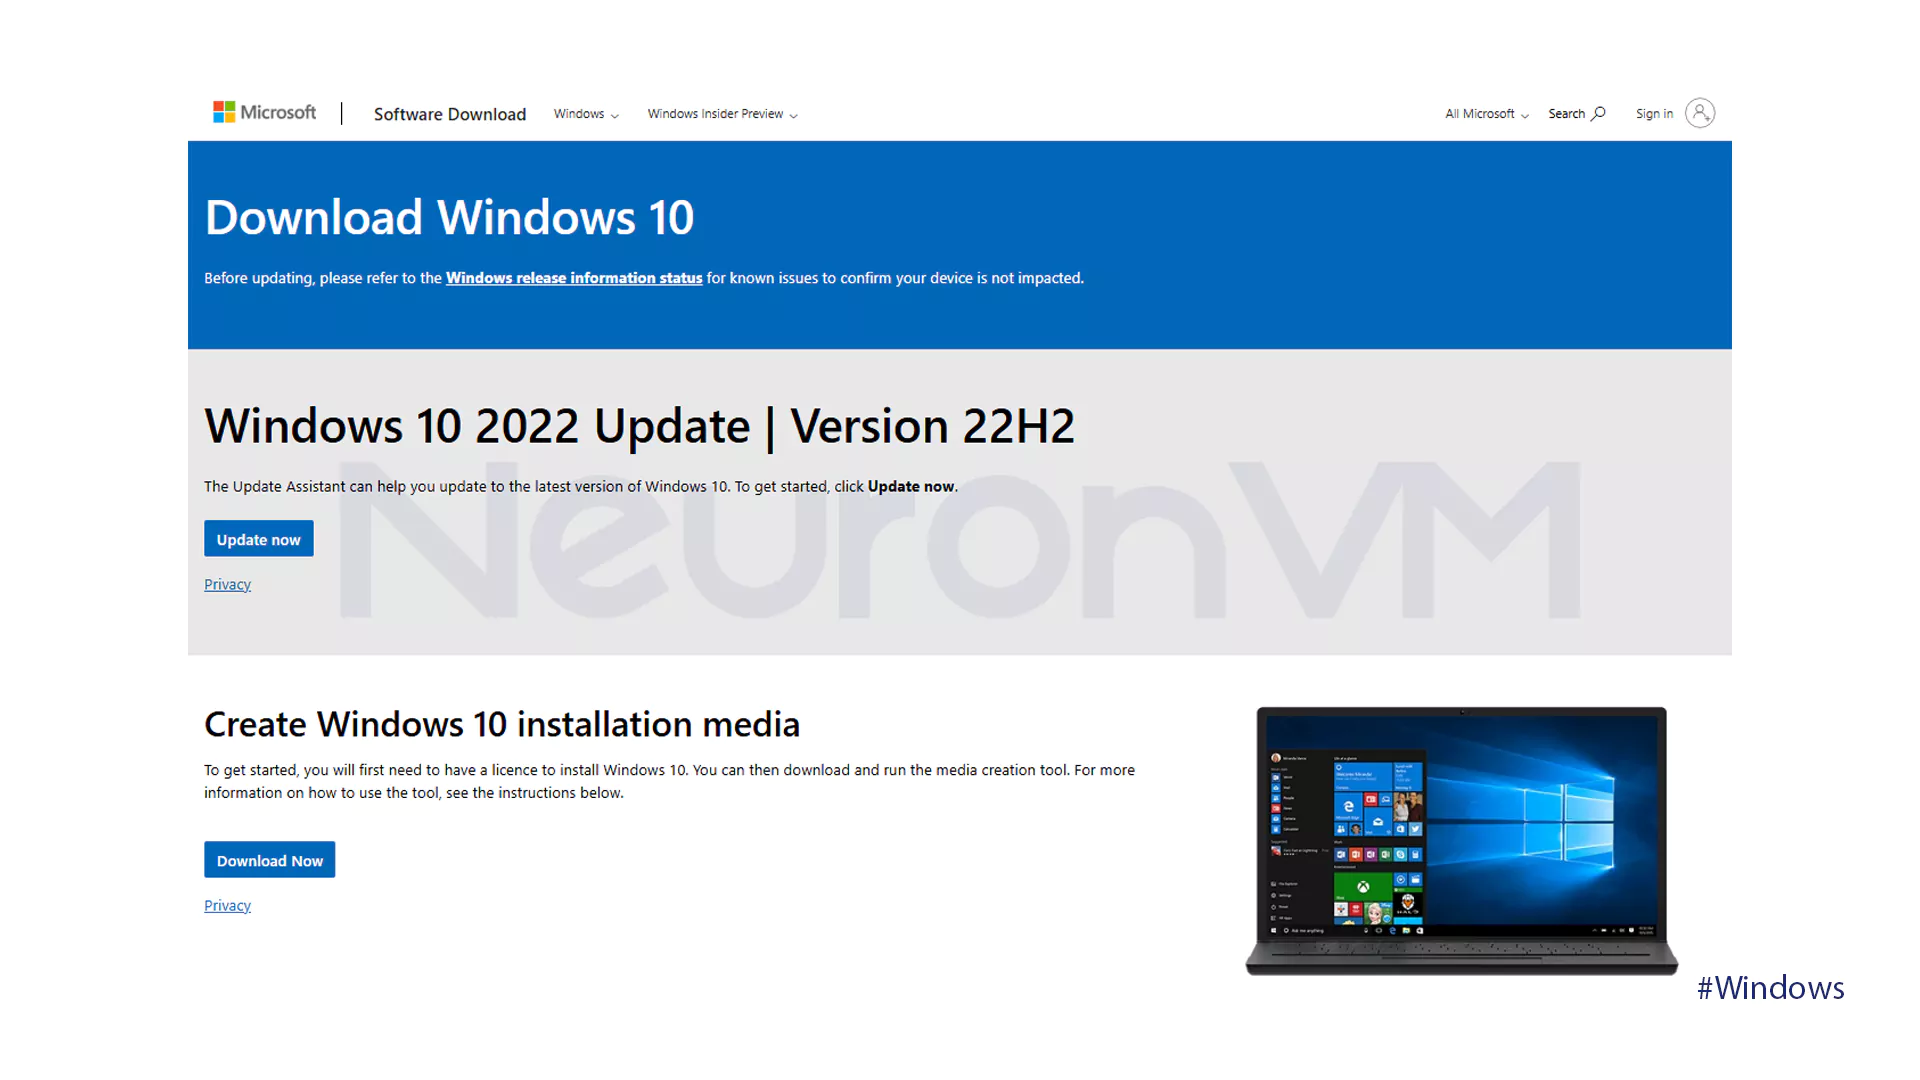
- Go to www.micorsoft.com and download the Windows ISO file.
- Then you have to burn the ISO to USB.
- Go to the Start menu navigate the Windows System file and choose Control Panel.
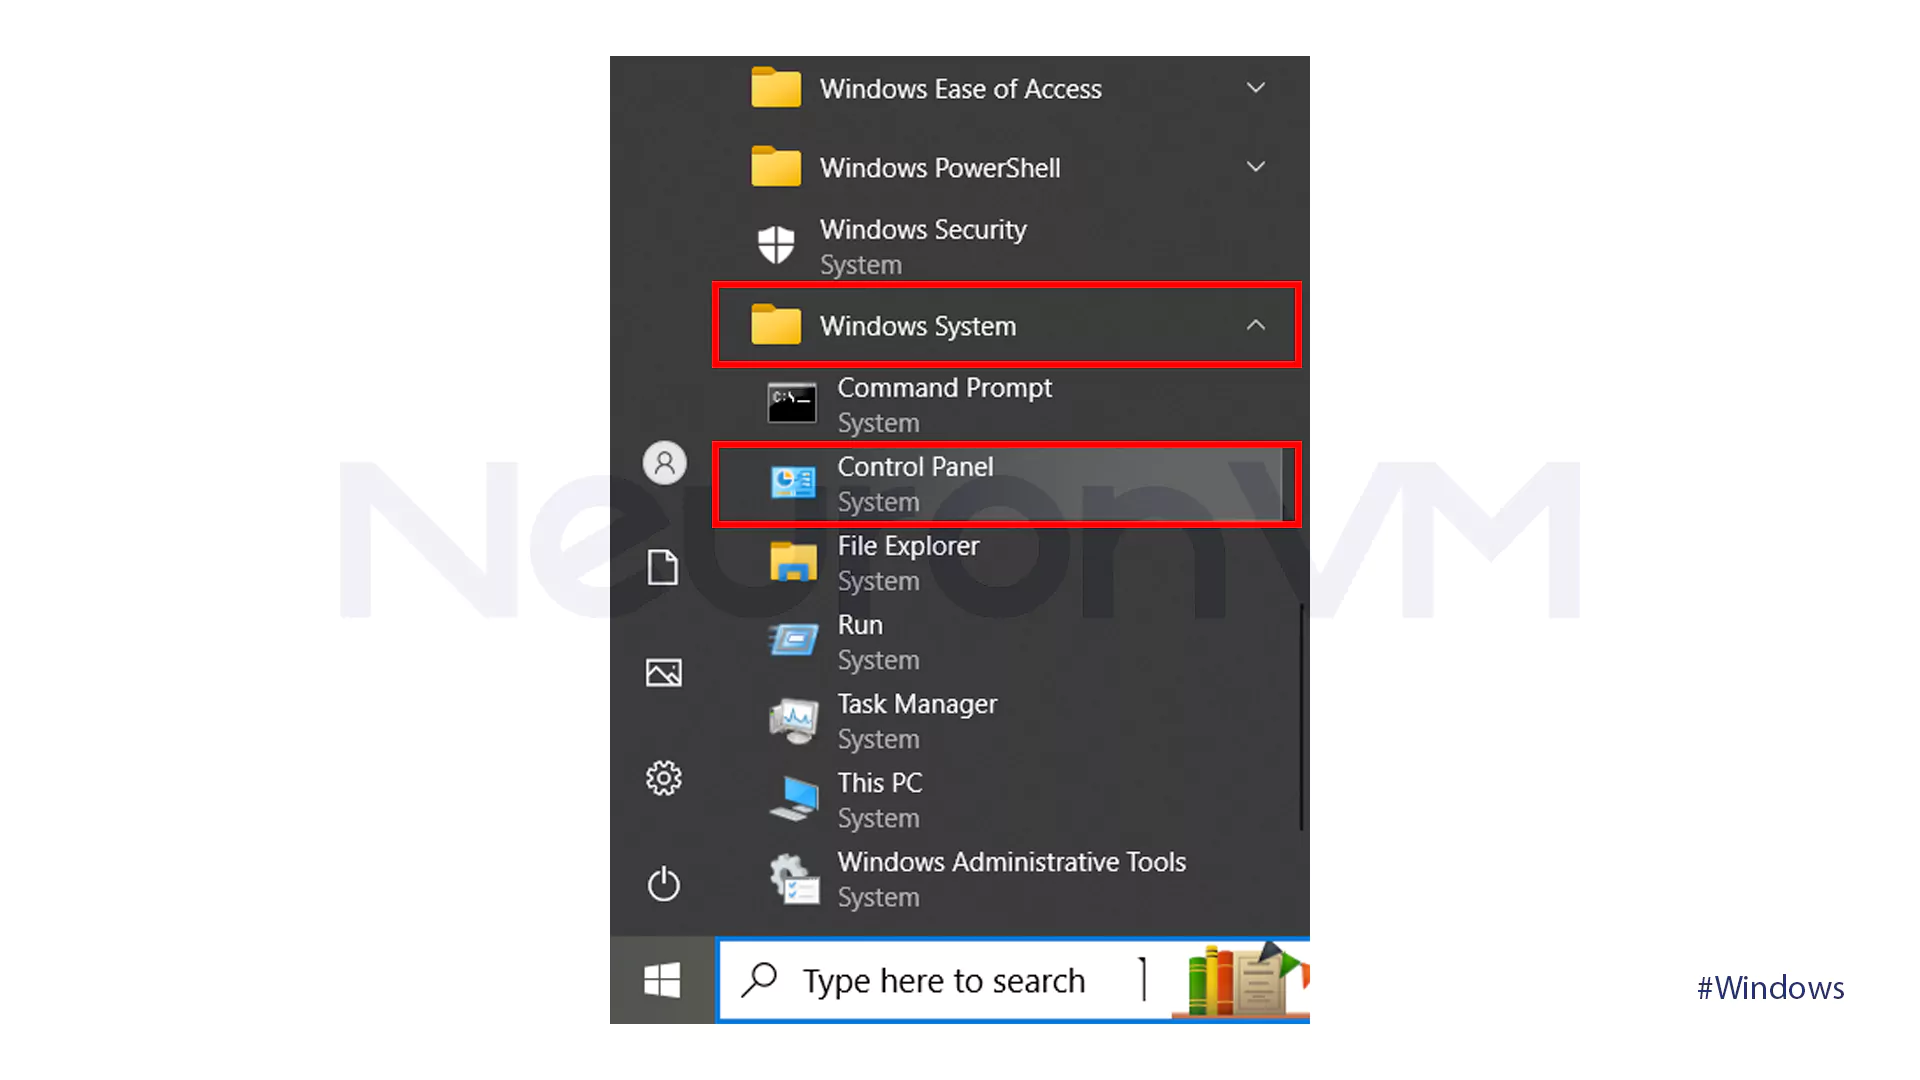
- In your computer’s Control Panel, type Windows To Go in the search bar, and click on it.
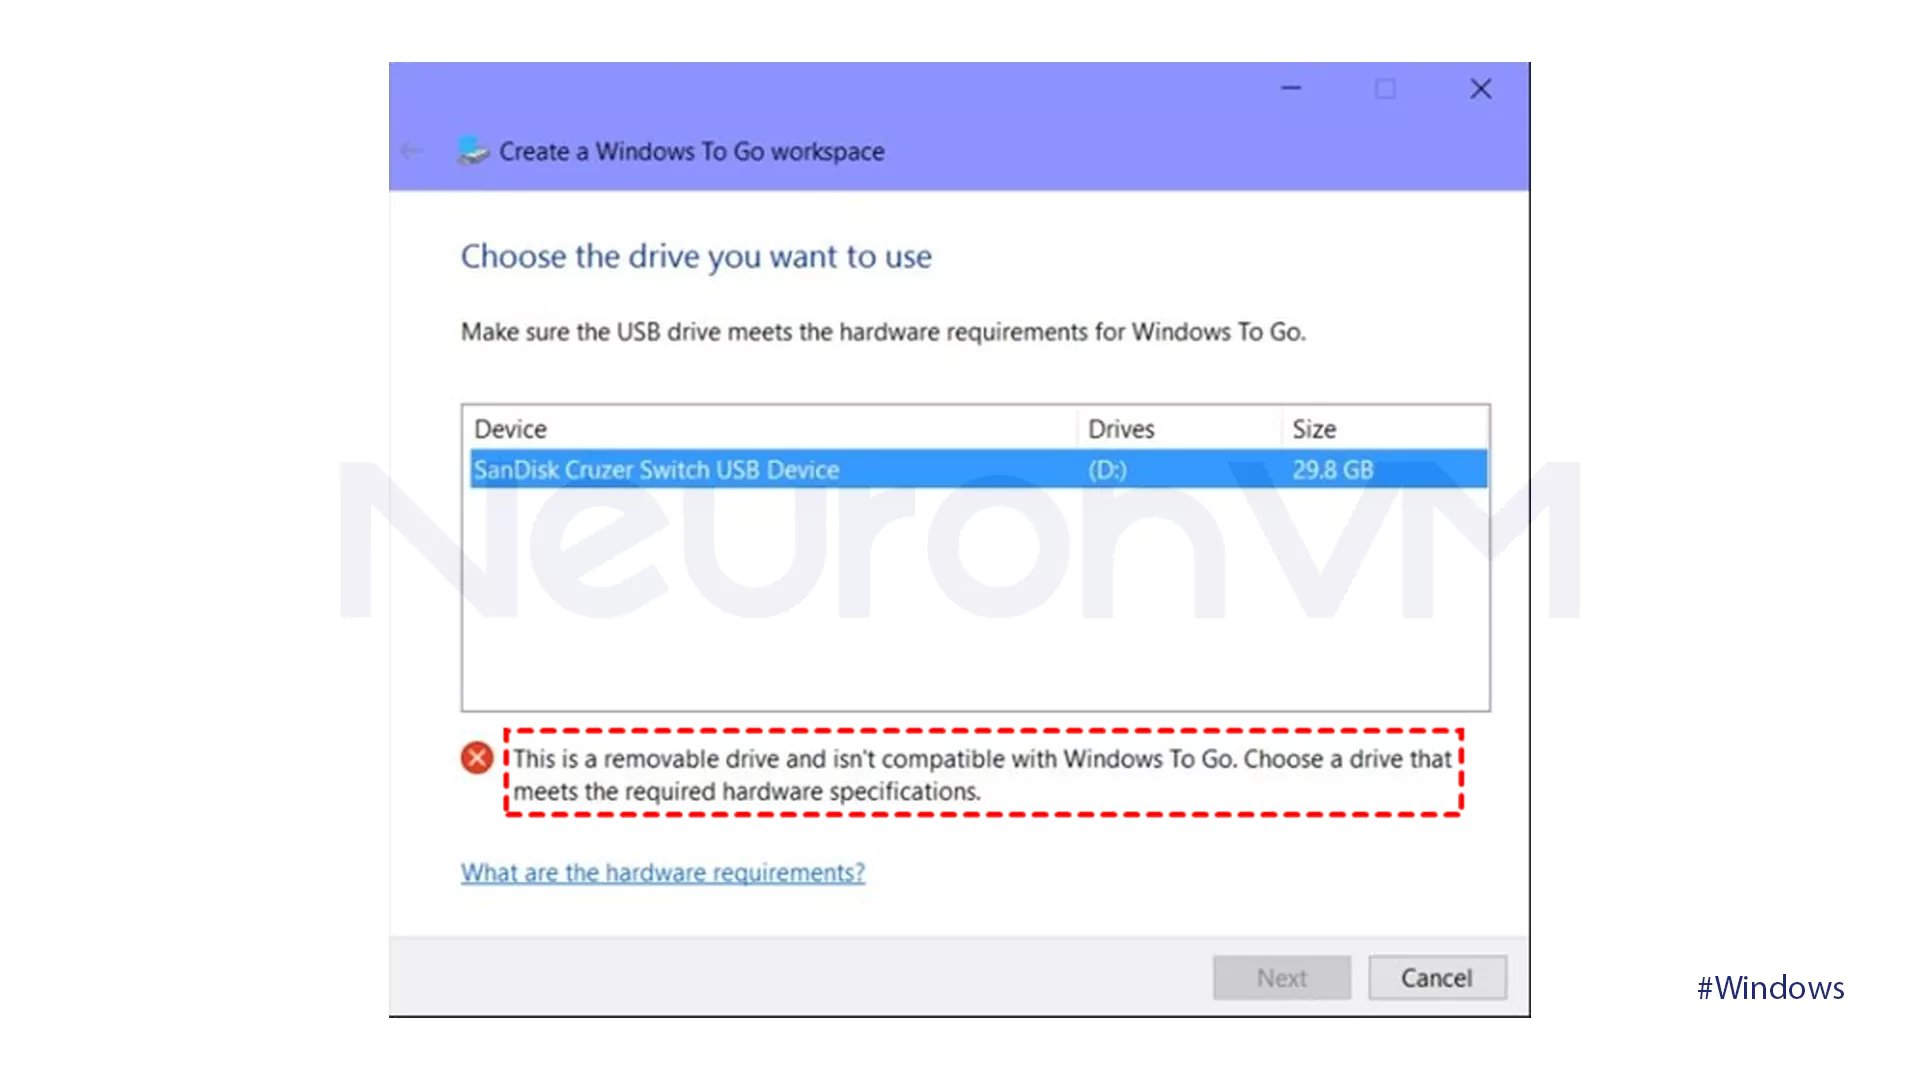
- Click on the USB drive that you want to ISO onto and tap on Next.
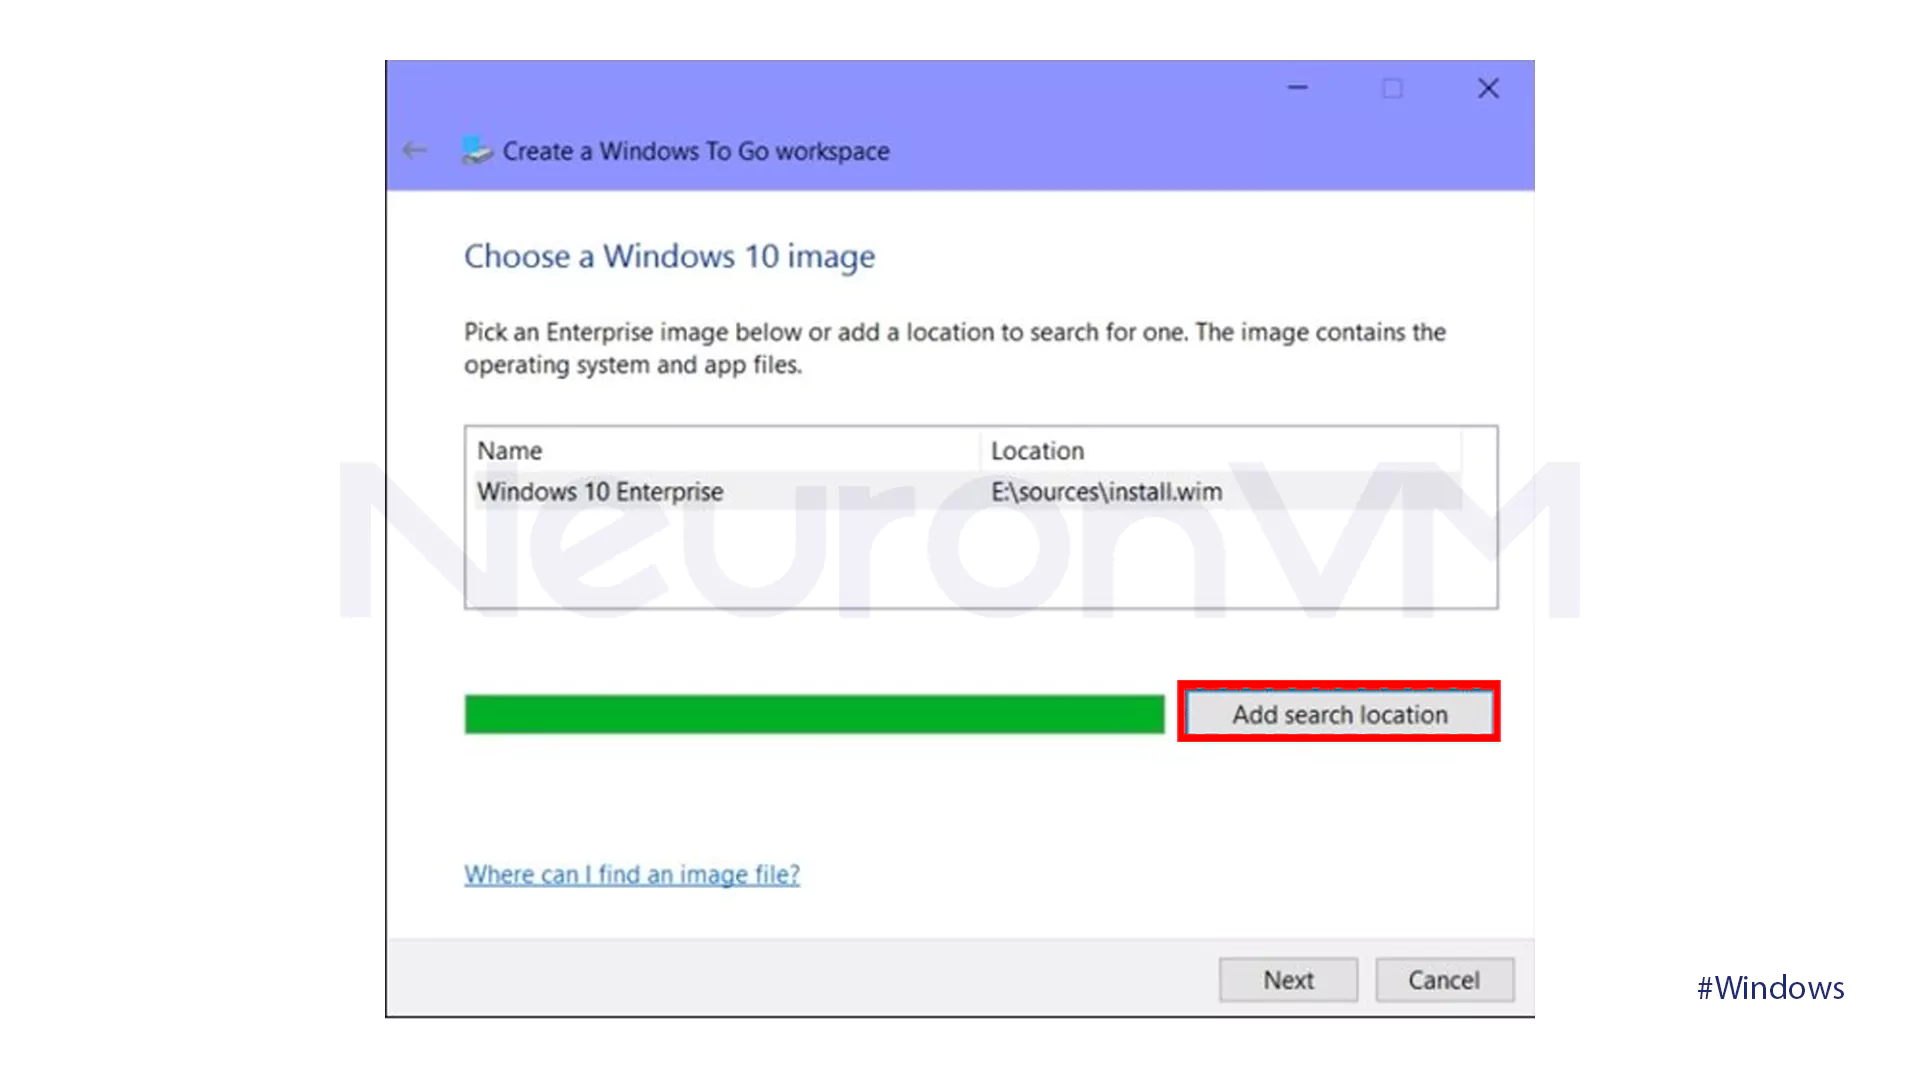
- Click on the shown option in the image below and search for the ISO file.
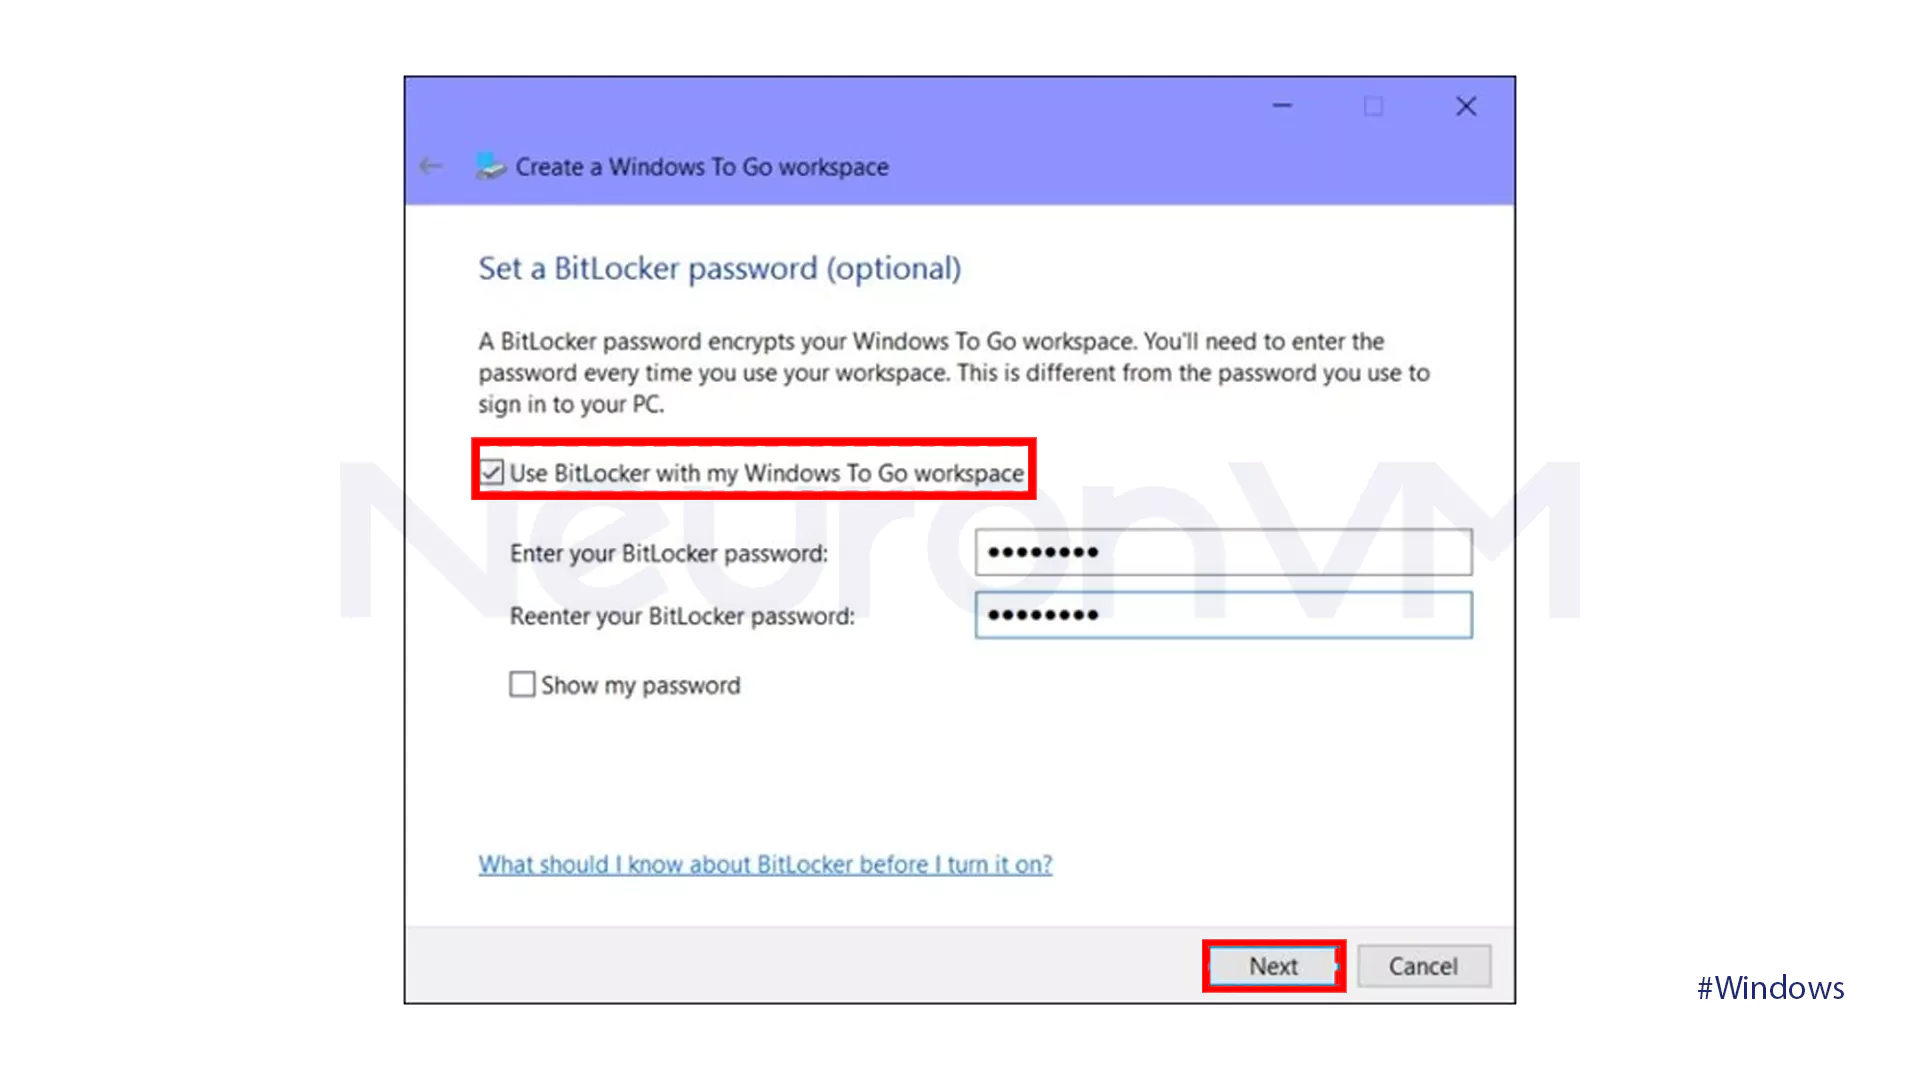
- To preserve data on a USB drive, enable BitLocker drive encryption and click on Next.
Step 2: Boot USB
To install a new operating system from USB, you need to download the installation files that will turn the USB into a bootable drive. Then, you need to change the BIOS or UEFI settings to allow your computer to boot from USB. Follow these steps:
- To access the BIOS setting, press the ESC key during the startup.( You can use F1, F2, or F10 Keys too.)
- Go to the BOOT tab.
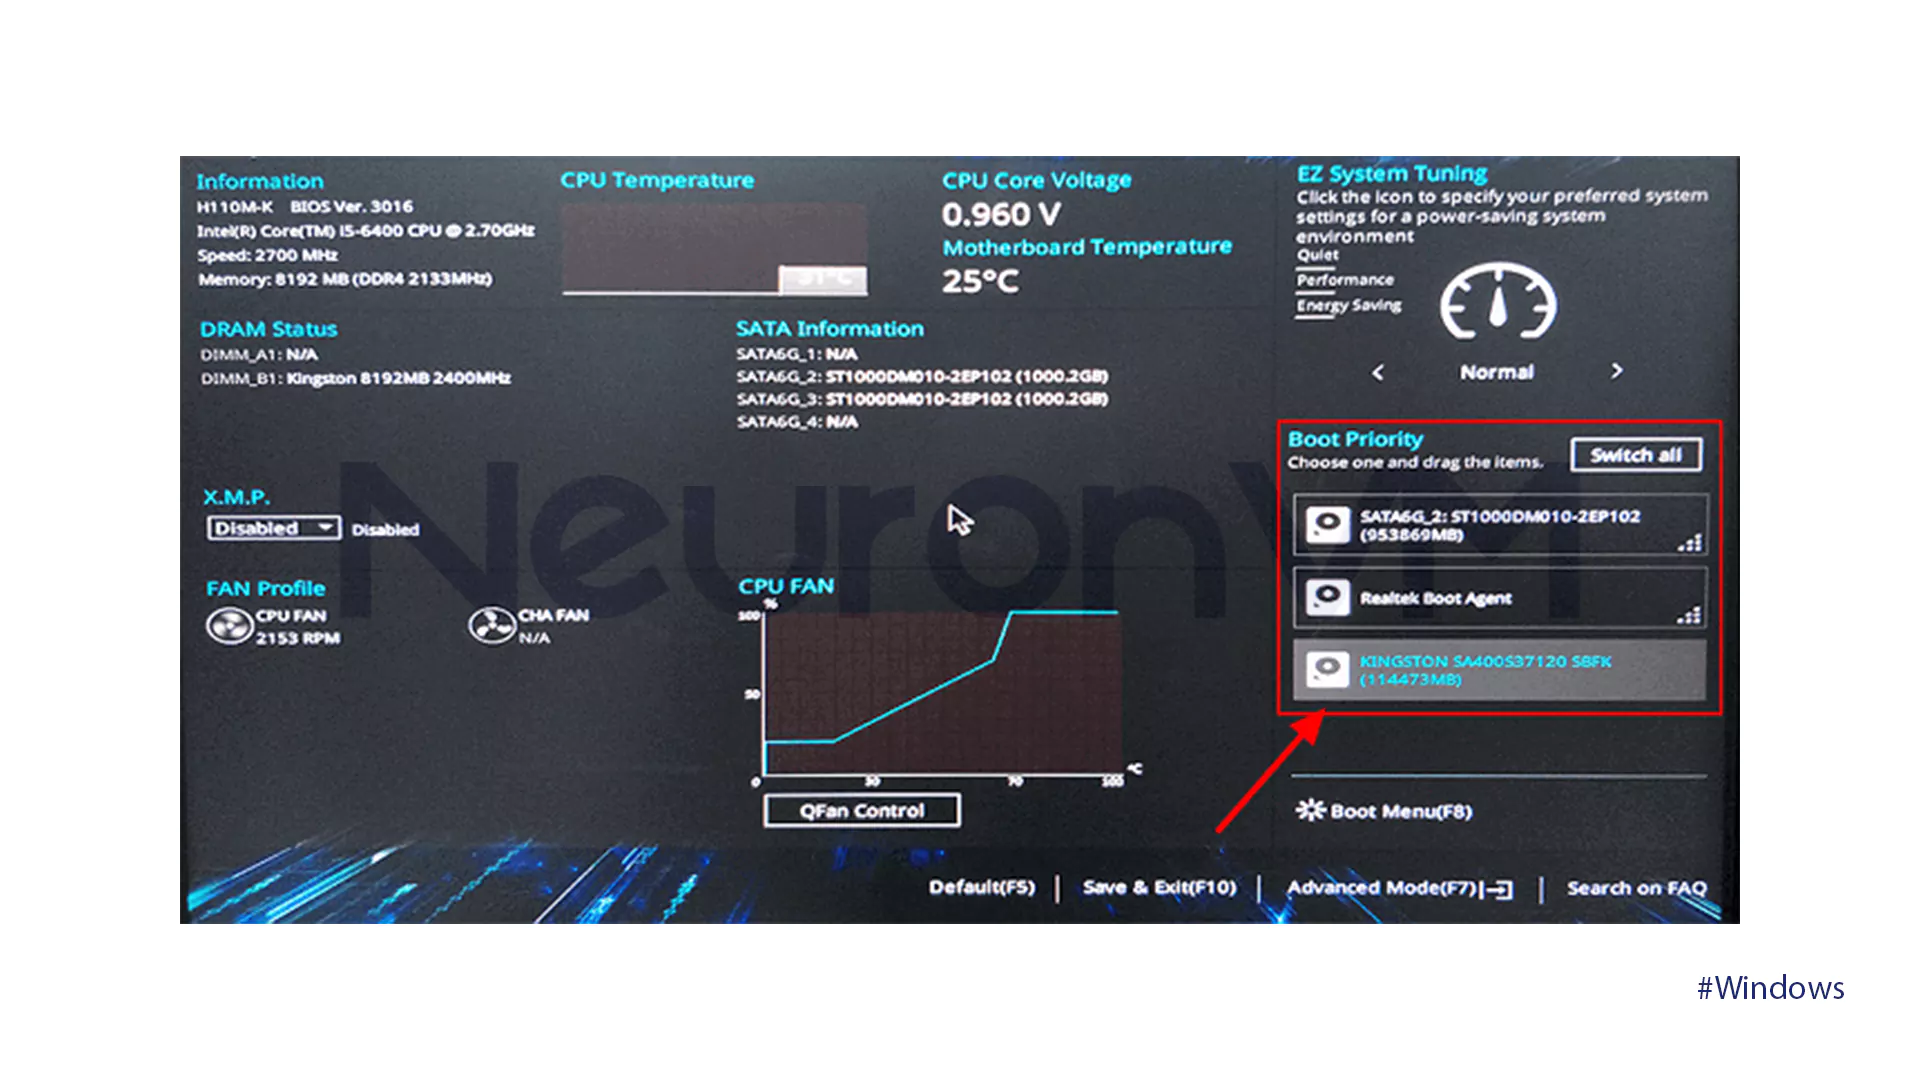
- Configure the BIOS to make the USB drive the primary boot device.
- Then, save the changes and exit the setup.
- Insert the USB to start the booting process.
- After configuring the language, keyboard, timezone, and currency settings tap on OK.
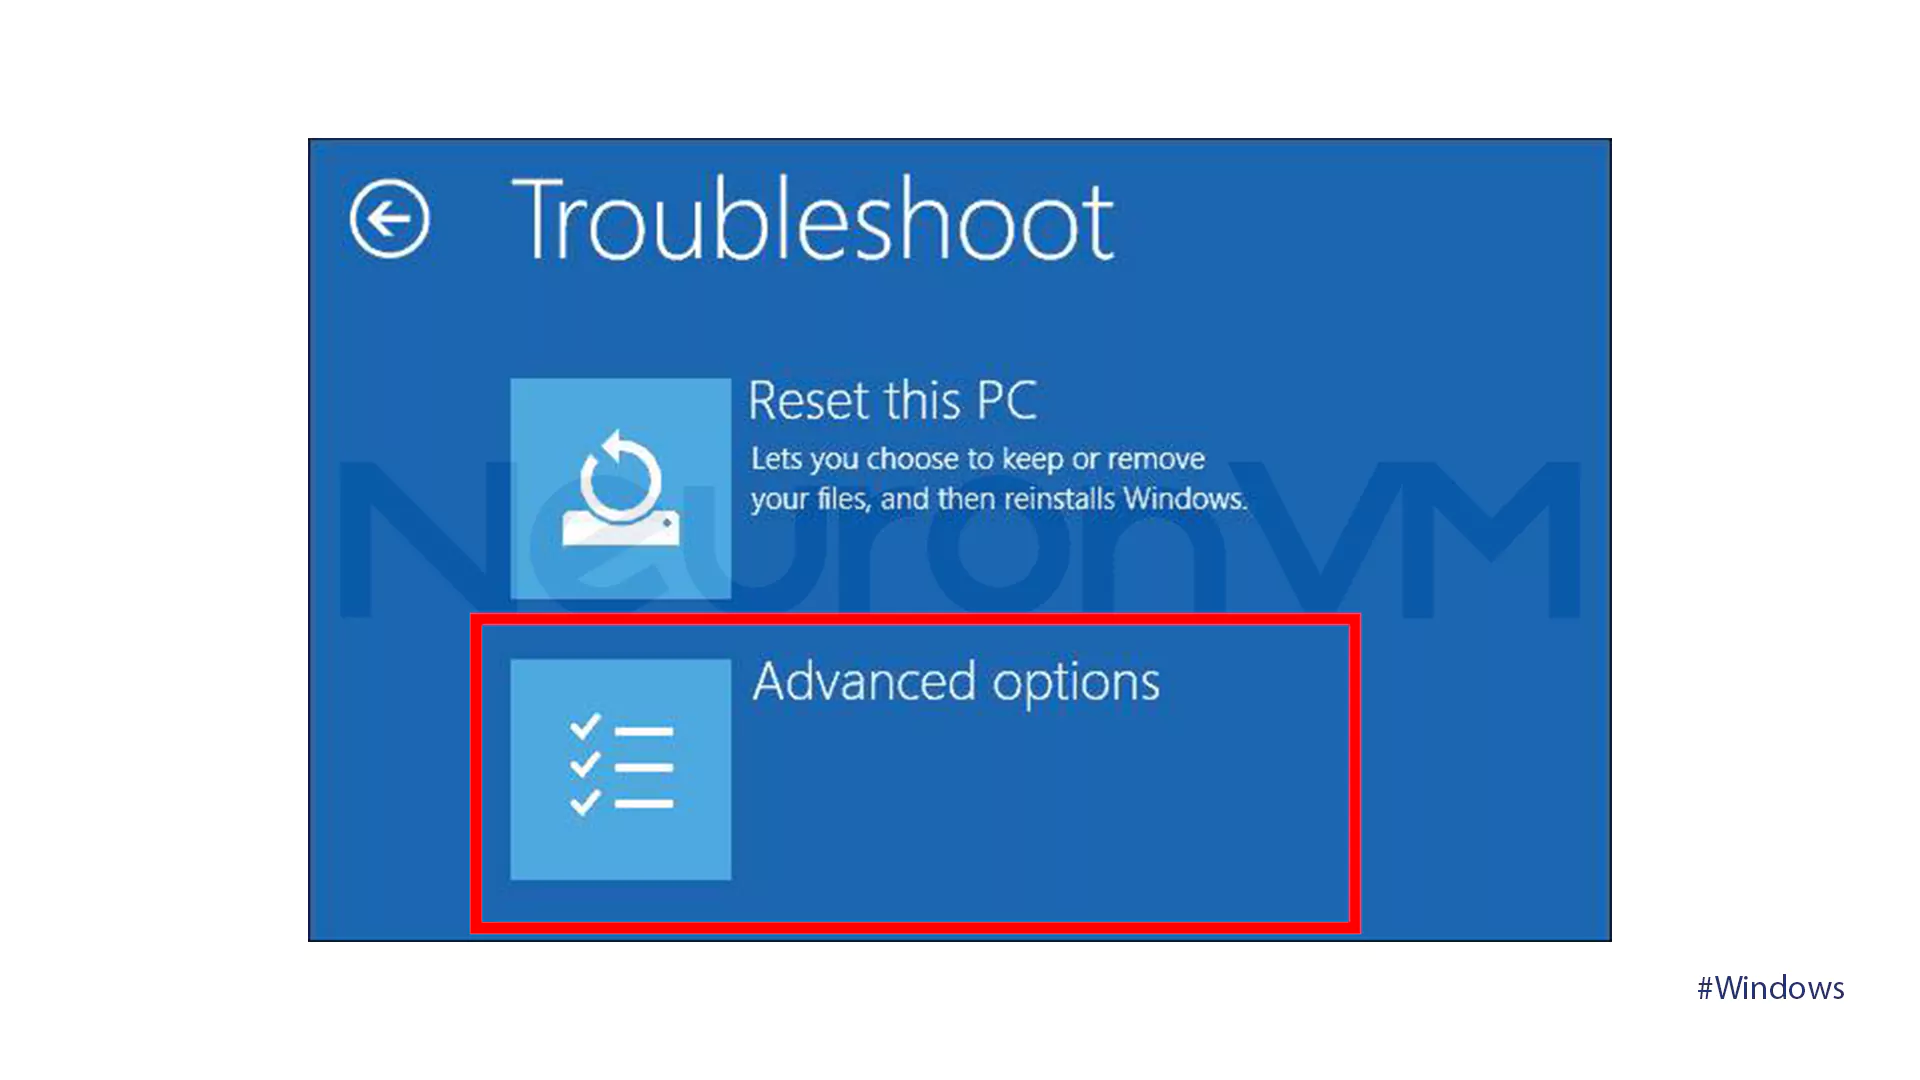
- Go to Repair your computer section and choose Troubleshoot.
- Click on the Advanced Options.
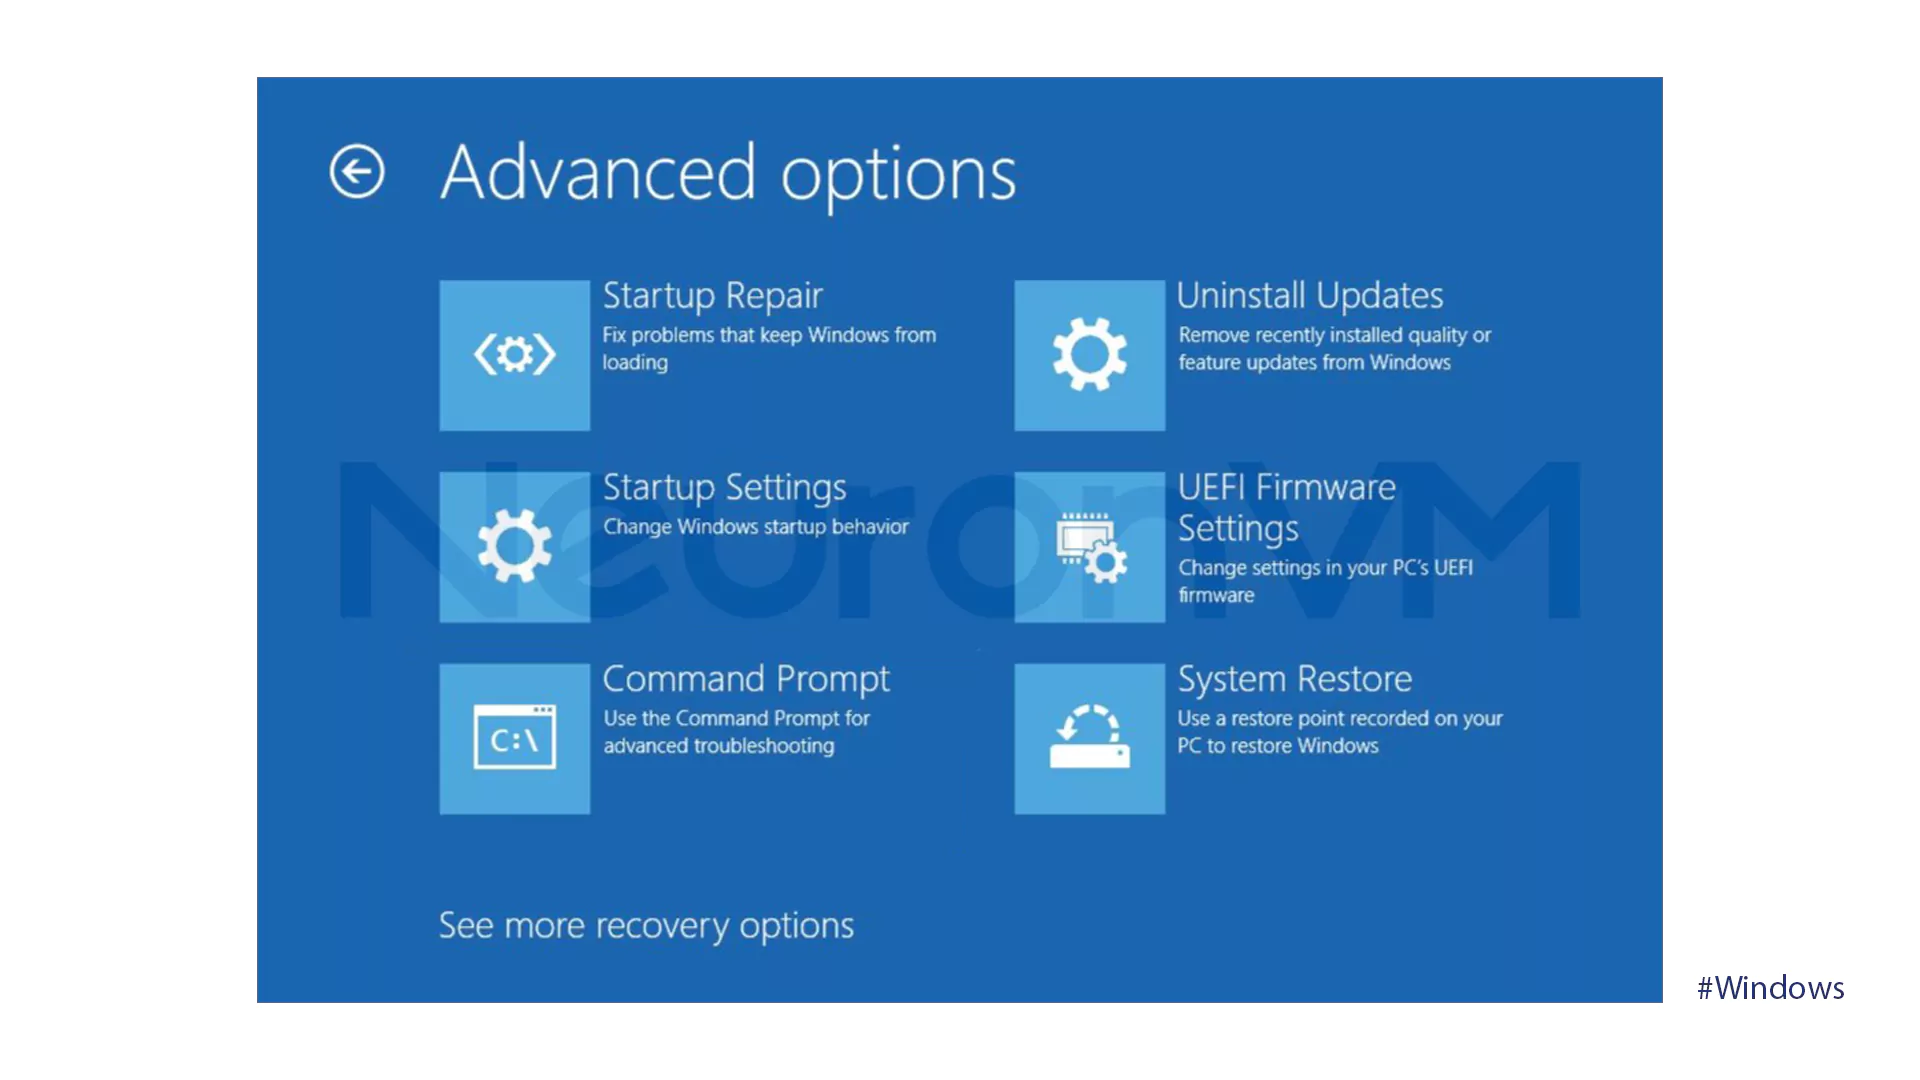
Step 3: USB Repair Tool
In the advanced options, you’ll get to see the tools to repair Windows from USB. Follow the steps below to get to know these tools and how to use them to reinstall Windows from USB:
- The Startup Repair tool
This tool scans for system problems and automatically repairs them, such as corrupted system files that prevent Windows from starting.
- The Command Prompt tool
This tool gives you the ability to manually repair system problems. For example, you can use the BCDBoot command to repair a corrupted boot system file.
- The Uninstall Updates tool
This tool uninstalls the latest update to resolve issues after installing a quality update or feature update.
- The System Restore tool
This tool restores system files, registry, and settings by returning your computer to a previous working state, allowing you to reach a system restore point you created when you had a problem.
- The System Image Recovery tool
This tool provides a copy of the drive that Windows needs to run to recover your computer when the hard drive fails.
Determine your needs and choose the right tool to reinstall Windows 1o from USB successfully!
Conclusion
By following the instructions mentioned in the steps above, you can easily reinstall Windows 10 from a USB drive and get access to an upgraded version of Windows 10 by resolving performance issues. Back up your data before you begin and start working with a new and optimized operating system today!
You might like it

Almalinux Tutorials
How to Install Cloudlinux on Almalinux 9


Windows Tutorials
How to Change a JPG to a PNG Windows 11


How to Install Wifi on Ubuntu Server Step by Step
