How to get Node.js server to run on Windows always

 8m
8m
 0 comments
 Print
Print
Running a Node.js server on your Windows VPS or computer is great for building apps, testing projects, or even hosting your own services, but it can be frustrating when the server stops working or shuts down out of nowhere, that’s why knowing How to get Node.js server to run on Windows always is so important, it helps keep your server running smoothly without you needing to restart it all the time, in this guide we will walk you through simple ways to make sure your Node.js server stays up and running, so you can focus on your work.
 How do you run a Node.js server on Windows nonstop?
Running a Node.js server nonstop on Windows means keeping it active all the time, even after restarting your computer, this helps make sure your apps and services stay available without interruptions.
Requirements
- Windows 10, 11, or Windows Server
- Administrator Access: Needed for installing services
- Internet Connection: To download Node.js
Install Node.js
Step 1
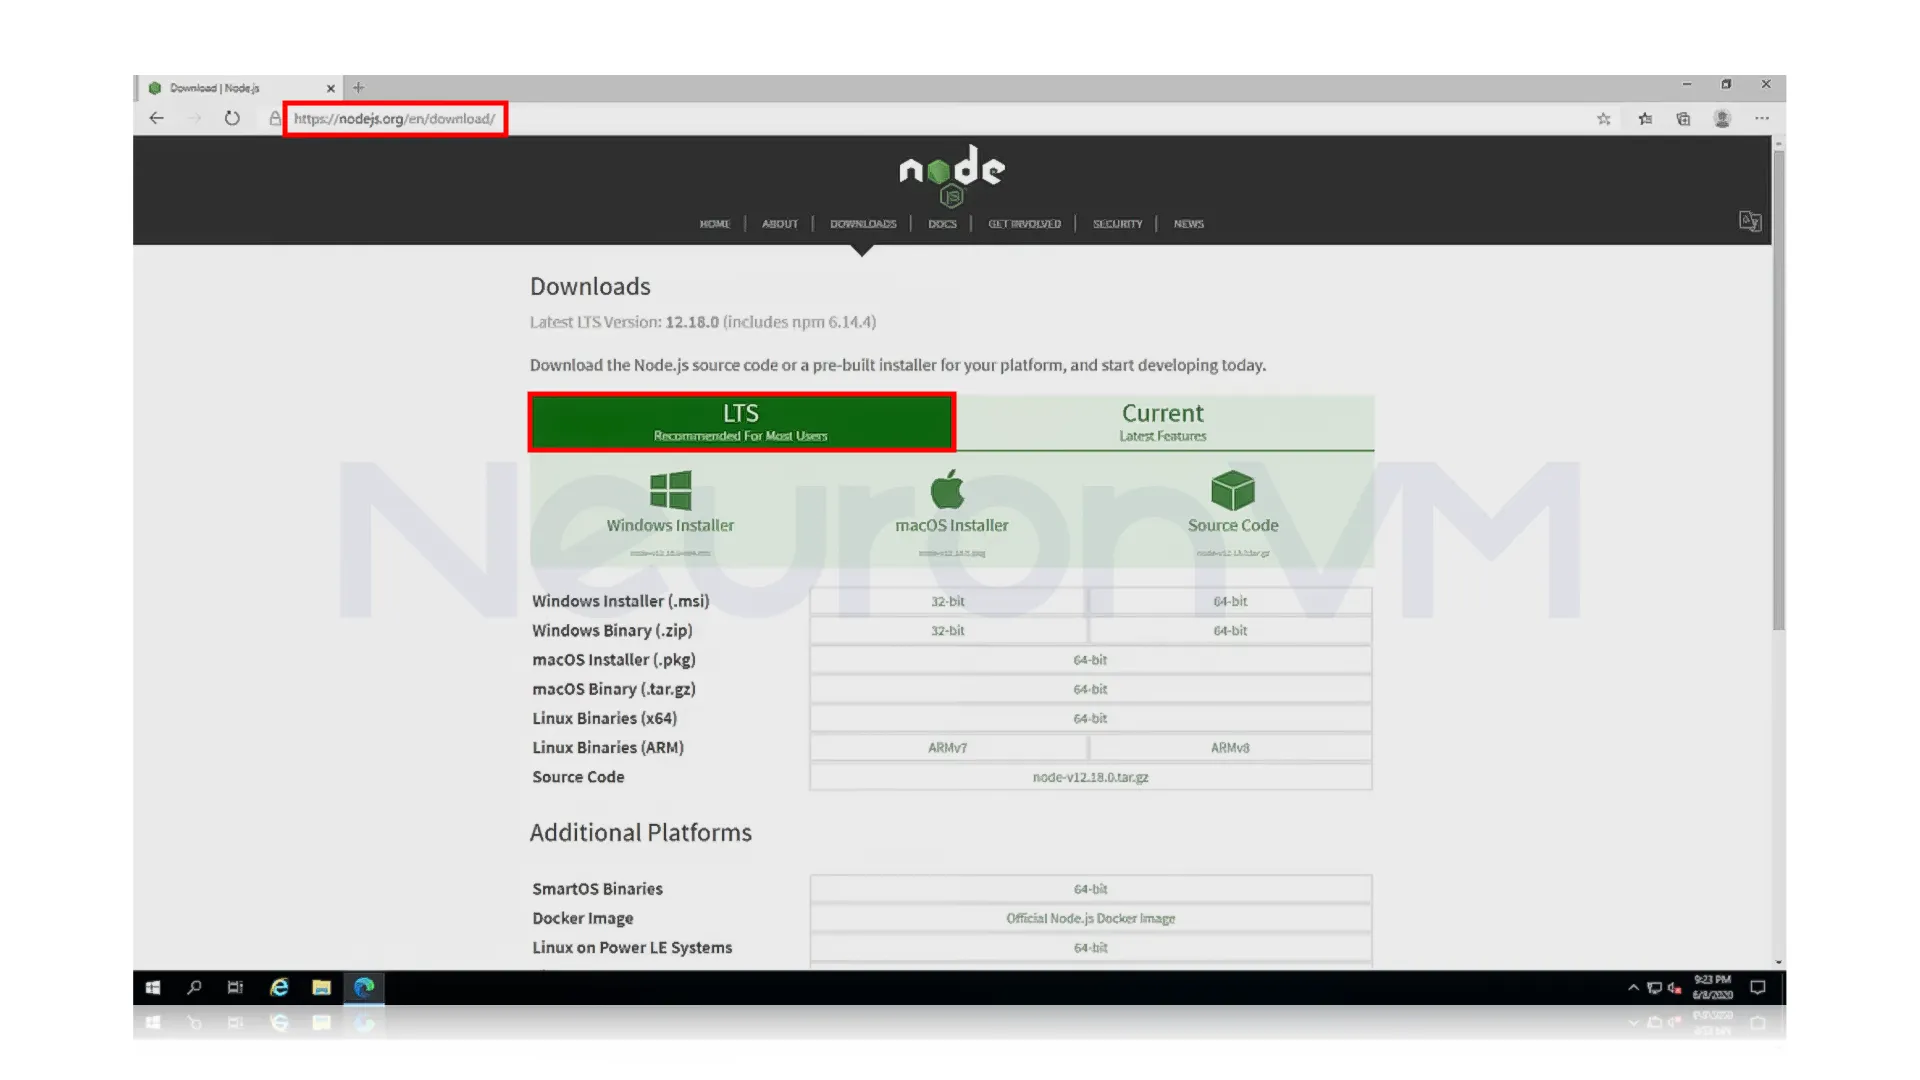
Installing Node.js on Windows is very easy because there is a simple installer you can use, first open your browser and go to the official Node.js website, there you will see a button to download the Windows version, choose the LTS version because it is more stable.
Step 2
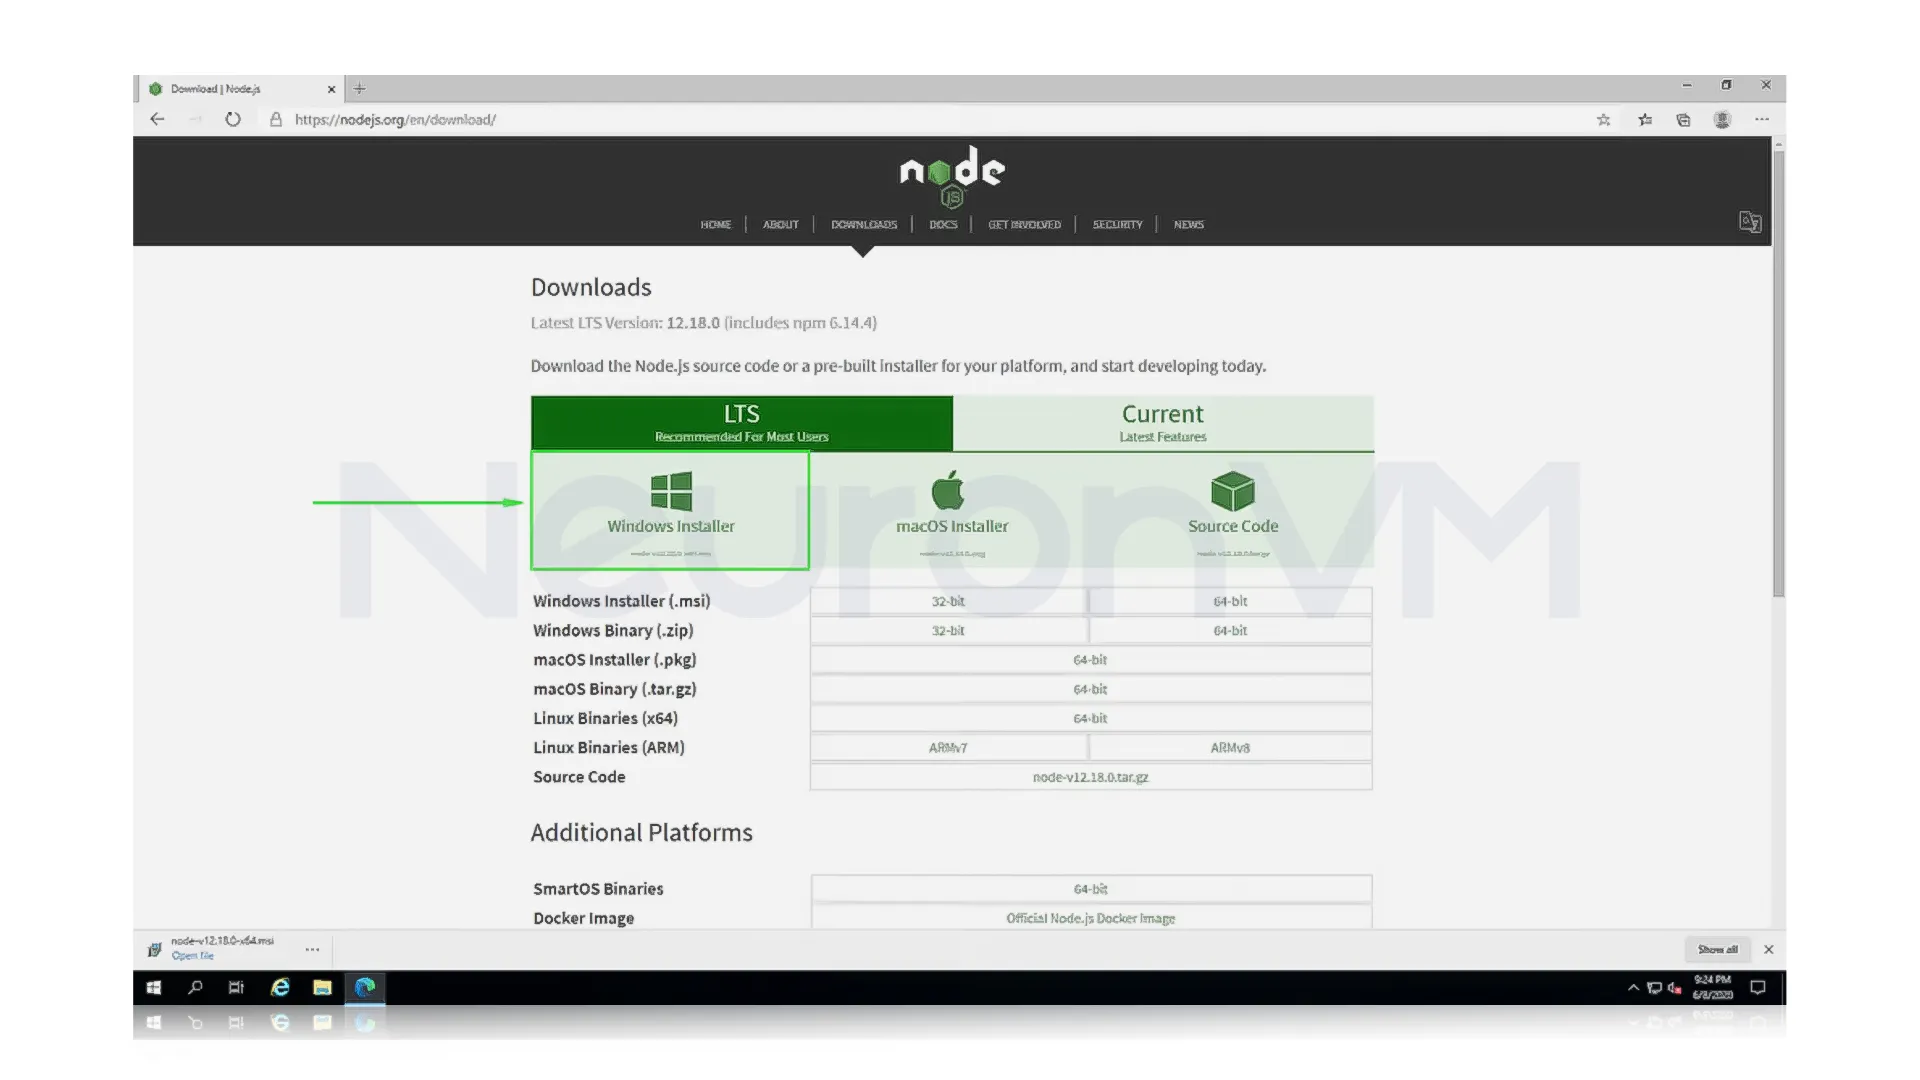
Click the Windows Installer button (LTS version is recommended) to download the Node.js setup file, This installer is made for Windows and includes both Node.js and NPM, once the file is downloaded, find the file on your browser or downloaded folder to begin the installation.
Step 3
Next, click on the file you just downloaded from your browser, this will open the Node.js installer and start the setup process.

Step 4
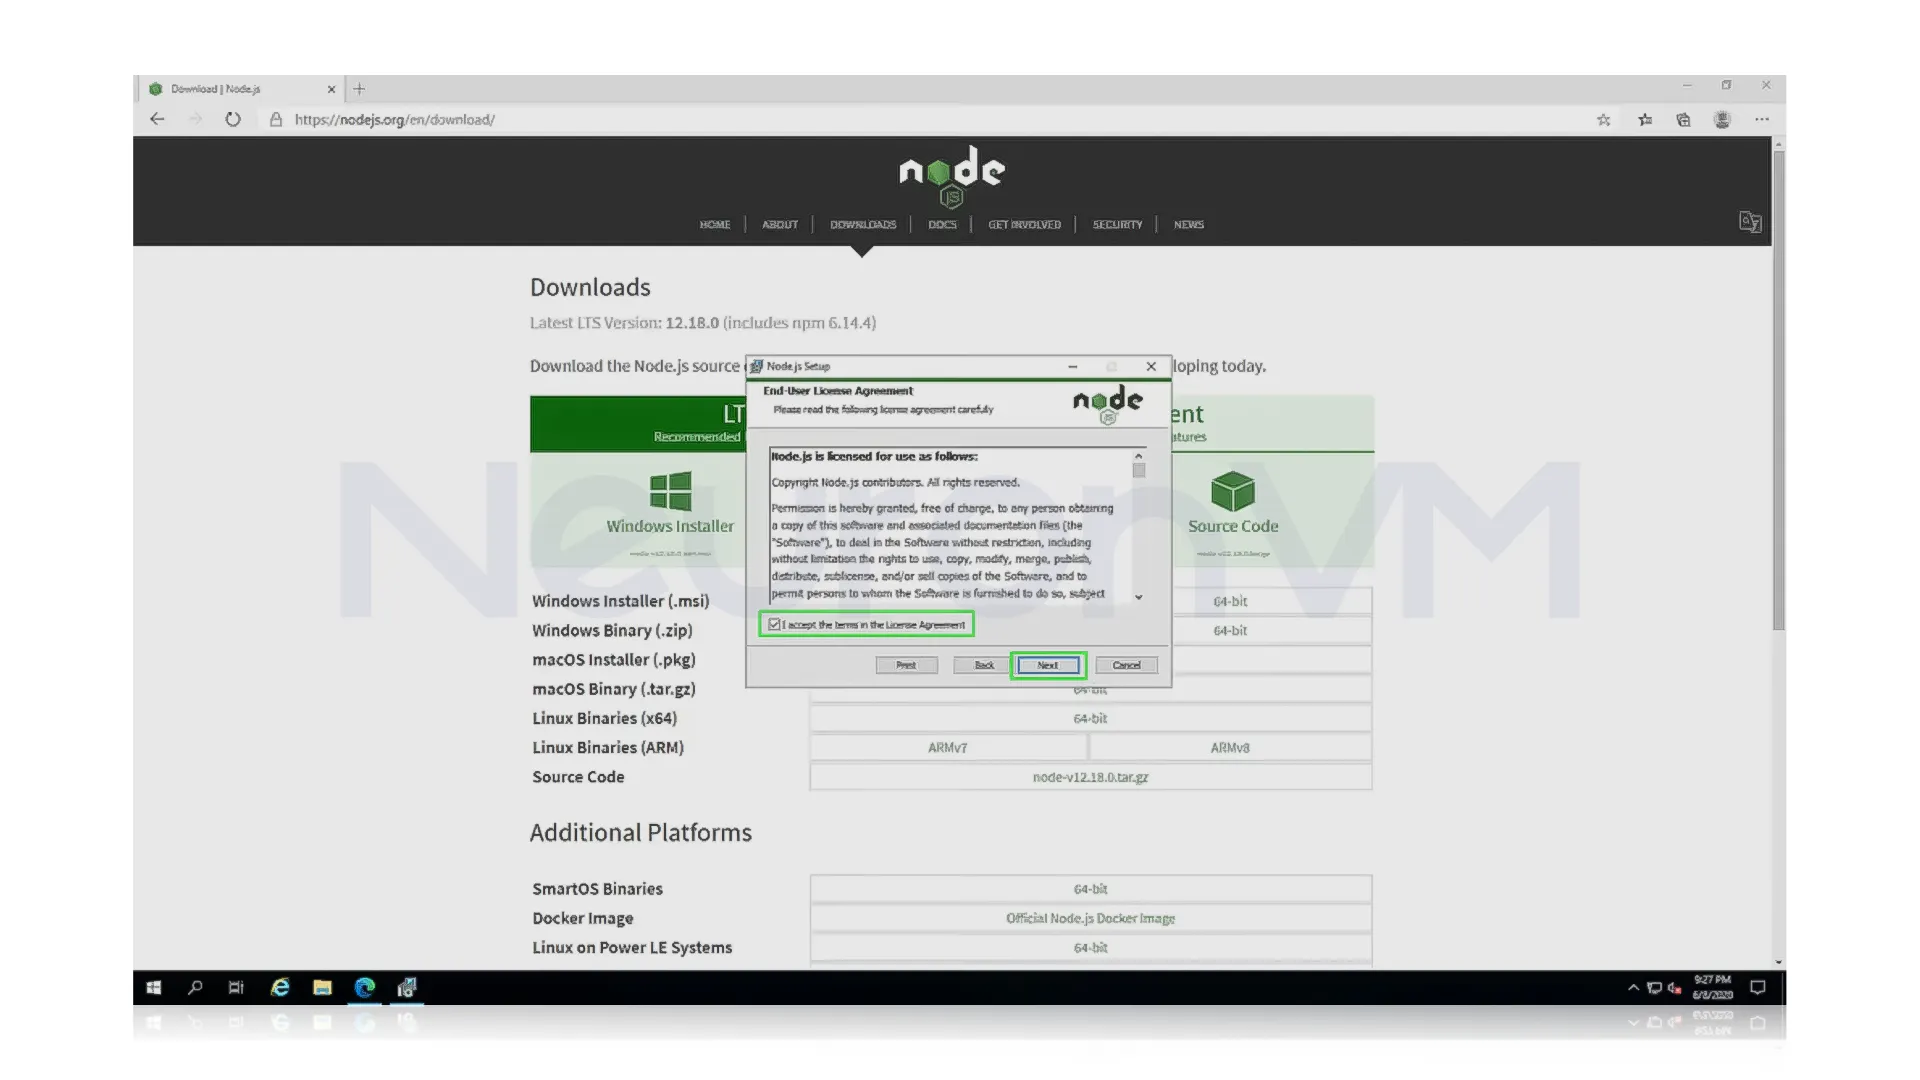
When the installer opens, click Next to begin, then check the box to accept the license agreement, after that keep clicking Next on each screen on each screen to continue through the setup steps.
Step 5
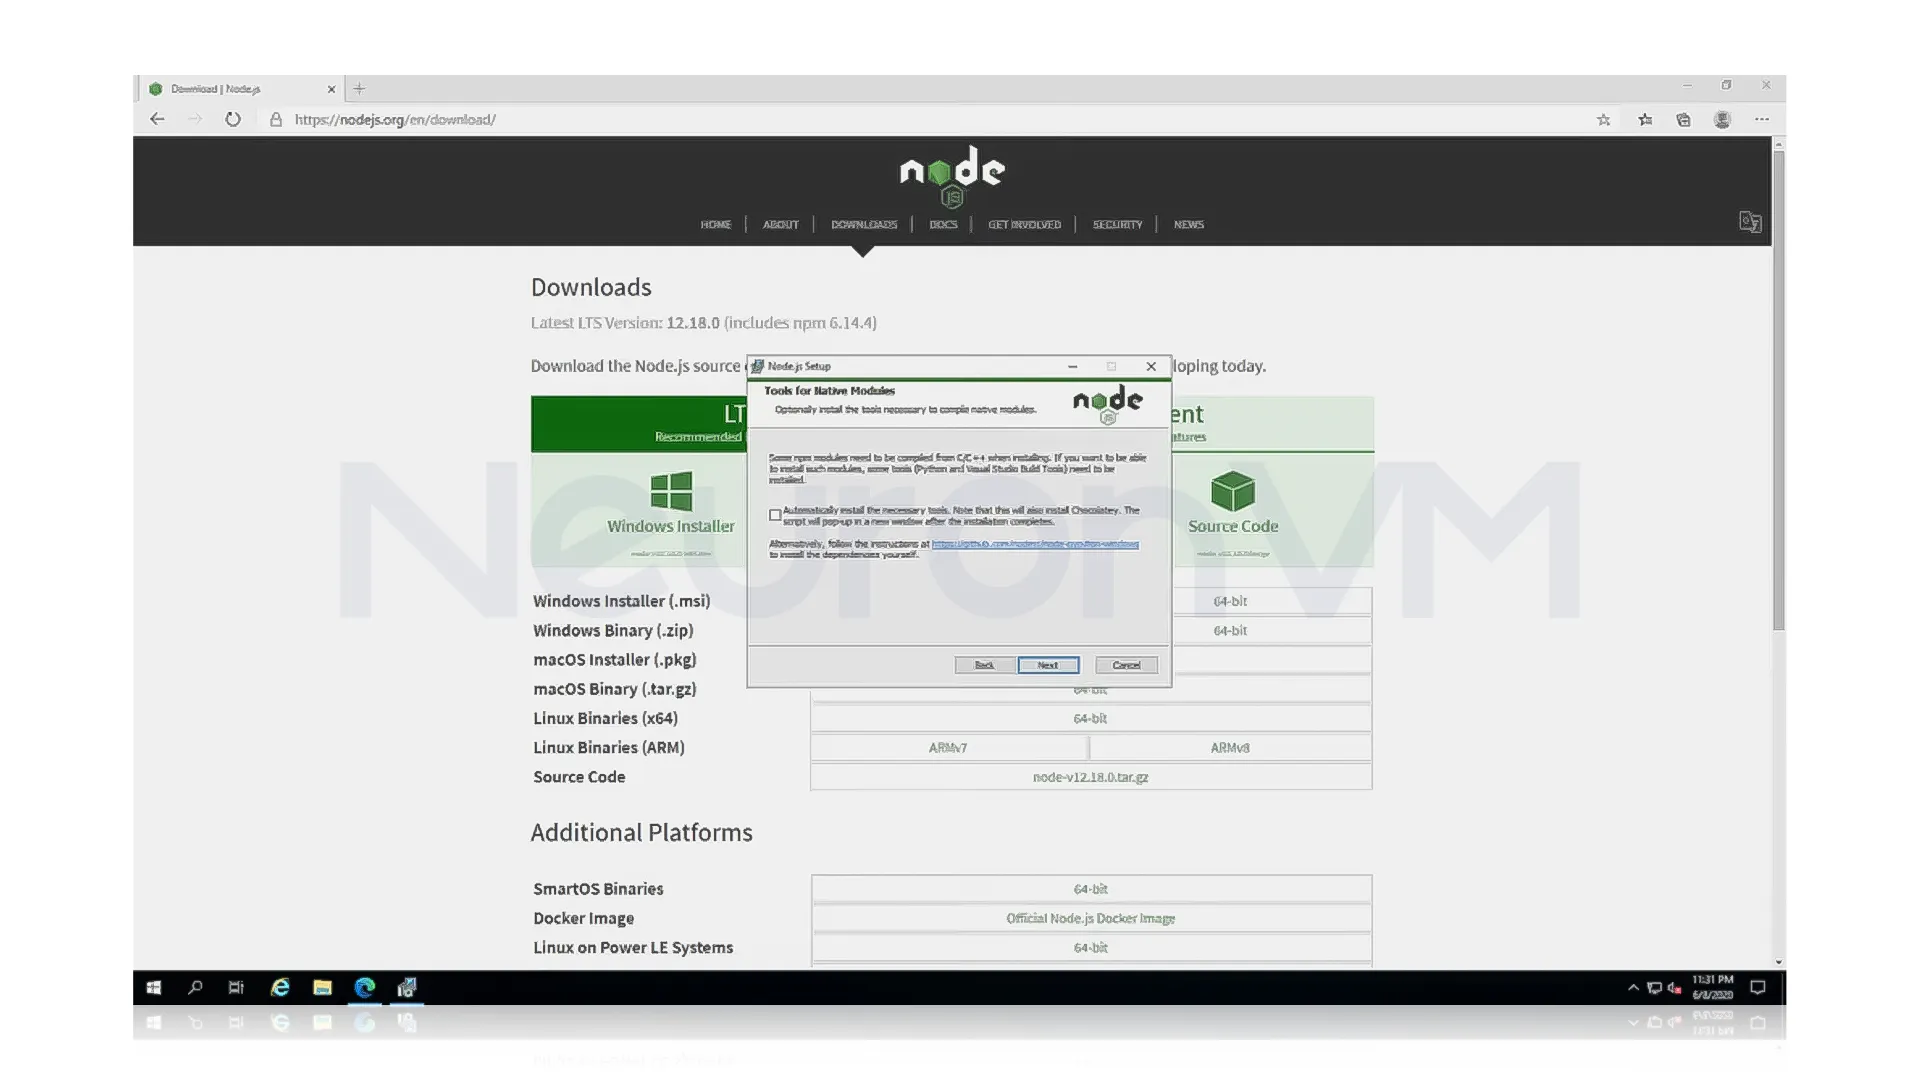
During the installation, you will be asked if you want to install additional tools needed to build native modules, it’s up to you to decide, but in this guide, we won’t be installing those tools.
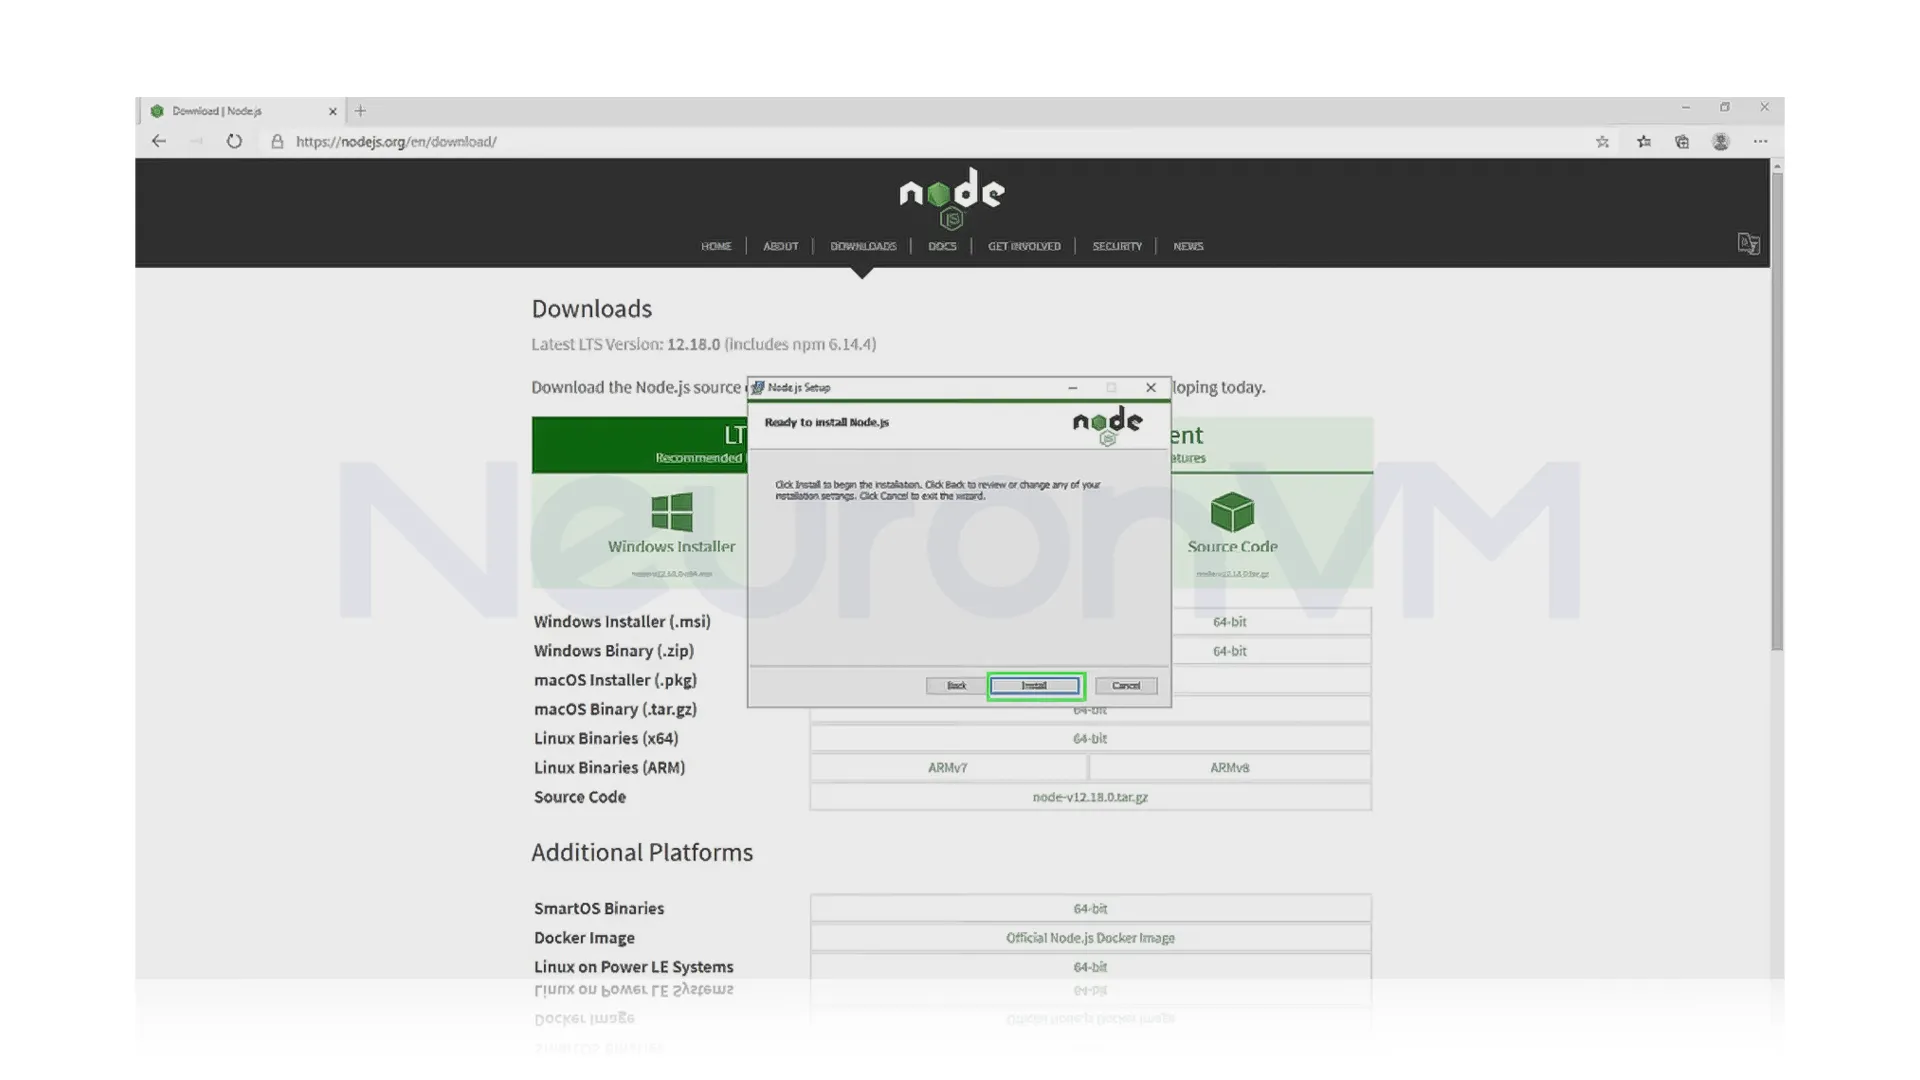
Step 6
To complete the setup process, click on the install button, this action will start the installation of Node.js on your Windows computer, the installer will then copy all necessary files and set up the environment required.
While the installer is running, the screen should look similar to the image below.
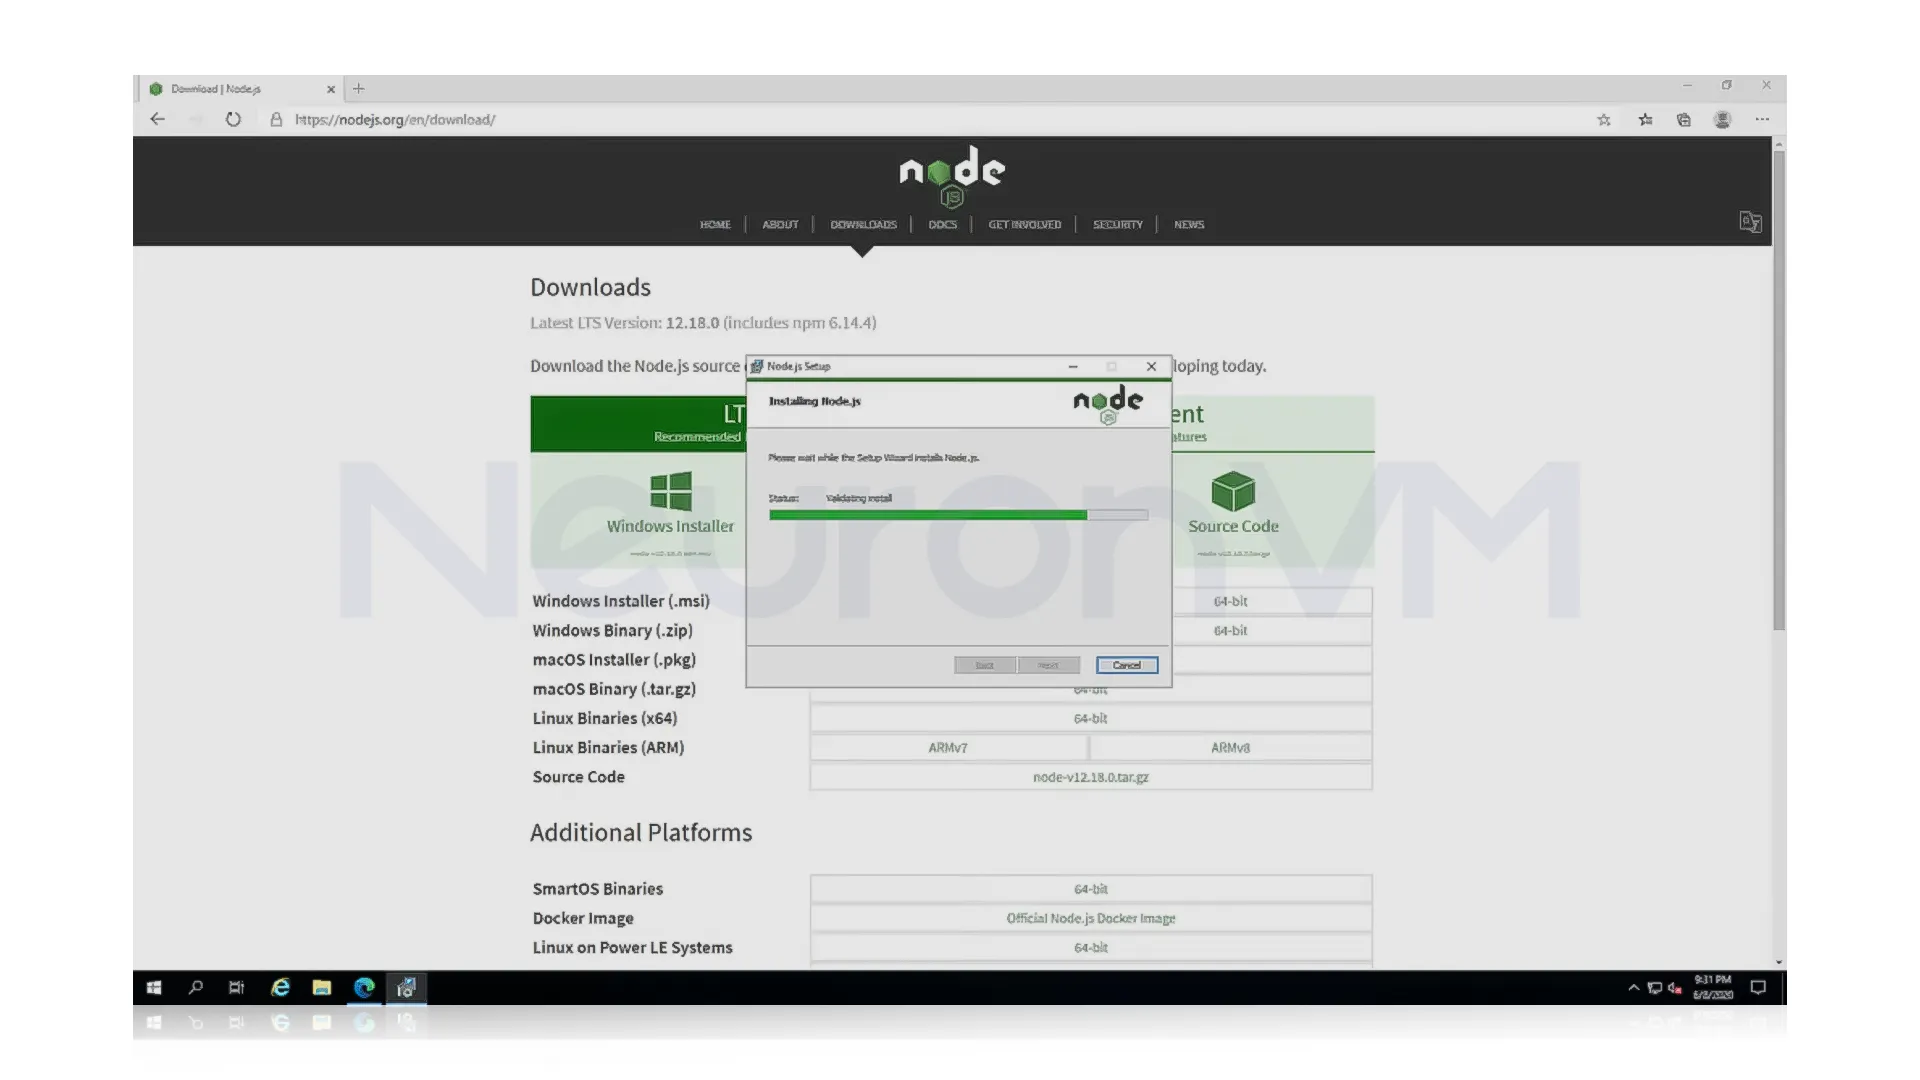
Once the installation is finished, the installer will let you know and ask you to click the finish button to close the setup.

Verify the Installation
Node.js is now installed, to make sure it worked, you can quickly check by running a simple command, first open the command prompt by pressing the Windows key, typing in CMD, and hitting Enter, then you need to type the command below and press Enter.
C:\Users\Administrator>node -v
When you install Node.js on Windows, it also comes with NPM, which is Node package, to check that you can install packages, try running this command in the command prompt.
C:\Users\Administrator>npm install -g react
And that’s all, with Node.js and NPM set up, you are ready to start building and running Node.js applications.
Why should you install Node.js on Windows?
Installing Node.js on Windows is a good idea, especially if you are learning web development or building apps using JavaScript, it is very easy to set up on Windows because there is a simple installer that does most of the work for you and you don’t need to use complicated commands, one of the best parts about Node.js is that you can use the same language for both front and back parts of your website, it also comes with NPM, which lets you quickly add extra tools and features to your projects, if you use Windows as your main computer, installing Node.js lets you build and test apps right on your PC, Node.js has a big community so you can find any help and guides easily if you get stuck.
Conclusion
Keeping your Node.js server running all the time on Windows is super helpful, especially if you are building web apps or testing projects that need to stay active, in this guide, we showed you simple steps to install Node.js and check that it’s working properly on your Windows computer.