How to Install WinPE ISO on Windows 11

 6m
6m
 0 comments
Why is it important to learn How to install WinPE ISO on Windows 11? For both consumers and IT professionals, installing and configuring several operating systems and tools is an ability, especially in technical and professional environments. One useful tool in this field is WinPE, which allows users to install, debug, and repair Windows systems in a small, lightweight package. In this post, we defined WindowPE and talked through the steps on how to install WinPE ISO on Windows 11. So read this article to the end!
What is Windows PE?
WinPE is a slim and light version of Windows that is ideal for environments that don’t need stability and is mainly intended for deployment and recovery operations. In addition to starting a new installation of Windows on workstations and servers, WinPE is also used to debug and fix unbootable systems or recover data, and it also provides a platform for hard disk preparation and Windows image installation. Through a network, WinPE can be used to remotely install and manage Windows systems. Users can also automate tasks during the deployment or recovery process by adding custom scripts or apps.

Setup WinPE ISO on Windows 11
Follow the steps below to install WinPE ISO on Windows 11:
Step 1: Download and set Windows ADK & Windows PE
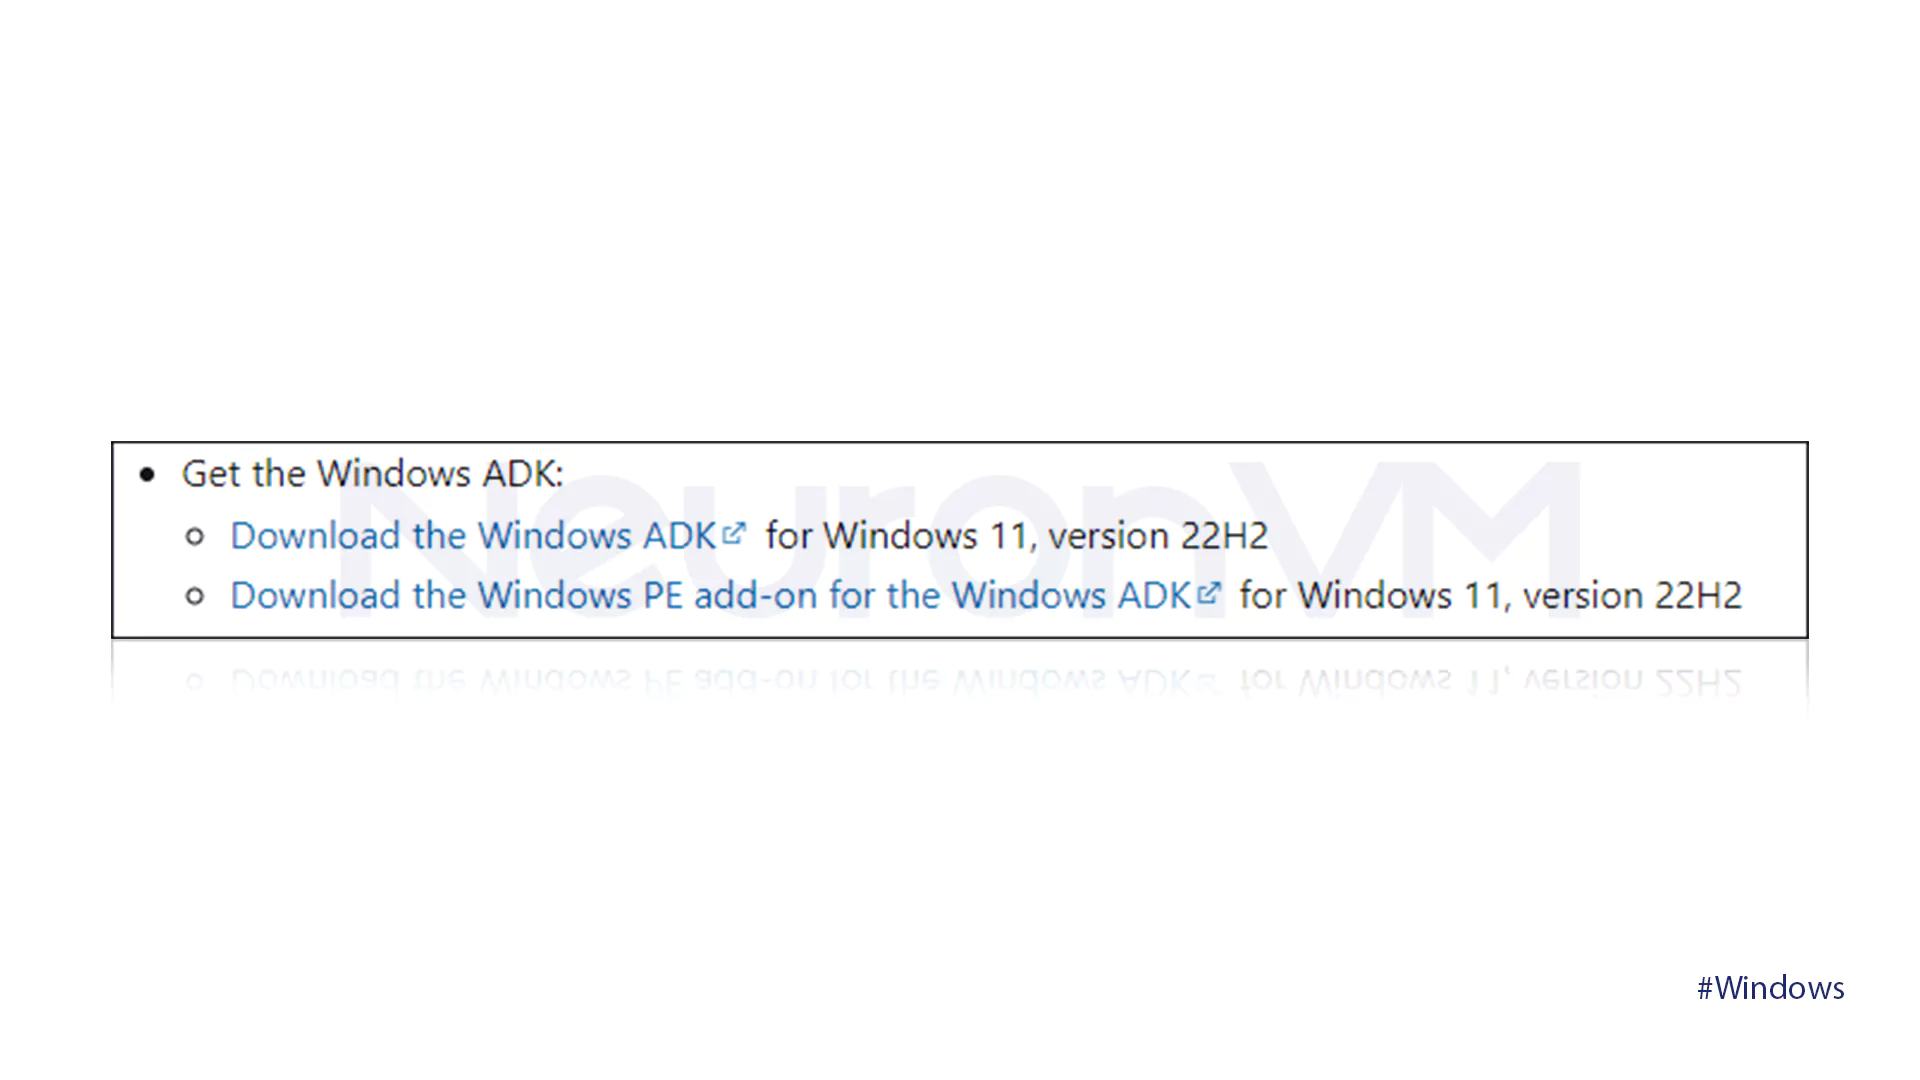
- Go to Microsoft’s official website and download Windows ADK & Windows PE.
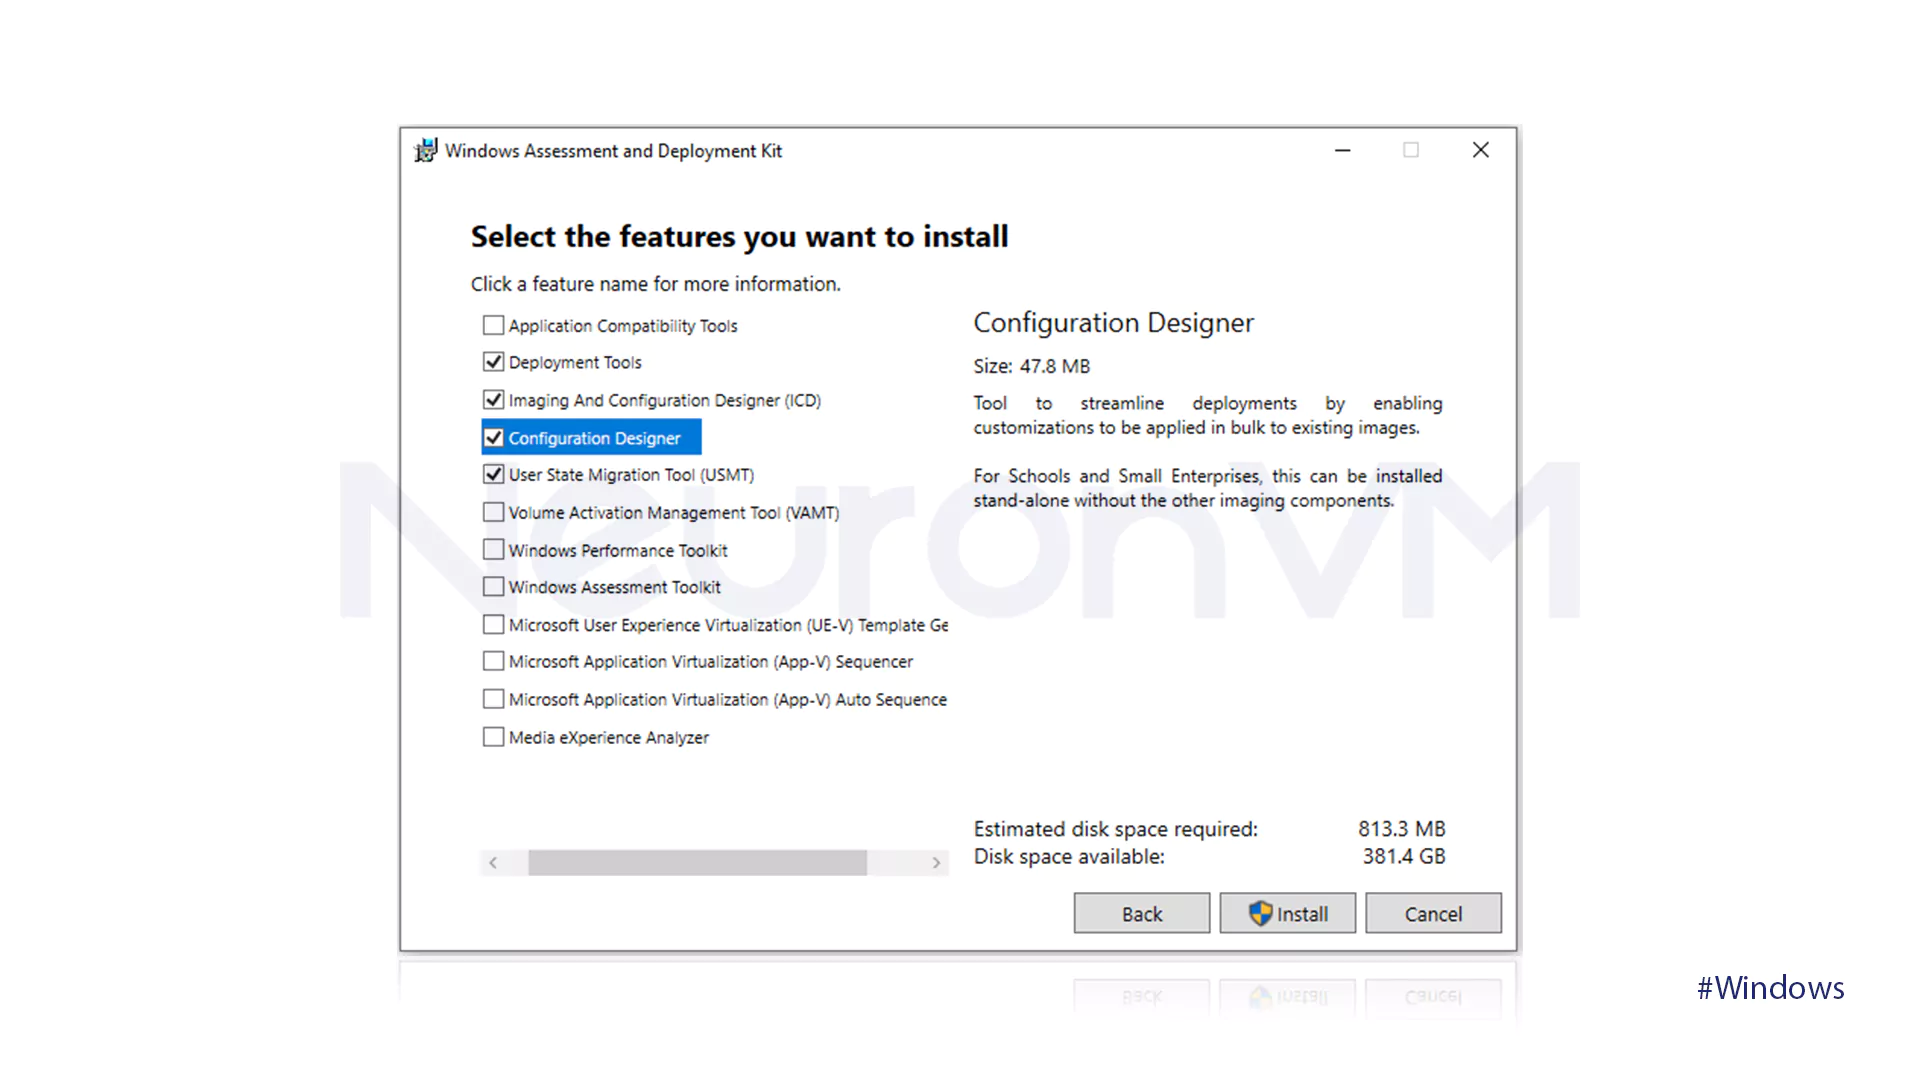
- Locate the adksetup.exe file and double-click.
- Click Next after selecting for installation.

- Click the Install button after selecting the features you require.

Step 2: Setup a Bootable WinPE USB Drive
- Open PowerShell.
- Connect a USB Drive to your computer.
- Type the command below to set a bootable WinPE USB:
copy amd64 C:\WinPE_amd64
MakeWinPEMedia /UFD C:\WinPE_amd64 X:
Step 3: Create a partition
- To store Windows 11 installation files, make a new partition on your hard drive.
- Assuming the new partition is designated “O”, mount the Windows 11 ISO and move all of its contents there.
- On your C: drive, create a blank folder and call it My Name Drive.
Step 4: Start the WinPE USB
- Restart your computer.
- Start the WinPE USB.
- Open a Command Prompt in the Windows PE environment.
Step 5: Utilize Diskpart to Configure Drive
- Type the command and hit Enter.
diskpart
- To find your partitions, use list volume.
- Use the command below to select the new partition:
select volume O
- Type the command below to choose a mount point:
assign mount="H:\My Mounted Drive"
Step 6: Activate the Windows 11 Installation
- To access your mounted, change the directory:
H:
cd My Mounted Drive
- Type the following to begin the installation:
setup
- By following the instructions, use the partitions of your choice to install Windows 11.
Conclusion
Users who use WinPE and are proficient in it are better equipped to face the obstacles created when working with Windows 11. This tool may be very useful when the operating system needs to be reinstalled or crashed. Users and IT professionals can improve system management with WinPE, a powerful pre-installation environment for installing, debugging, and fixing operating systems. We hope this post improves your understanding of how to install WinPE ISO and how to use it.
You might like it


