How to Install VNC on Ubuntu (18.04, 20.04, 22.04) – Full Setup Guide


 13m
13m
 0 comments
 Print
Print
Remote access is now a requirement in today’s networked world. From managing servers to providing technical support or simply accessing your desktop remotely, Virtual Network Computing (VNC) is a flexible and powerful solution. Ubuntu, being widely used in so many different environments, is a prime candidate for VNC use. This post offers a step-by-step guide to installing and setting up VNC on every version of Ubuntu, providing you with hassle-free remote desktop access regardless of your particular distribution.
Steps to Install VNC on Ubuntu
To install VNC on Ubuntu, follow the steps below:
Prerequisites
- Ubuntu Server
– Requires a server running Ubuntu
– Non-root administrative user
– Firewall configured with UFW
- Remote Access
– Local computer with a VNC client installed
– Supports SSH tunnels
- Recommended Software
– Windows: TightVNC, RealVNC, UltraVNC
– macOS: Screen Sharing, RealVNC
– Linux: vinagre, krdc, Real VNC, TightVNC

Step One: Install
Even though Ubuntu servers are typically command-line only, you can also install a graphical user interface by adding both a desktop environment and a VNC server. Add Xfce and TightVNC to your Ubuntu server for a good remote GUI experience, even with limited bandwidth.
- Once your SSH connection, ensure your package list is up to date:
sudo apt update
- Installing the Xfce desktop and some useful extras involves installing Xfce and the xfce4-goodies package:
sudo apt install xfce4 xfce4-goodies
For VNC, the display manager is not important; choose one and move on.
- Once you’ve finished installing Xfce, you can install the TightVNC server:
sudo apt install tightvncserver
- To set up your VNC password, create config files, and launch the VNC server, run the vncserver command:
vncserver
- You’ll be prompted to enter and re-enter a password to use for remote access:
Output
You will require a password to access your desktops.

Password:
Verify:
Use a 6-8-character password. A view-only option exists.
- VNC sets up config, starts on port 5901 (display: 1), and may have multiple running on consecutive ports:
Output
Would you like to enter a view-only password (y/n)? n
xauth: file /home/sammy/.Xauthority does not exist

New 'X' desktop is your_hostname:1

Creating default startup script /home/sammy/.vnc/xstartup
Starting applications specified in /home/sammy/.vnc/xstartup
Log file is /home/sammy/.vnc/your_hostname:1.log
- To change your VNC password or set up a view-only password, use the vncpasswd command:
vncpasswd
Step Two: Configure
To enable the VNC server to launch Xfce, you must change its startup commands. They are located in the startup file in the .vnc directory of your home directory.
Modify startup to instruct VNC to use the Xfce desktop.
- You need to first shut down any running VNC server on port 5901 to be able to make modifications to the configuration:
vncserver -kill :1
- Although the output format will be identical to the example given, the actual PID will be different each time you run it:
Output
Killing Xtightvnc process ID 17648
- Make a backup of the startup file before editing it:
mv ~/.vnc/xstartup ~/.vnc/xstartup.bak
- At this point, you will want to create a new file named startup using a text editor. We recommend nano:
nano ~/.vnc/xstartup
- You should now copy and paste the following lines into the open file:
#!/bin/bash
xrdb $HOME/.Xresources
startxfce4 &
The shebang (#!) instructs *nix systems to run the script’s commands in Bash, one line at a time.
The script imports user’s.Xresource settings (GUI configurations) and initiates the Xfce desktop session at VNC server boot-up.
- To save and exit the file, press Ctrl+X, Y, and Enter (in case of nano).
- The startup file must be made executable so the VNC server will run properly:
chmod +x ~/.vnc/xstartup
- Restart the VNC server:
vncserver -localhost
-localhost causes VNC to bind to the loopback and will accept only local connections.
SSH tunneling secures VNC, leveraging current SSH access.
Step Three: Connect
To secure your VNC session, which isn’t encrypted by default, you’ll establish an SSH tunnel and then connect your VNC client through it.
- Send VNC forward securely with this SSH command:
ssh -L 59000:localhost:5901 -C -N -l sammy your_server_ip
An SSH tunnel for VNC is more secure than port 5901 because it limits access.
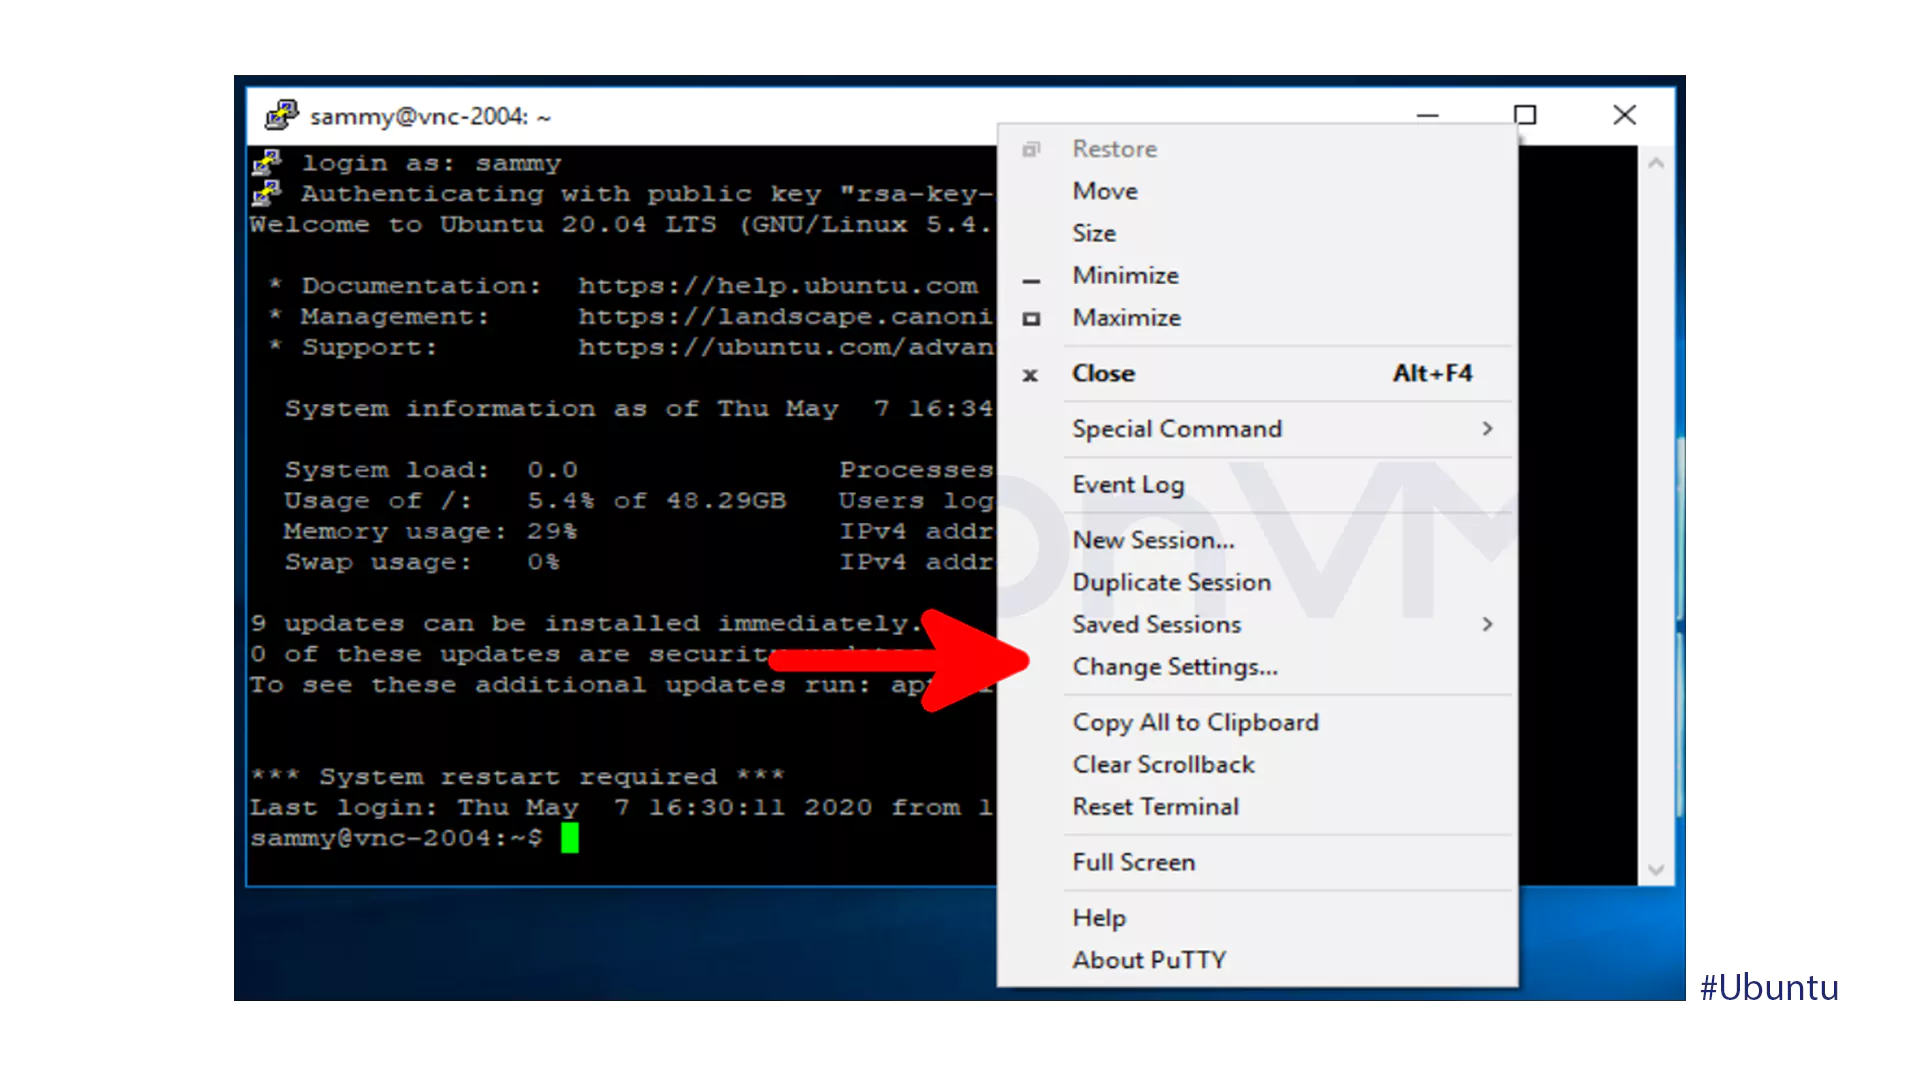
- SSH tunneling can be established with PuTTY by using the Change Settings… option, which can be accessed by right-clicking the top edge of the terminal window.
- In PuTTY’s Reconfiguration window, on Connection > SSH > Tunnels, enter Source Port and Destination localhost:5901:
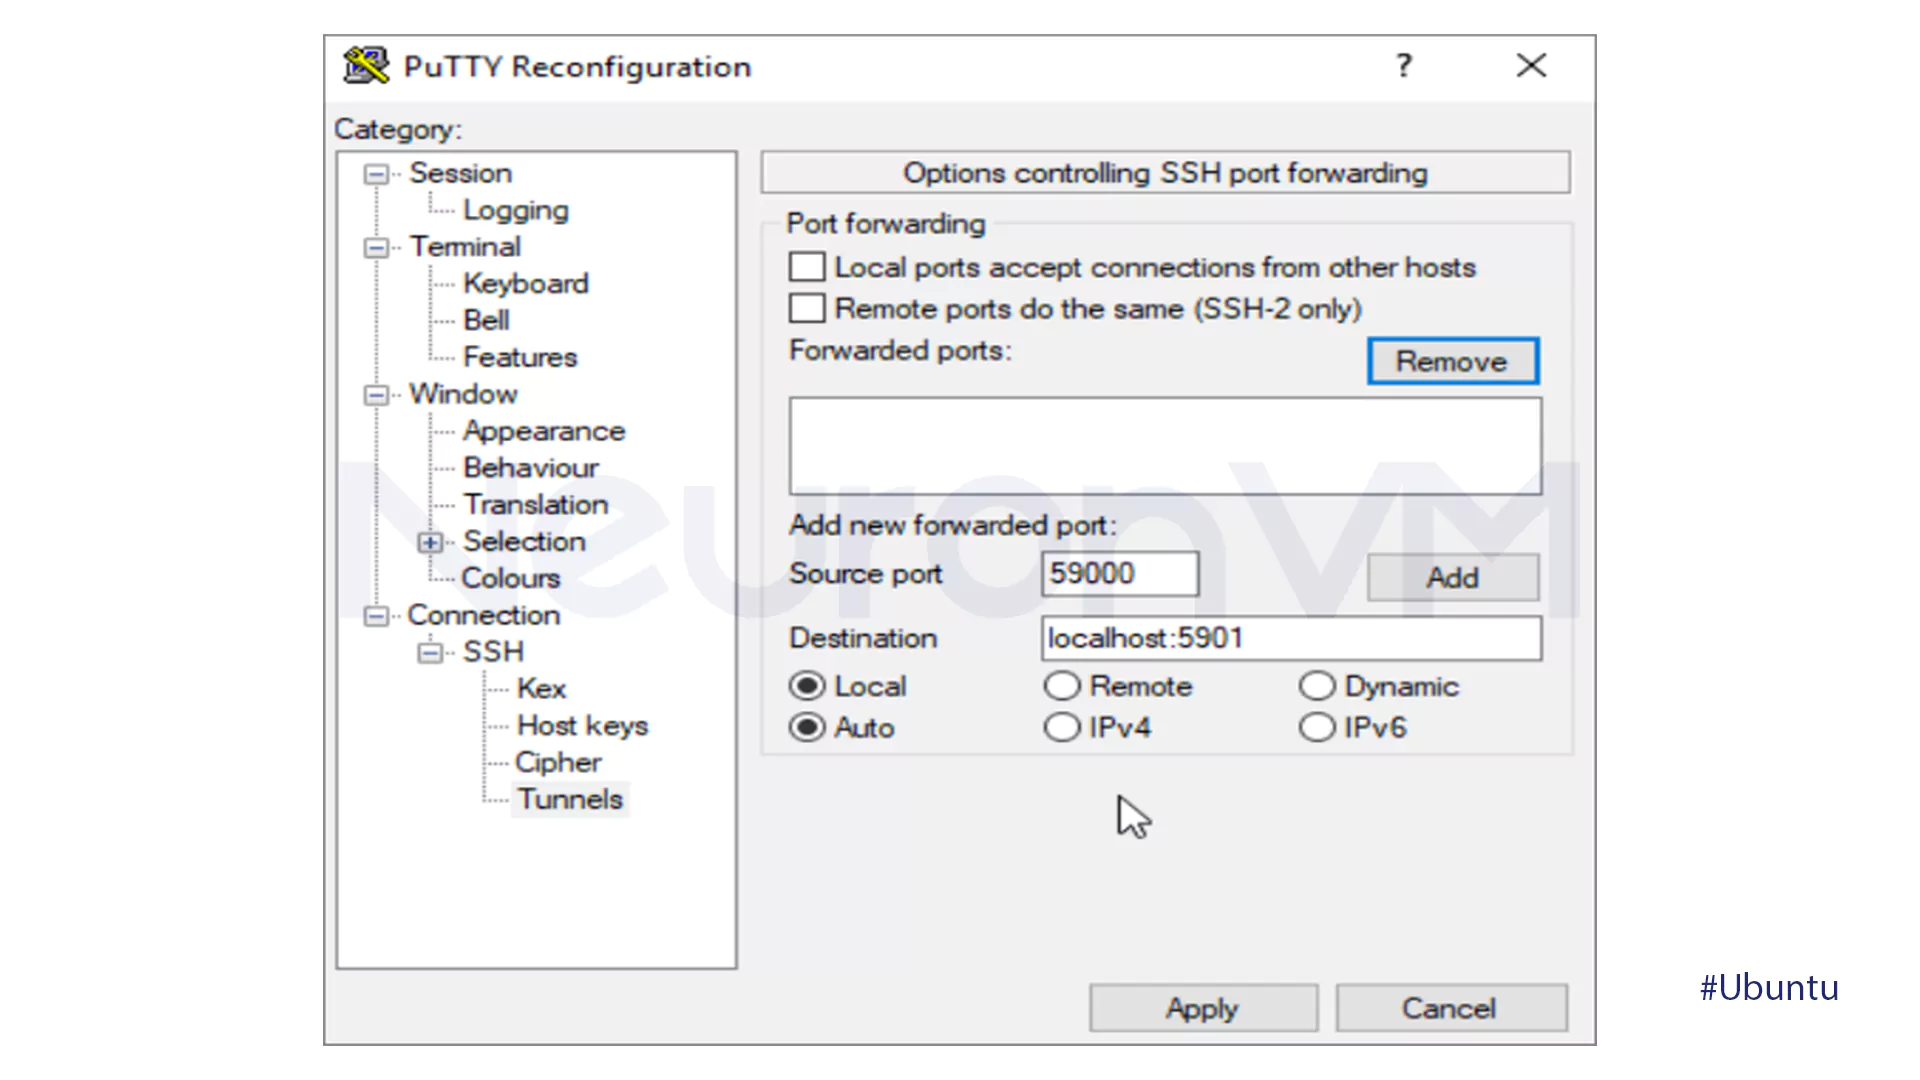
- To enable the tunnel, click the Add button, then the Apply button.
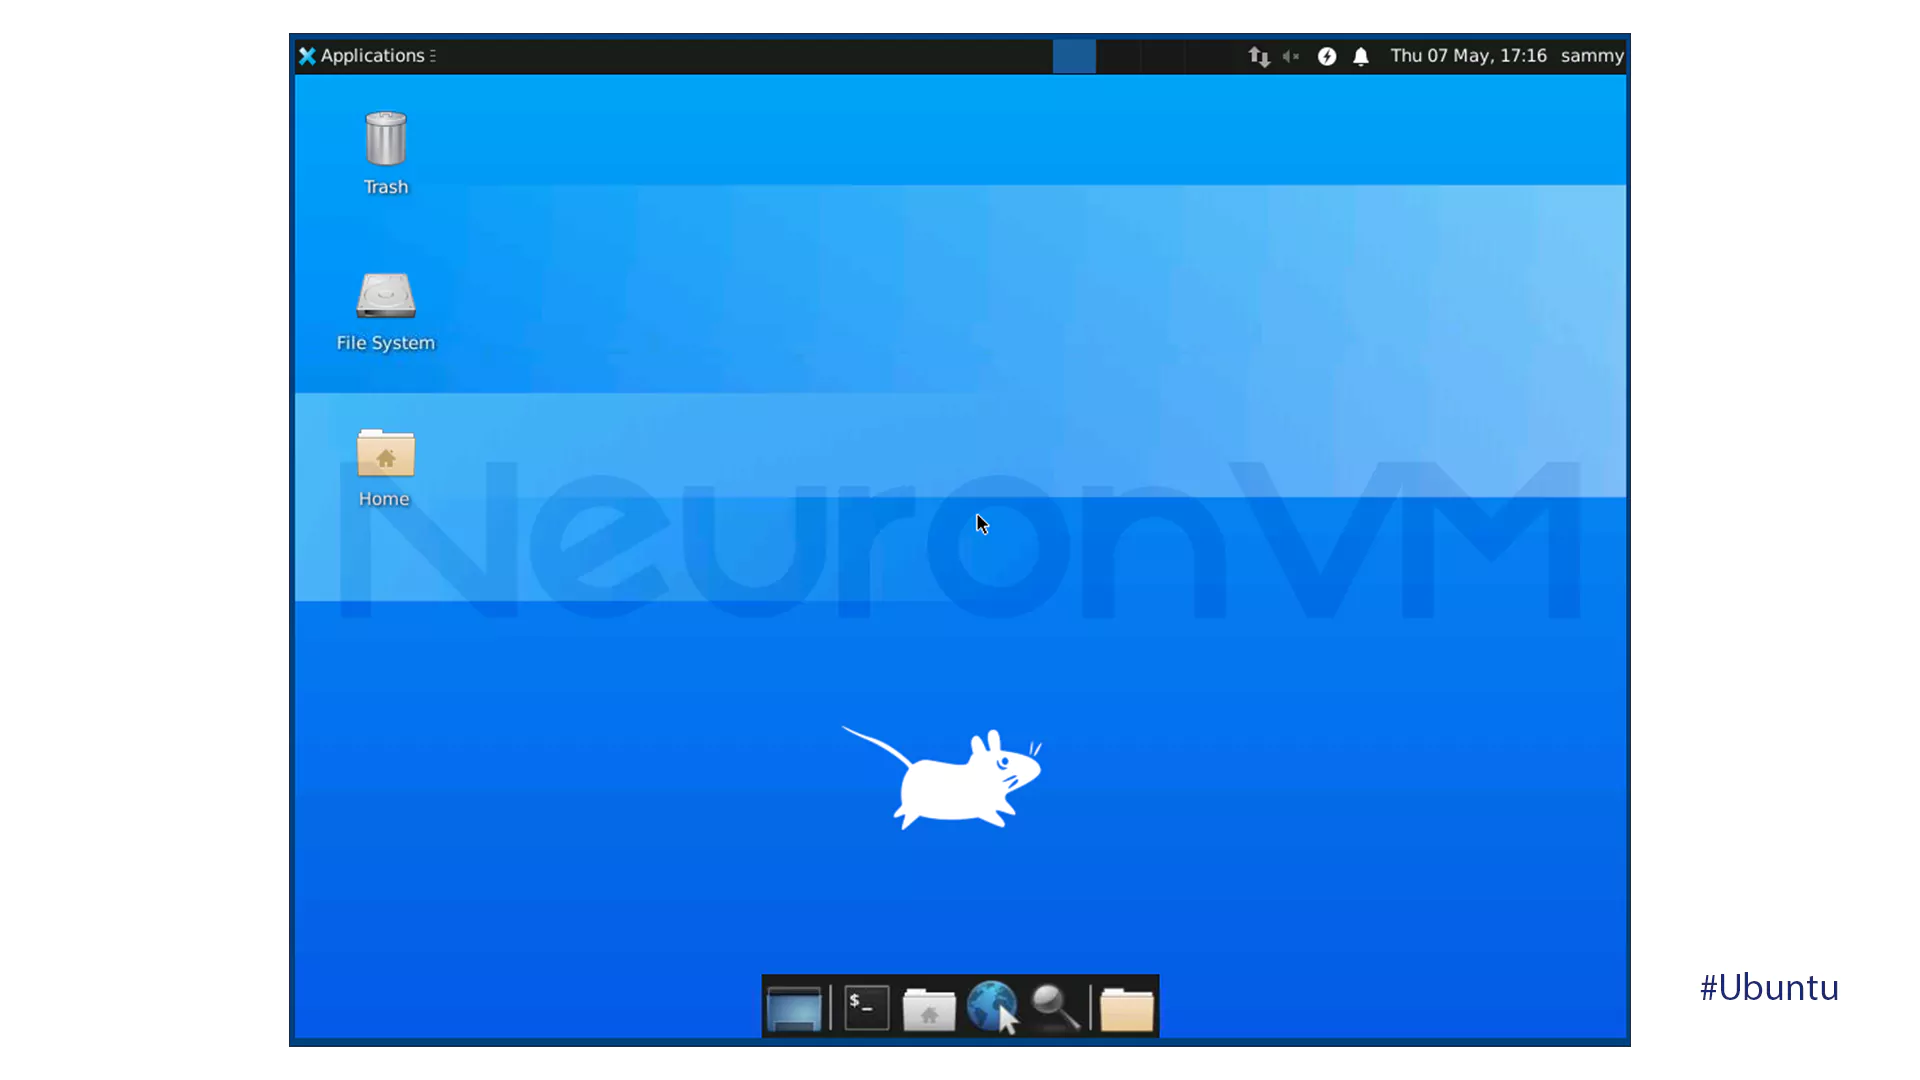
When the tunnel works, use your VNC client to connect to localhost:59000, and you will be prompted for your VNC password.
- Once connected, it will display the default Xfce desktop looking something like the following image:
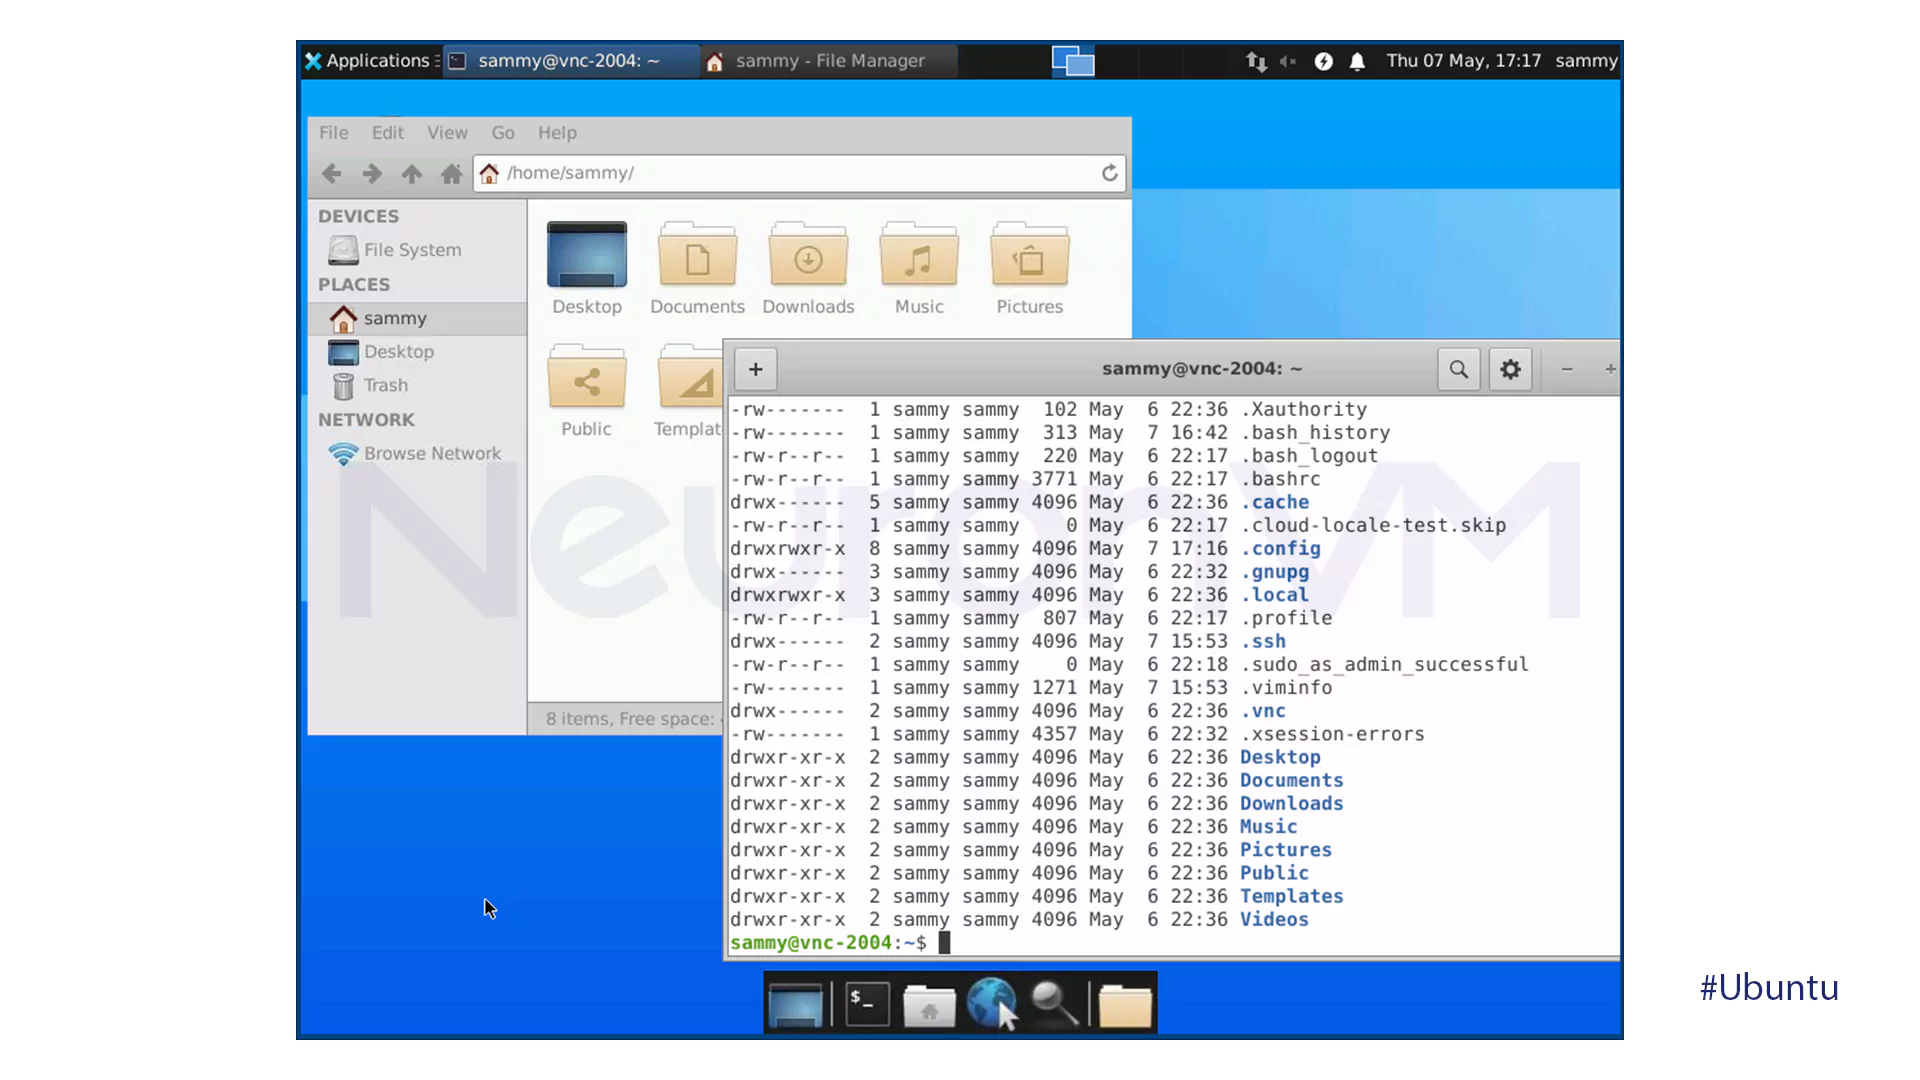
- You may access files in your home directory using either the file manager on the command line, as shown here:
- End the VNC session by closing the SSH tunnel with CTRL+C on your local terminal. You can proceed to install the VNC server as a systems service.
Step Four: Run
Setting up VNC as a system service simplifies service management and makes it start when the server is booting.
- To start with, you will have to install the following systems unit file: /etc/systemd/system/[email protected]:
sudo nano /etc/systemd/system/[email protected]
The @ character enables us to pass an argument, the VNC display port, when we run the service.
- Add the following lines to the file, and be sure to substitute the User, Group, workingDirectory, and PIDFILE username fields with your specific username:
/etc/systemd/system/[email protected]
[Unit]
Description=Start TightVNC server at startup
After=syslog.target network.target

[Service]
Type=forking
User=sammy
Group=sammy
WorkingDirectory=/home/sammy

PIDFile=/home/sammy/.vnc/%H:%i.pid
ExecStartPre=-/usr/bin/vncserver -kill :%i > /dev/null 2>&1
ExecStart=/usr/bin/vncserver -depth 24 -geometry 1280x800 -localhost :%i
ExecStop=/usr/bin/vncserver -kill :%i

[Install]
WantedBy=multi-user.target
ExecStart stops VNC, and ExecStart starts it with personalized settings and -localhost.
- Save and then exit the file.
- Restart systemd to recognize the new service:
sudo systemctl daemon-reload
- Turn on the unit file:
sudo systemctl enable [email protected]
The 1 following the @ indicates the display number, :1, configured previously in Step 2.
- Stop the running VNC server instance, if it is running.
vncserver -kill :1
- Go ahead and start the service using the normal systemd method:
sudo systemctl start vncserver@1
- To check it started, run this command:
sudo systemctl status vncserver@1
- The output should be something like this if it started okay:
Output
? [email protected] - Start TightVNC server at startup
Loaded: loaded (/etc/systemd/system/[email protected]; enabled; vendor preset: enabled)
Active: active (running) since Thu 2020-05-07 17:23:50 UTC; 6s ago
Process: 39768 ExecStartPre=/usr/bin/vncserver -kill :1 > /dev/null 2>&1 (code=exited, status=2)
Process: 39772 ExecStart=/usr/bin/vncserver -depth 24 -geometry 1280x800 :1 (code=exited, status=0/SUCCESS)
Main PID: 39795 (Xtightvnc)
...
The VNC server is now configured to start automatically upon boot and managed with normal systemctl commands.
- The client side is the same. To reconnect, establish your SSH tunnel again.
ssh -L 59000:localhost:5901 -C -N -l sammy your_server_ip
After establishing the tunnel, connect to localhost:59000 using your client.
What is VNC?
VNC stands for Virtual Network Computing and provides you with an easy, graphical means of managing remote servers so you can work on files and programs in the comfort of a familiar desktop environment, even if you are not proficient with command-line commands.

Conclusion
By following the steps in this tutorial, you’ve been able to install and configure VNC on your Ubuntu machine, enabling efficient remote desktop access. Whether you’re using the latest LTS release or an older one, the same principles apply, and it’s therefore possible to be flexible across the Ubuntu environment. Remember to stay secure by using strong passwords, SSH tunneling, and updating your system.