


How to Install MikroTik on VirtualBox

 13m
13m
 0 comments
 Print
Print
Introduction
MikroTik is a company that makes networking tools like routers and special software named RouterOS, this software helps with controlling internet traffic, creating secure connections, managing the network, and much more, on the other hand, VirtualBox is a free program that lets you run other operating systems on your computer, like therre is another computer inside of your computer which makes it a great choice for testing things without needing extra devices.
Knowing How to Install MikroTik on VirtualBox is a smart way for many people, such as students, tech learners, or anyone interested in networking, to practice and try things out without needing real router hardware, you can create your own virtual lab and learn how networking works, and test different setups safely, If you need something more stable and always online check out our MikroTik VPS plans !!!

Requirements
- VirtualBox installed
- MikroTik RouterOS ISO Image (Download it from their main website)
- RAM: at least 512 MB
- Disk Space: at least 2 GB
Step-by-Step Installation Guide
Here is the step-by-step guide for How to Install MikroTik on VirtualBox, follow these clear steps to easily install MikroTik on VirtualBox
Step 1: Create a Virtual Machine
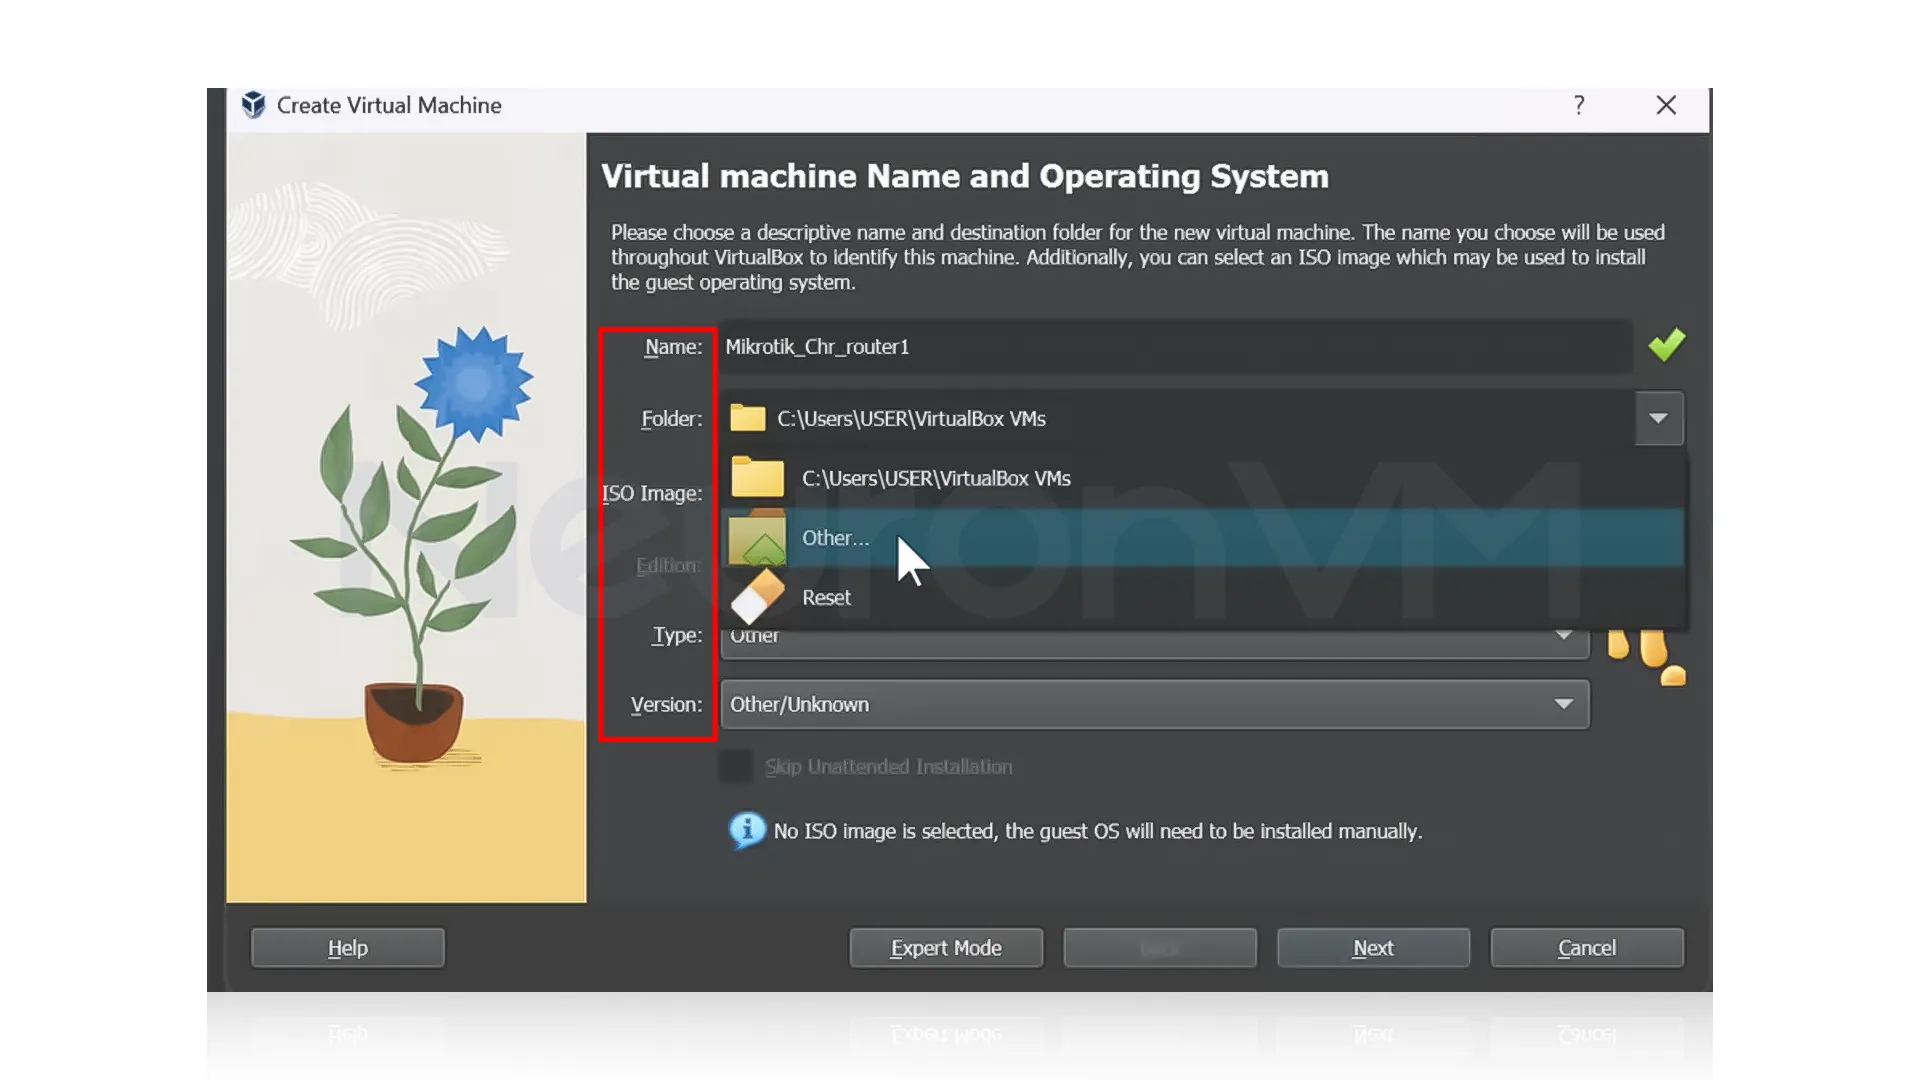
Open VirtualBox, click on New, or press and hold (Ctrl + N), then name your virtual machine something like “MikroTik_CHR_Router”, choose Type: Other, and Version: Other/Unknown (64-bit), then choose where to save the VM files if needed, then click Next.
 Step 2: Set RAM and CPU
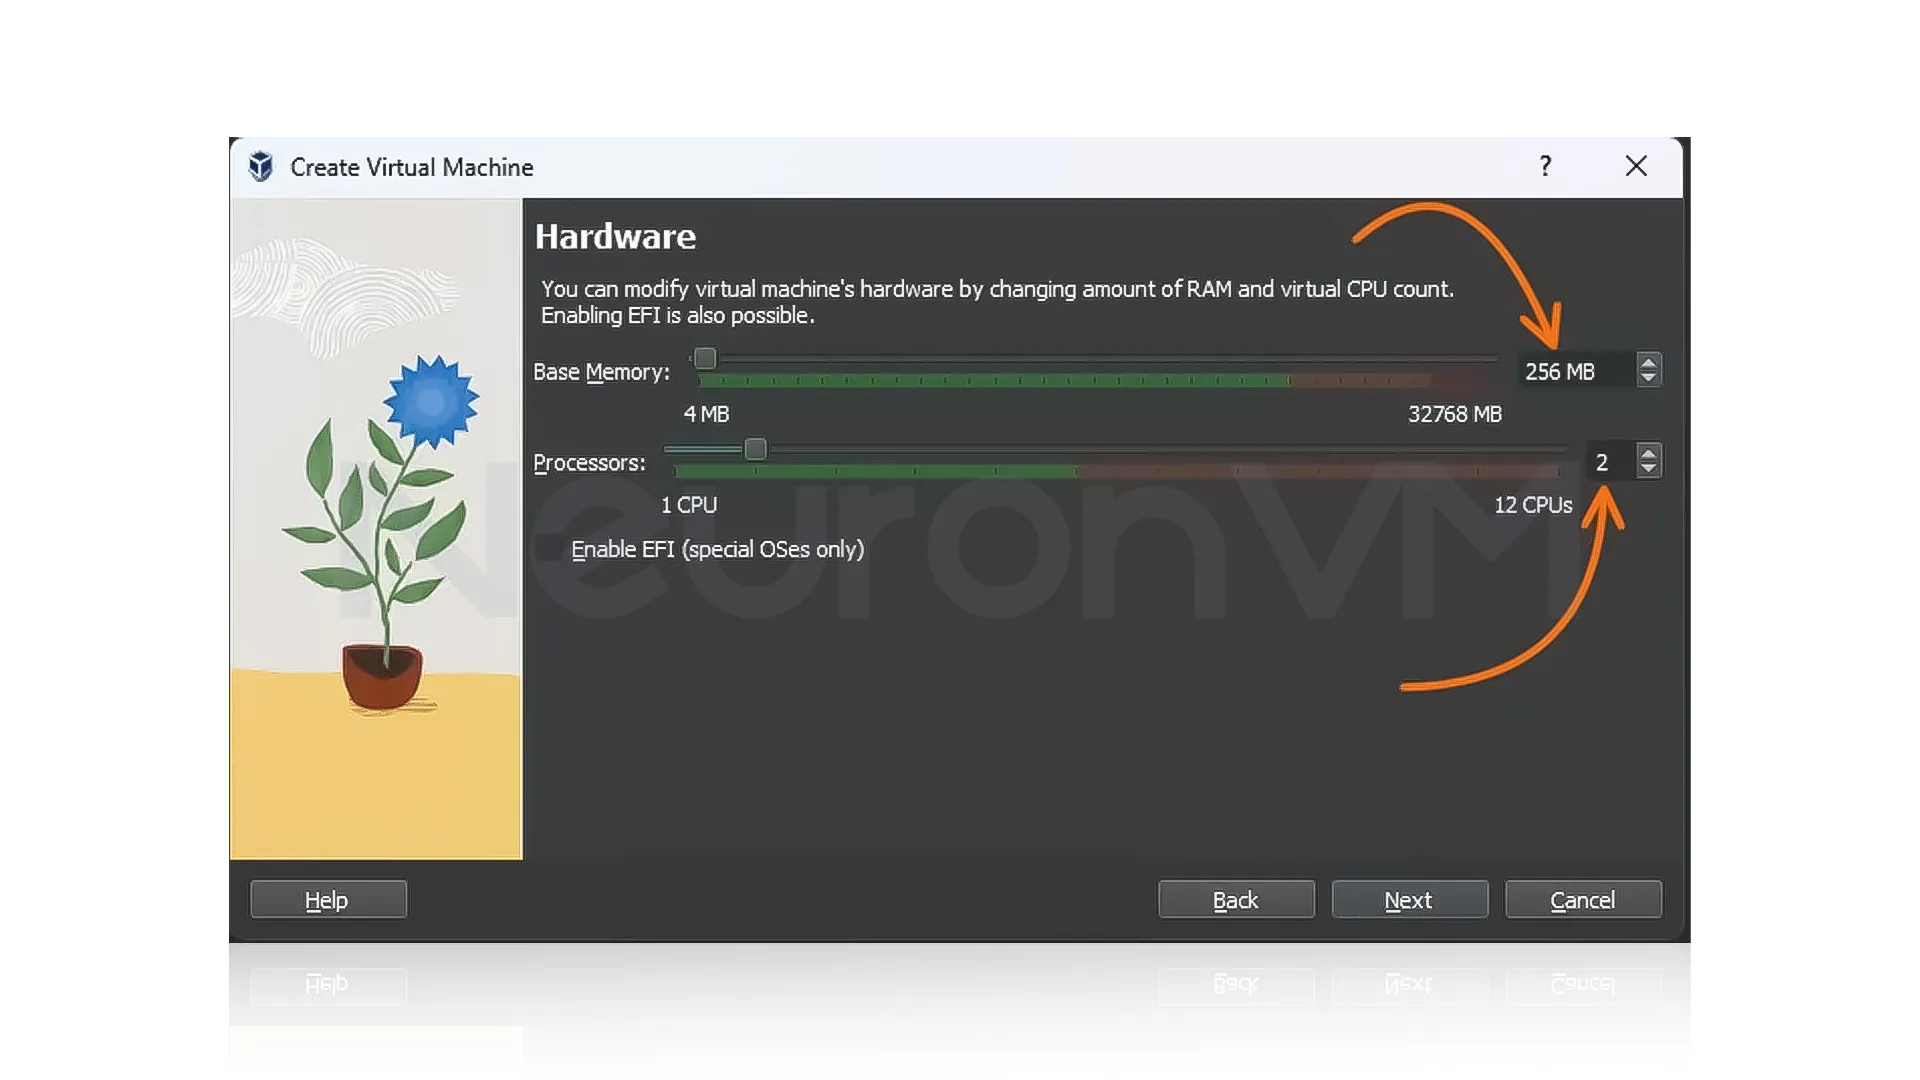
Next, you will decide how much memory and how many CPU cores to give the MikroTik virtual machine, at a minimum, assign 128 mb of RAM, for the CPU; 1 core is enough for basic tasks, but you can assign 2 cores if your system allows it for better responsiveness, once done click Next to continue.
 Step 3: Connect the MikroTik Hard Disk
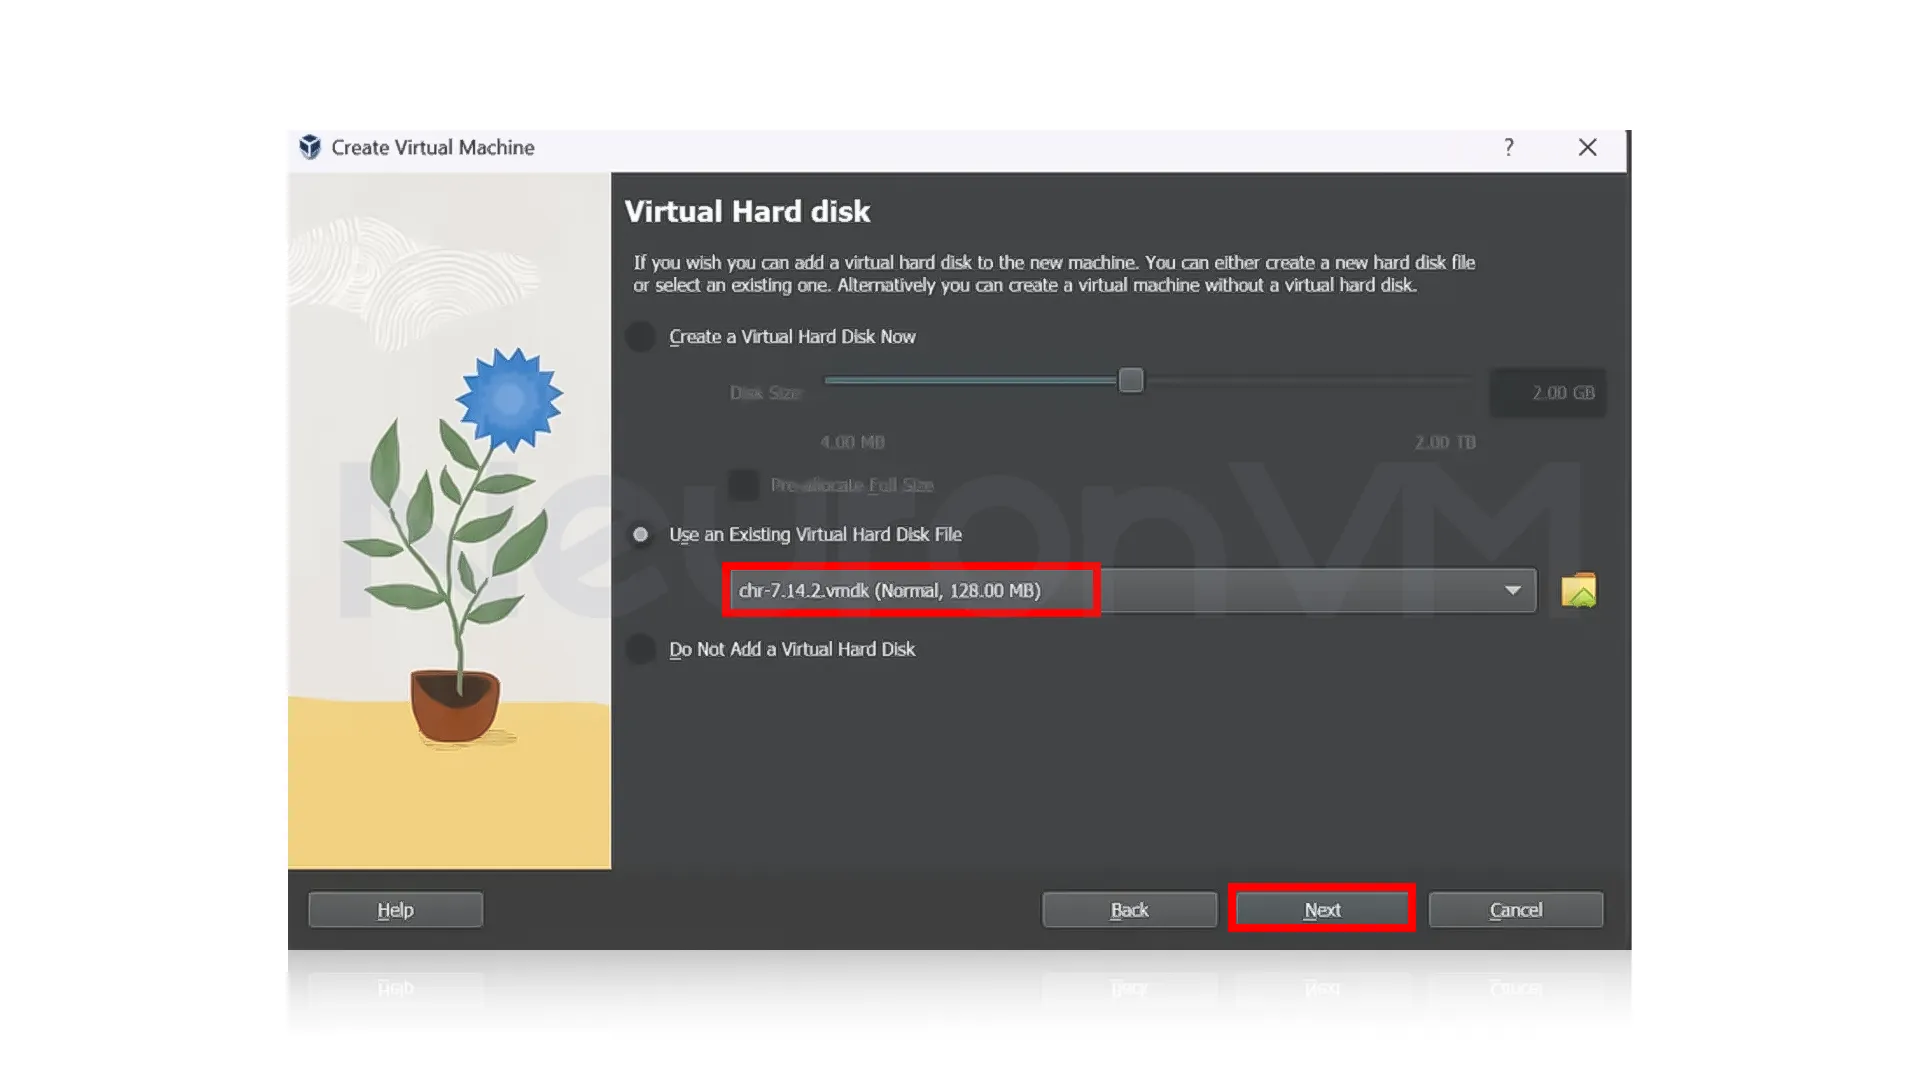
Now it’s time to connect the MikroTik disk image you downloaded earlier, on the hard disk screen, select “Use an existing virtual hard disk file”, then click the folder icon on the right side to open it.
![]() A screen will pop up that lets you choose a hard disk to add the VMDK file, click on the “Add” button, which will open a file explorer where you can find and select the VMDK file that you downloaded earlier, simply browse through your folders and click on it to select it.
A screen will pop up that lets you choose a hard disk to add the VMDK file, click on the “Add” button, which will open a file explorer where you can find and select the VMDK file that you downloaded earlier, simply browse through your folders and click on it to select it.
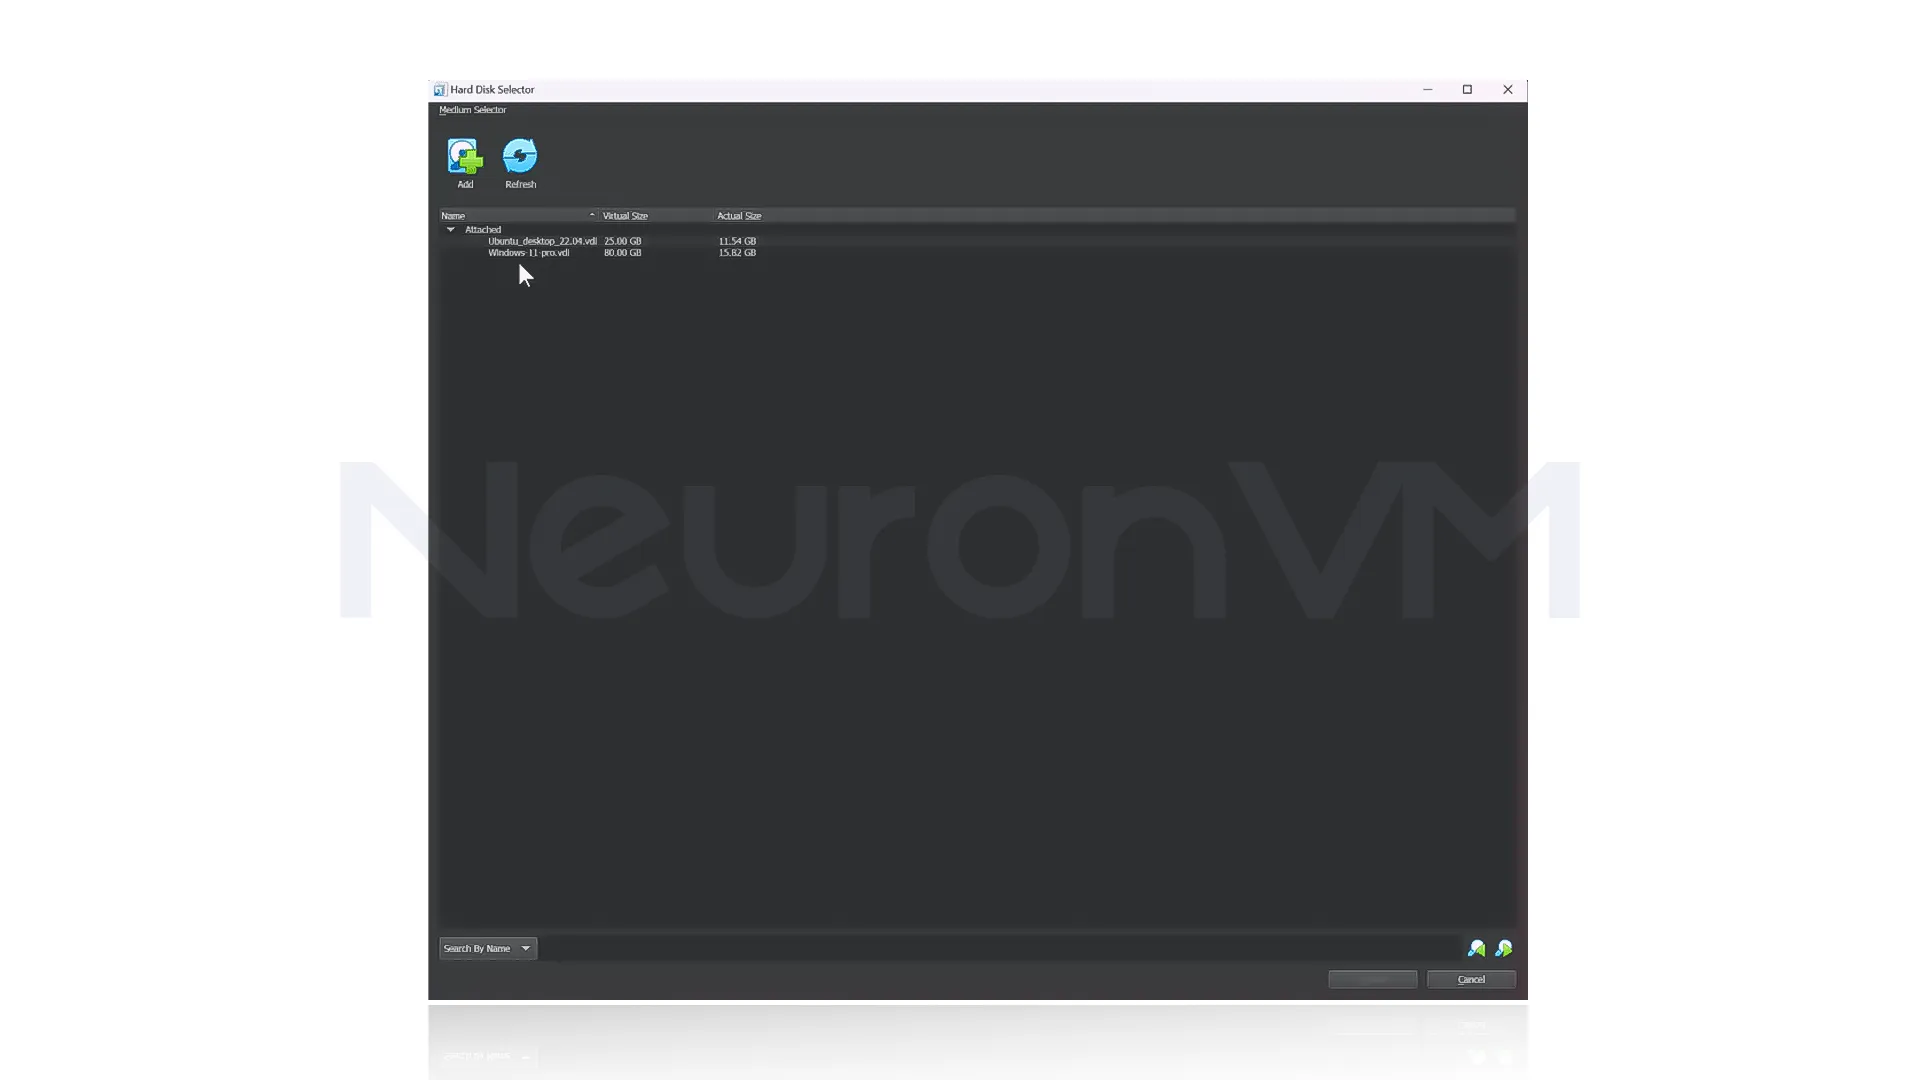 Once you’ve found the file, click on it to select it, which will add the file to the list, after adding the file, look for the VMDK file in the list that appears, When you see it, click on it to select it and then click the choose button to confirm your selection, this will ensure that the correct file is selected for the next step.
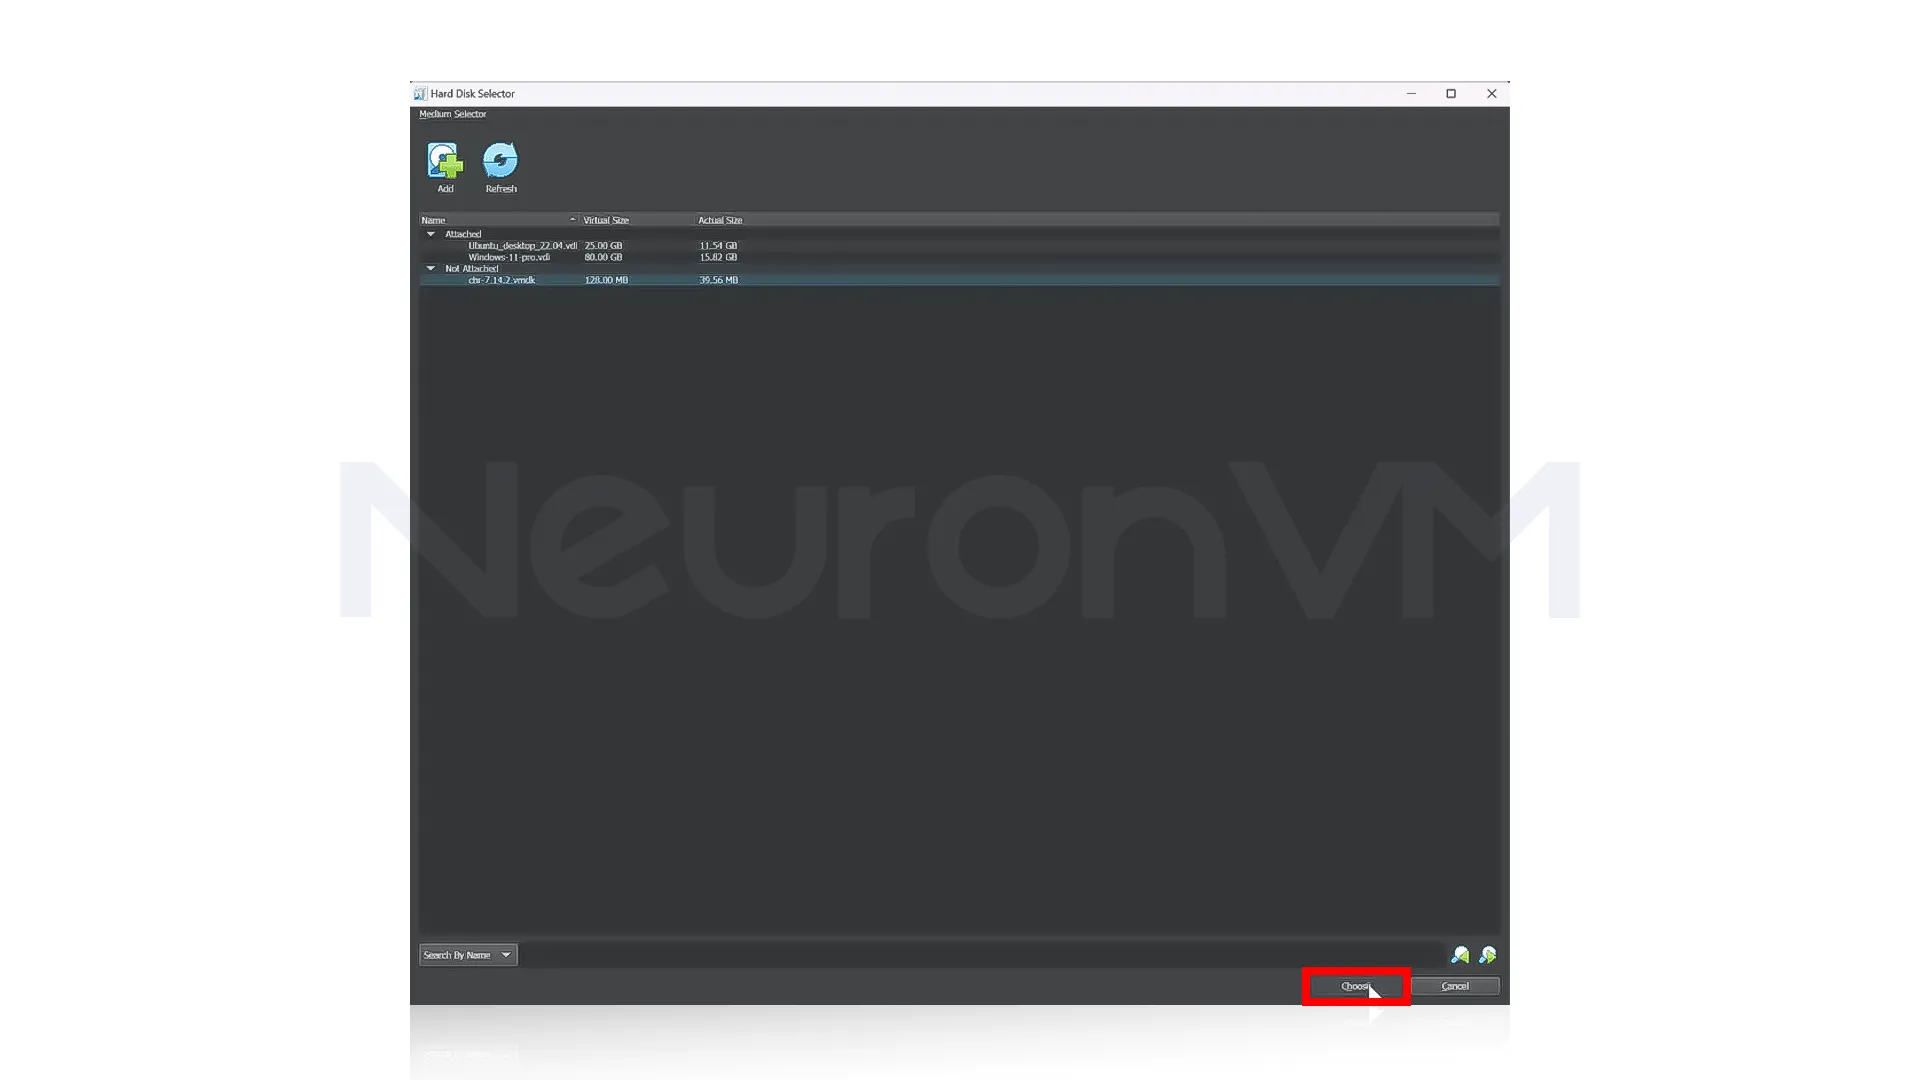
At this point, the VMDK file should be selected, once you confirm that it is the correct file, click on “Next” to continue.
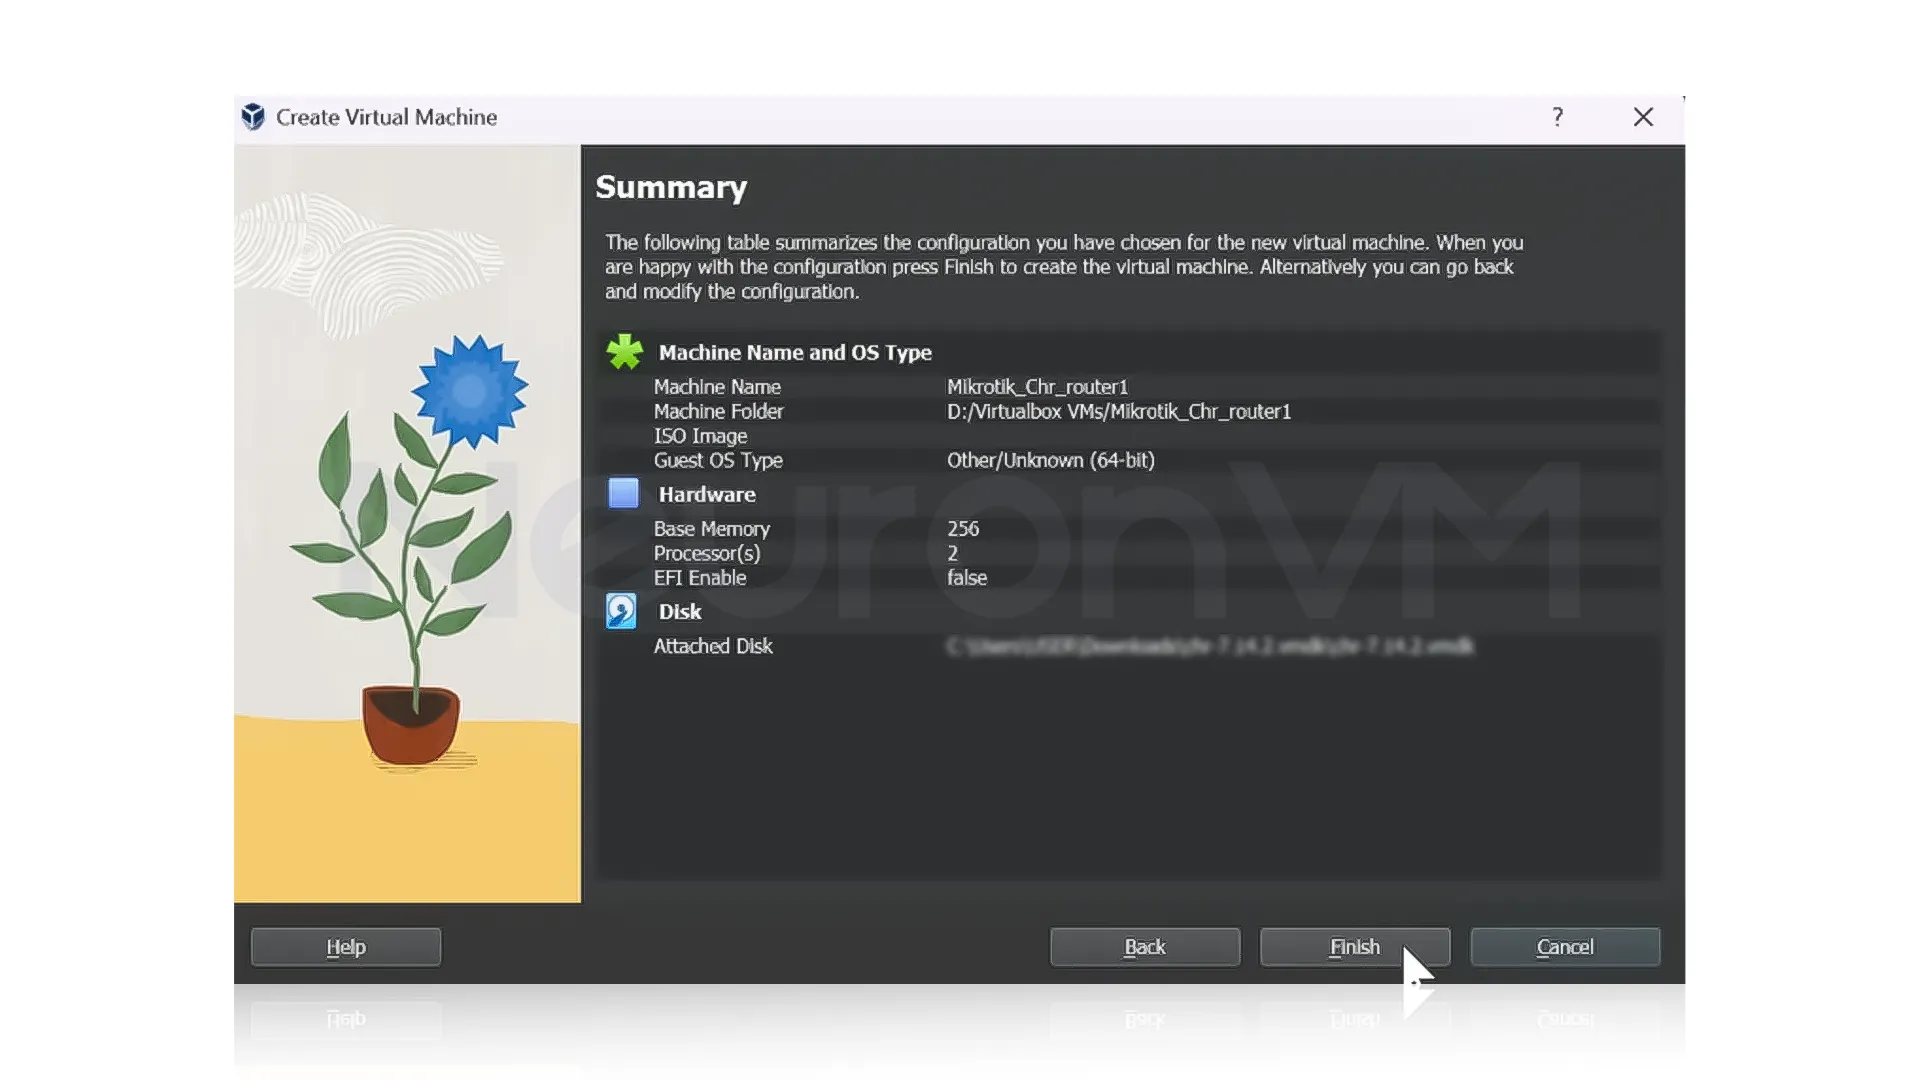
 Finally, a summary of the installation will appear, showing all the settings you’ve chosen, take a moment to double-check everything and make sure it’s all correct, if everything looks good, you have to click on the “Finish” button and complete the setup.
 Step 4: Adding a Network Adapter
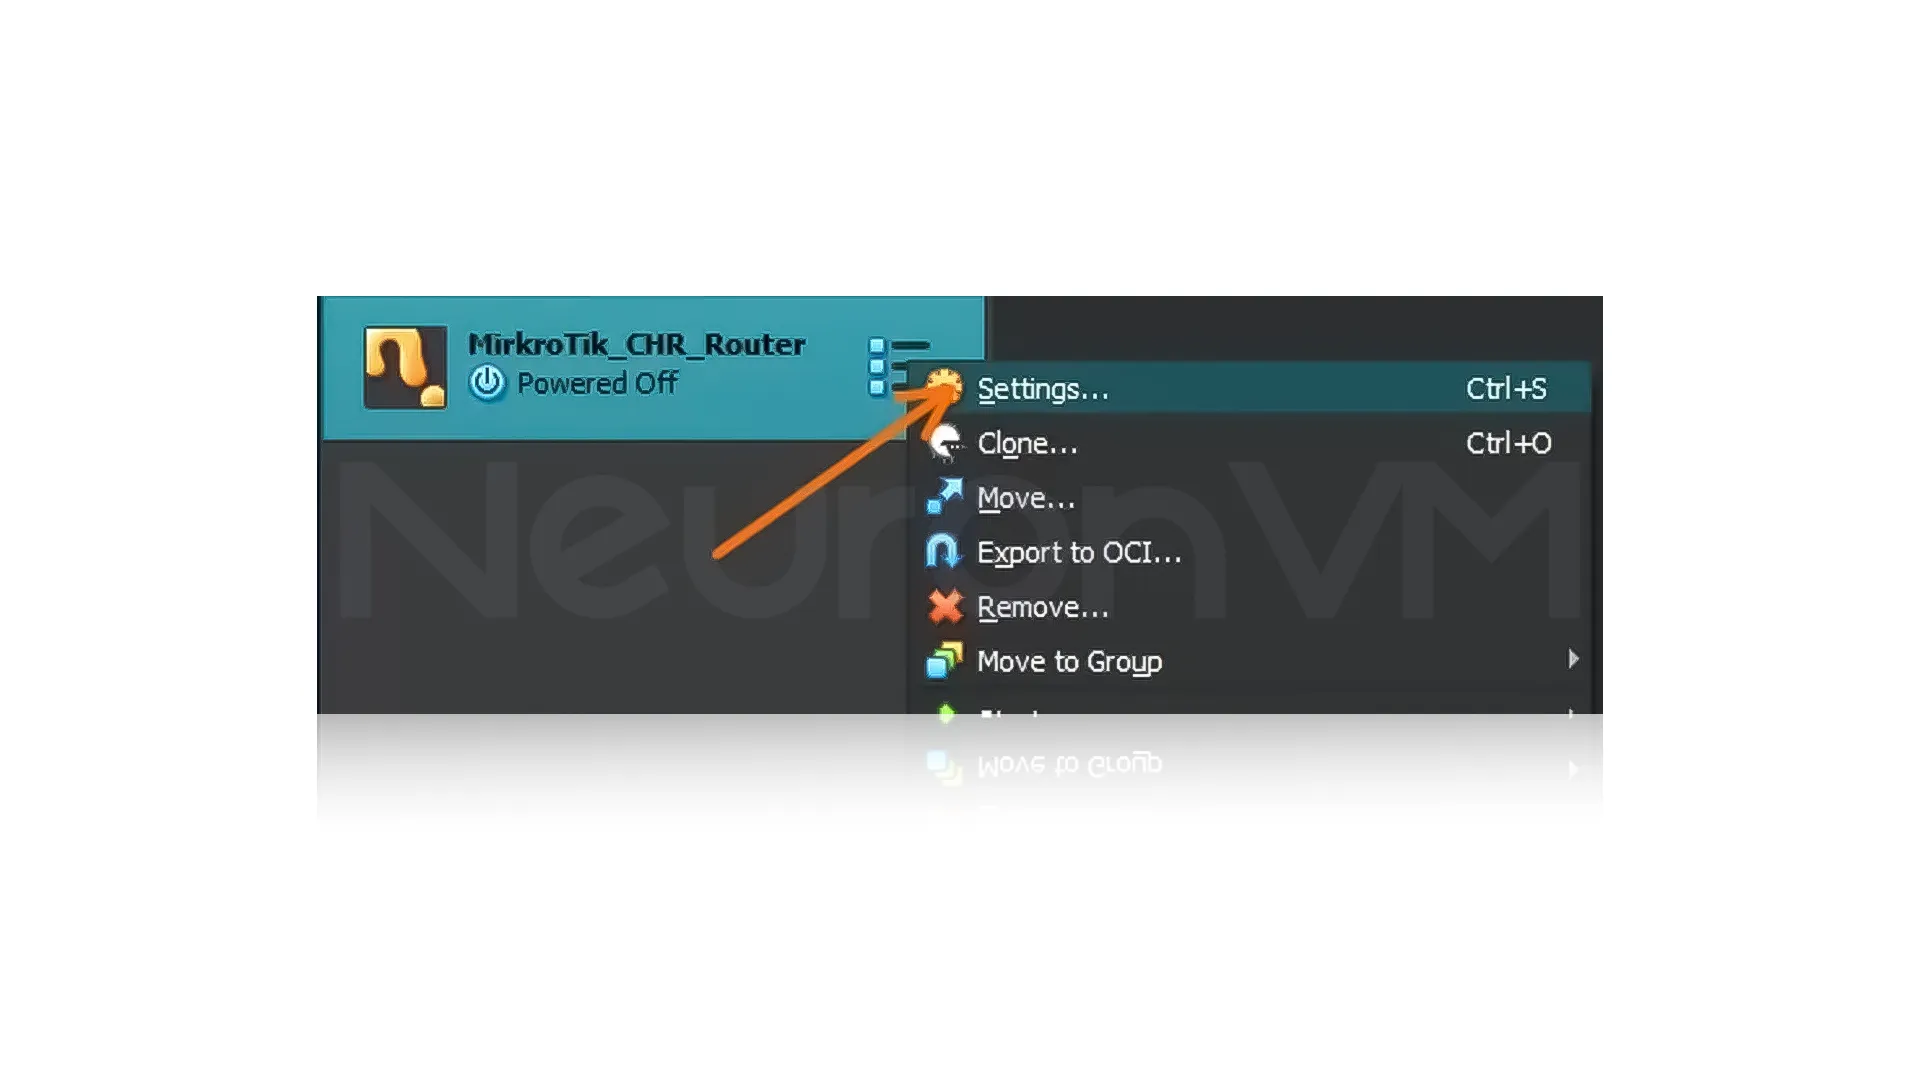
When you first install the MikroTik router, it comes with only one network adapter by default, but we need two adapters, one for the WAN connection and the other for the LAN connection, so we need to add it manually, to begin right click on virtual machine and select “Settings” from the menu.
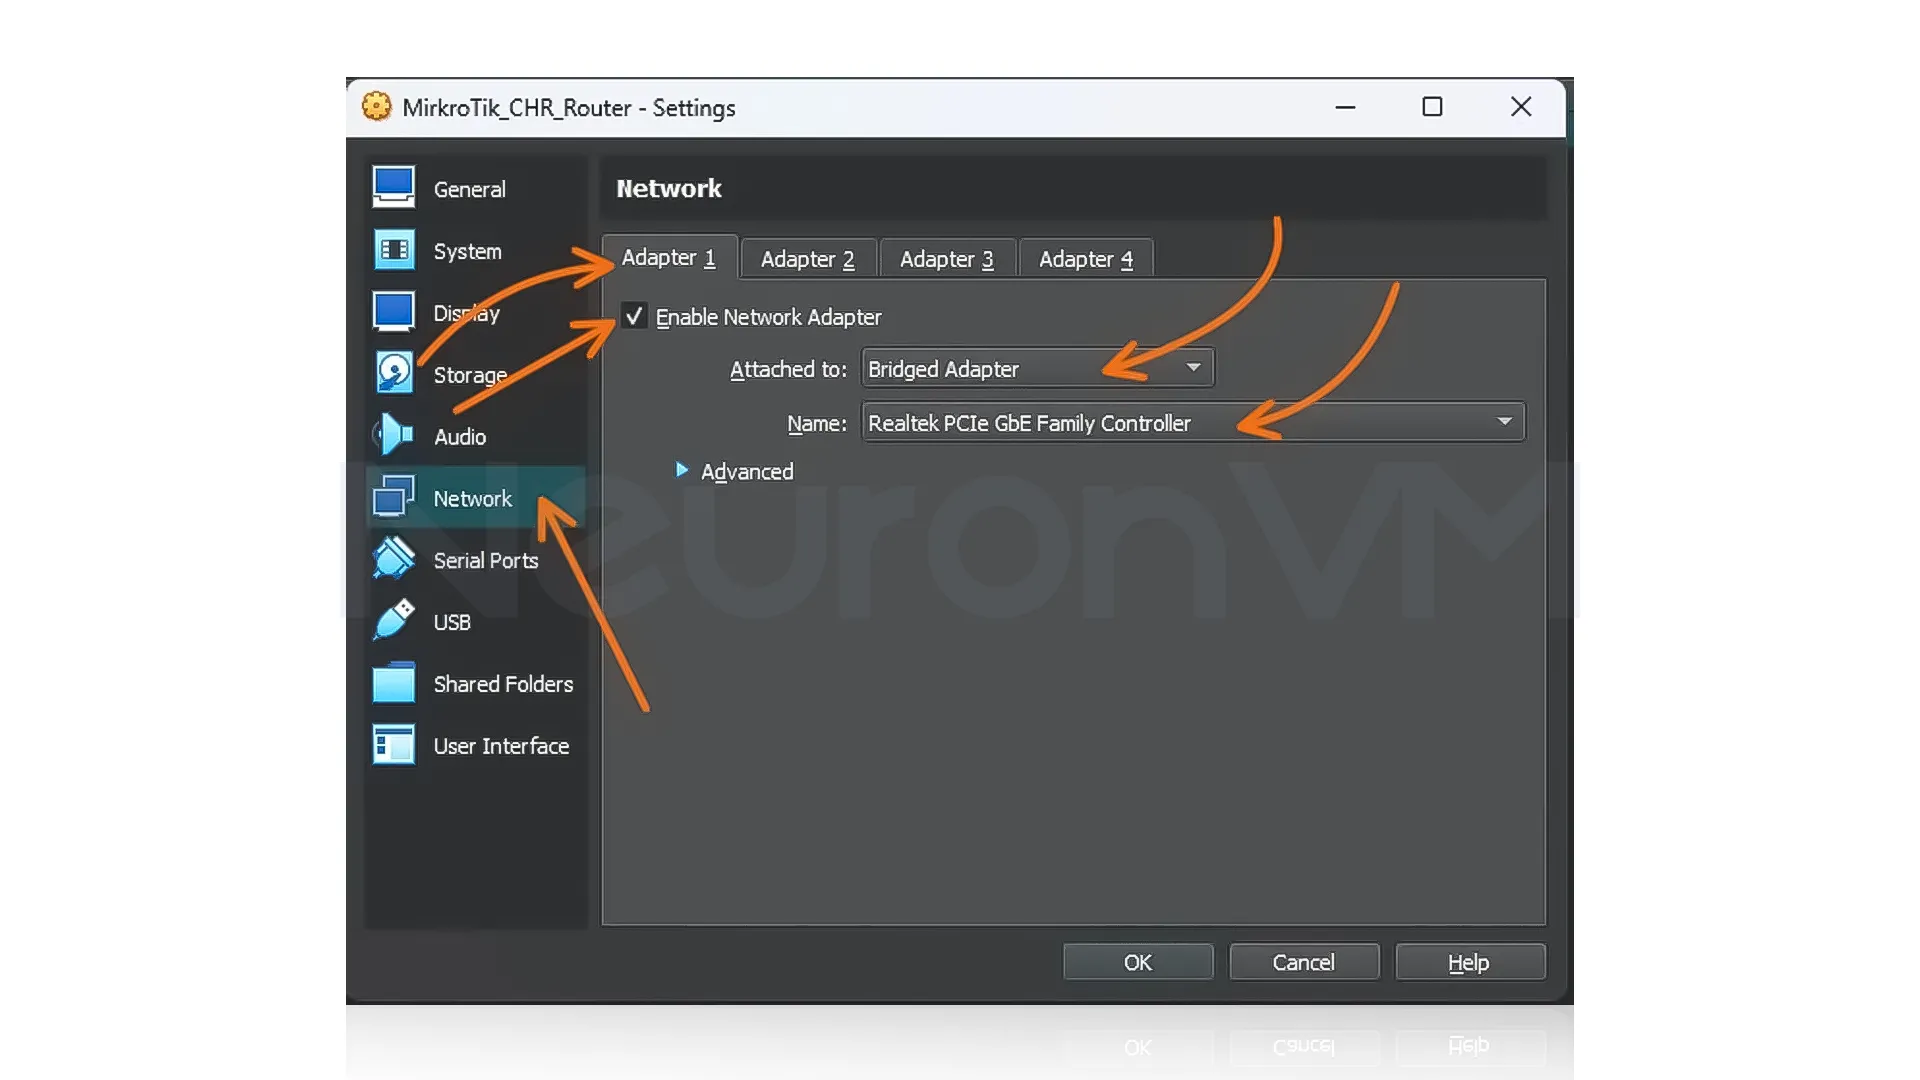
 Step 5: Configuring the WAN Adapter
To change the WAN adapter, click on “Network”, under “Adapter 1” make sure the box named “Enable Network Adapter” is checked, then change the “Attached To: ” option from NAT to Bridged Adapter, NAT can be used, but limits control, Bridged Adapter connects the MikroTik VM directly to your local network, only use NAT if Bridge doesn’t work.
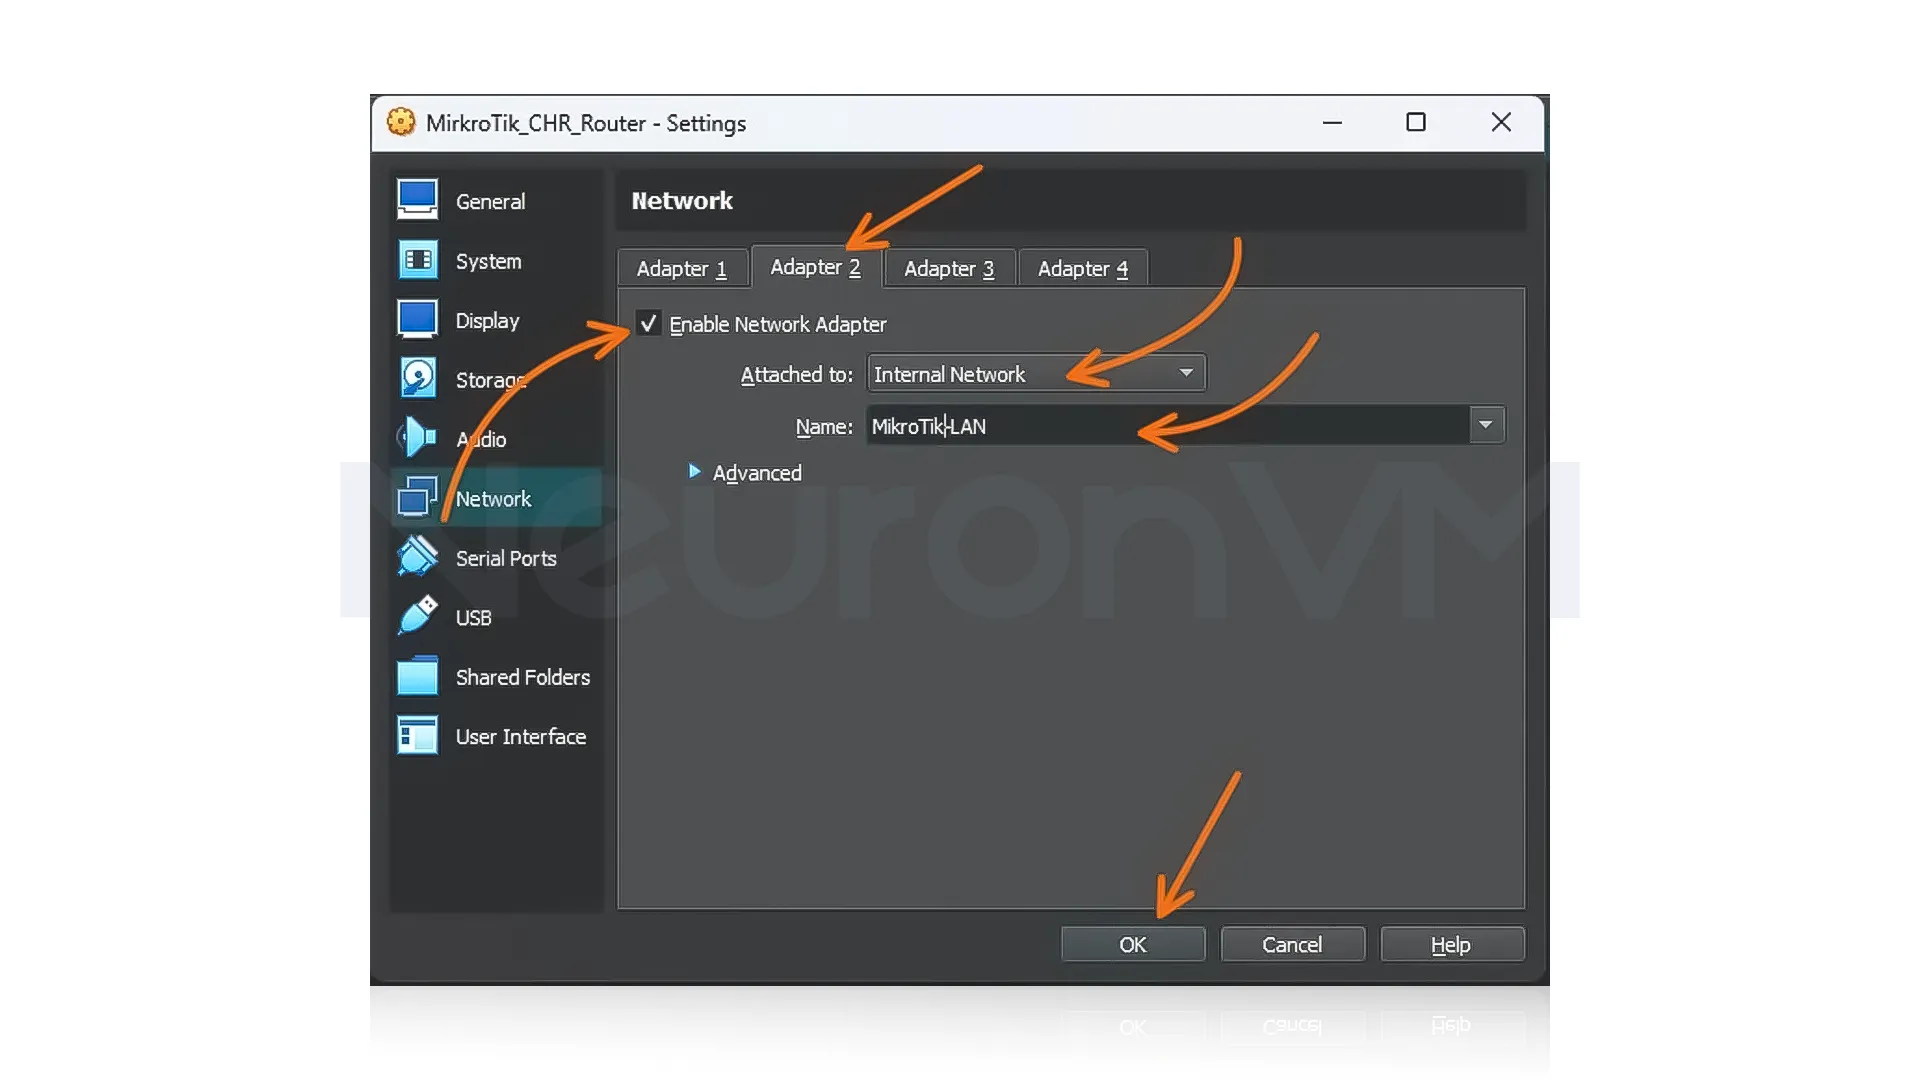
 Step 6: Adding the LAN Adapter
To add the LAN adapter, go to the Adapter 2 tab in the Network Settings, make sure Enable Network Adapter is checked, and set “Attached To” as “Internal Network”, in the Name field, enter a name, Once it is done, click on “Ok” to save the settings.
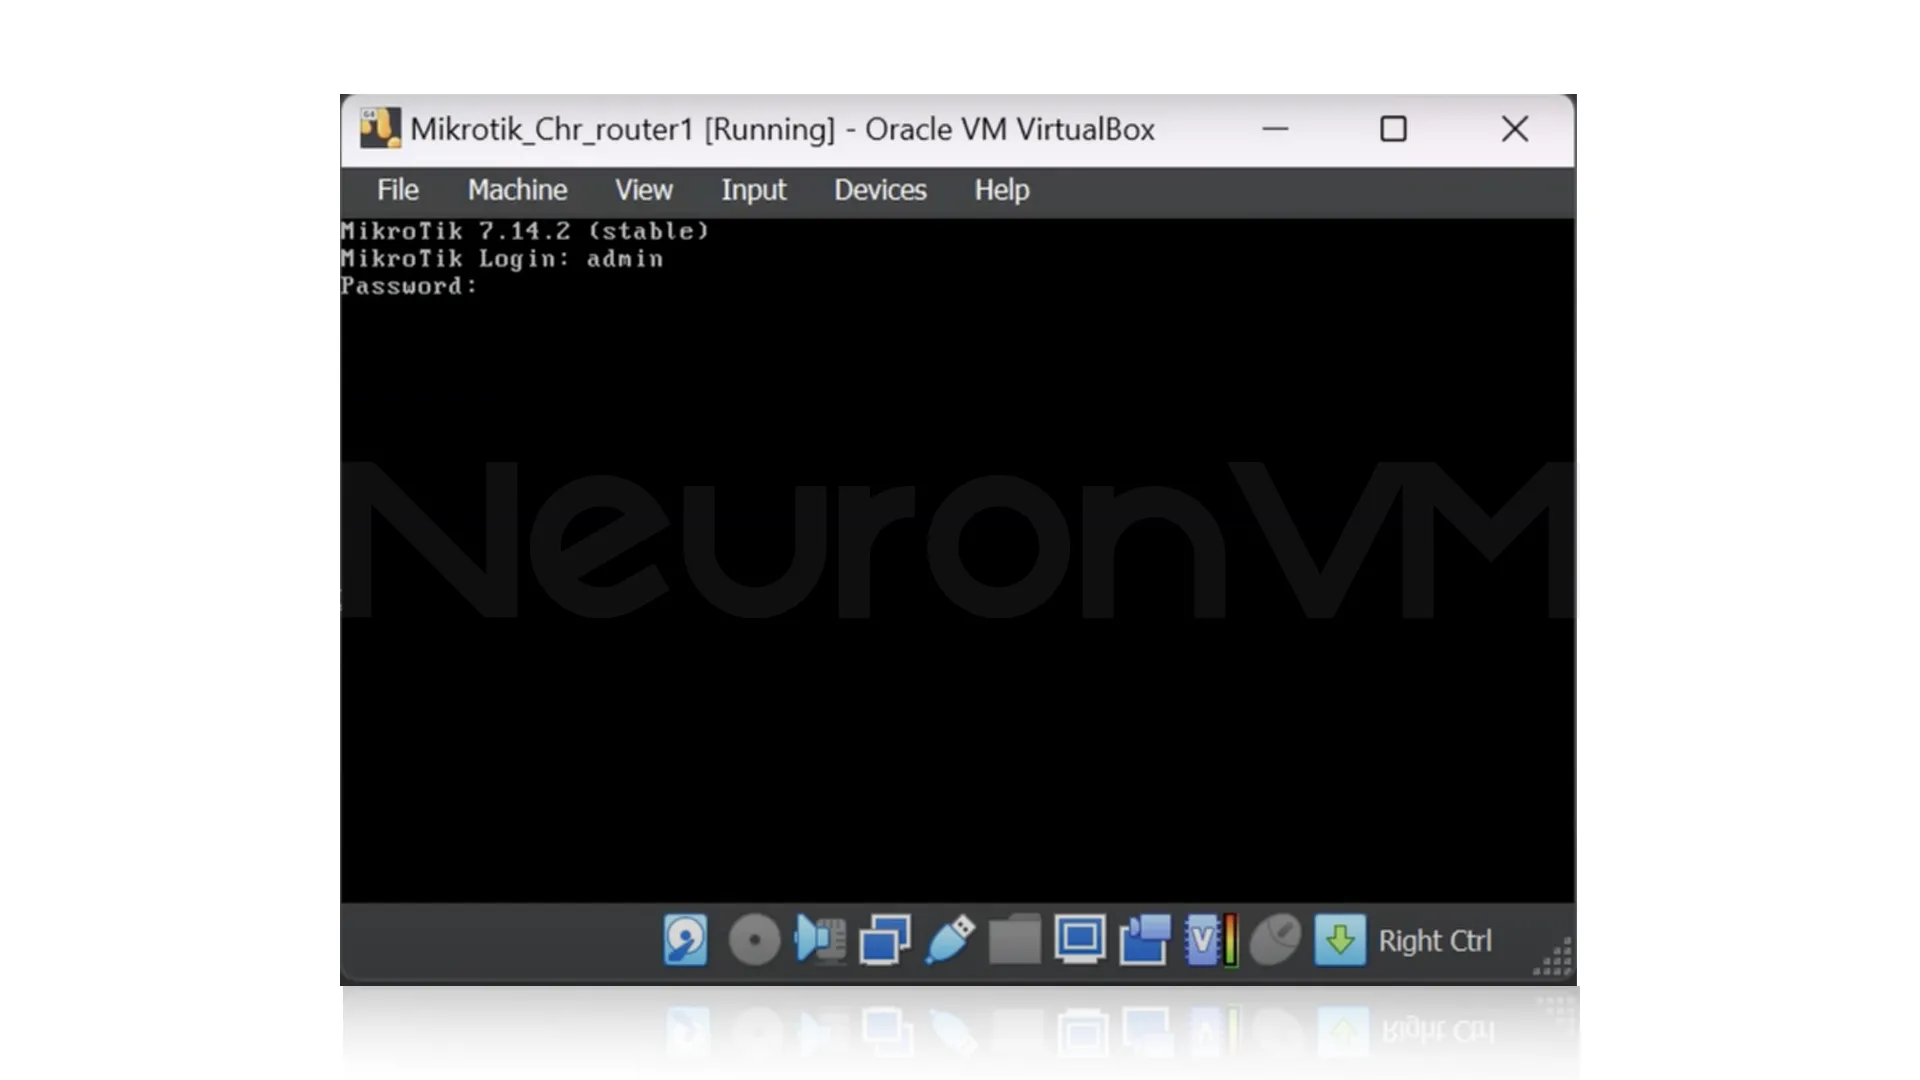
 Step 7: Starting the MikroTik VM
To start the MikroTik virtual machine in VirtualBox, either double-click on the VM or right-click on it and select Start, The VM will begin booting up, and after a few moments, you will be prompted to log in, That is all you need to install MikroTik on VirtualBox.
 Initial MikroTik Configuration
Accessing the MikroTik GUI
Now that the MikroTik router is set up in VirtualBox, we can access its management interface through the GUI, first you need to find the IP address assigned to the MikroTik router, open the CLI window and type the following command:
ip address print
You can access the MikroTik web config by entering the router’s IP in a browser, then logging in; however, using the Winbox utility is preferred for better control, Open Winbox, which should already be installed, and it allows you to connect via MAC Address or IP Address, if the router doesn’t appear in the Neighbors list or shows an IPv6 address, simply enter the router’s private IPv4 address manually to connect.

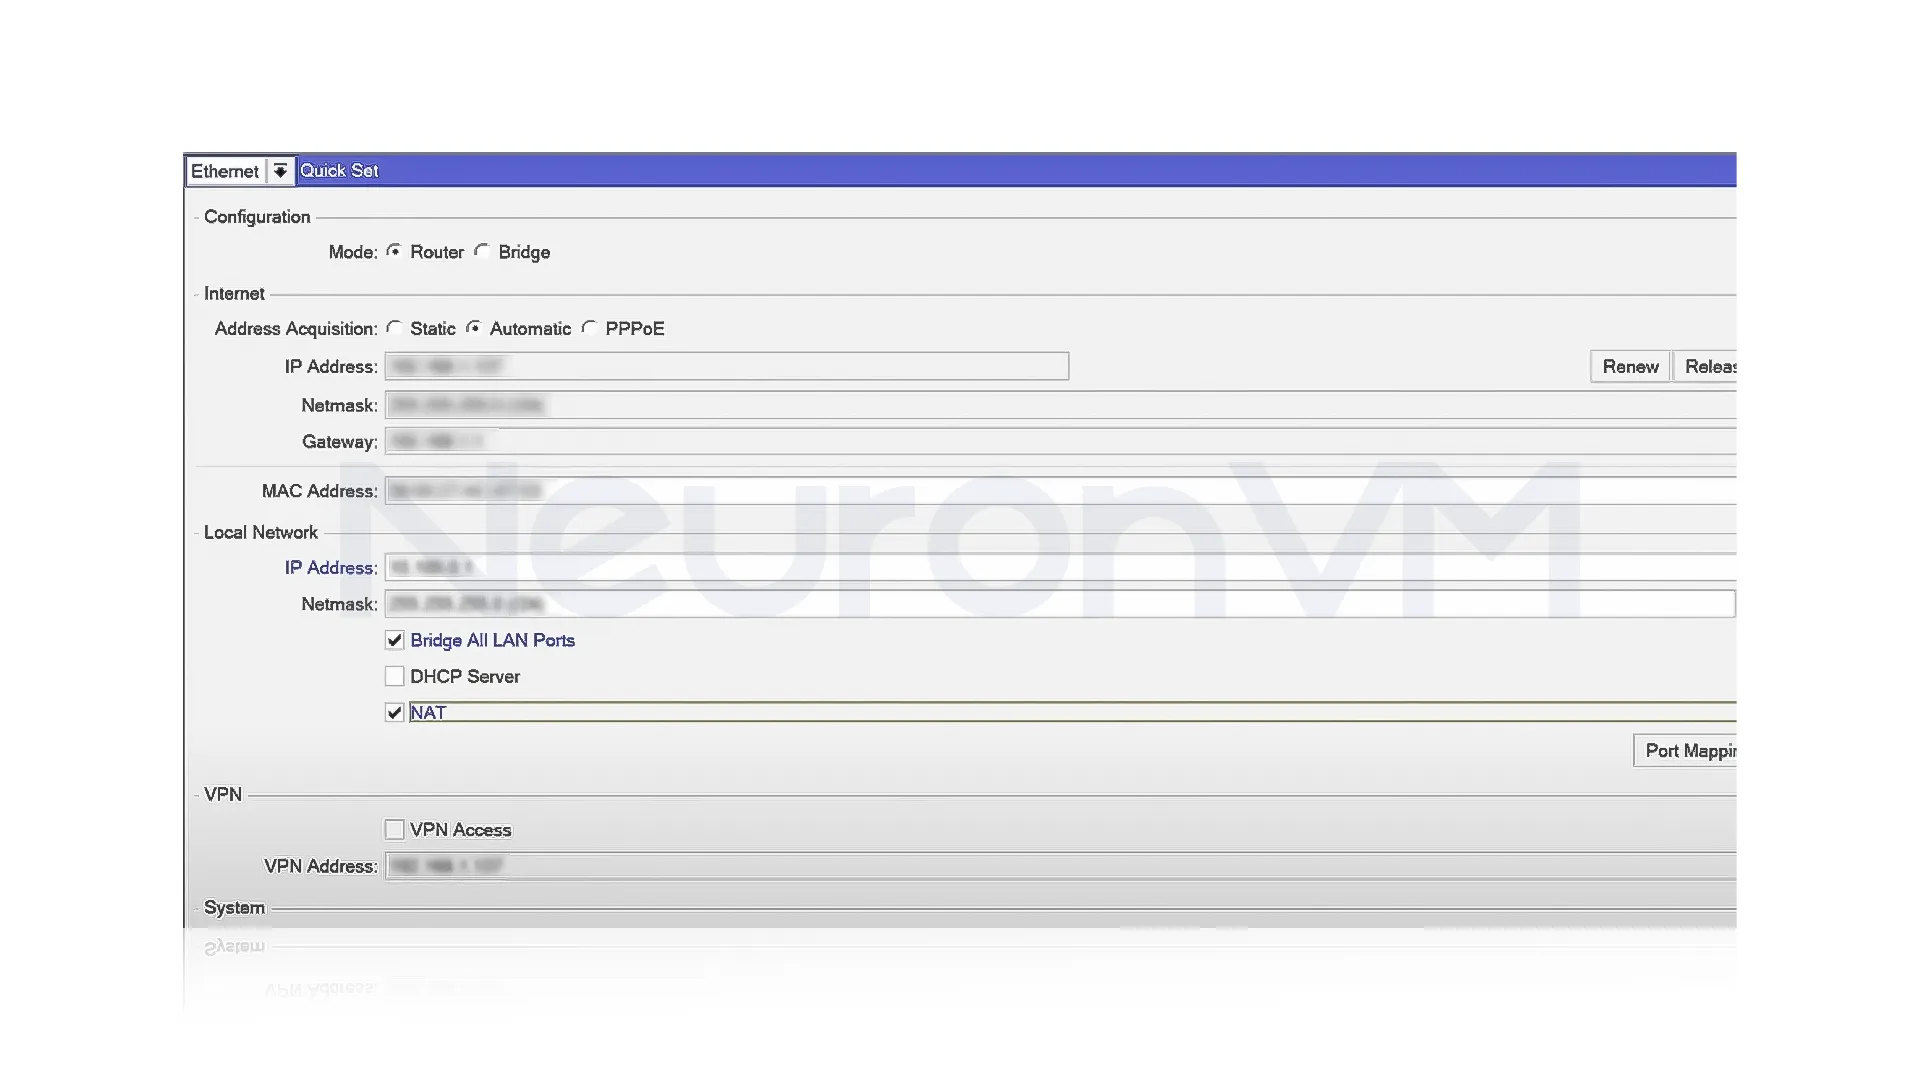
Setting up the Initial Network
To set the initial Network, you need to click on the top-left corner, You will see that the WAN connection is already set to 192.168.1.137, which shows that it is using automatic settings, if it is right, don’t make any changes. Now, to set up the LAN address to 10.100.0.1 and also make sure to set the Netmask to 255.255.255.0, next, check the “Bridge all LAN” box ports, and make sure NAT is enabled, then click on the Apply button.
 Common Issues and Fixes:
There are some problems you might face when installing MikroTik on VirtualBox, read the provided solutions to fix your problems.
Stuck at Boot?
If your virtual machine is stuck when trying to start, it might be because the ISO isn’t set up correctly, to fix this problem, try downloading a fresh ISO from MikroTik’s official website.
No Network Connection?
If the virtual machine can’t connect to the internet, you need to check the network adapter mode, make sure to set your adapter to Bridged Adapter to NAT.
RouterOS License Warning?
If you are seeing a license warning, it is probably because you are using the trial version of MikroTik RouterOS, you need to buy a license to fix this problem.

Why use a MikroTik VPS instead?
- A MikroTik VPS stays online all the time, unlike a test lab, and you don’t need to worry about power outages and hardware causing downtime.
- MikroTik VPS services are hosted in powerful data centers, which have a fast internet connection and better performance compared to a local network.
- You get a public IP address, so you can access your system from anywhere in the world, which makes remote management much easier.
- When you are using a local test lab, you are limited by your physical hardware, but when using a MikroTik VPS allows you to not stuck with these kind of problems.
Explore MikroTik VPS at NeuronVM
You can check out NeuronVM’s MikroTik plans for more details and to find the right plan for your needs.

Conclusion
Installing MikroTik on VirtualBox is a great way to learn and test networking without extra hardware, as it allows you to set up a virtual test environment where you can try out different network setups safely, however if you need a better performance the MikroTik VPS is the best option available for you because of the benefits it offers, leave us your thoughts on this article.

![How to Install Atom on Fedora 34 [Step-by-Step]](https://neuronvm.com/wp-content/uploads/2025/07/Introduction-and-Install-Atom-on-Fedora-34.webp)