


How to Install Eclipse IDE on Kali Linux [2025 Updated Guide]

 14m
14m
 0 comments
 Print
Print
Introduction to Eclipse IDE on Kali Linux
Eclipse IDE is one of the powerful tools used by programmers, especially for Java development, whether you are building applications or testing code, Eclipse IDE offers a wide range of tools and features to help you get the job done, So learn How to Install Eclipse IDE on Kali Linux with our article. If you are using Kali Linux for security and hacking, you might also want to use it for writing code, by installing Eclipse, you can create, edit, and test your programs right on Kali. If you’re looking for a high-performance environment, consider using a Linux VPS for secure development.

What is Eclipse IDE and Why Use It on Kali Linux?
It is an open-source tool used by developers to write and test code and software, It is most popular for Java programming, but it is better to know that Eclipse also supports other languages like C, C++, PHP, and Python, this tool offer so many options like smart code editor, debugging tools, and support for team projects, this tool works on Windows, Linux, macOS, and it can also be customized to different needs.
☑️ All-in-one Environment for Coding and Testing
Kali Linux is widely used for security testing and development, Installing it gives you more power over writing and editing all with one system.
☑️ Supports Multiple Programming Languages
With Eclipse, you can work in Java, Python, C, C++, PHP, and more, This makes it perfect for writing custom tools for security.
☑️ Open-Source and Free
Both Kali Linux and Eclipse are open-source; you don’t need to pay for licenses, and you can customize both to fit your needs.
☑️ Perfect for Building Security Tools
If you are interested in developing your own hacking and analysis tool, it is perfect for it because you can code and test in the same secure environment.

Installing Eclipse IDE on Kali Linux
Requirements:
- Kali Linux system with a desktop environment
- Java is installed on your system
- Root or sudo privileges
Method 1: How to Install Eclipse IDE on Kali Linux Using Snap
Step 1: Install Snap on Kali Linux
Eclipse is available in the Snap Store, so you can easily install it using the snap command on Kali Linux, if you are not familiar with snap, it is basically a package manager for snap that makes it simple to install and update with just one command, to intall Eclipse via snap, use the following command to check if the snap is installed.
snap version
If the snap is already installed on your device, you will see the version information in the output, but if it is not, run the following command in the terminal.
sudo apt install snapd -y
Step 2: Create Symbolic Link for Snap
After installing Snap, you need to create a symbolic link so that Snap apps like Eclipse can run smoothly, and you can access your home directory.
sudo ln -s /var/lib/snapd/snap/ snap
Step 3: Update Snap and Install Eclipse IDE
Now that the snap is installed and set up, update the Snap package list to make sure you get the latest versions of apps, This command will check and install any available updates for your Snap package.
sudo snap refresh
Install Eclipse IDE on Kali Linux
Now, after following these steps, you are ready to install Eclipse on Kali Linux, run the command below to run the latest stable version of Eclipse from the Snap Store:
sudo snap install --classic eclipse
After installing Eclipse from the Snap Store, your terminal will show a message saying that the IDE was successfully installed, you might also want to see the version number.
Launch Eclipse IDE on Kali Linux
After installing Eclipse, you can open it from the desktop, click the “Activities” button in the left corner of your screen, then type “Eclipse” into your search bar, when it appears, click it to start the IDE.
 These are all the steps you need to install Eclipse on Kali Linux using the Snap method.
Method 2: Install Eclipse IDE on Kali Linux Using the Official Installer
If you want to make sure that you are getting the latest version of Eclipse, you can try to install it from the official Eclipse website, here is how to do it:
Step 1: Download Eclipse Installer from Official Website
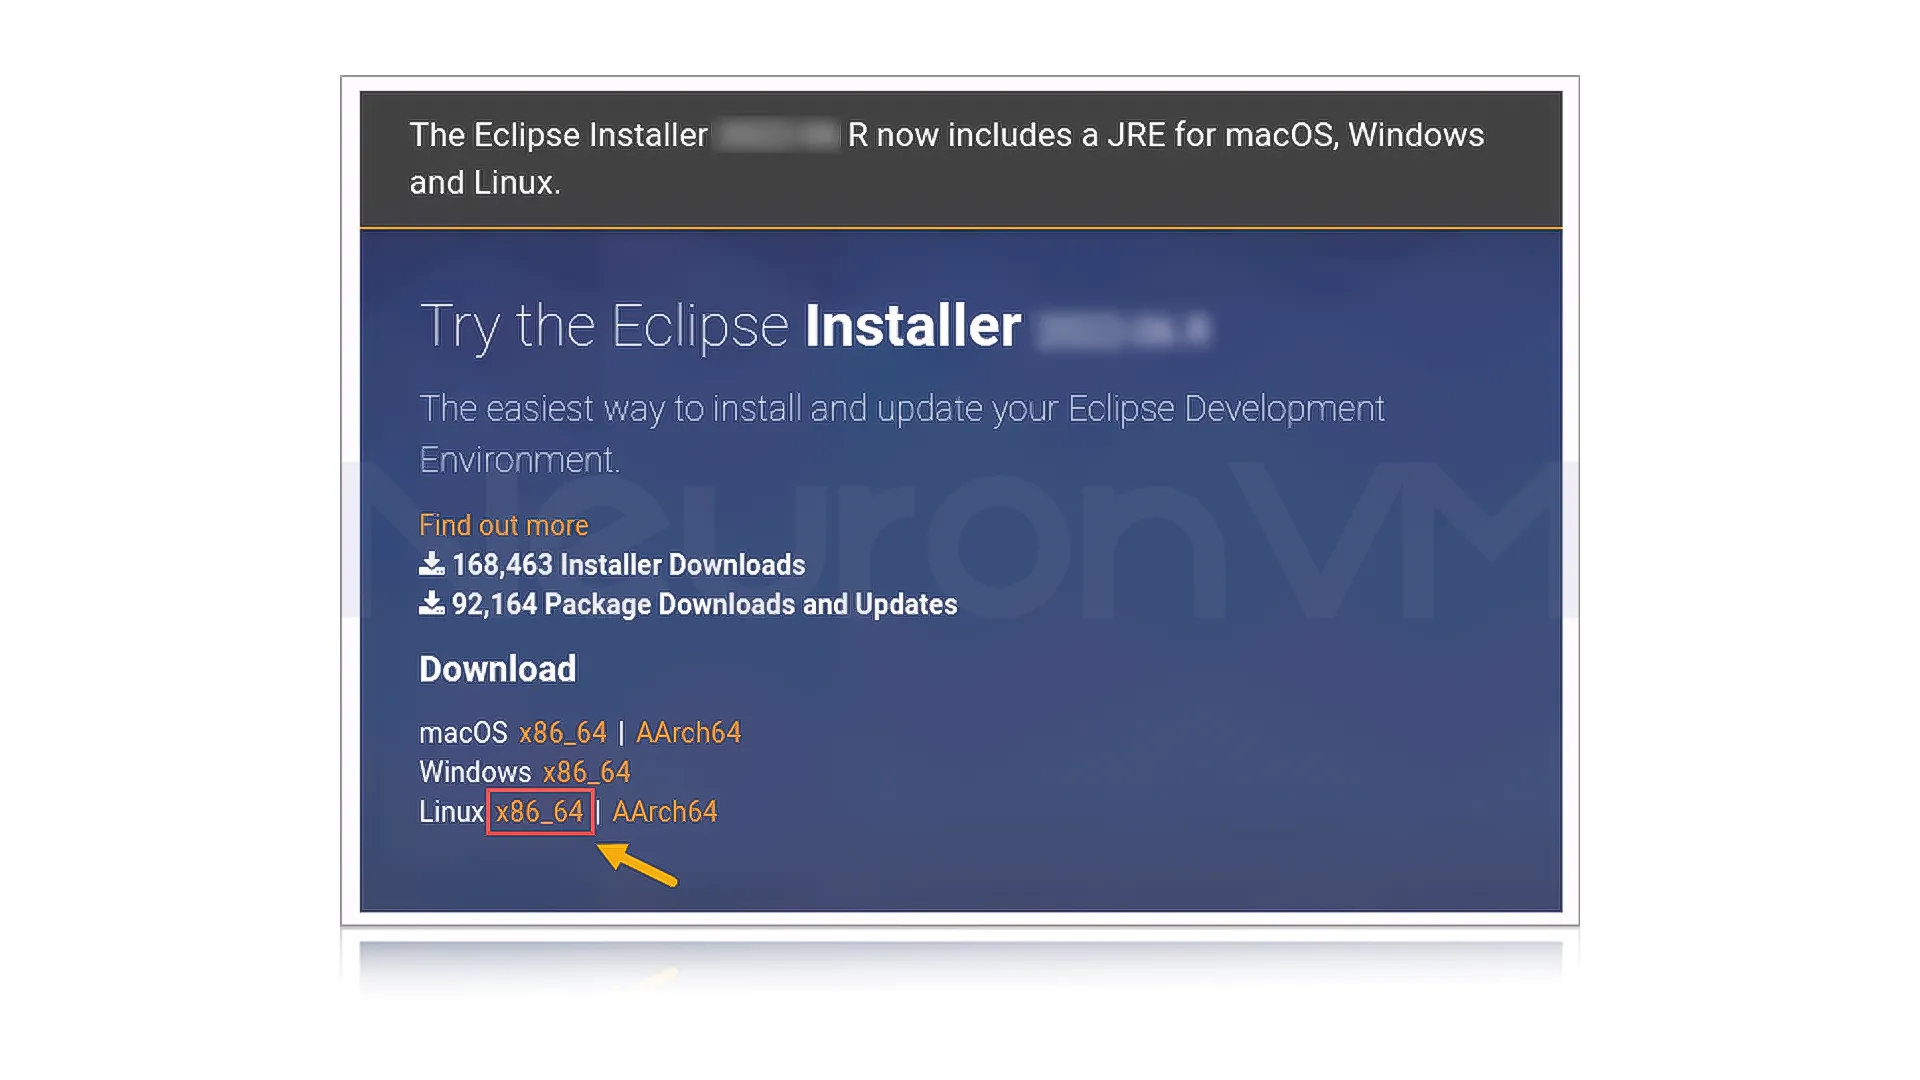
Open your favorite browser and go to the Eclipse download page, On that page, you will find the latest stable version of Eclipse, Click the download button for the version you prefer, for the most up-to-date release, choose the version listed on top.
Step 2: Extract and Run the Installer
After opening the Eclipse download page, click the Download button for Linux, it will be downloaded by default, and you will be able to see it in your Downloads folder, This file contains the Eclipse installer needed for installation on your system.
Extract the Downloaded Archived File
After the download is finished, open your terminal you will now extract the Eclipse installer so it’s ready to use, You can put it anywhere you like, but in this tutorial, we will use the “\opt” folder, which is also a common place to keep extra software.
sudo tar -xvzf eclipse-inst-linux64.tar.gz -c /opt
Verify the Installer Folder
After you have extracted the Eclipse file, the eclipse-installer folder should be created in the “\opt” folder, to check if the folder is there, you can list the files inside the “/opt” directory.
ls -a /opt
Change to the “eclipse-installer” Folder
After confirming that the “eclipse-installer” exist, you need to move into that folder to start the installation.
cd eclipse-inst
Run the Eclipse Installer
Now that you are in the installer folder, it’s time to start the installer, so run the command below to start the installer:
./eclipse-inst
Step 3: Choose Eclipse Version and Install
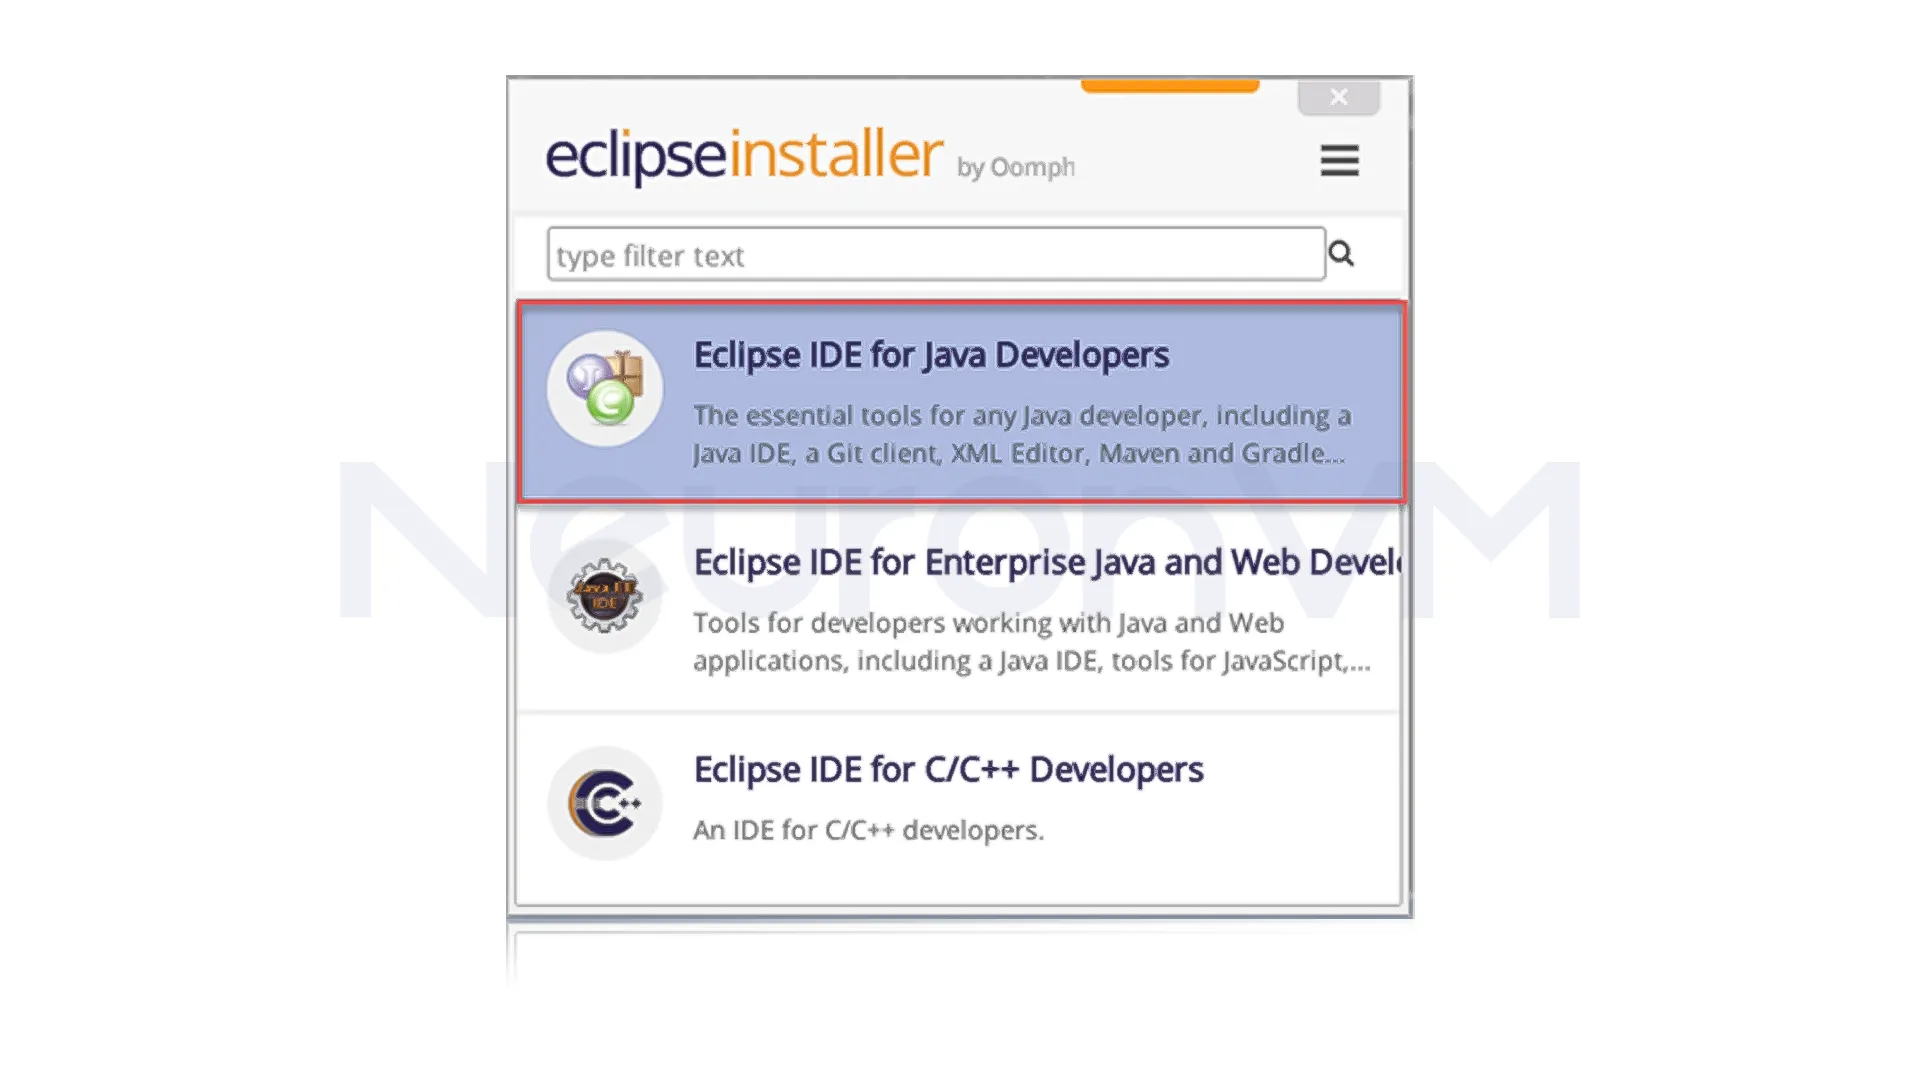
When the Eclipse installer window opens, you will see a different list of Eclipse IDE versions for different programming languages, click on the one you need, we will select Java in this article.
 Select Java Version & Where to Install Eclipse
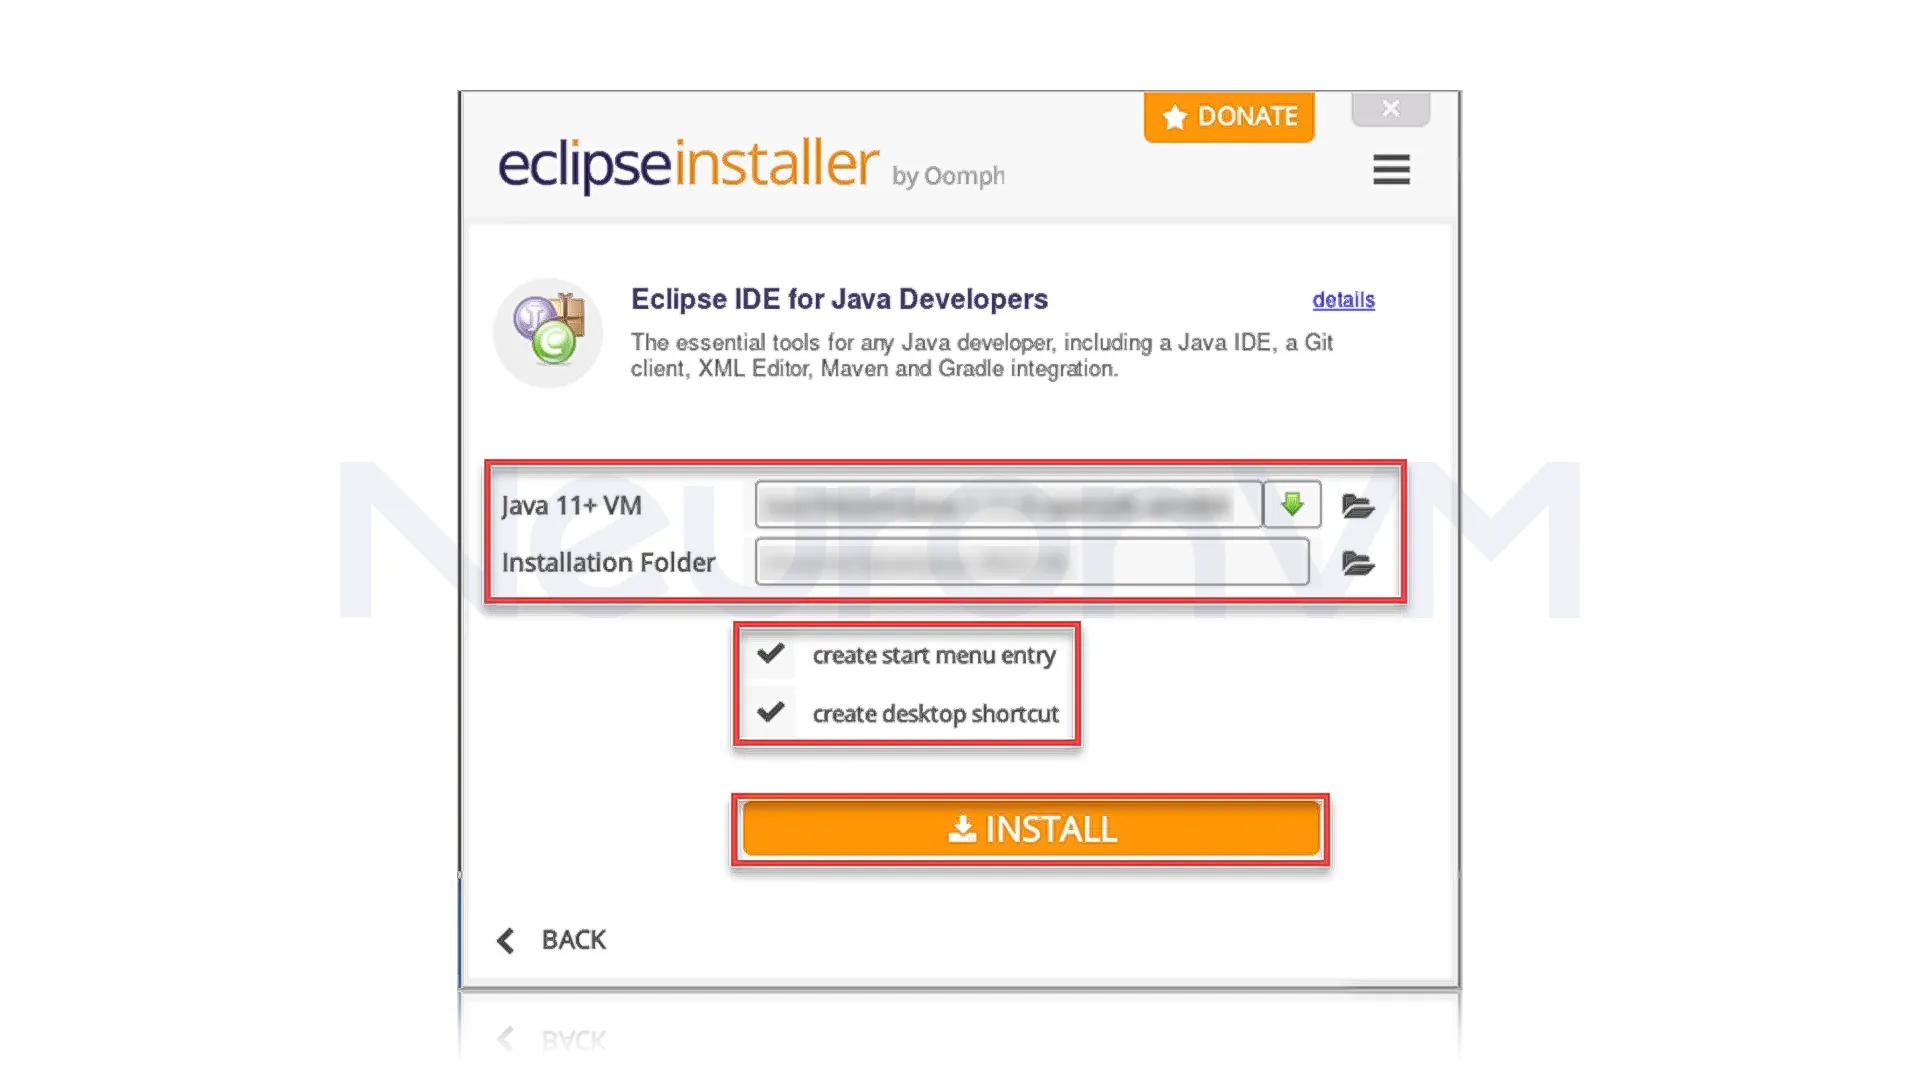
On the next screen you will be asked to select your Java version and the folder where the Eclipse will be installed, note that most of the time the default options are fine, so you don’t need to change anything but make sure to check the two boxes shown in the picture.
 Accept the License Agreement
On the next screen, you will the Eclipse foundation Software User Agreement, Cick on the “Accept Now” to agree to the terms and start the installation proccess, after that the process will be changed to installing.

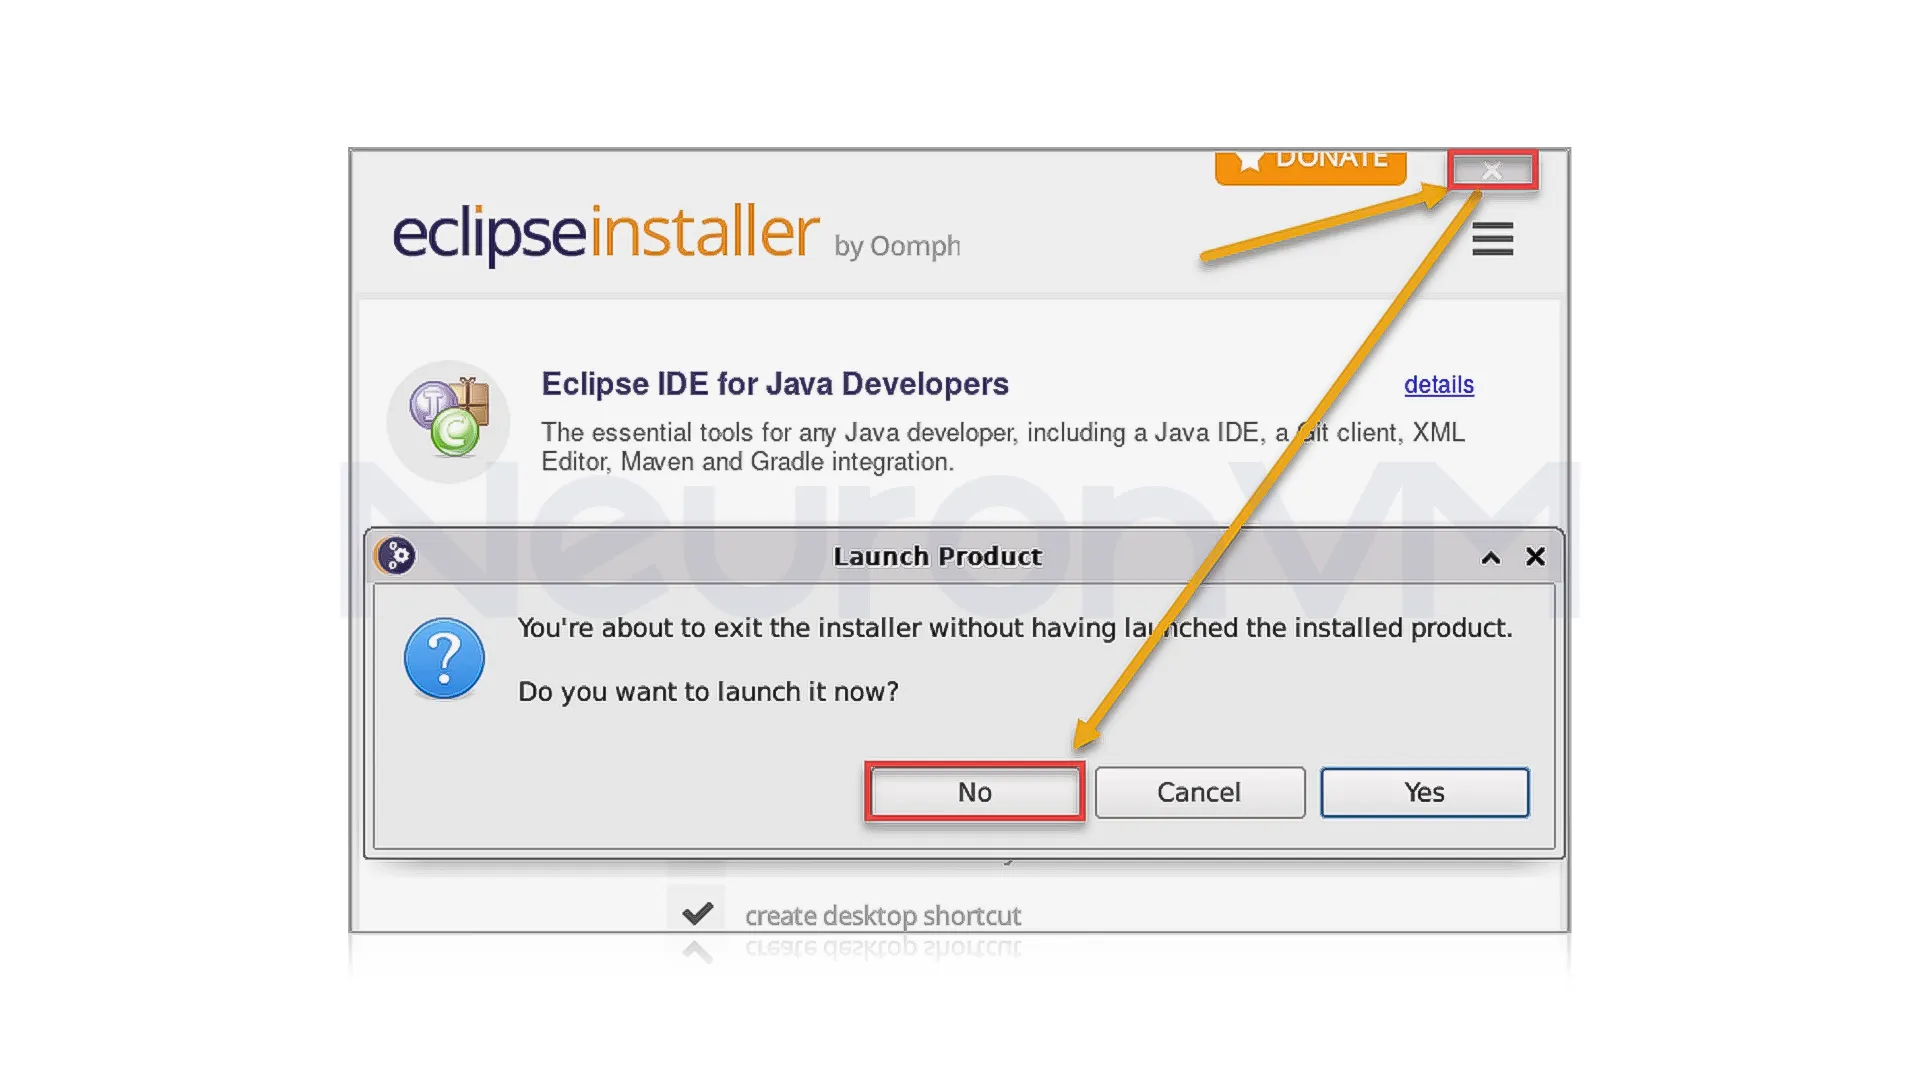
Exit the Installer
Once the installation is complete, click the exit button on the installer window, when asked if you want to quit, click “No” to confirm and exit the setup.
How to Launch Eclipse IDE on Kali Linux
Now that you have installed the Eclipse IDE, you can start it in a few different ways, depending on how you installed it, if you have installed it through the Snap Store, you can start it by running the following command in your terminal.
eclipse
If you are using a desktop environment with a search or application finder, you can easily start Eclipse by searching for it, clicking the activities menu, typing Eclipse in the search bar, and when it appears, click on it to open the IDE.
💥 Try NeuronVM for Your Development Needs
Are you looking for a powerful and reliable hosting solution for your development projects? NeuronVM offers great hosting services to make your coding projects run smoothly, whether you need a virtual machine or a dedicated server to host your development environment, NeuronVM is the best choice for you.
Conclusion
Eclipse IDE is a great tool for coding in Java and other languages, offering everything you need to build, test, and work on security projects, by installing Eclipse on Kali Linux, you get a full environment to write and test your code, both Eclipse and Kali Linux are open-source making them a perfect choice for developes, checkout NeuronVM to find other hosting options for yourself.