How to Install Desktop Sharing in Ubuntu - GUI on Ubuntu

 7m
7m
 0 comments
Today, in this article, we want to examine an important topic that is definitely a question for many Linux users. This article reviews the installation of desktop sharing in Ubuntu and provides important explanations of the GUI in Ubuntu, which reading and following can make it easier to work with the system and the command line environment. So, to discover the ability of remote desktops in Ubuntu, we invite you to read this tutorial carefully.

Prerequisites for set up screen sharing on Ubuntu
1- Make sure you are using the latest versions of Ubuntu.
2- Make sure your system is connected to the Internet and measure its speed.
3- Which protocol do you want to use? There are two options, VNC (Virtual Network Computing) or RDP (Remote Desktop Protocol), and if you use VNC, you should choose the appropriate server.
4- Enable Screen Sharing option in your system to configure.
5- Get permission to connect through the port despite the firewalls you have.
6- You can also enable dynamic DNS if you want.
7- As a last note, check that your system will use VPN or SSH tunnels with full security during the upcoming installation steps.
Install Desktop Sharing in Ubuntu and setup that!
Enter settings and first click sharing in this section. This operation is in the form of a switch key as shown in the image below.
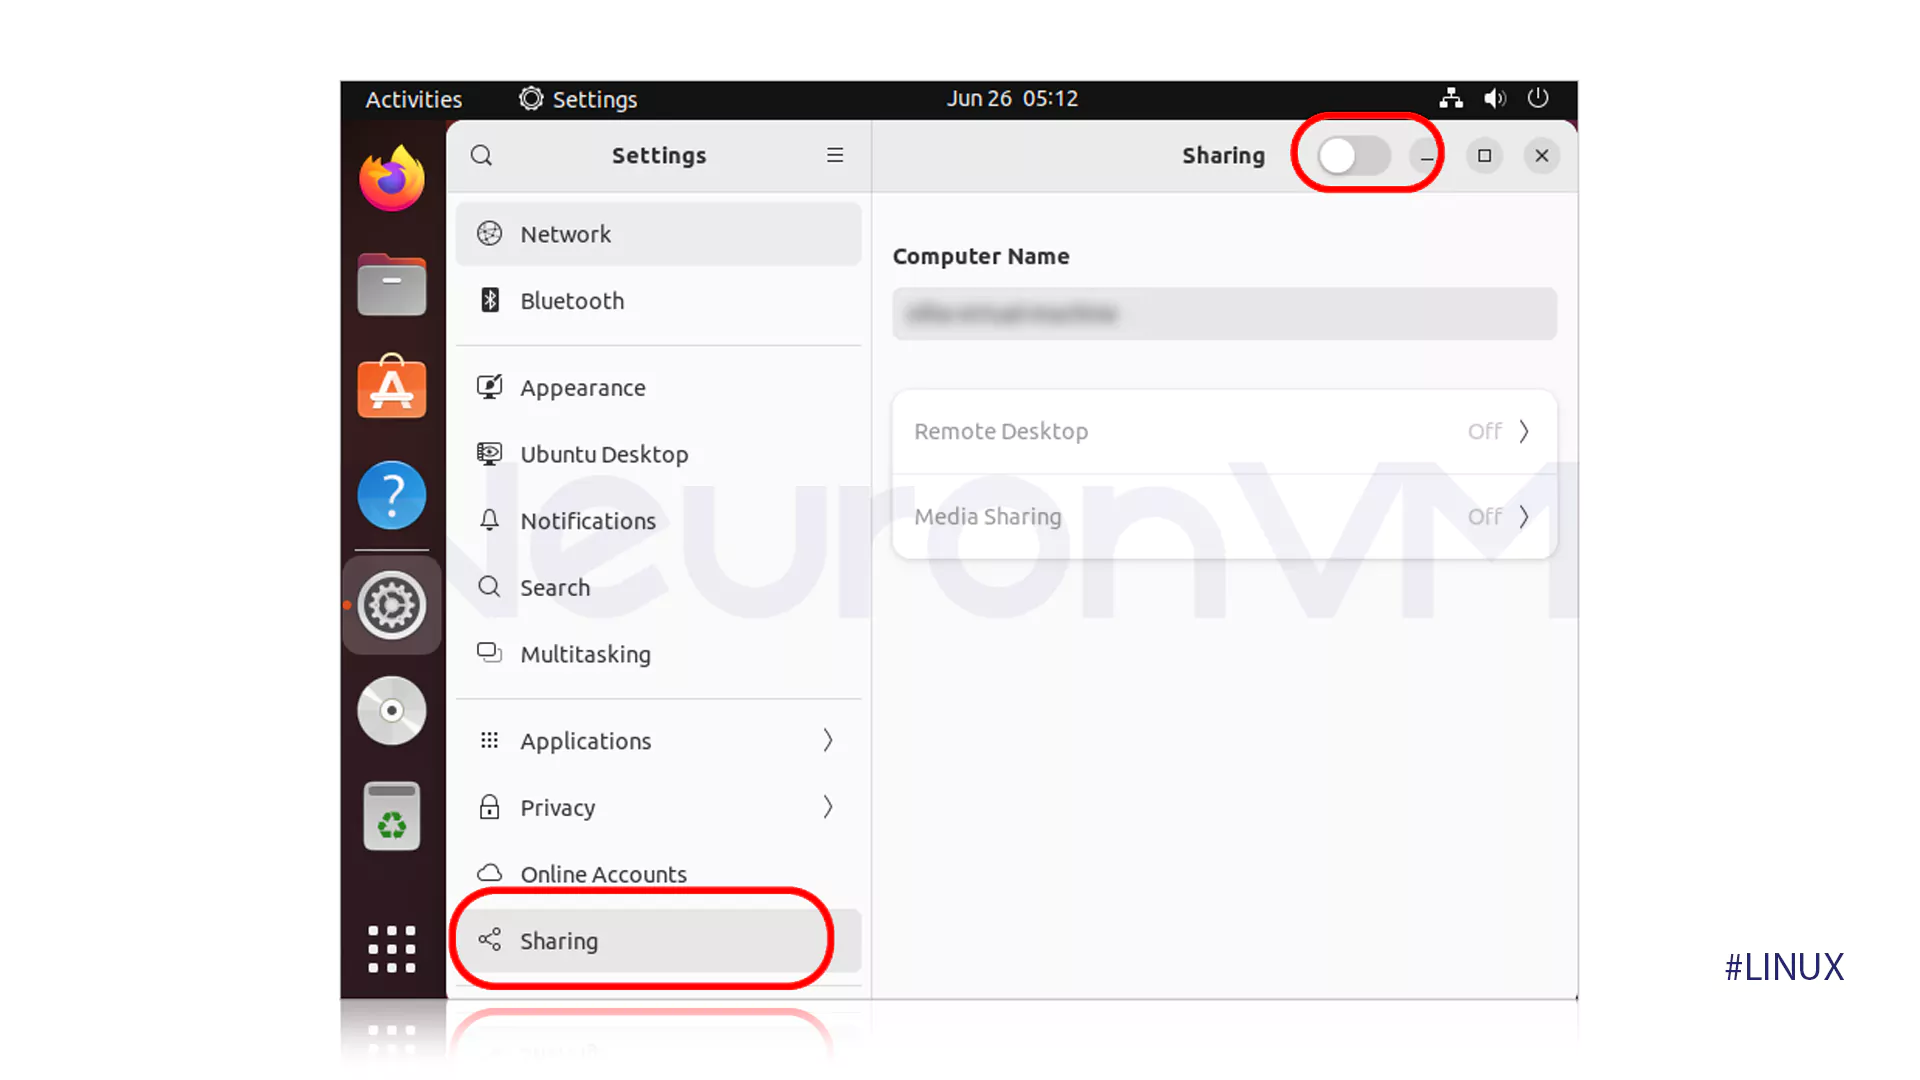
In this step of how to install desktop sharing in Ubuntu, press the Remote Desktop option and allow remote control if necessary.
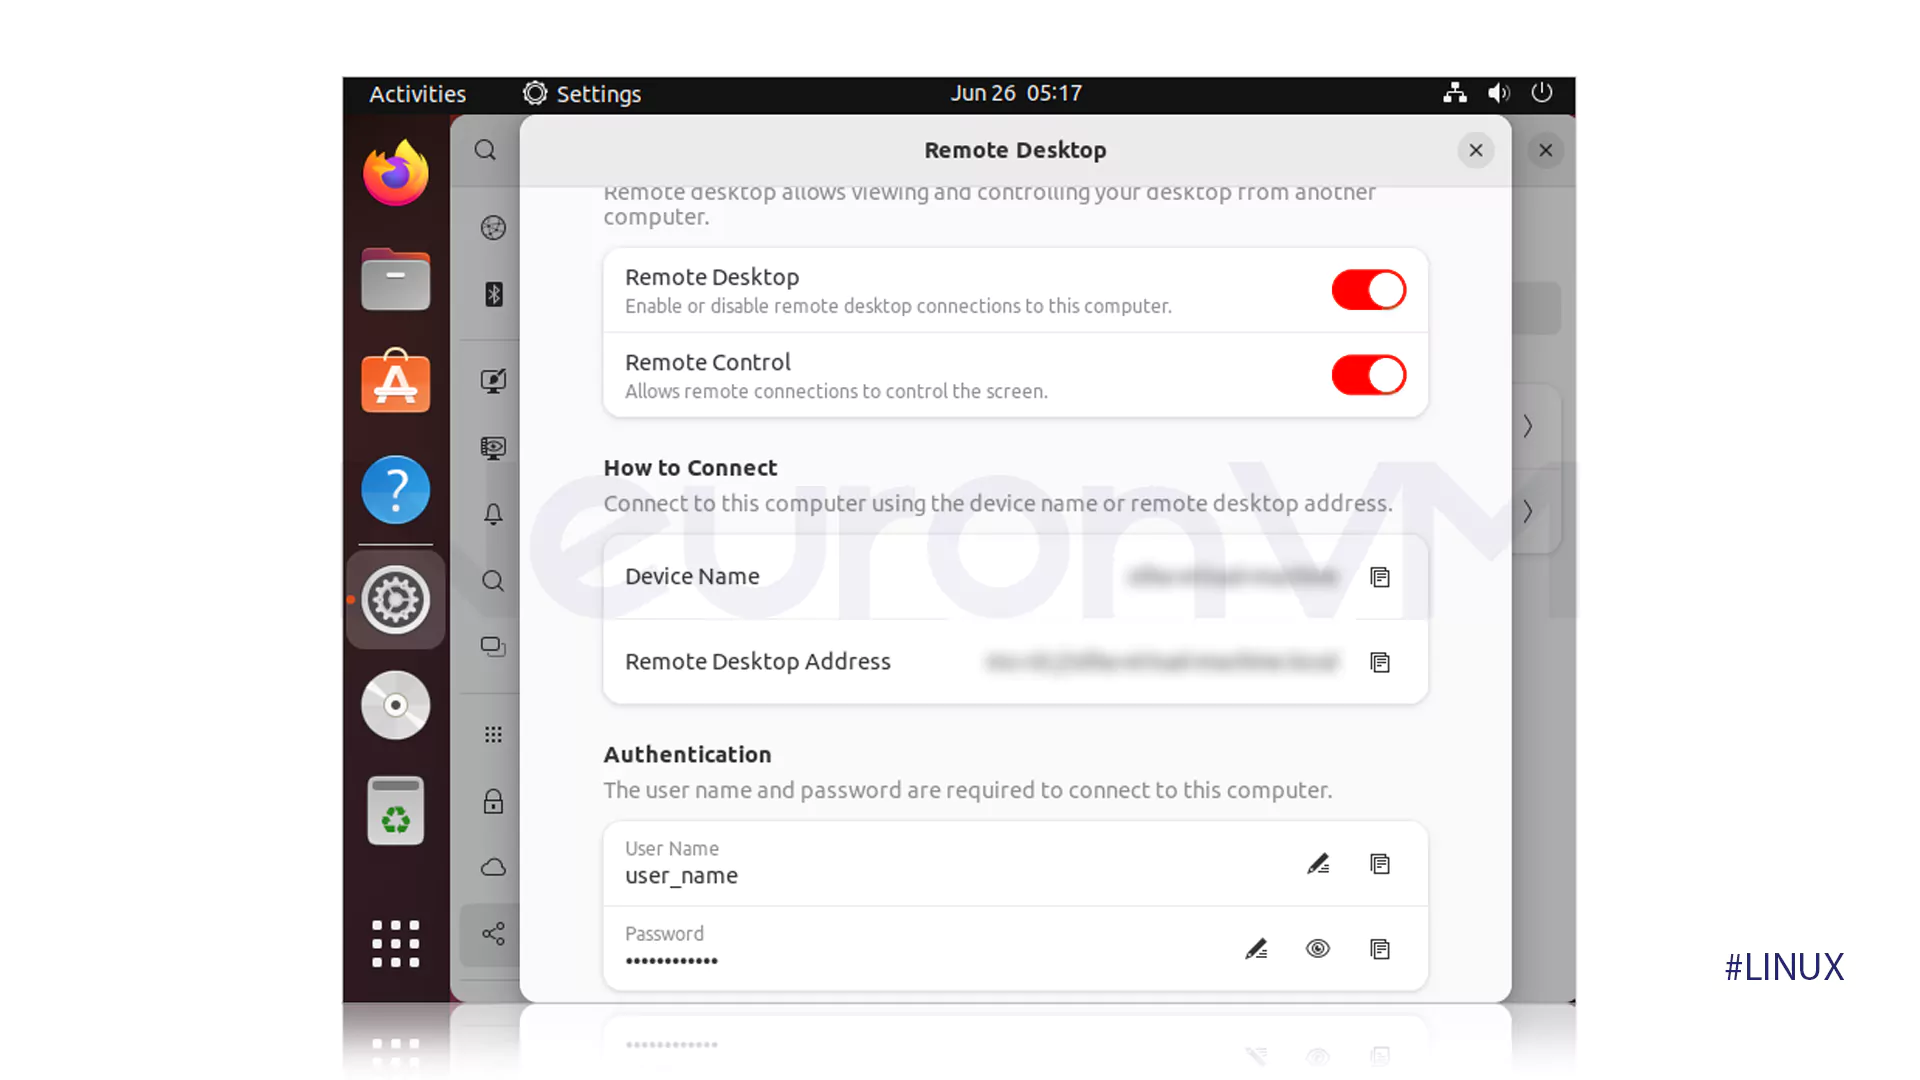
Set the credentials that are involved in the client software on the connecting device by entering the Authentication section. Now you need to set up information such as address, username, password, etc. to allow others to access your desktop and share it with the intended user.
Third-party software alternatives to desktop sharing in Ubuntu
Another method that you can use in the continuation of this issue is using third-party programs to set up screen sharing in Ubuntu Linux, which we will also discuss. Some of the advantages of using this advantage can be considered as customer support, troubleshooting problems and the implementation of presentations, which will definitely be welcomed by many users. So let’s take a look at how one of these apps works and explore the built-in Virola messenger. Once you have downloaded and installed this program, enter the chat room and select the users you want to share your system with. So, select the Share Screen / Remote Control option and click on the moving elements section in the common area to create system sharing settings. The interesting thing is that you can consider the settings to the extent that the quality of the image is according to your wishes!
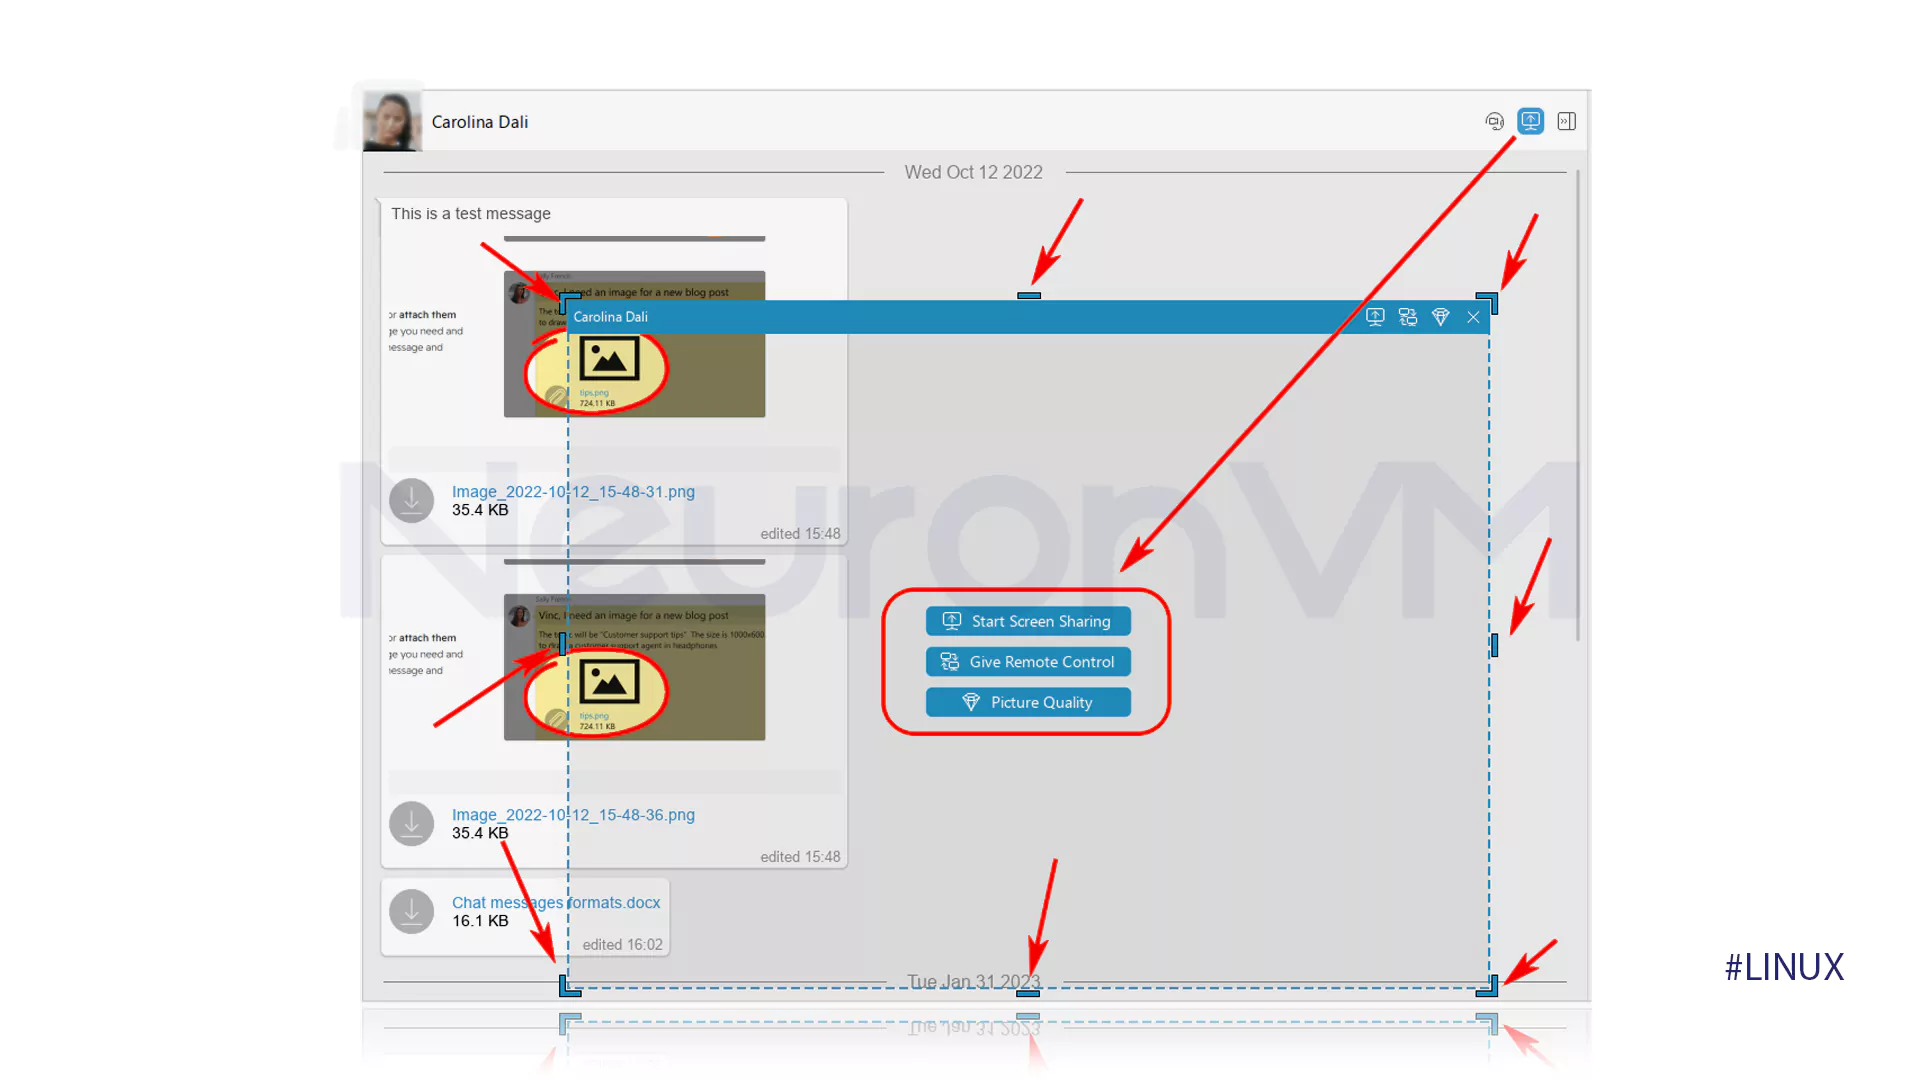
At this stage of Install Desktop Sharing in Ubuntu, a tab will appear for you, which you can turn into a chat room. At the end, you can end the Install Desktop Sharing in the Ubuntu process by using the Stop Screen Sharing / Remote Control button.
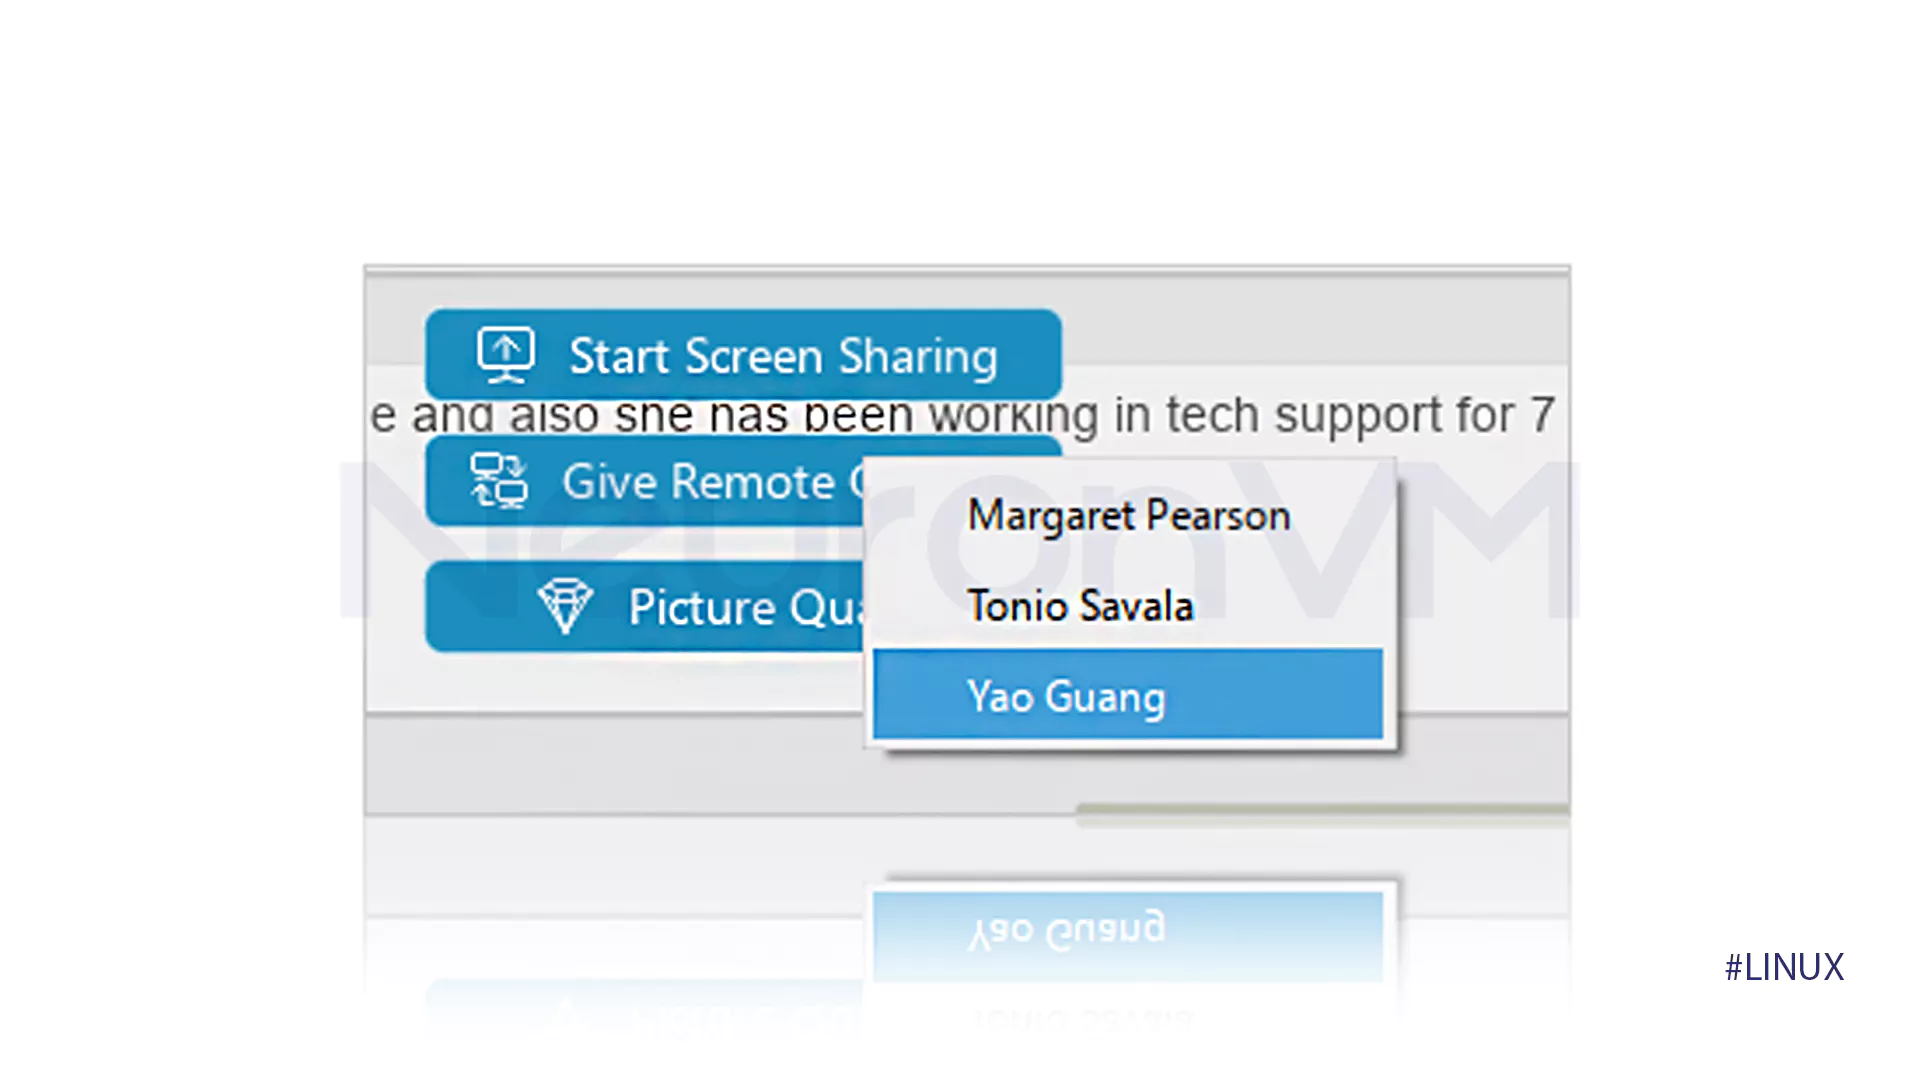
This type of Install Desktop Sharing in Ubuntu and using the program we introduced does not require a lot of knowledge and skills, and you can implement your goals in Install Desktop Sharing in Ubuntu with the menus you see in the pictures. It is known as one of the fastest ways to Install Desktop Sharing in Ubuntu.
Conclusion
This topic explained in general how to install desktop sharing in Ubuntu so that you can access files or troubleshoot remotely with the help of the graphical user interface in Ubuntu. Thank you very much for joining us in another series of Ubuntu tutorials on the our website. We hope you can experience a safe and fast installation by following the steps above.


