How to Install AlmaLinux on VirtualBox


 Study duration :
7 Minutes
Study duration :
7 Minutes
 0 Comment
Are you looking to explore AlmaLinux? It is free and open-sourced and a great alternative to CentOS. if you don’t want to disturb your system, learn How to Install AlmaLinux on VirtualBox so you can enjoy exploring AlmaLinux without disturbing your current system.

Whether you’re a developer, system administrator, or a Linux fan, installing AlmaLinux on VirtualBox is an excellent way to test its features. In this article, we will walk you through the entire process of installing AlmaLinux on VirtualBox. No matter if you are an advanced user or you don’t know anything about tech at all, you will enjoy this user-friendly tutorial. Visit our website for more advanced and un-advanced tutorials.
Installing AlmaLinuux on VirtualBox
Requirements:
- VirtualBox installed on your system
- RAM Minimum 4 GB
- Storage Minimum 20 GB
follow the provided steps individually to achieve your goal and explore AlmaLinux on VirtualBox.
Download AlmaLinux
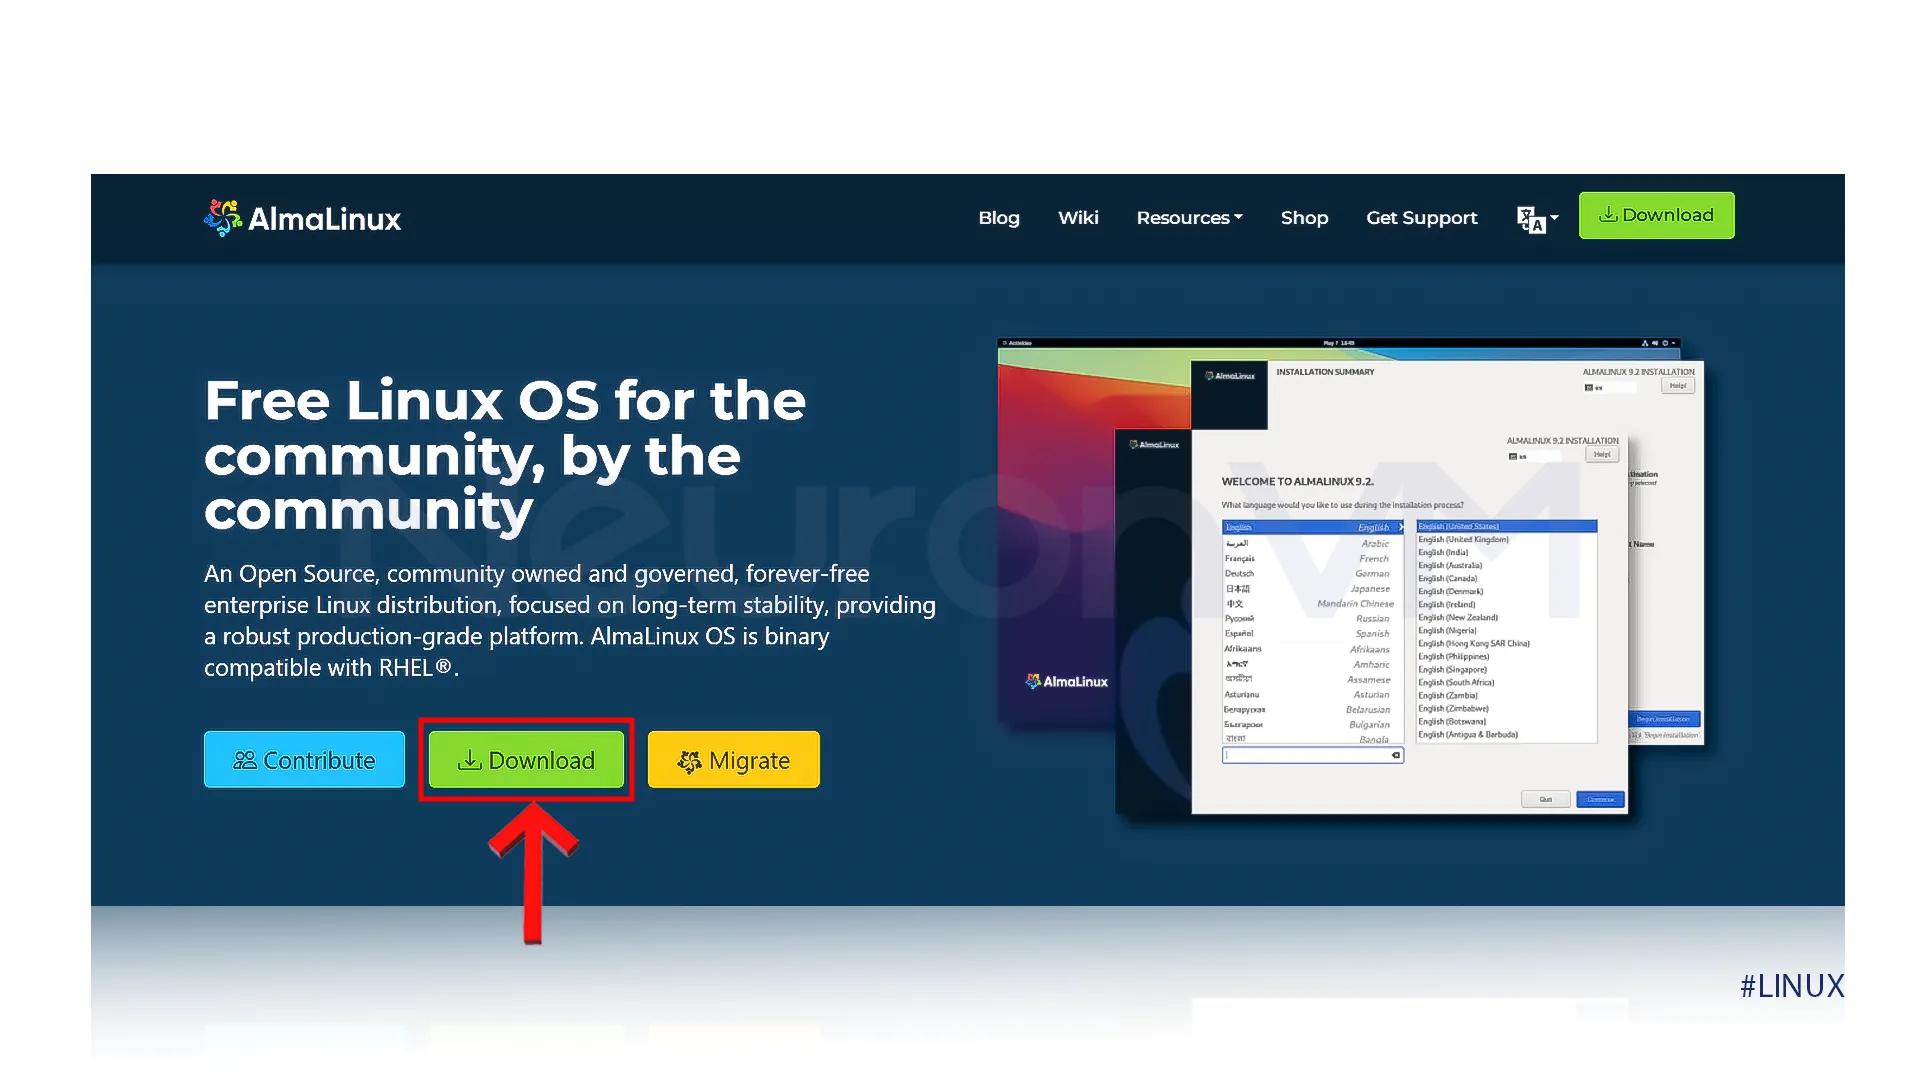
1-For the first step, you need to download the AlmaLinux DVD ISO file, which is available on their main website. To do that, click on the provided link and select the Download option.
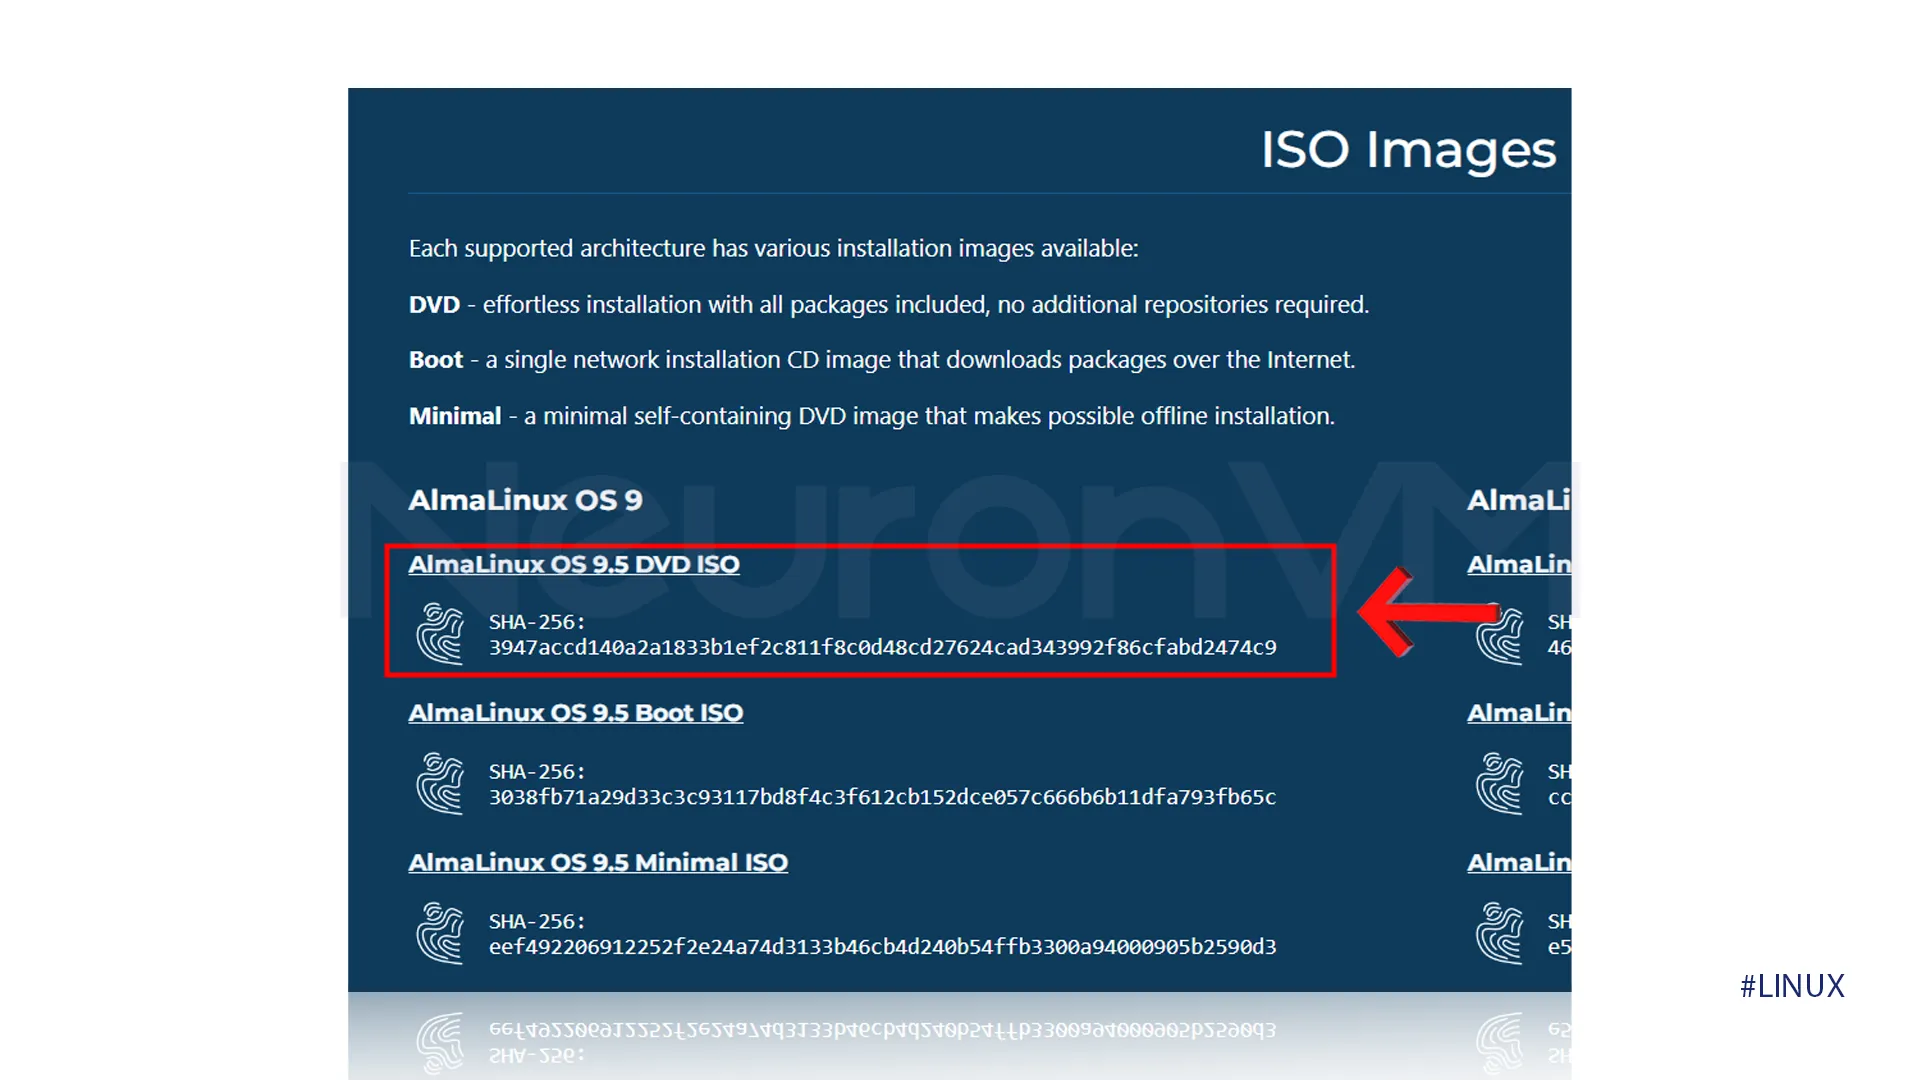
2-In the new tab, you can choose any of the provided options, but we recommend choosing the one that is shown in the image. Pay attention to the fact that each supported architecture on their main website contains a DVD.
Start your VirtualBox
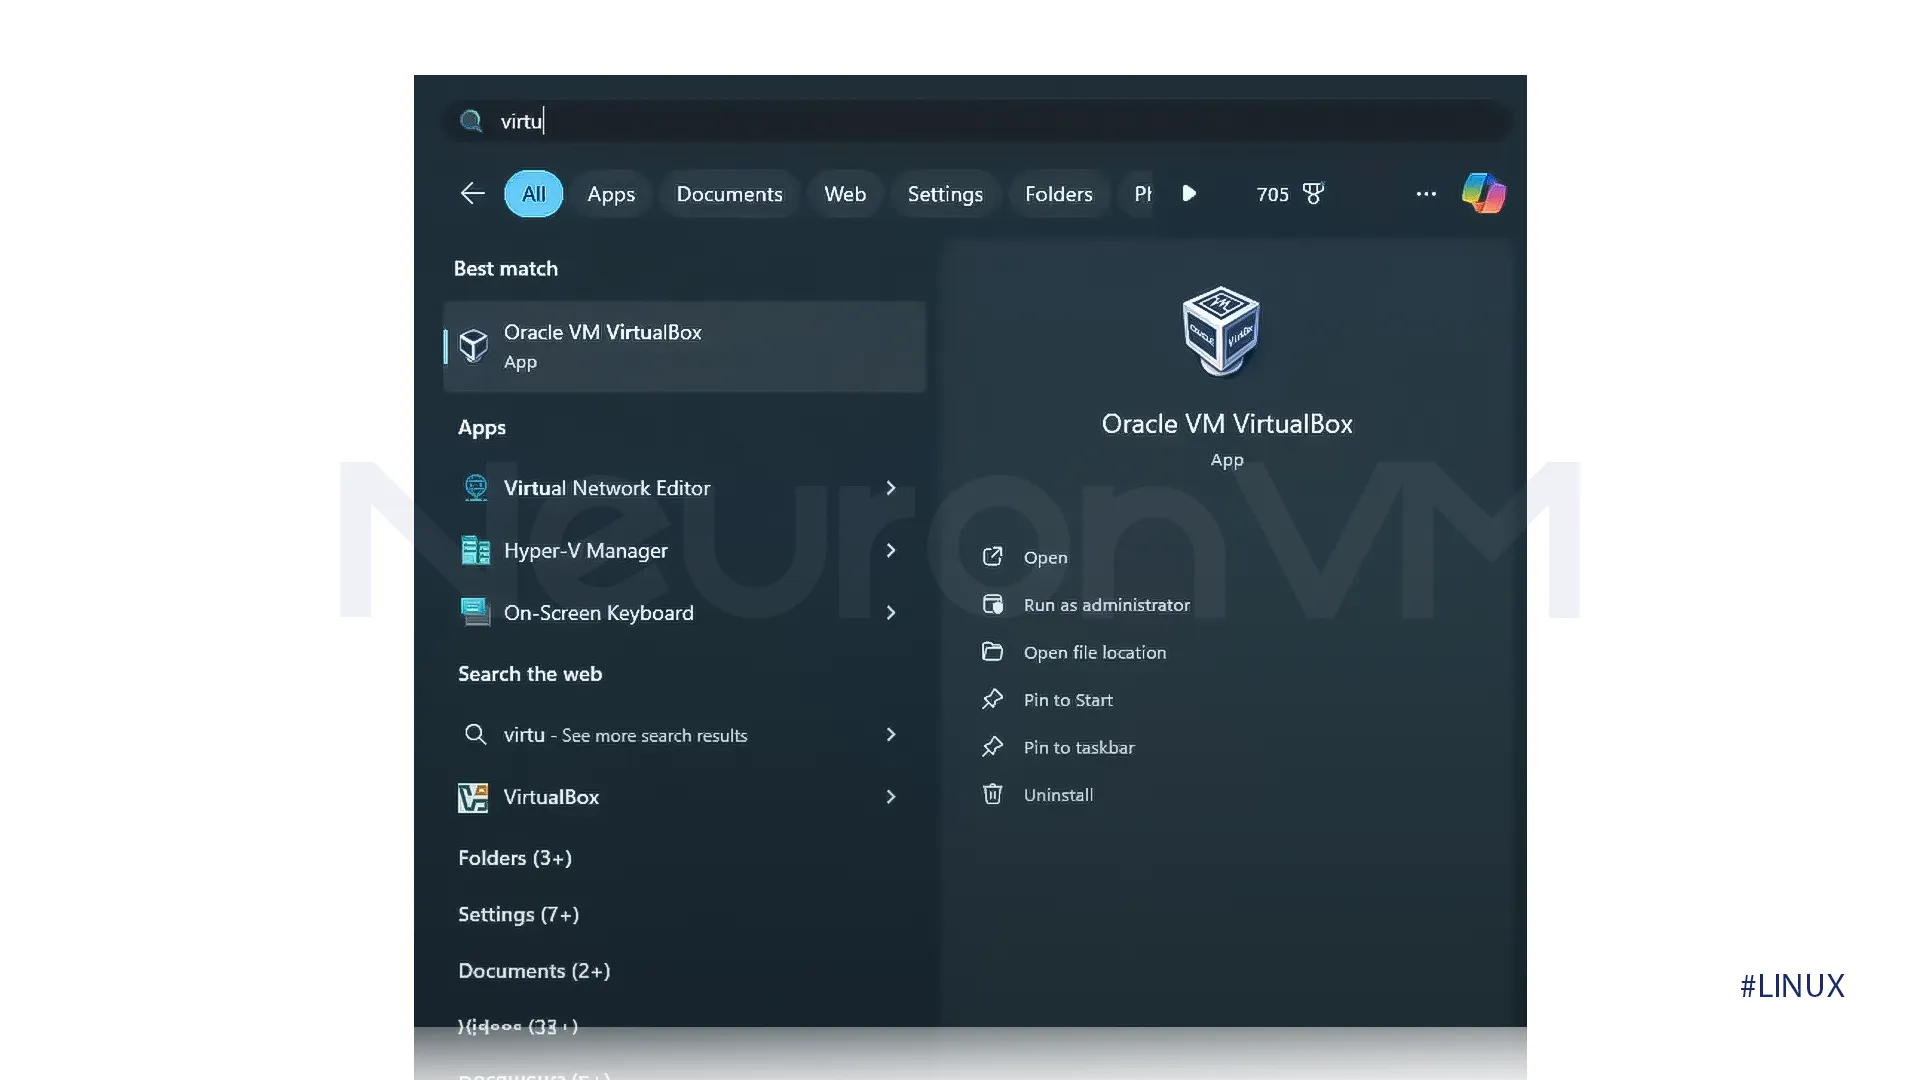
3-After the Download is completed, go to the Start tab, search for the Oracle VM VirtualBox, and select it then choose new to continue.
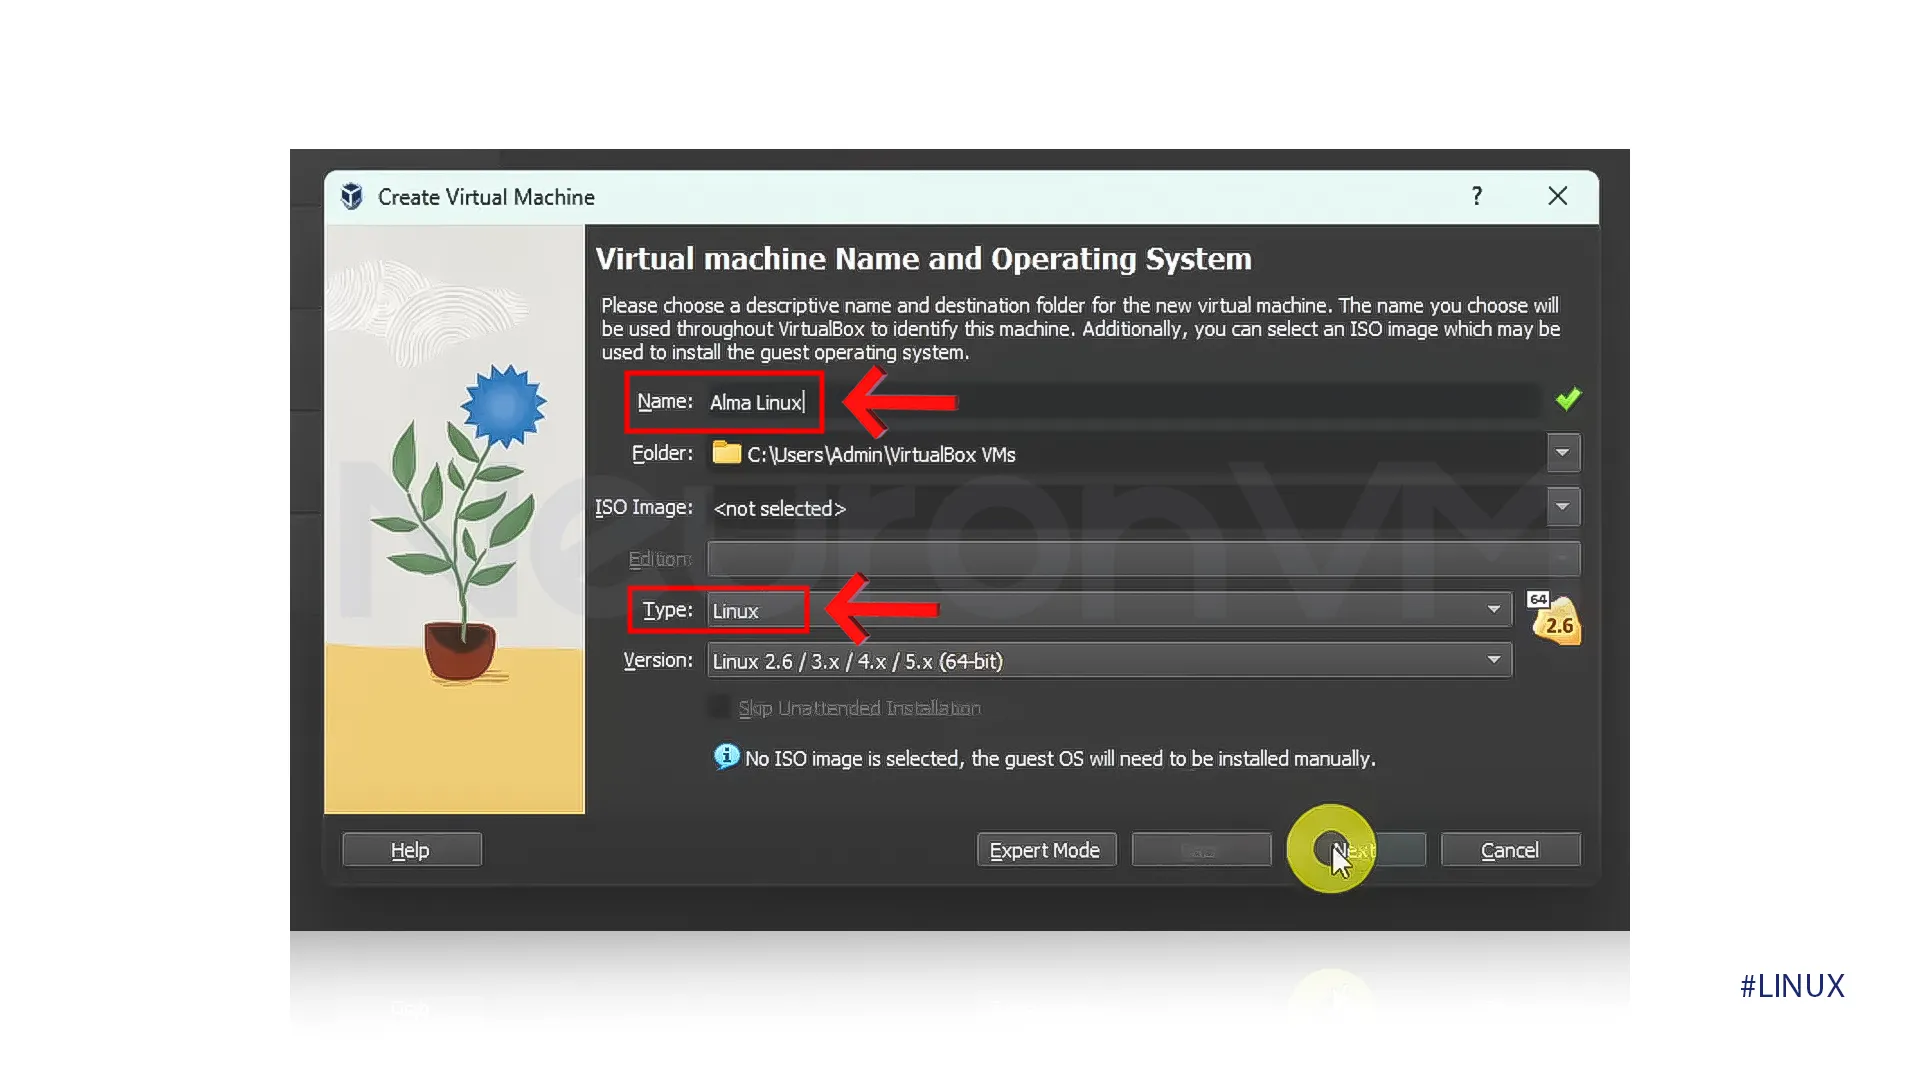
4-You will need to name your Virtual Machine and make sure to select Linux for the type of operating system and press Next to continue.
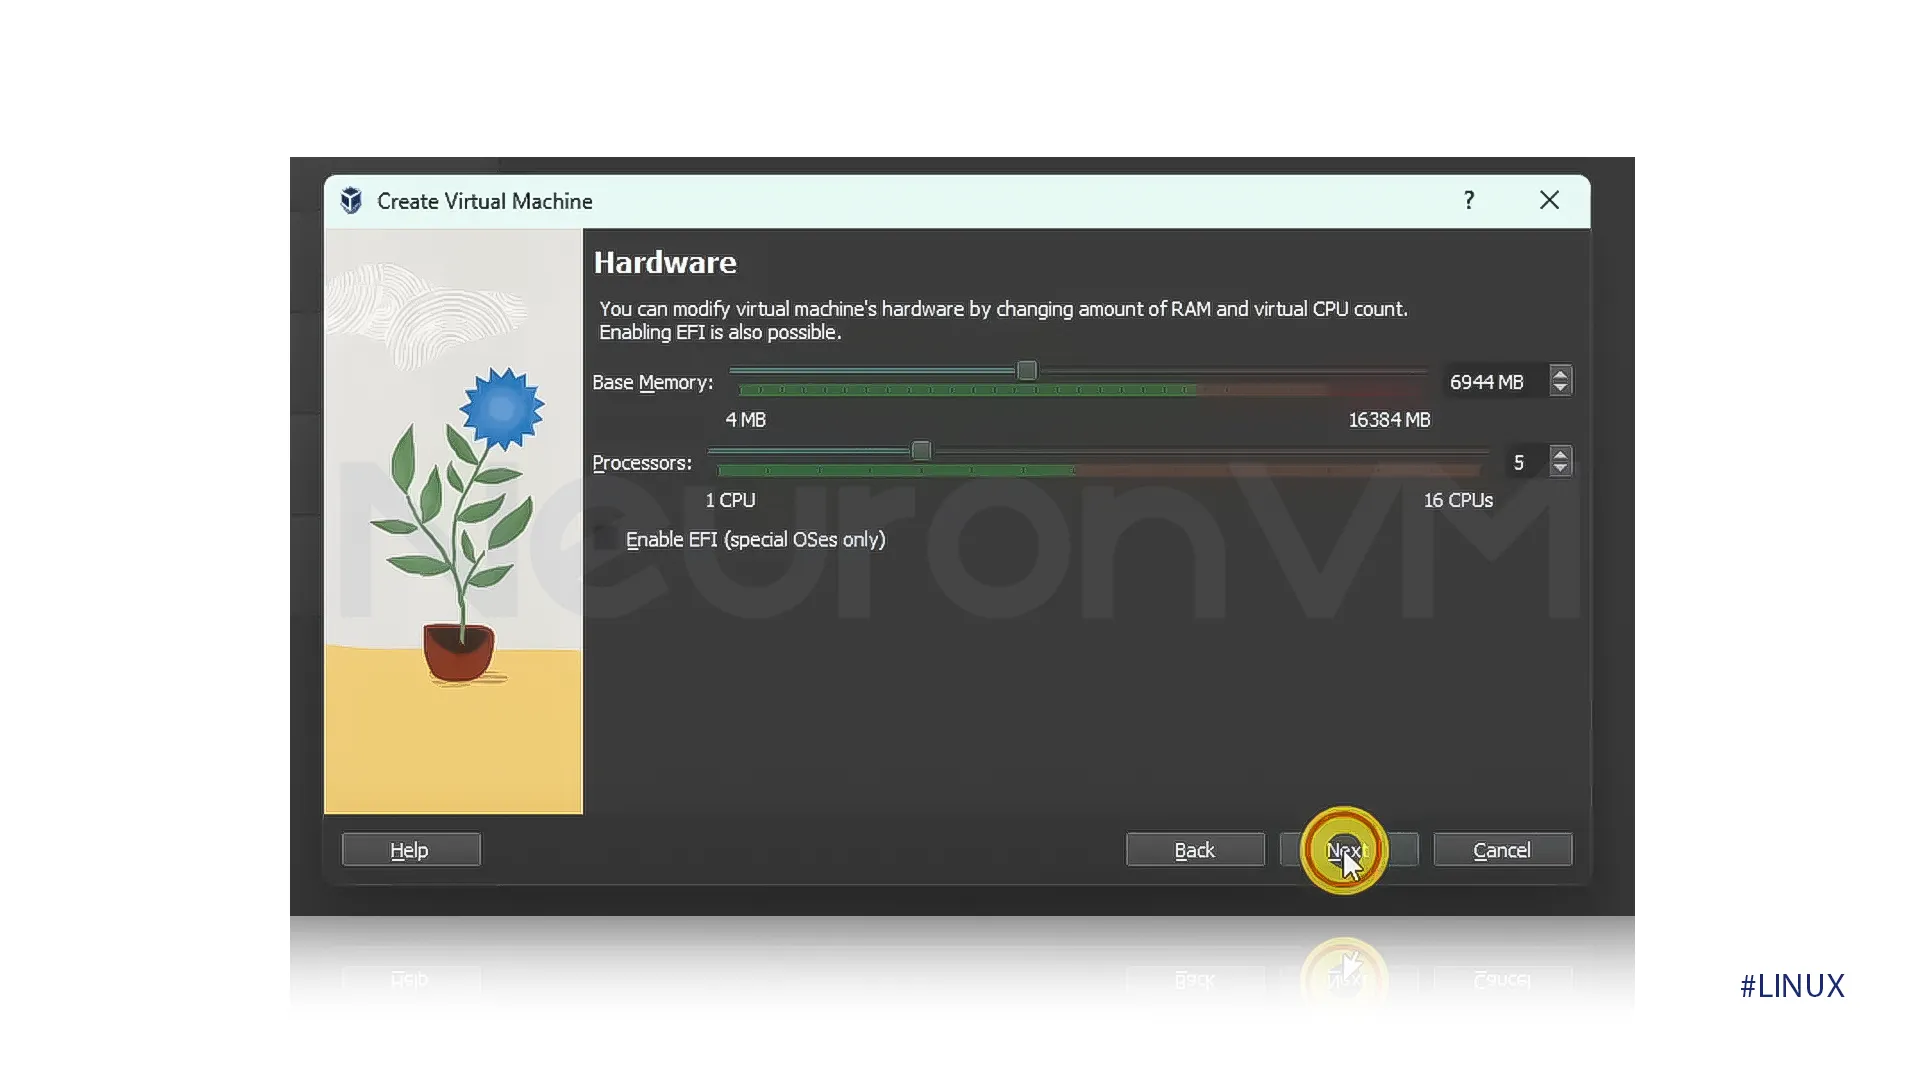
5-You can modify the Virtual machine’s hardware by changing the settings of Base memory and processor.
Note: The settings provided in the image are ideal for starting.
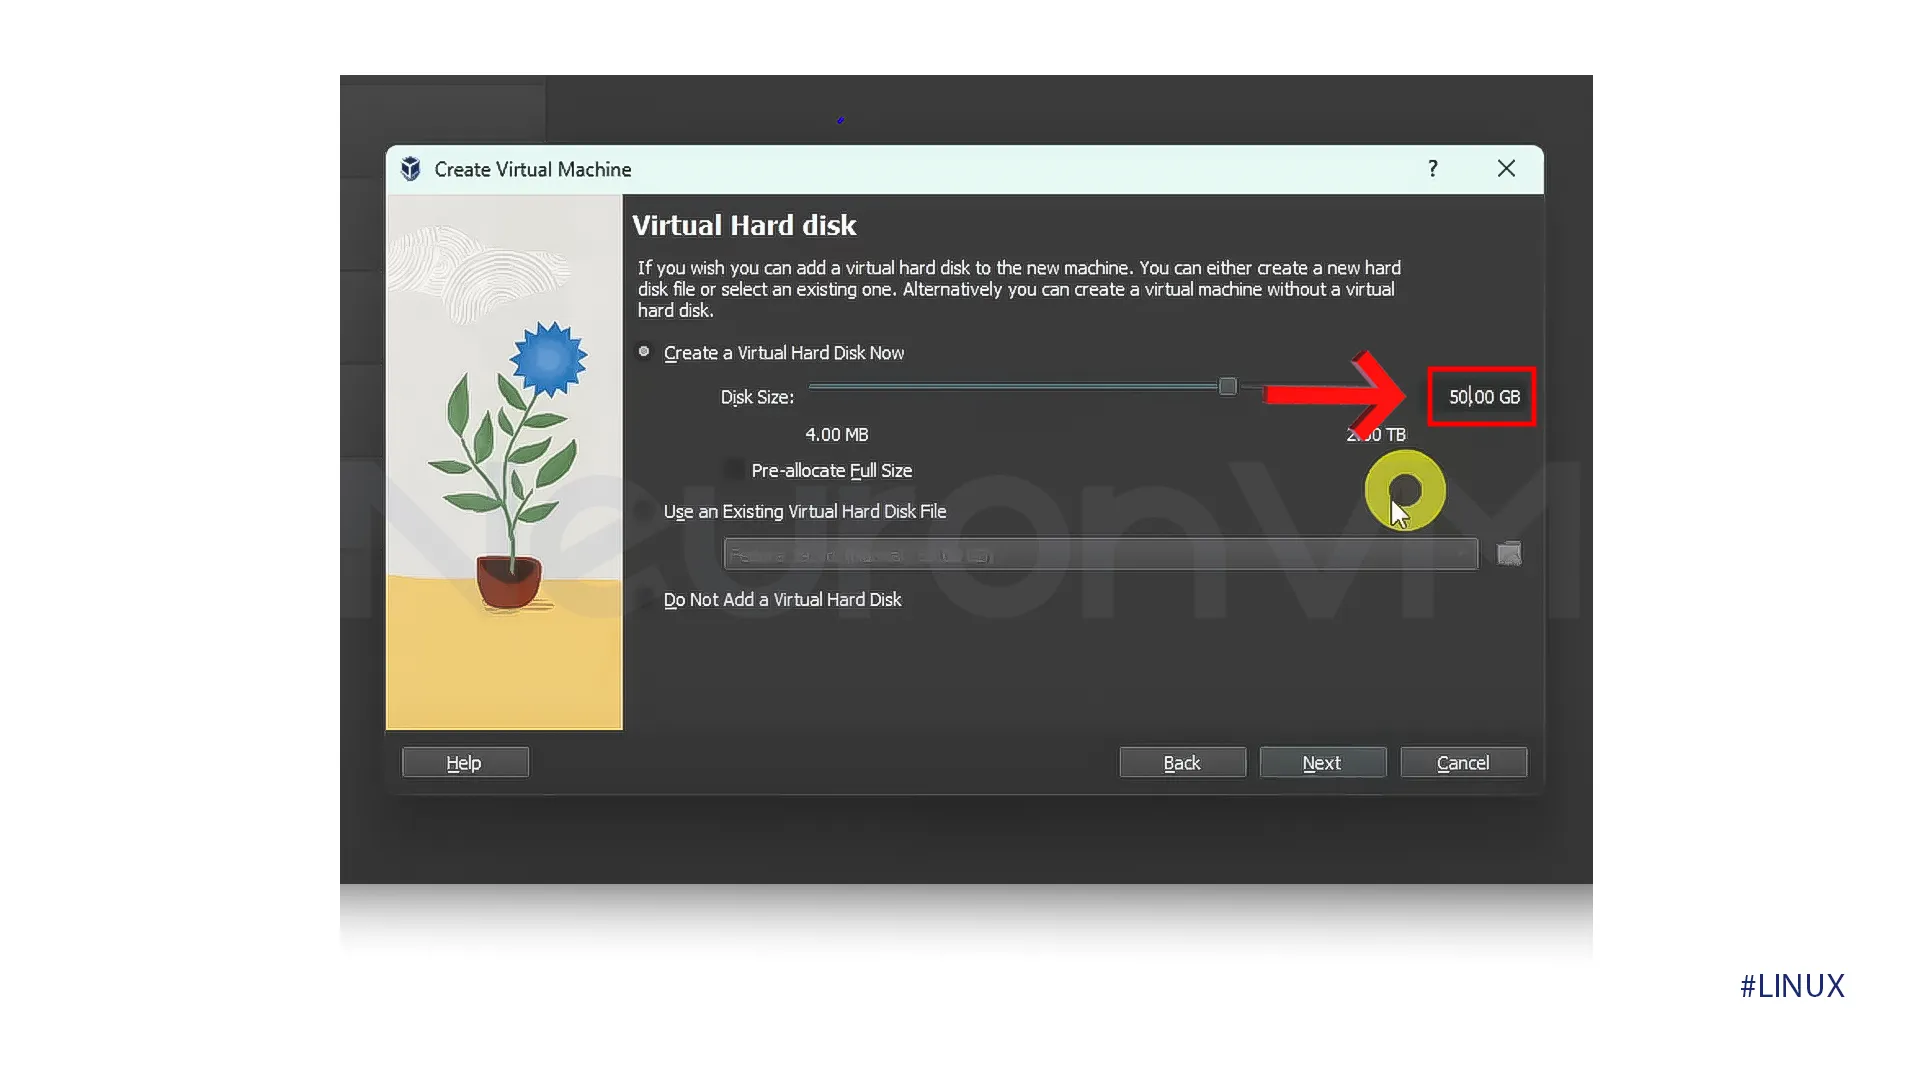
6-In Virtual Hard Disk Settings, change the Disk size to 50,00 GB and click on Next to continue.
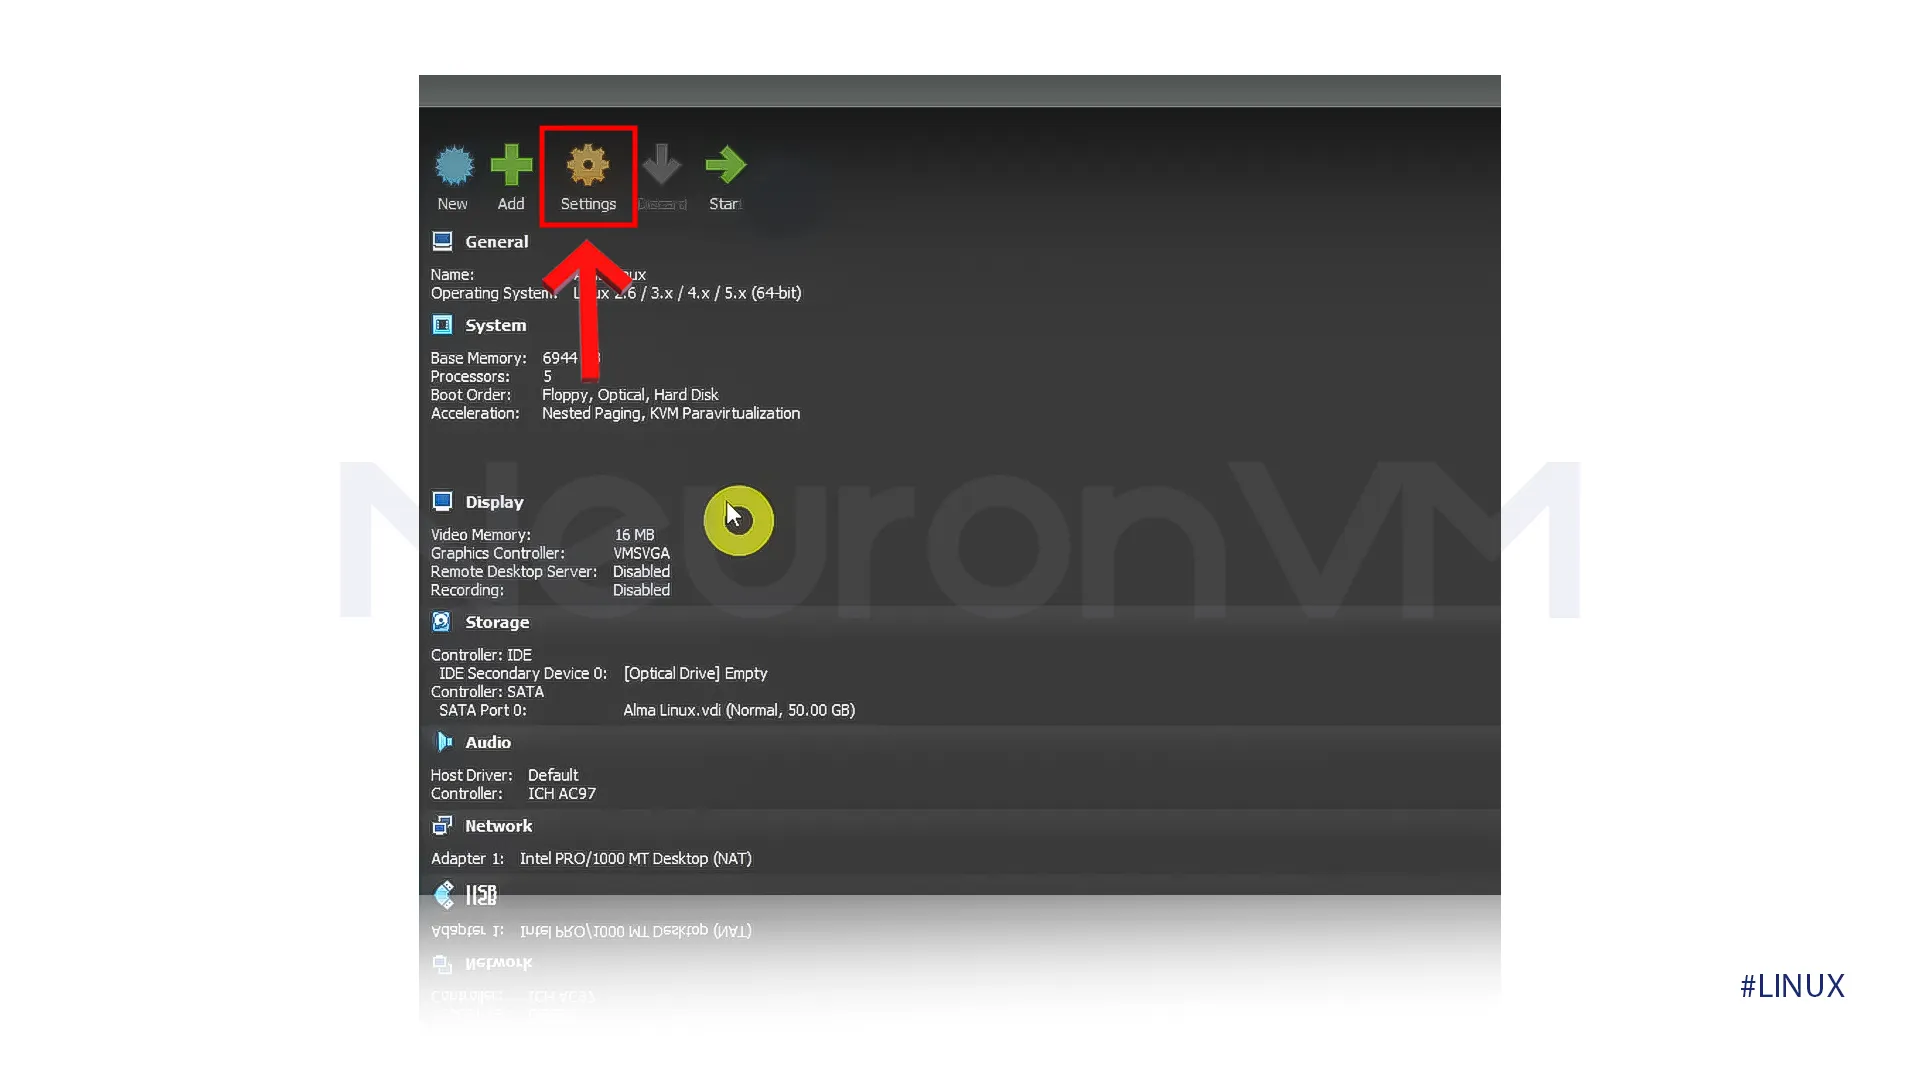
7-Once you have made the previous changes, Click on Setting at the top of the menu.
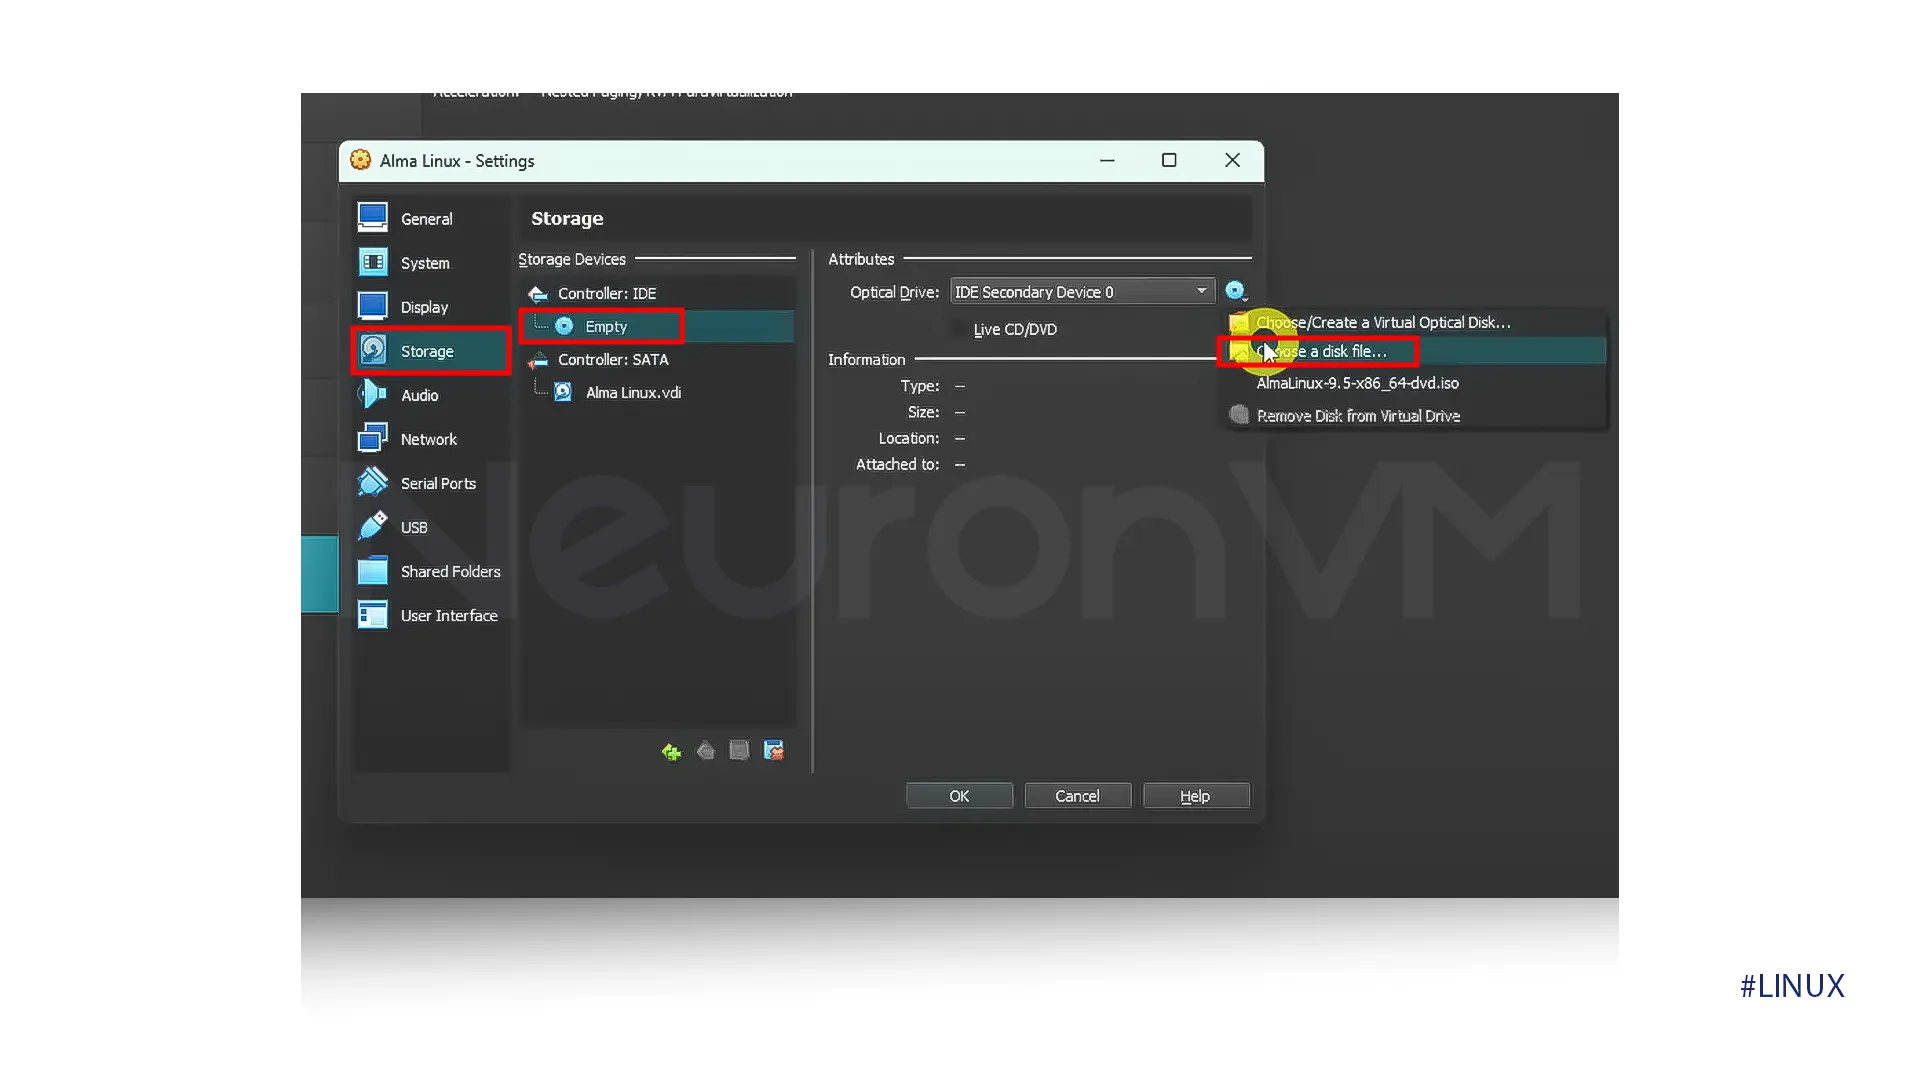
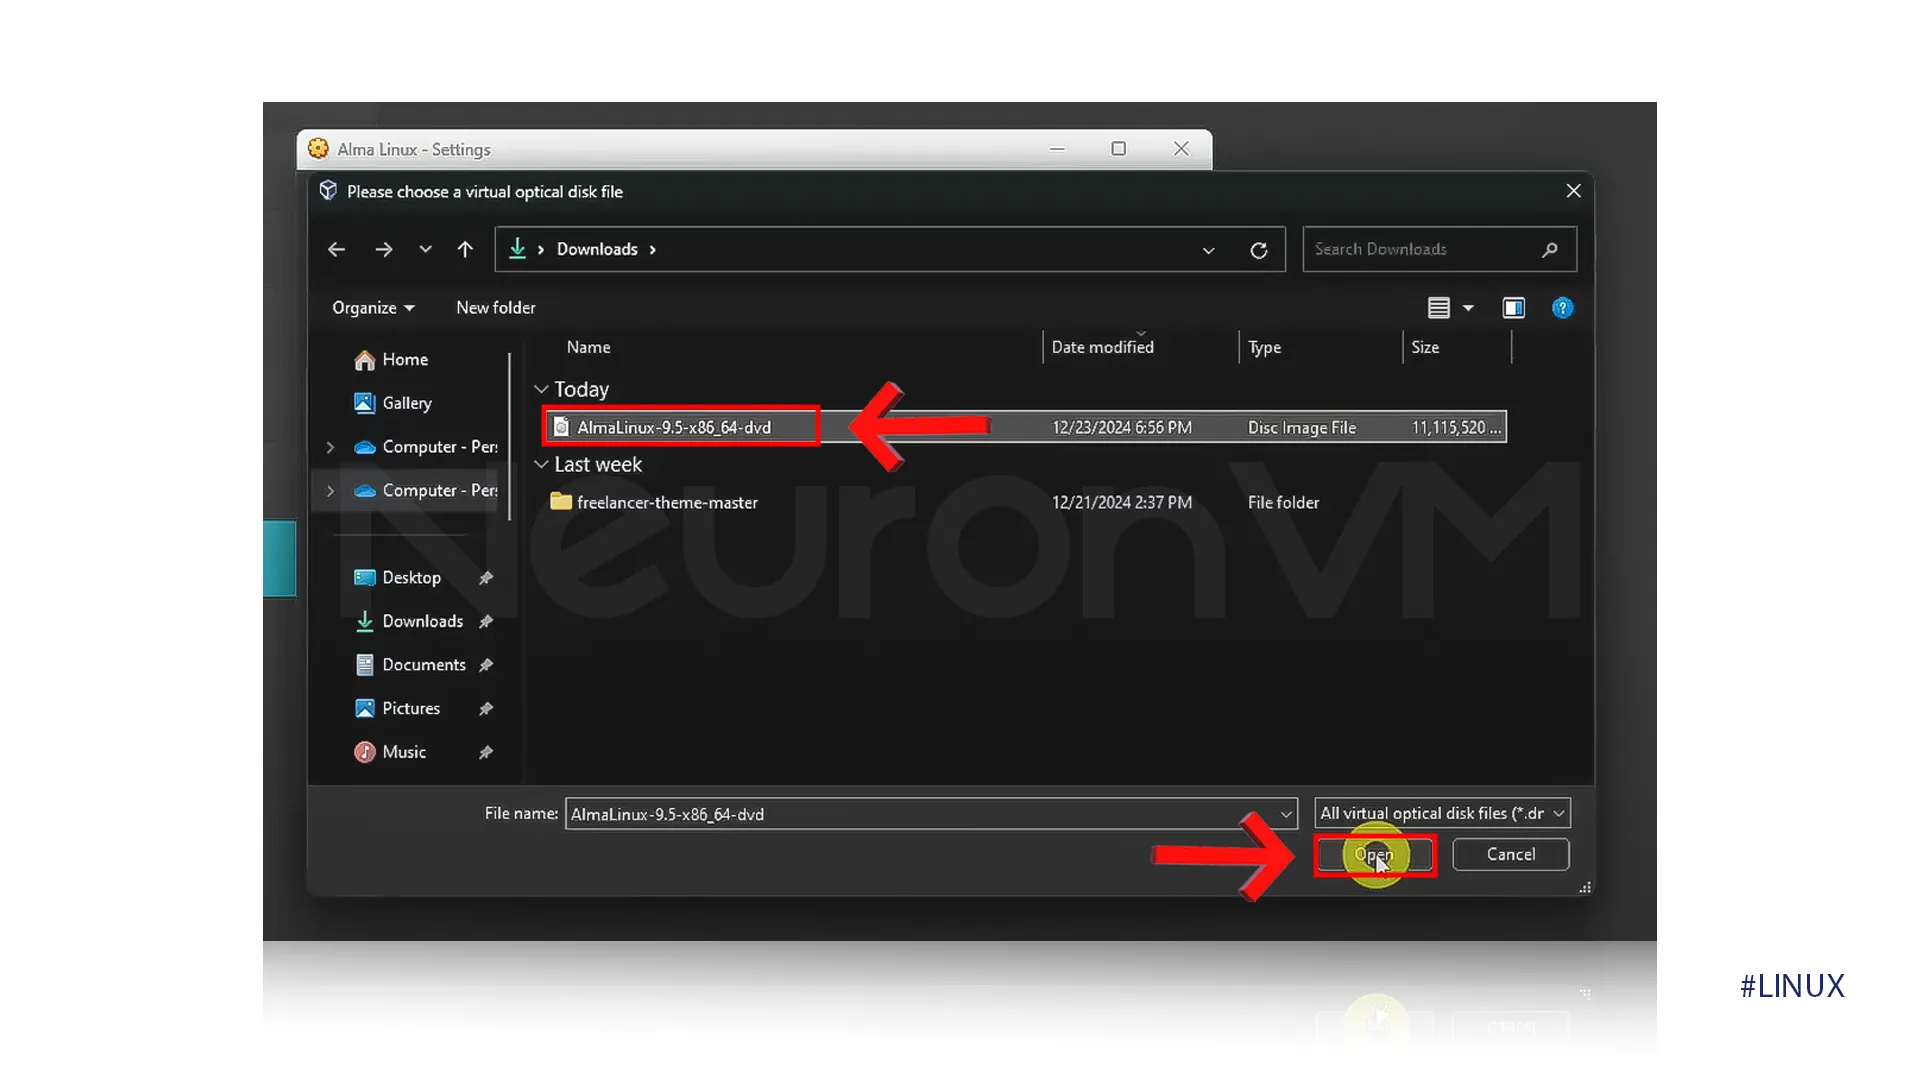
8-In the Settings Tab, select Storage, then in the Storage devices, choose Empty. on the right side, click on the optical drive, then choose the option “Choose a disk file.”
9-Select the AlmaLinux file that you have downloaded in the first step, then click on Open, then click on Ok.
Run AlmaLinux on VirtualBox
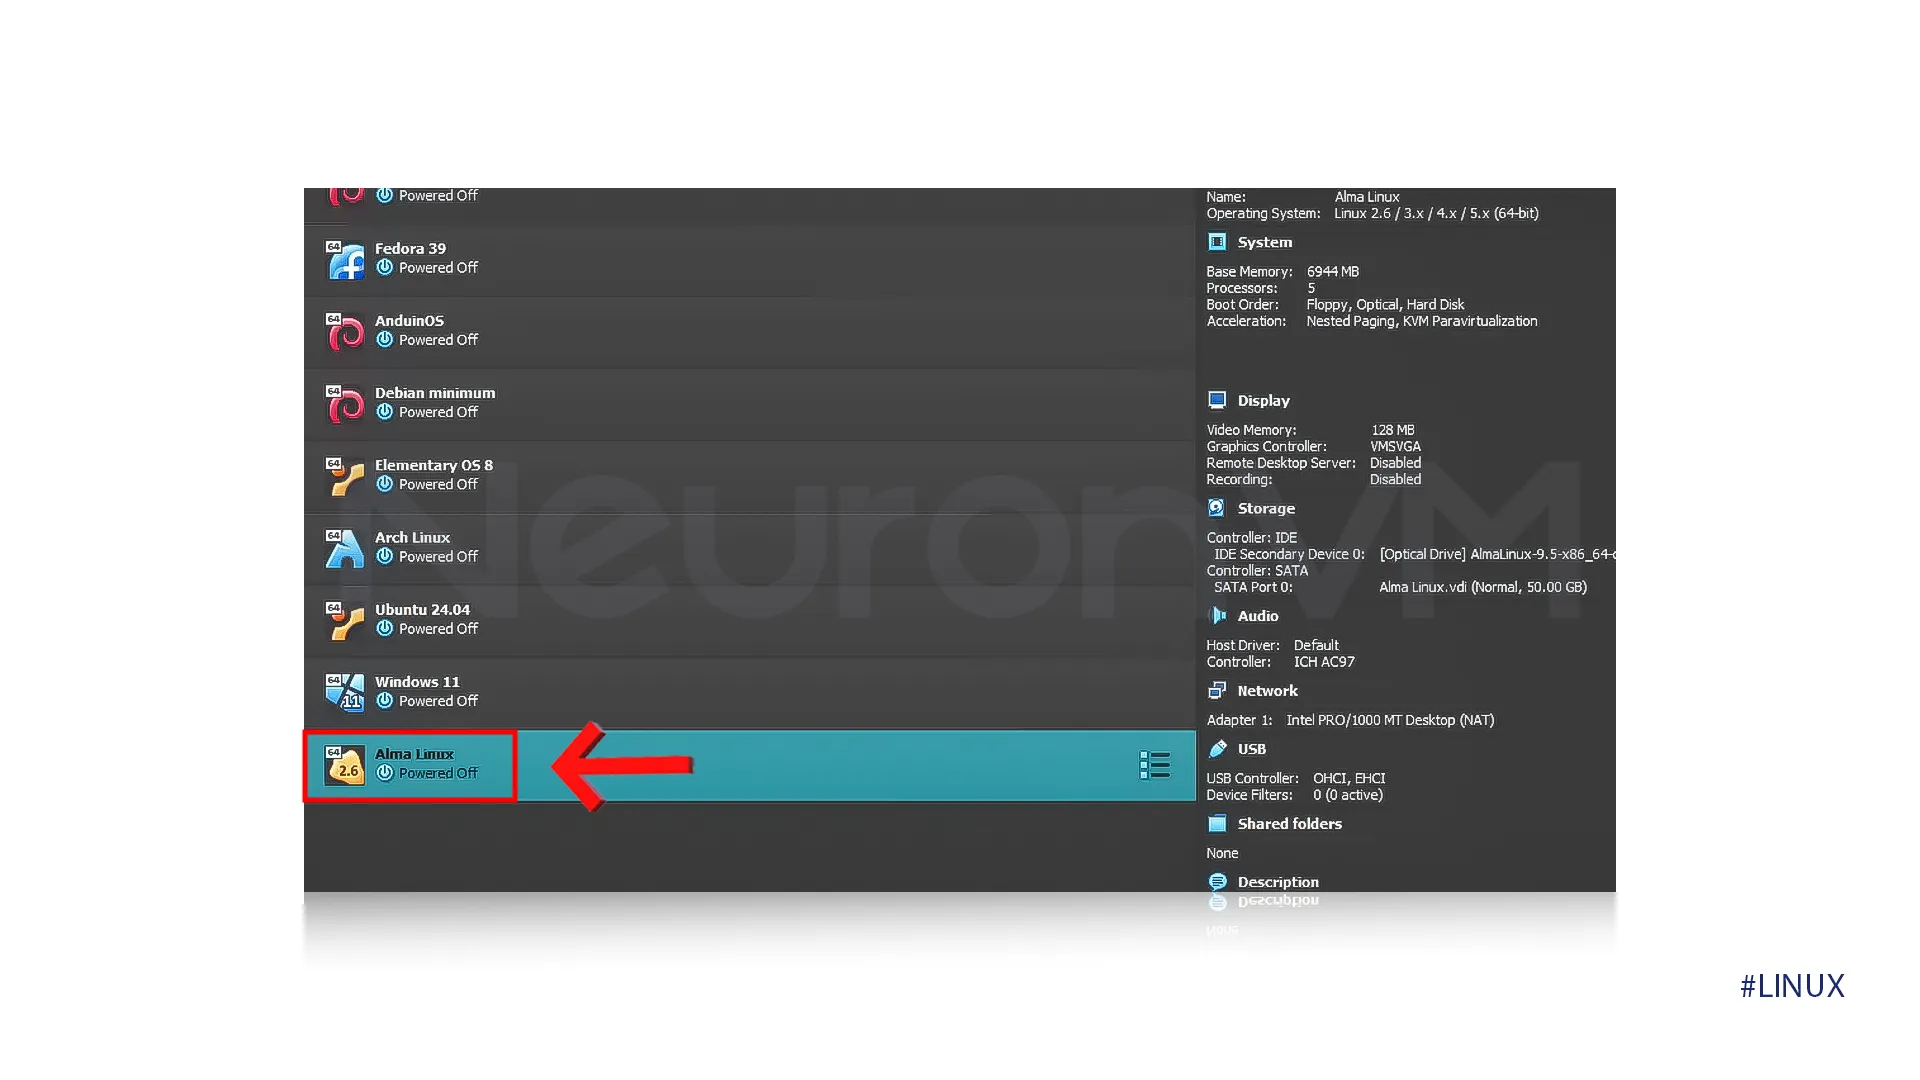
10-Choose AlmaLinux on the left side of the menu to start the AlmaLinux on VirtualBox.
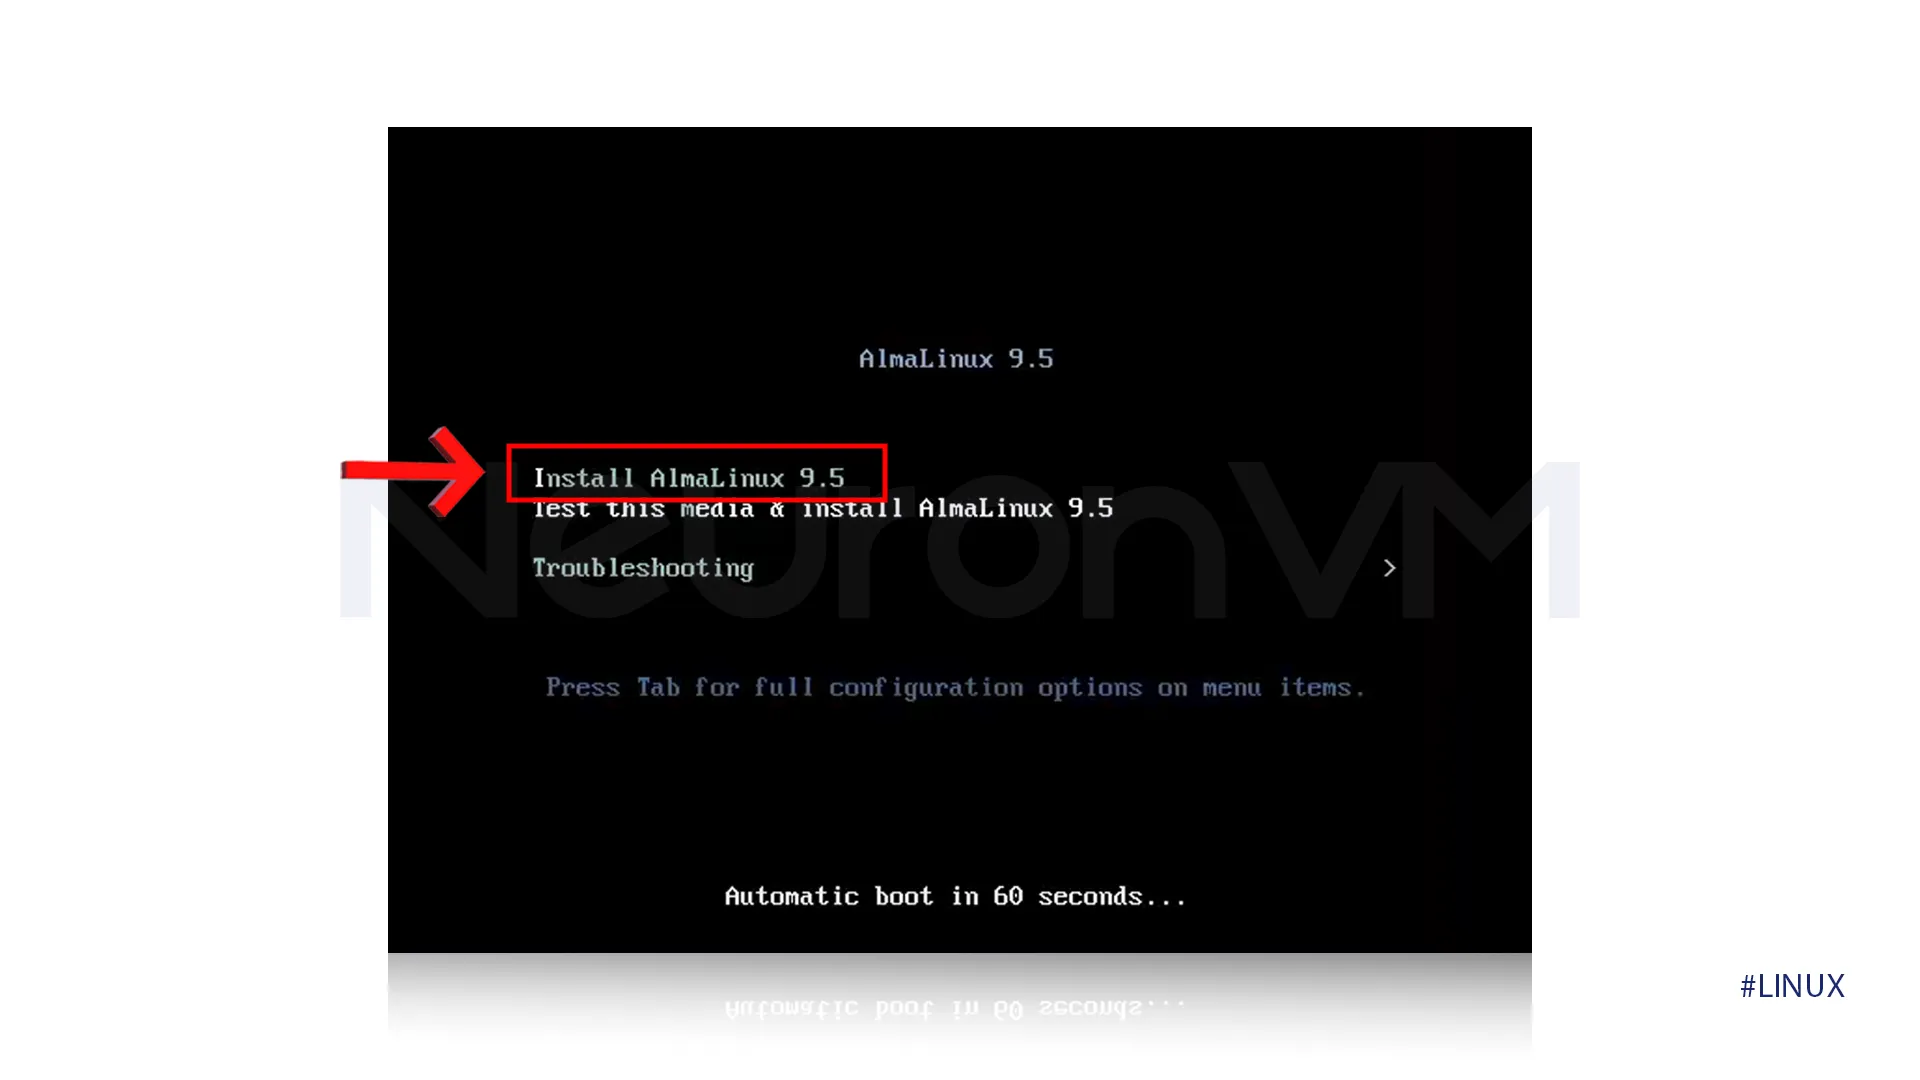
11-After selecting that, a new tab will open, click on the first option, which is “Install AlmaLinux,” and then it will begin to install.
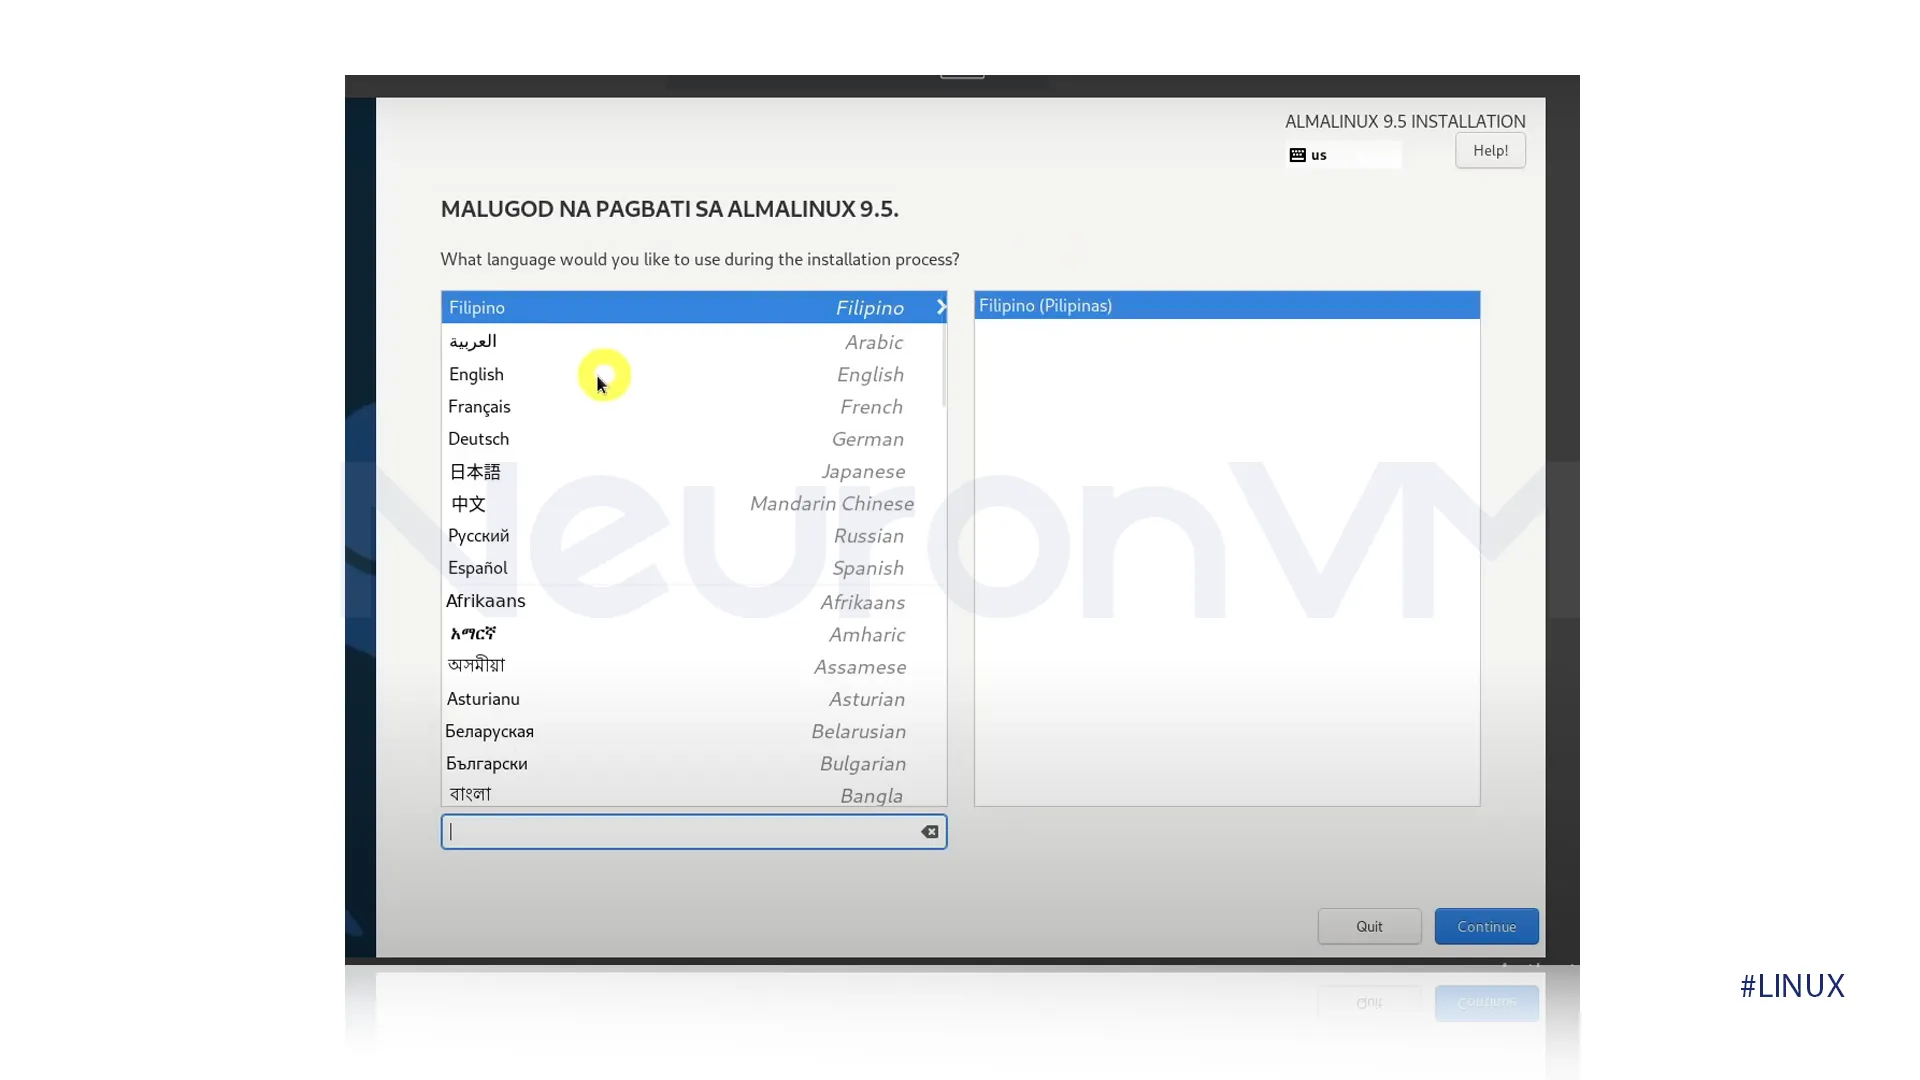
12- A New tab will open, you need to choose the required language for installation, then click on continue.
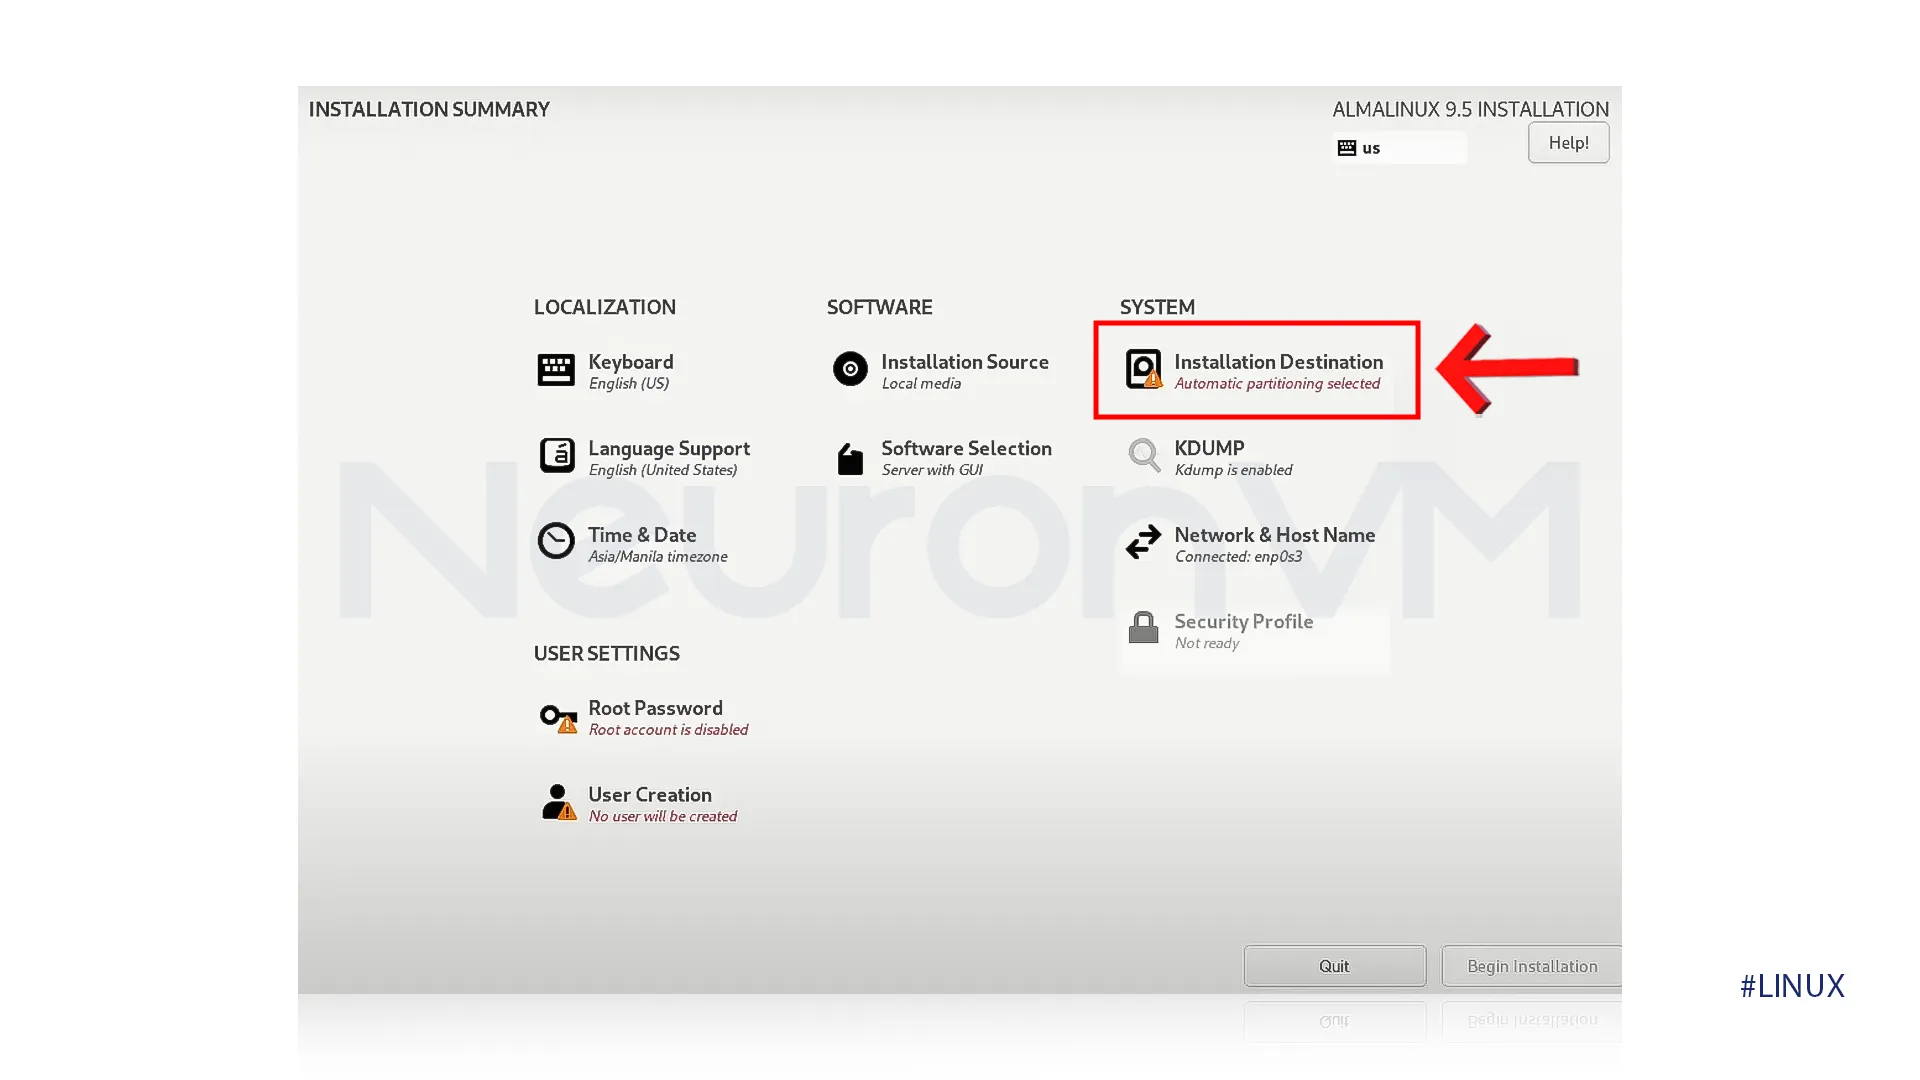
13-Then a new tab will open in the System section, choose “Installation Destination” to select the virtual or physical hard drive.
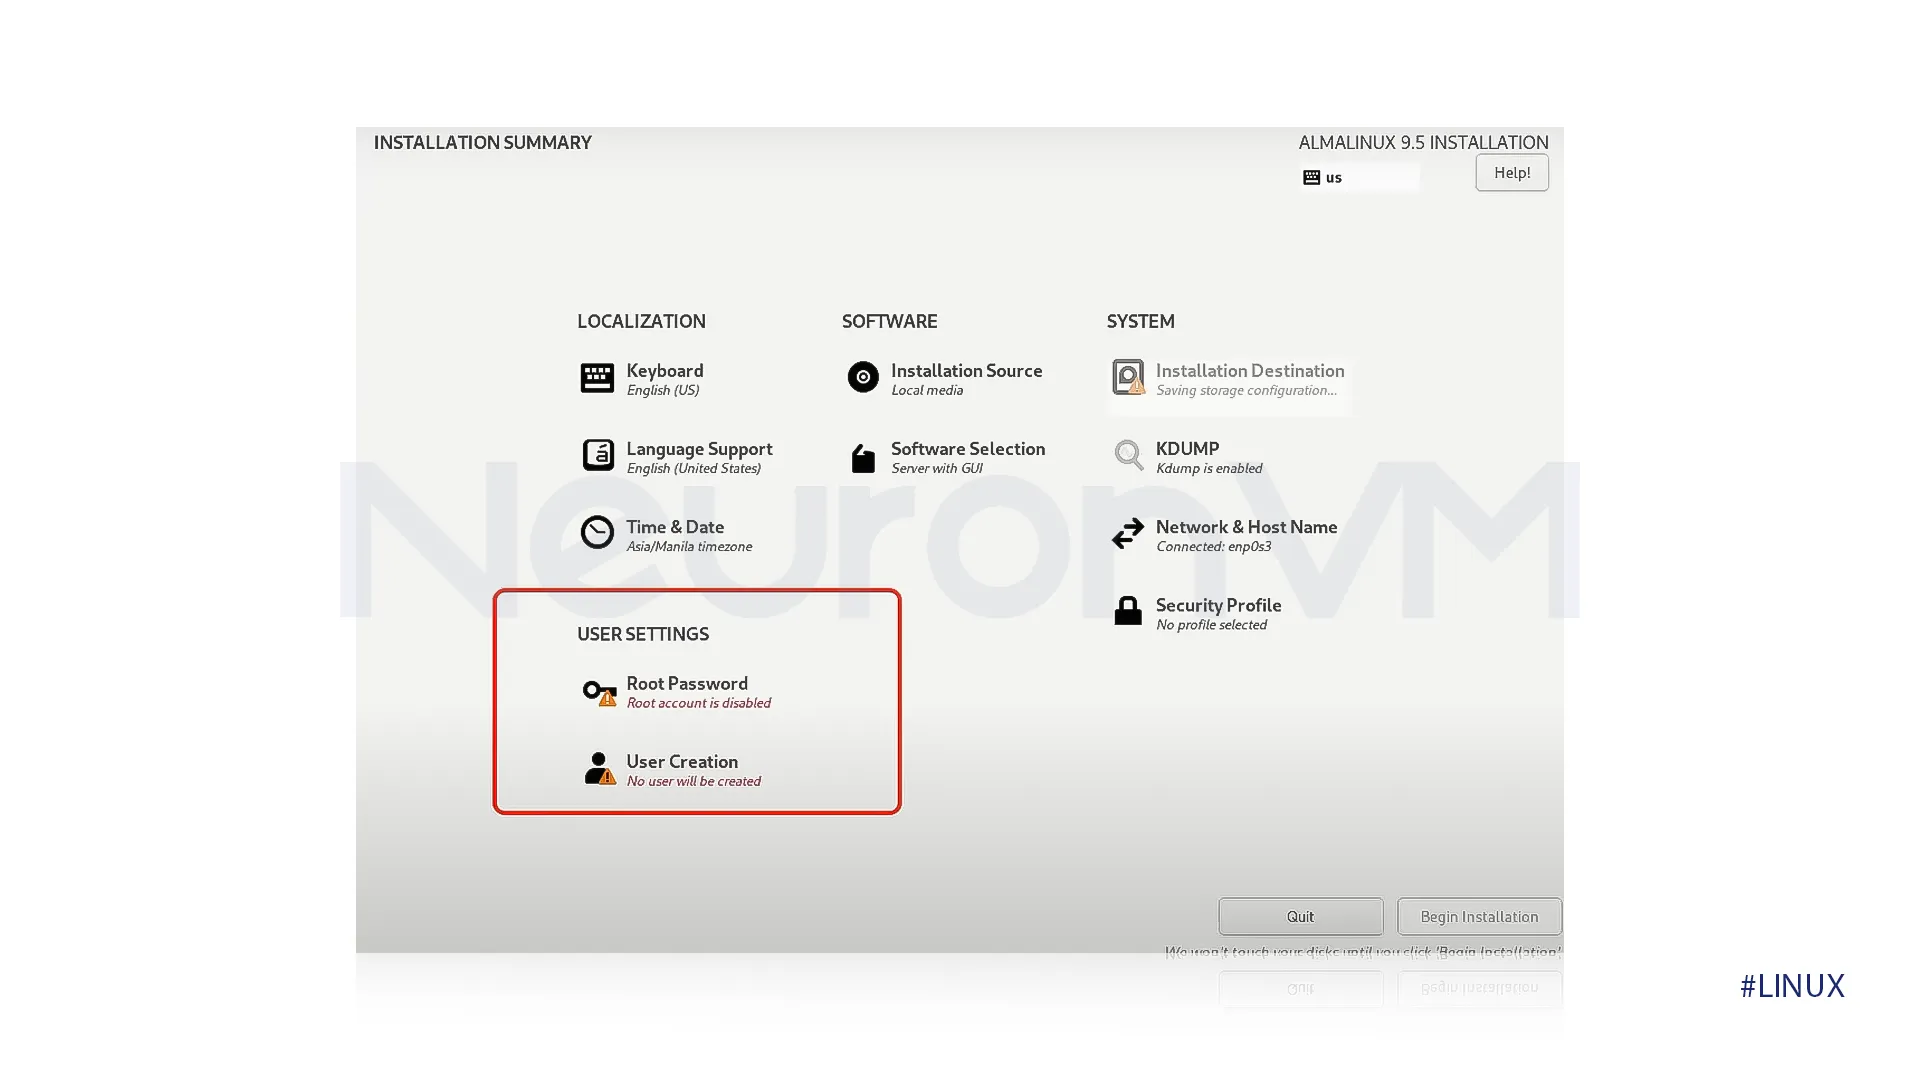
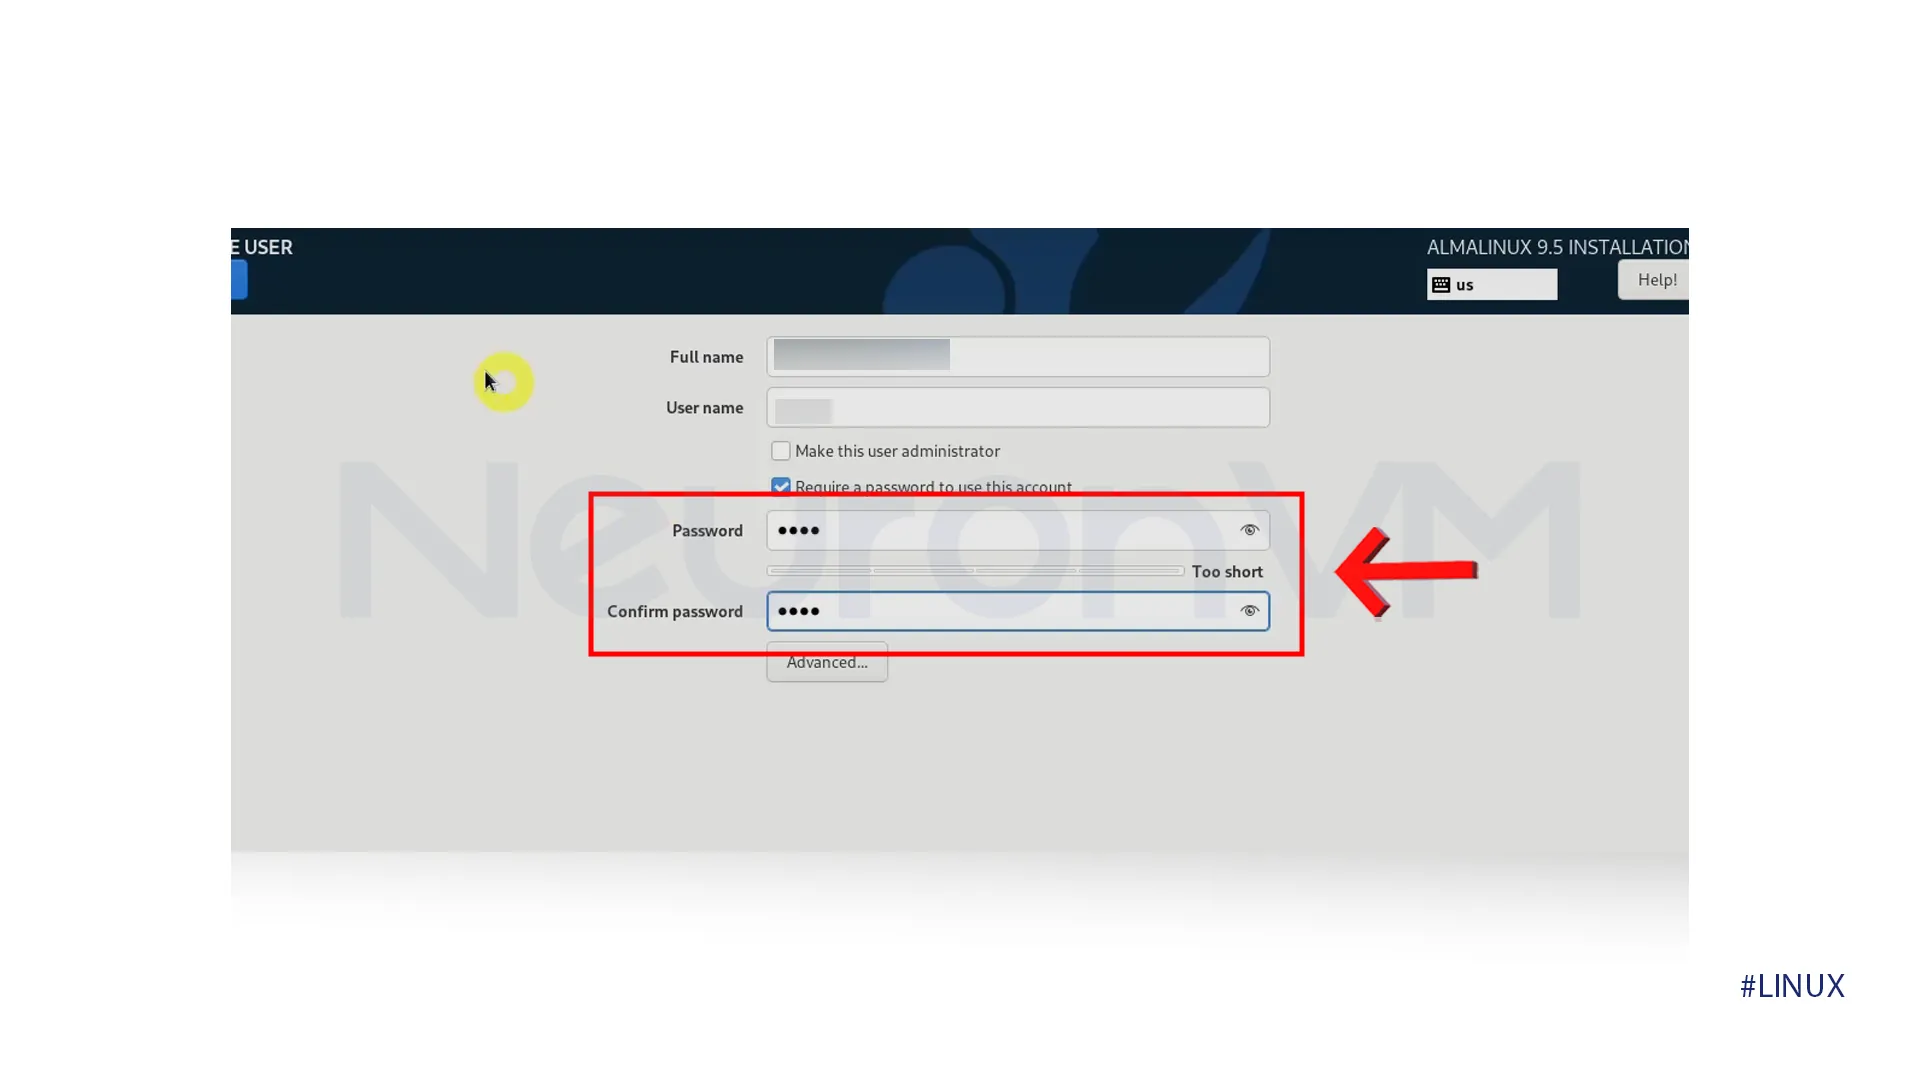
14-On the User Settings option, set a new Root user and passwords as well, first, you need to click on Root Password to set a password, and then you need to click on User Creation to create a user.
15- Put the password you have created in the Root Password in the password section.
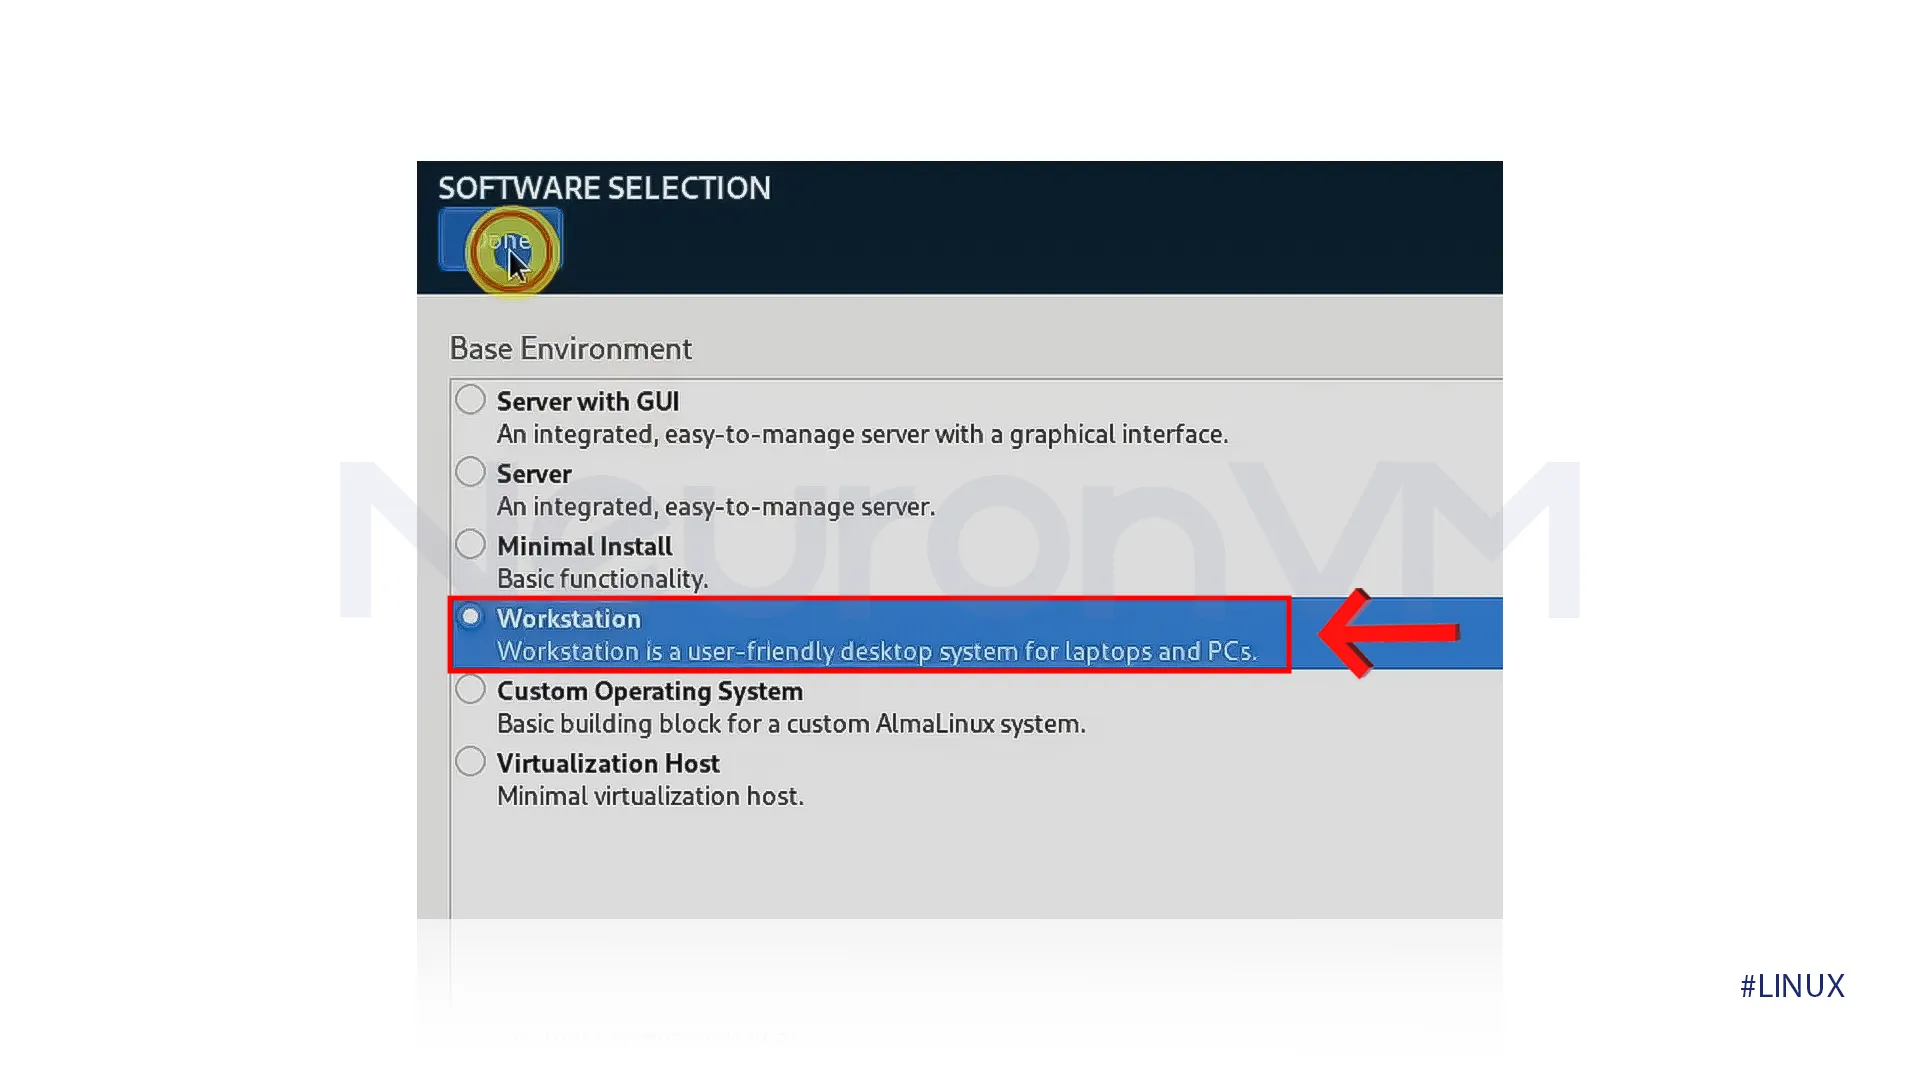
16-Select the Software selection to continue.
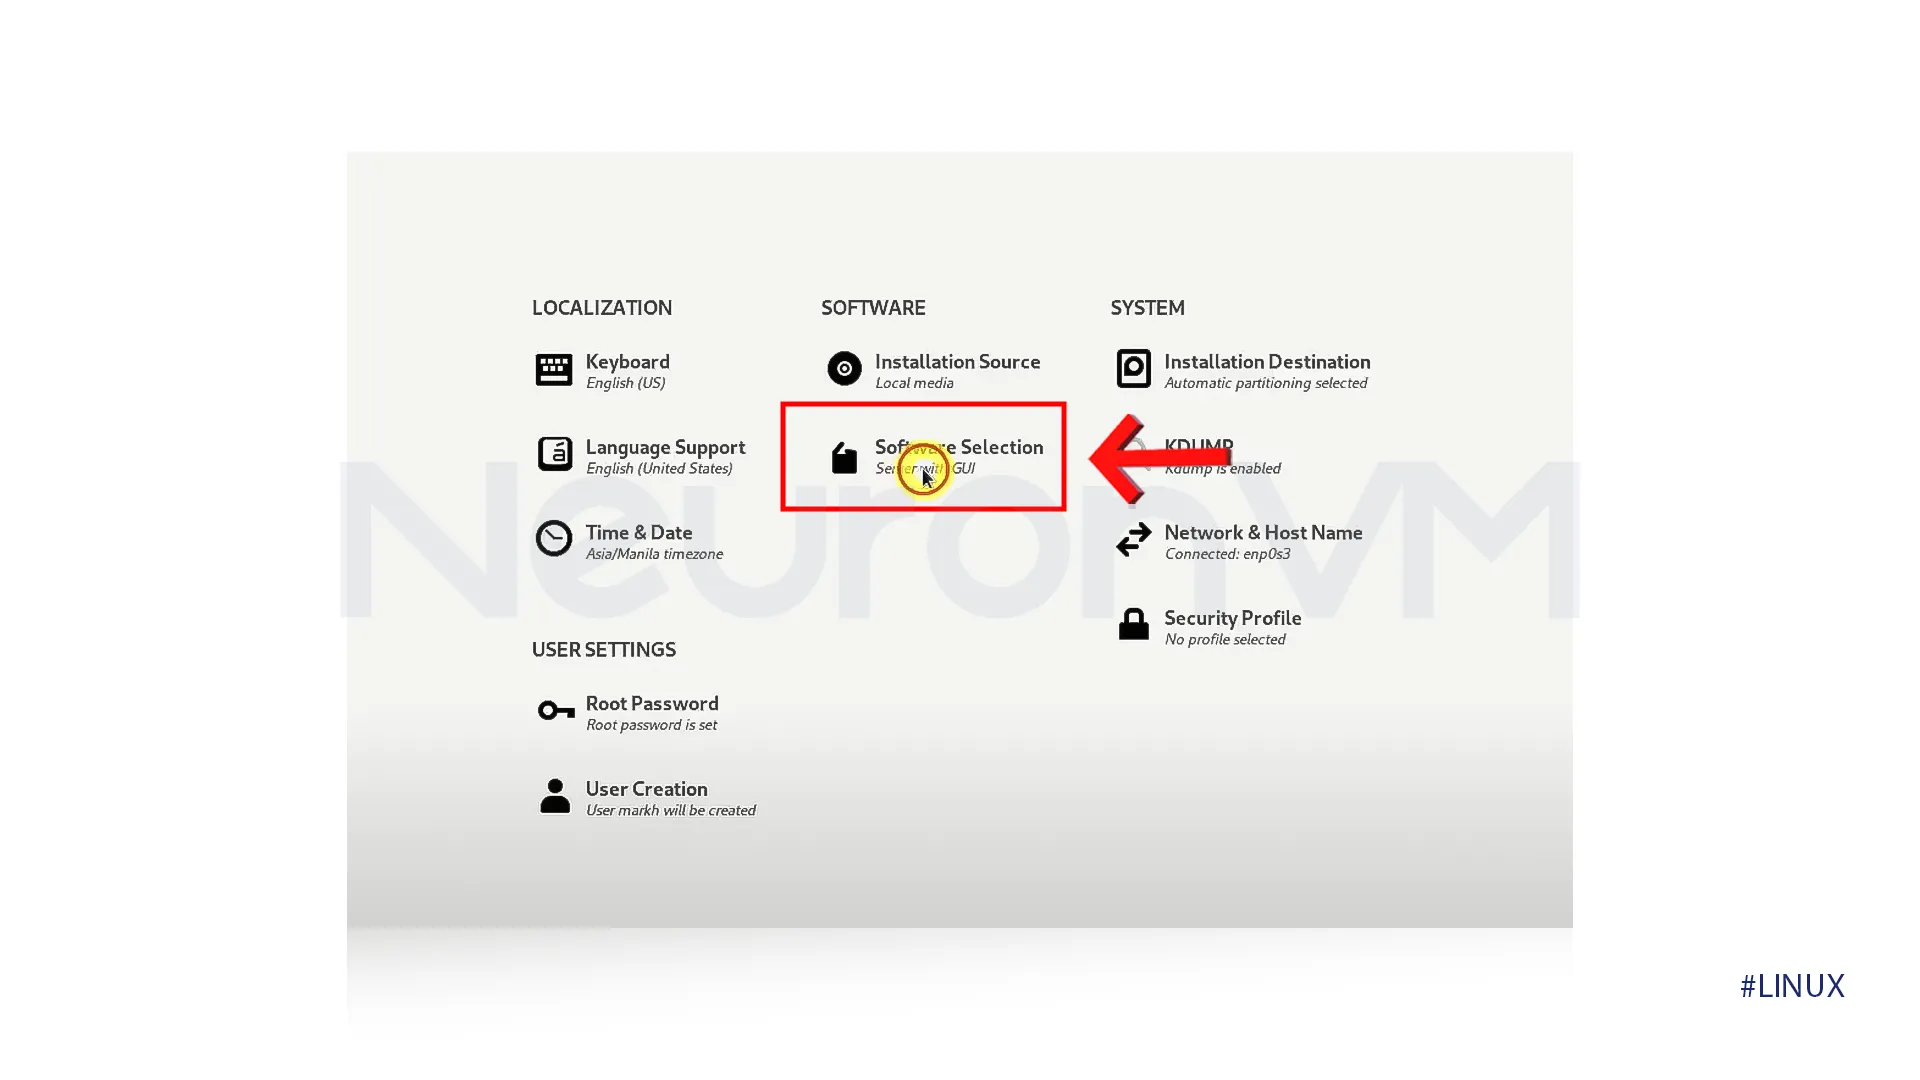
17-On the Sofware Selection menu, select the option “Workstation” to activate this feature in your Base environment.
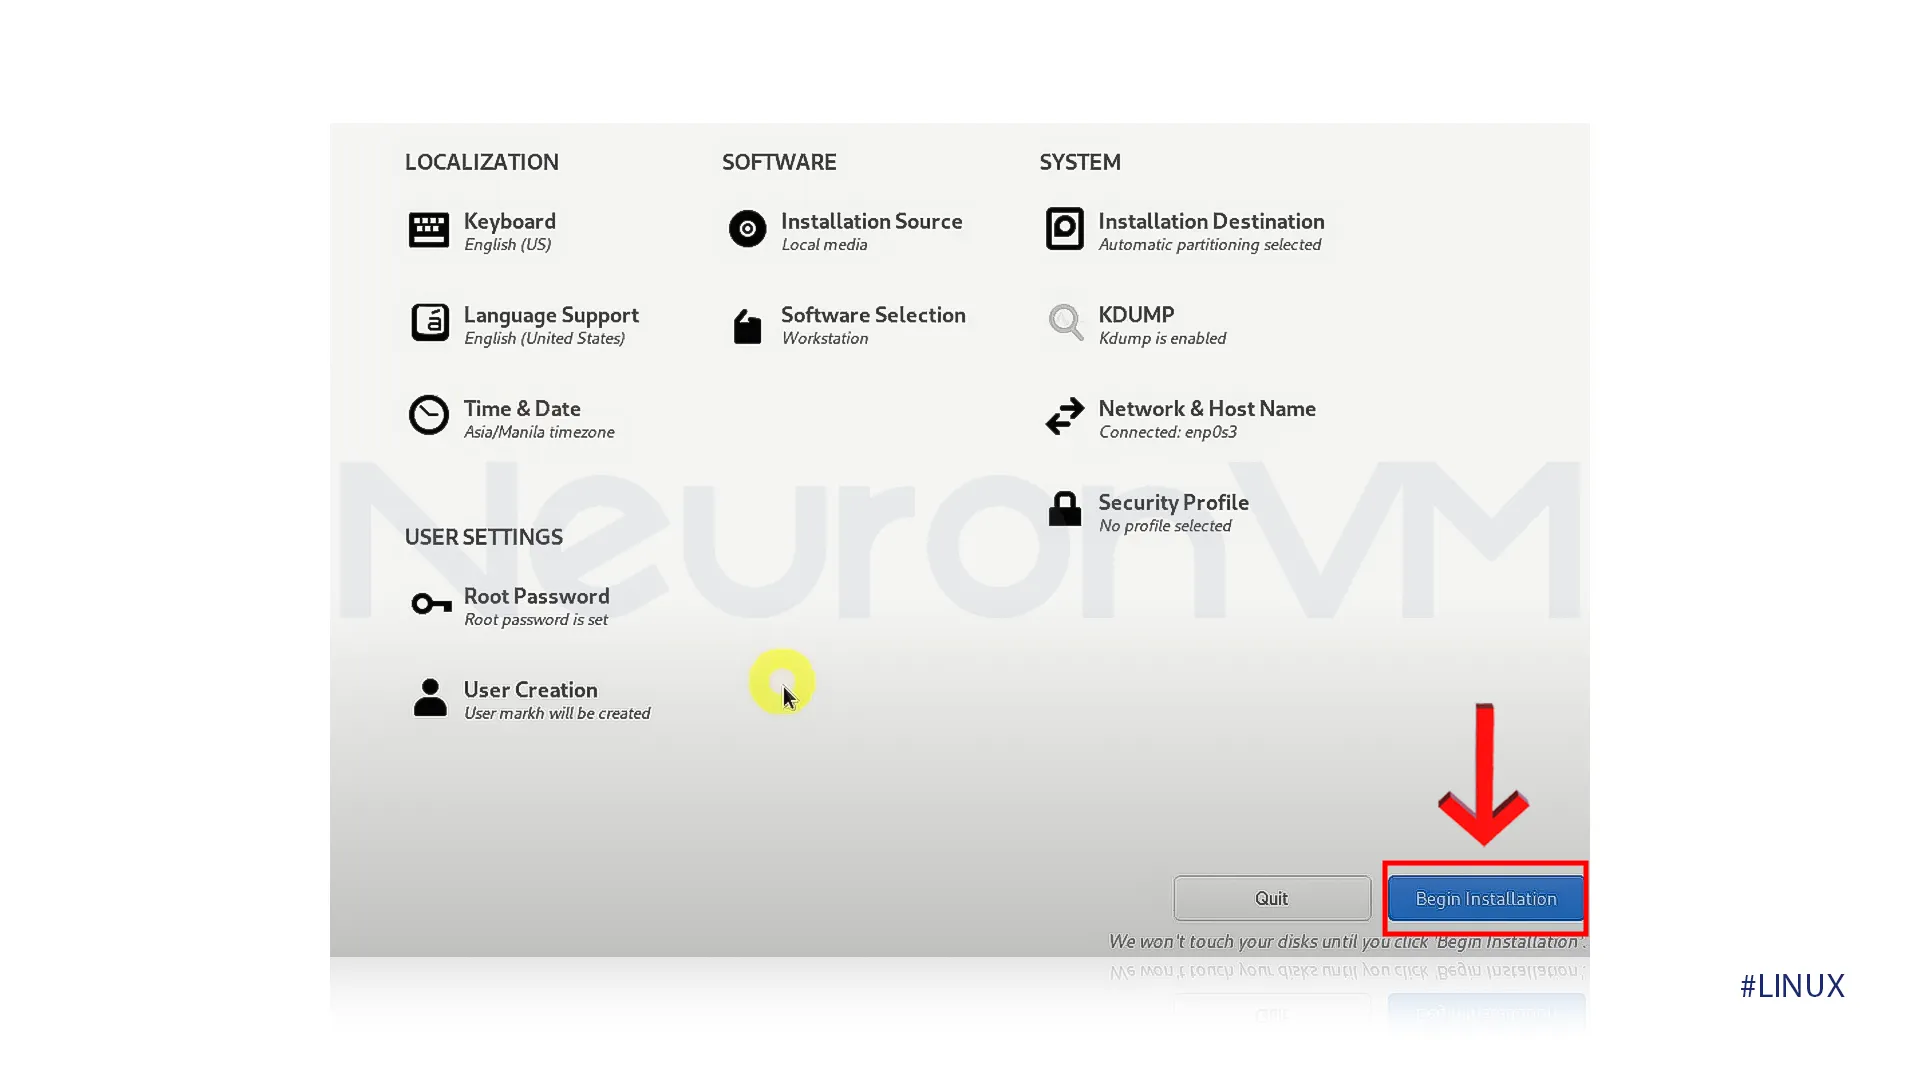
18-You can finally click on the Begin Installation button to let the installation begin.
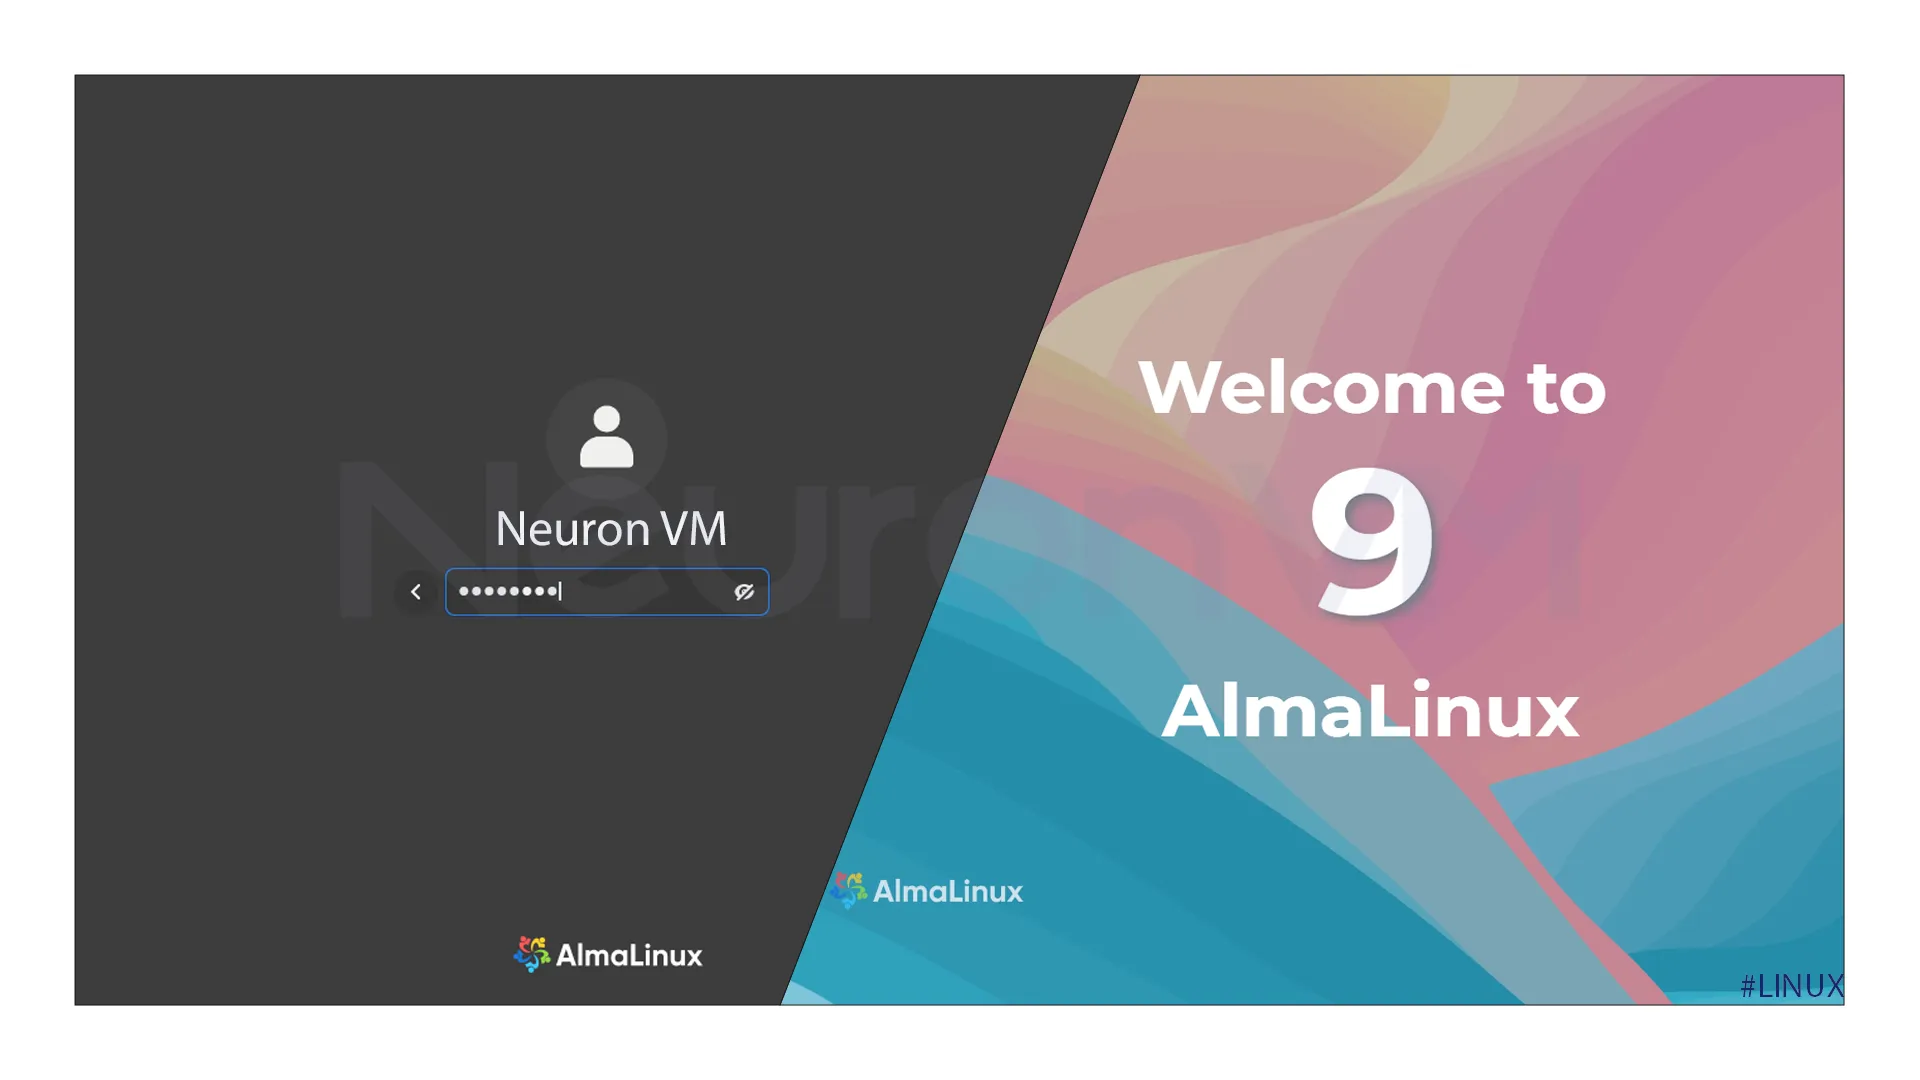
19-Choose your Account and enter your passwords next to begin your AlmaLinux experience.
These were all the steps you needed to successfully install AlmaLinux on VirtualBox.
Conclusion
AlmaLinux is a great choice for developers. However, no matter if you are an expert or a beginner, this tutorial won’t let you down. We provided the most straightforward and effortless tutorial to help you enjoy your AlmaLinux experience on VirtualBox, but feel free to ask us any upcoming questions.

