


How to Increase Root Partition Size in AlmaLinux


 7m
7m
 0 comments
 Print
Print
If you want to Increase Root partition Size and keep your AlmaLinux running smoothly, it is important to have enough space in your main system area. This is why you need to know How to Increase the Root Partition Size in AlmaLinux.
 Increasing the Root partition helps our system to function properly, in this article, we will show you the easiest way to achieve this goal, you can also use different methods to increase your system’s functionality by following the steps provided on our website, just click on AlmaLinux tutorials!
Why do you need to Increase Root Partition Size?
After a while, the storage space on your computer can get used up, this is a common problem that everybody deals with, or at least has that problem once. There are many reasons why this happens. The programs we use get bigger over time, and newer versions of programs need bigger spaces. Our computers also keep records of what is done in files and this takes a lot of space. It is also important to get a backup of important files, which also needs storage space. Our photos videos and all the things we save on our computer need their own space.
Increasing Root Partition Size in AlmaLinux
By following the provided steps you will be able to increase Root Partition size easily in AlmaLinux and stay till the end of this article, to achieve this goal.
Requirements
- sudo access
- Backup from important data: Essential
- Adding disk space to VM
To add disk space to the VM, you need to power off the VM, then you can increase the Virtual Disk Size and power it back on. Now we can increase the root partition size in AlmaLinux.
 Double-check Your Disk space
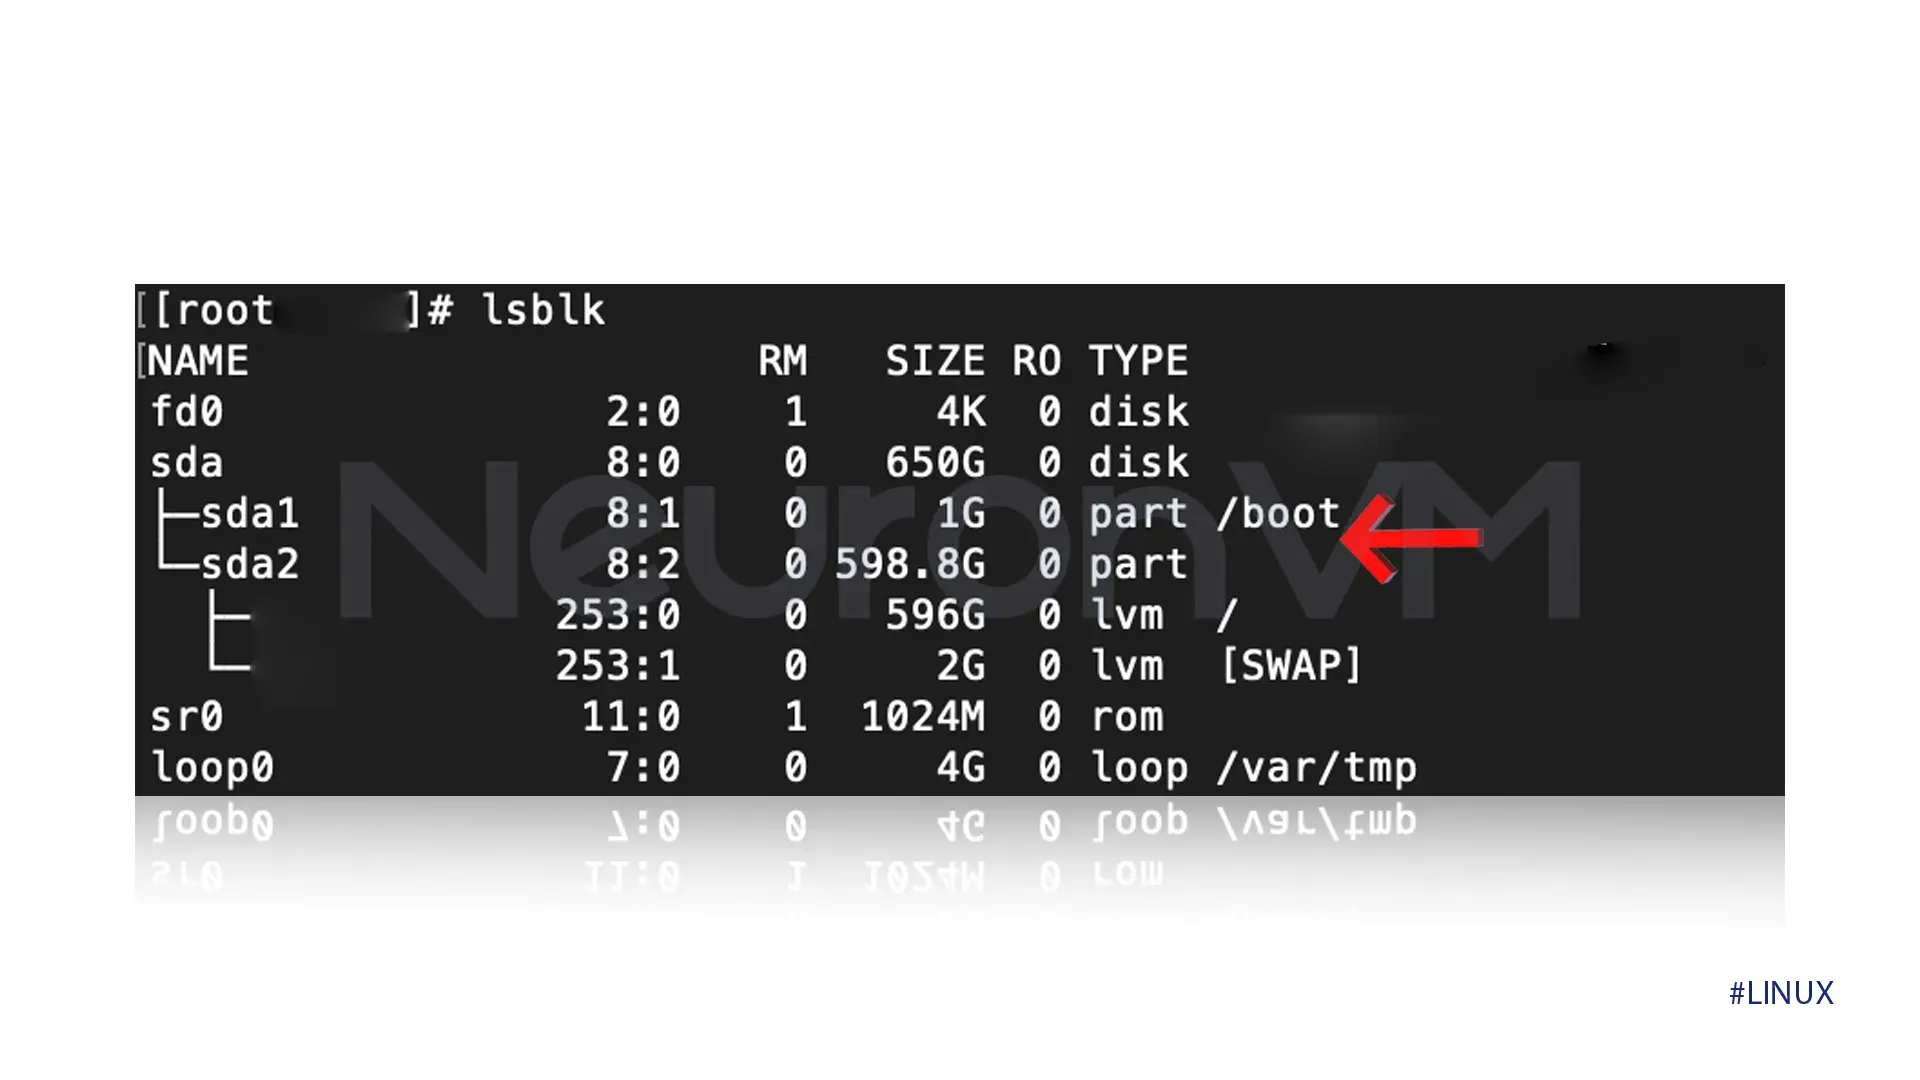
We need to see how your disk is set first, to double-check our disk space Log in to your AlmaLinux server, then open a terminal and type the command below.
lsblk
This command will list all the block devices that are connected to your system, Under /dev/sda you will see the updated disk size.
sda 650G # Updated disk size
sda2 598G # Existing partition
 Rescan the Disk
Sometimes the system does not immediately recognize the new disk space that you have added recently, so we need to make the system rescan the disk again. The following command will tell the computer to rescan the disk again.
echo 1 > /sys/class/block/sda/device/rescan
Increase Partition Size
After rescanning the disk, the new disk space will be recognizable for the system, so now we can make the partition bigger to use it. We will provide 2 options for this step, but we recommend using the first step.
Option1: growpart
If you don’t already have growpart tool, install it by using the command below.
yum install cloud-utils-growpart -y
To extend the second partition to use all available space by growpart tool, enter the following command.
growpart /dev/sda 2
To confirm that the partition size has increased enter this command in the terminal.
lsblk
Only use the second option only if option number one doesn’t work for you.
Option 2: parted
If the growpart is unavailable, use the parted by entering the following command.
parted /dev/sda
To make the desired changes use the comment below indivitually.
print # View the current partition table
resizepart 2 100% # Extend partition 2 to use all available space
print # Confirm the changes
quit
These were all the steps that are required to increase root partition in AlmaLinux.
Conclusion
By following the provided steps you will be able to successfully increase the size of your partition if you have any problems go back and double-check each step to make sure all the commands you use are correct commands. If you are still facing issues, leave us a comment our experts will get back to you.
You might like it
Ubuntu Tutorials
How to Install and Use Xfce on Ubuntu 18.04 (Best Guide)
Ubuntu Tutorials
Top Way to Setup Samba on Ubuntu 22.04

MikroTik Tutorials
How to Set a Public IPv6 /64 on a 6to4 Tunnel in MikroTik
