How to Create a Local Account on Windows Server 2019


 7m
7m
 0 comments
 Print
Print
Creating a Local Account might sound complicated, in environments such as Windows servers that lack an Active Directory, understanding How to Create a Local Account on Windows Server 2019 is essential, that is why we will provide an easy tutorial on that.
If you want to Create a Local Account on Windows Server 2019, follow the steps provided in this tutorial.
What are Local Accounts?
Local user accounts manage security and access to resources, we will guide you to create a Local Account manually in this tutorial but Windows has built-in default accounts that are automatically created when the operating system is installed.
Both the default account and the accounts you created stay in the Users folder in the Computer Management console.
Local accounts provide essential functionalities, as a Windows Server user you have to understand its usage and limitations.
What is the usage of Local Accounts?
When the server is not part of the domain, we need local accounts to install software and arrange settings, if you want to have access to different services, then you should consider that a Local Account is a must.
You can create dedicated specific accounts for different services to increase security in your computer.
You can read more about Local Accounts in Microsoft’s main website.
Security Considerations
Make sure to set a strong password when creating a new account with a mixture of numbers symbols characters.
Regularly view your accounts for updating, removing the accounts that are no longer in use.
You have to minimize the usage of your Local Account for security reasons and try to use it as you need.
With all the flexibility that Local Accounts offer on Windows Servers, it is crucial to pay attention to the previous points to have a secure and smooth experience using this feature.
Creating a Local Account on Windows Server 2019
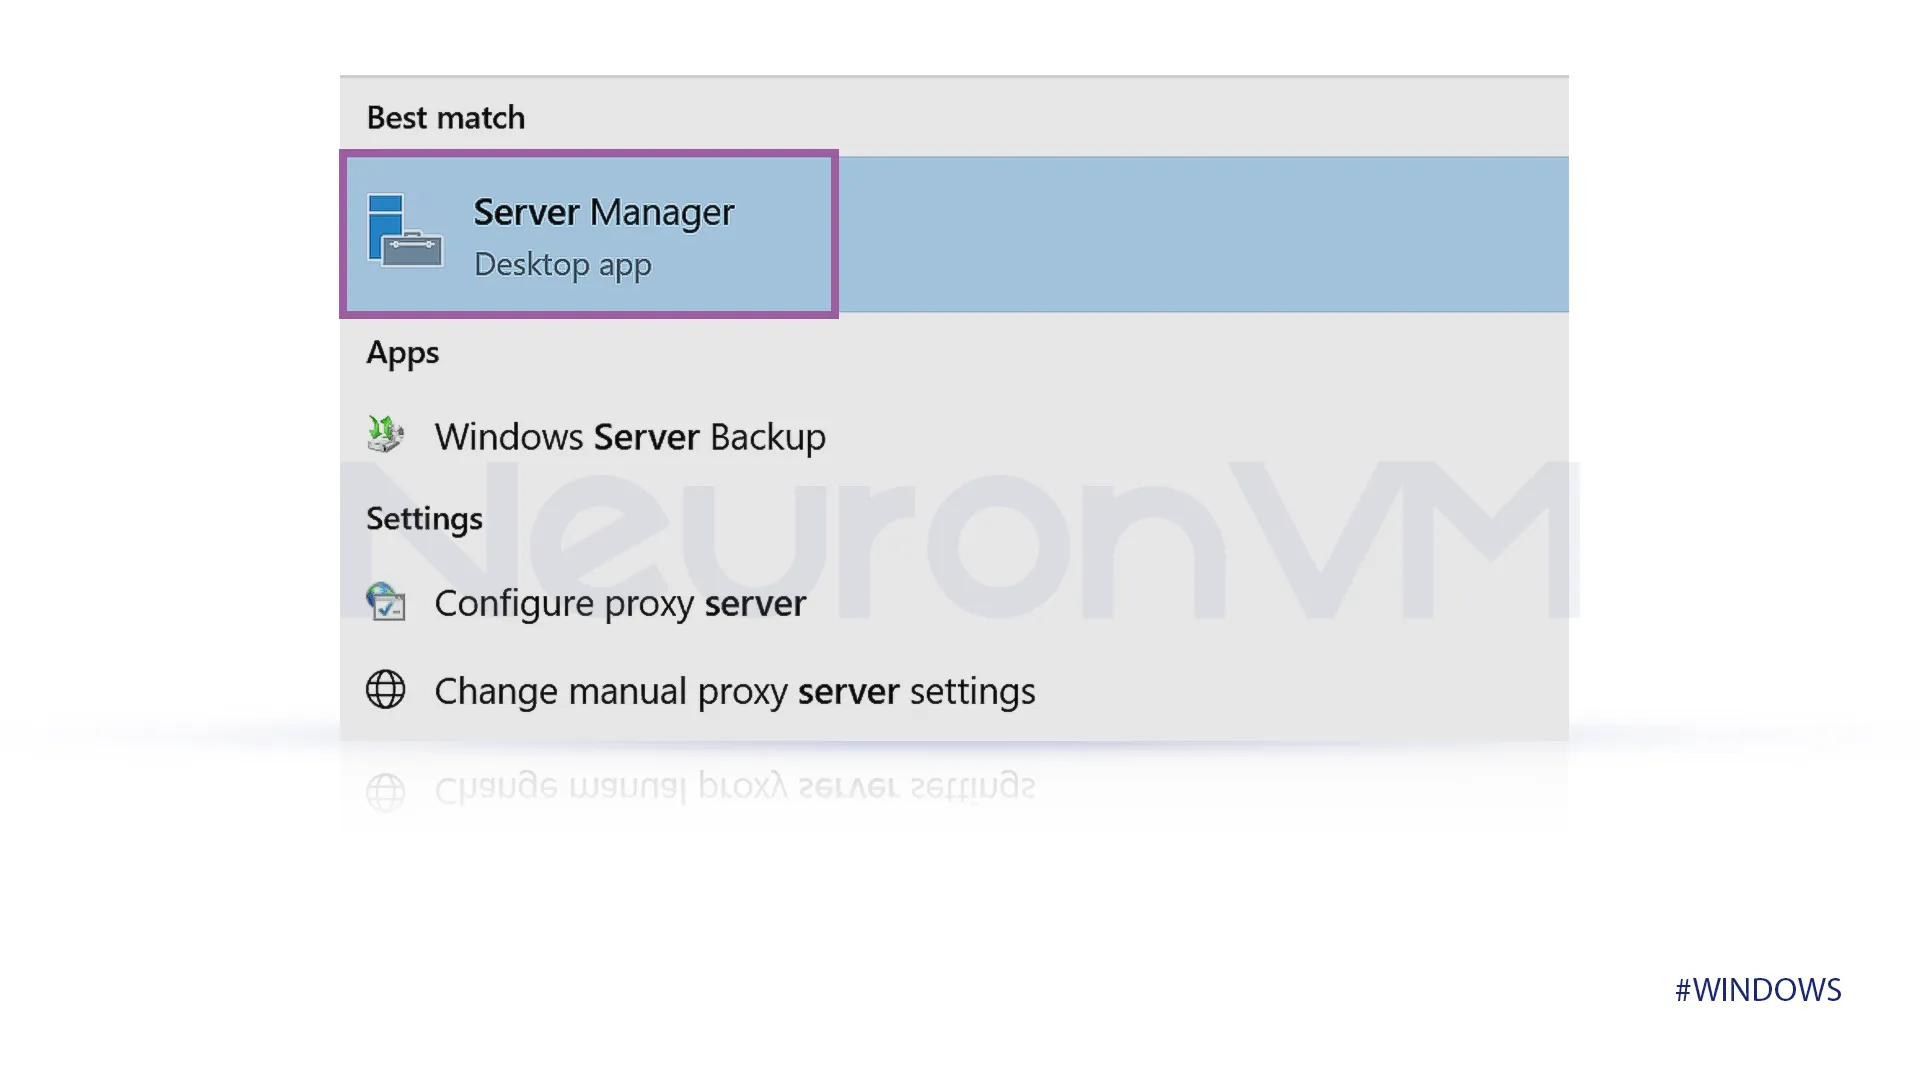
“Server Manager”
The first step for Creating a Local Account on Windows Server 2019, click on the Start button and search for the Server Manager, Click on it to continue our steps.
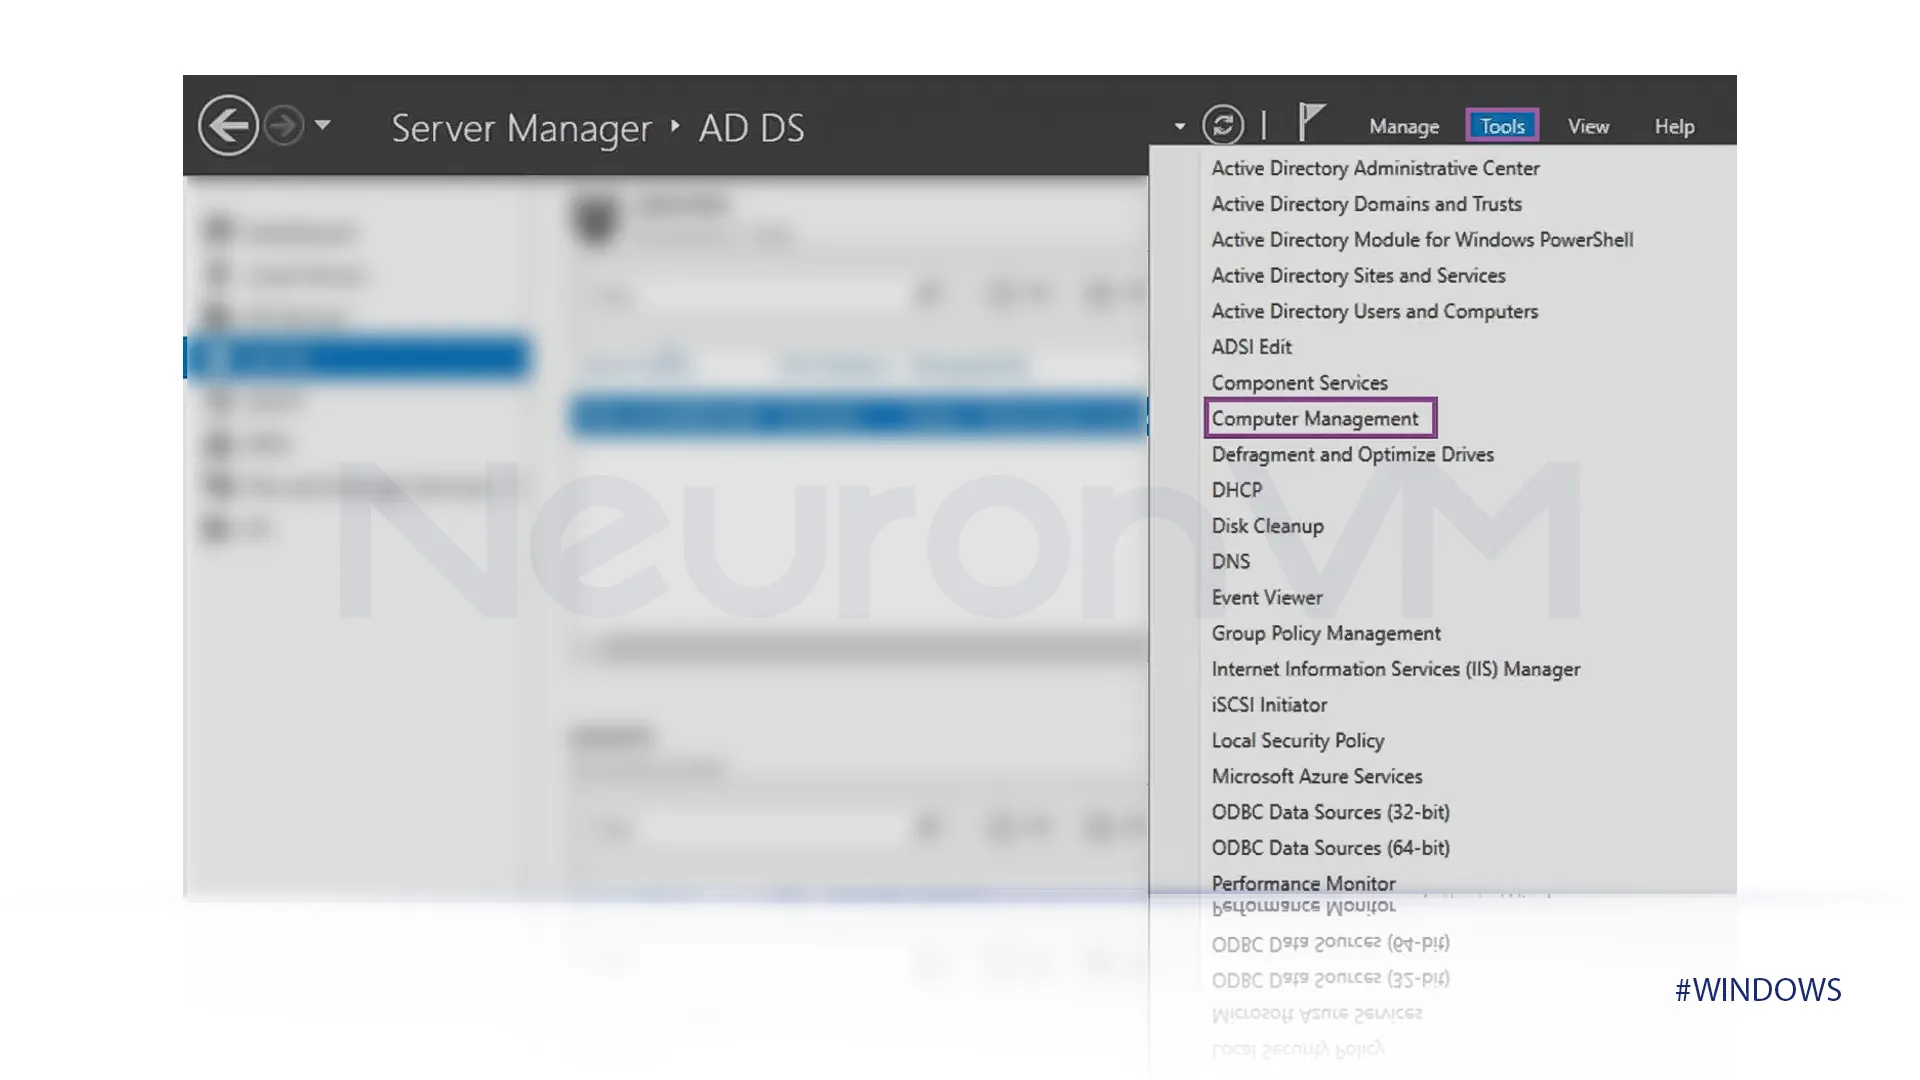
“Computer Management”
After you click on the Server Manager a tab will open click on “Tools,” look for “Computer Management” and select it.
 “Local user and Groups”
After clicking on Computer Management a new tab will pop up, in the left bar select “Local Users and Groups,” click on Users and New User to create a new user.
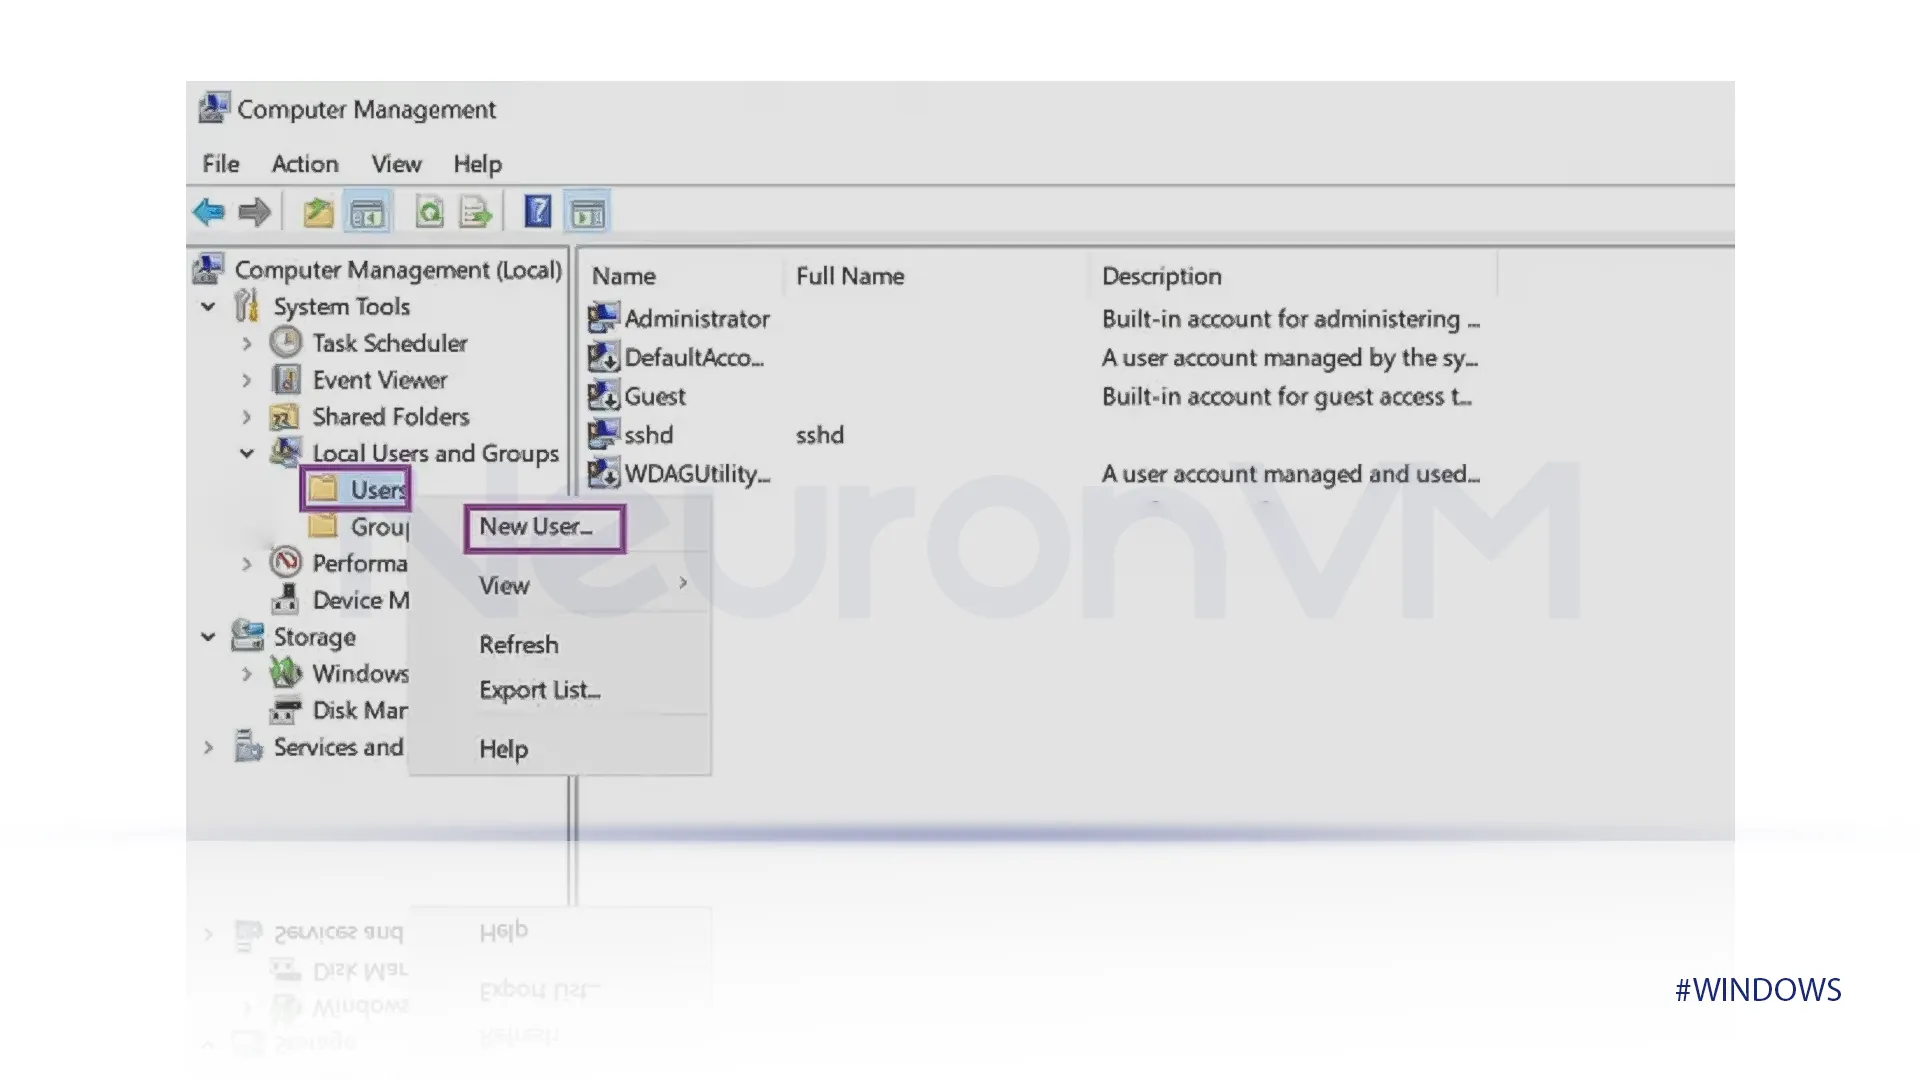
Then select a username and password to create a new account, At the bottom of the tab select how you want your password to be treated and select the best fit for yourself.
We recommend using the first option for the safety reasons.
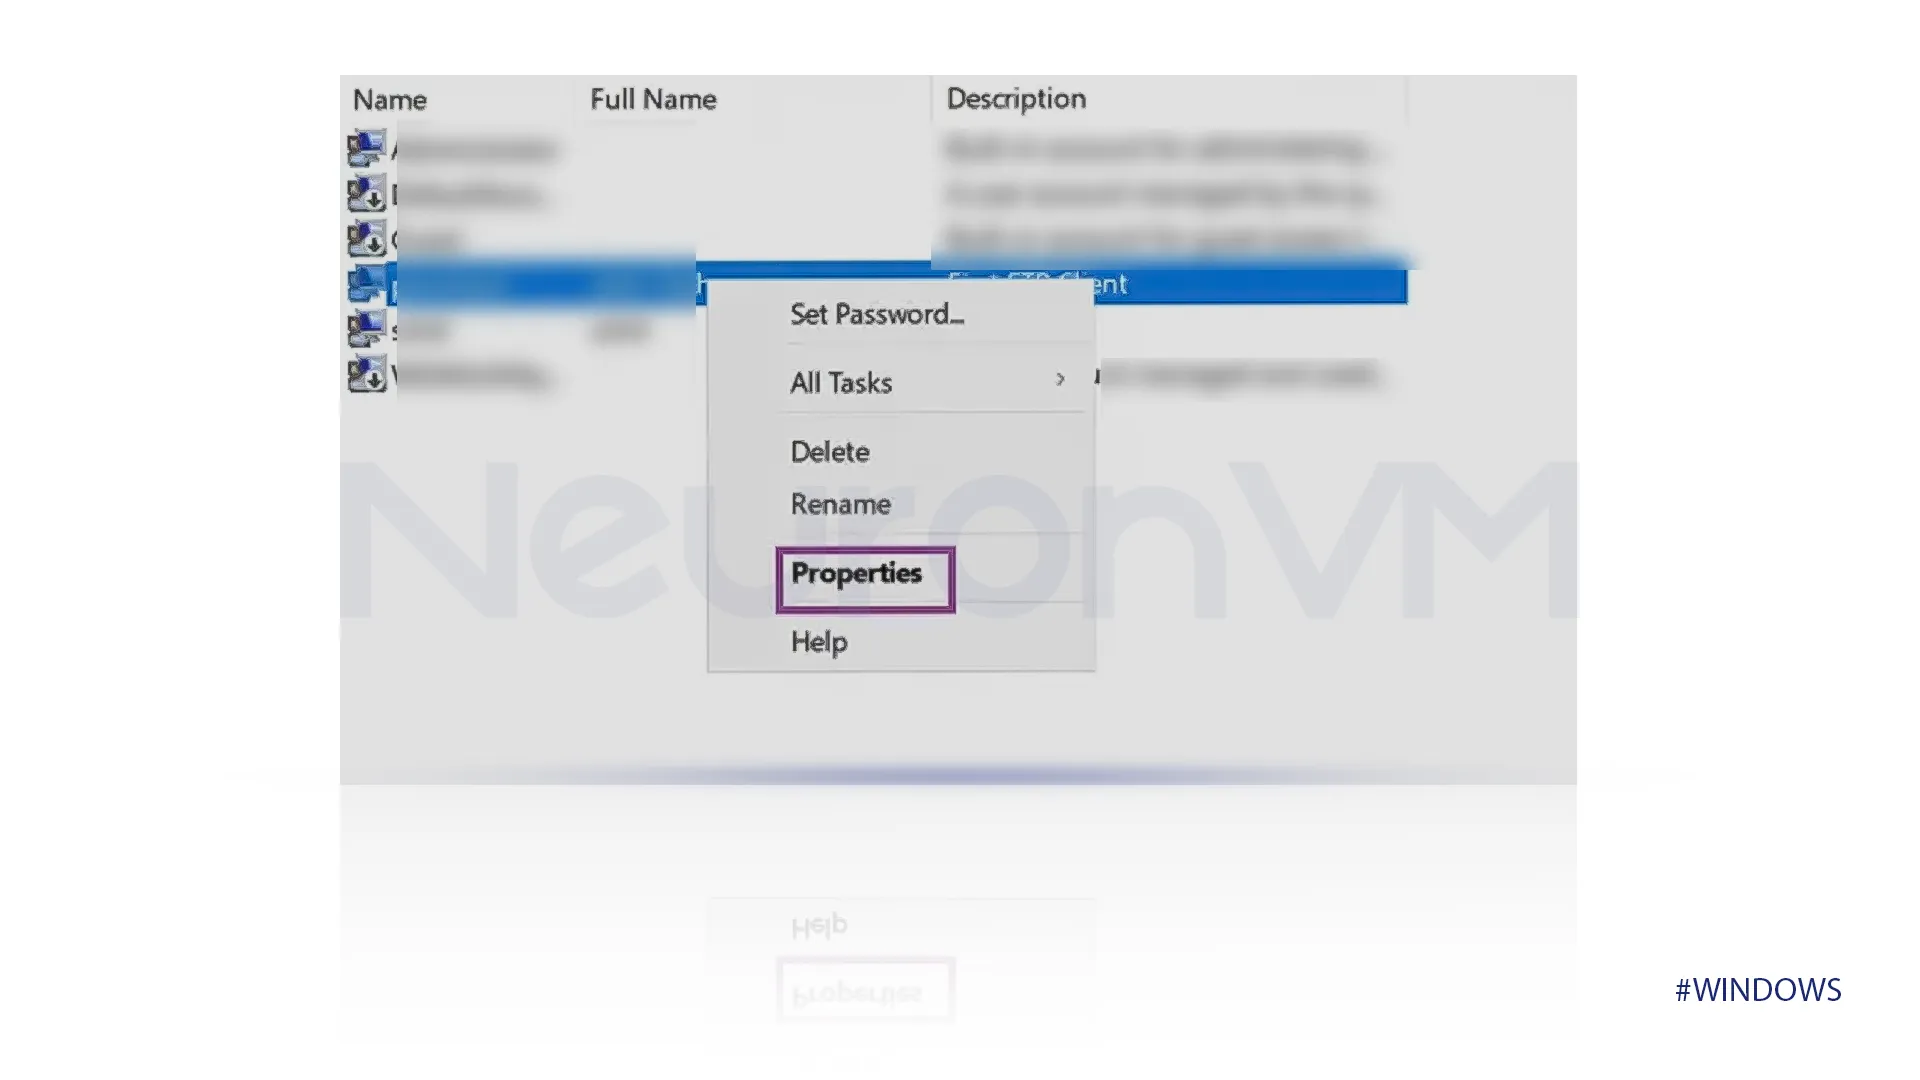
 “Administrator Group”
If you want the created user to be an administrator, select the user again, right-click on the user you want to be an administrator then select properties.
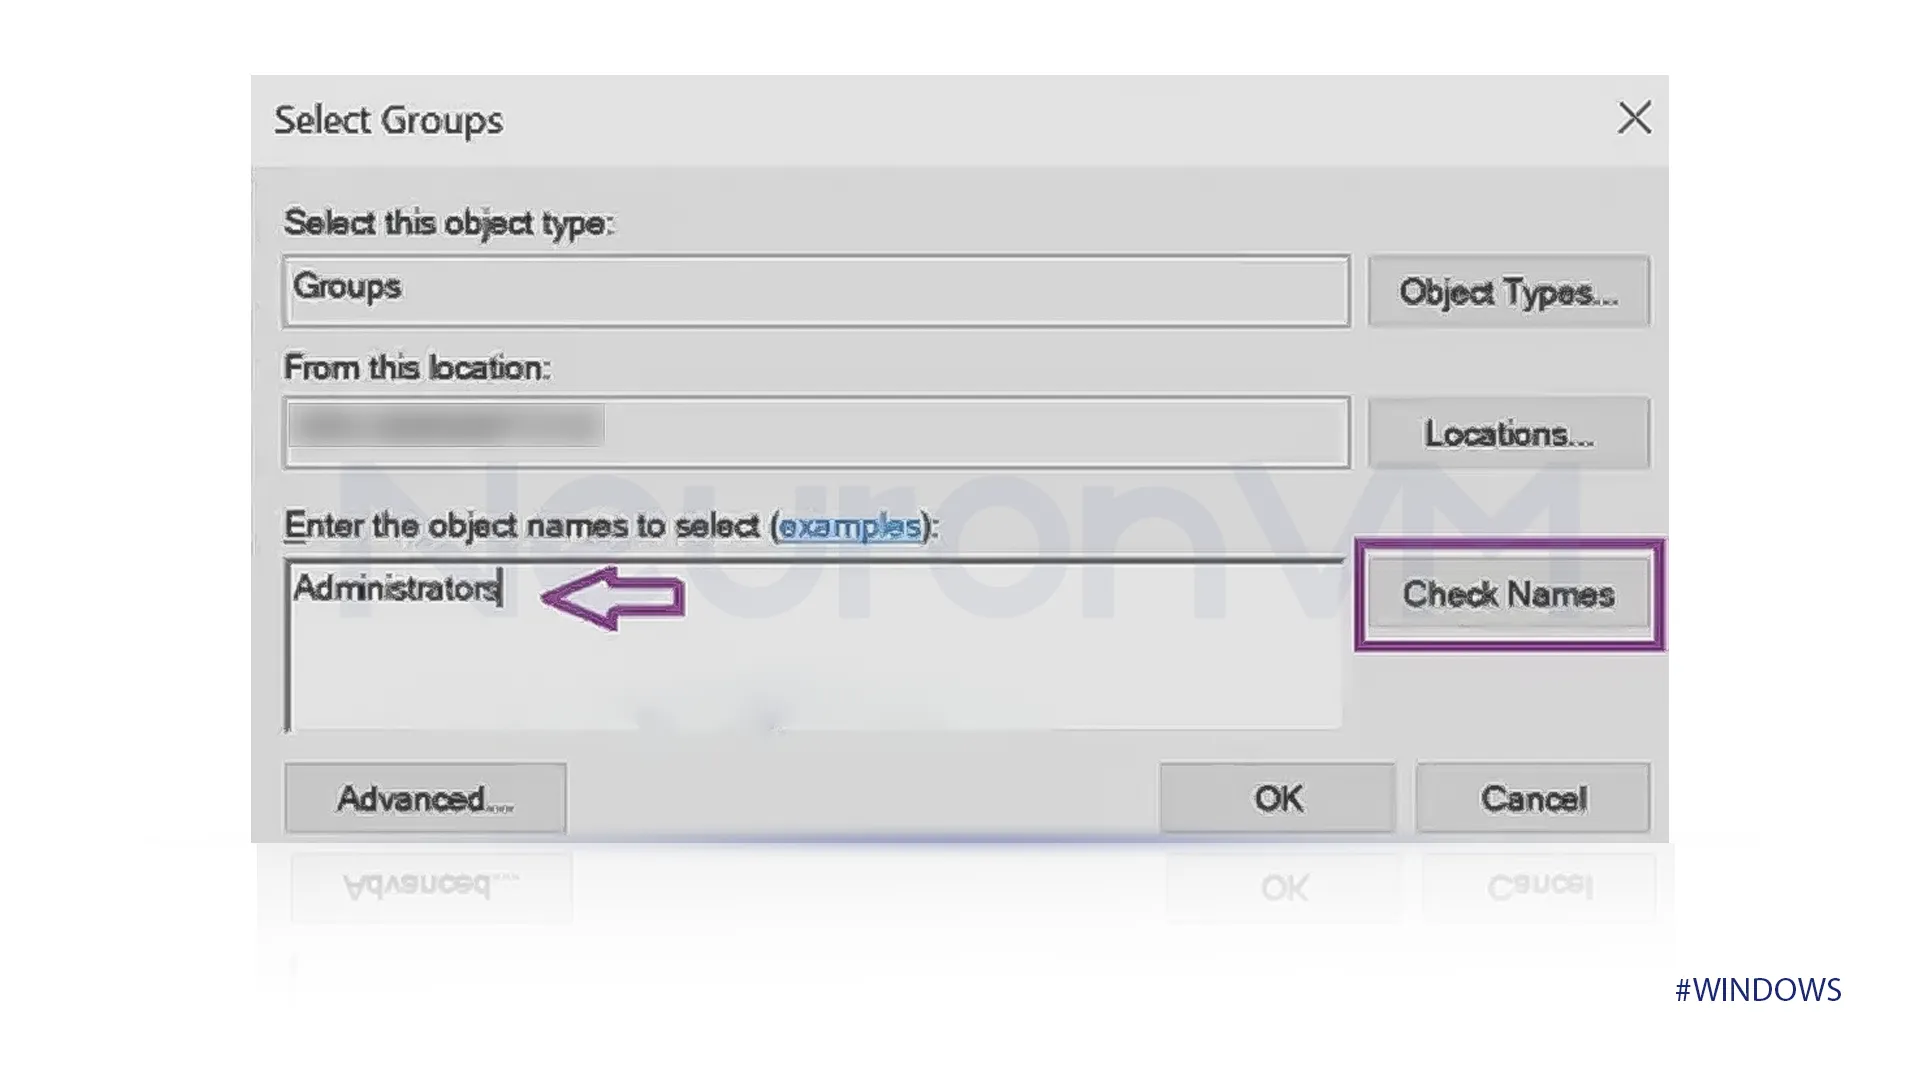
 “Penchant Properties”
After the previous step, a new window will open, click on “member of” then select add. On the Select Group section type “Administrator” and click on Check Name, after the group is found click on OK.
You can add any user by following the previous steps.
Conclusion
This article provided a clear guide on how to create a Local Account on Windows Server 2019. Make sure to follow the steps one by one and apply every security consideration that is in this article. It is not only a guide to follow to Create a Local Account we also provide the concept of a Local Account and settings to change and points to pay attention to have the smoothest experience, we also thought about how to change the account you made to the administrator. If you face any problem creating a local account on Windows Server, comment us.
You might like it