How to Change Administrator on Windows 10 and 11
 7m
7m
 0 comments
Understanding How to Change Administrator on Windows 10 and 11 might be beneficial in so many ways, you can limit the damage you can get if your account is hacked. By following our guide for Changing Administrator you can enhance the security and stability of Windows 10 and 11.
The default settings of Windows create every new account user account, so you have to follow the provided tutorial in order to change it to Adminstator.
What are the benefits of Changing the user account to the administrator?
We all hate to have a hard password to remember and type, especially if it is the computer we use every day, you can use a strong password for administrator without affecting your daily use.
You have more control over pc and it helps manage who can have access to make major changes.
If you suspect your security is at risk or you bought a new computer follow our guide to change your user account to the administrator, make sure to set a strong password to all of your accounts, especially for your Administrator account.
Change Administrator on Windows 10 & 11
Before starting on this tutorial we want to inform you this is not recommended to be applied on a shared computer.
We are going to provide 3 easy methods on How to change the Administrator on Windows 10,11 including changing it by Settings, Control Panel, and Command Prompt.
Note: Pictures might differ in different methods between Windows 10&11, Every method that is provided in this article works for both Windows 10 and 11 and even older versions.
First method: Change the Administrator on Windows using Control Panel
You can access your control panel by pressing the following “Windows + R” keys together.
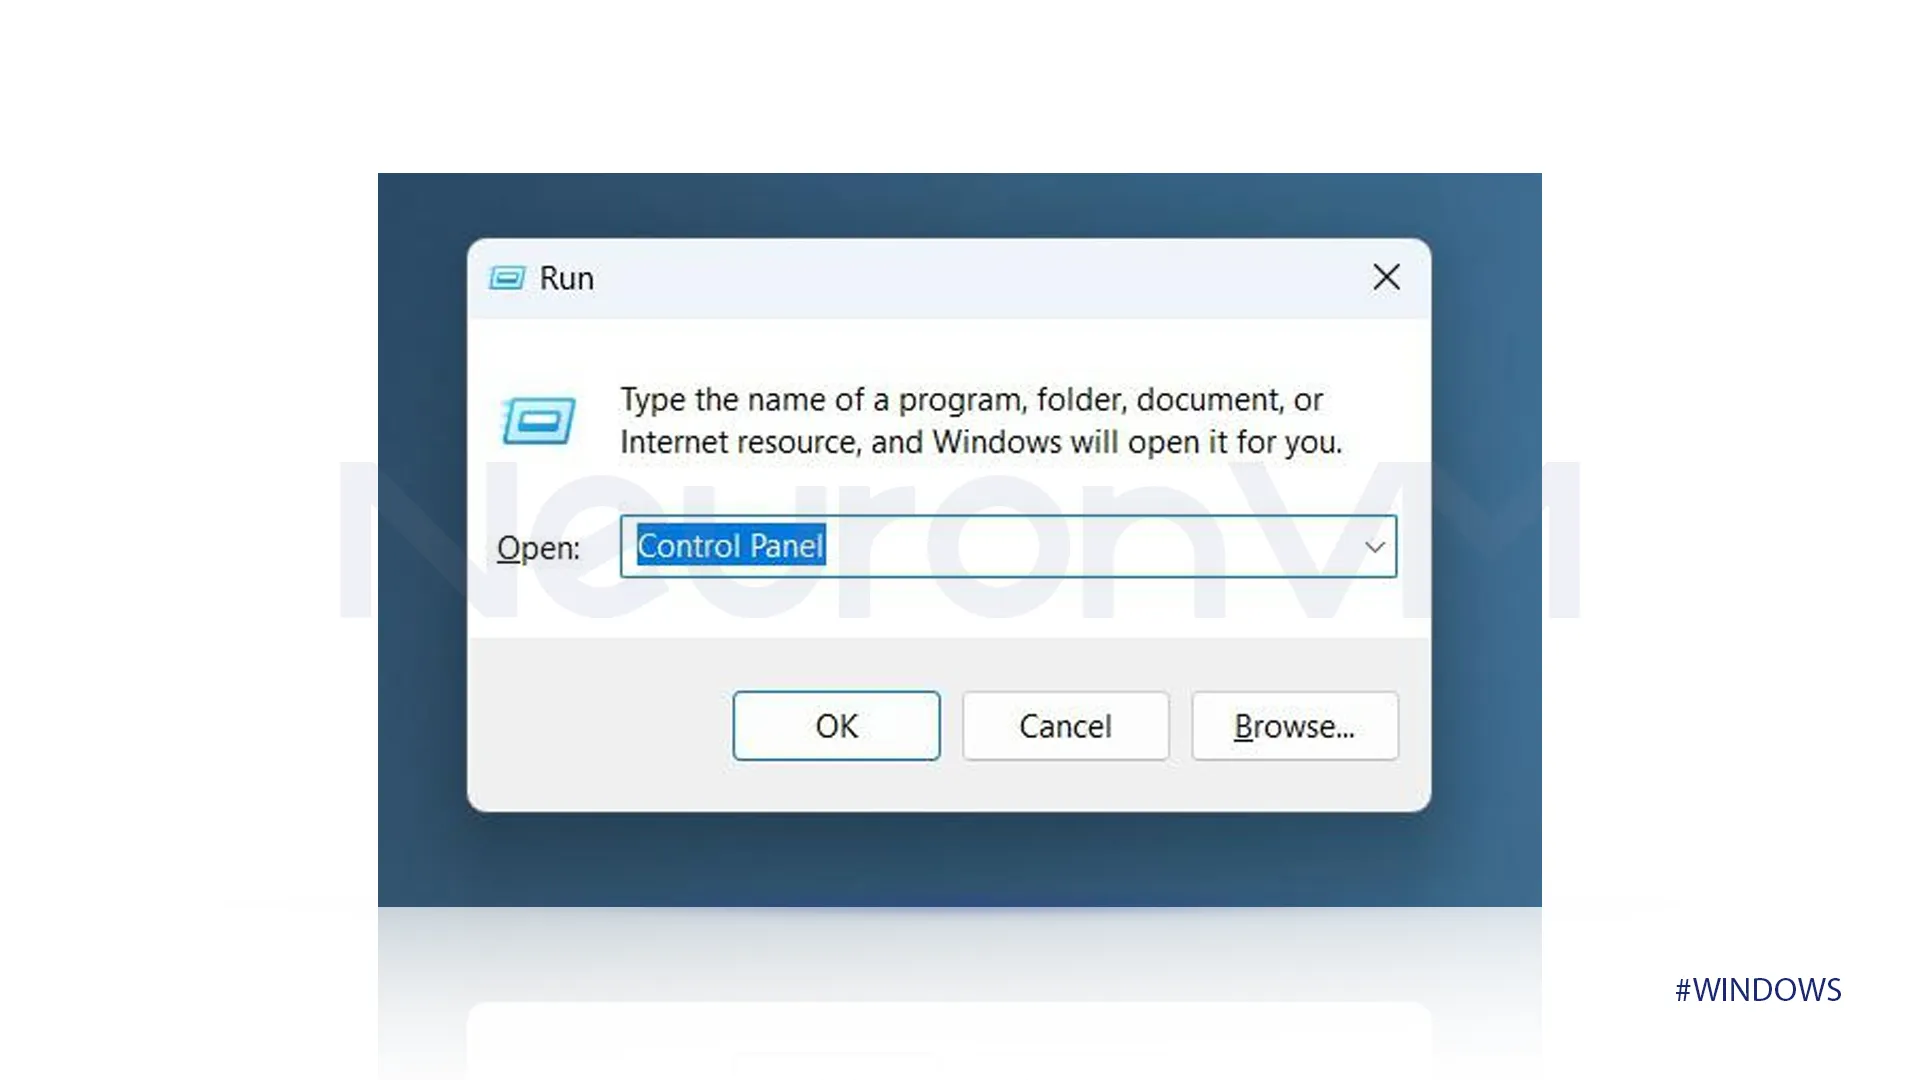
After running the previous command, a new tab will open, click on “User Account”, in the new tab select User Account again.
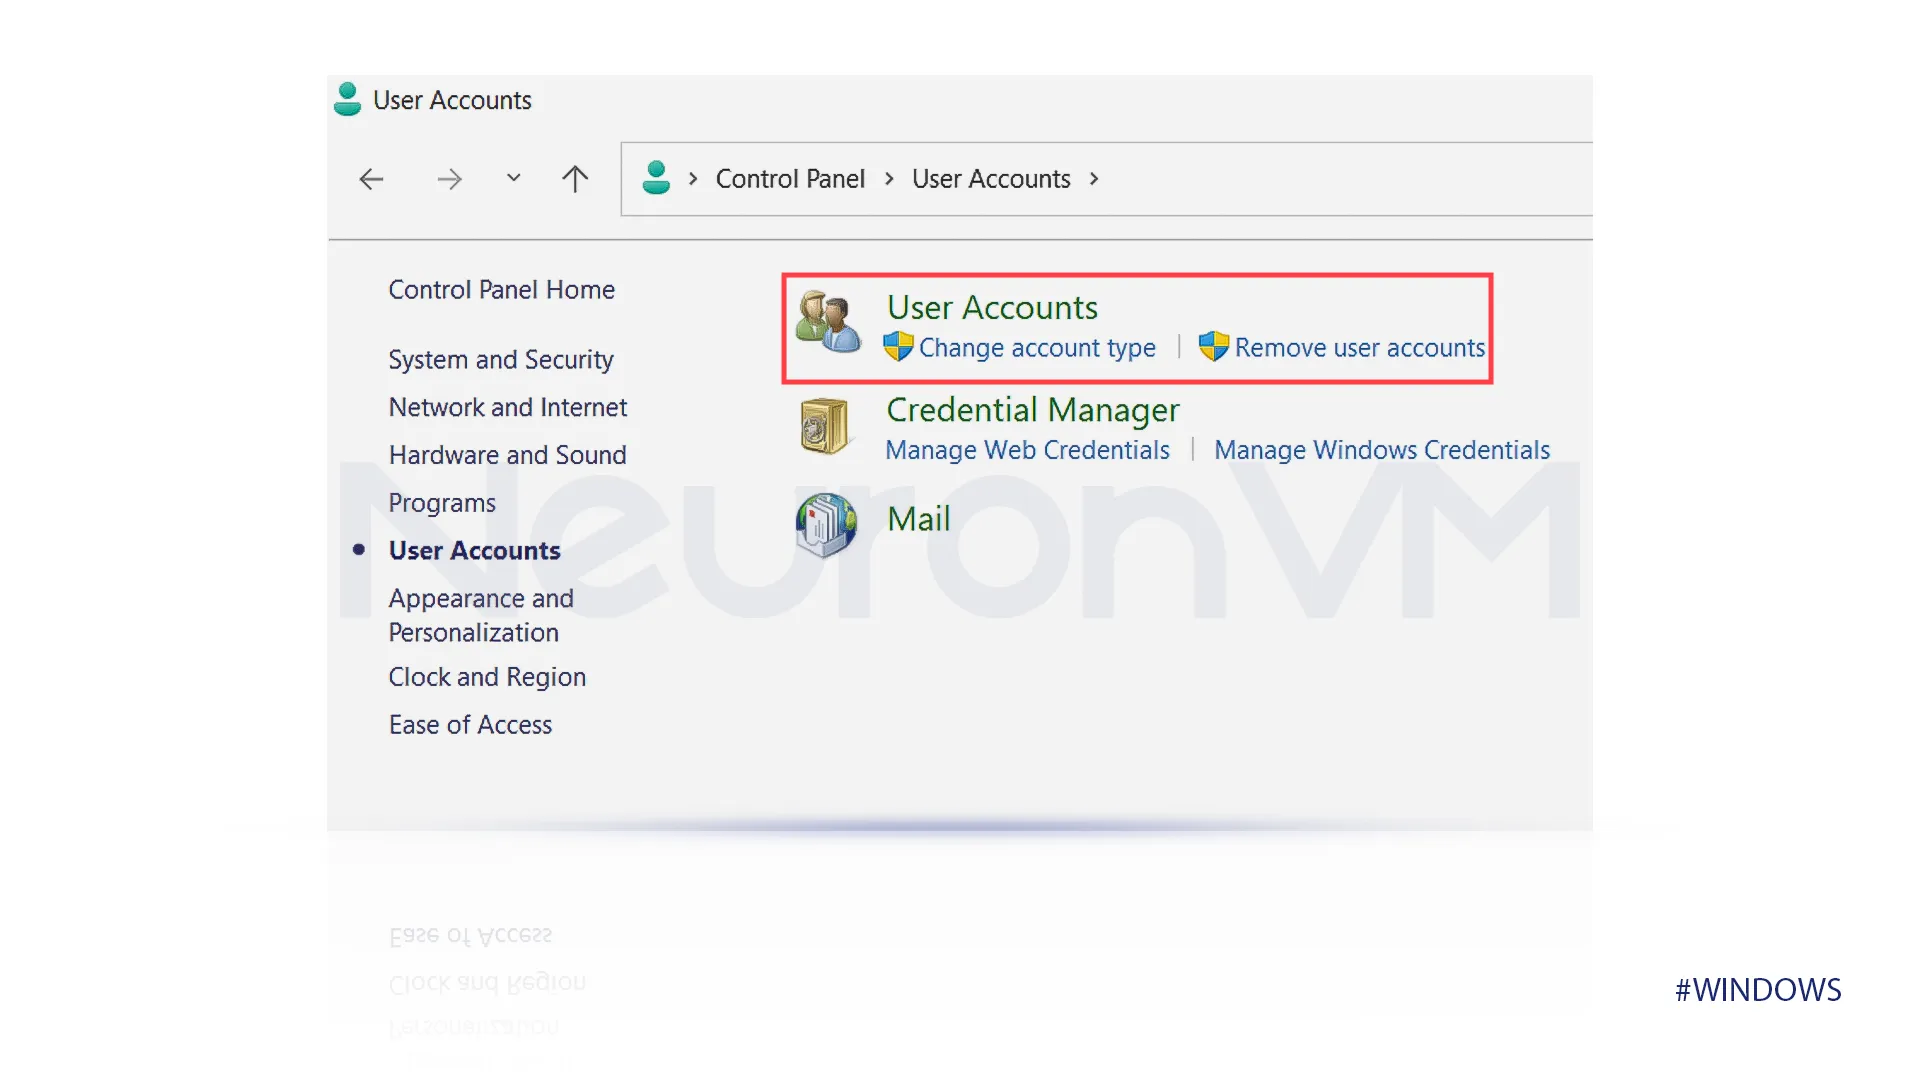 On the same page click on change account type, then select the account you wish to make changes on and click on it.
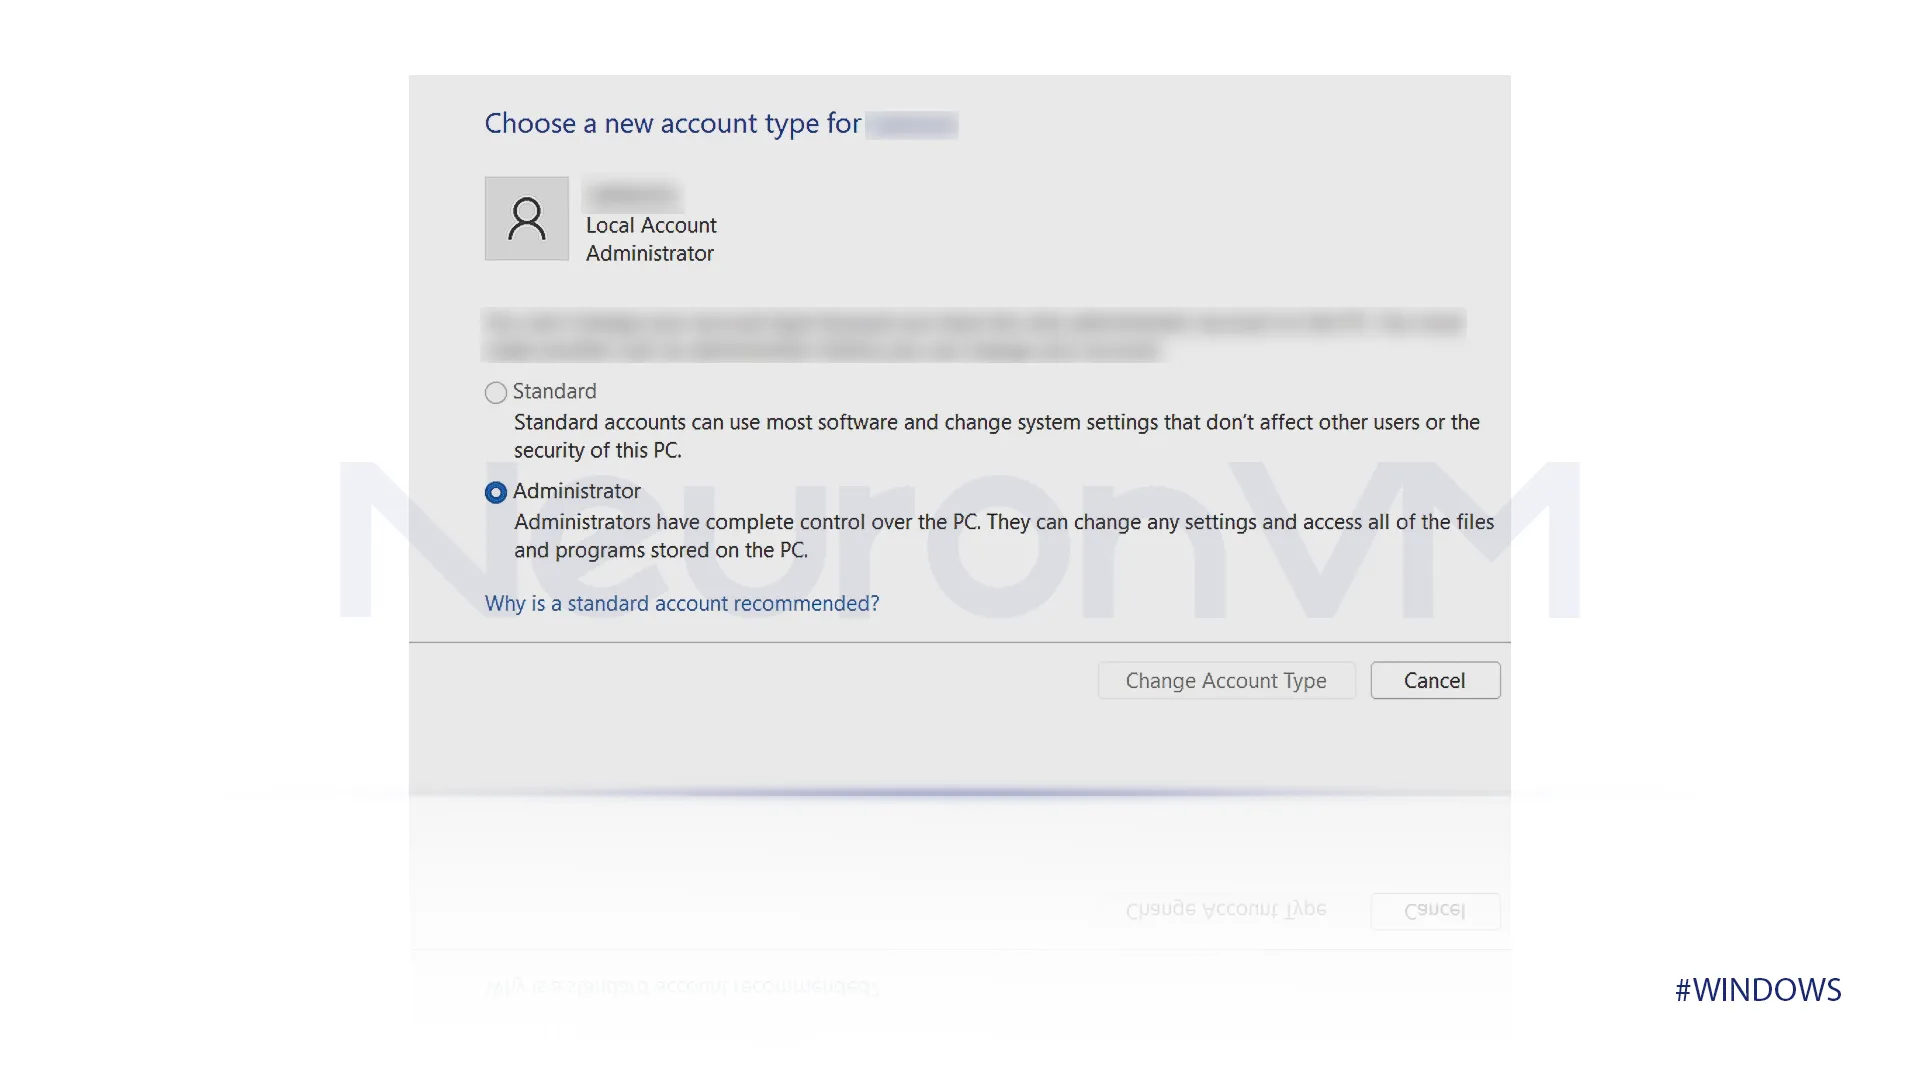
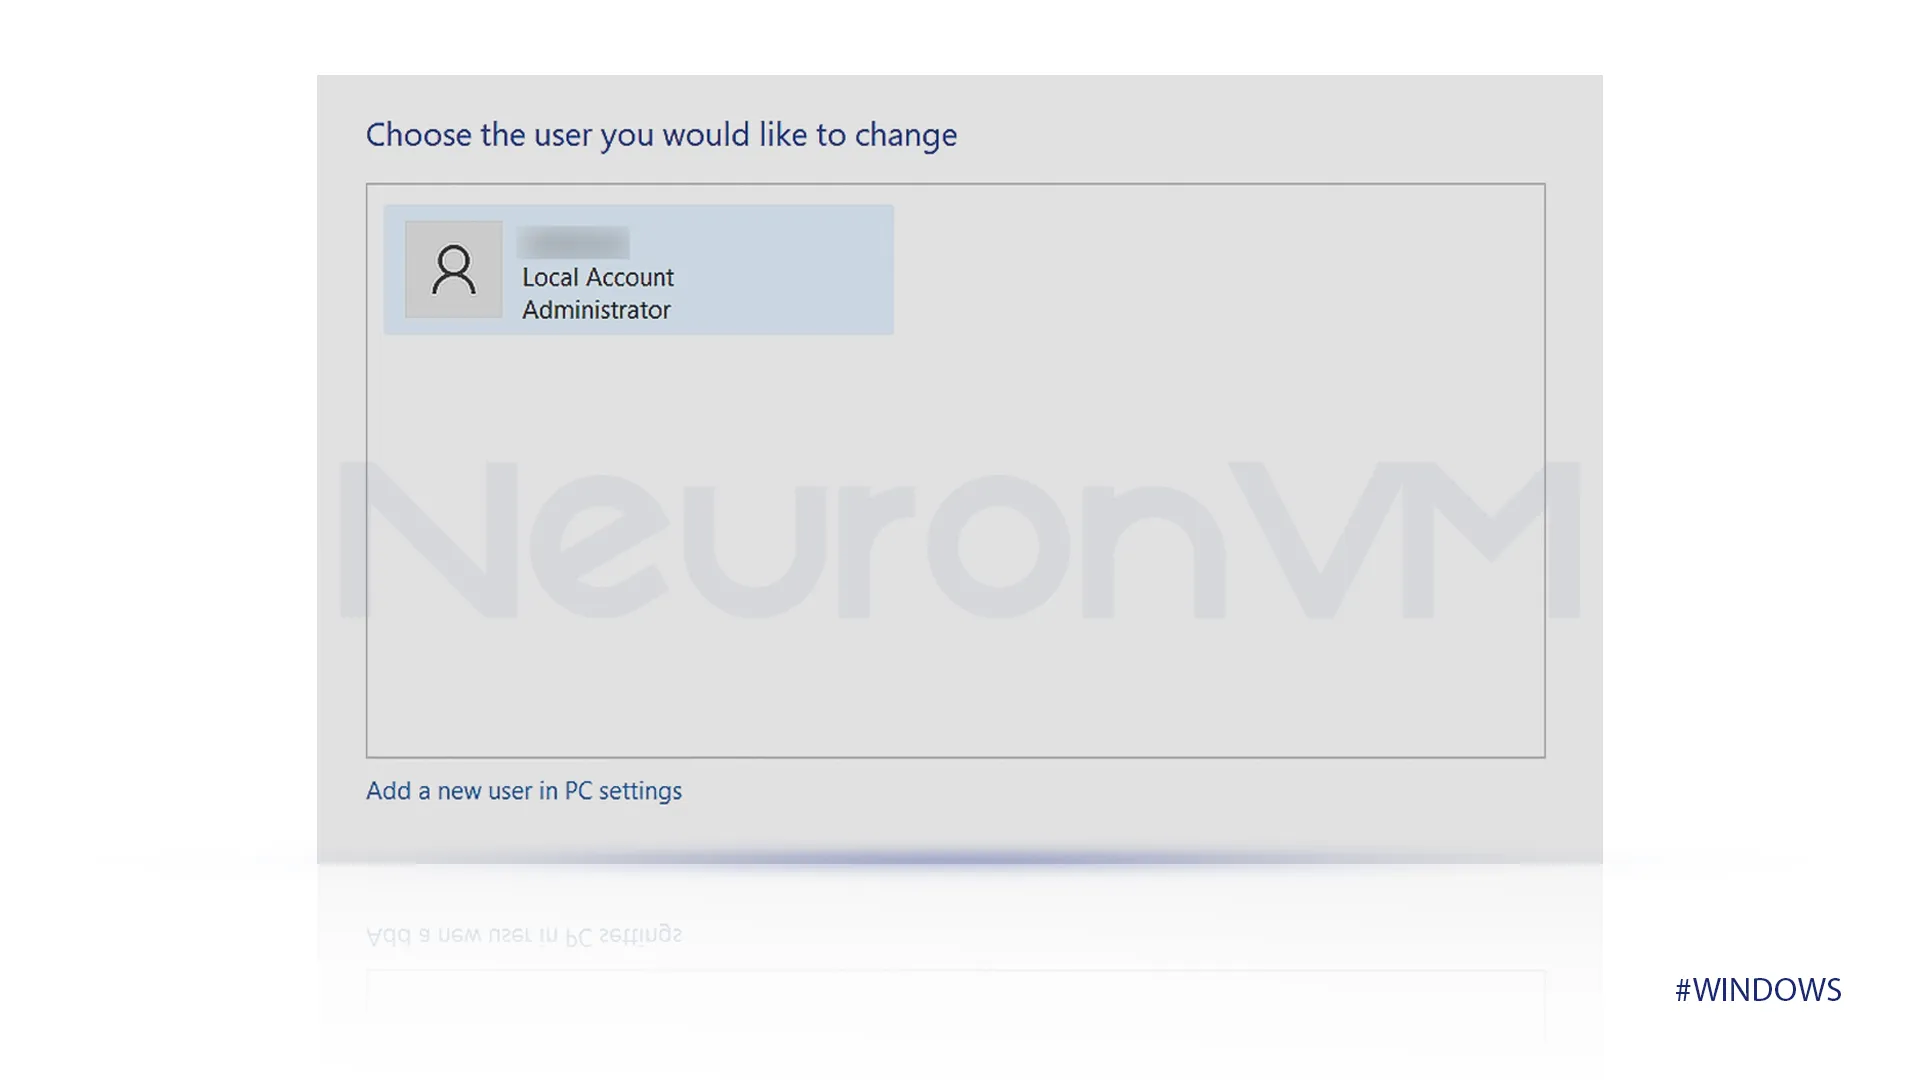 A new tab will open once you click on the account, select “Change Account Type”, and change it to adminstator.
Note: If you only have one account on your computer, you can’t change it to a Standard account, it is an administrator account by default.
 Second method: Change the Administrator on Windows using Command Prompt
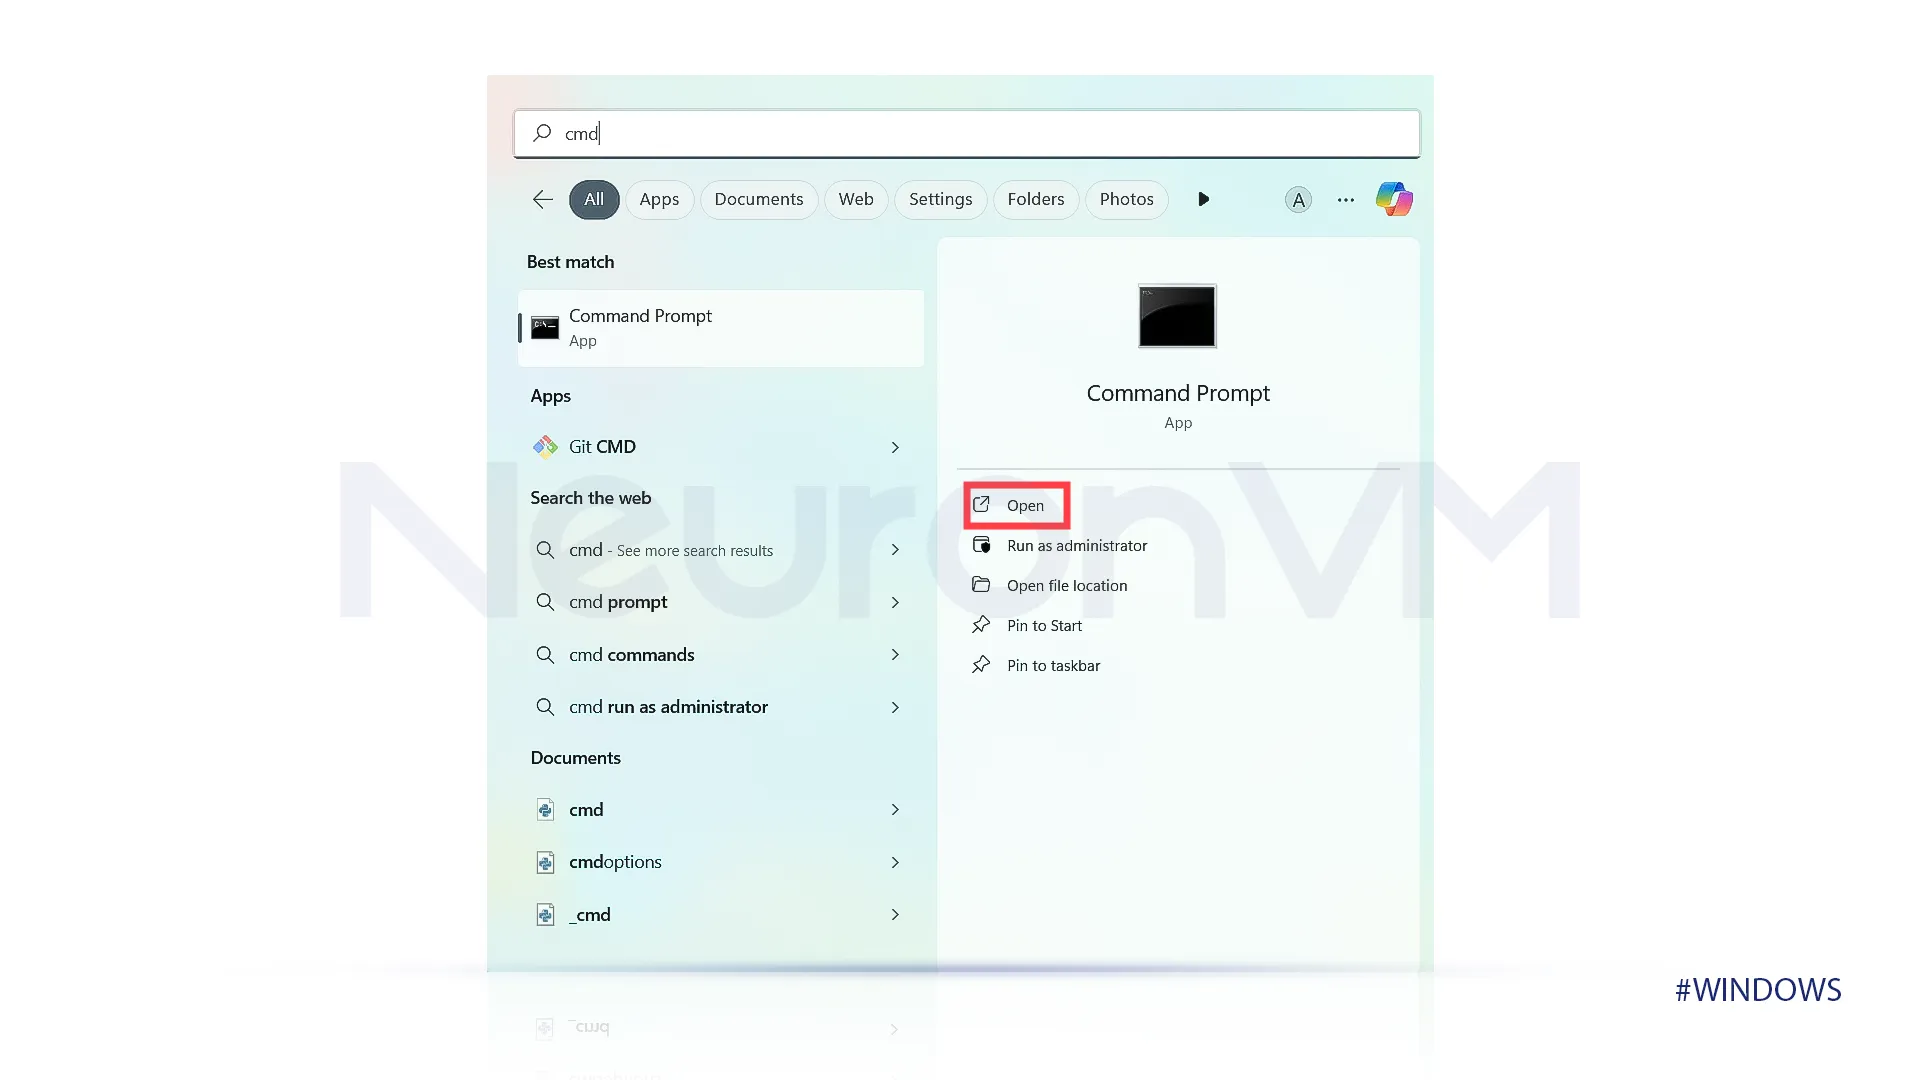
Use “Windows + S” or click on the start button, once it is open type cmd or Command Prompt.
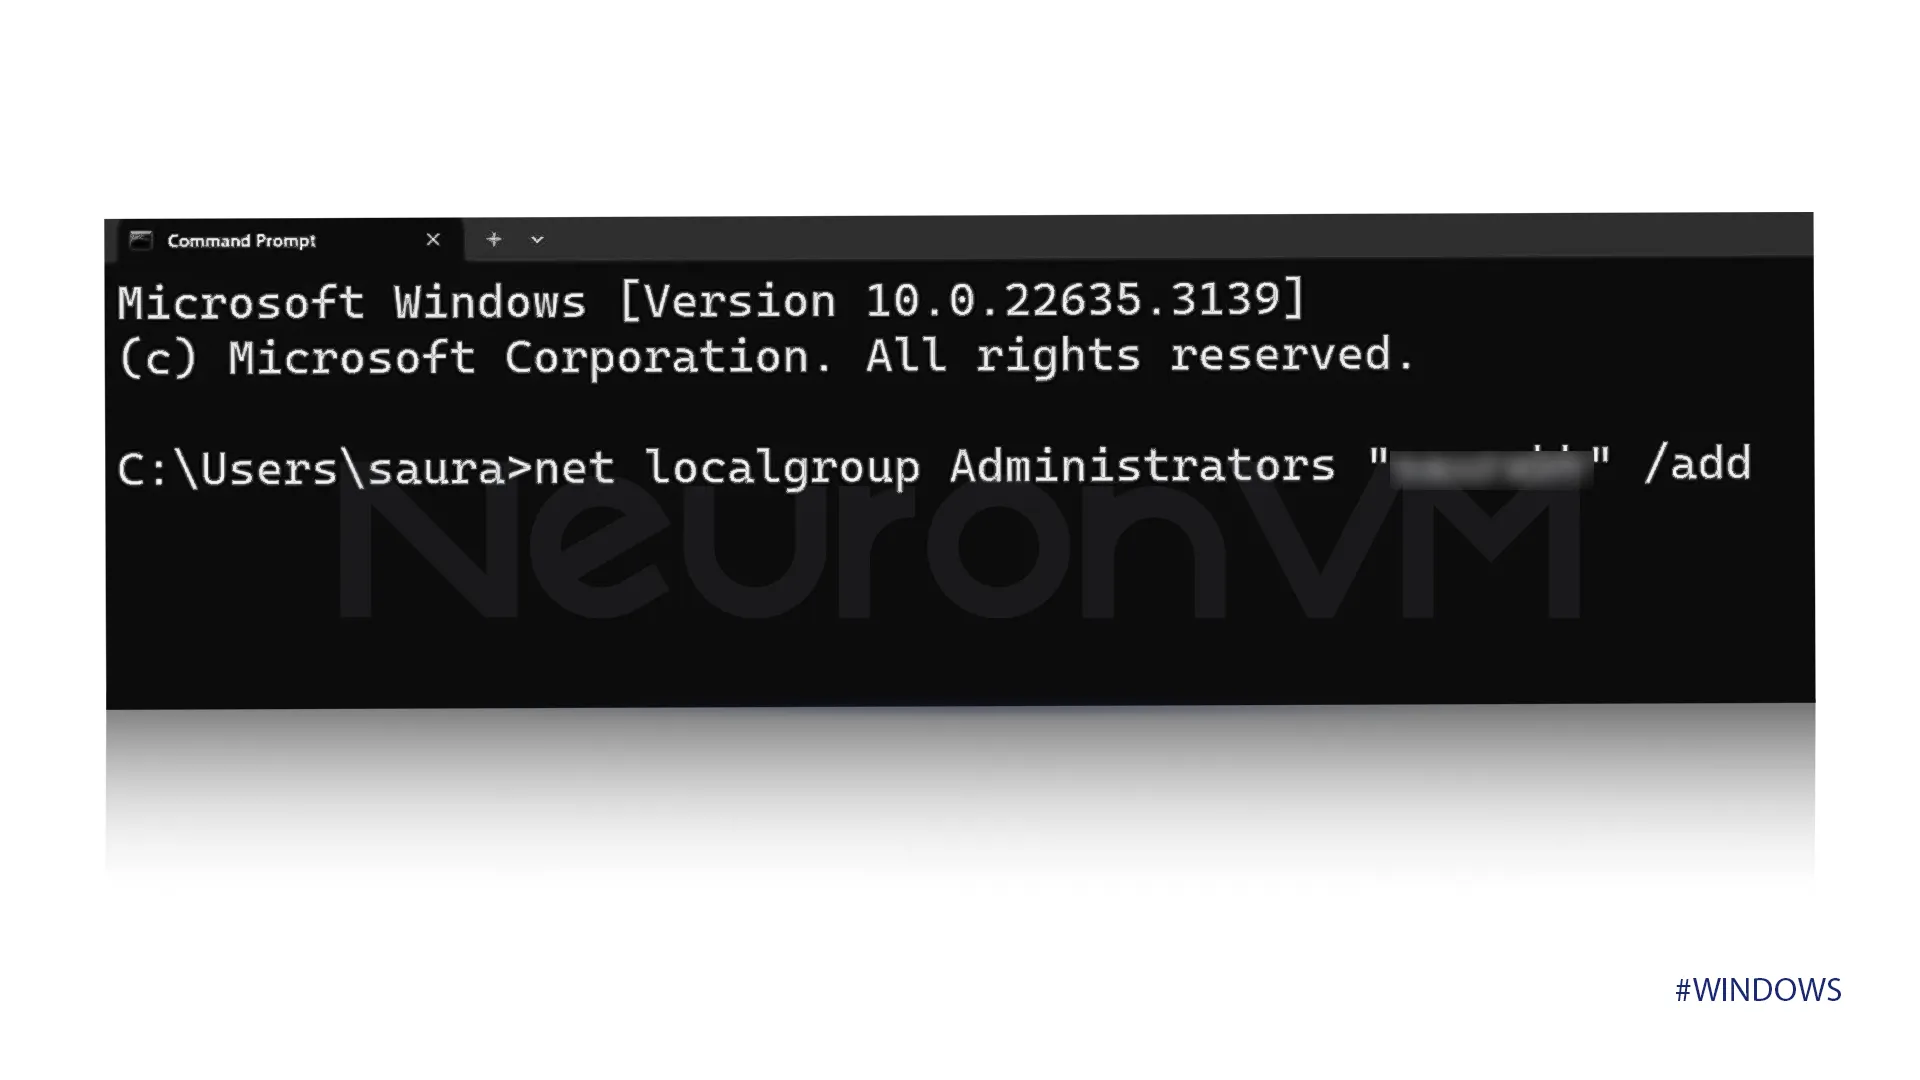
 Type the following command in CMD and change the name with your Account’s name then press enter.
net localgroup administrators "name" /add
Third method: Change the Administrator on Windows using Settings
Changing the Administrator by settings is one of the most straightforward ways to do it.
Open the settings by searching it in the Start menu or simply press “Windows + L”, After opening the Settings, look for the Accounts on the left bar and select it.
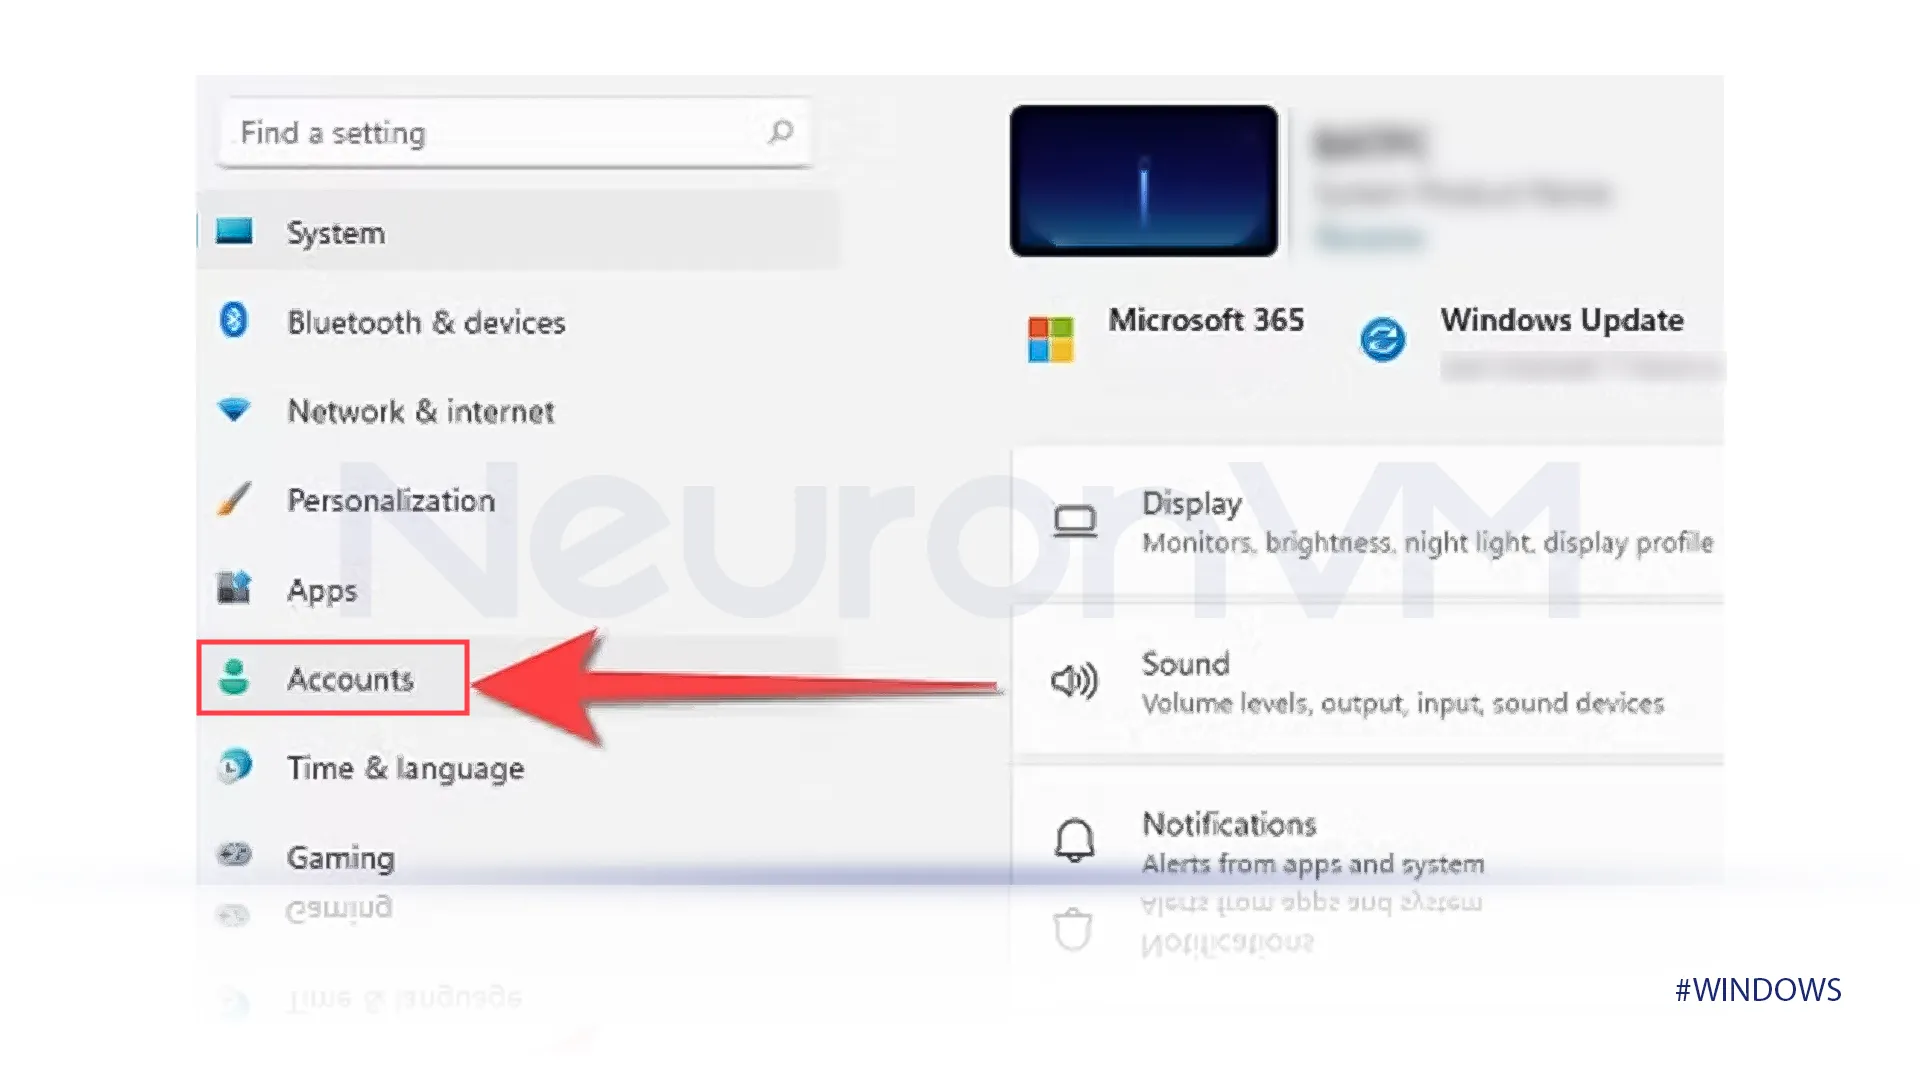
Once you have selected Accounts, from the right side choose “Family & other users.”
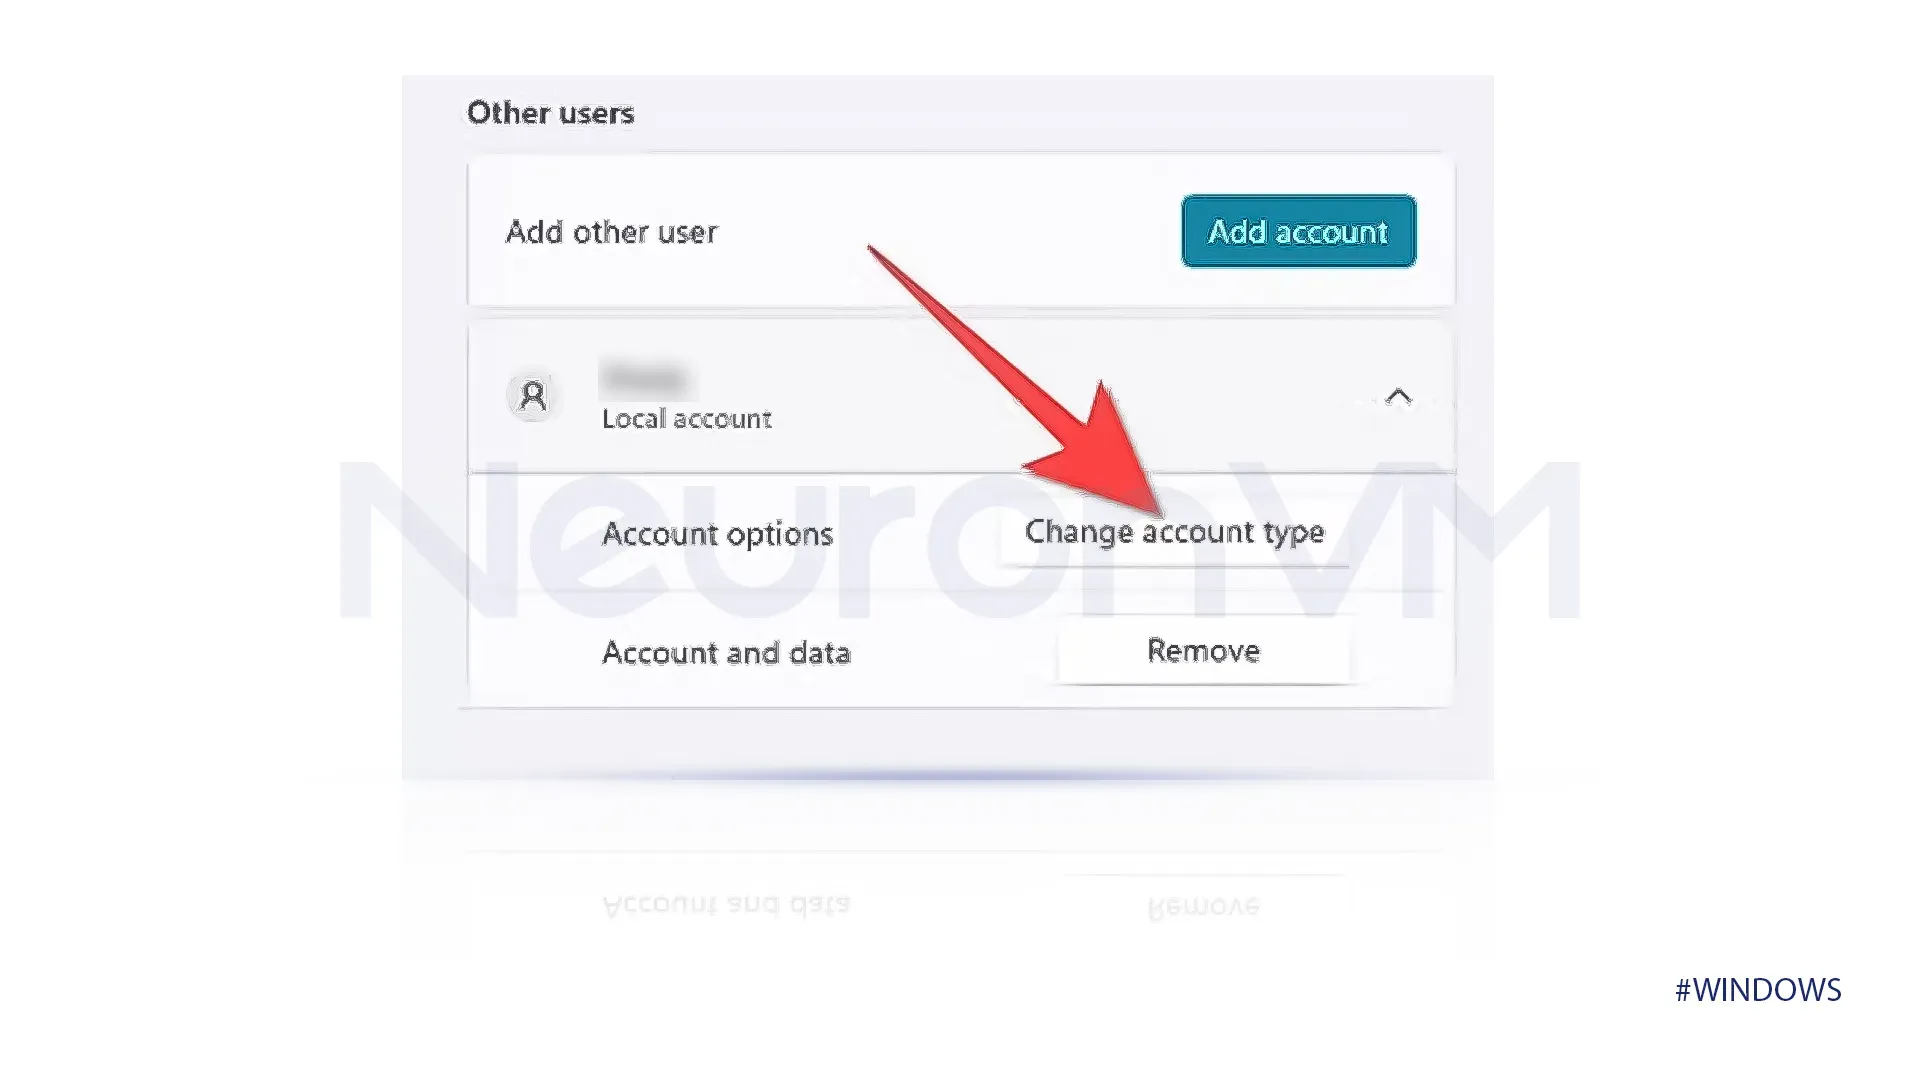
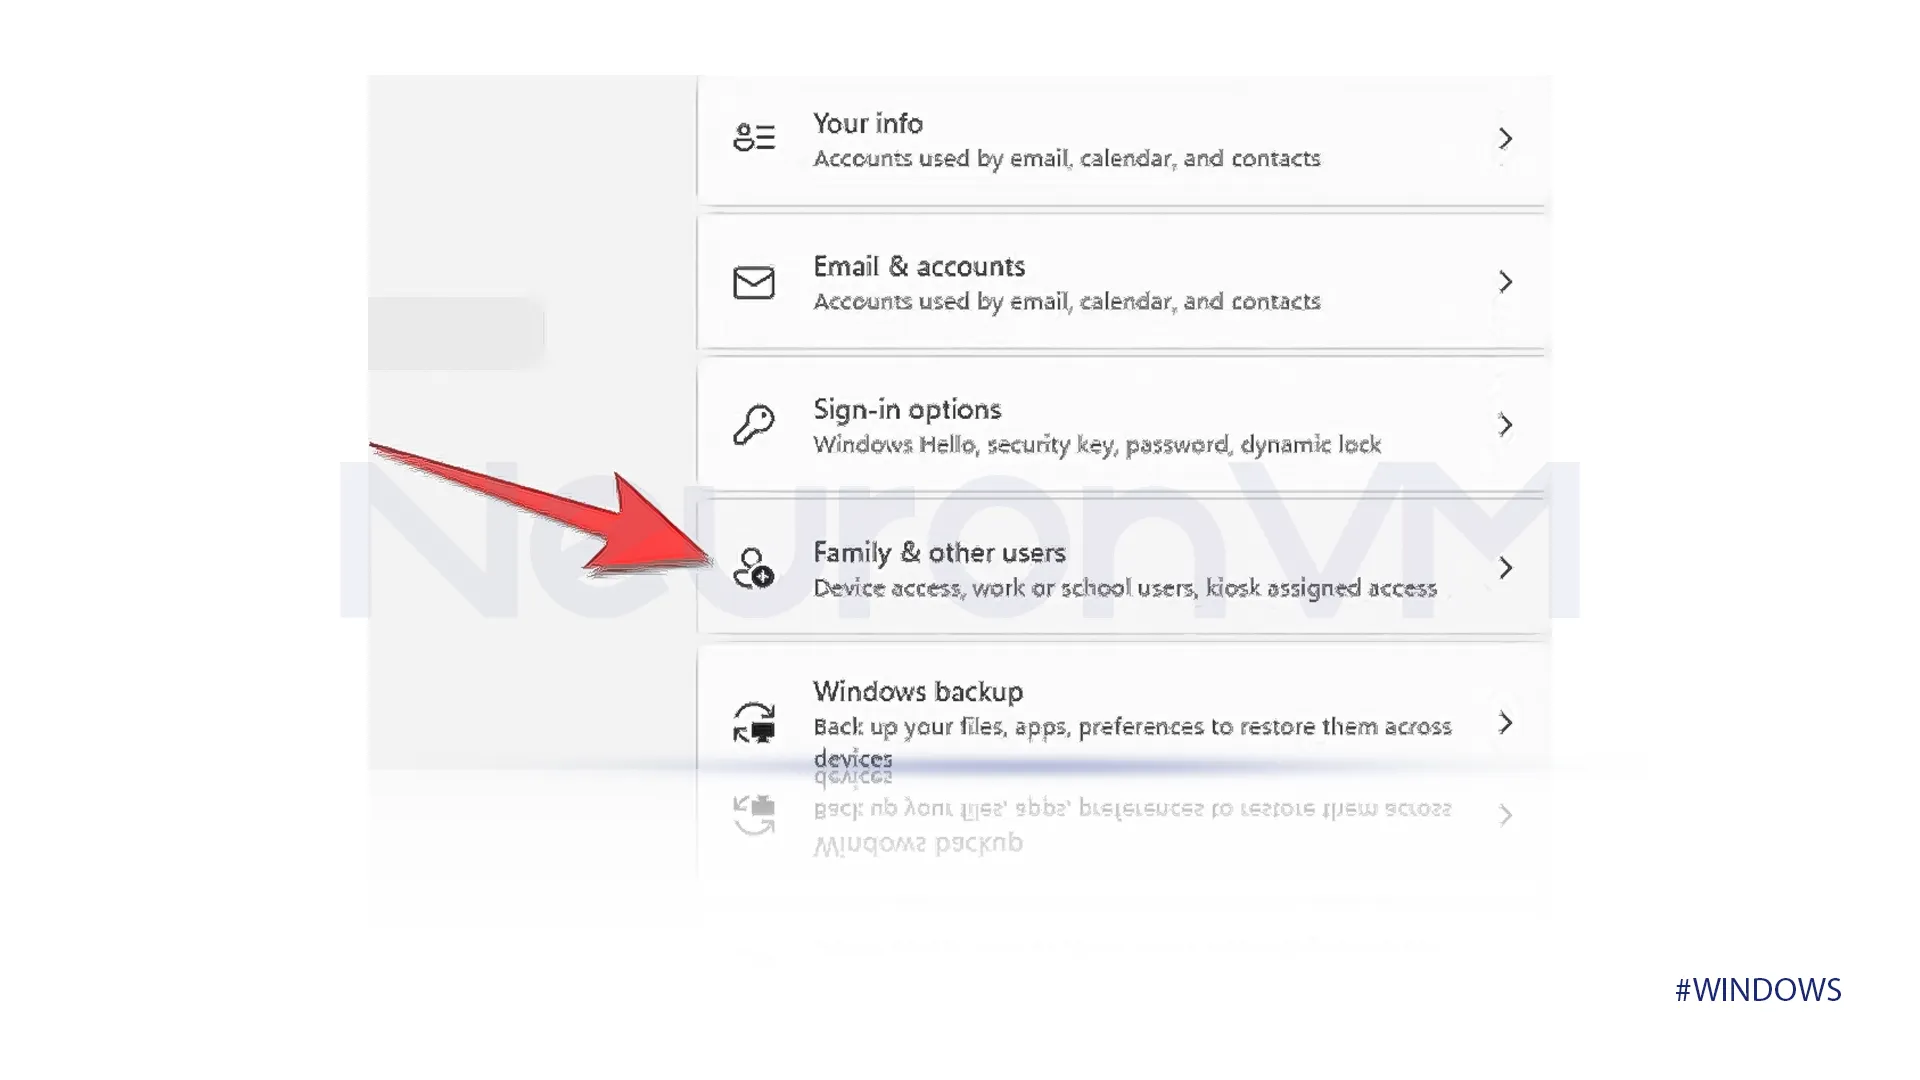 Your accounts will be under Your Family or Other Users, they are in their standard format that we will change.
Click on the account you want to change, in the Account options, click on “Change Account Type” and select Yes when the computer asks for permission to make changes.
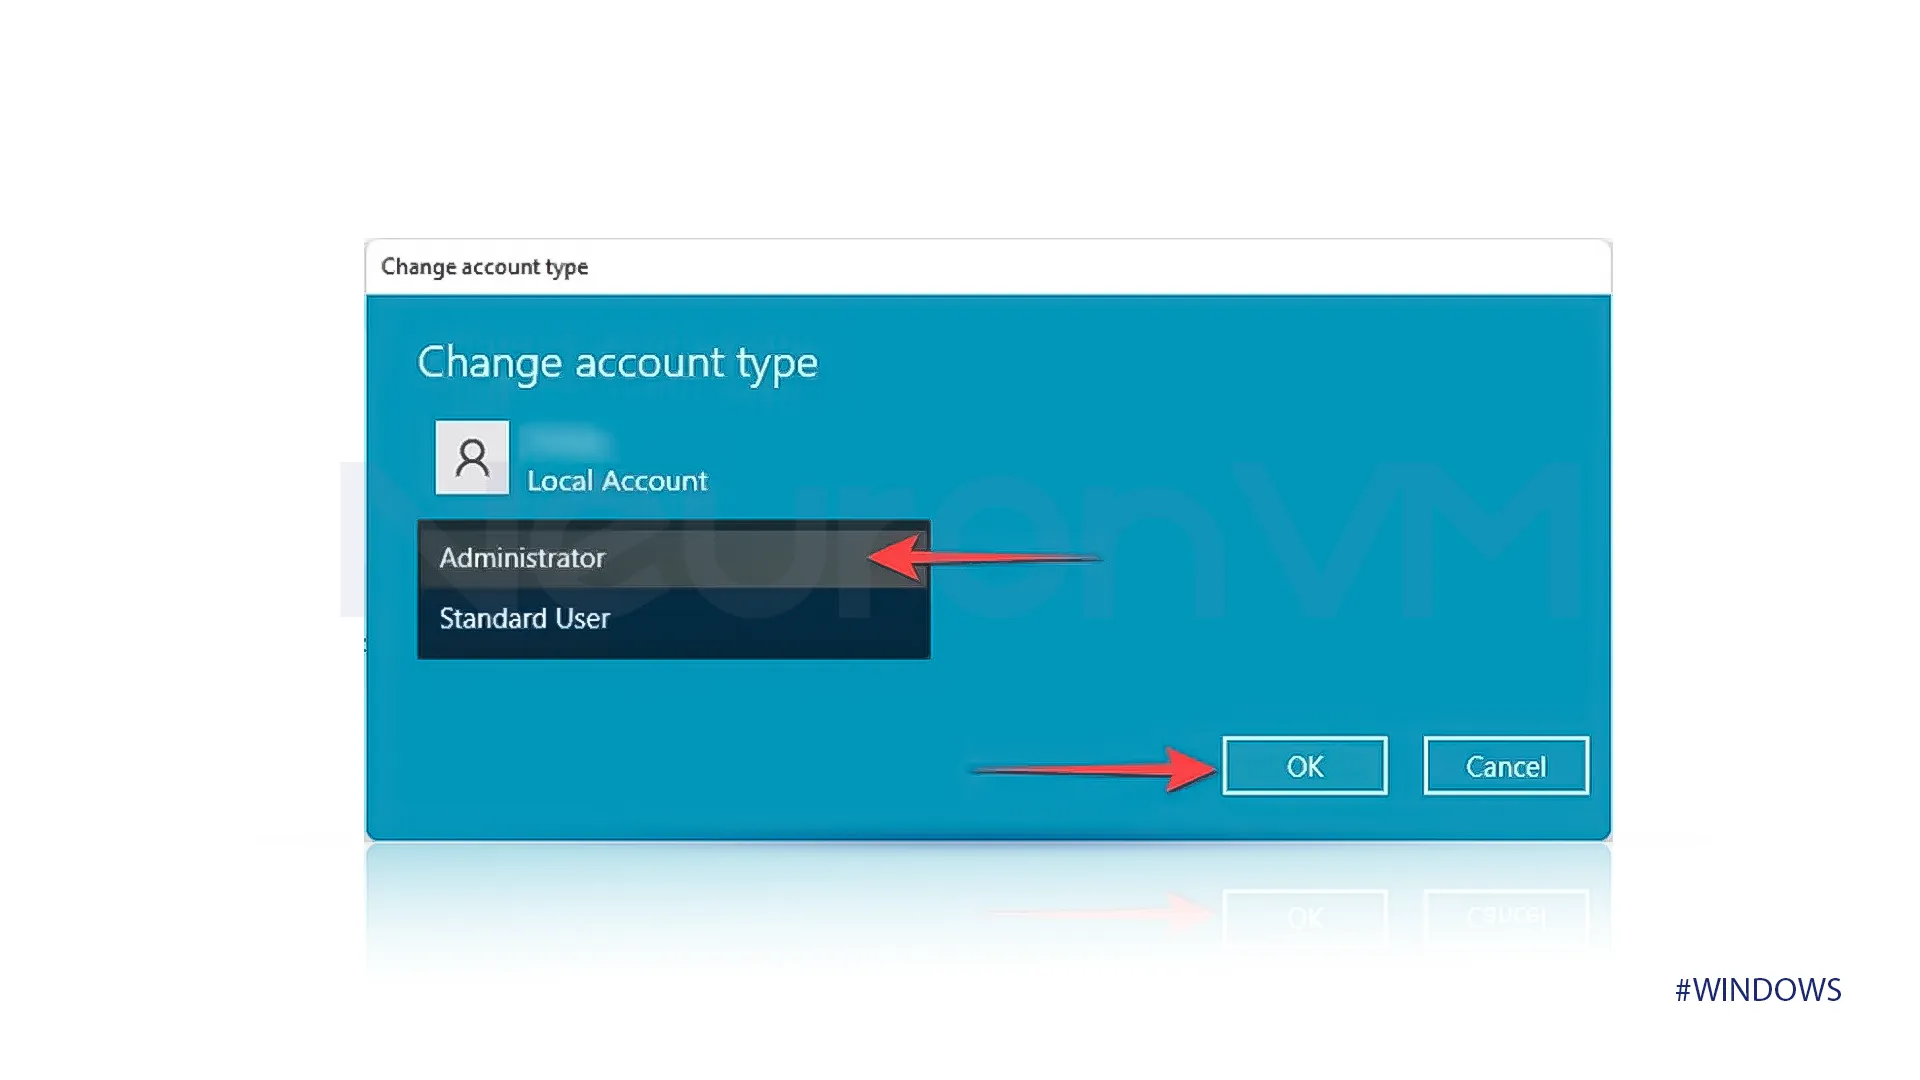
Once you click on Change account type a new tab will open, which has two options including Standard and Adminstator.
After clicking on Administrator your account will be changed, remember that you can change it anytime by following the same steps provided, just select Standard instead of Adminstator.
Conclusion
We provided three methods to change administrator on Windows 10 & 11, you can also use these methods on older versions.
You can follow any method in this article as you want, make time to do these steps to enhance your security, for more security tips in Linux and Windows check our website.
You might like it


