


How to Add an Additional IP on Windows & Linux


 8m
8m
 0 comments
 Print
Print
Why Add an Additional IP? Let’s be honest: when you have a dedicated server and are working with just one IP address, you’ll quickly find yourself with limitations. Your email server needs a PTR, your test and prod environments need to be separate, or you want to have multiple sites with separate IPs. That’s where Add an Additional IP comes in: more order, service isolation, and better reliability for services like email. Now let’s get started, step-by-step and free of boring jargon.
Part 1) Windows: How to Add an Additional IP
Graphical Method (Easy and Risk-Free):
Press Win + R and type ncpa.cpl → Enter (Network Connections window opens).

Right-click on the desired network adapter → Properties → Double-click Internet Protocol Version 4 (TCP/IPv4).
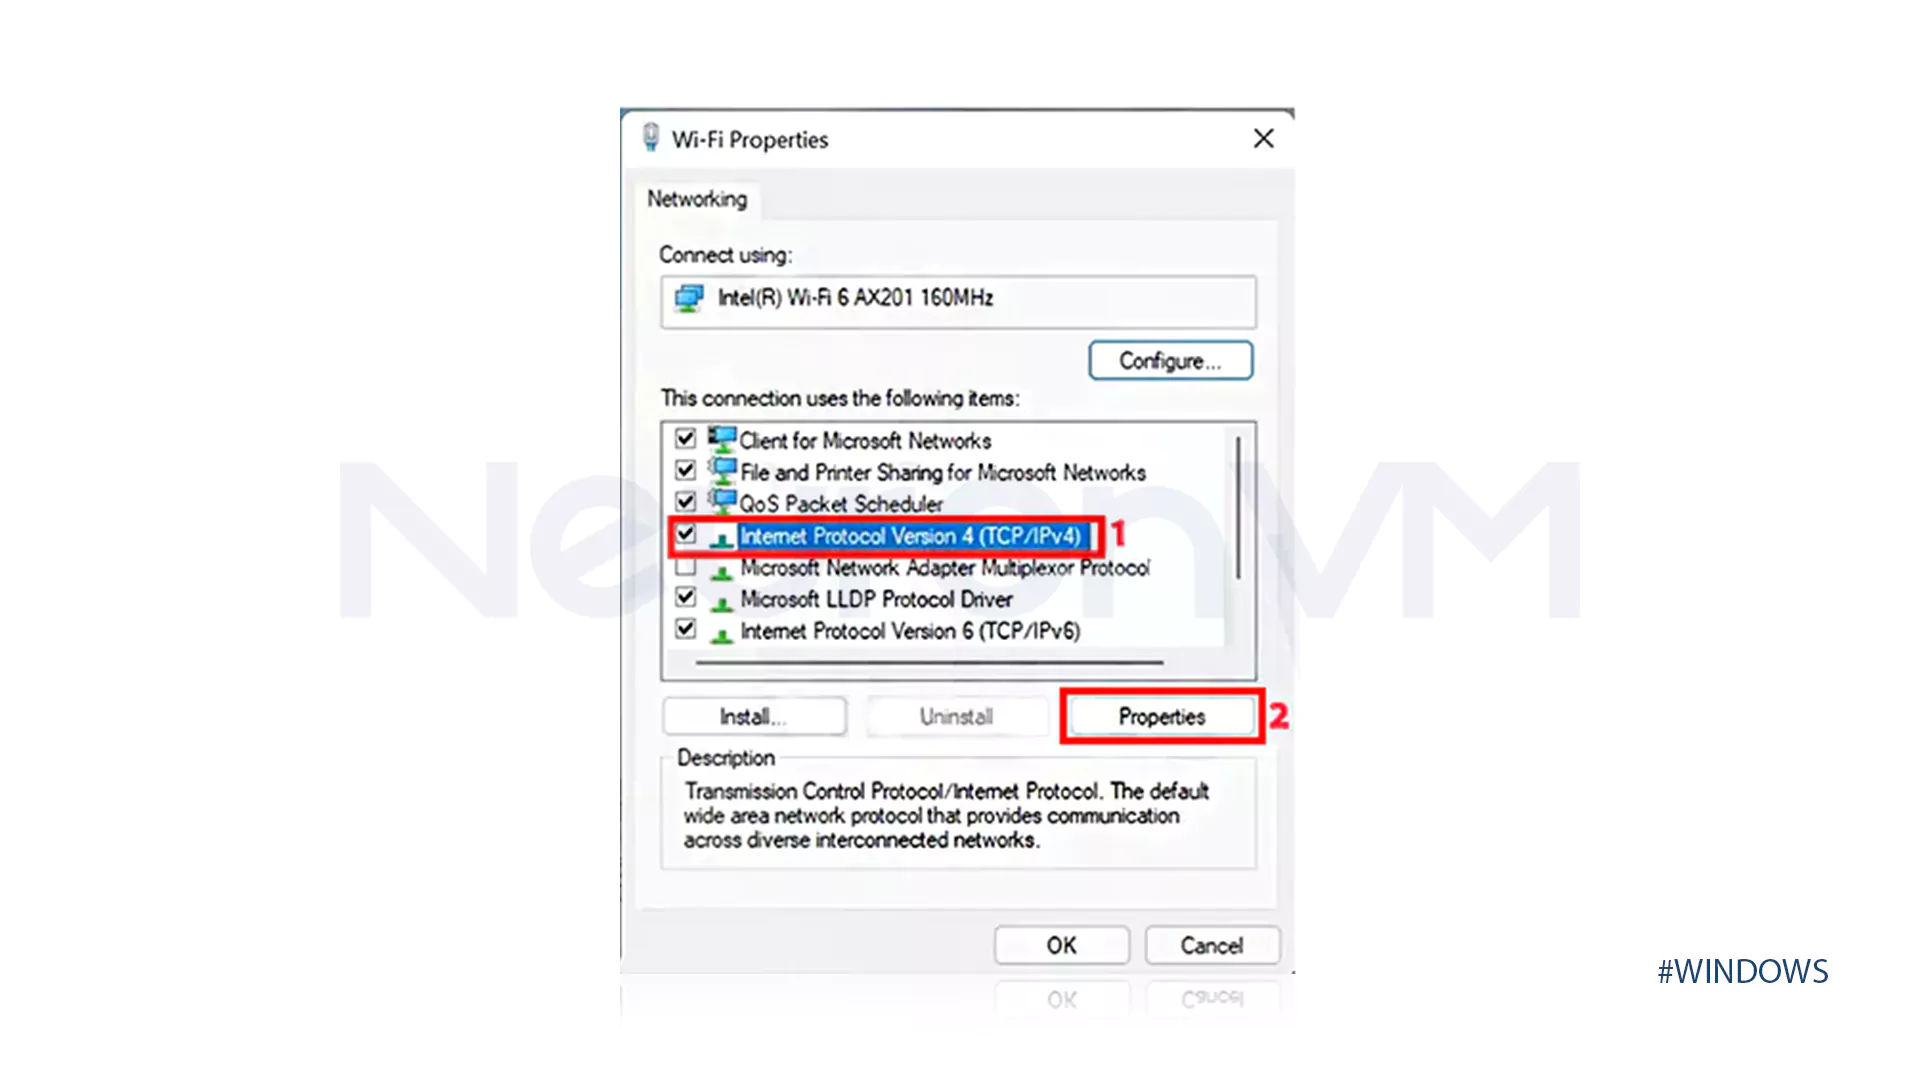
Advanced… → IP Settings tab → Add… → Enter the IP and Subnet mask → Add → OK → OK.

In these fields, you should enter the IP address and subnet and then click on Add.
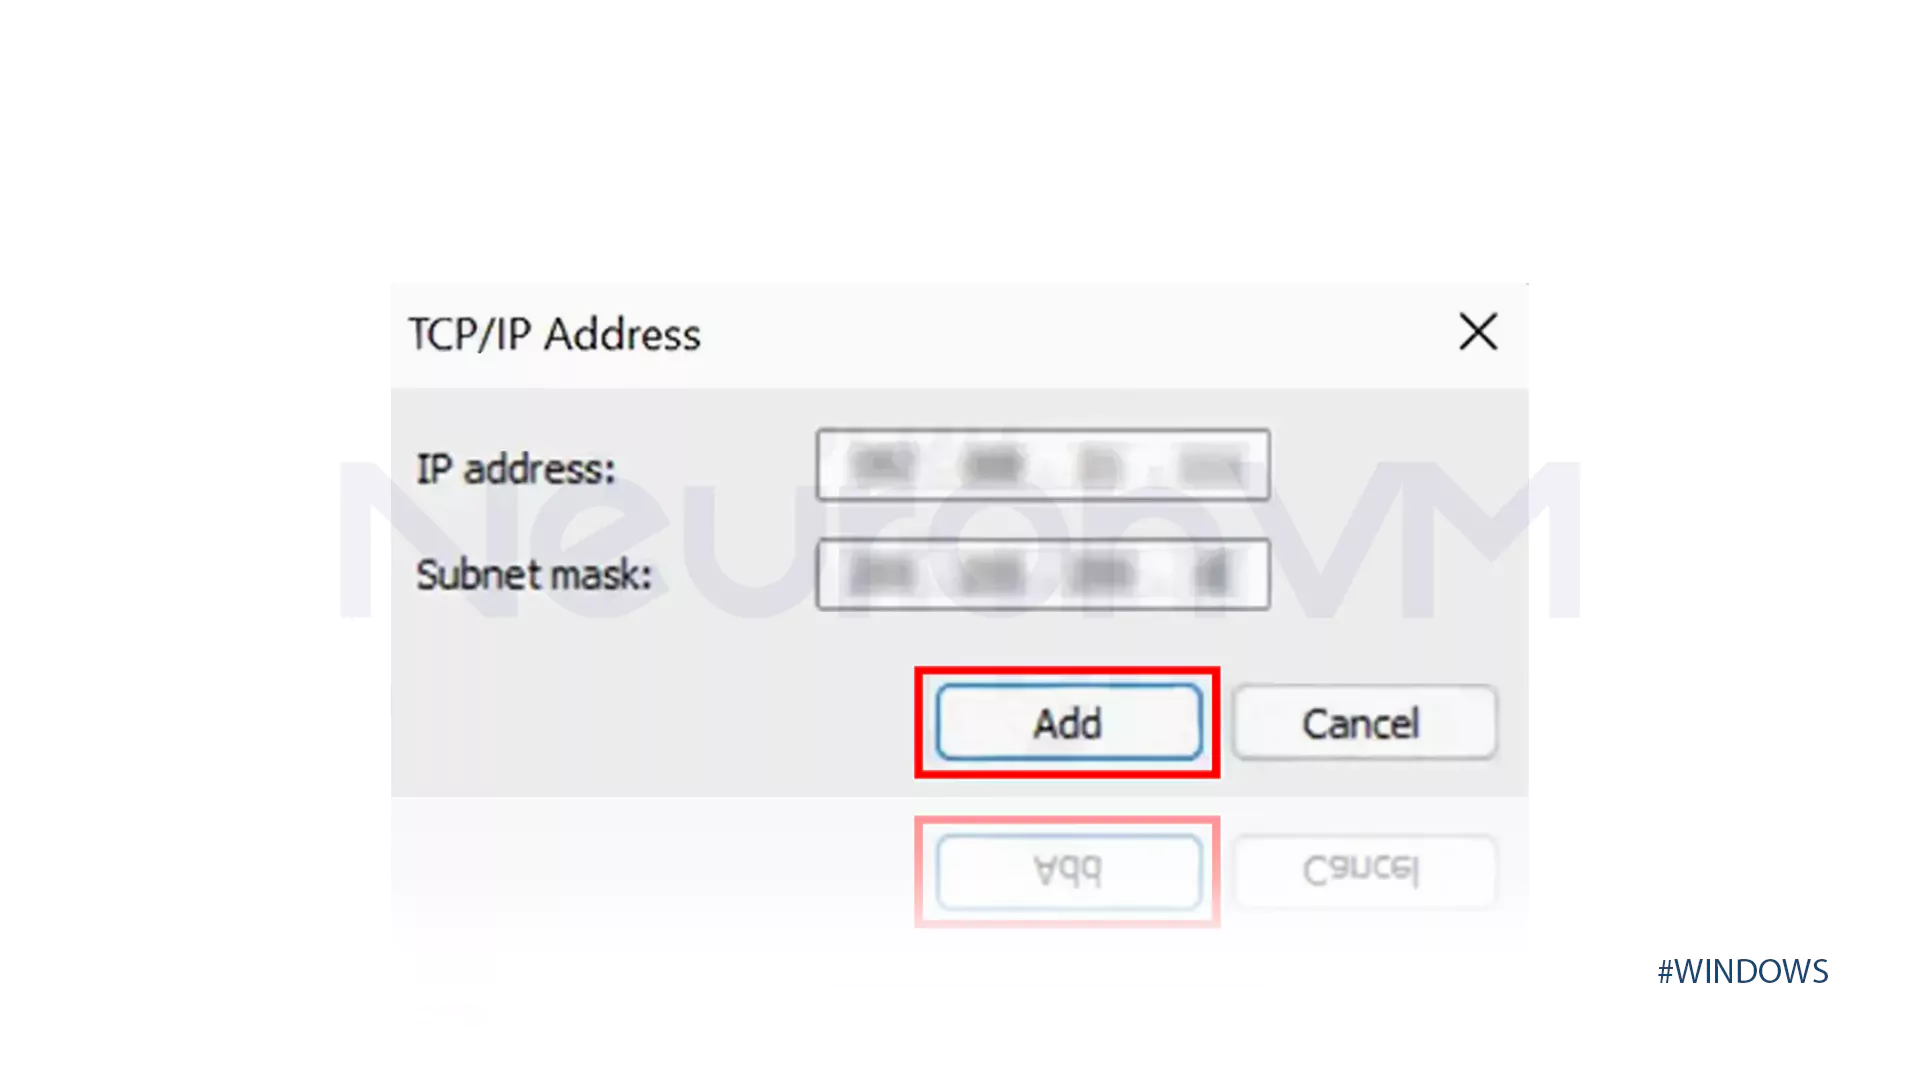
Tutorial: Do not add a new Gateway at this stage; just add the IP and subnet. Having more than one Default Gateway usually causes RDP/SSH to break or cause routing issues.
You can add an additional IP on Windows both via Network Connections and Command Prompt.
Part 2) Command Line Method (PowerShell is recommended, or netsh.)
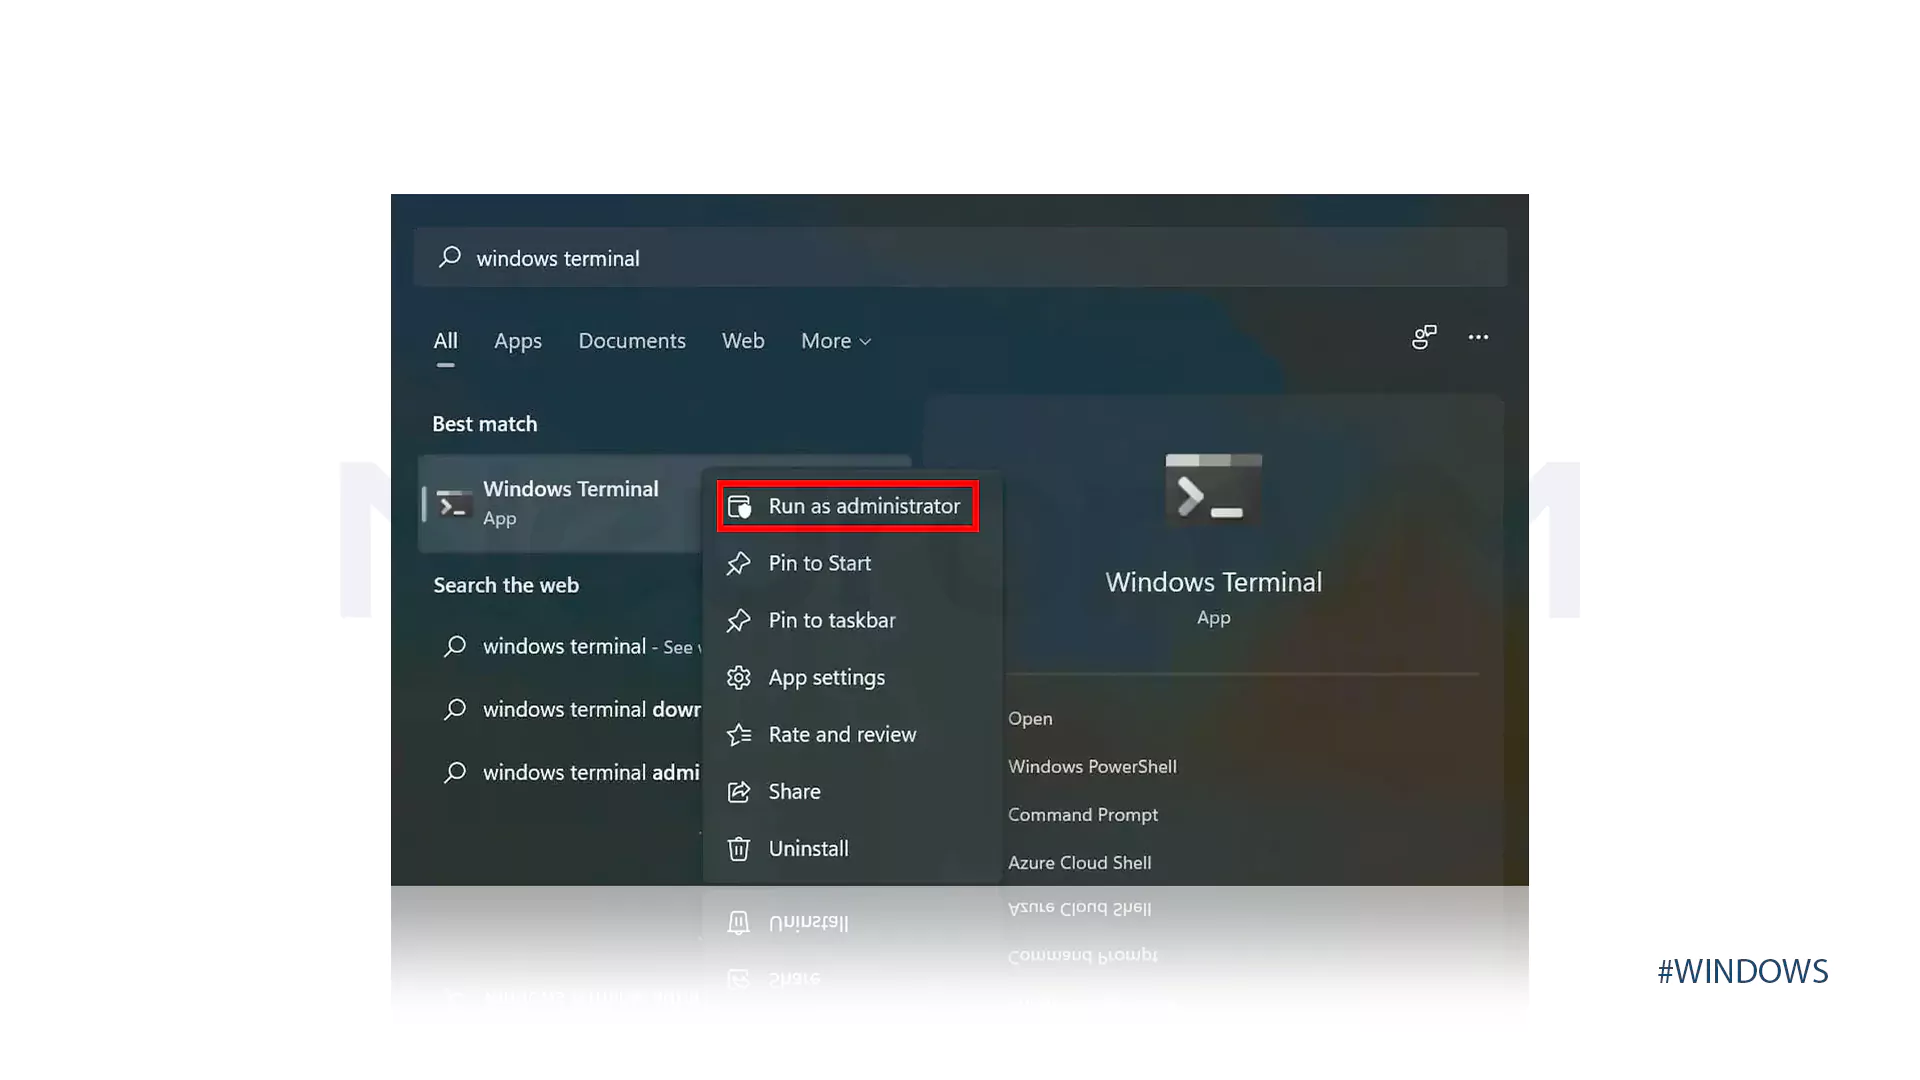
Firstly, launch the Search menu by pressing Windows+S, enter Windows Terminal in the text field at the top, right-click on the relevant search result, and select Run as administrator:
Now, press the downward-facing arrow and from the list of options choose Command Prompt:
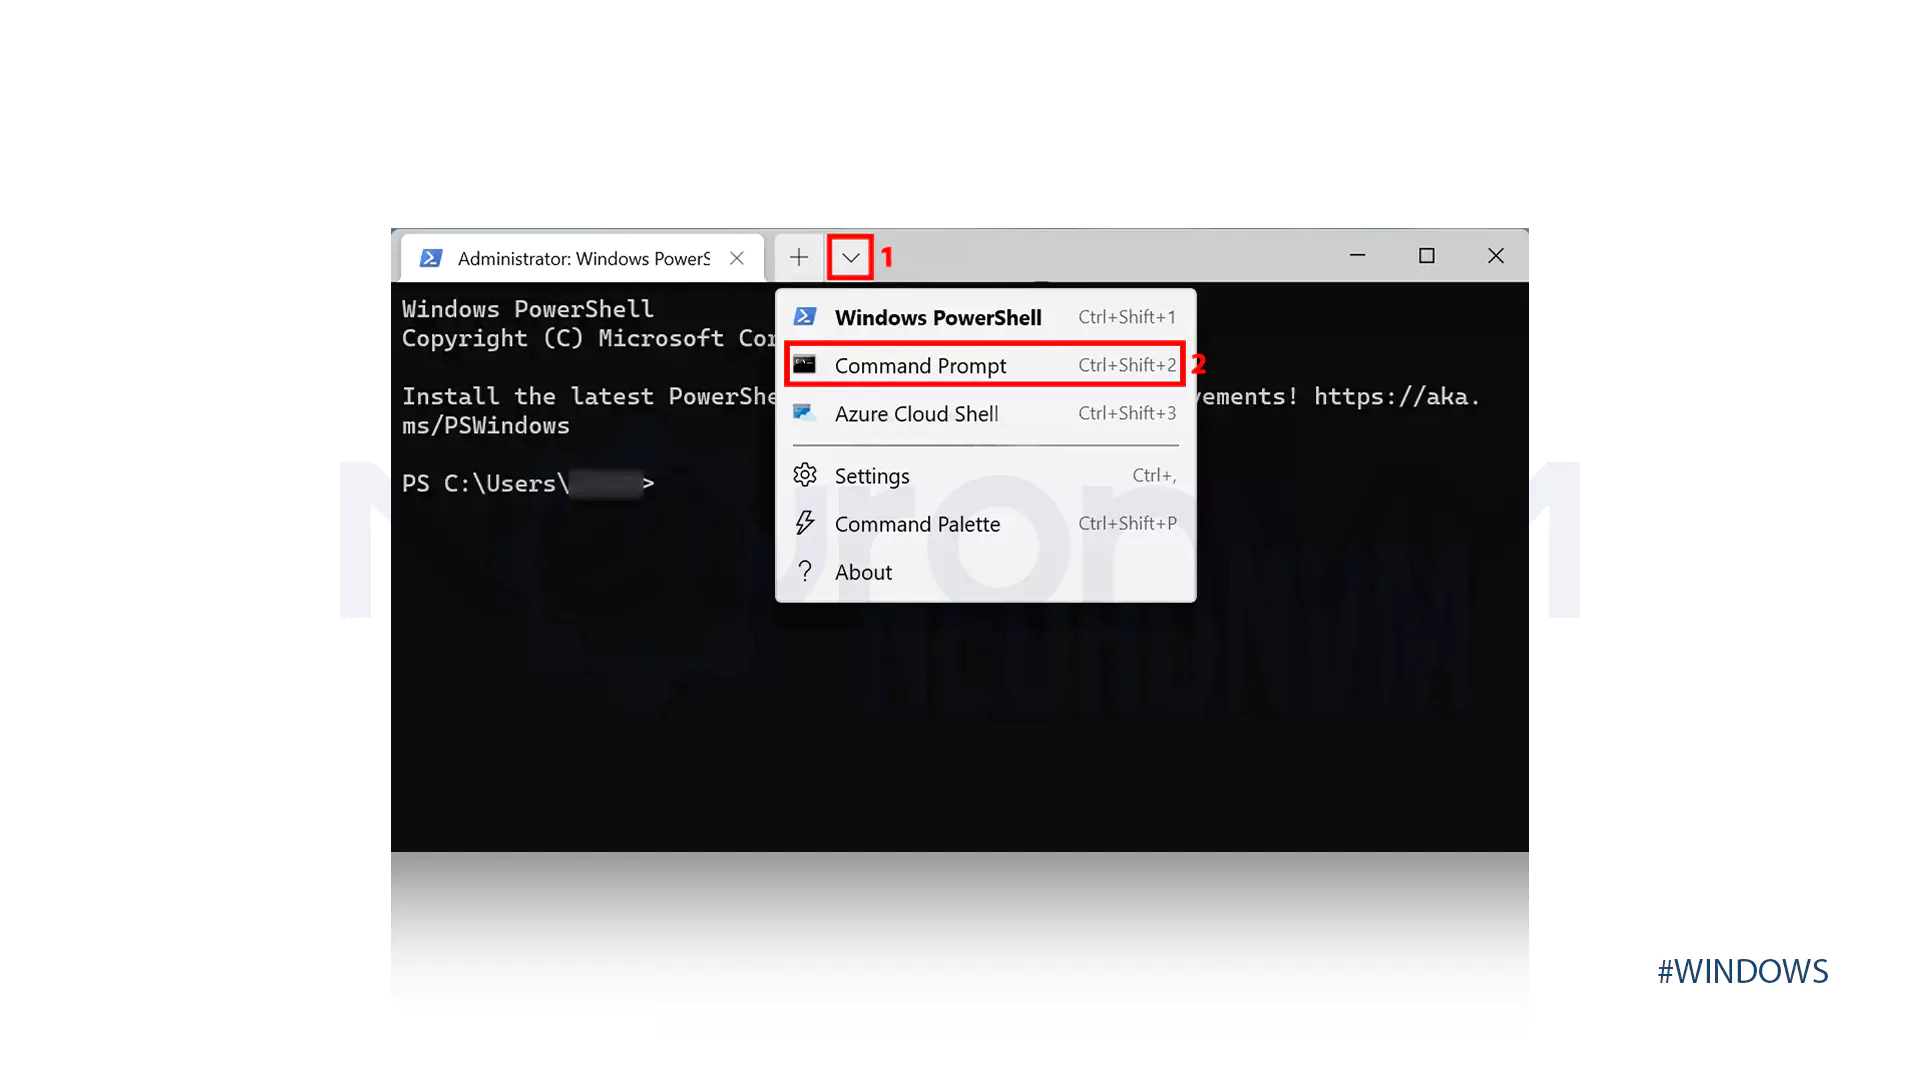
Now, run the command below:
netsh int ipv4 add address " NIC name " IP_address Subnet
Remember to replace the NIC (Network Interface Card) name , IP address, and subnet.
Part 3) Linux: How to Add an Additional IP (Ubuntu, RHEL/CentOS, Debian)
First check the interface name and network status:
ip -br a
3.1 Ubuntu 18.04/20.04/22.04+ (Netplan, stable and standard)
Secure editing (stable):
Open the netplan file (name may be different):
sudo nano /etc/netplan/50-cloud-init.yaml
Sample configuration with two IPs (note the spaces/indentation):
network:
version: 2
ethernets:
ens3:
dhcp4: no
addresses:
- 192.0.2.101/24
- 192.0.2.100/24
gateway4: 192.0.2.1
nameservers:
addresses: [8.8.8.8,1.1.1.1]
Secure operation with rollback:
sudo netplan try # If you don't confirm within X seconds, it will rollback

sudo netplan apply
Temporary (until reboot):
sudo ip addr add 192.0.2.100/24 dev ens3 label ens3:1
Tutor warning: Don’t use Tab in YAML only Space; incorrect indentation will cause the settings to not be applied.
3.2 RHEL / CentOS / Rocky / Alma (NetworkManager with nmcli)
Use nmcli in modern versions:
# Assumption: eth0 connection is active
sudo nmcli con mod eth0 +ipv4.addresses 198.51.100.10/24
sudo nmcli con mod eth0 ipv4.method manual
sudo nmcli con up eth0
If you want to create a new connection for the system, If you want to create a new connection for your system:
sudo nmcli con add type ethernet con-name eth0-ip2 ifname eth0 ipv4.addresses 198.51.100.10/24 ipv4.method manual autoconnect yes

sudo nmcli con up eth0-ip2
Note: Usually the old Gateway is enough; there is no need to add a new Gateway.
3.4 Debian (traditional ifupdown or NetworkManager)
ifupdown (traditional): Edit the /etc/network/interfaces file
auto eth0
iface eth0 inet static
address 192.0.2.101/24
gateway 192.0.2.1
dns-nameservers 8.8.8.8 1.1.1.1

auto eth0:1
iface eth0:1 inet static
address 192.0.2.100/24
Then:
sudo ifdown eth0 && sudo ifup eth0
# Or only if necessary:
sudo ifup eth0:1
If NetworkManager is installed, use nmcli similar to the RHEL section.
Part 4) Quick Troubleshooting When Adding an Additional IP
SSH/RDP down? Quickly use netplan try (Ubuntu) or the KVM/Recovery console of the data center.
1- Duplicate address detected: This means that the IP is also used on another network check with your provider.
2- Ping from the outside does not work, but the IP is displayed inside the server: Usually the cause is a firewall or a lack of routing from the provider.
3- After adding a second gateway, the connection became unstable: Removing the additional gateway solved the problem Does it.
4- Is the IP with /32 (failover): You may need a virtual MAC or a special route from your provider.
Conclusion
When the goal is to have a clean, secure, and versatile server, a useful first step is to learn and confidently implement Add an Additional IP. We went from graphical Windows methods to modern Linux tools (Netplan, nmcli), reviewed firewall and DNS tips, and practiced quick troubleshooting. If you implement these tips step by step, not only will errors be reduced, but your services will also rank higher in search and email.
Yes, usually your hosting provider sets limits. Always check before assigning.
Not directly, but it helps you separate projects, SSL certificates, and mail reputation, which indirectly boosts reliability.
Always use console/KVM access provided by your data center to roll back changes safely.
You might like it

Kali Linux Tutorials
How to Install and Enable XRDP on Kali Linux


Ubuntu Tutorials
How to Install and Use Counter-Strike on Ubuntu 20.04

Centos Tutorials
How to Disable SELinux on CentOS (Best Practices)
