How to Install FFmpeg in Windows
 9m
9m
 0 comments
In this tutorial from NeuronVM, we want to explore the issue of how to install FFmpeg in Windows, which may not have been resolved for you. For this reason, we will spend a few minutes with you by mentioning all the issues related to install FFmpeg in Windows, along with the general concept of the software and how to install FFmpeg in Windows. Thank you very much in advance for choosing our website for training and services, and we hope to be able to achieve your satisfaction.
What is FFmpeg software?
Before installing FFmpeg on Windows, you should be familiar with the concept of this command line tool (CLI). Many Windows users believe that you need a software to process multimedia files such as videos and audio files, and the best option is the free and open source software FFmpeg. For this reason, installing FFmpeg on Windows has its own fans and you can easily have a set of libraries and programs for managing multimedia files and streams.
Top FFmpeg uses in Windows environment
1- Ability to convert video and audio files to your favorite formats.
2- Ability to reduce the size of video and audio files without losing quality.
3- Ability to cut, rotate and combine videos in a completely professional way.
4- Ability to extract metadata information from multimedia files on Windows systems.
5- Ability to record and play live audio and video in the system.
Prerequisites for installing FFmpeg on Windows
1- First, you need a system that runs Windows (Windows 10 is used in this tutorial).
2- Then you need to have an archive file for the installation steps. (7-Zip is used in this article)
3- Now you need to make sure that you have access to Command Prompt or Windows PowerShell.
4- The last prerequisite you need to have to install FFmpeg in Windows is access to Administrator privileges.
The best recommended method for install FFmpeg in Windows
To install FFmpeg on Windows, it will take only 4 steps, which we will mention below, so follow these steps carefully to benefit from the useful features of the FFmpeg software as quickly as possible:
Step 1: Download FFmpeg for Windows
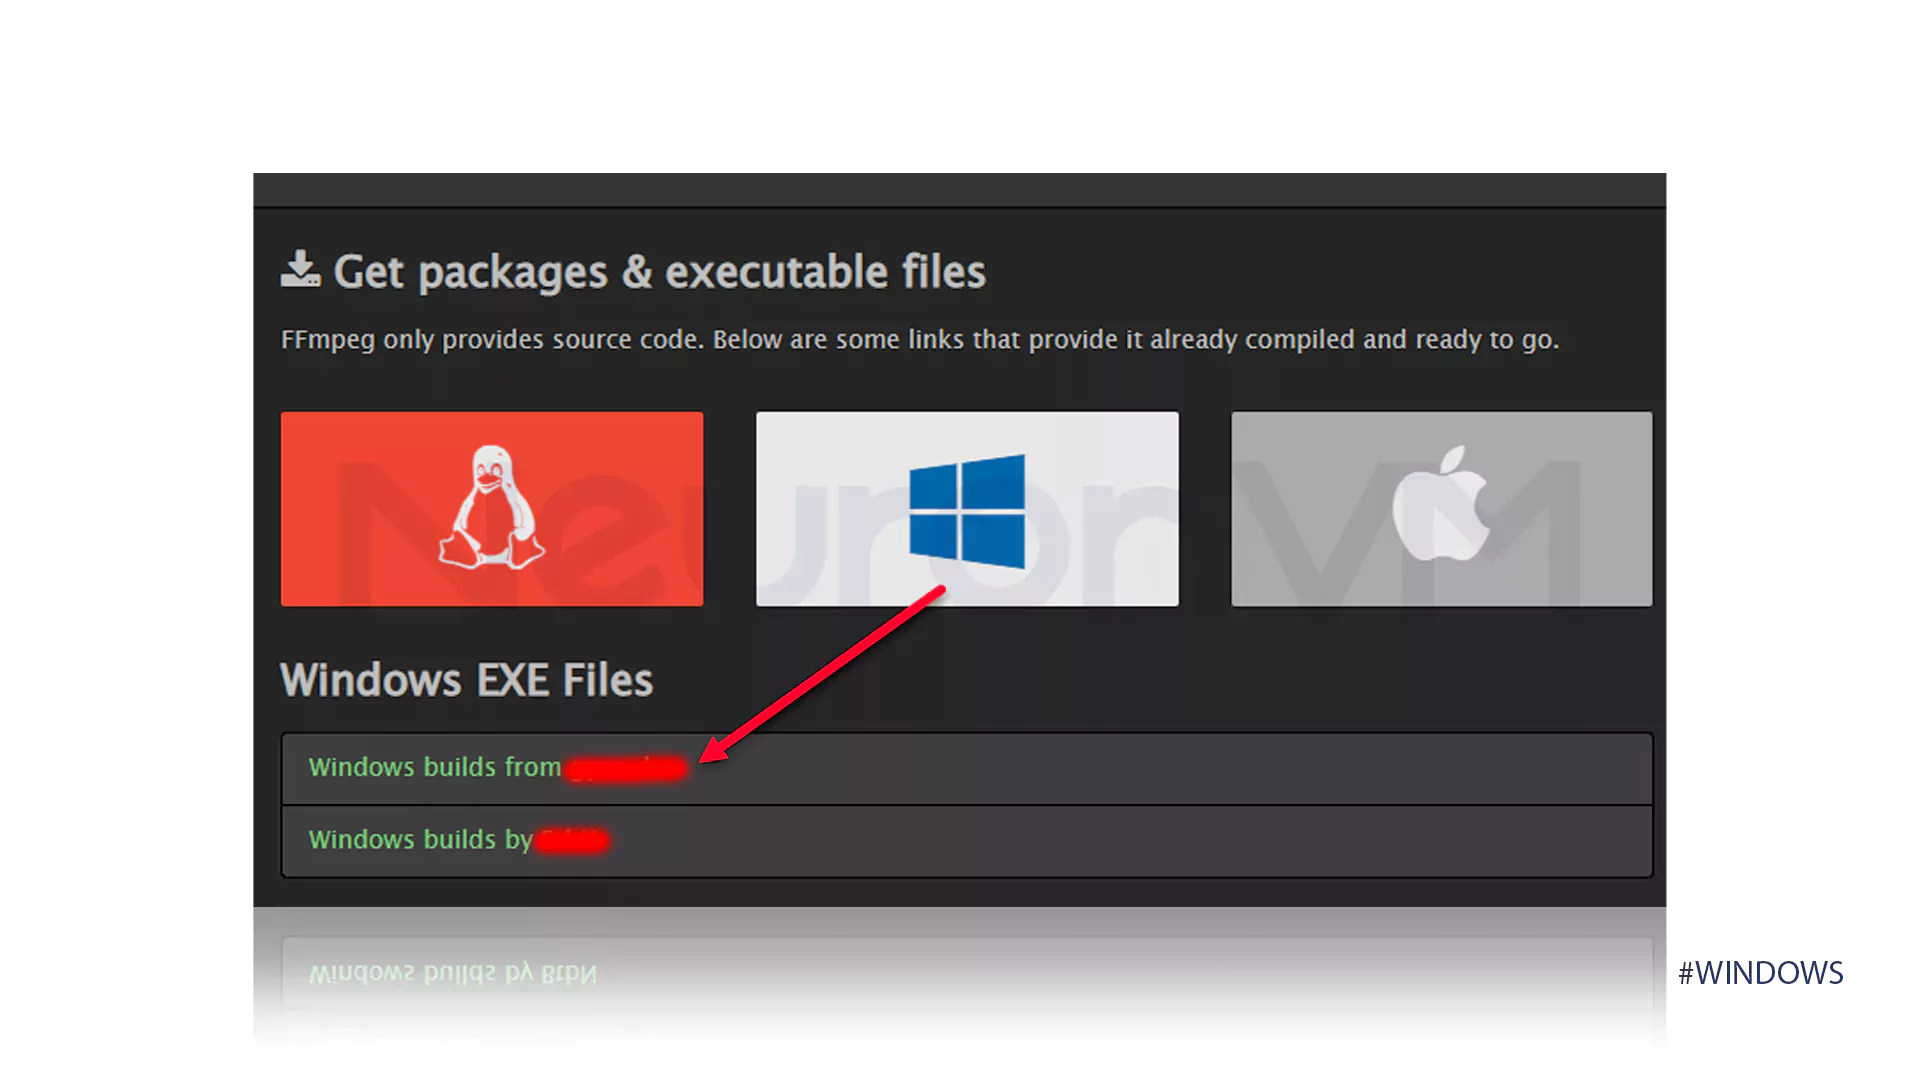
First, go to the official and authentic page of the FFmpeg software, and after reviewing the Linux, Windows, and Mac download options, select the option appropriate for the Windows system. Next, select the gyan.dev link to open a new page for you.
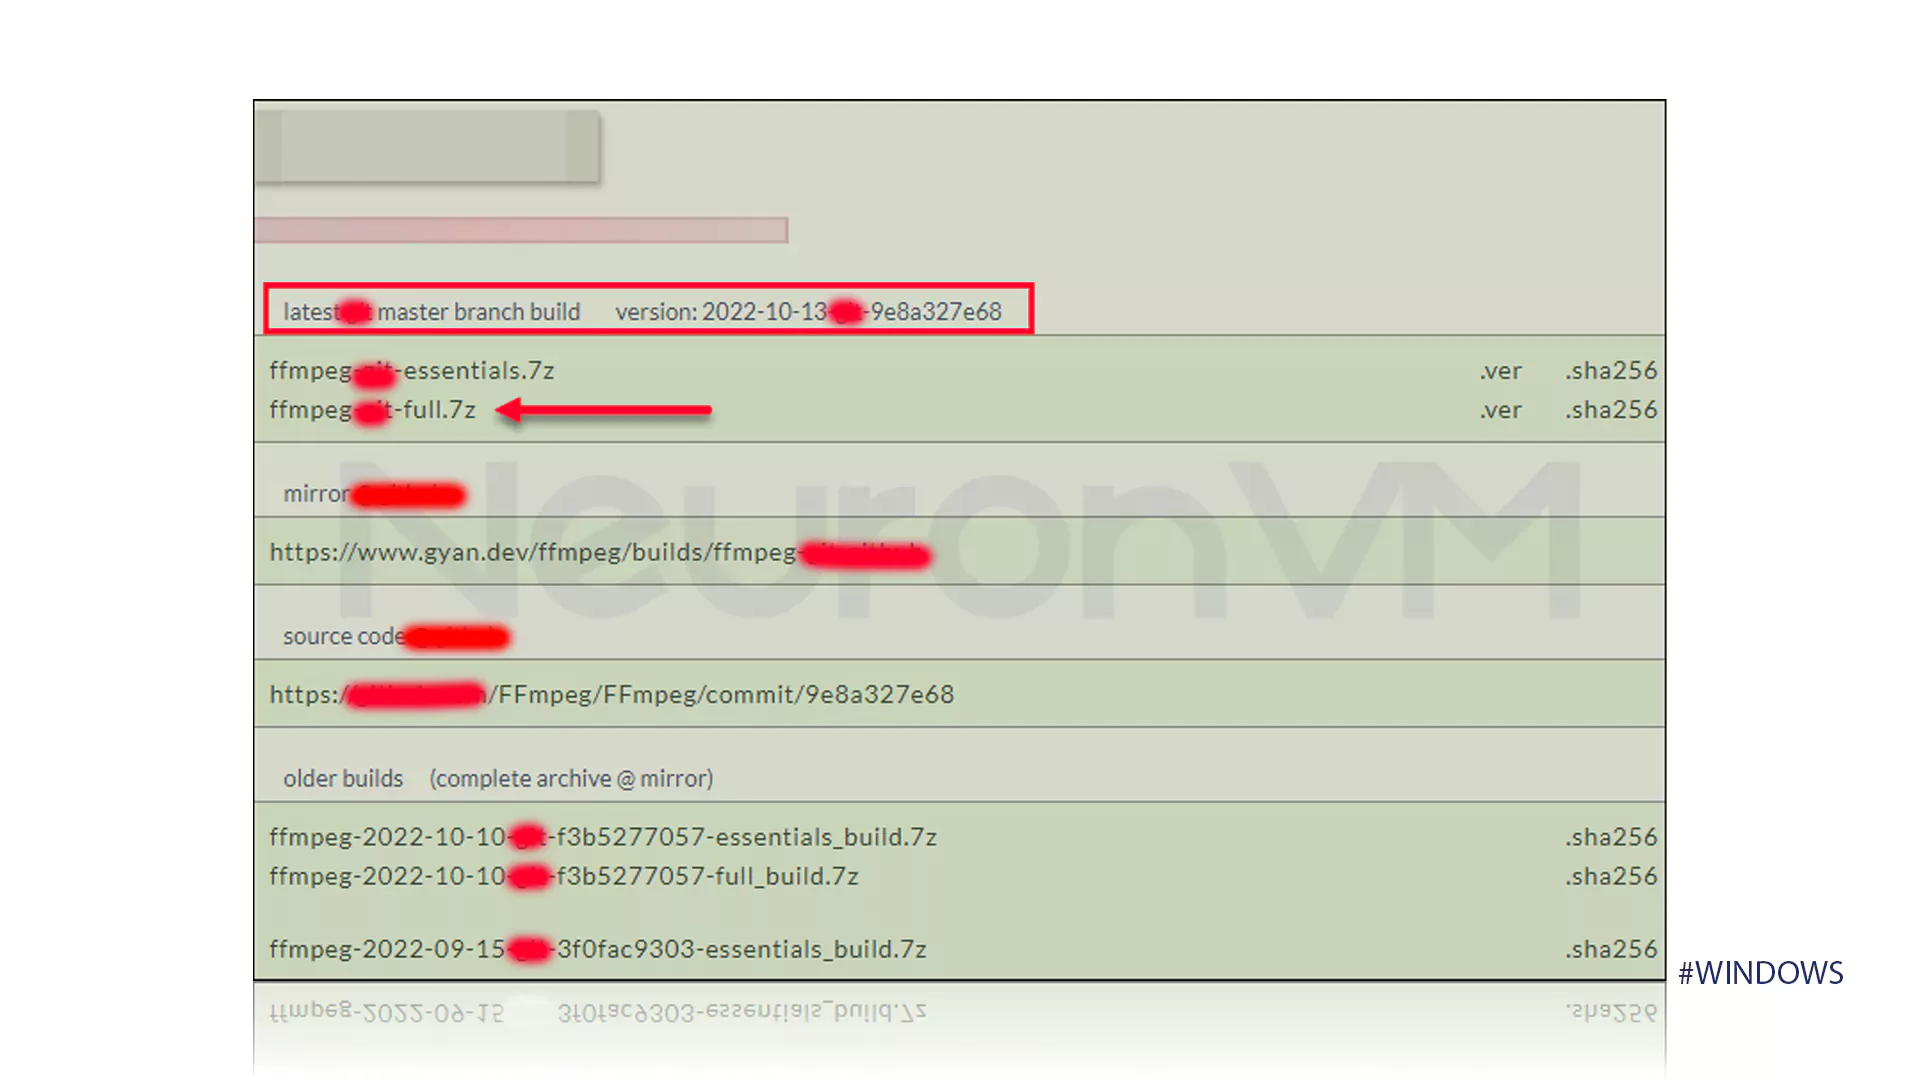
The image below shows that you need to look for the latest FFmpeg build in git master builds. Once you find this option, you need to click ffmpeg-git-full-7z and get the latest version of the libraries. But be careful that you may have to choose a download location at this stage and if the download doesn’t start automatically, you need to save the file.
Step 2: Extract the files downloaded in the previous step.
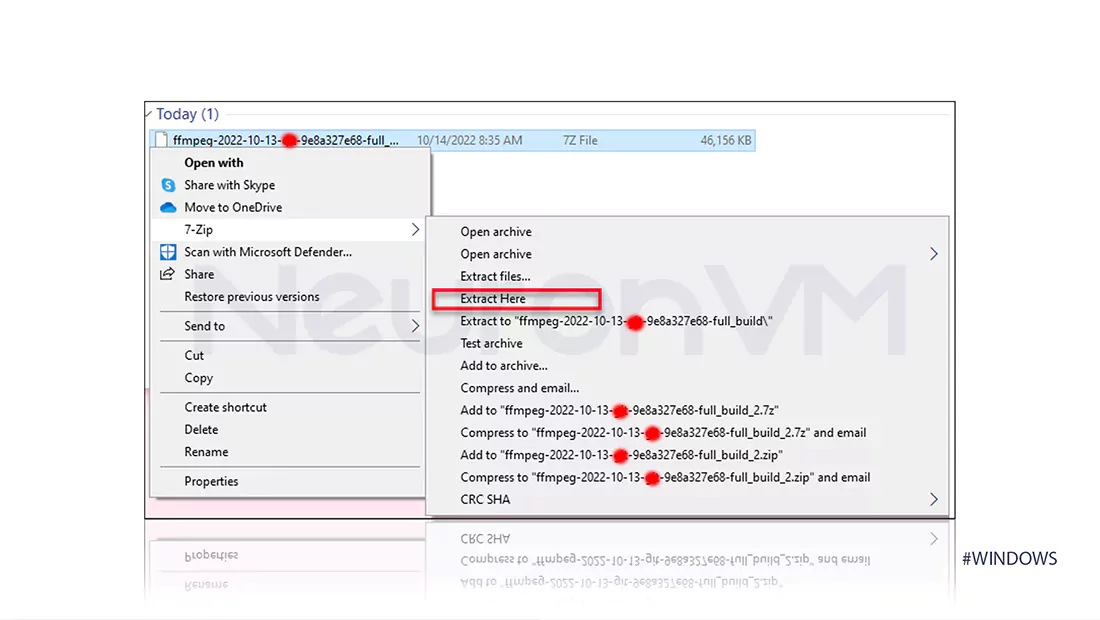
The default location is the Downloads folder, otherwise, you can browse to the file you downloaded to install FFmpeg on Windows. Once you find the file, right-click on it and drag it to the 7-Zip file. Note that you can use other options instead of 7-Zip. After completing these steps, you should select Extract here and wait for the operation to complete.
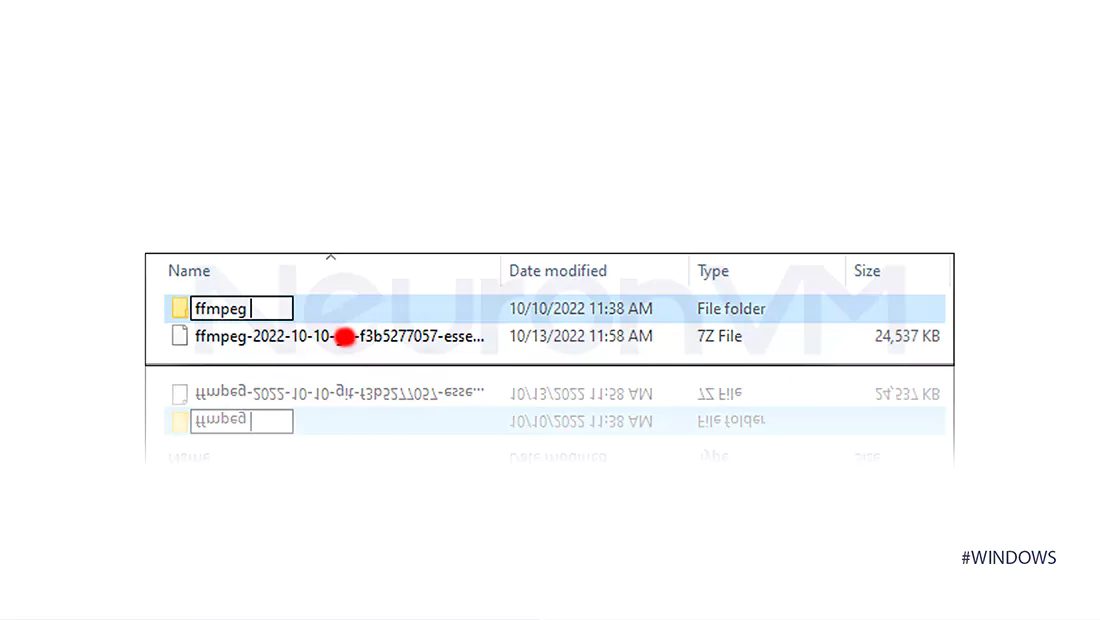
Now at this stage of install FFmpeg in Windows, rename the folder you extracted to FFmpeg.
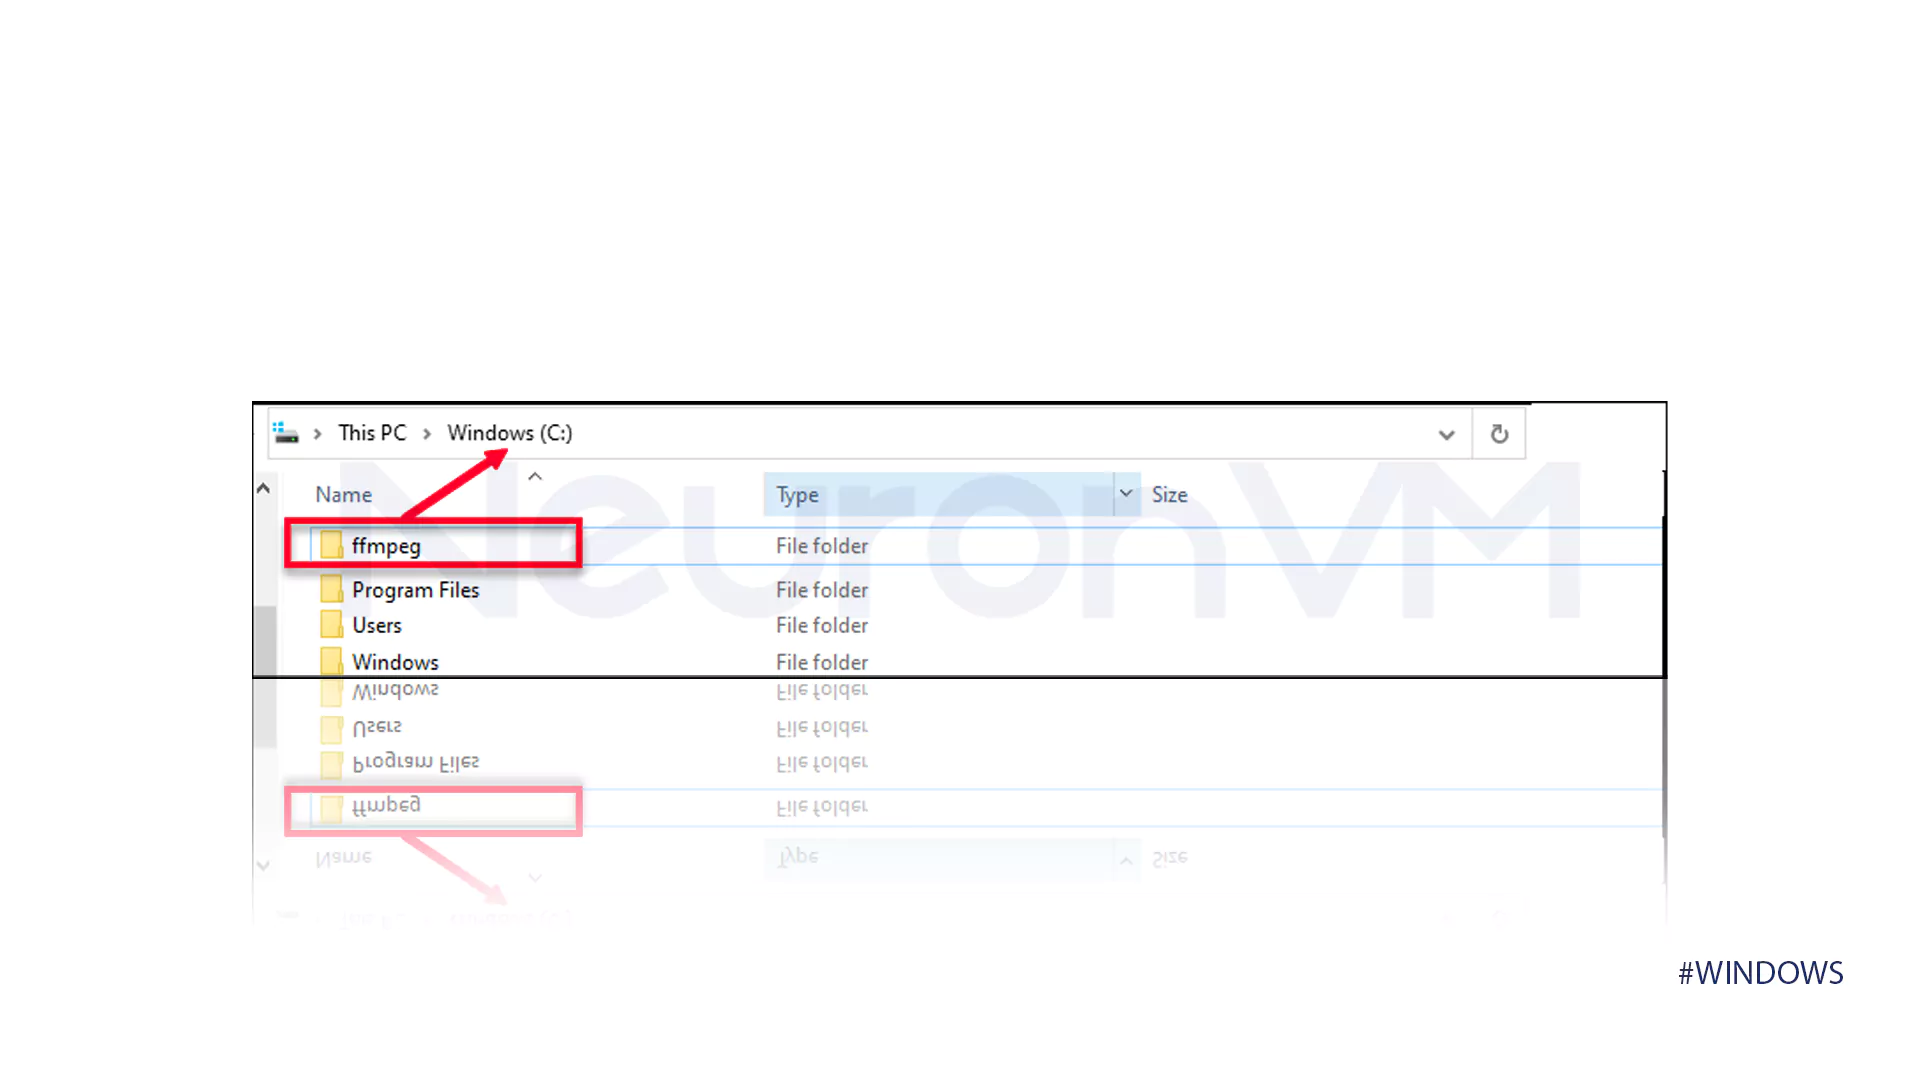
Now you can easily move the folder to the root of drive C or any other folder you want, according to the image below.
Step 3: Add FFmpeg to PATH
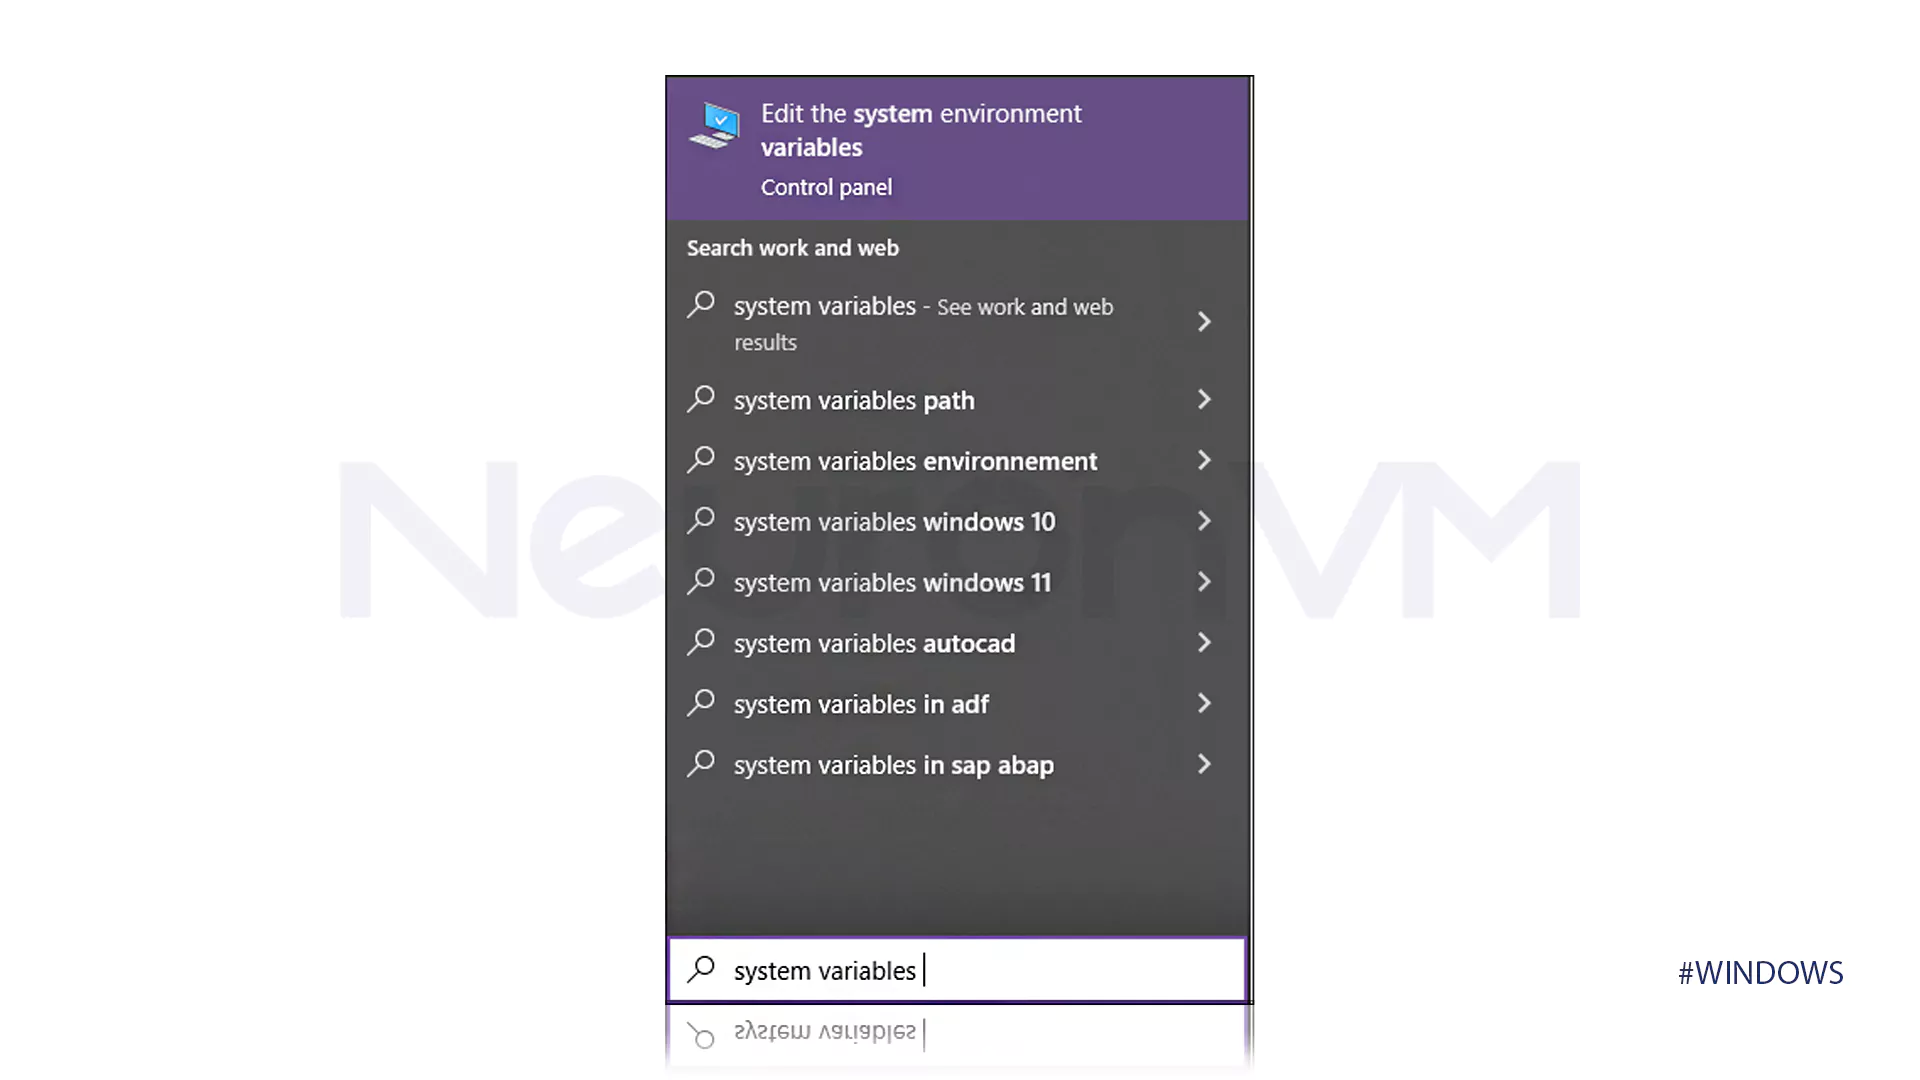
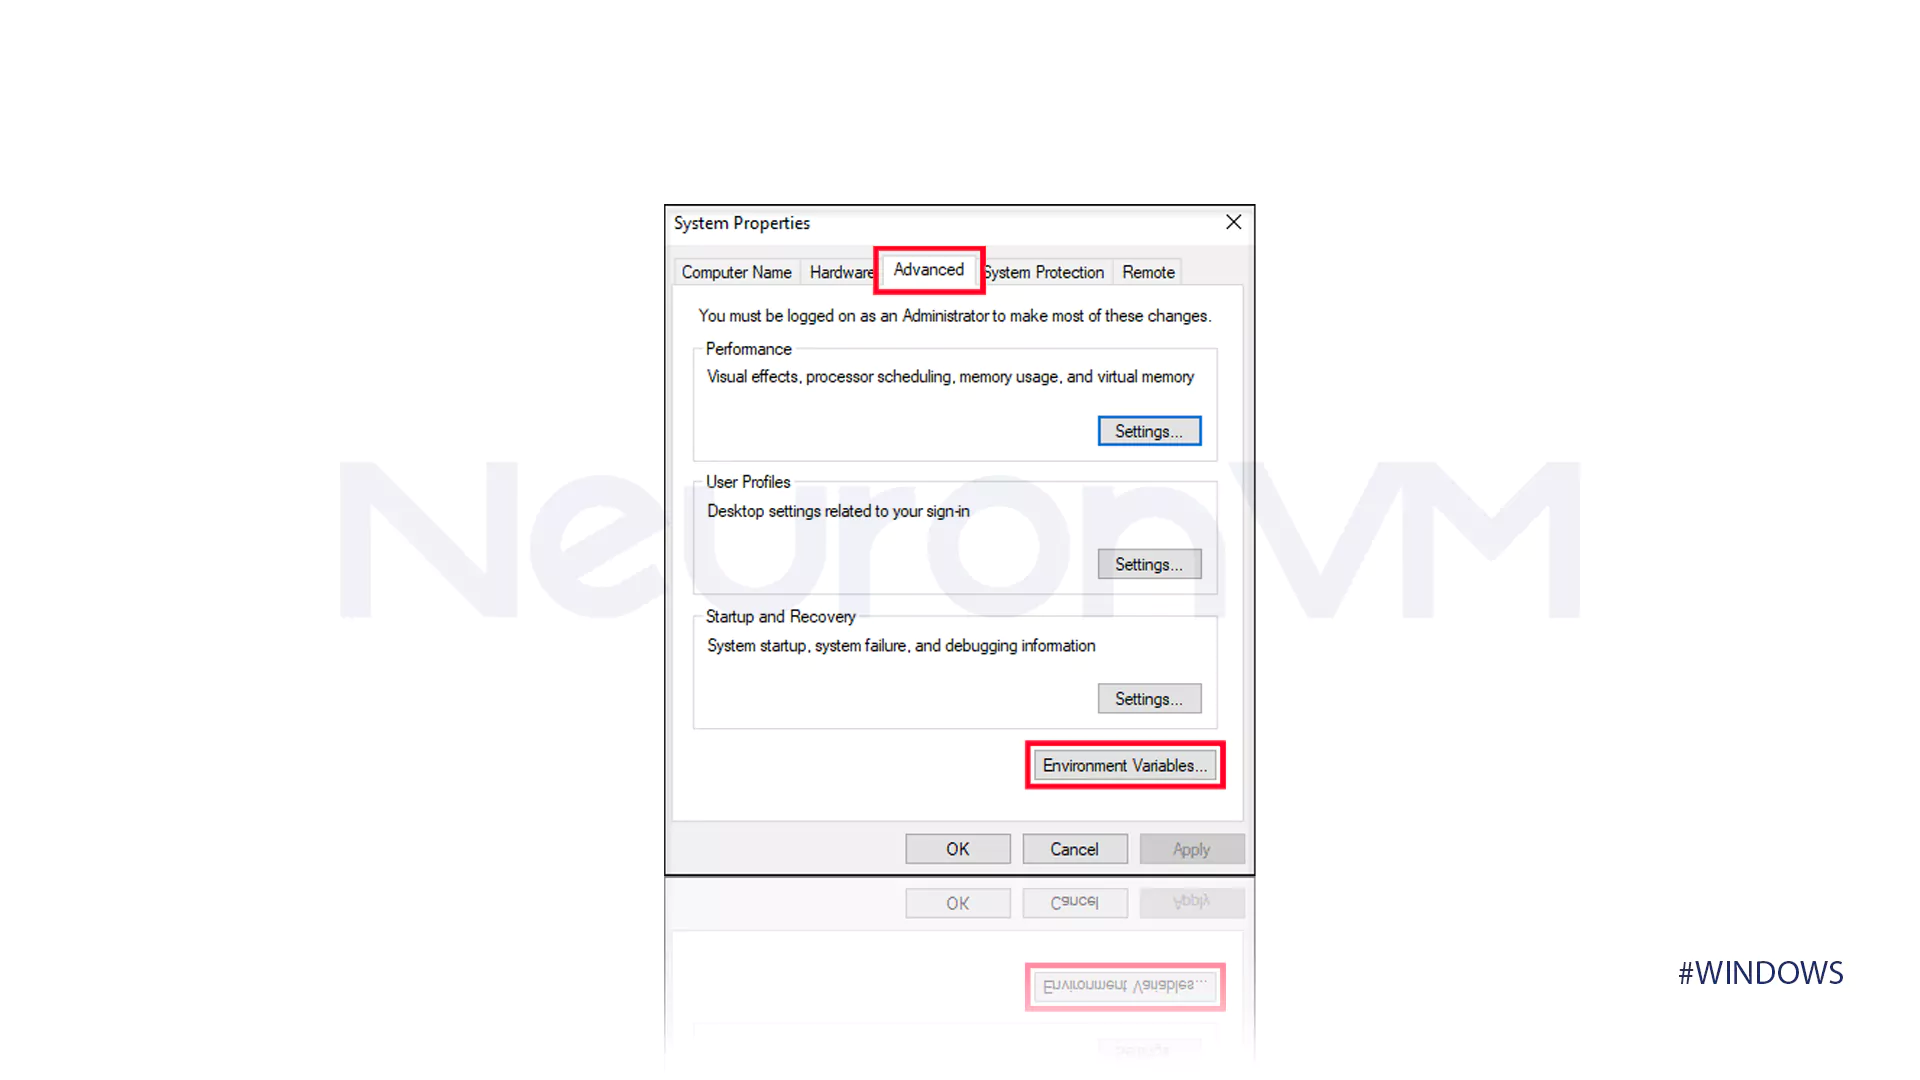
The purpose of this step in install FFmpeg in Windows is to add FFmpeg to the PATH so that you can set Windows environment variables. To do this, you must first find the Edit the system environment variables option by typing system variables in the search bar.
Then click on the Environment Variables button located under the Advanced tab, which you can also see in the image below.
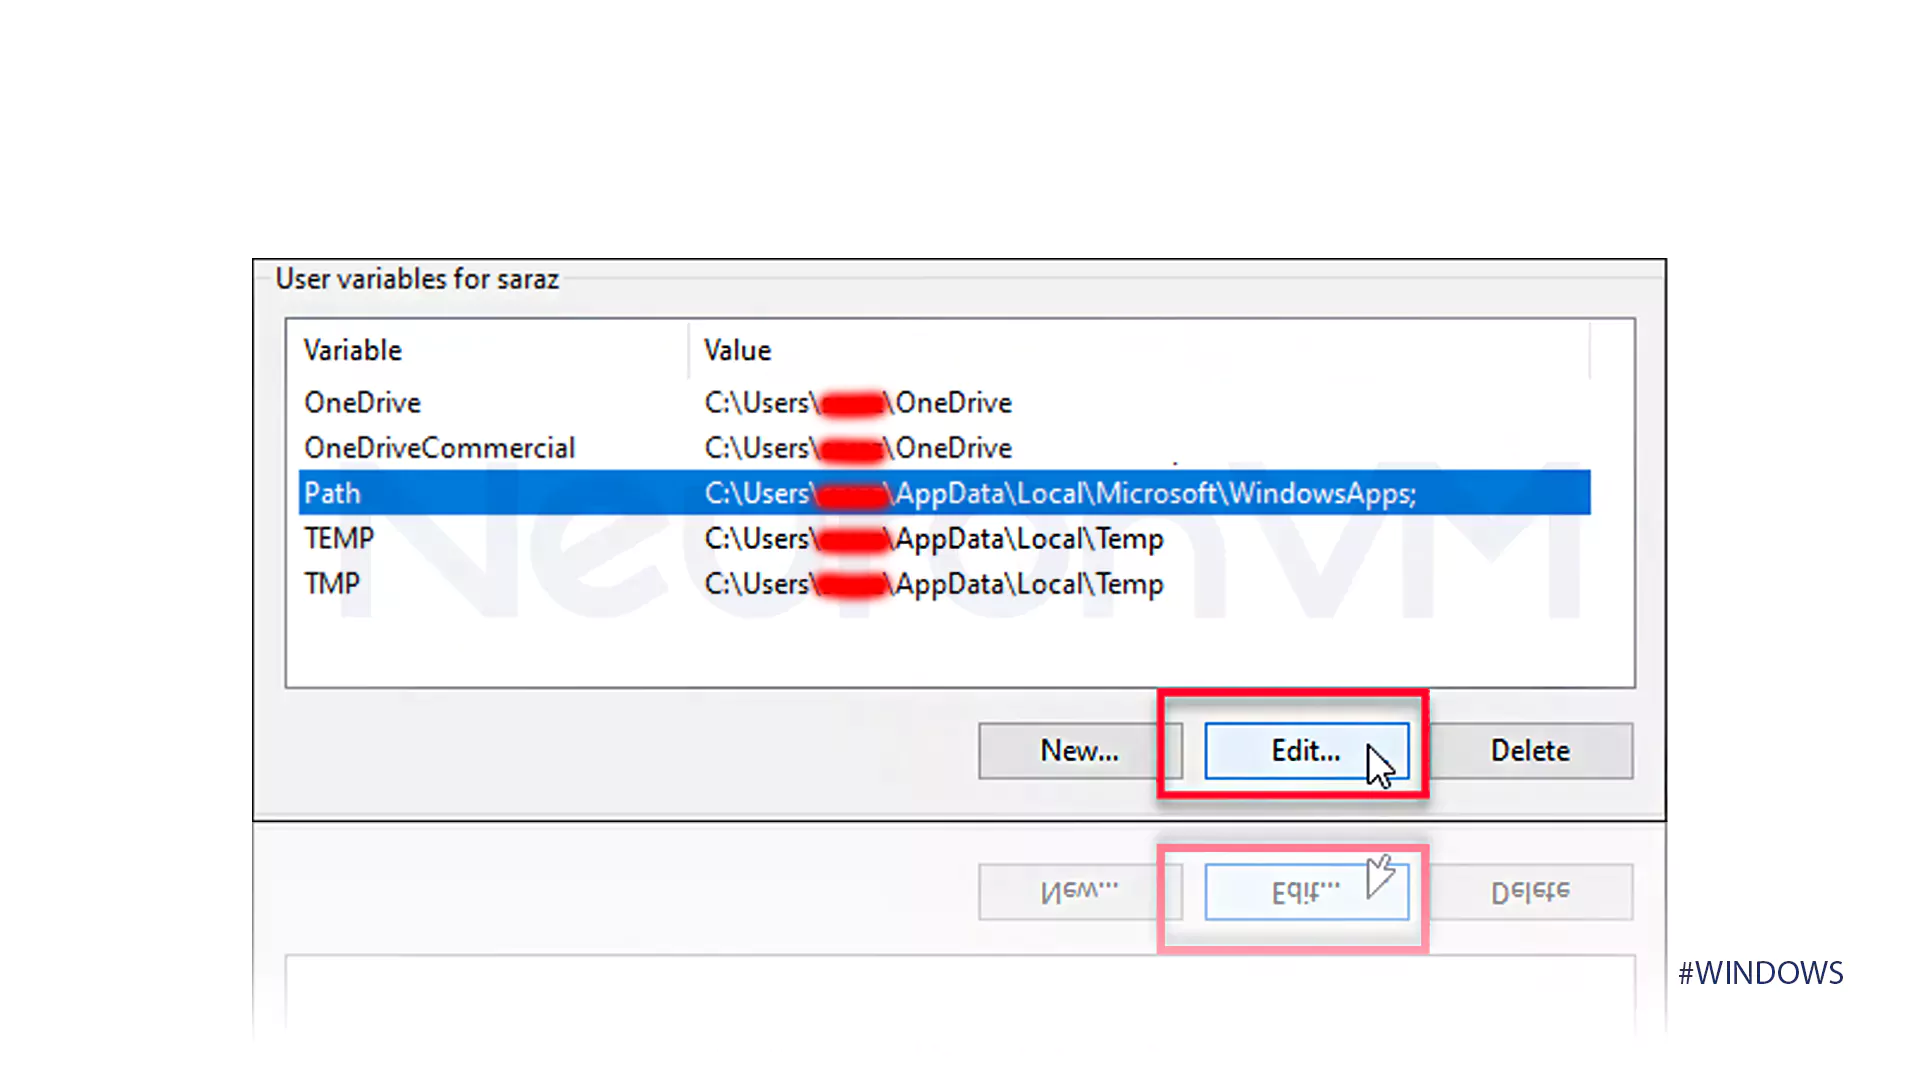
This step is so that you can select the path you want in the User variables section and finally click the Edit button.
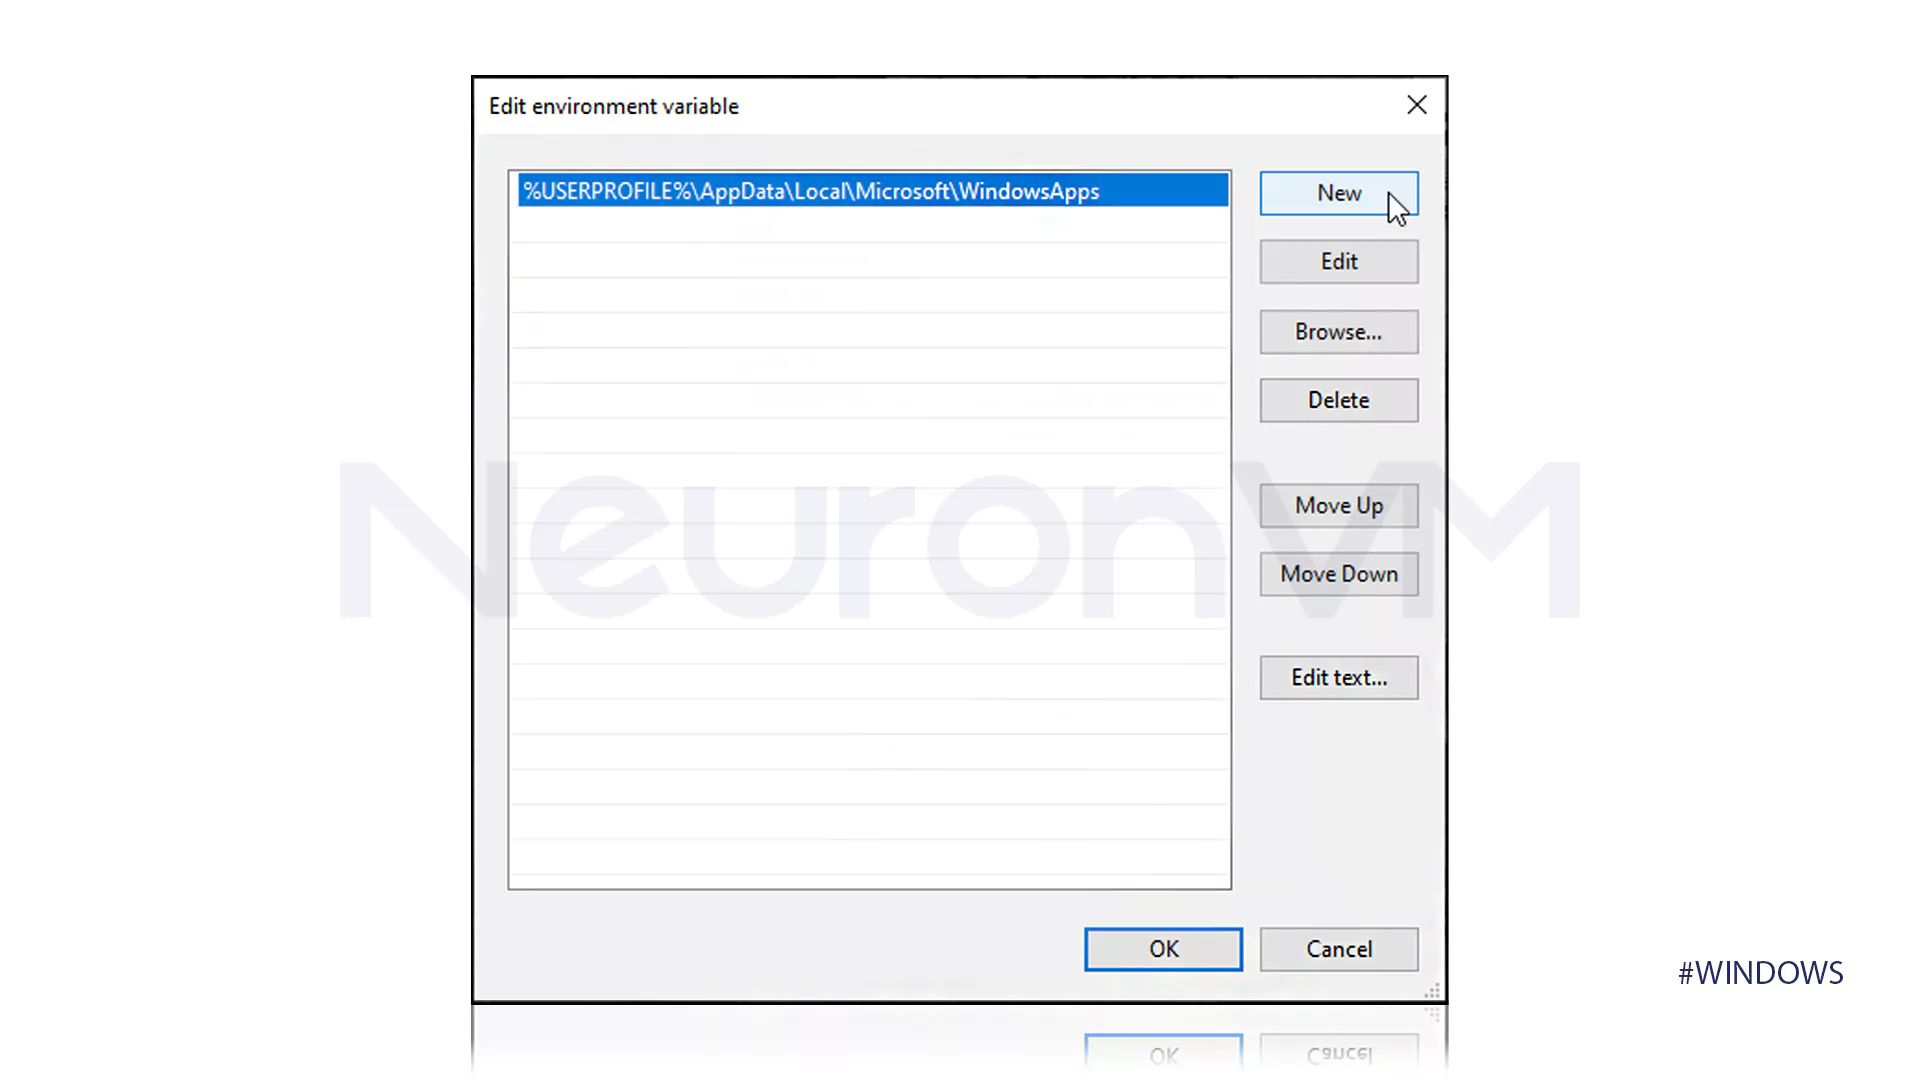
From the side menu, select the New option, whose location is indicated in the image below.
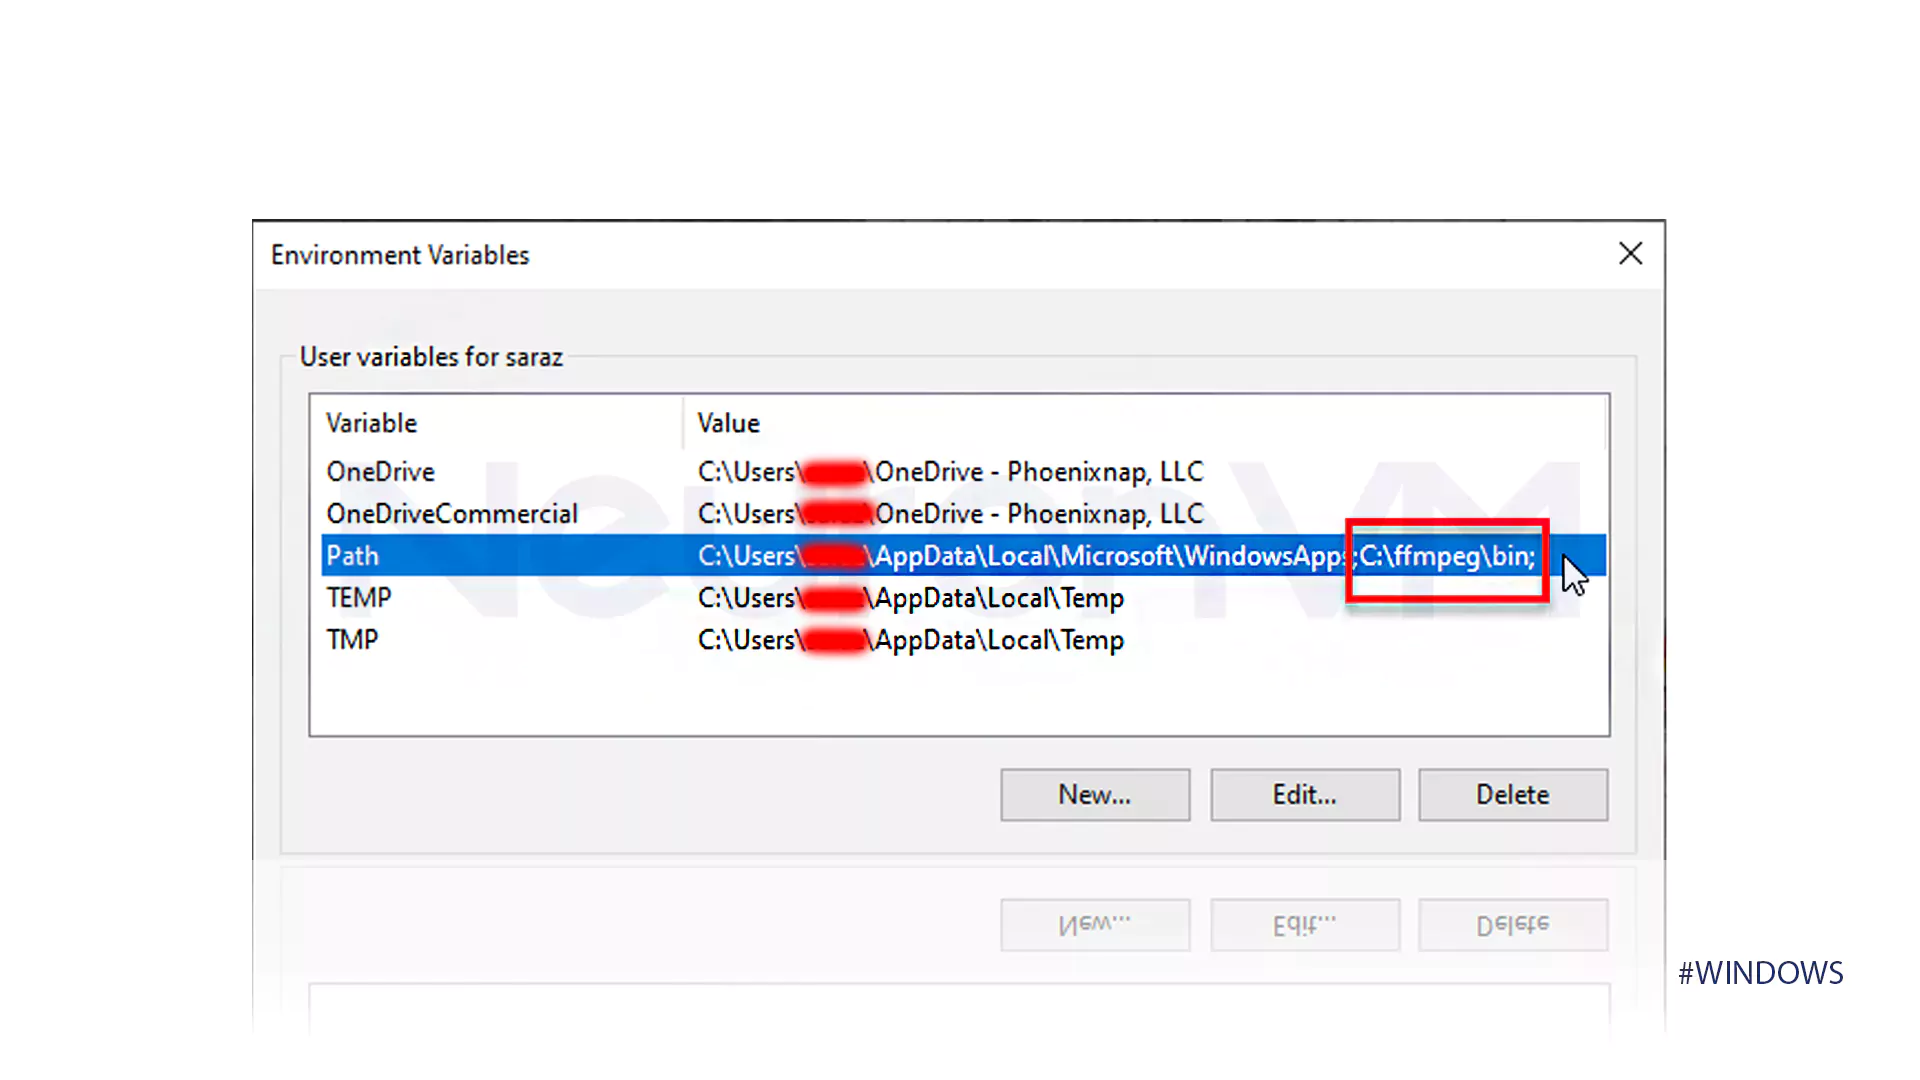
Now, at this stage of install FFmpeg in Windows, you need to add C:\ffmpeg\bin to the empty space you see and confirm the changes made by OK.
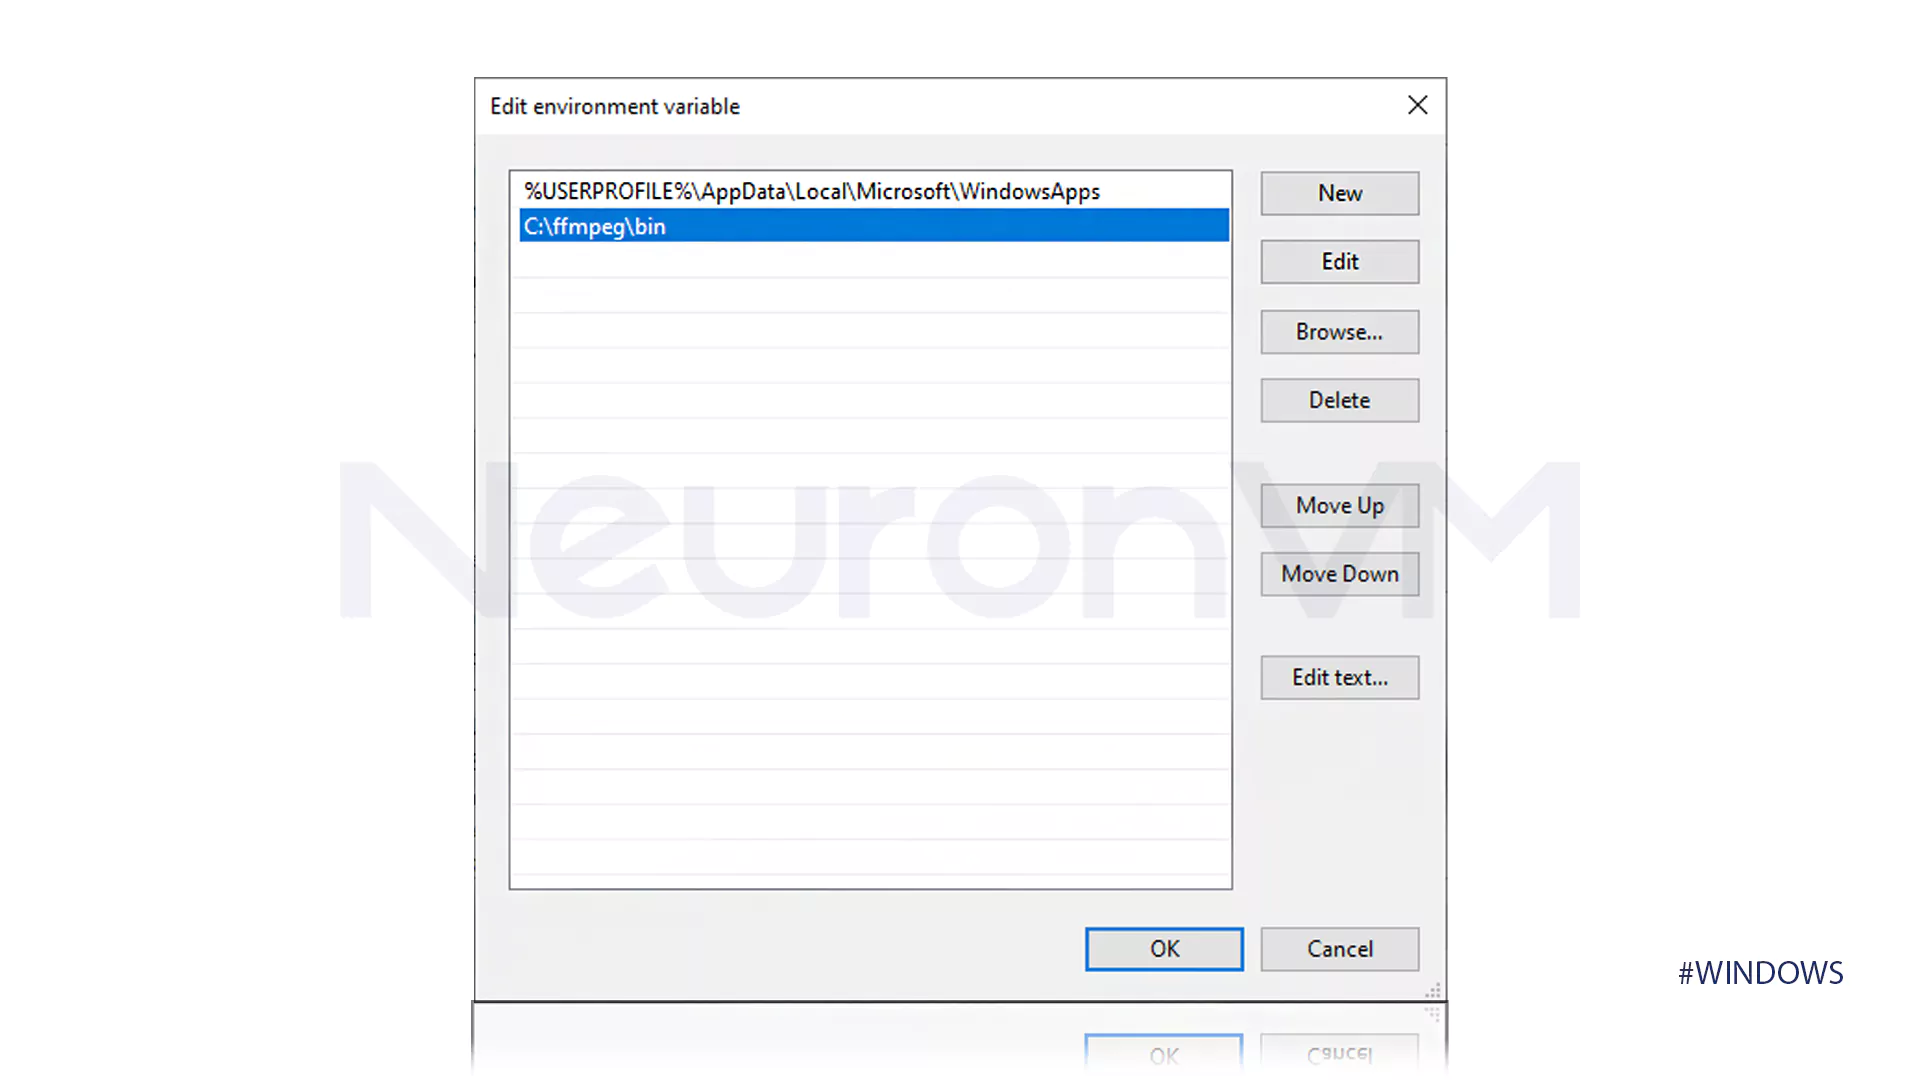
This step actually confirms that the FFmpeg file has been added to the PATH by making a change in the Path variable line.
Step 4: Verify the FFmpeg PATH section
At the final stage of installing FFmpeg on Windows, running the following command will confirm that FFmpeg has been added to the PATH. So to do this, open a Command Prompt or PowerShell and run the following command:
ffmpeg
Conclusion
In this article, we have examined one of the easiest ways to install FFmpeg in Windows, which you can follow in a few minutes and take advantage of the unique advantages of FFmpeg software. Also, if you have experience using FFmpeg software on Windows, we invite you to share your comments with us.
You might like it
MikroTik Tutorials
How to Configure VPN on Mikrotik Router

Ubuntu Tutorials
How to Install tftp Server on Ubuntu 20.04

Linux Tutorials
How to Install Uptime Kuma with Caddy on Ubuntu 20.04


