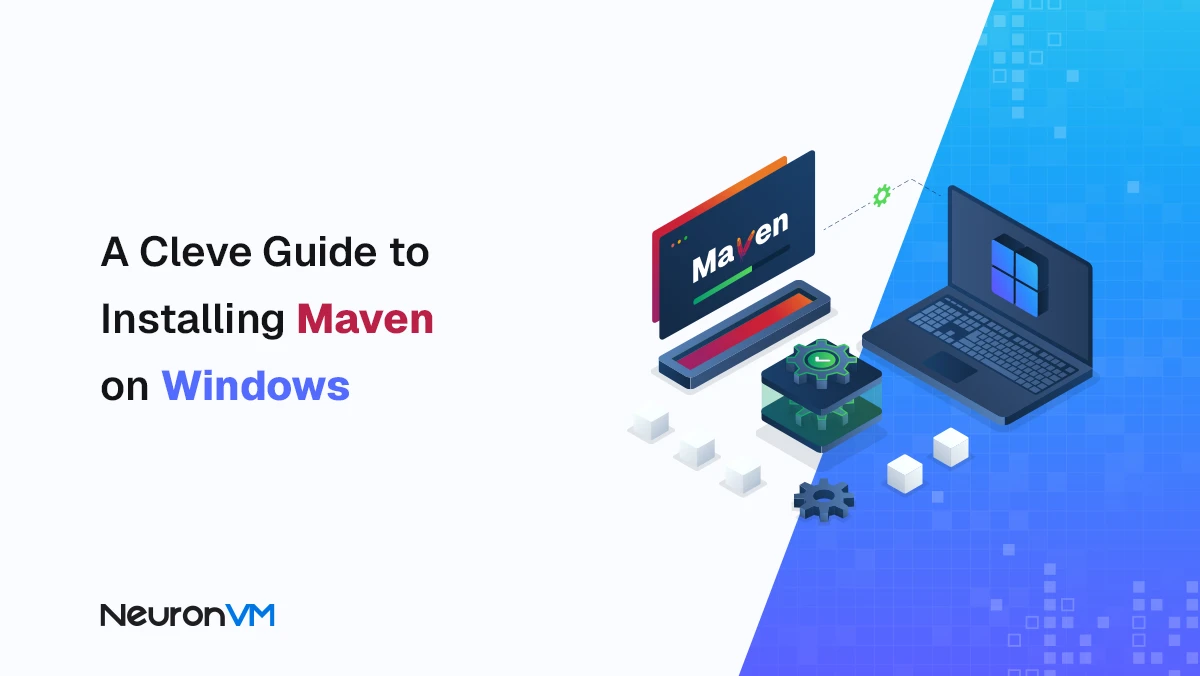
How to Install Maven on Windows + Fix PATH Issues Easily

 7m
7m
 0 comments
 Print
Print
Sometimes when you are building a Java project on Windows, you need a tool like Maven to manage dependencies or automatically build the project. I remember the first time I tried to install Maven, I encountered strange errors, especially when Windows didn’t understand the path of the variables correctly! So in this article, I explained step by step and without complications, how to install and set up Maven on Windows so that you can be ready to work in less than 10 minutes.
10 Minute Guide to Install Maven on Windows
Step 1: Download and Extract Maven
1- Go to the Maven download page and select the latest version.
2- Download the Binary zip archive file.
3- After the download is complete, there is no installation required, just extract the zip file to a location of your choice.
I usually use the following path:
C:\Program Files\Maven\apache-maven-3.8.4
Step 2: Set the MAVEN_HOME system variable
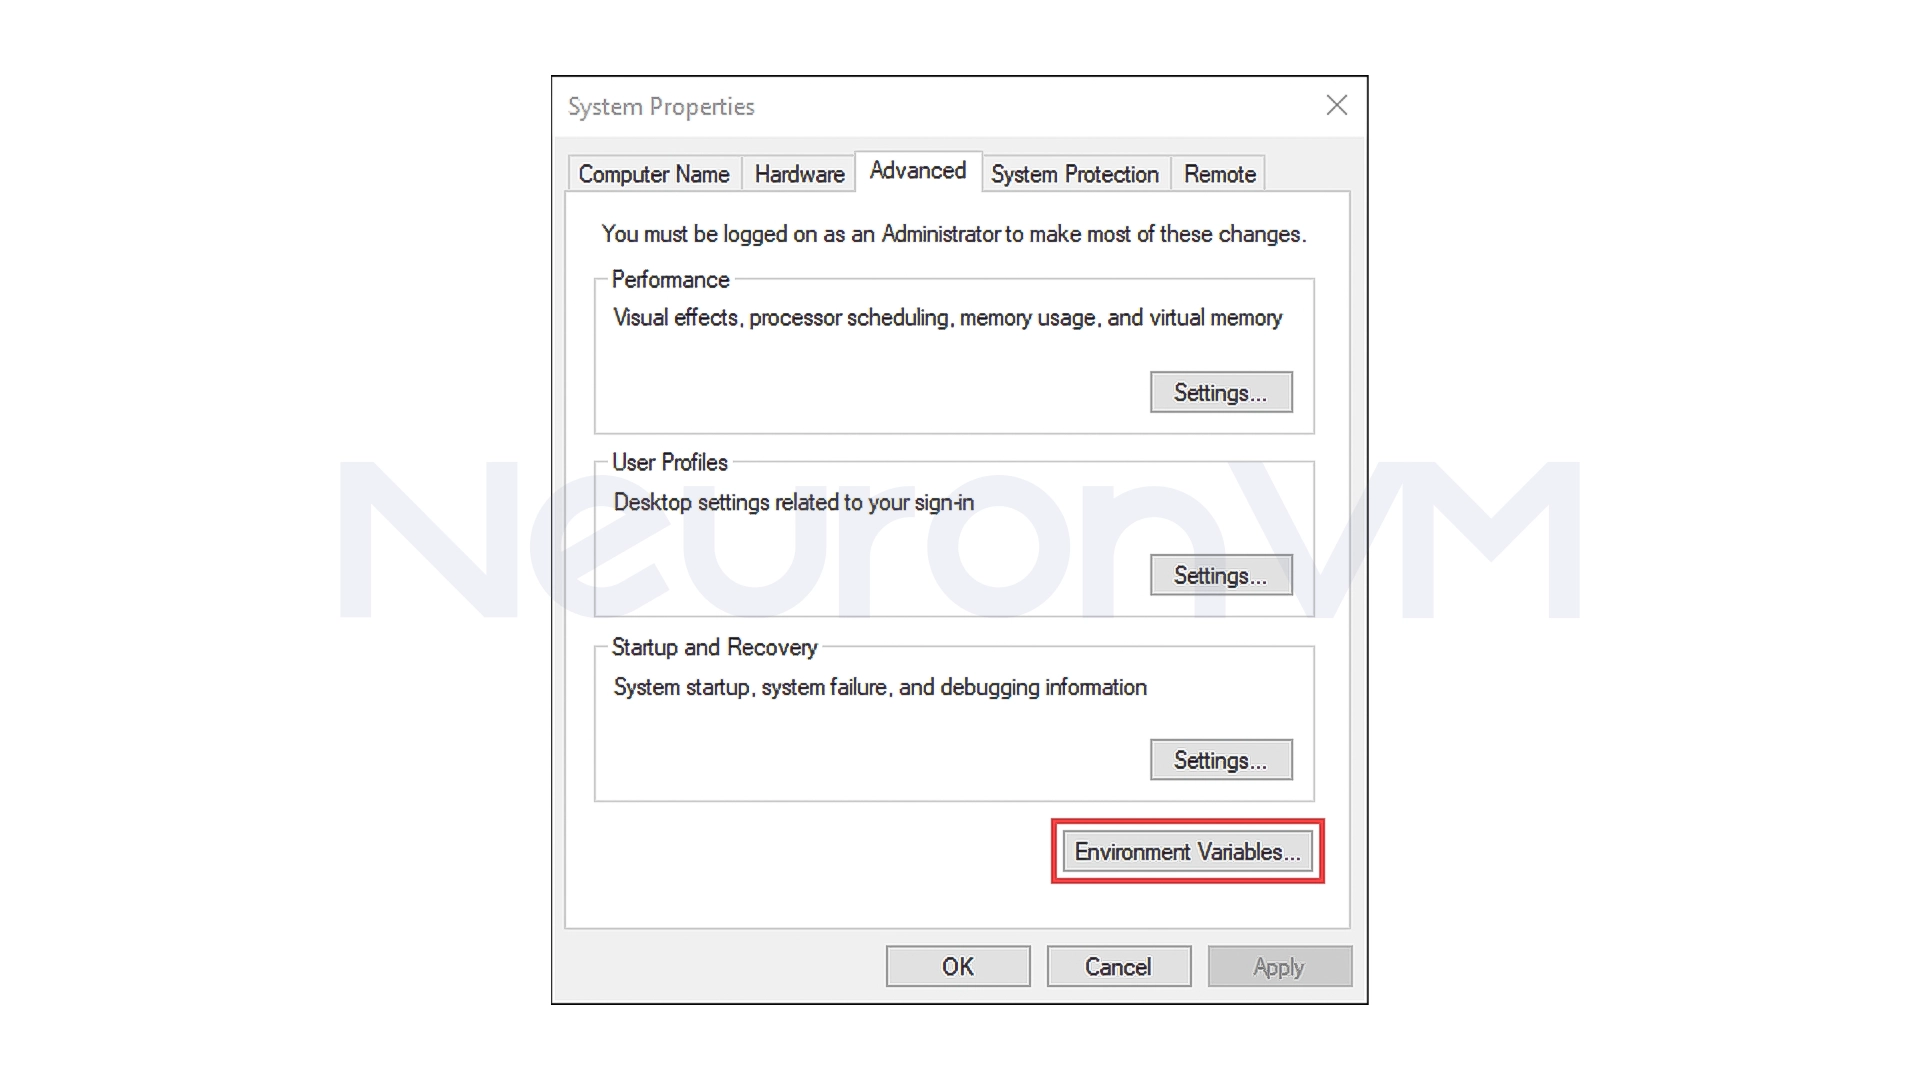
1- Search for environment variables in the Start menu.
2- Click Edit the system environment variables.

3- In the window that opens, click the Environment Variables button.
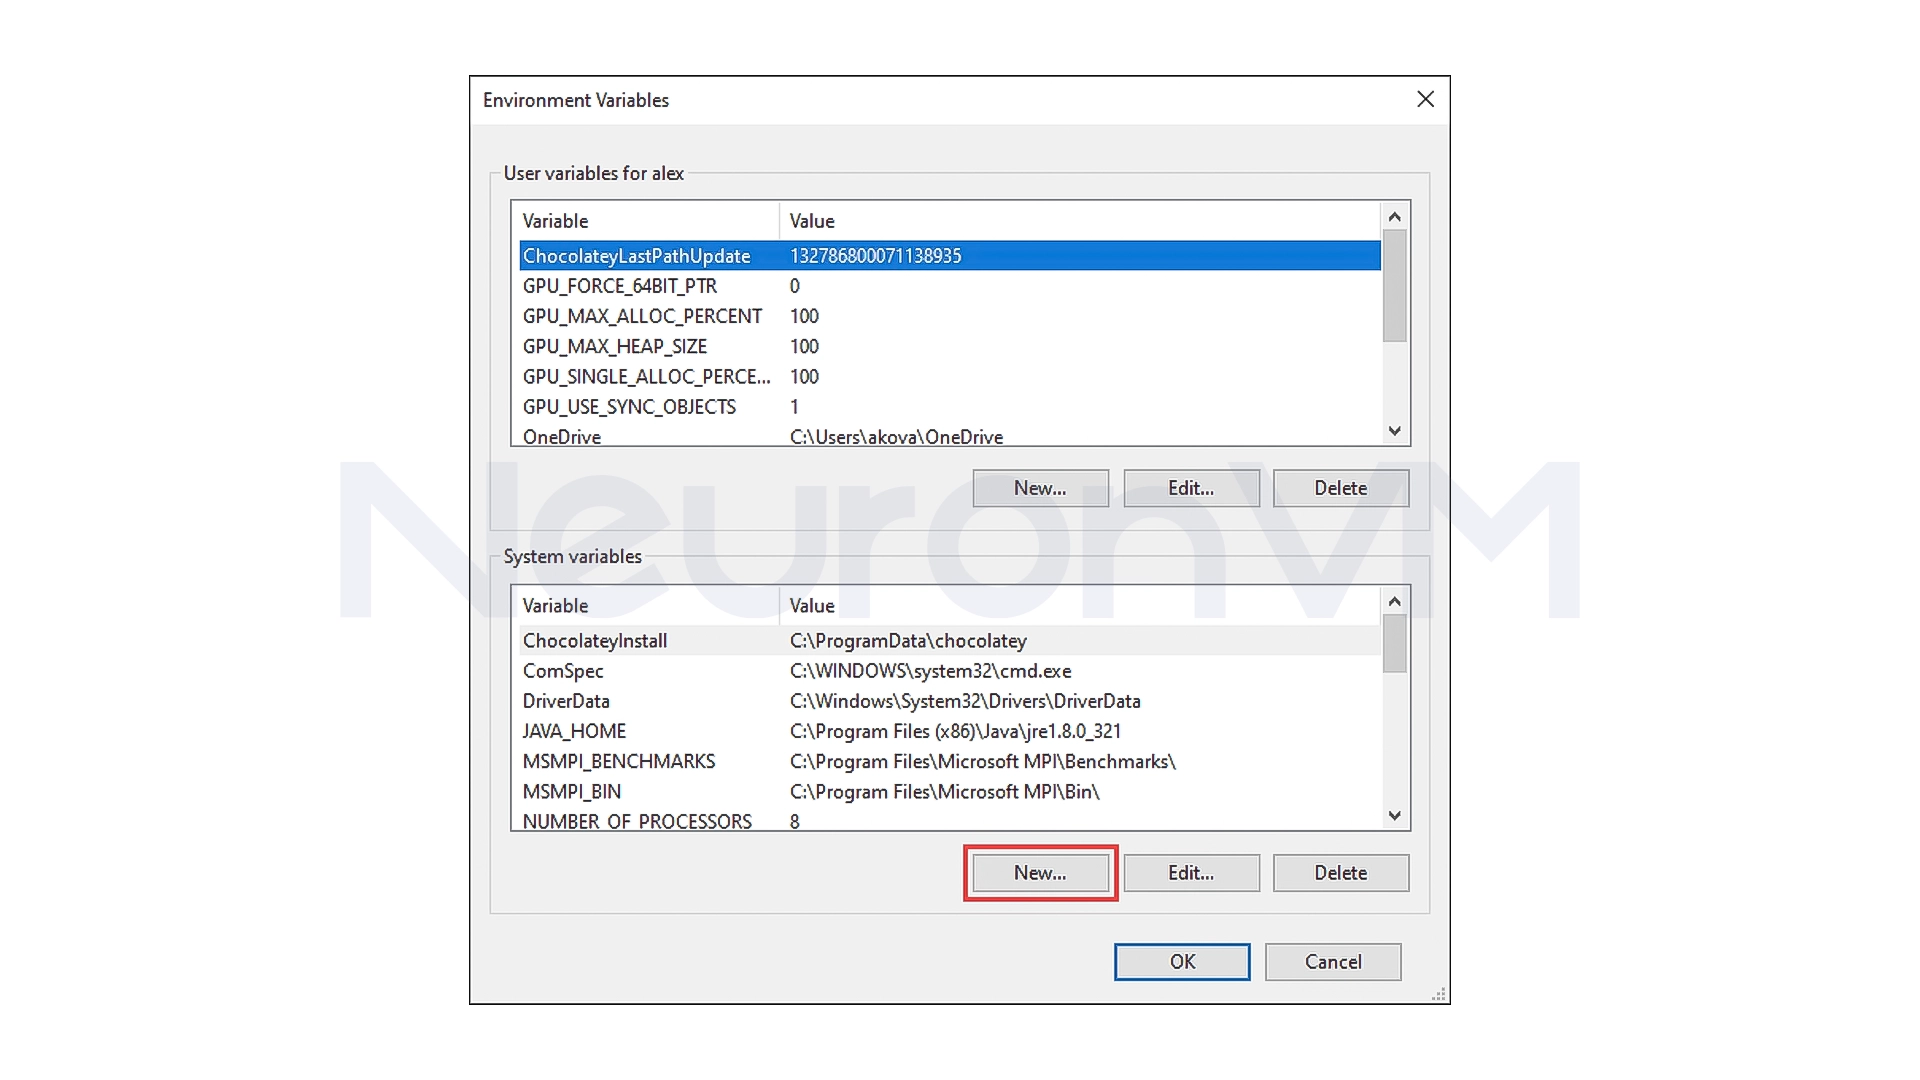
4- Under the System variables section, click New.
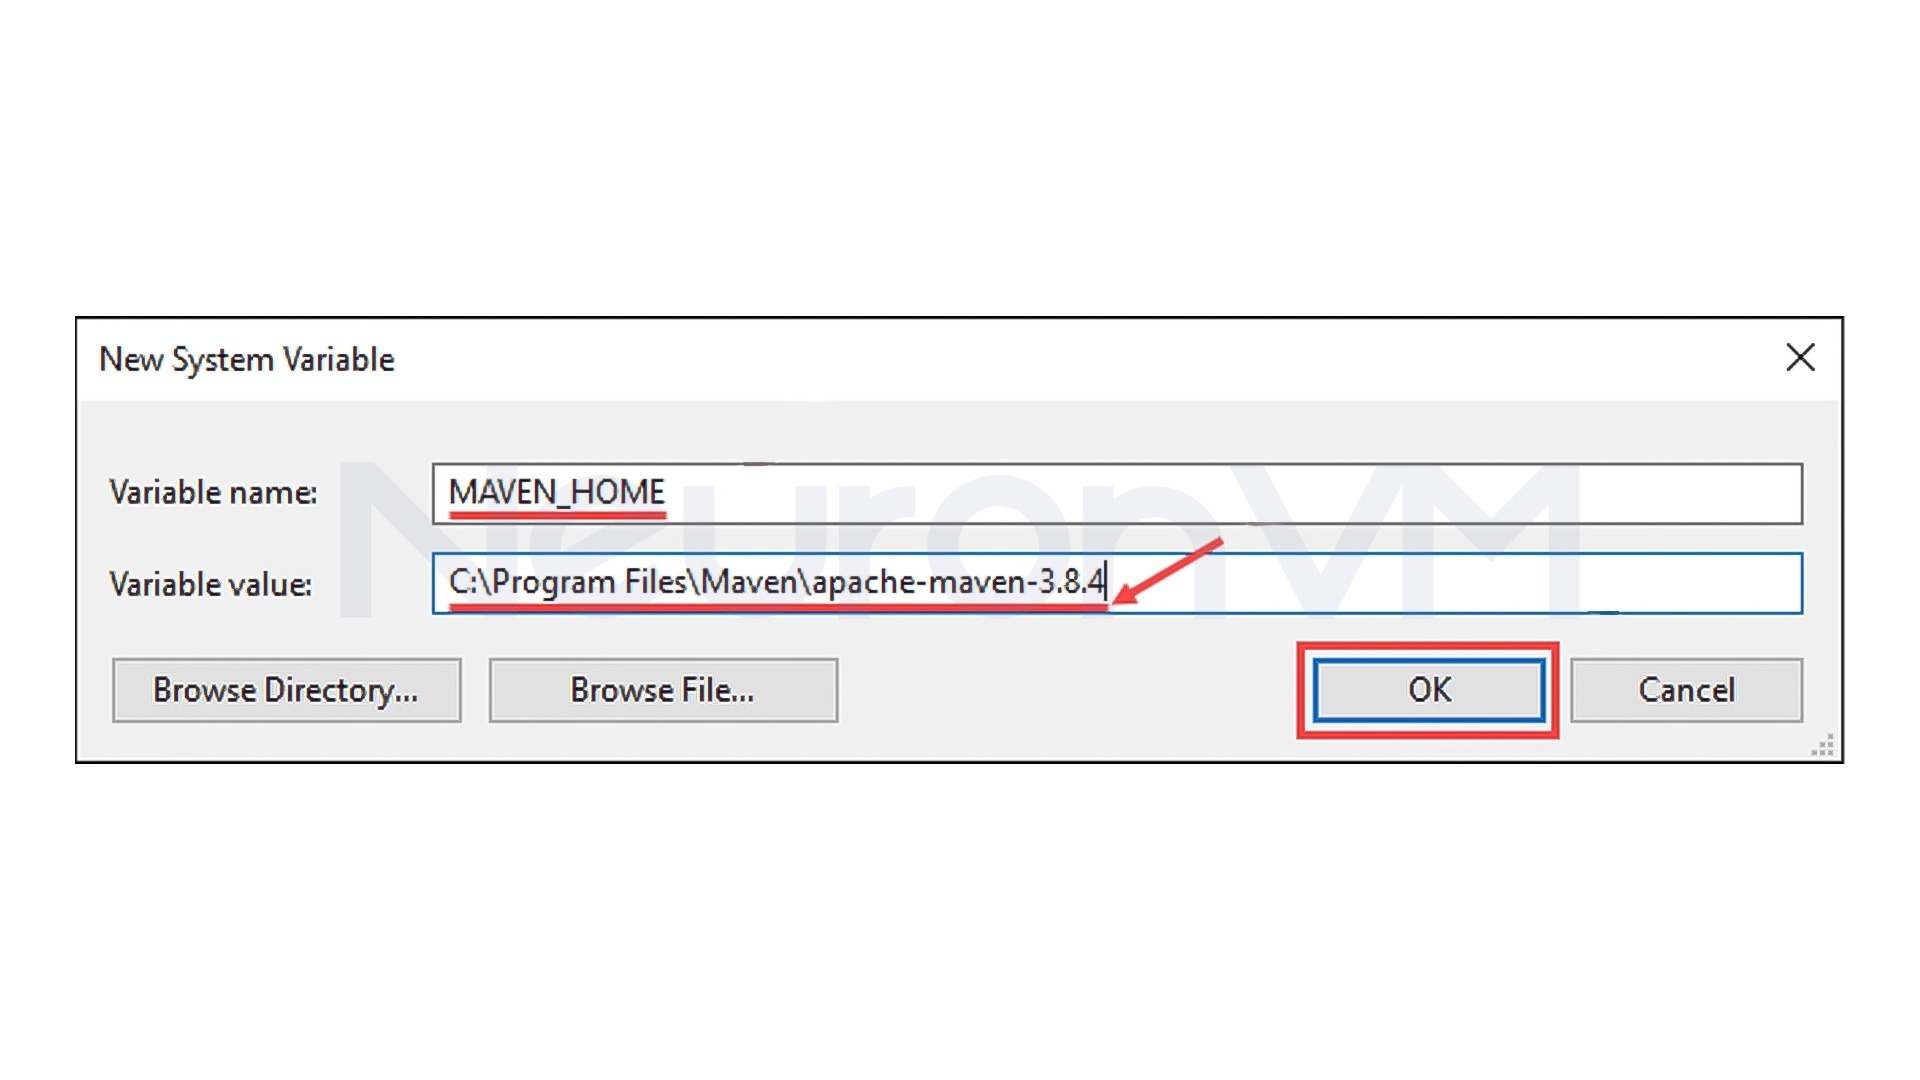
5- Enter the following value:
Variable name: MAVEN_HOME
Variable value: The path to the Maven directory (for example, C:\Program Files\Maven\apache-maven-3.8.4)
6- Click OK to save the settings.
Step 3: Add Maven Path to PATH
1- In the same System variables section, find the Path variable and click Edit.
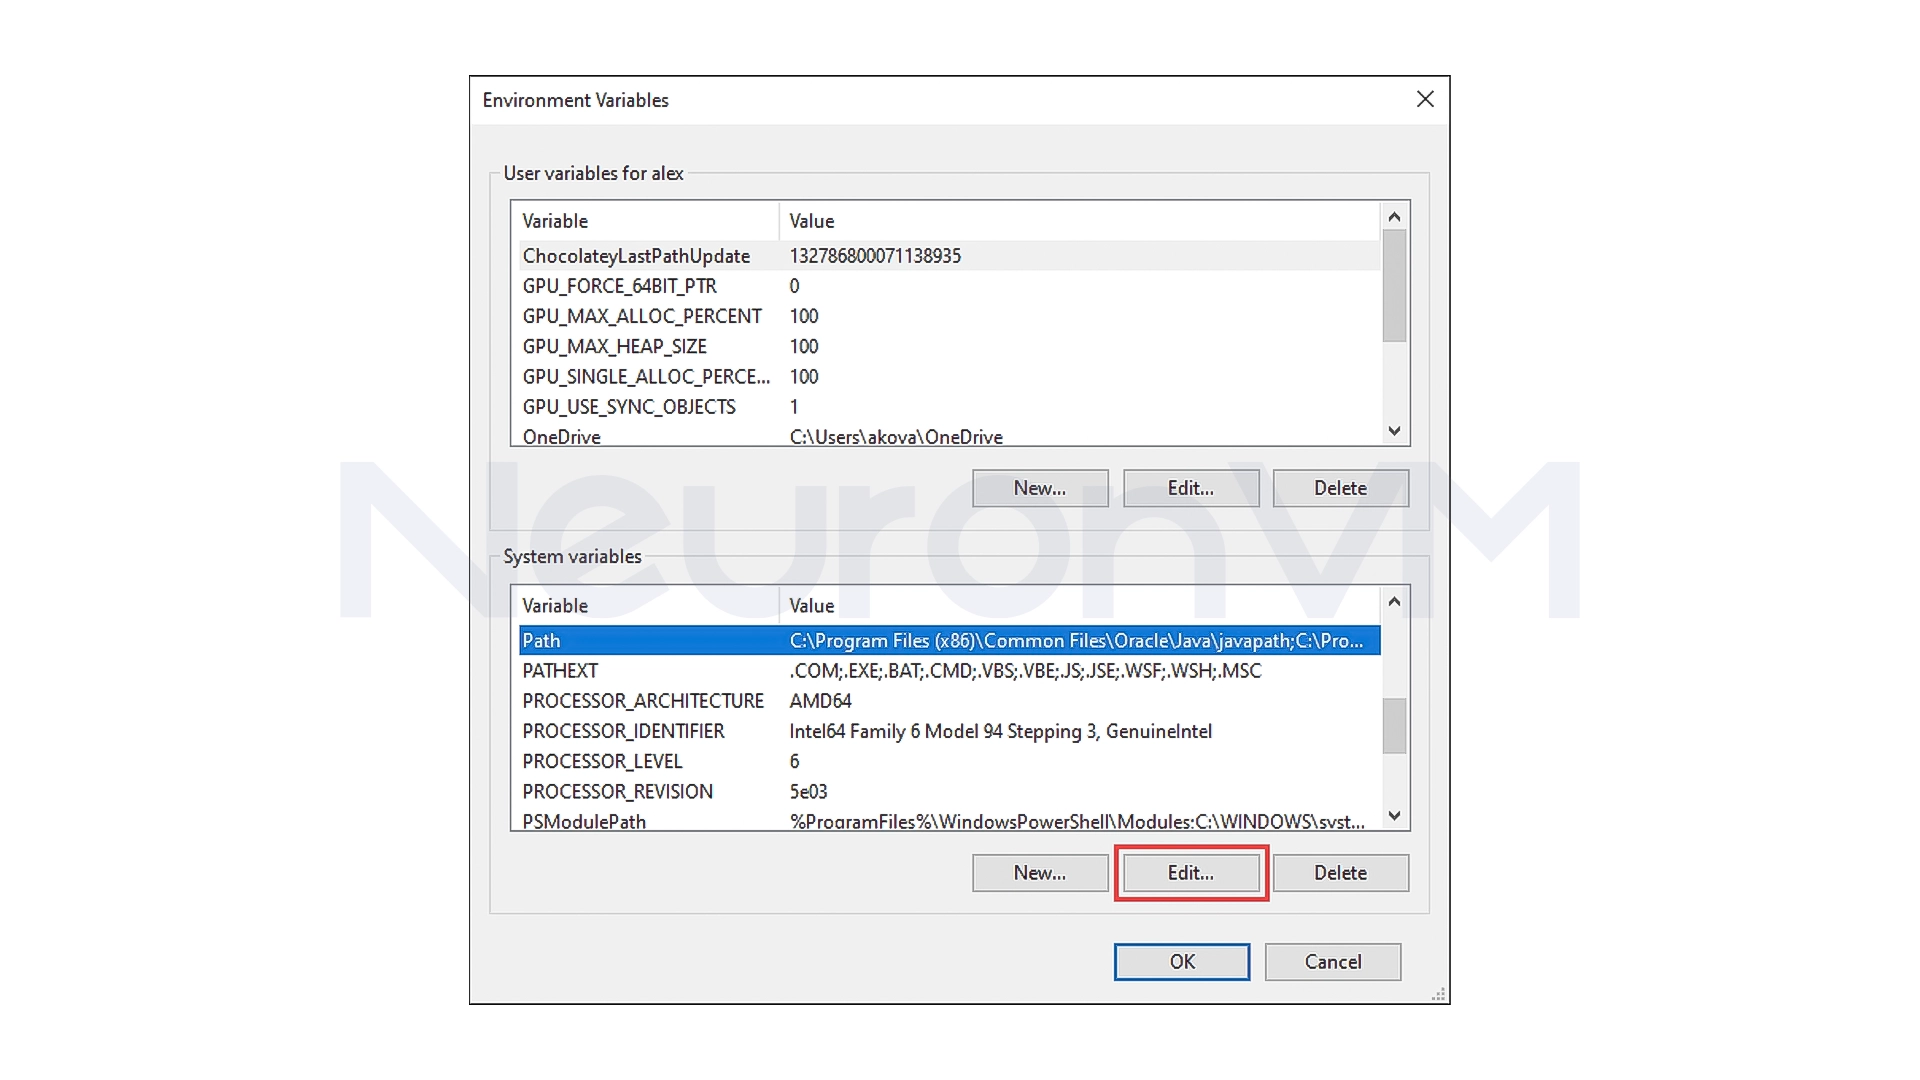
2- Click the New button and enter the following value:
%MAVEN_HOME%\bin
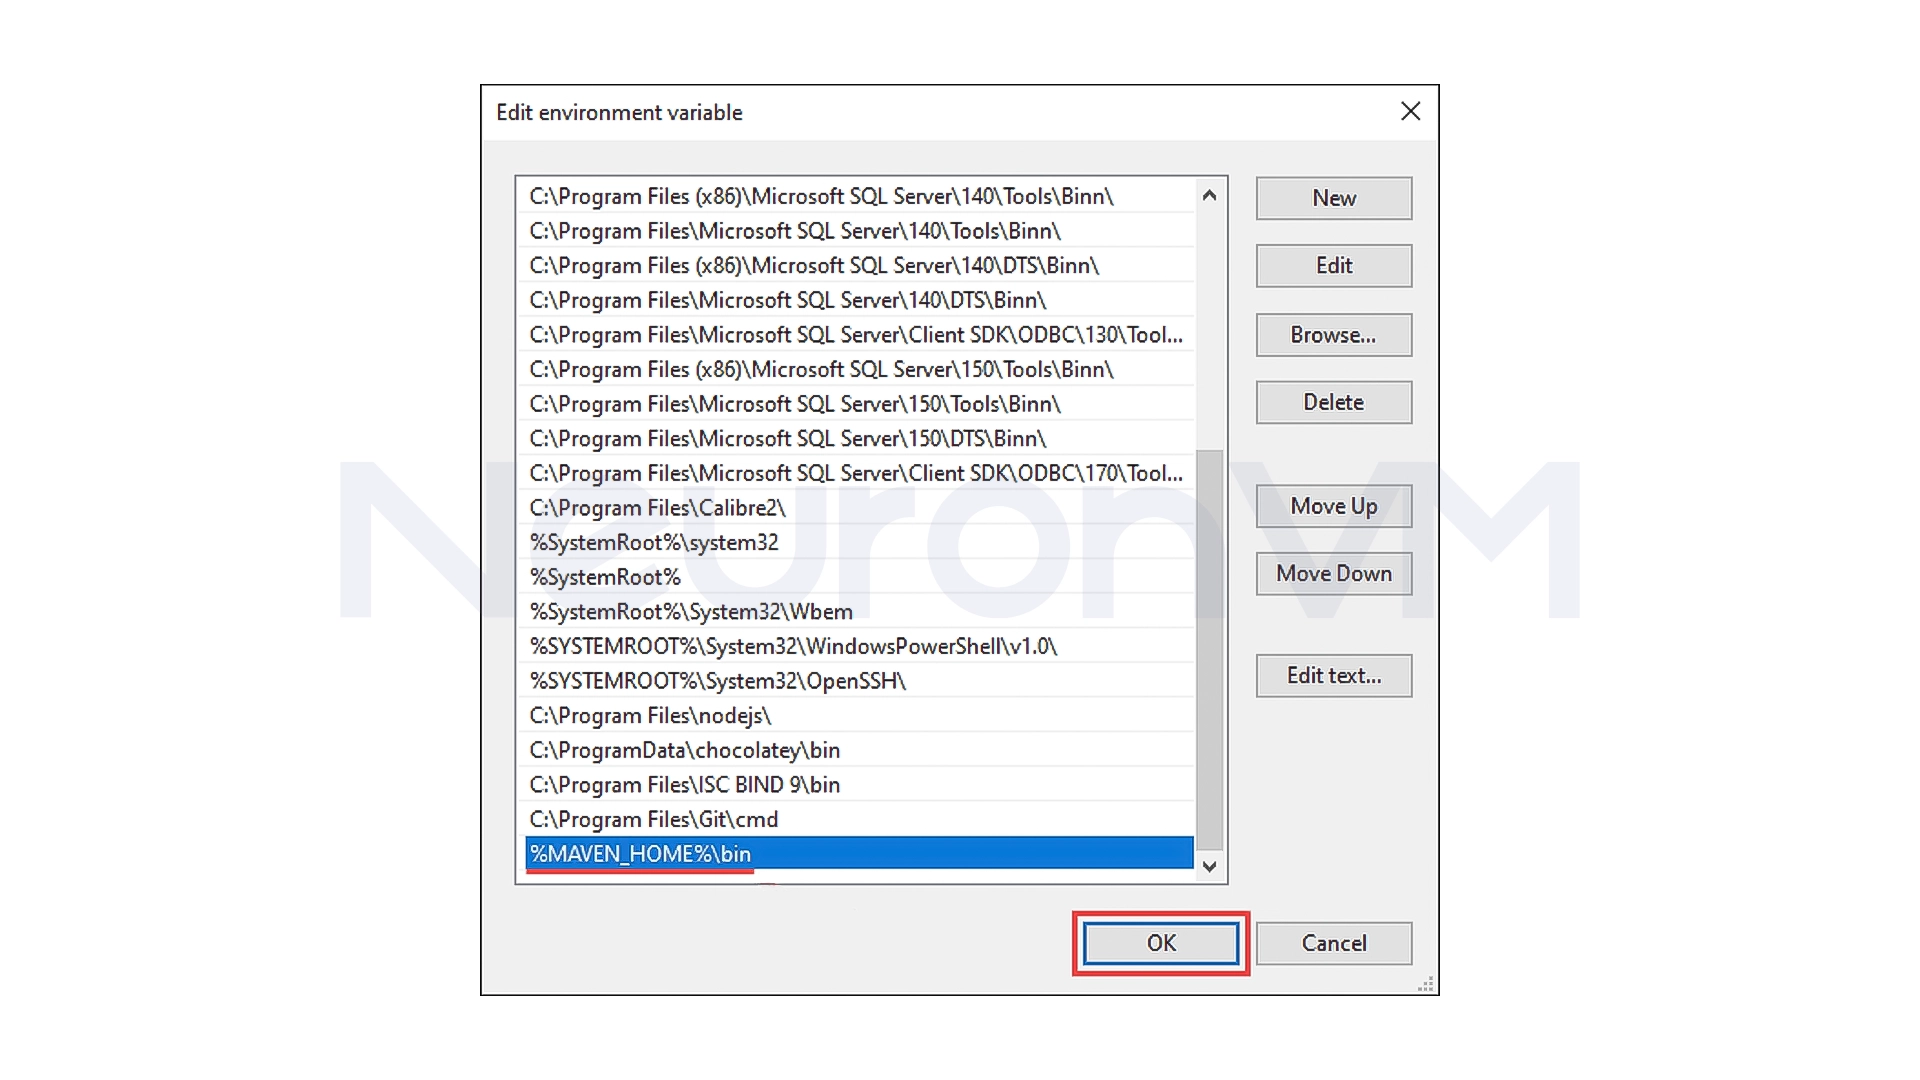
3- Click OK to save the changes.
Note: If you do not perform this step, you will encounter the error ‘mvn’ is not recognized as an internal or external command.
Step 4: Verify Maven Installation
To make sure Maven is installed correctly, open a Command Prompt and type the following command:
mvn -version
If the output includes the Maven version, then everything is working properly.
My personal experience with Maven on Windows
When I first installed Maven on Windows, everything seemed simple until Windows didn’t understand its path!
My main problem was that I didn’t enter the PATH correctly. A small mistake in the path cost me a lot of time.
One thing I learned was to always make sure Windows knows the path before running Maven with the command “mvn -version”. Maven is a really powerful tool, especially for Java projects with a lot of dependencies. After installation, you just need to configure it once, and it will take care of the rest.
A Personal Look at the Real Uses of Maven
When working with Java projects, using Maven is not just installing another tool, but a way to save hours of repetitive work, I remember that before I used Maven, I had to manually download each JAR file and check its version every time I ran the project, But since I set up Maven, everything became automated, and I think one of the most attractive features of Maven is that it works neatly. When this tool is configured correctly, all team members can run the project on their own systems without worrying about different settings or versions, because Maven is one of those tools that you install only once, but you enjoy its benefits for a long time.
Conclusion
Finally, installing Maven on Windows may seem like a simple matter of a few steps, but it’s really a starting point for organizing your Java project world, When everything is configured correctly, Maven acts like an assistant that knows where to get libraries, how to build your project, and how to minimize errors and after my first successful Maven installation, I realized how much easier my work became especially when I had large, team-based projects. I think if you’re working with Java and haven’t used Maven yet, now is the time to install it and enjoy its speed and organization.
Maven is a project management tool for the Java language that helps you manage dependencies, of your projects automatically.
Not at all! Just enter the correct paths and environment variables. If you follow the steps carefully, the installation will take less than ten minutes.
Usually, the problem is with the paths or system variables. A quick check of the PATH and MAVEN_HOME settings usually fixes everything.