How to Install SSH on Linux Mint (Step-by-Step Guide)

 Study duration :
13 Minutes
Study duration :
13 Minutes
 0 Comment
SSH stands for Secure Shell, which allows users to securely access remote computers over an insecure network connection. This means that you can log in to a computer without having to worry about someone else being able to see your Password. In this tutorial, you will learn how to install SSH on Linux Mint. The first thing you have to do after installing an operating system is to activate SSH on your system because it provides an encrypted network protocol to safeguard client logins and remote servers. In this way, you can access the device remotely and ensure the security of the operation.
Prerequisites
– A Linux VPS with the Linux Mint operating system installed on your computer.
– Superuser privileges to install software on the system.
– An active internet connection to download the necessary packages.
Step-by-step installing SSH on Linux Mint
To install SSH on Linux Mint, simply run a few simple commands in the terminal. This will allow you to connect to another server or system remotely and securely.
1- Installing OpenSSH Server:
First of all, make sure your operating system is up to date:
sudo apt update && sudo apt upgrade
Now install the OpenSSH Server package:
sudo apt install openssh-server
2- Check if SSH is enabled:
After installation, SSH will be enabled by default at system boot. To make sure, you can run the following command:
sudo systemctl is-enabled ssh
If the result is enabled, SSH is enabled. But if it is disabled or inactive, enable it with the following command:
sudo systemctl enable ssh
3- Connecting to a Server via SSH:
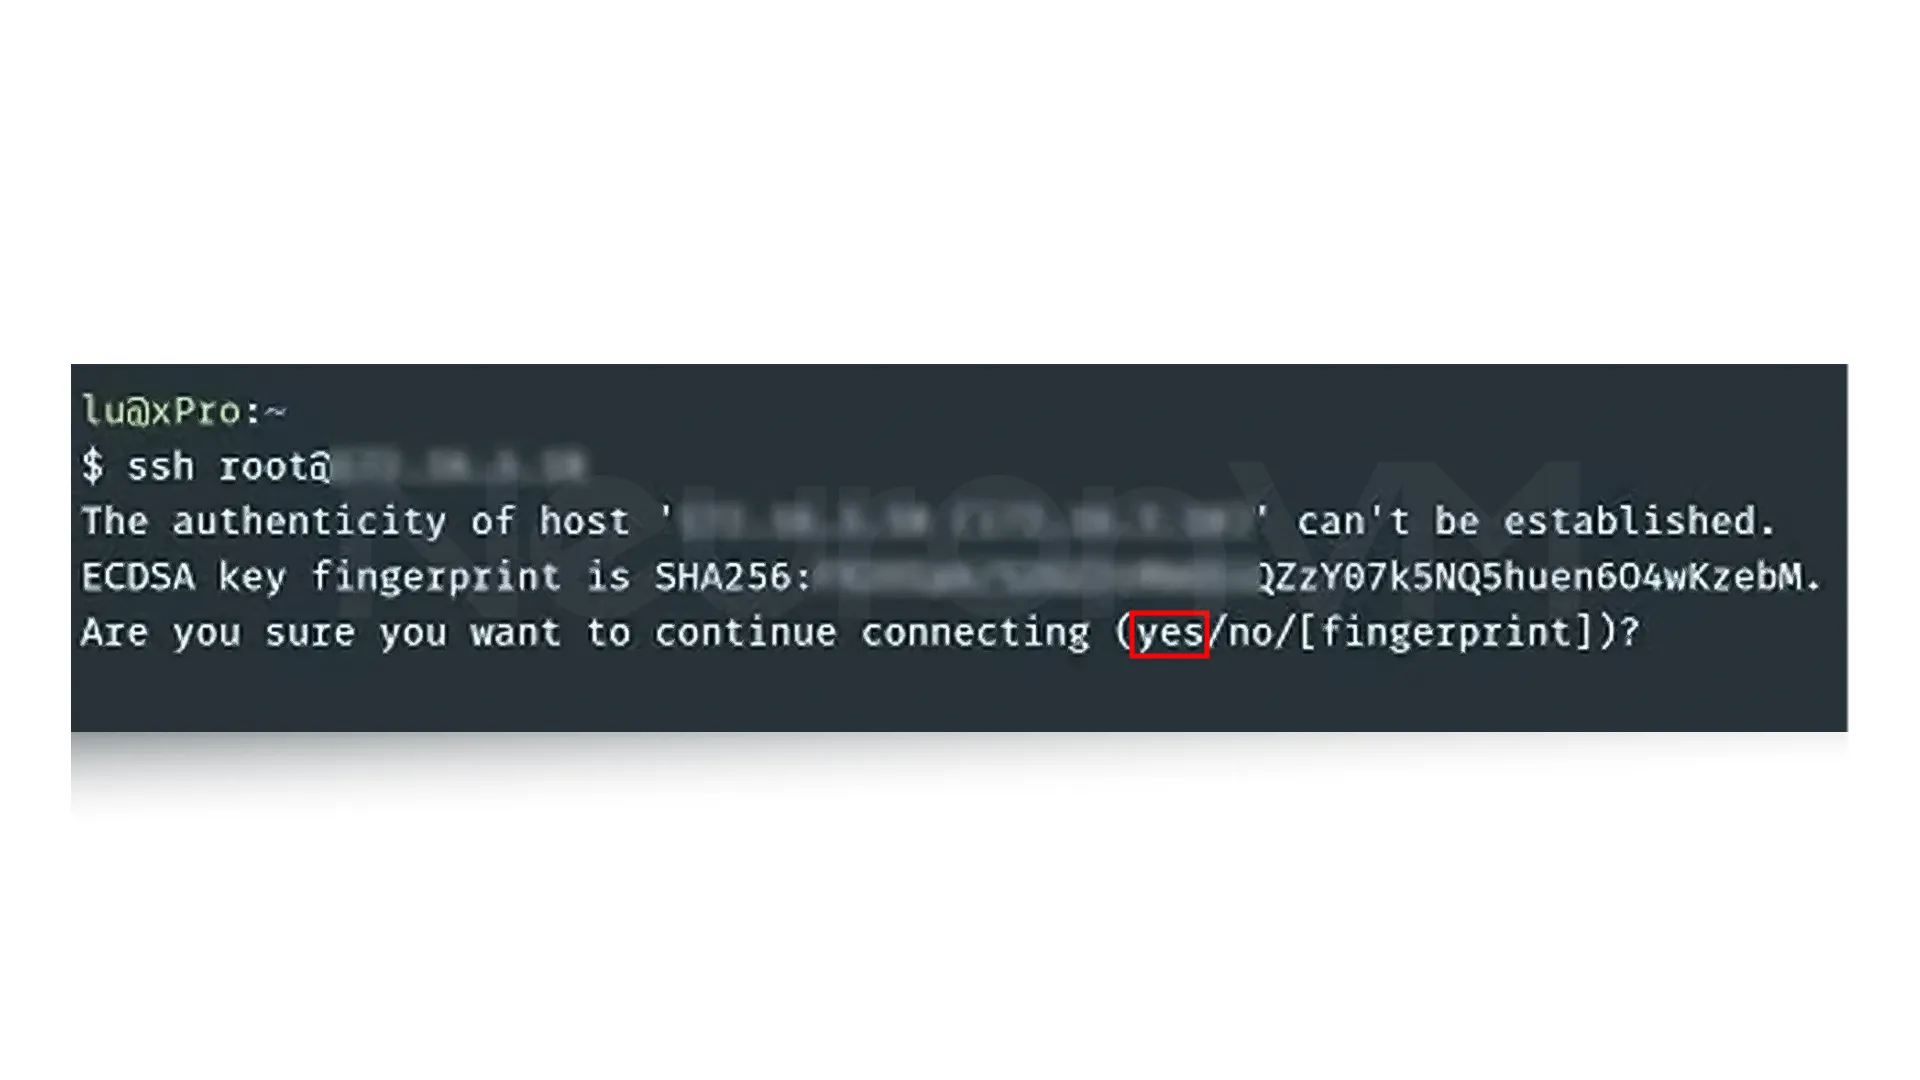
To connect to another system or server, you need to have the IP address or hostname and username of that system. Now run the following command:
ssh username@ip-address/hostname
The first time you see a message to confirm the connection, type yes, then enter the user password and press Enter.
3- Open SSH access in the firewall:
If you have a firewall enabled on your system, you need to allow SSH access:
sudo ufw allow ssh
To re-enable the firewall after changes:
sudo ufw enable
sudo ufw reload
Now SSH is ready on your Linux Mint, and you can securely connect to systems and servers, run remote commands, or even transfer files.
6 Key Features of SSH
SSH isn’t just for connecting to servers; it provides a wide range of security and management features that are almost completely unmatched, you can always learn more about it on SSH’s main website:
Access Control: You can get all control over which user is allowed to access the server, from which system, and by what method.
Secure Communication: All data is encrypted, meaning that even if someone takes the packets on their way, they will not know anything about the actual content that you have.
Remote Command Execution (RCE): You can easily run commands directly on your server without even the need for a physical presence; this feature is really great for managing multiple servers.
Secure Remote Login: SSH is a strong and secure alternative to the old and insecure Telnet; it makes sure that no one can steal your password or your login information.
Secure File Transfer: With tools like SCP, you can move files between systems quickly and easily without the risk of eavesdropping.
Port Forwarding: A professional SSH feature that easily allows you to transfer your other connections, such as databases or your web services, in an encrypted form.
Real-world experience with SSH and practical tips
When I first tried to connect to a Linux server via SSH, I thought I would just type a simple command and be done. But I realized that each service and application on the server may require a specific version of SSH or have firewall restrictions. It was there that the importance of knowing the installation path, setting JAVA_HOME (or similar paths for SSH), and keeping multiple versions side by side became clear to me for proper server management.
By following these tips, when I was able to establish a secure connection and the services ran without any problems, I felt in complete control of the server and realized that SSH is not just a simple tool, but the key to professional server security and management.
Security tips after installing SSH
Keep official SSH enabled: You need to always make sure the SSH you install comes from a trusted source, such as the OpenSSH, and it is enabled on your device, this action makes sure that you get the latest security updates.
Regularly update the system and packages: By running the simple “sudo apt update && sudo apt upgrade” command, your system and SSH will always stay up to date, which means vulnerabilities will be low.
Configure SSH for essential users or services: If you use SSH only for a specific user or even a service, limiting access will reduce so much security risks.
Use monitoring and security tools: For servers that have very sensitive data, it is better for you to use monitoring and security scanning tools to quickly identify abnormal behavior so you can resolve the problem quickly.
What is SSH used for?
SSH is not just a tool for connecting to a server; in fact, it is one of the most important supports for modern systems administration, for example:
1- If you have a VPS on a service like NeuronVM, the first secure way to log into your server is by logging in by SSH.
2- Many developers like to use SSH with tools such as SCP to transfer sensitive files like database backups or their project source code.
3- SSH is very important in DevOps, as it lets automated tools connect to servers and do tasks without even needing human help.
Without SSH, server management becomes almost impossible in today’s world.
Comparing SSH with similar tools
You might ask, Why should we use SSH when there are tools like Telnet or RDP?
1- Telnet is very old and sends data without encryption, which means anyone in the middle can see the password and your data.
2- RDP is designed more for Windows and focuses more on a graphical environment, and there is no command-line management for you.
3- SSH has both strong encryption and great flexibility for running commands, and it is great for port forwarding.
That’s why almost all system administrators choose SSH as the gold standard for managing servers.
Security best practices after installing SSH
To get the most out of SSH, just installing it is not enough. You need to follow a few security tips:
Use public/private keys instead of passwords:
This method effectively prevents brute-force attacks.
Change the default port (22):
Many automated attacks are performed on port 22; changing it to another port makes it harder for attackers.
Restricting User Access:
With the ~/.ssh/authorized_keys file, you can determine who is allowed to log in and from which system.
Monitoring Logs:
Always check the ” /var/log/auth.log” logs to quickly detect any unauthorized attempts.
Conclusion
SSH is more than just a simple tool for connecting to a server, because this encrypted protocol is the base of security and professional administration in the Linux world, by installing and enabling OpenSSH on your Linux Mint, you are actually taking an important step towards more secure and professional system administration experience, but you must remember, installation is just the beginning; it’s security settings like SSH keys, port changes, and log monitoring that will elevate the experience you have from a casual user to a professional system administrator, if you take these tips seriously, SSH can ensure the security and also the stability of your servers for years to come without any problem.


SSH is a secure protocol for remotely connecting to servers, executing commands, and transferring files.
Unlike Telnet, all data is encrypted in SSH, and unlike RDP, command line management and port forwarding are available.