How to Configure XFCE Desktop on Rocky Linux

 Study duration :
11 Minutes
Study duration :
11 Minutes
 0 Comment
Introduction
XFCE is known for being a lightweight and fast desktop environment, known for its simplicity, low resource usage, and stability, It is also a perfect choice and an excellent choice for Rocky users that want a responsive graphical interface, so it is beneficial to understand How to Configure XFCE Desktop on Rocky Linux, XFCE desktop is an ideal choice for older hardware or servers where efficiency is key. We have designed this article to be beginner-friendly, whether you are setting up a new desktop or you want to switch from a heavy environment, this guide will walk you through the steps to configure XFCE easily.

🔹 Why Use XFCE on Rocky Linux?
- • Lightweight for VPS and servers: Because XFCE uses minimal system resources, and might be the ideal choice for virtual private servers.
- • Suitable for low-resource environments: Perfect for older hardware or systems with limited memory and CPU power.
- • Great for remote desktop over VNC or XRDP: XFCE ensures you have fast and stable performance even over slower connections.
🔹 Pre-Requisites
- • An installed Rocky Linux Setup that supports Rocky Linux 8,9
- • Sudo or root privileges
- • Stable Network connection
🔹 Step-by-step Guide to Configure XFCE on Rocky Linux
These steps will help you set up XFCE with ease, Follow the steps below to transform your Rocky Linux system into a customizable desktop environment.
Step 1: Update Your System
First, open your terminal and run the following command to update your Linux system.
sudo dnf update
Step 2: Add the EPEL Repository
The EPEL repository contains different packages that are not available in the standard repositories; these packages are useful when installing certain software, such as XFCE, run the following command to install the EPEL repository
sudo dnf install epel-release
By entering the command below, you will list the available package groups by running the following command.
sudo dnf --enablerepo=epl group
Step 3: Enable the PowerTools Reposity
The PowerTools repository contains some tools that can help manage your system, You need to enable this repository before installing some packages, to enable it, run the command below:
sudo dnf config-manager --set-enabled powertools
Step 4: Verify the Availability of XFCE Packages
First, check if the XFCE packages are available for installation, To check if the XFCE package group is available, run the command below:
sudo dnf group list
If you want to verify which version of XFCE is available, run the following command:
sudo xfce4-panel --version
The previous command will display the installed version of the XFCE desktop environment, allowing you to confirm the version you’re about to install.
Step 5: Install XFCE and Xorg Display Server
Now that everything is ready, you can install the XFCE Desktop Environment along with the necessary Xorg packages.
sudo dnf groupinstall "xfce" "base-x"
Step 6: Set Your System to Boot into Graphical Mode by Default
To make your system automatically boot into XFCE instead of the command line, you must set the default target to graphical mode.
sudo systemctl set-default graphical
If you’re working with a minimal server setup and you want to start the desktop environment manually, you need to run these commands instead:
echo "exec /usr/bin/xfce4-session">> ~/ .xinitrc startx
Step 7: Reboot and Log In to XFCE
Once all the steps are completed, it’s time to reboot your system and log in to your new XFCE desktop environment, you can reboot your system with the following command:
sudo systemctl reboot
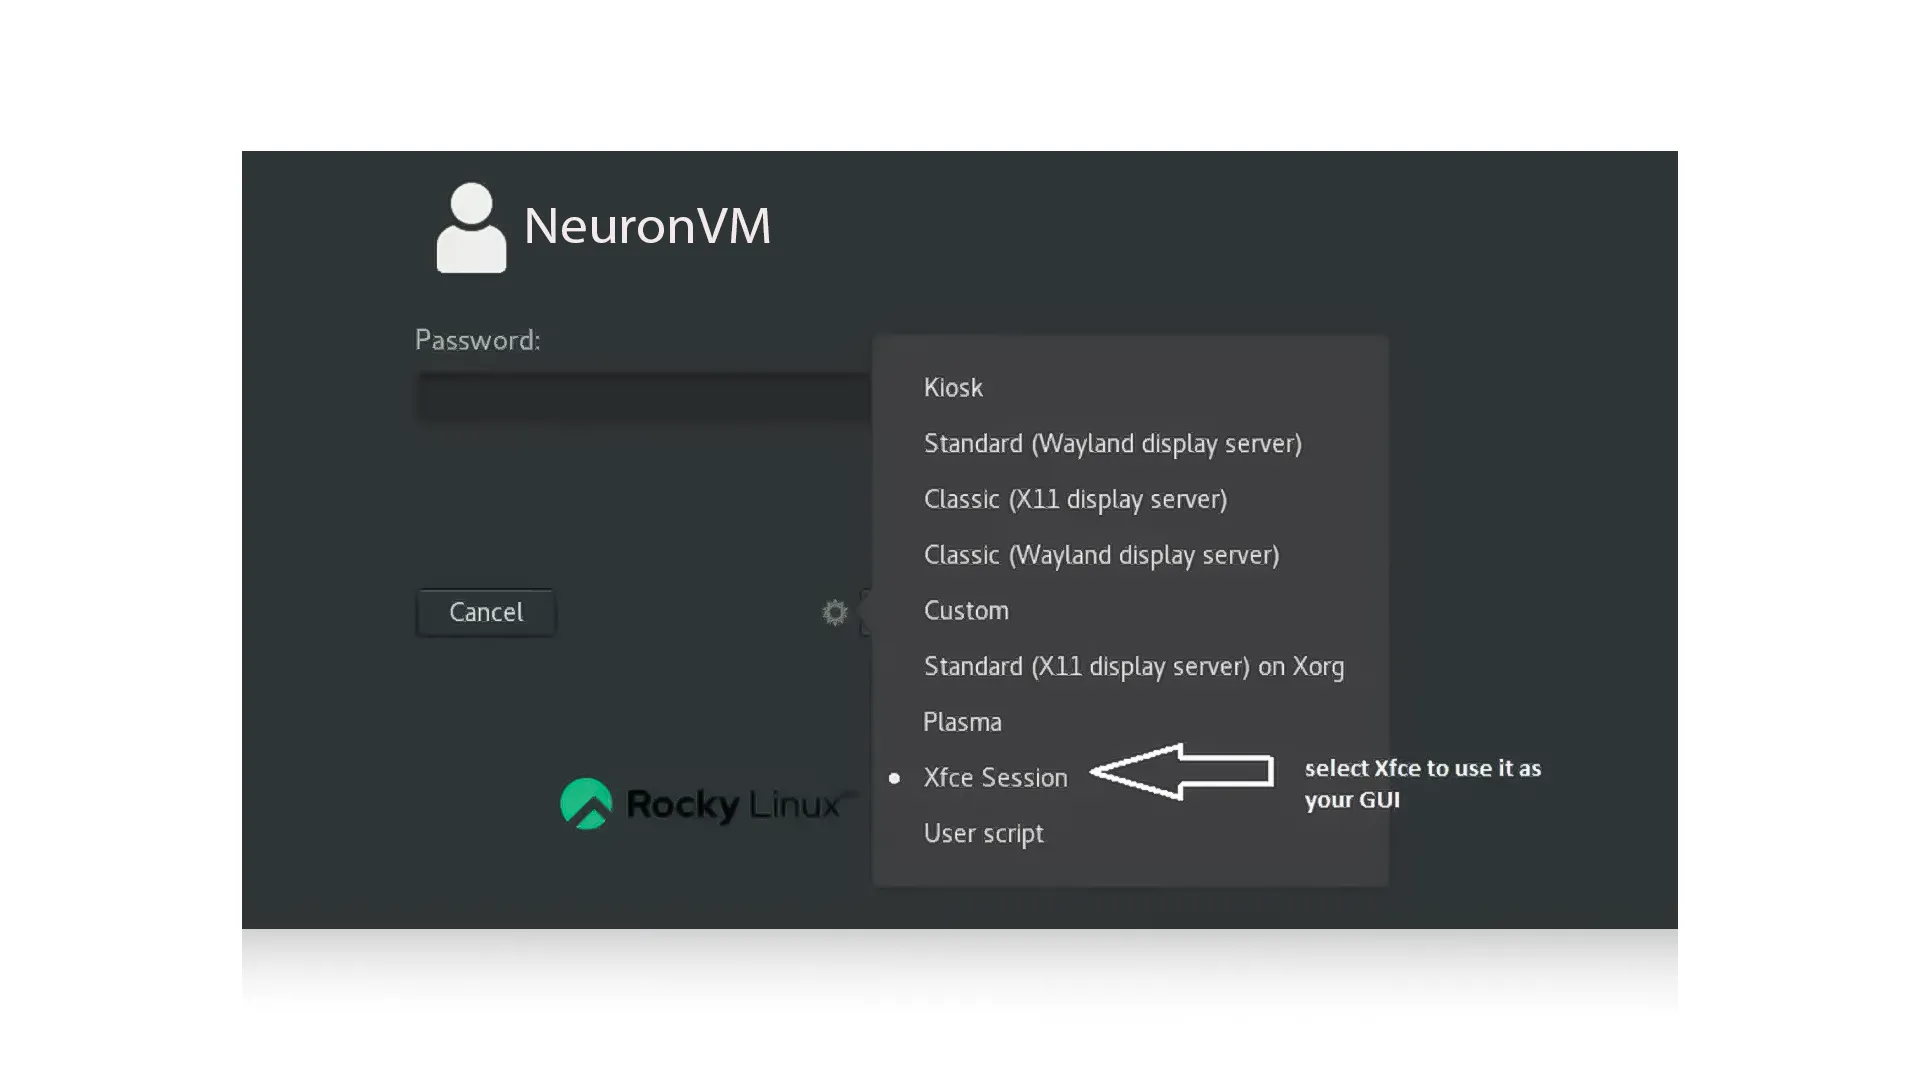
When you reach the login screen, click on the settings icon next to the “Sign in” button.
 Log in with your username and password, and you should be taken directly to the XFCE desktop environment, enjoy using the XFCE desktop environment on Rocky Linux.

🔹 Enable Remote Access (Optional Section)
Once XFCE is set up, you might want to access it remotely from another computer or over the internet; you have to install VNC or XRDP, and you can install any of them per your liking.
🛡️ Security Tips
- SSH Tunneling: VNC is not encrypted by default; you can use SSH tunneling to secure it.
- Firewall Setup: Make sure only the allowed ports are open by using the “firewall-cmd” to restrict traffic.
🔹 Customize Your XFCE Desktop
You can easily customize your XFCE Desktop to look more modern and stylish, without using as much memory as heavier desktops like GNOME.
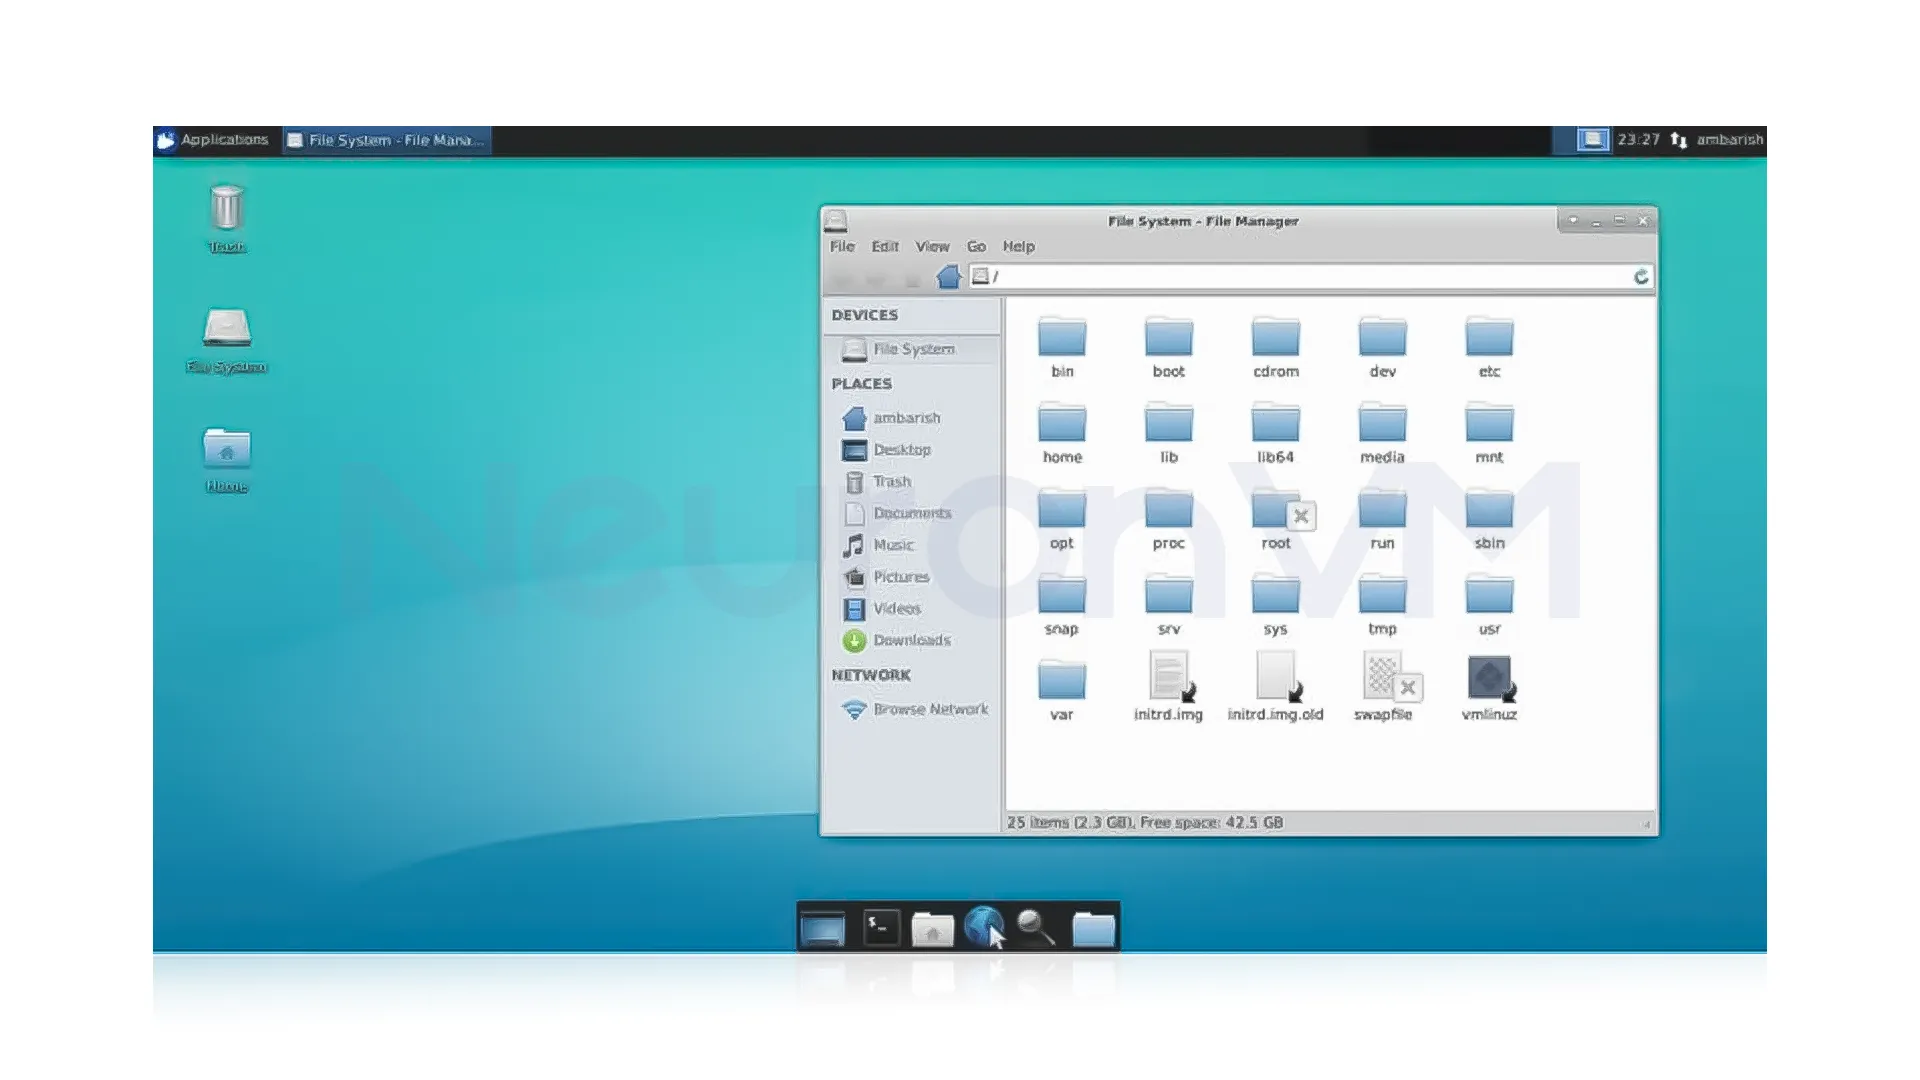
This is what the XFCE desktop looks like when you first install it, which is boring, so follow the next steps to use some themes and make other changes to make XFCE look fresher.
 Change themes in XFCE
It is the simplest way to change the look of your XFCE’s appearance, first visit the XFCE’s main website and choose your favorite one.
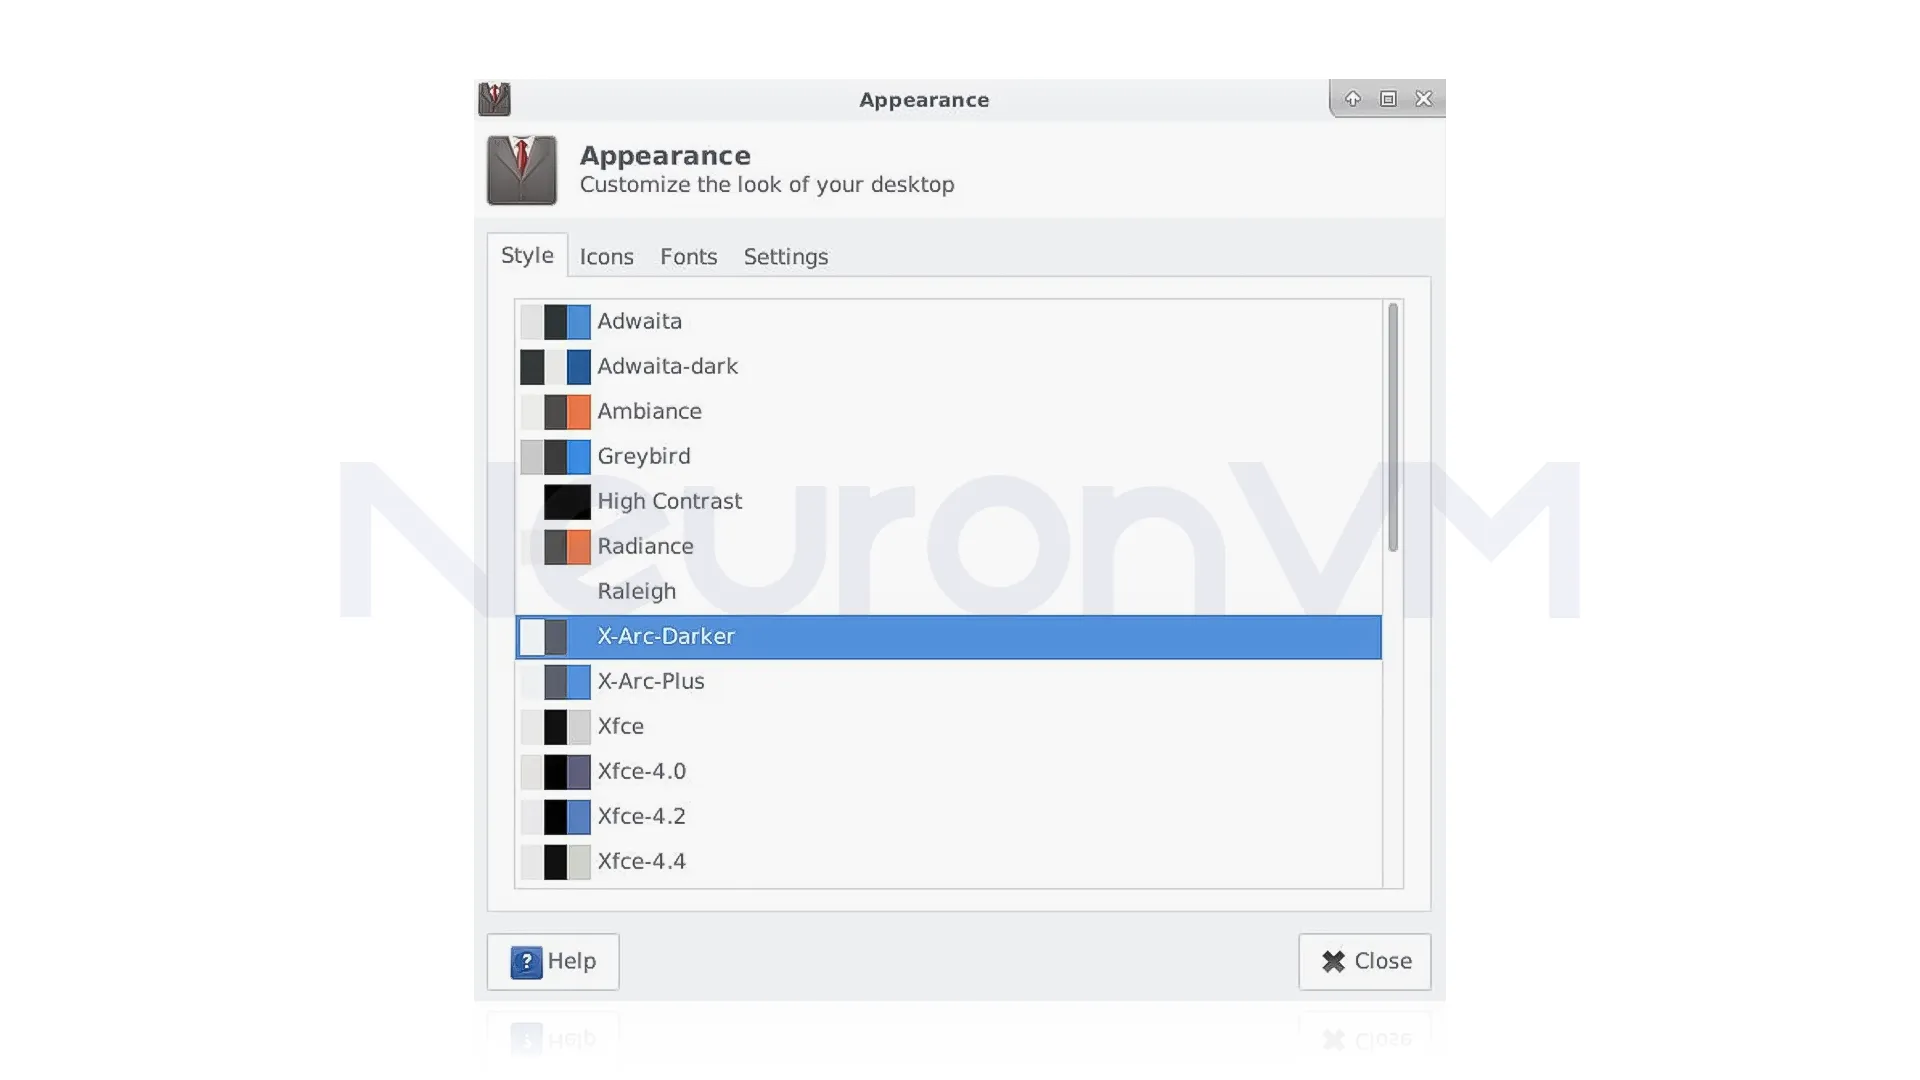 You can also find the icon themes on XFCE’s main website, Just download the icon theme you like, extract the files, and move the extracted folder into a hidden folder called “.icons” in your home directory, After adding the icons, go to the settings > appearance > icons and select your new icon theme from the list.
![]() This is the appearance is for the “Moka Icon” set, which we installed, find more about other Linux themes on our website.
This is the appearance is for the “Moka Icon” set, which we installed, find more about other Linux themes on our website.
![]()
🔹 Troubleshooting Common Issues
If you are having a problem installing XFCE, we have provided some quick fixes for common problems, follow them to fix your problems.
XFCE not showing at login? If the XFCE icon is not showing up on your login screen, you must click on the gear icon or session menu and select XFCE before logging in.
Black screen when using VNC? This usually happens when the desktop session isn’t set up correctly.
No display manager installed? If your system doesn’t automatically show a login screen after booting, you might not have a display manager installed, You can install one like LightDM or GDM.
🔹 Use Cases & Recommendation
XFCE is a perfect choice for VPS users, especially when you’re working with limited system resources, as it is lightweight, in a virtual private server, performance and speed matter most, if you are using a low-cost VPS, by using XFCE, you can get a fast and responsive graphical environment without slowing down your system, try out the best VPS hosting plans on our website.
🔹 Conclusion
XFCE is a fast and lightweight, and reliable desktop environment that is ideal for both new and experienced Linux users, no matter whether you’re installing it on an old machine or a VPS, it gives you a smooth and customizable environment, leave your thoughts about this article on the comments.

