How to Install Netinstall on MikroTik (Step-by-Step Guide)

 8m
8m
 0 comments
 Print
Print
## Introduction
If you need to install Netinstall on MikroTik, you’re in the right place. Whether your router is stuck, unresponsive, or needs a clean reinstall of RouterOS, this step-by-step guide will help you recover it easily using MikroTik’s Netinstall tool.
## Step 1: What Is Netinstall and Why Use It?
Netinstall is a small but powerful tool developed by MikroTik that allows you to reinstall or repair RouterOS on your MikroTik device. It’s especially useful when:
– You’ve forgotten your login credentials
– Your router is bricked or stuck
– In certain situations, manually upgrading or downgrading RouterOS becomes necessary to restore full functionality.
– You want to reset the system and reinstall everything from scratch
If Winbox and WebFig are not working and your device won’t boot properly, Netinstall is your go-to solution.
## Step 2: Requirements
- A Windows PC
- MikroTik Router with Ethernet port
- Netinstall Tool
- Ethernet Cable
- USB to Ethernet adapter (optional)
❗Important Note: When you use Netinstall to reinstall your RouterOS, your licence key typically remains as it’s linked to your MikroTik hardware, and reinstalling on the same device shouldn’t remove it.
## Step 3: Download Netinstall and RouterOS Files
### Check Your Device’s Architecture
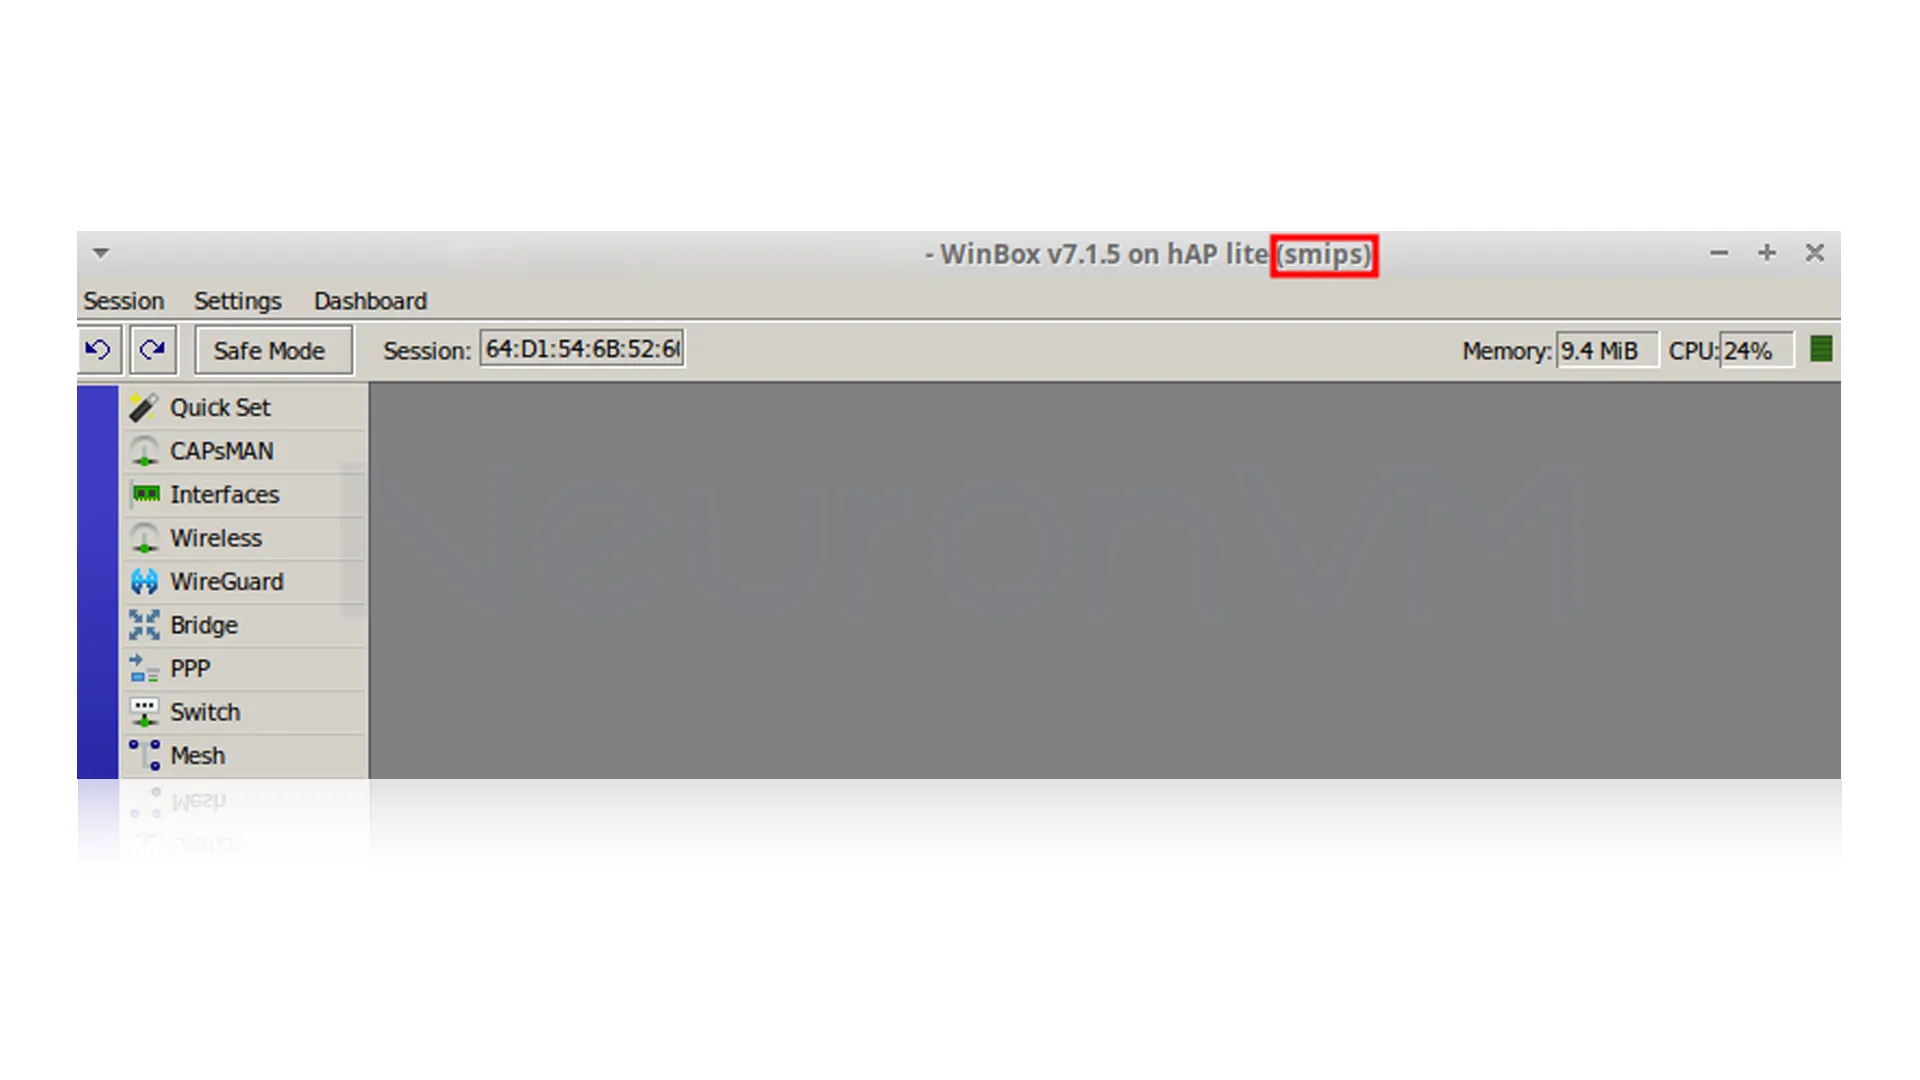
To get the right Netinstall software, you first need to know your MikroTik device’s processor type, The easiest way to do that is to connect to your router using Winbox, You can find the processor architecture right after the RouterOS version in Winbox. In this walkthrough, we’ve chosen a MikroTik device that operates on the “smips” architecture for illustration.
### Download the Netinstall Tool
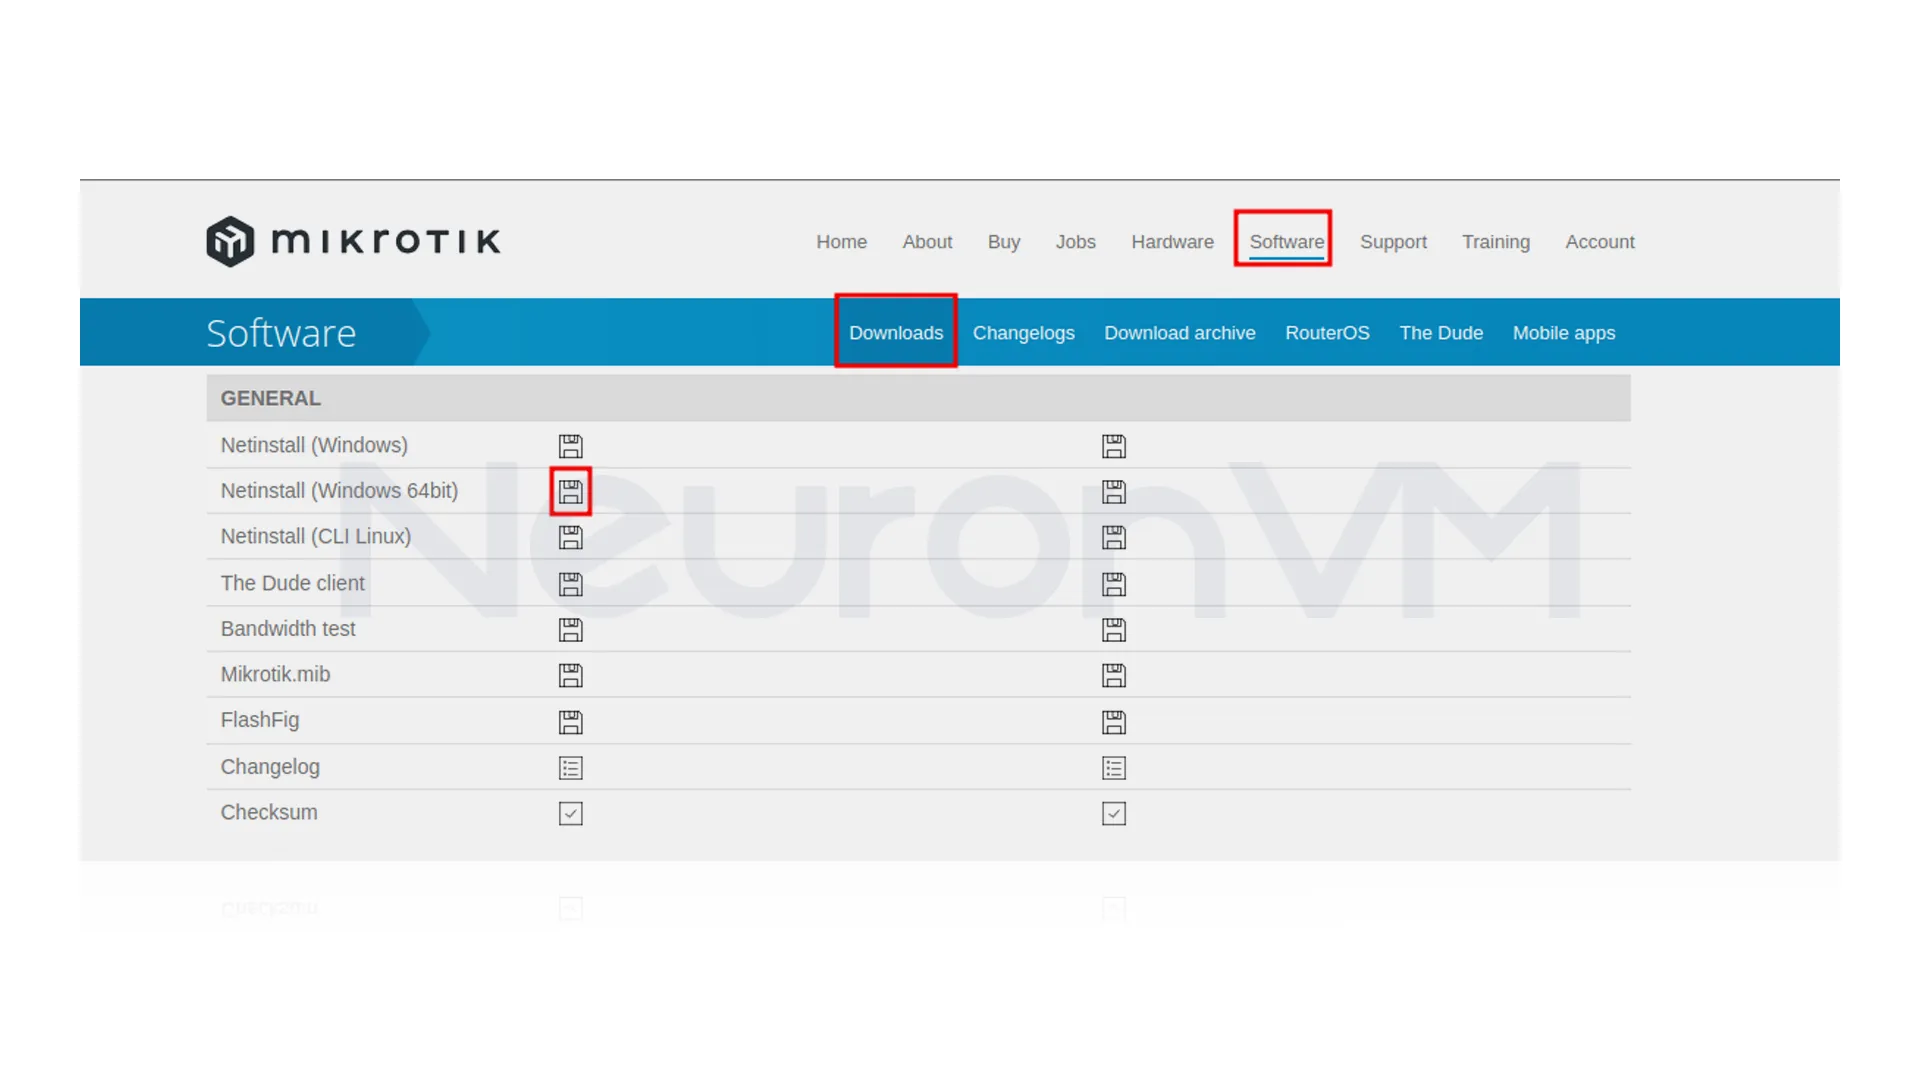
To download the Netinstall software, go to the official MikroTik website, click on the software menu, then select downloads. You need to locate the Netinstall tool under the general section, which is usually represented by a floppy disk icon, we have selected Windows 64 for the operating system version.
### Get the RouterOS Packages
#### Updating or Fixing the Latest Version
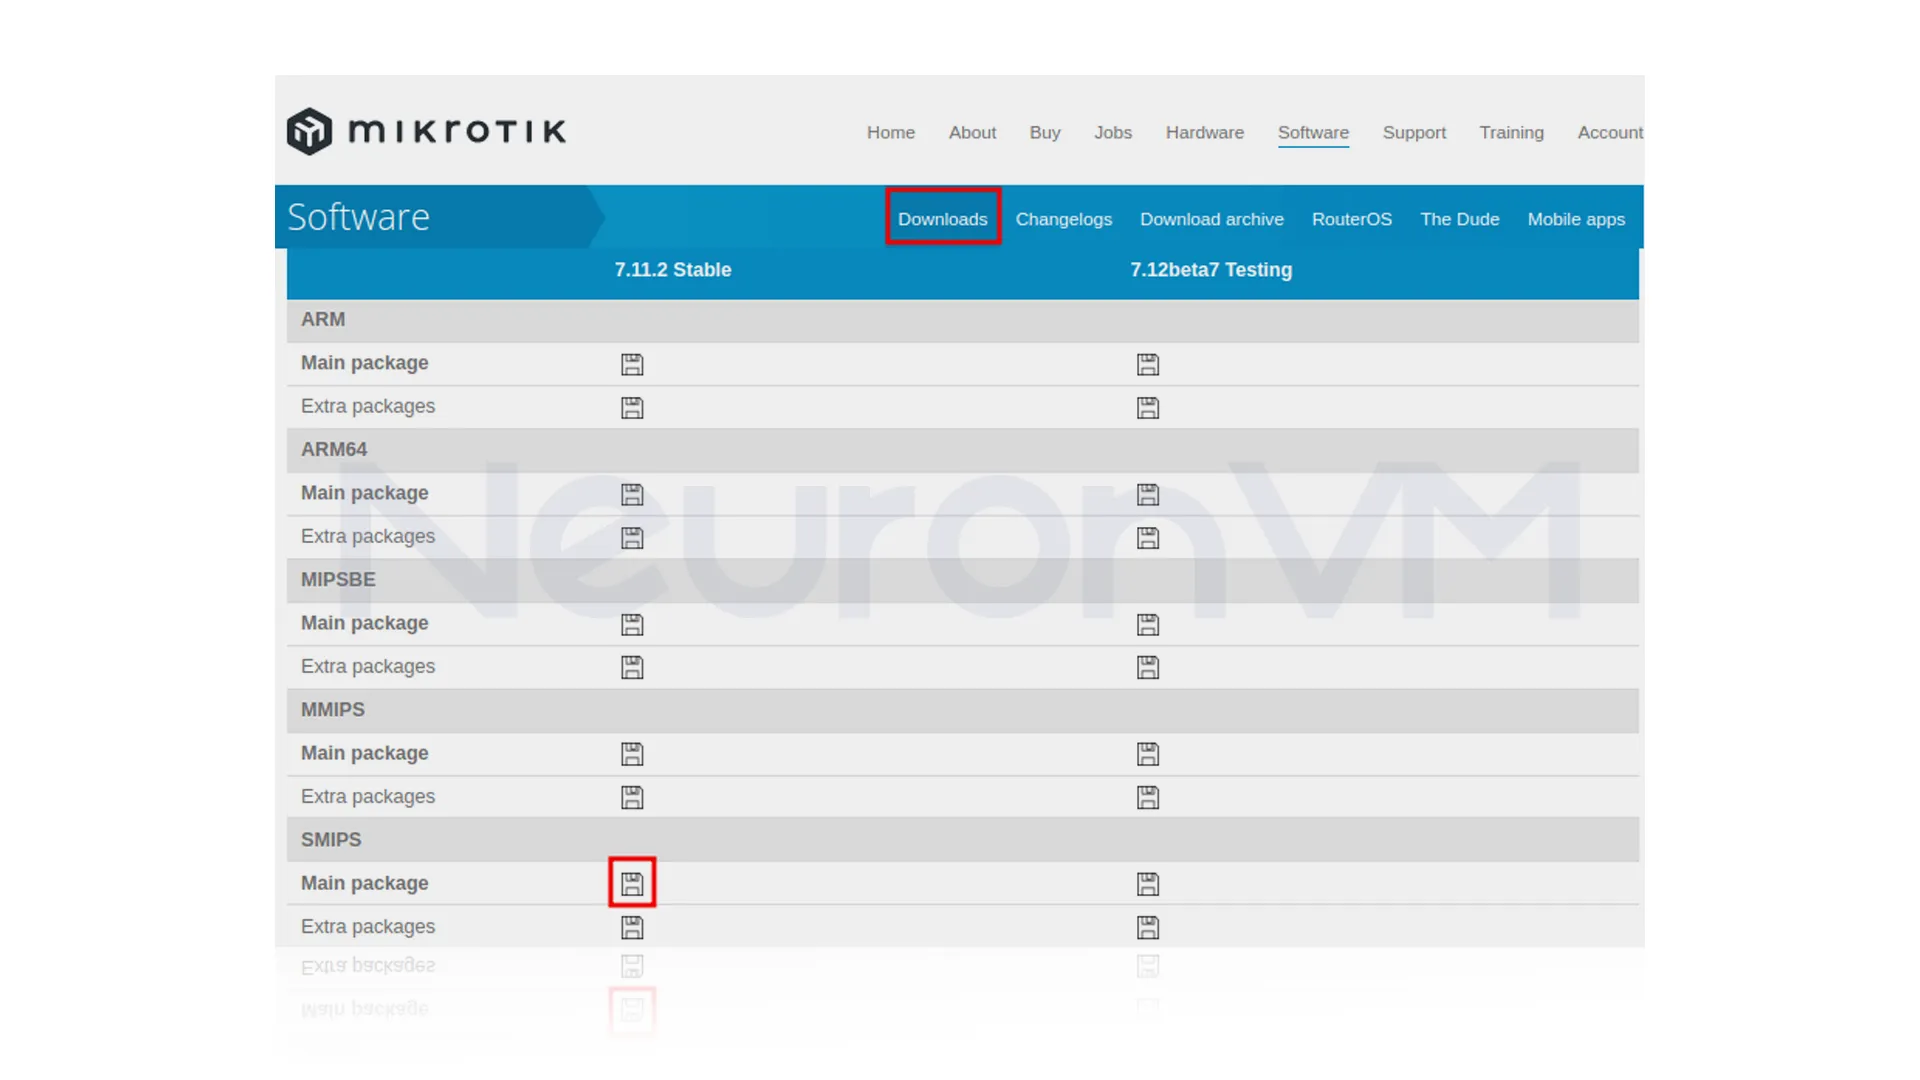
If your MikroTik already has the newest software shown on the downloaded page, or if you want to update to that newest version, find the section for your router’s processor type, then you have to click on the floppy disk icon, which is next to the main package symbol to download the software file.
 #### Going to an Older Version (Downgrading)
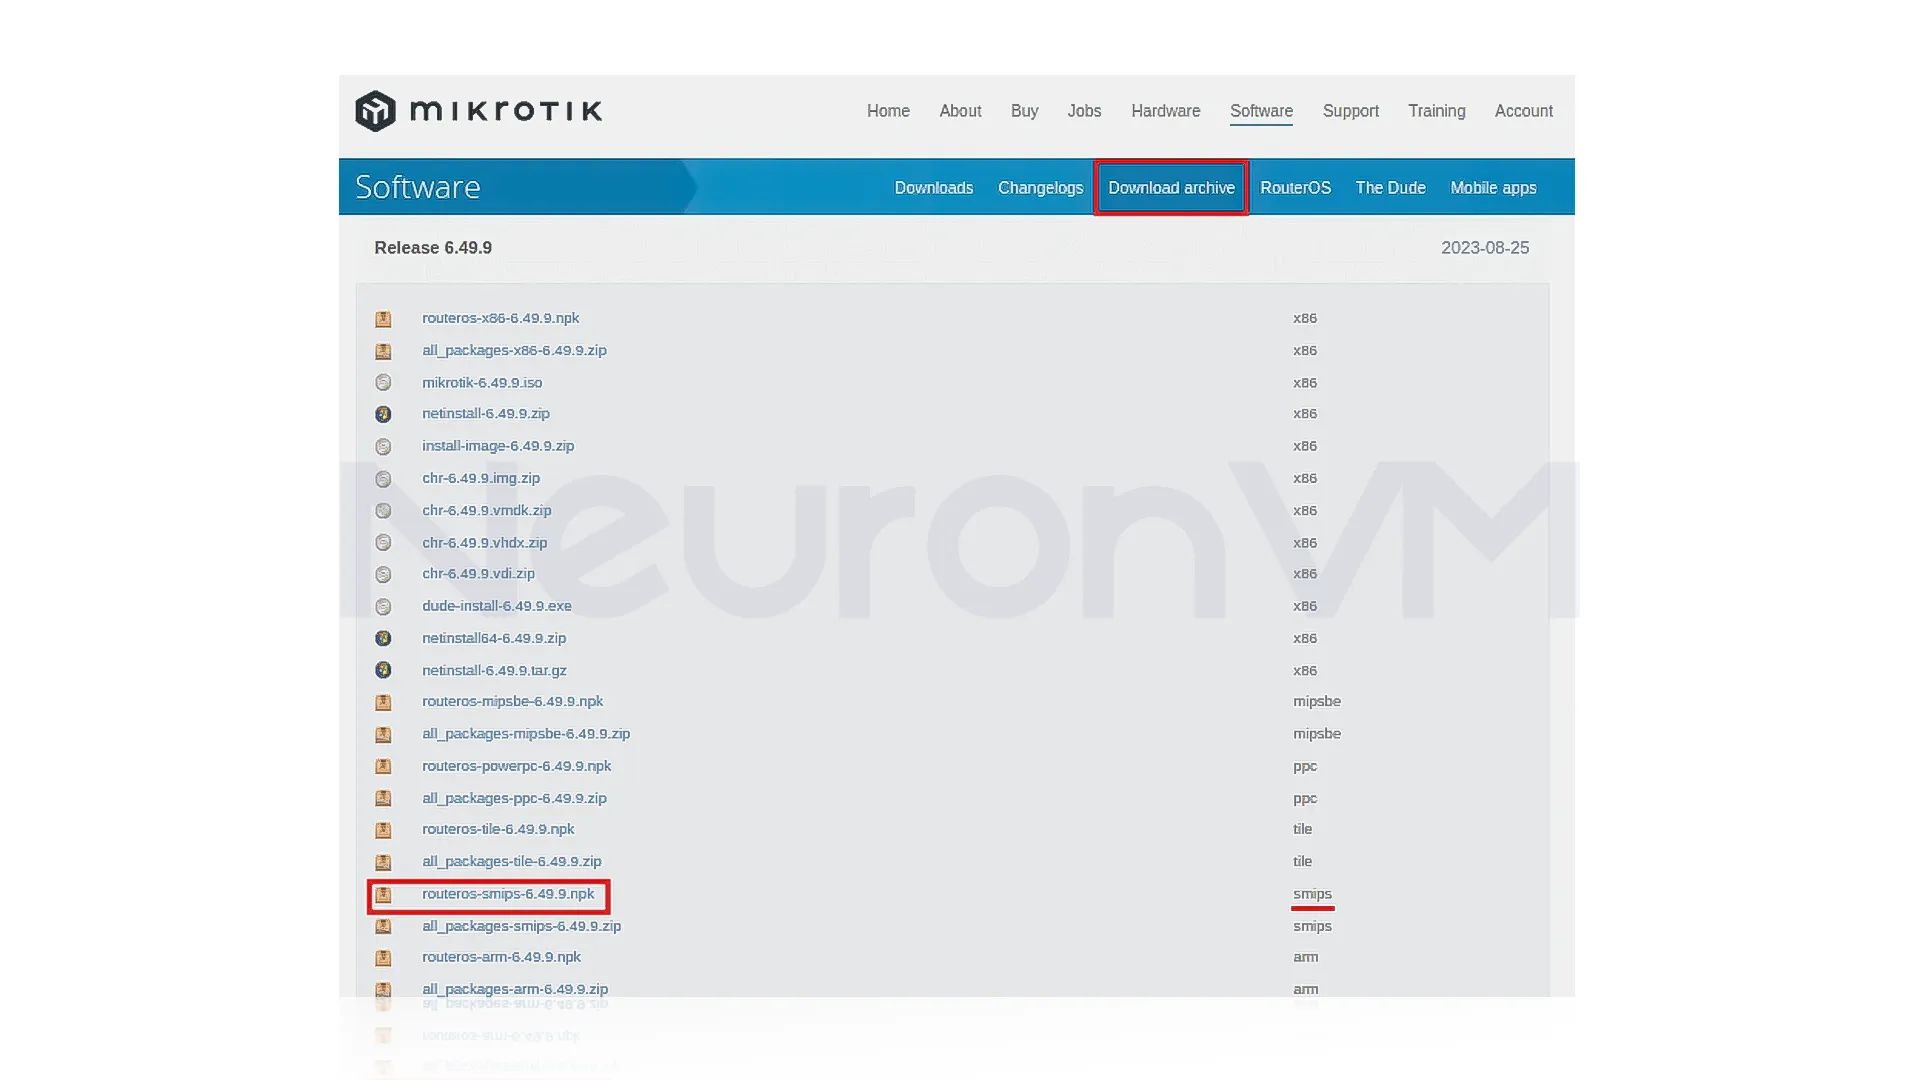
If you want to install an older version of RouterOS using Netinstall, go to the MikroTik website and click on the download archive, then download the file that ends in “.npk” for your MikroTik processor type.
 ## Step 4: Configure Your PC for Netinstall
### Set a Static IP Address
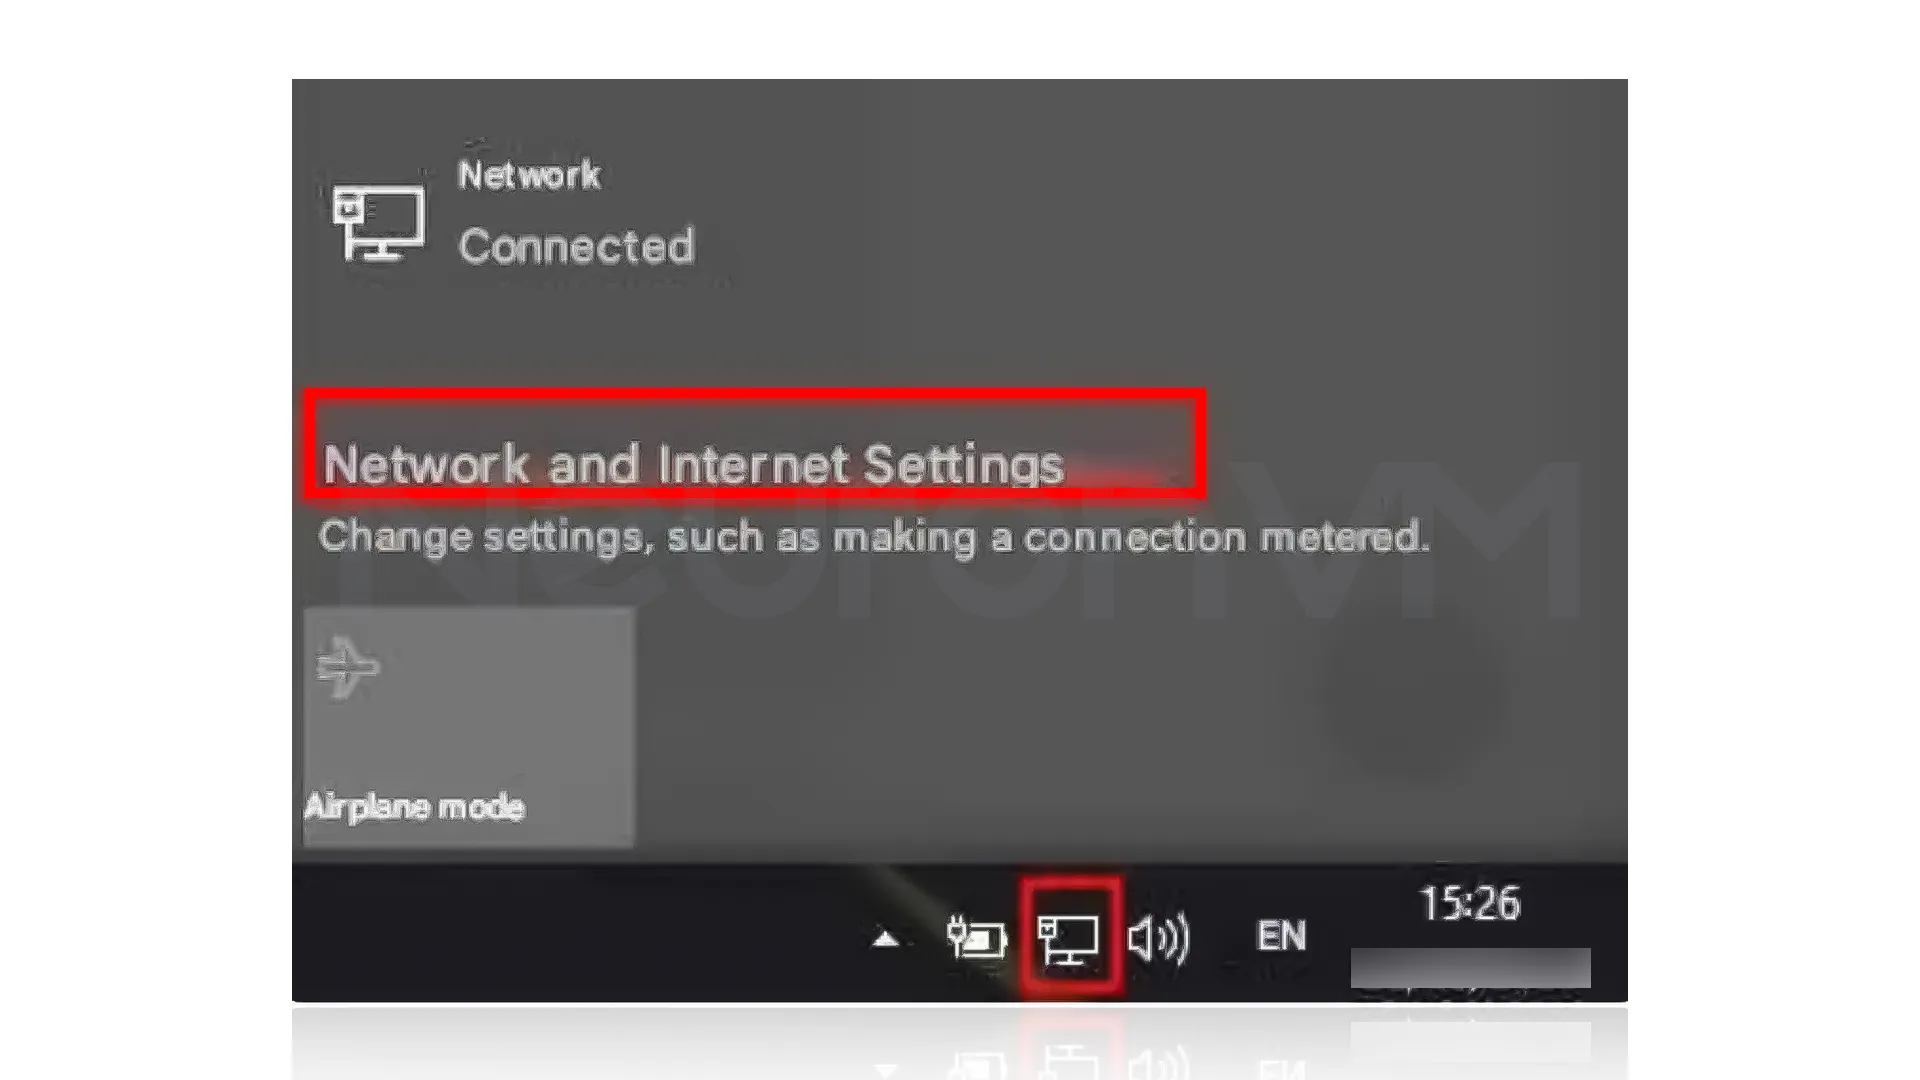
For Netinstall to work well with your MikroTik, you might need to change your computer’s network IP address, on Windows, click the network icon in the corner of your screen, then click “Network and Internet Settings.”
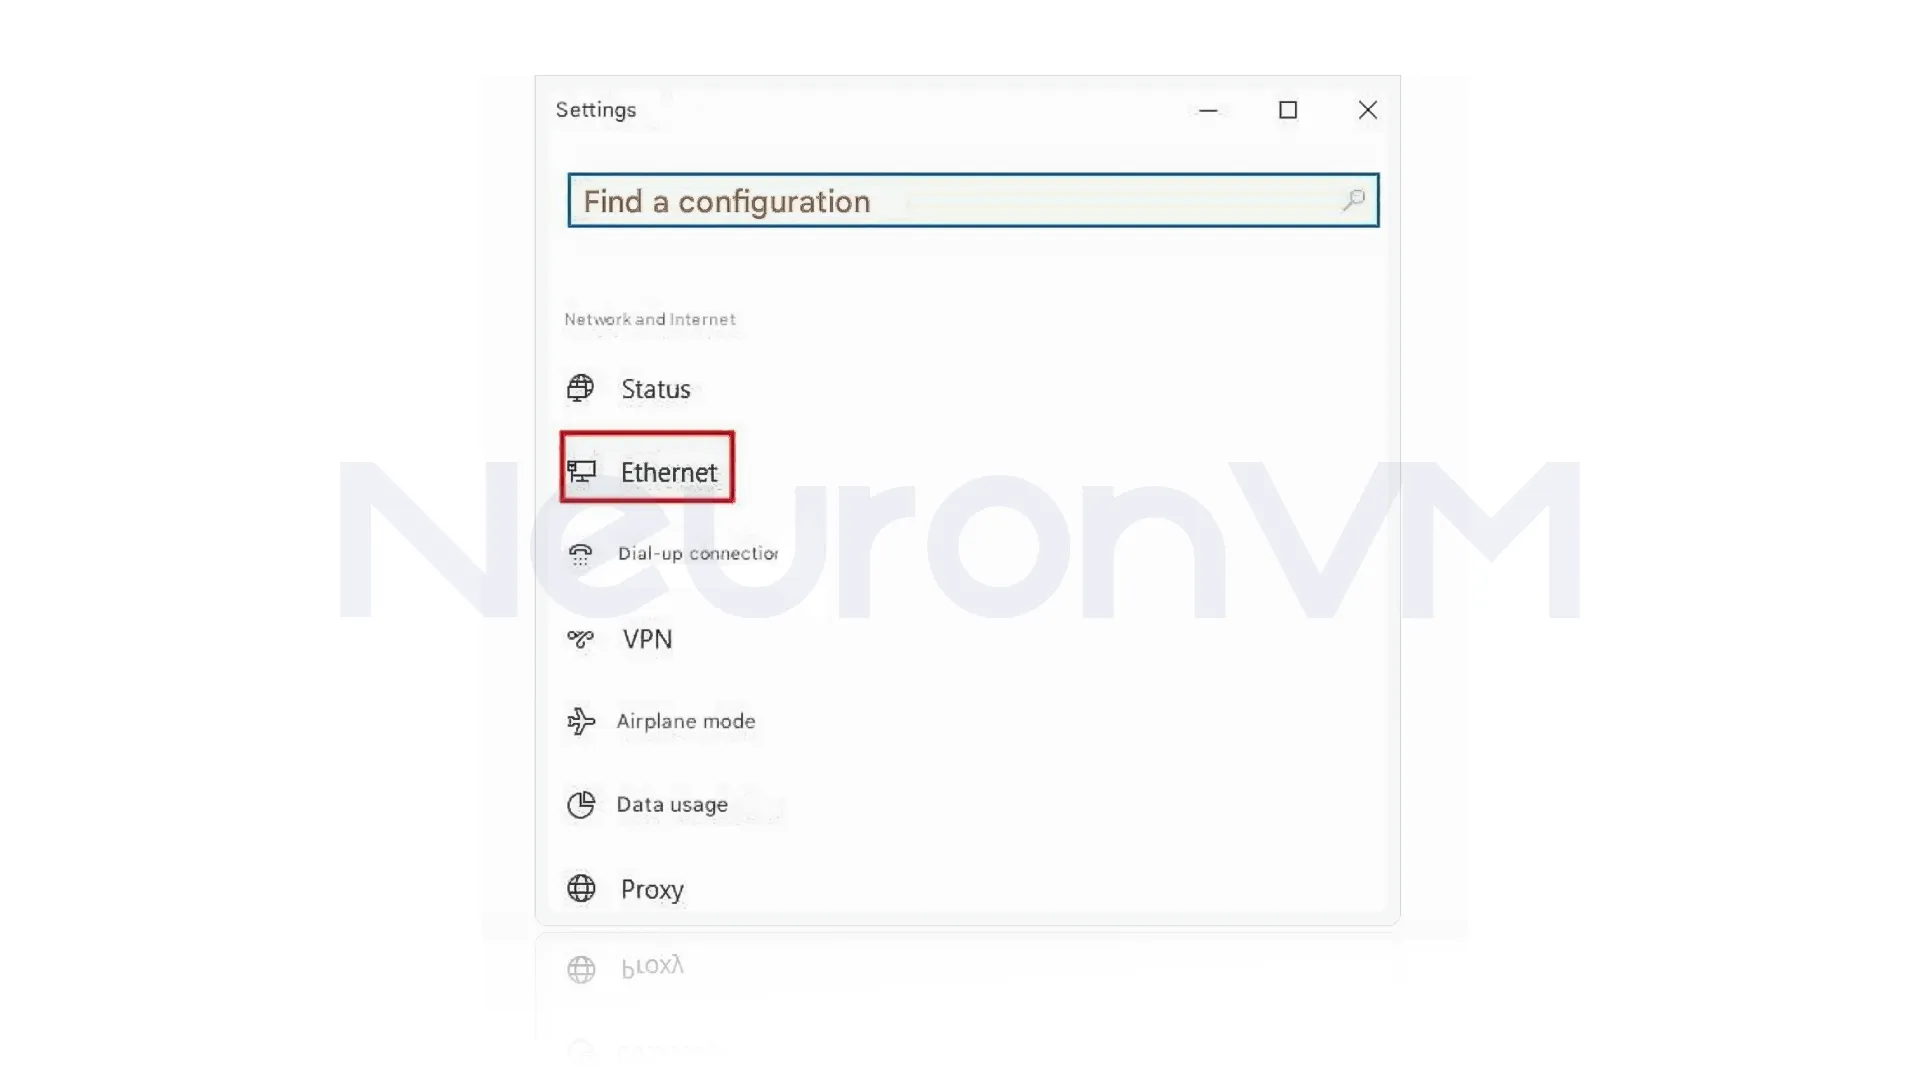
 Then select “Ethernet.”
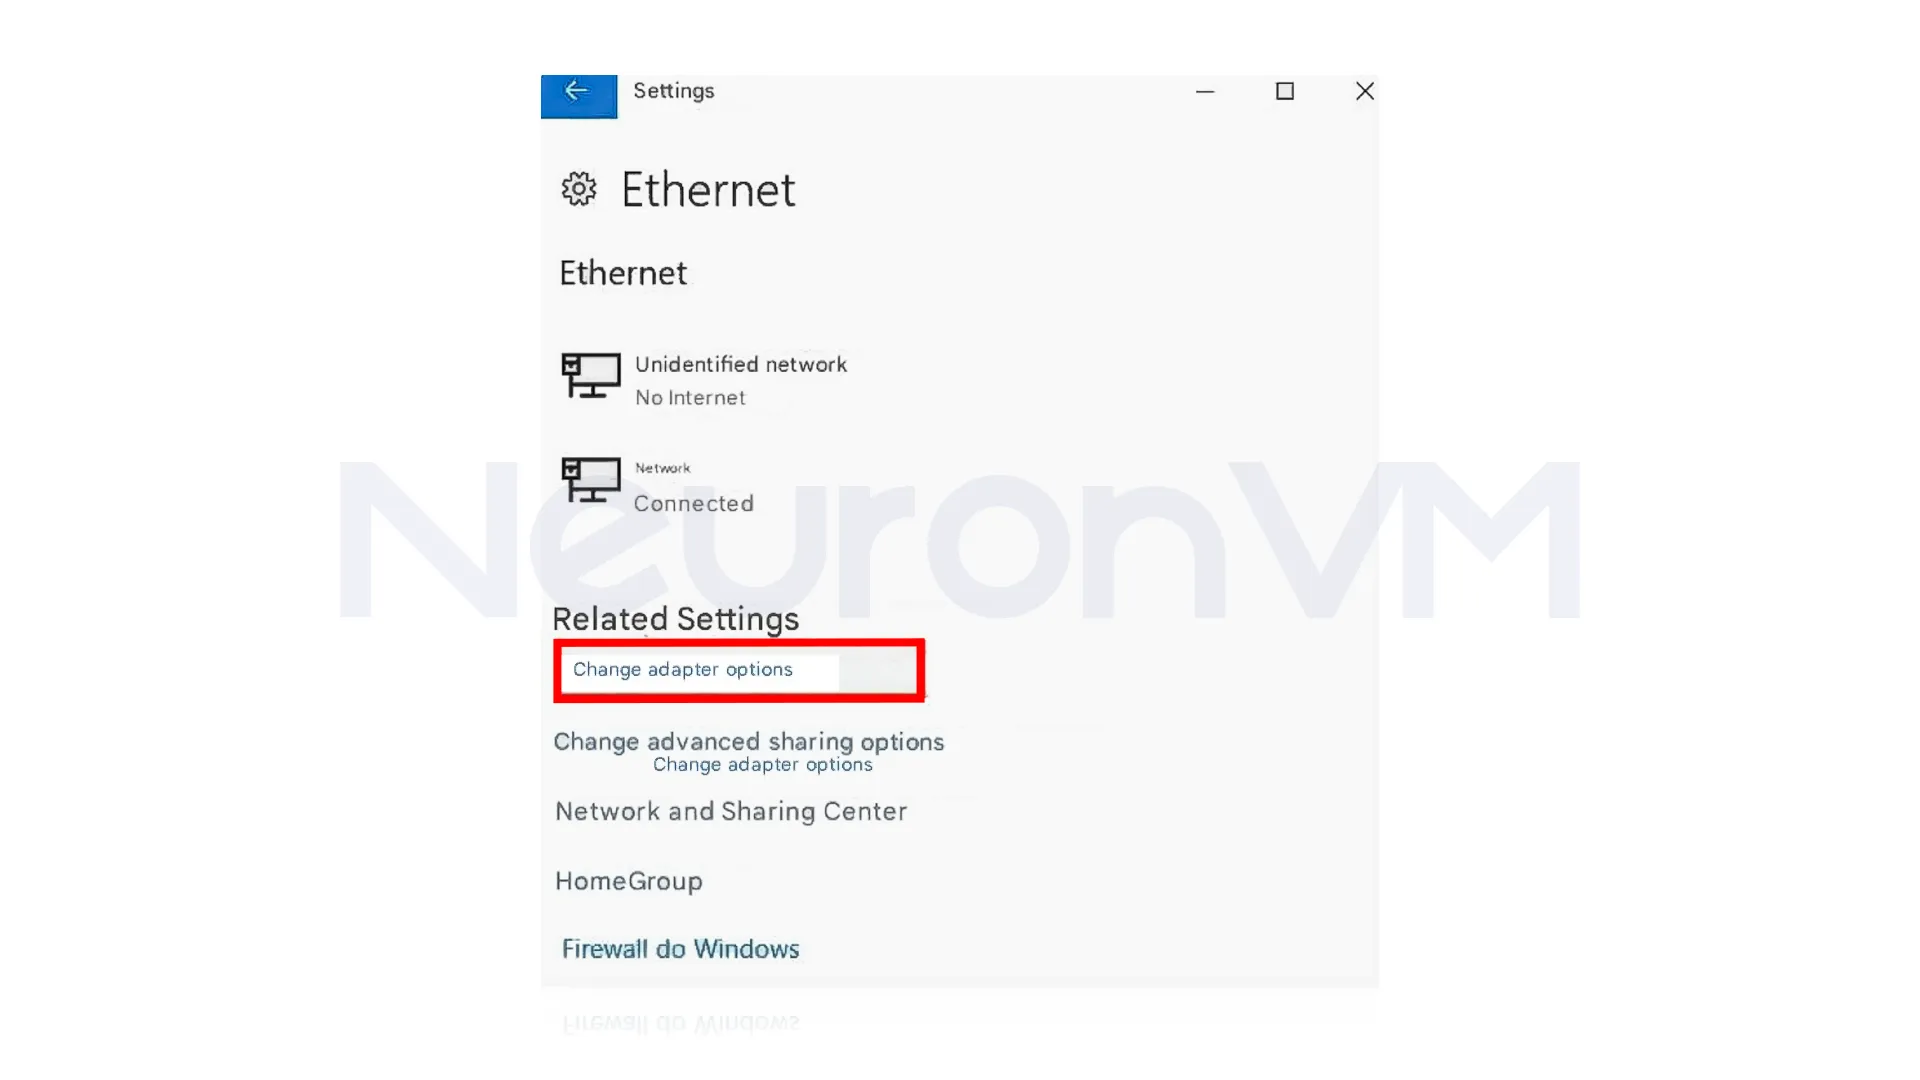
 You have to select “Change Adapter Options.”
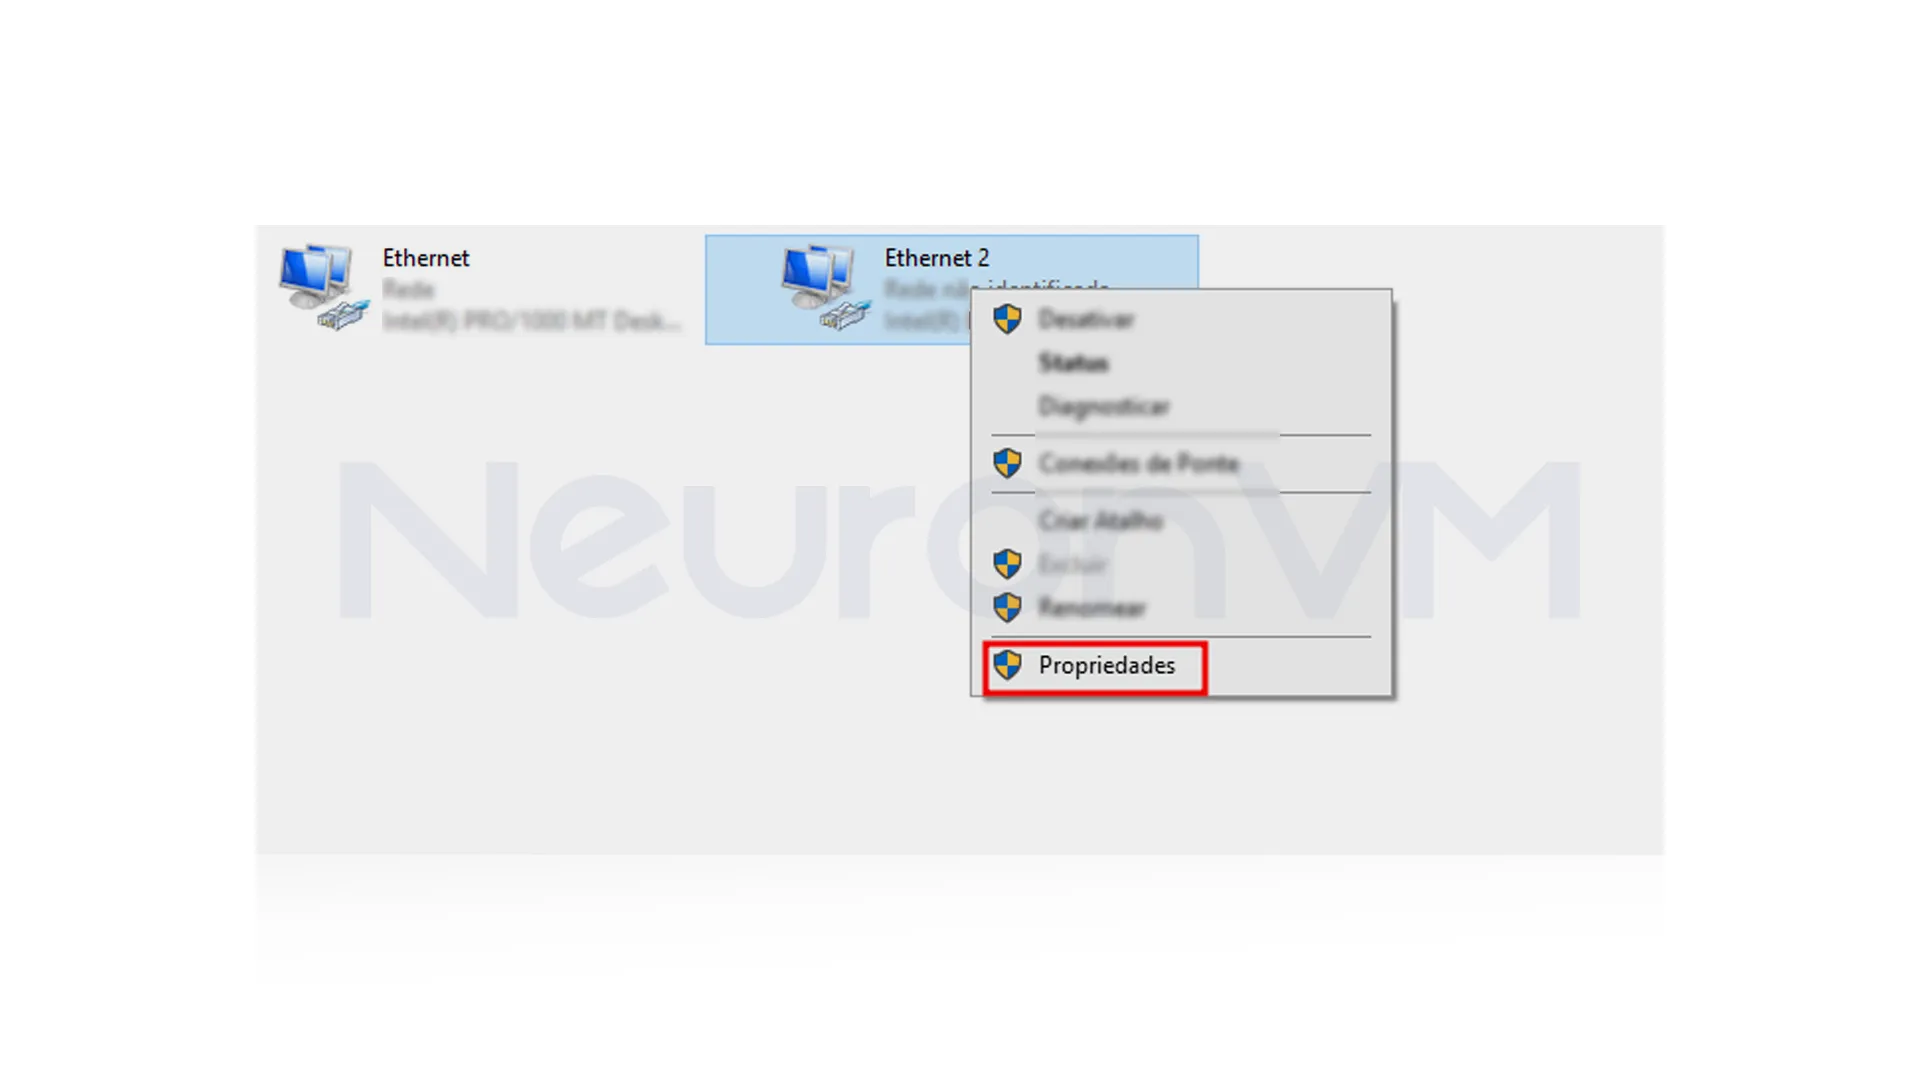
 Once you’re in “Network and Internet Settings,” look for the network connection, then right-click on it and choose “Properties” from the menu that pops up.
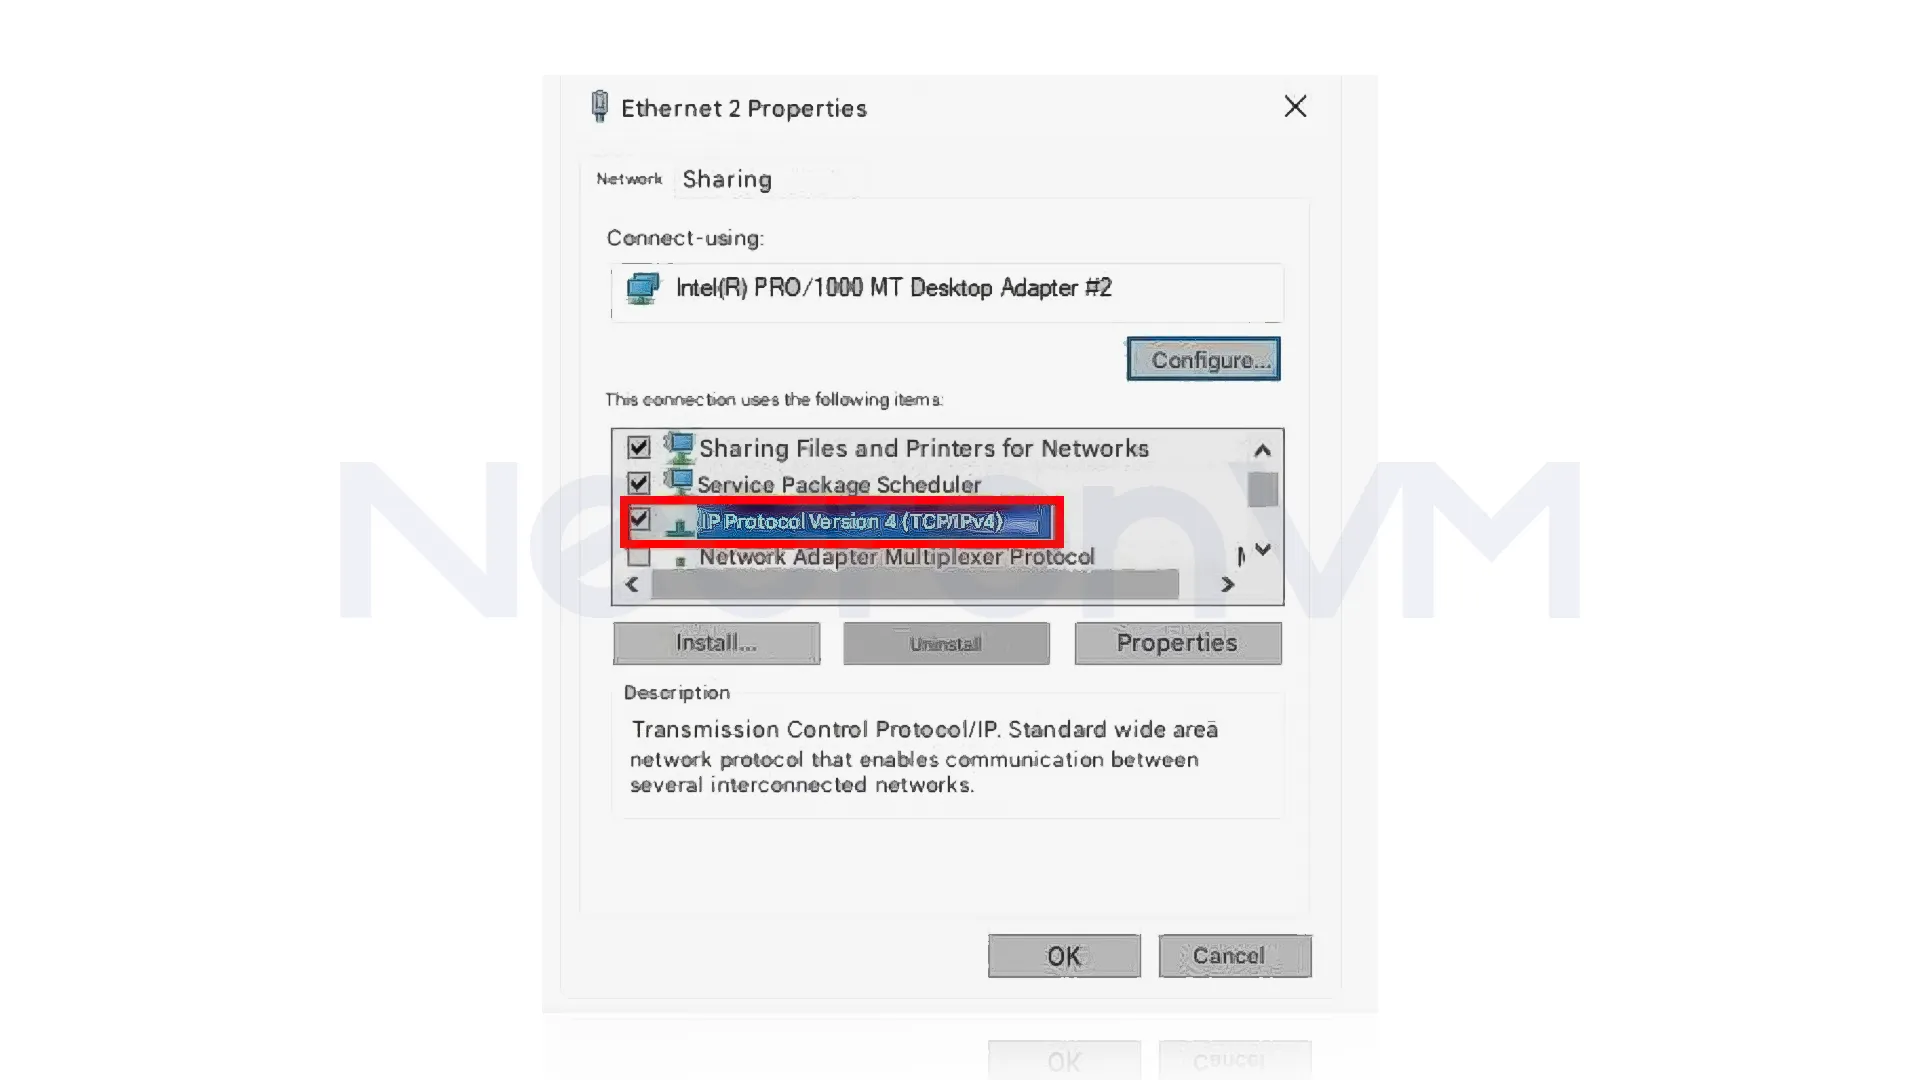
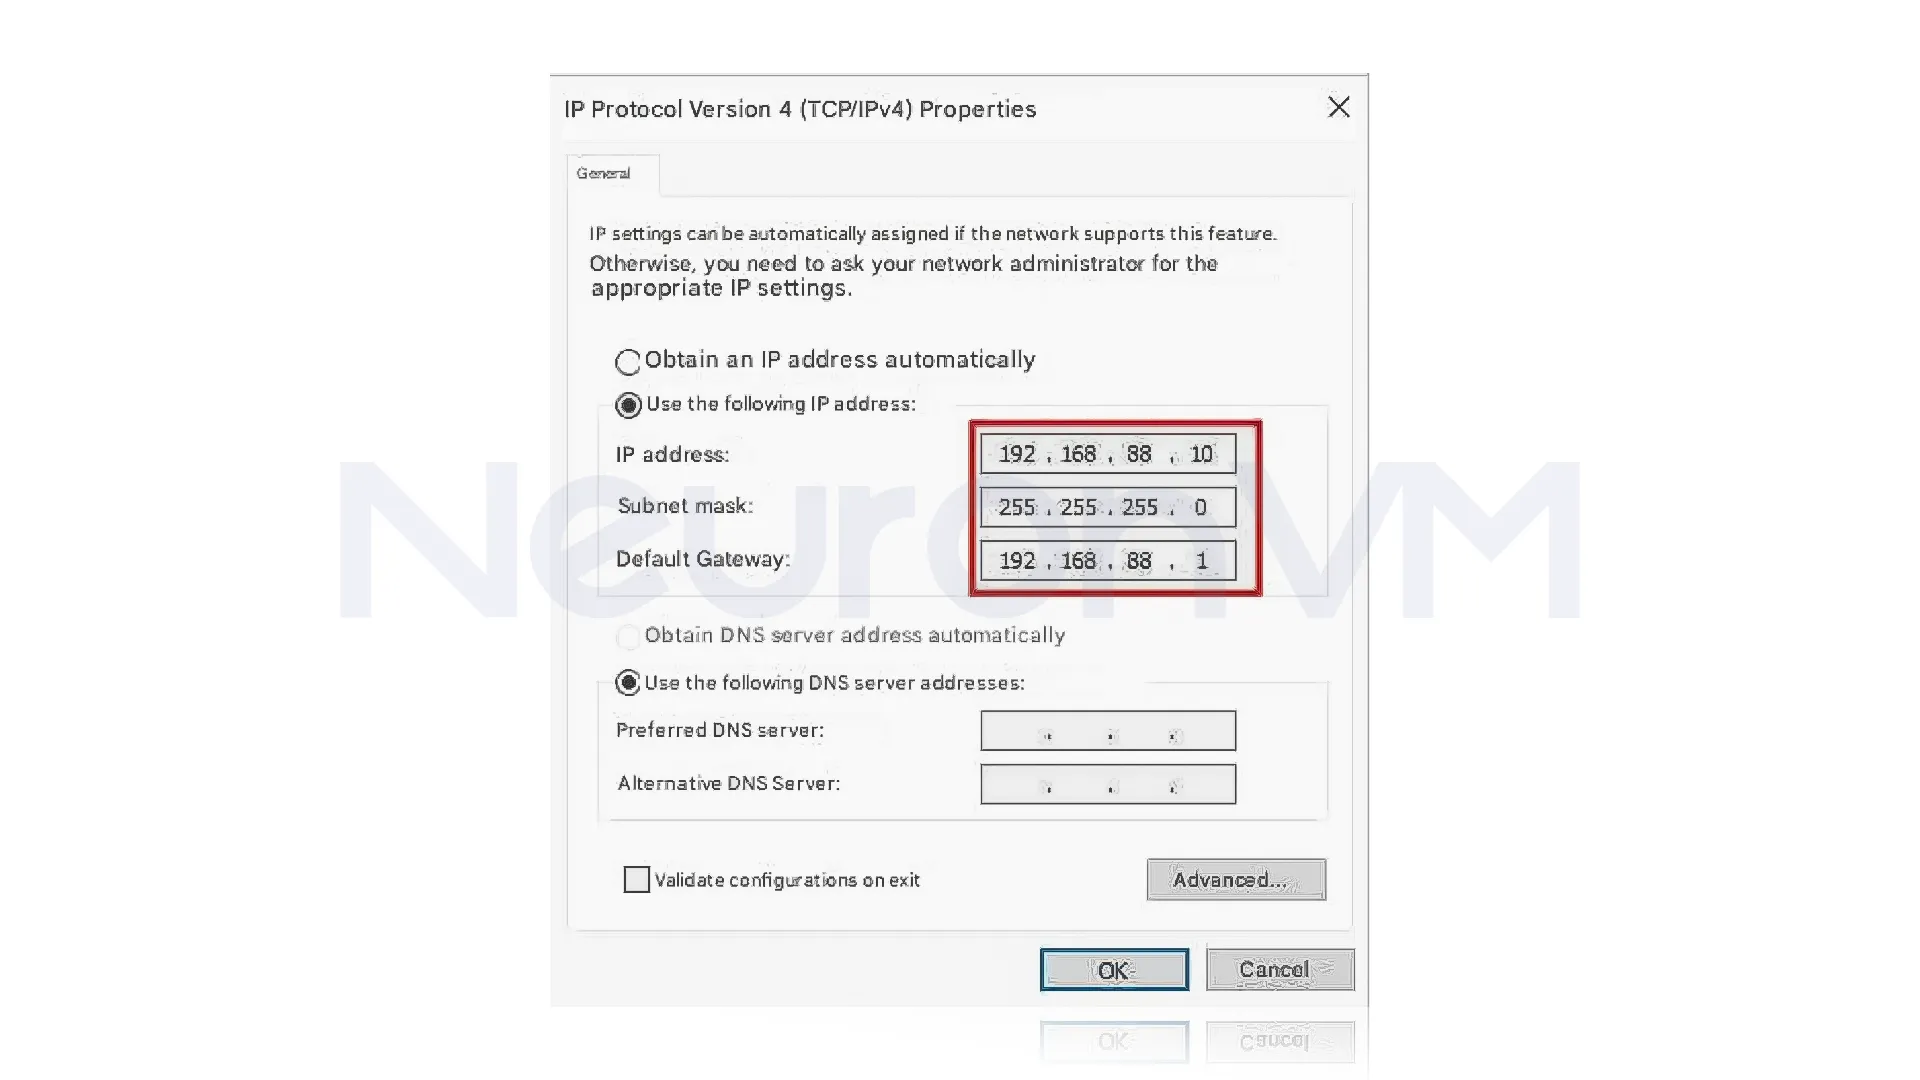
 In the properties window, double-click on the “TCP/IPv4”, then you have to enter the network address information that was shown to you.
 After entering the needed information, click “OK” to save the changes you have previously made.
## Step 5: Run Netinstall and Configure It
### Run as Administrator
Once the Netinstall archive is extracted, go to the folder, locate the “netinstall.exe” file, and launch it with administrator rights to begin the process.
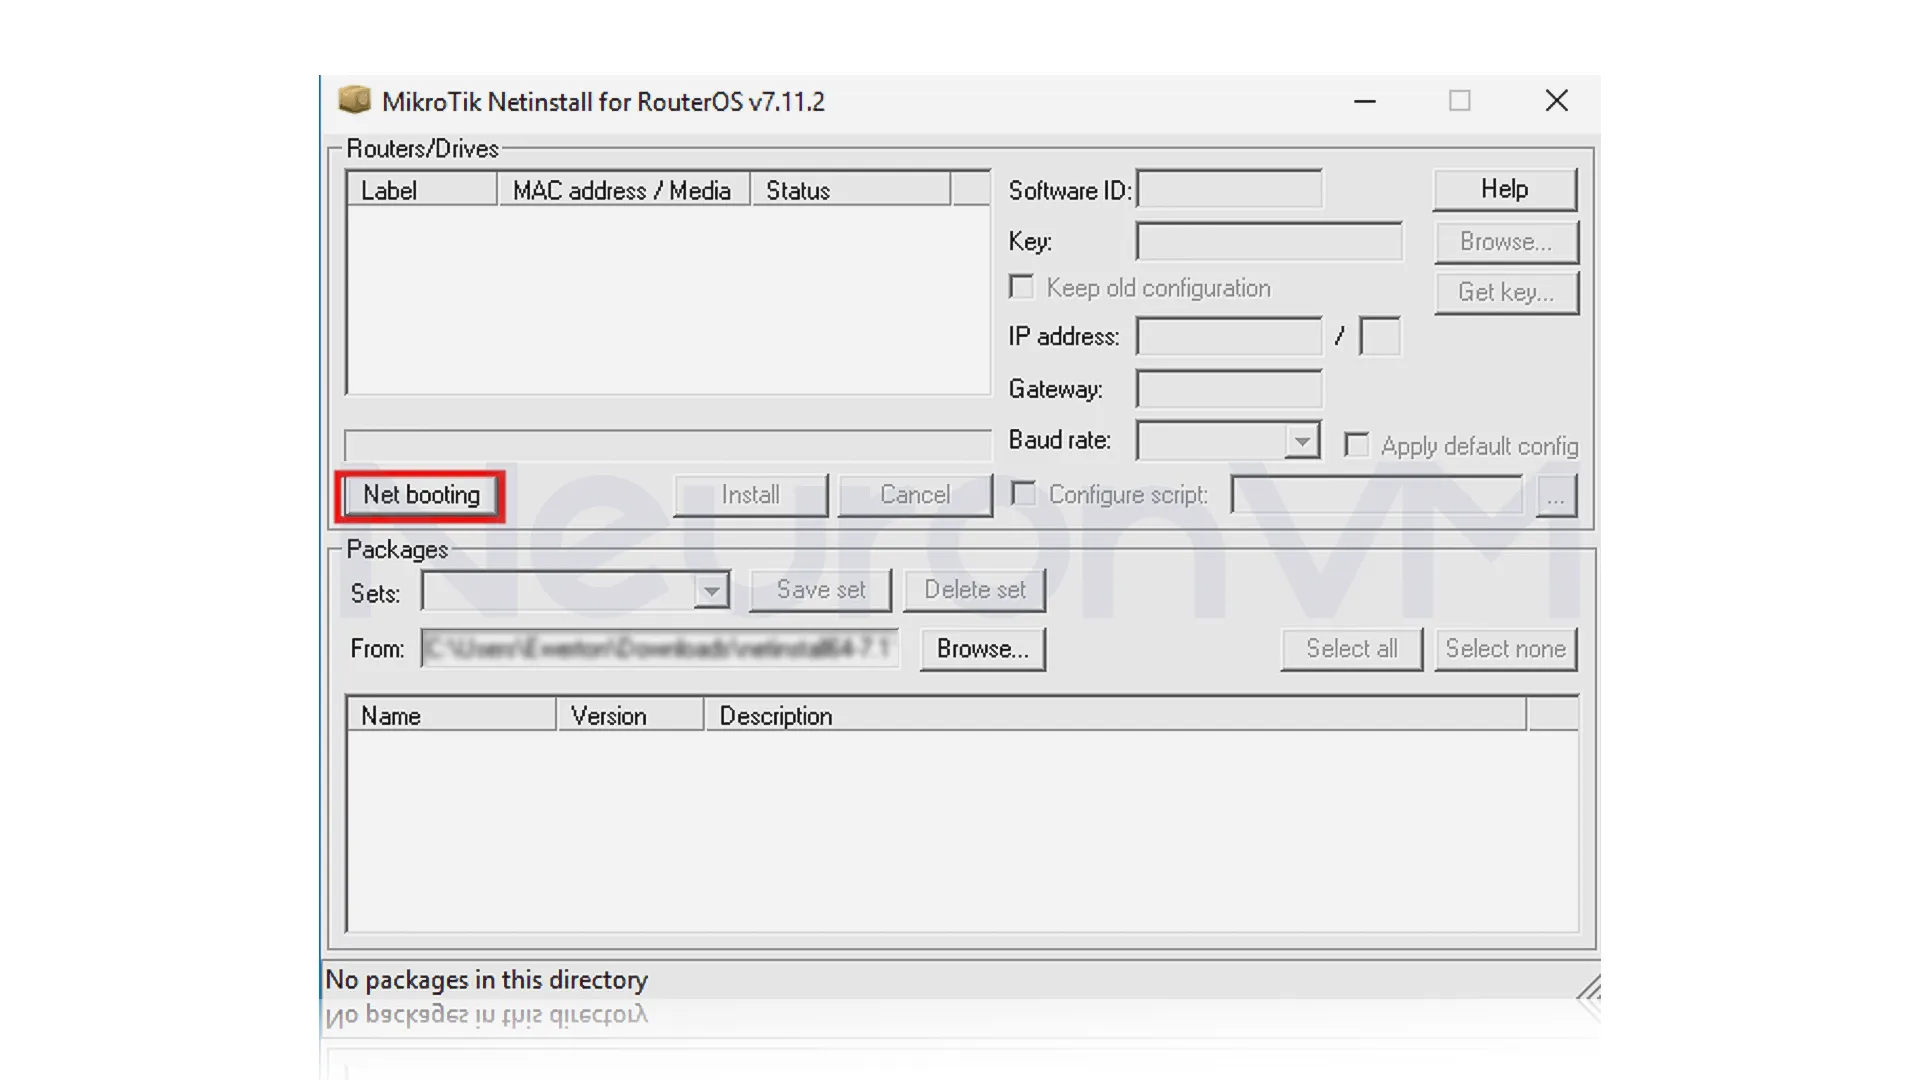
 Inside the Netinstall program, find the button “Net Booting” and click it, which tells the program you’re going to connect to your MikroTik over the network.
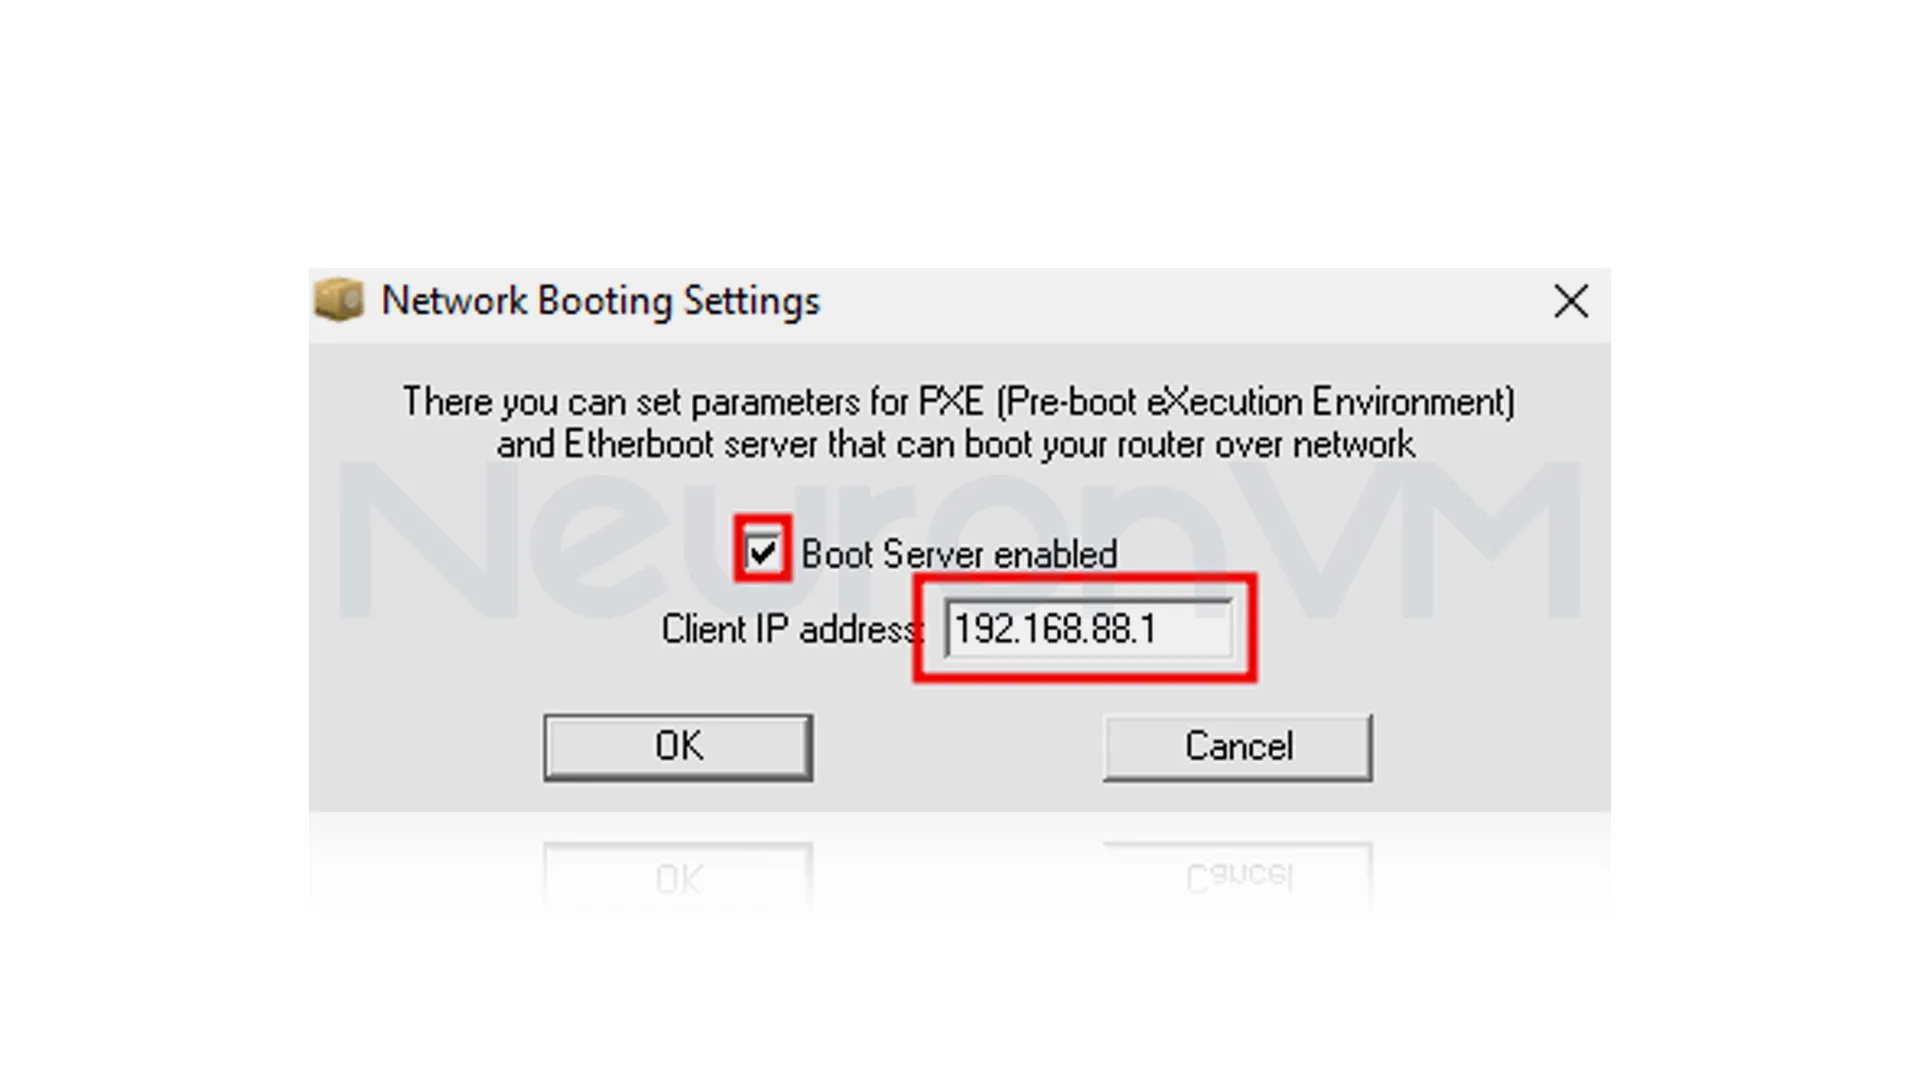
### Enable Net Booting and Enter IP
 In the Netinstall, under net booting, turn on the boot server, enter a new IP for your MikroTik in “Client IP Address” and click OK.
## Step 6: Reboot Your MikroTik for Netinstall
### Select Your Device and Load Files
Plug the Ethernet cable into the correct port, press and hold the reset button on your MikroTik, then power it on — continue holding the button for about 30 seconds to enter Netinstall mode.
### Start Installation
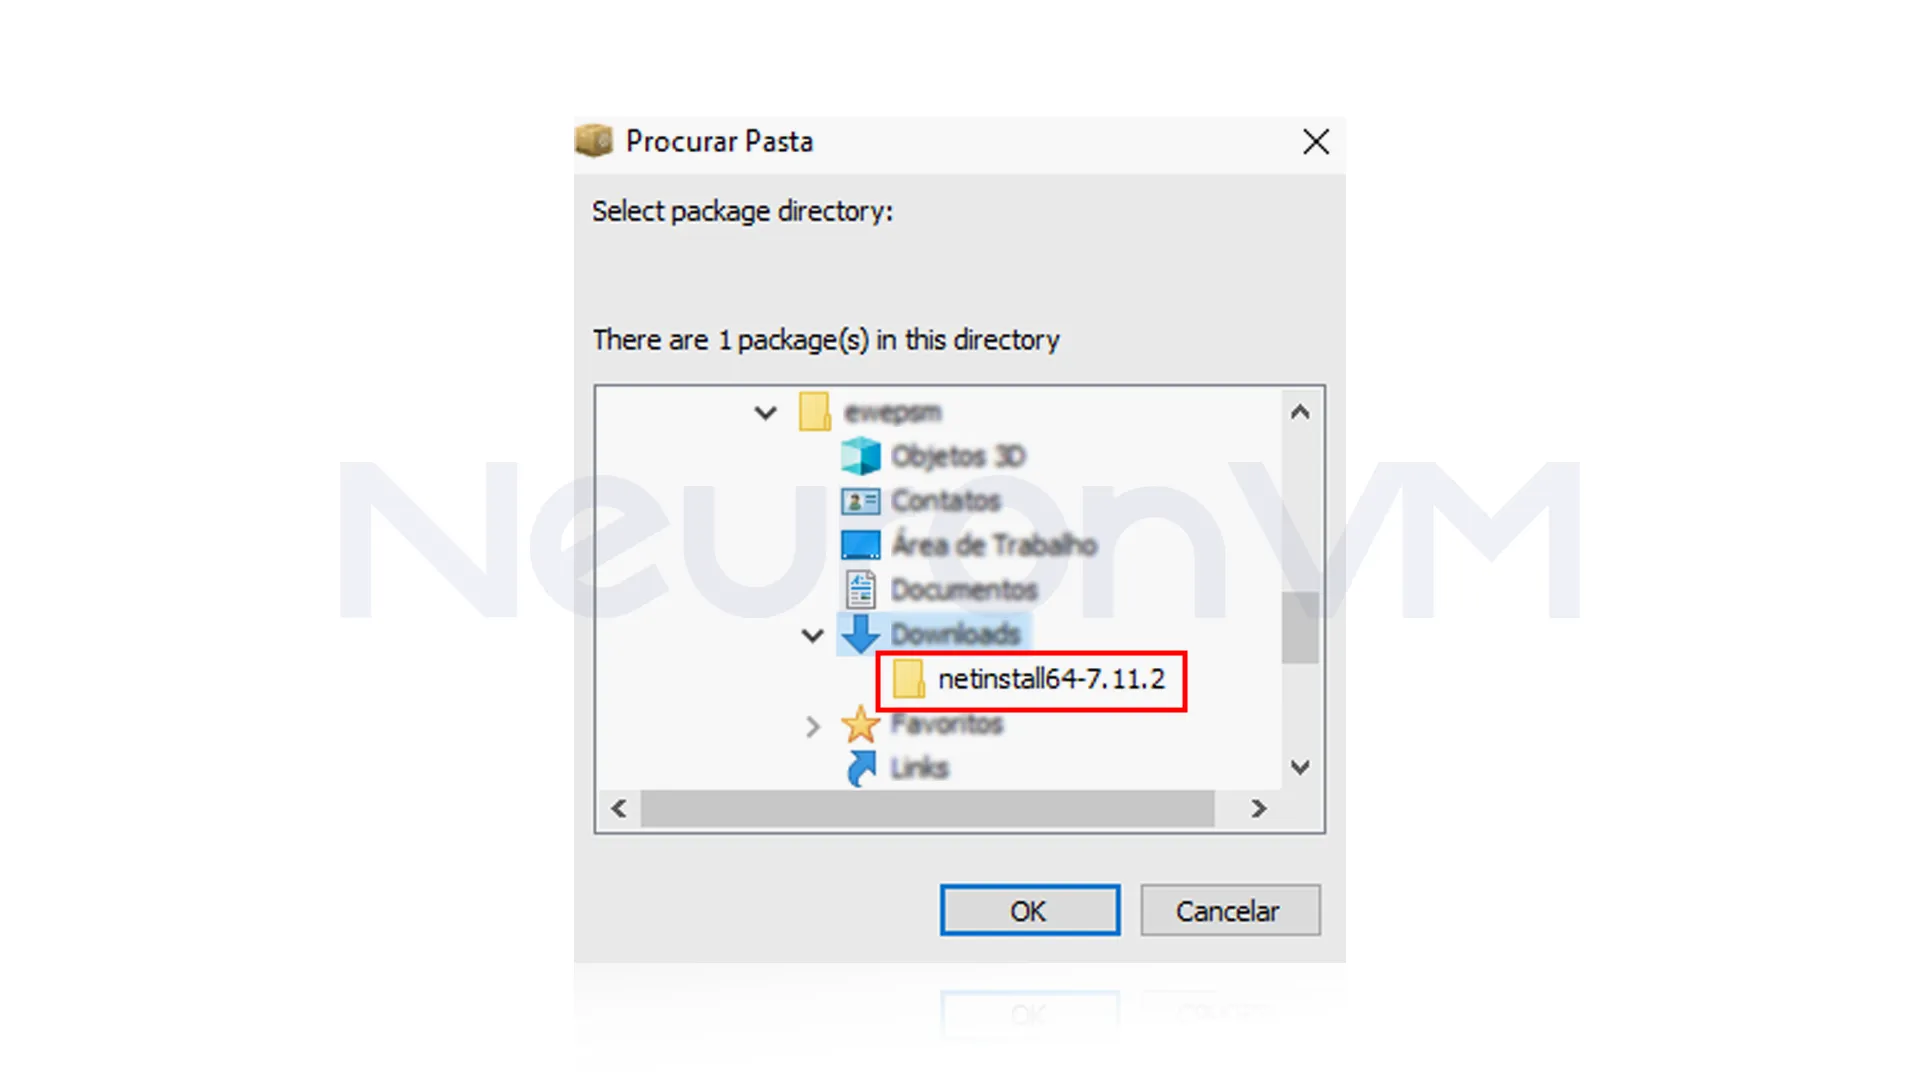
Within the 30 seconds of holding the reset button, you should see your MikroTik’s name show up in the “Routers/Drivers” box in Netinstall, if you don’t see it, go back and check the steps, once you see it click “Browse.”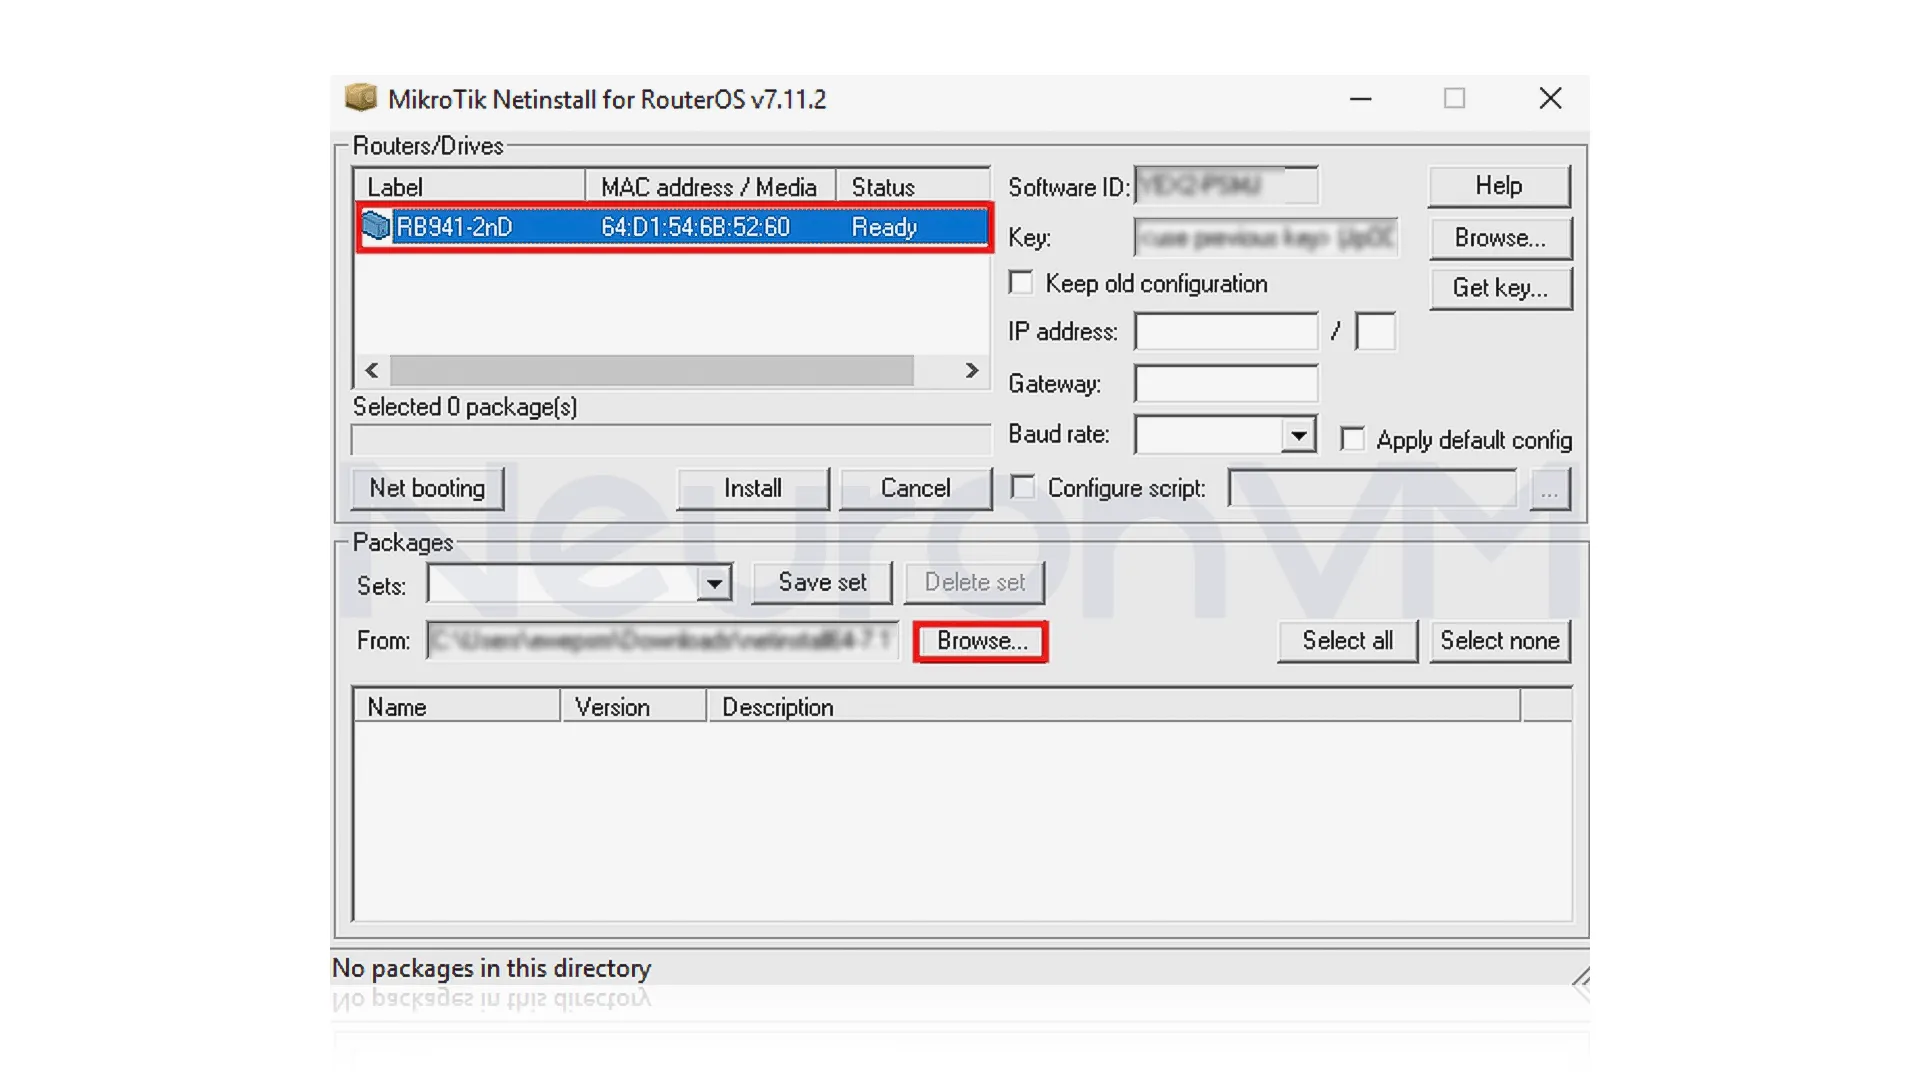 Once you select Browse, find the “.npk” file’s folder, and click “OK.”
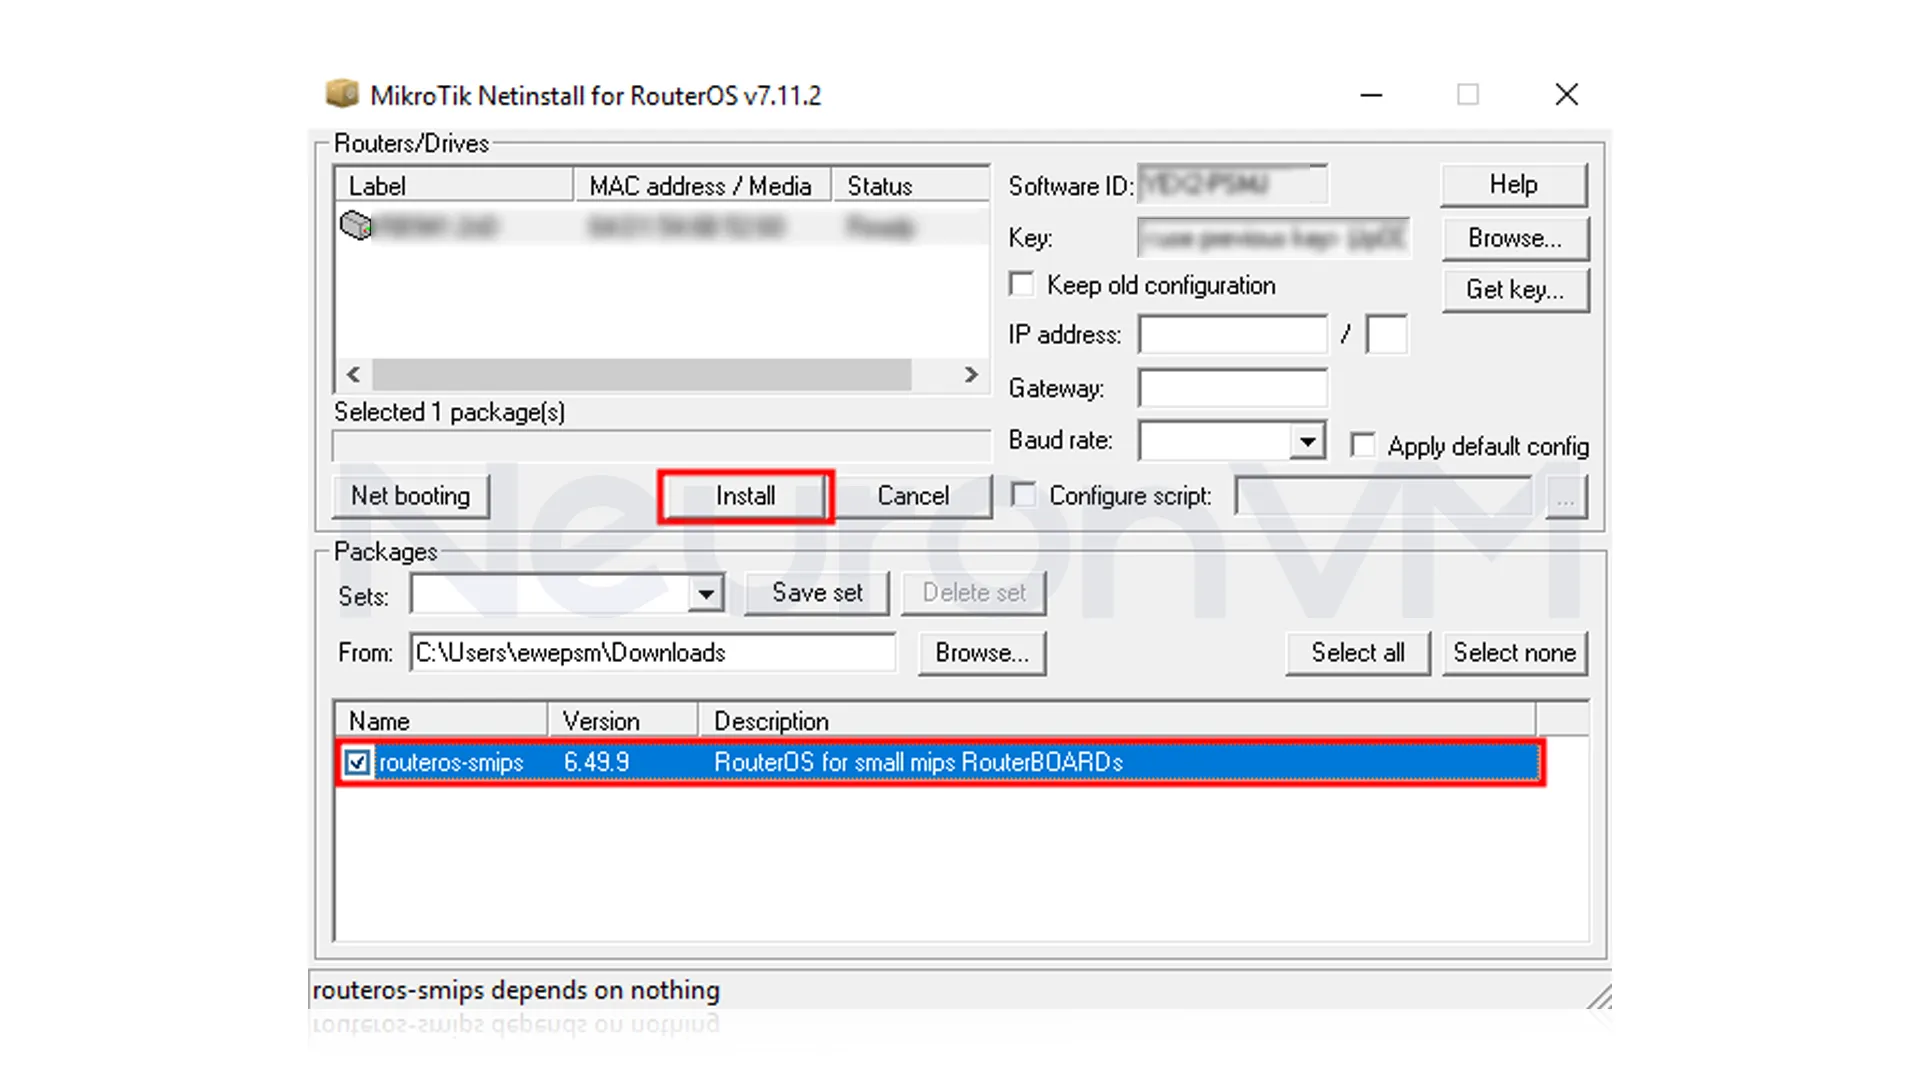
 Next, you have to select the RouterOS file and select install, then wait for the “Installation Finished Successfully” message.
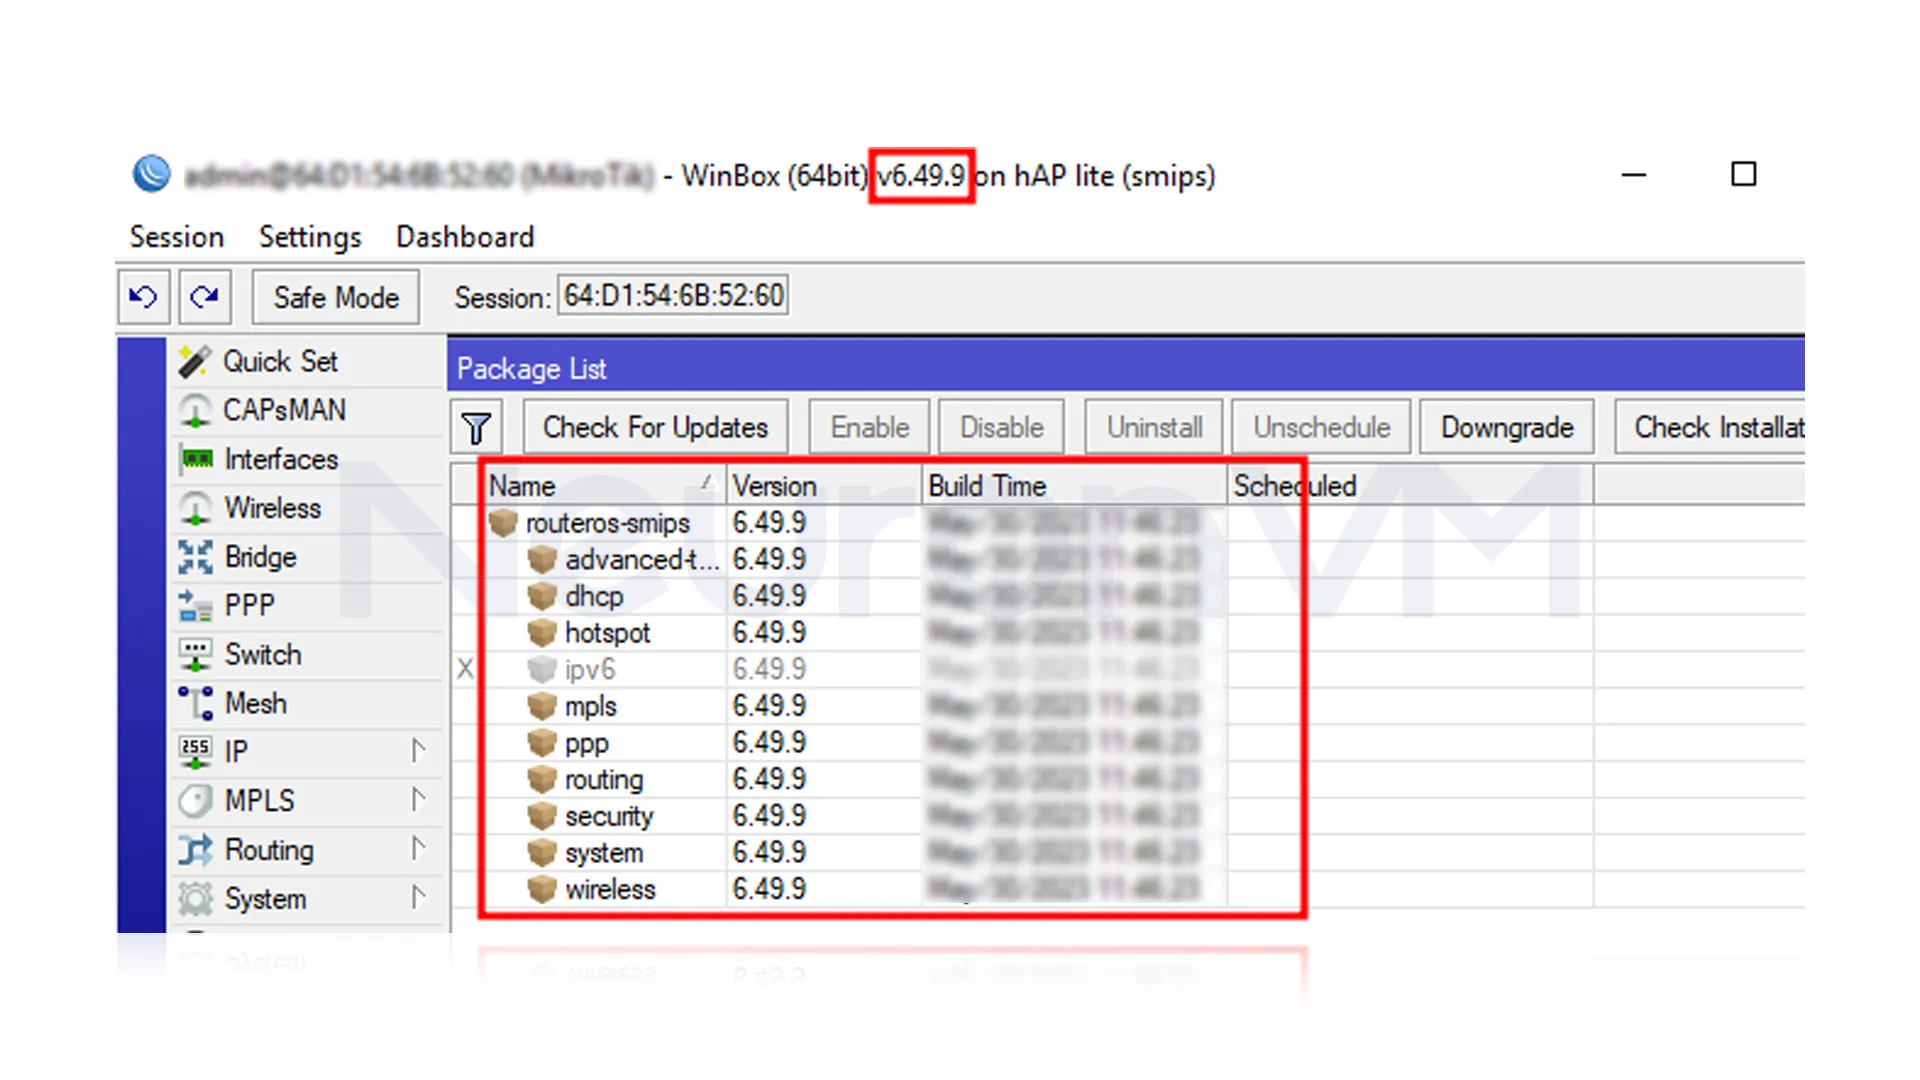
 Open Winbox to see the installed RouterOS version on your MikroTik.
 You’ve now completed all the steps to recover RouterOS using Netinstall.
## Step 8: After Installation
– Reboot the router.
– Use Winbox to access it.
– Set your login, IP address, and restore basic configurations.
## Troubleshooting Tips
If your MikroTik isn’t showing up in Netinstall:
– Check your firewall settings.
– Disable all other network adapters (like Wi-Fi).
– Try a different Ethernet cable or port.
– Hold the reset button for the full required time — usually around 30 seconds — to ensure your MikroTik device enters Netinstall mode successfully.
## Do You Need Help Managing MikroTik Remotely?
Manage your MikroTik device remotely with ease. Our MikroTik VPS supports Netinstall and includes 24/7 expert support to keep you up and running.
## Conclusion
In this guide, we have shown you How to Install Netinstall on MikroTik to fix your router’s software. By following these steps, you can easily install Netinstall on MikroTik and recover your device quickly and safely.