Step-by-Step Guide: Enable UEFI Boot on Linux Mint 21.3

 Study duration :
11 Minutes
Study duration :
11 Minutes
 0 Comment
If you’re planning to install or run Linux Mint 21.3 on a modern system, enabling UEFI boot is essential. It offers faster startup times, better security, and improved hardware compatibility. In this guide, we’ll show you how to enable UEFI boot on Linux Mint 21.3.
UEFI VS. Legacy BIOS: What are The Differences?
UEFI is the new replacement for the old BIOS; it makes the computer start up faster, and it has better security to keep the computer safe, and can use bigger drivers, it is also easier to use.
Why You Should Enable UEFI Boot on Linux Mint 21.3
Enabling Linux offers many benefits, like faster boot times, support for larger hard drives, and improved security features like Secure Boot, so it is the right choice for the current hardware and software.
A Guide to Enable UEFI Boot on Linux Mint 21.3
We will provide you the easiest method available to enable boot for Linux Mint, but before starting, make sure the included requirements.
Requirements
- System with UEFI support
- A USB flash drive: at least 4 GB, has Linux Mint 21.3 ISO
- Back up all your important data
Note: If you already have Windows, this process will let you run both Windows and Linux Mint on the same computer.
Step 1: Checking and Switching to UEFI
1-First, you need to make sure your computer is set to use UEFI.
2-If it is not set to use UEFI, you will need to go into its settings, this step is usually done by pressing F2, F10, F12, or Delete.
3-Look for a setting named “Boot” and change it to “UEFI” if it is on “CSM” or “BIOS.”
❗Note: Make sure to take a screenshot before making changes to boot settings, for having a record, so if anything goes wrong, you can change it to its original settings.
### Step 2: Make a Bootable USB
1-Visit the official Linux Mint website and download the Linux Mint 21.3 file.
2-In this article, we will use a program called Balena Etcher to put Linux Mint onto your USB drive.
 To create a bootable USB using Balena Etcher:
3-Download the Balena Etcher and open it.
4-Plug in your USB drive.
5-Choose the downloaded Linux Mint 21.3 ISO file.
6-Click “Flash” and wait for it to create a bootable USB.
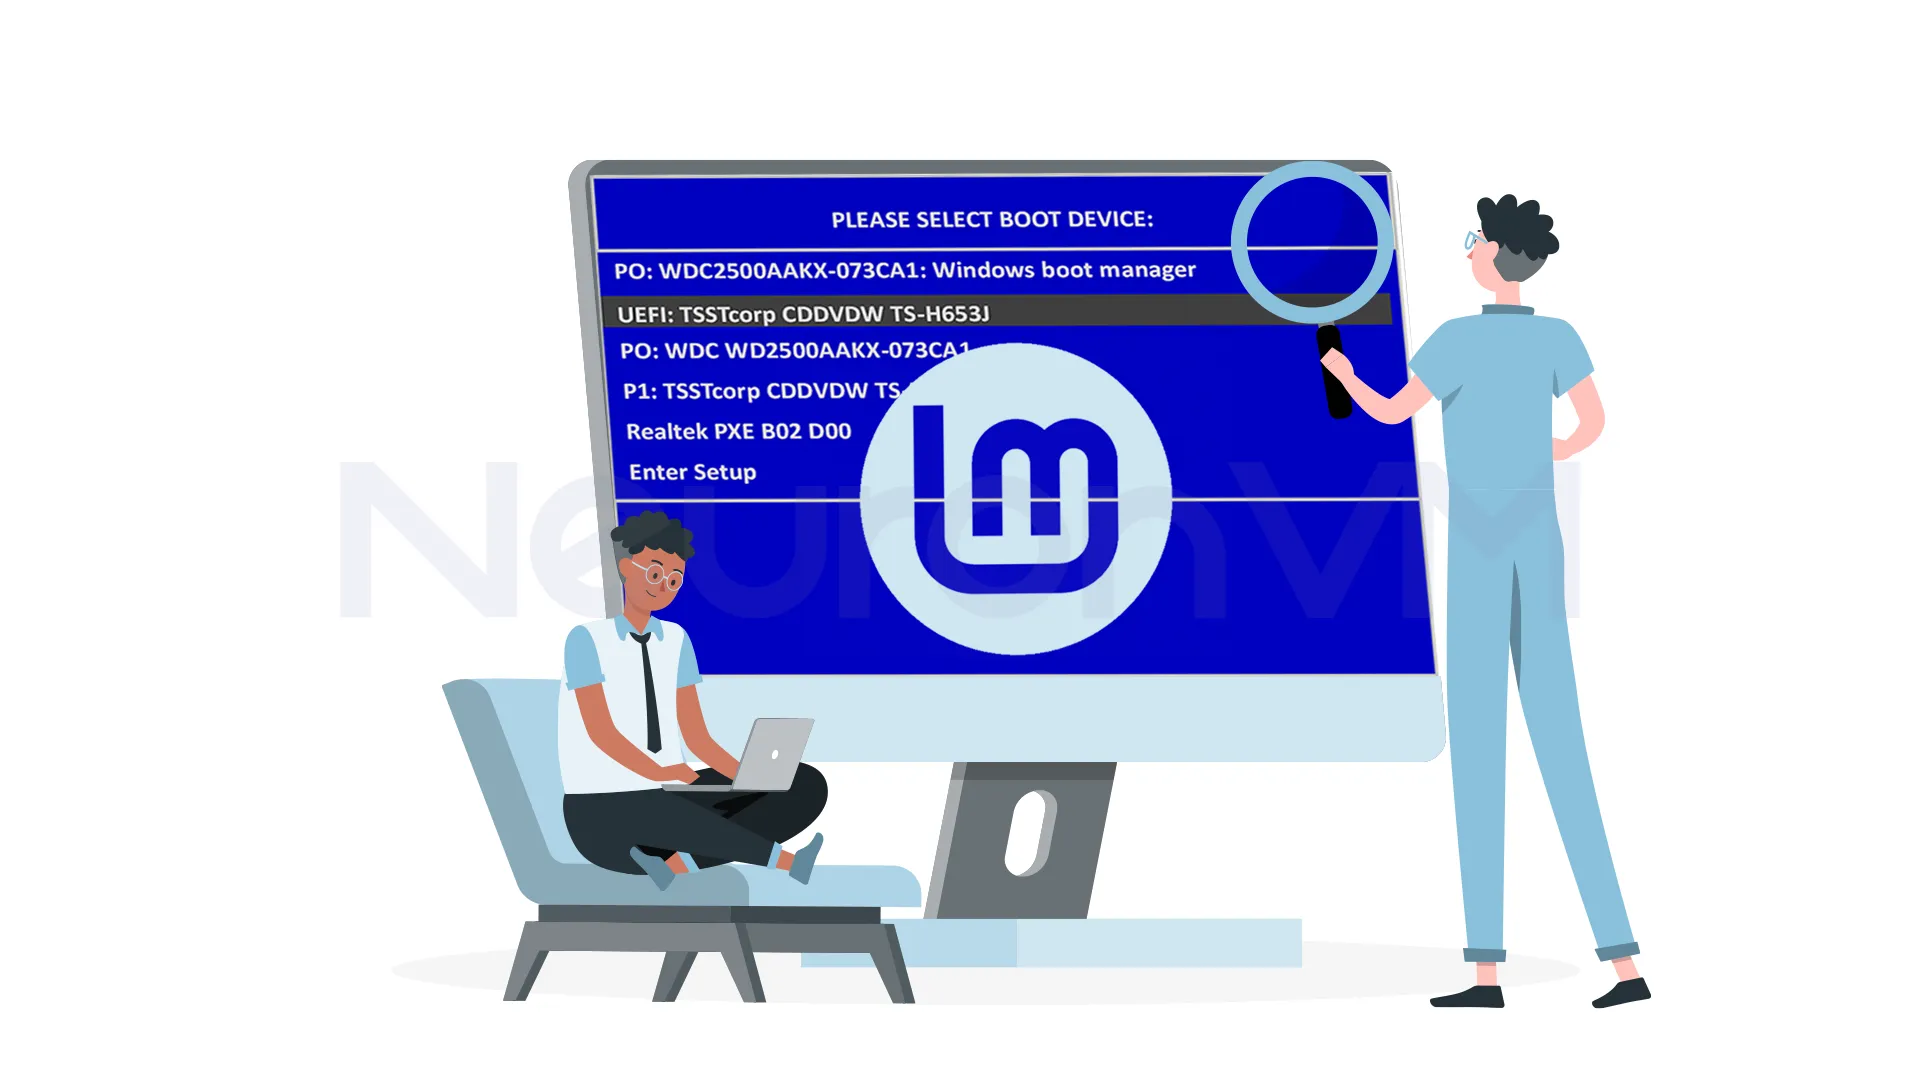
Step 3: Boot from the USB drive
1-Plug the USB drive into your computer and restart it.
2-As we have explained in step 1, go back to your computer’s settings.
3-You need to find the “Boot Order” and make sure your USB drive is on top of the list.
4-Save the changes you have previously made, your computer will start from the USB drive.
5-If it didn’t start from the USB drive by default, select the USB drive from the menu.
Step 4: Install Linux Mint 21.3 in UEFI Mode
1-Once Linux Mint starts from the USB, click on “Install Linux Mint.”
2-Choose the language as you desire and click on “Next.”
3-You can choose the installation type, the installer should automatically use UEFI.
4- Set your username, password, and time zone to finish the installation.
Step 5: Verify UEFI Boot is Enabled on Linux Mint 21.3
1-Open the terminal in Linux Mint.
2-Check the UEFI mode by entering the command below in the terminal.
[ -d /sys/firmware/efi ] && echo "UEFI mode" || echo "Legacy mode" || echo "Legacy mode"
3-If the output is “UEFI Mode,” the installation is successful, but if it says “Legacy Mode,” or an error, you will need to restart the process all over again.
4-If you get an error message, double-check that you typed the command correctly.
Step 6: Troubleshooting Common Issues
Even with a careful setup, UEFI installation can sometimes run into some issues, here is how to fix them.
GRUB not Appearing
You might see a black screen, or your computer might boot straight into Windows, if that happens, make sure your computer’s settings are all set to boot from the drive where Linux Mint is installed. If that didn’t work, Reinstall GRUB from a live Linux Mint session.
Boot Looping or Missing OS
If your computer keeps restarting, or if you are getting an error message saying it can’t find the operating system, make sure your hard drive or SSD is properly connected, and if you messed with partitions, use a live Linux Mint USB to check your partitions.
UEFI Entry Overwritten by Windows
Windows updates can sometimes mess up the boot settings, so you can only boot into Windows to fix this, go to your UEFI settings and set Linux Mint as the default boot option.
How to Use Boot Repair in UEFI
To use boot repair in UEFI, download the Boot Repair ISO and create a bootable USB drive. Then boot your computer from the Boot Repair USB, and it will give you a “Recommended Repair” option, which will fix the most common issues.
Tips for Dual-Boot Systems
Handling GRUB and Windows Boot Manager: It is a program that lets you choose between Linux Mint and Windows, you have to keep Windows updated to reduce the risk of interfering with GRUB. Sometimes changing the boot order in the UEFI settings can fix the problem.
Boot Order Management from UEFI Menu
You can choose which operating system to start first, and change the restart order in GRUB settings so Linux Mint can start first, or Windows, as you desire, You can also do this by pressing a key like F12 during startup.
Conclusion
In this guide, we provided a clear and straightforward pathway to Enabling UEFI Boot for Linux Mint 21.3, a crucial tutorial for modern systems for enhanced security and performance, by following the outlined steps one by one, from verifying UEFI to completing the installation process, you can successfully configure your Linux Mint system for UEFI using our tutorial, remember to backup your data and double-check settings, you can check to see if you had successfull innstalation following the instructions of the last step, we recommend you to explore the official Linux Mint website for further information and staying updated with Linux Mint community, Thanks for reading till the end of this article on NeuronVM.

