How to Transfer Files from Ubuntu laptop to Windows desktop


 Study duration :
12 Minutes
Study duration :
12 Minutes
 0 Comment
Are you looking for a way to transfer files from Ubuntu laptop to Windows desktop? Follow us through!
Good news for Ubuntu users who need to transfer files to a Windows desktop: there are a few painless ways to do it. In this post, we will walk you through the most common methods so that you can choose which one works best for you!
The best Methods to transfer files from Ubuntu laptop to Windows
Below are a few of the most common yet efficient ways through which file transfer from an Ubuntu laptop to a Windows desktop can be achieved, each having some advantages of its own:
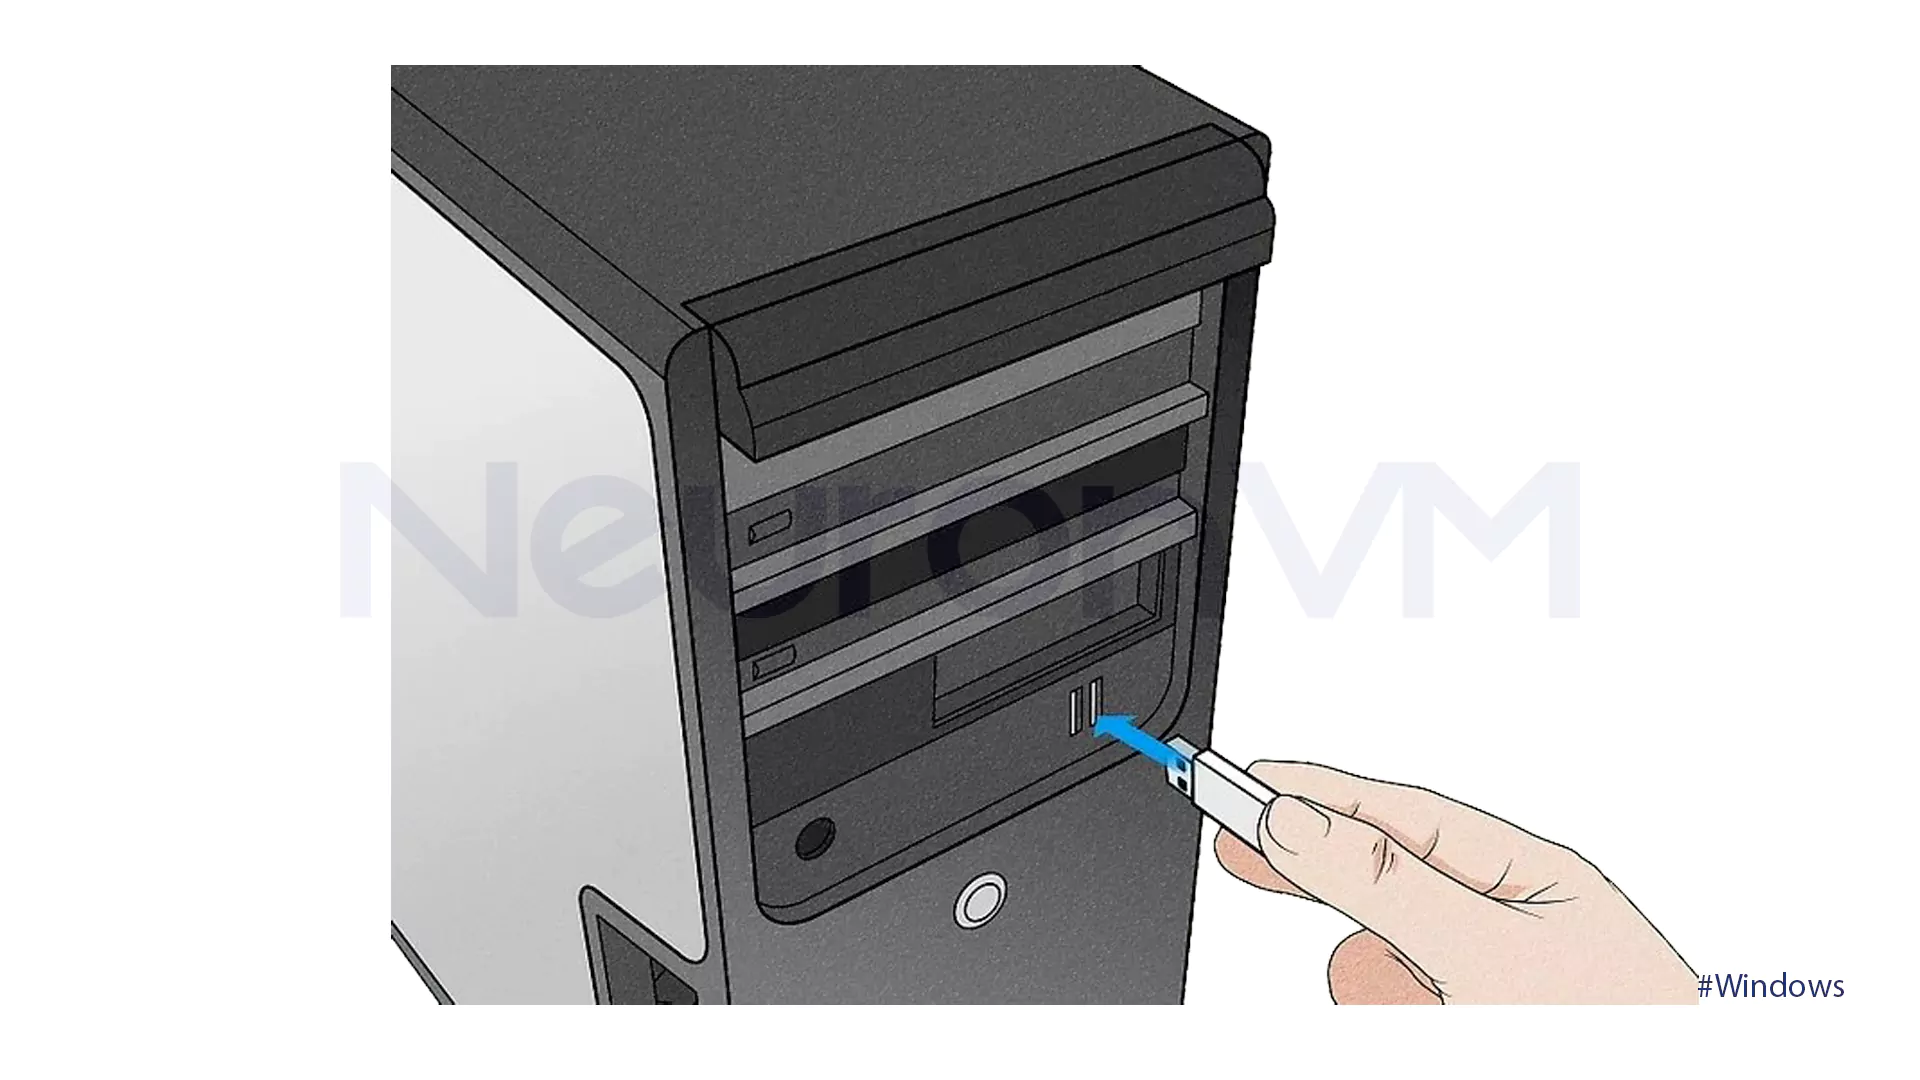
Method 1: Transfer files using a USB Drive
The first method to transfer files from Ubuntu laptop to Windows is easy, but you must have access to both machines:
- Connect the USB drive to your desktop running Ubuntu.
- Open the Files application, then look for the files you want to transfer.
- Drag the files into the folder for the USB drive.
- For added safety, you can safely eject the USB drive by right-clicking and choosing Eject.
- Next, connect the USB drive to your Windows laptop.
- Copy the files from the USB drive to your desired destination on your Ubuntu laptop.
Method 2: Transfer files via SSH
The second way to transfer files from Ubuntu laptop to Windows is to transfer by using SSH. For this method, you must install and enable SSH on your Ubuntu laptop and then have an SSH client application on your Windows desktop. We will use Putty for this example. Then, we will share your files over the network using commands:
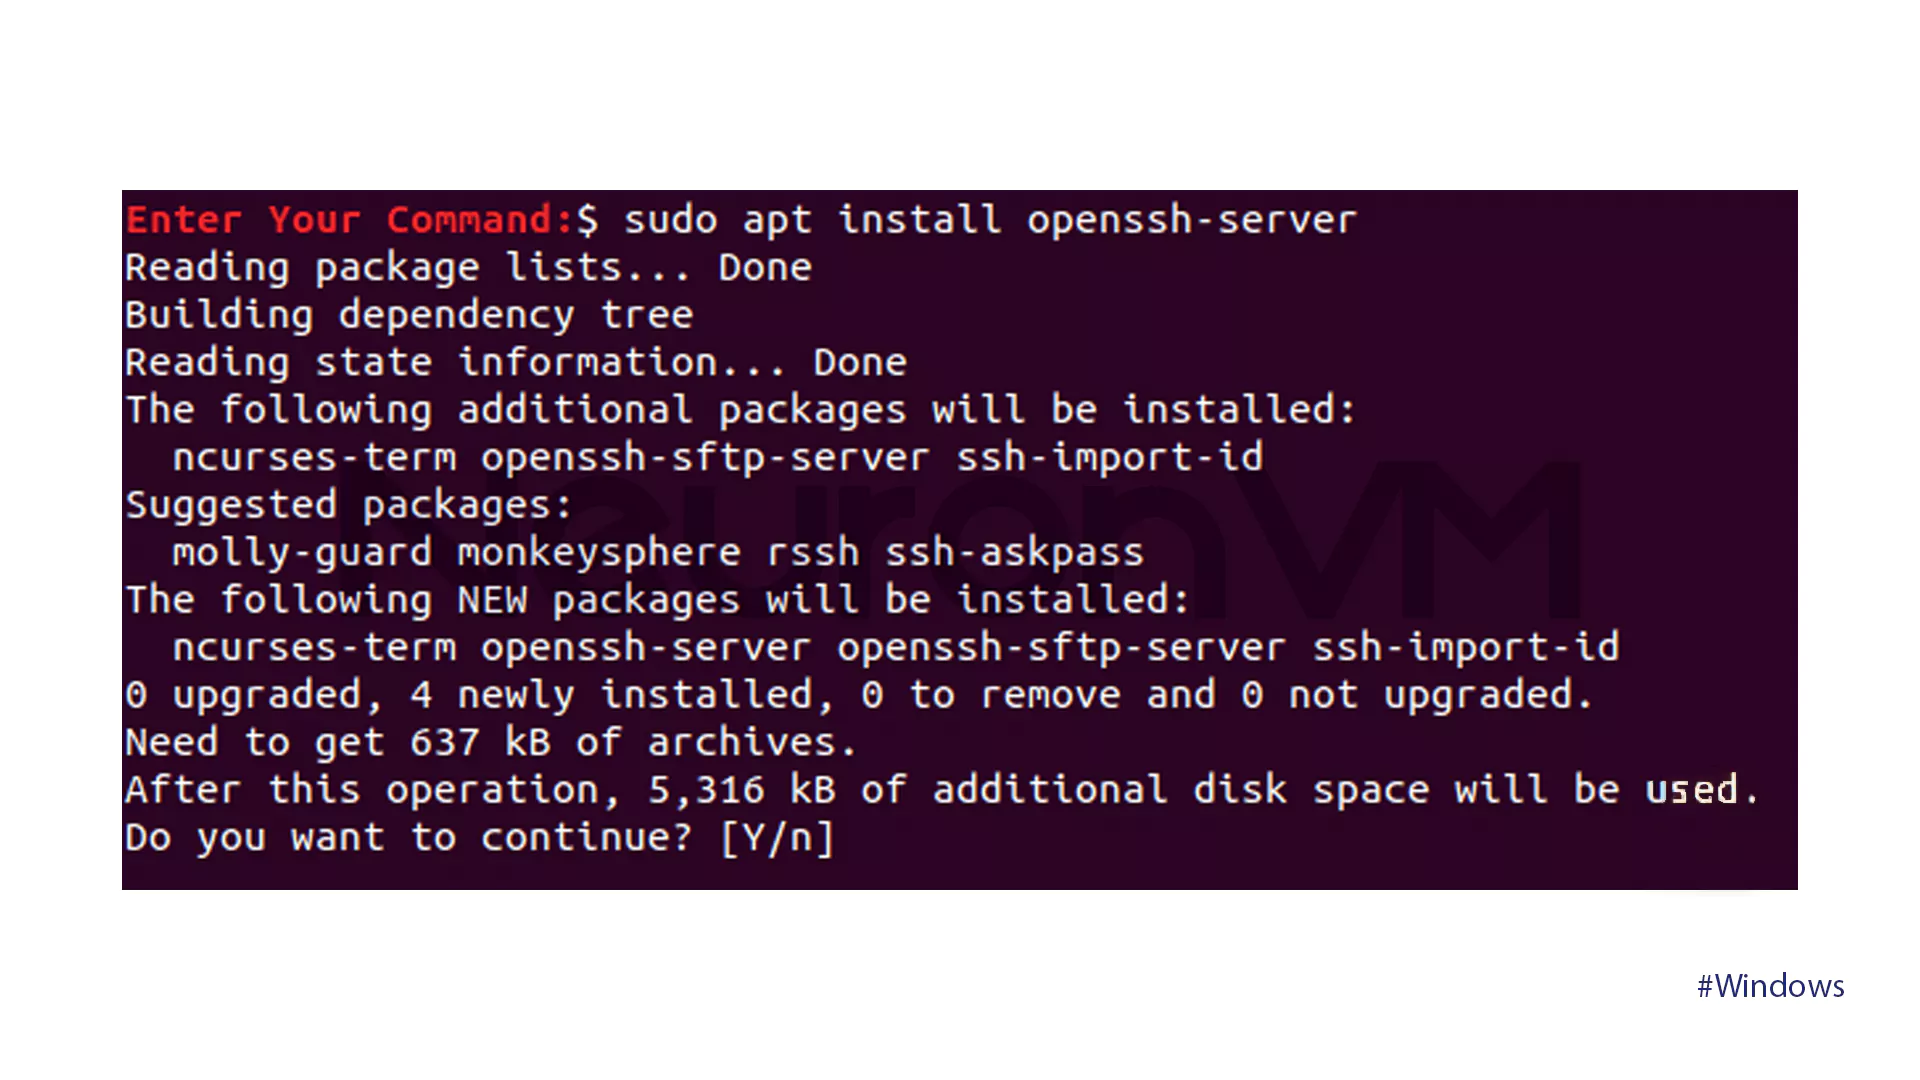
- There is one line to activate SSH on Ubuntu. For that, you must open the Terminal and type in this command:
sudo apt install openssh-server
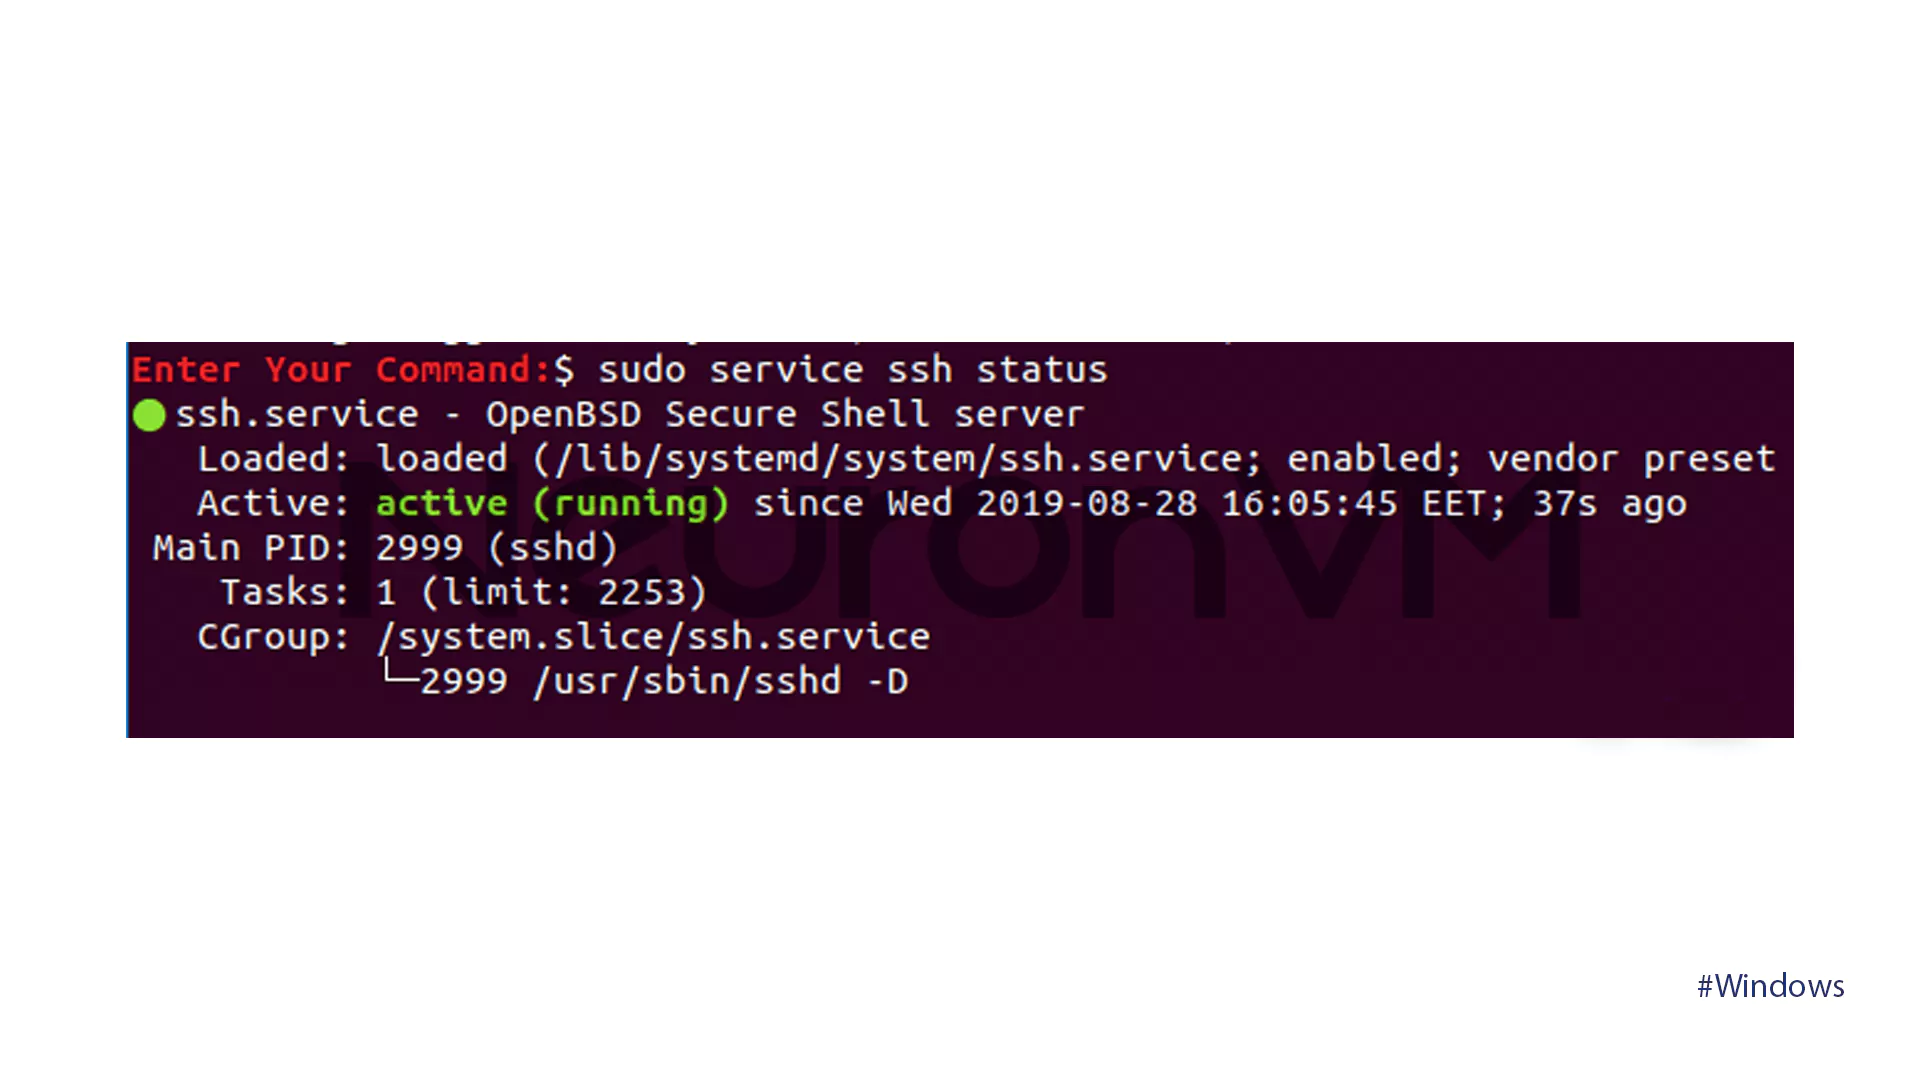
- Once installed, you can verify that the SSH service is running without problems using this command:
sudo service ssh status
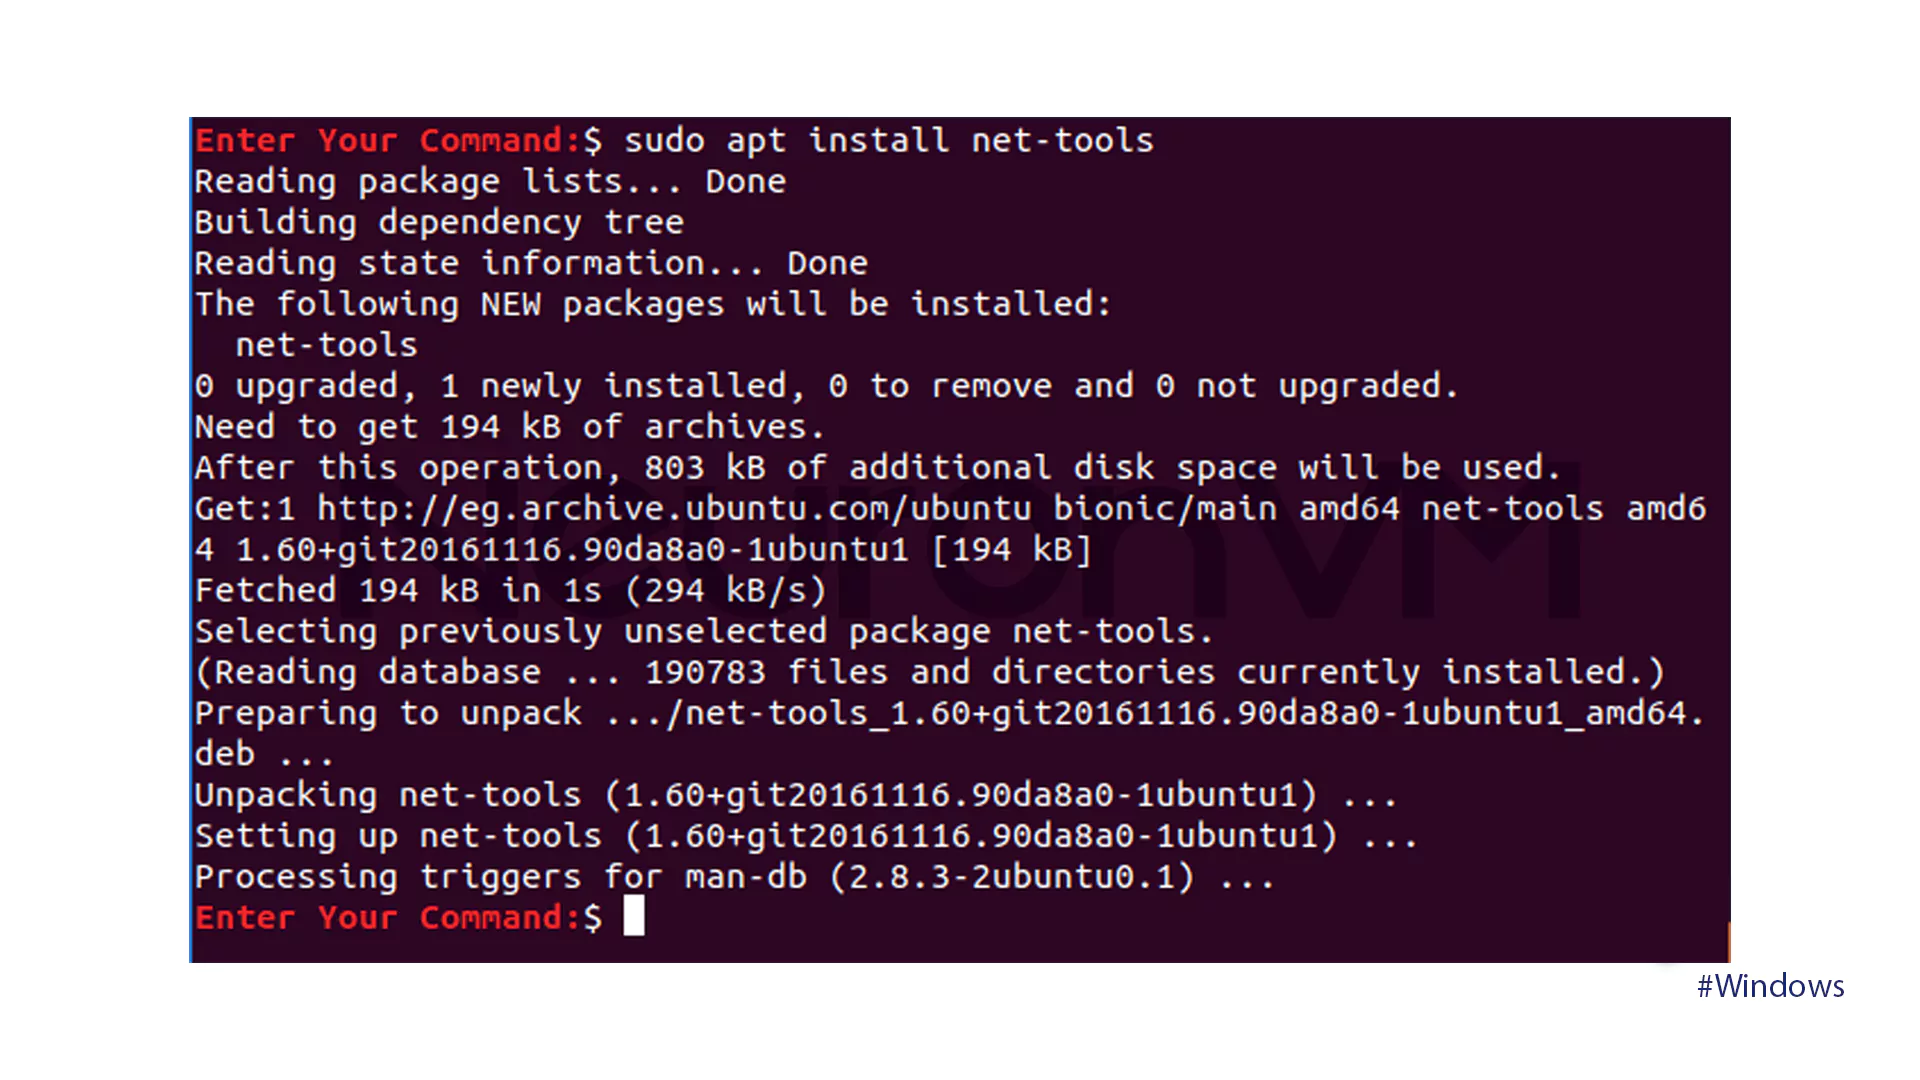
- First, you will need to install the net tools package. To use the Terminal, type the command below:
sudo apt install net-tools
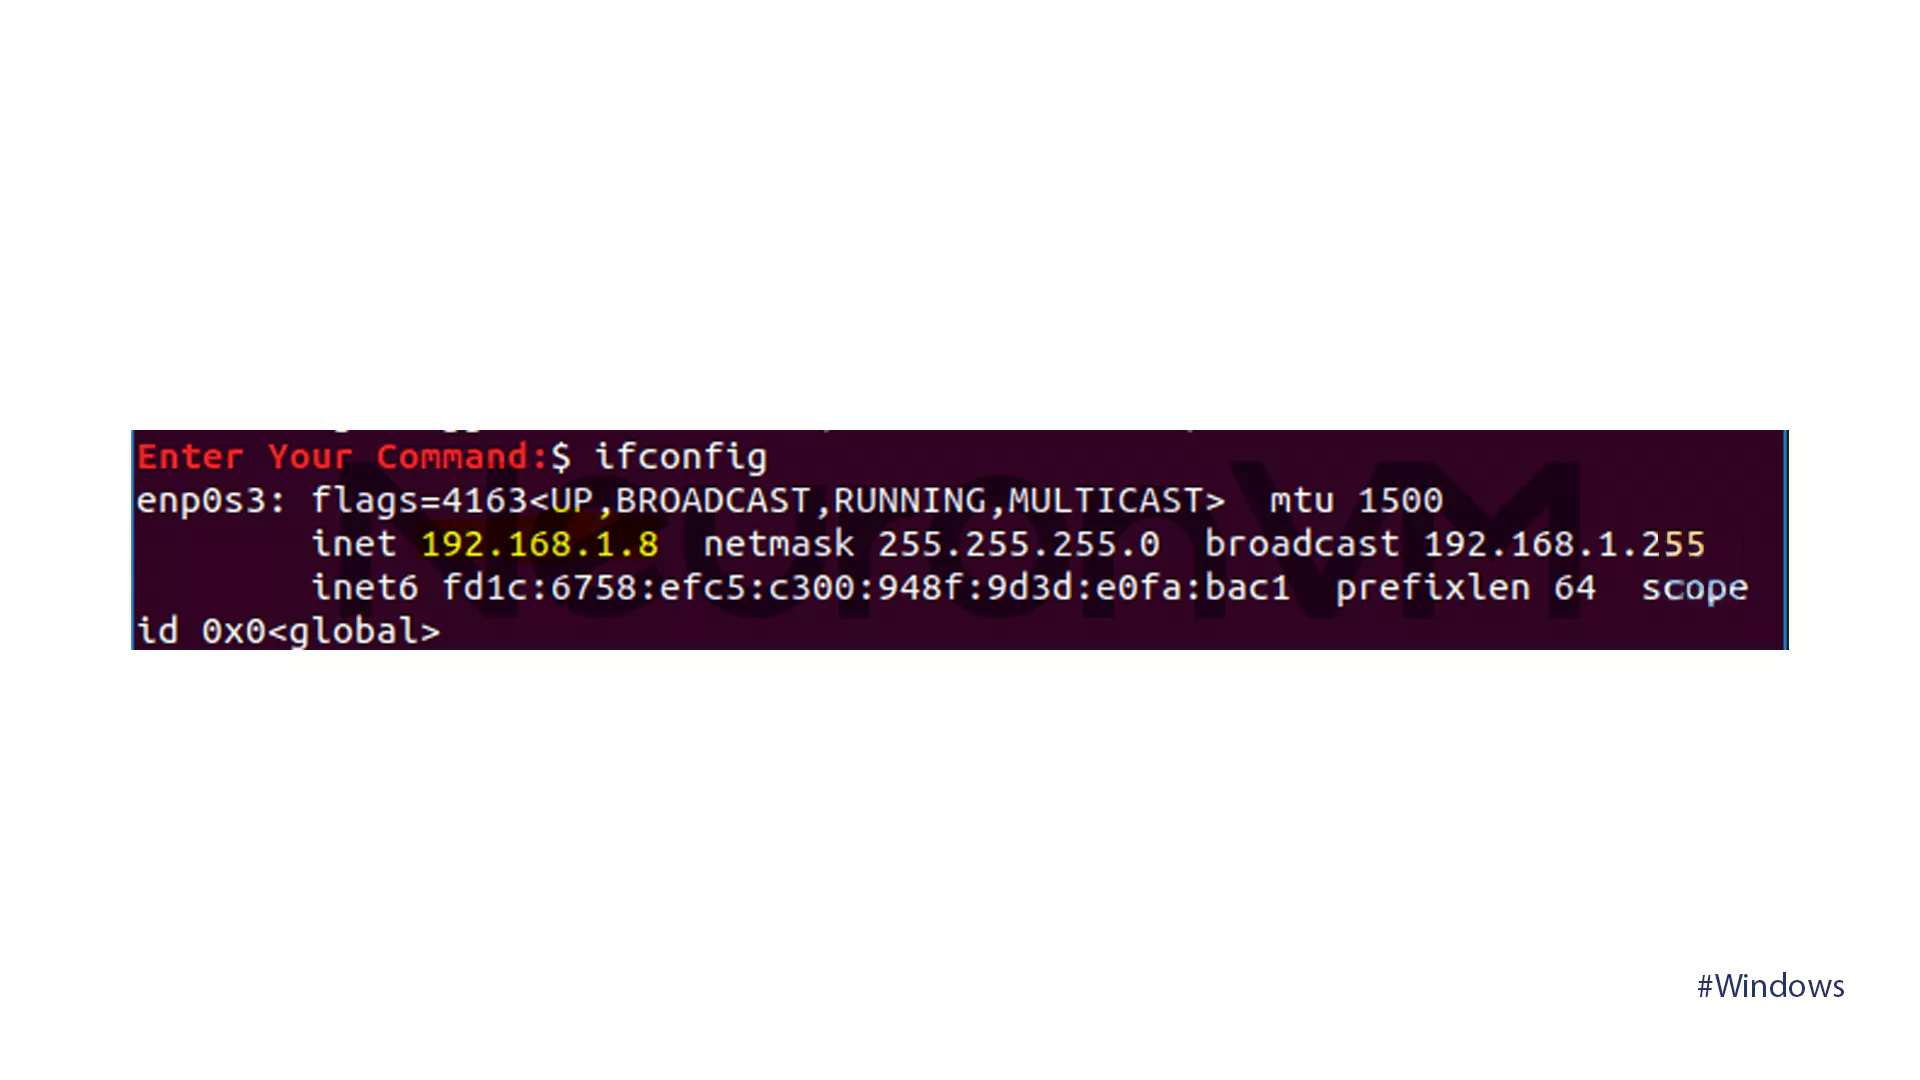
- The following is the next command you should use to find the IP address of your Ubuntu machine:
ifconfig
- On your Windows system, you’ll need to download two things: PuTTY and PSCP. PuTTY is your key to accessing your Ubuntu system, while PSCP allows you to transfer files securely. You can find both on the PuTTY website. PuTTY requires installation, but PSCP is ready to use once the download completes; place the PSCP.exe file in your C: drive for easy access.
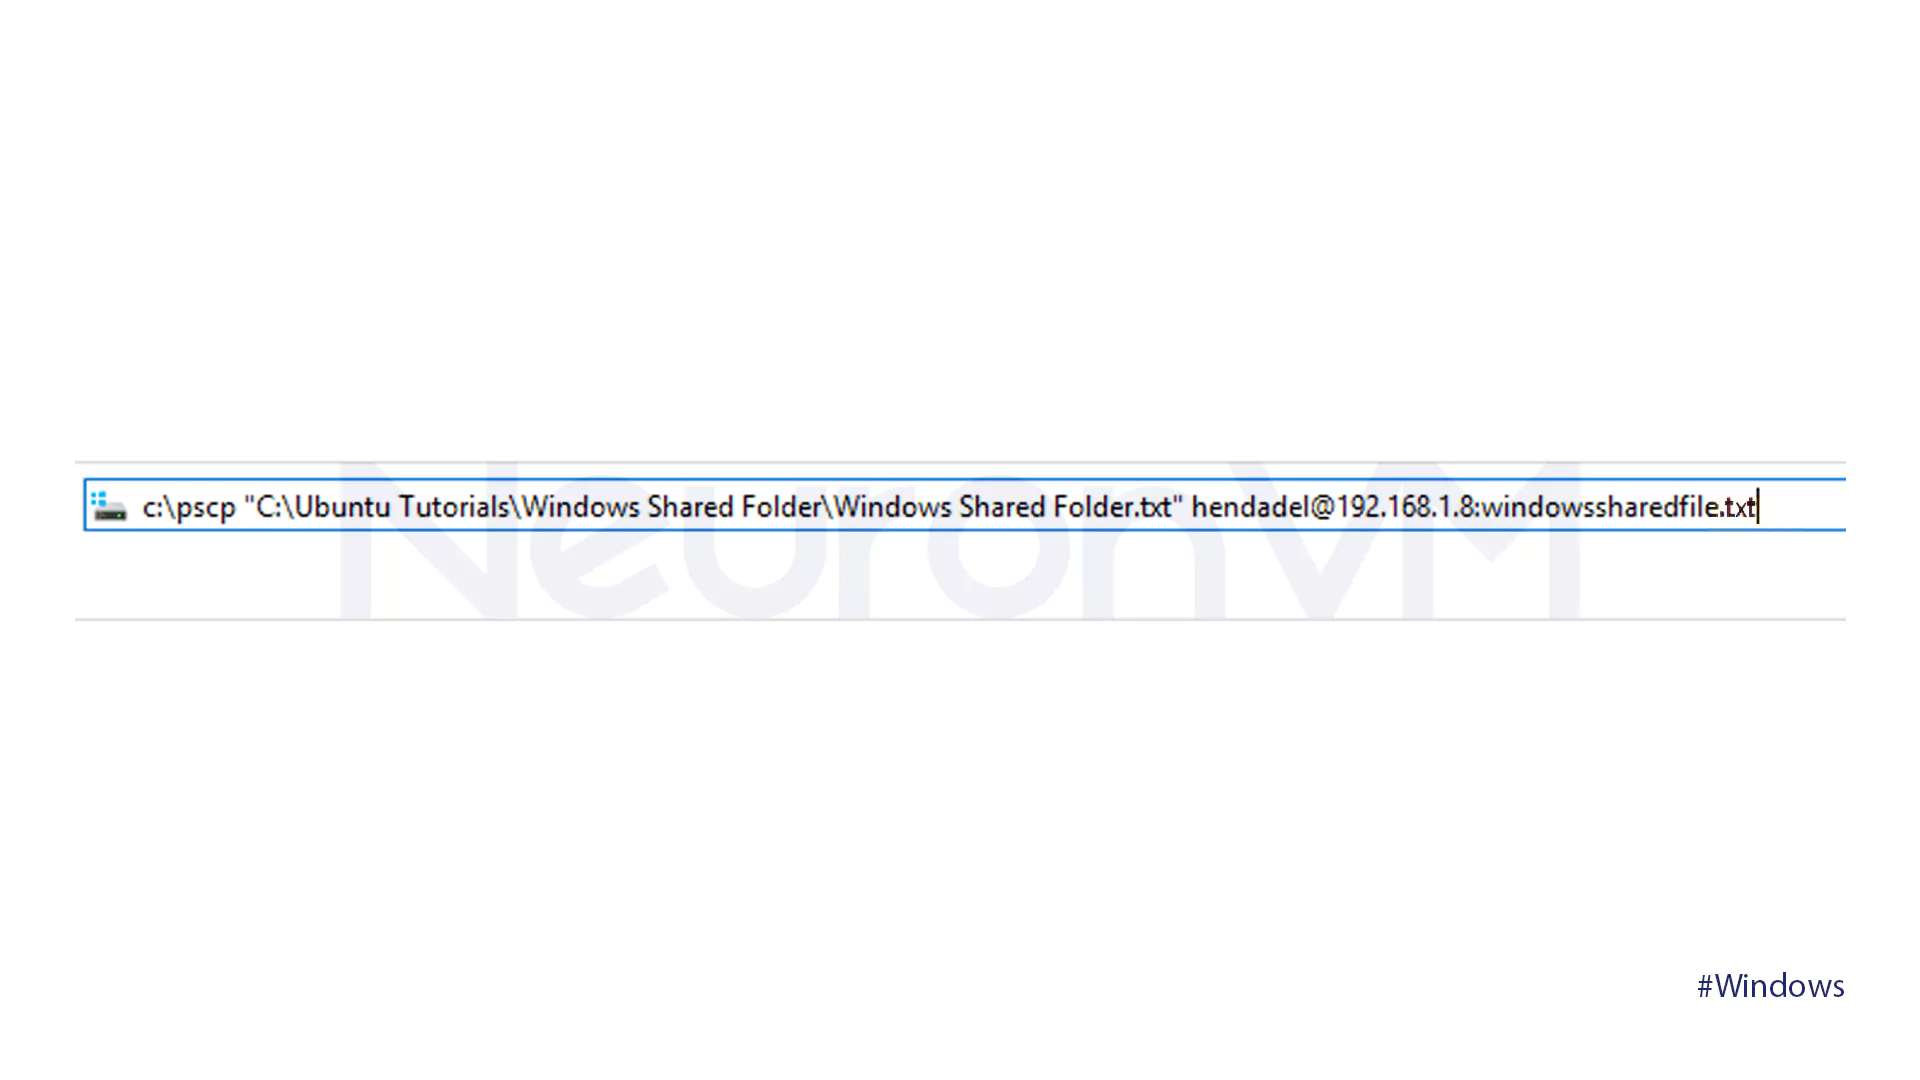
- Now, open the file explorer and run the following command to start transferring files from your Windows machine to Ubuntu.
c:\pscp "C:\Ubuntu Tutorials\Windows Shared Folder\Windows Shared Folder.txt" [email protected]:windowssharedfile.txt
- You’ll need to type in your Ubuntu password.
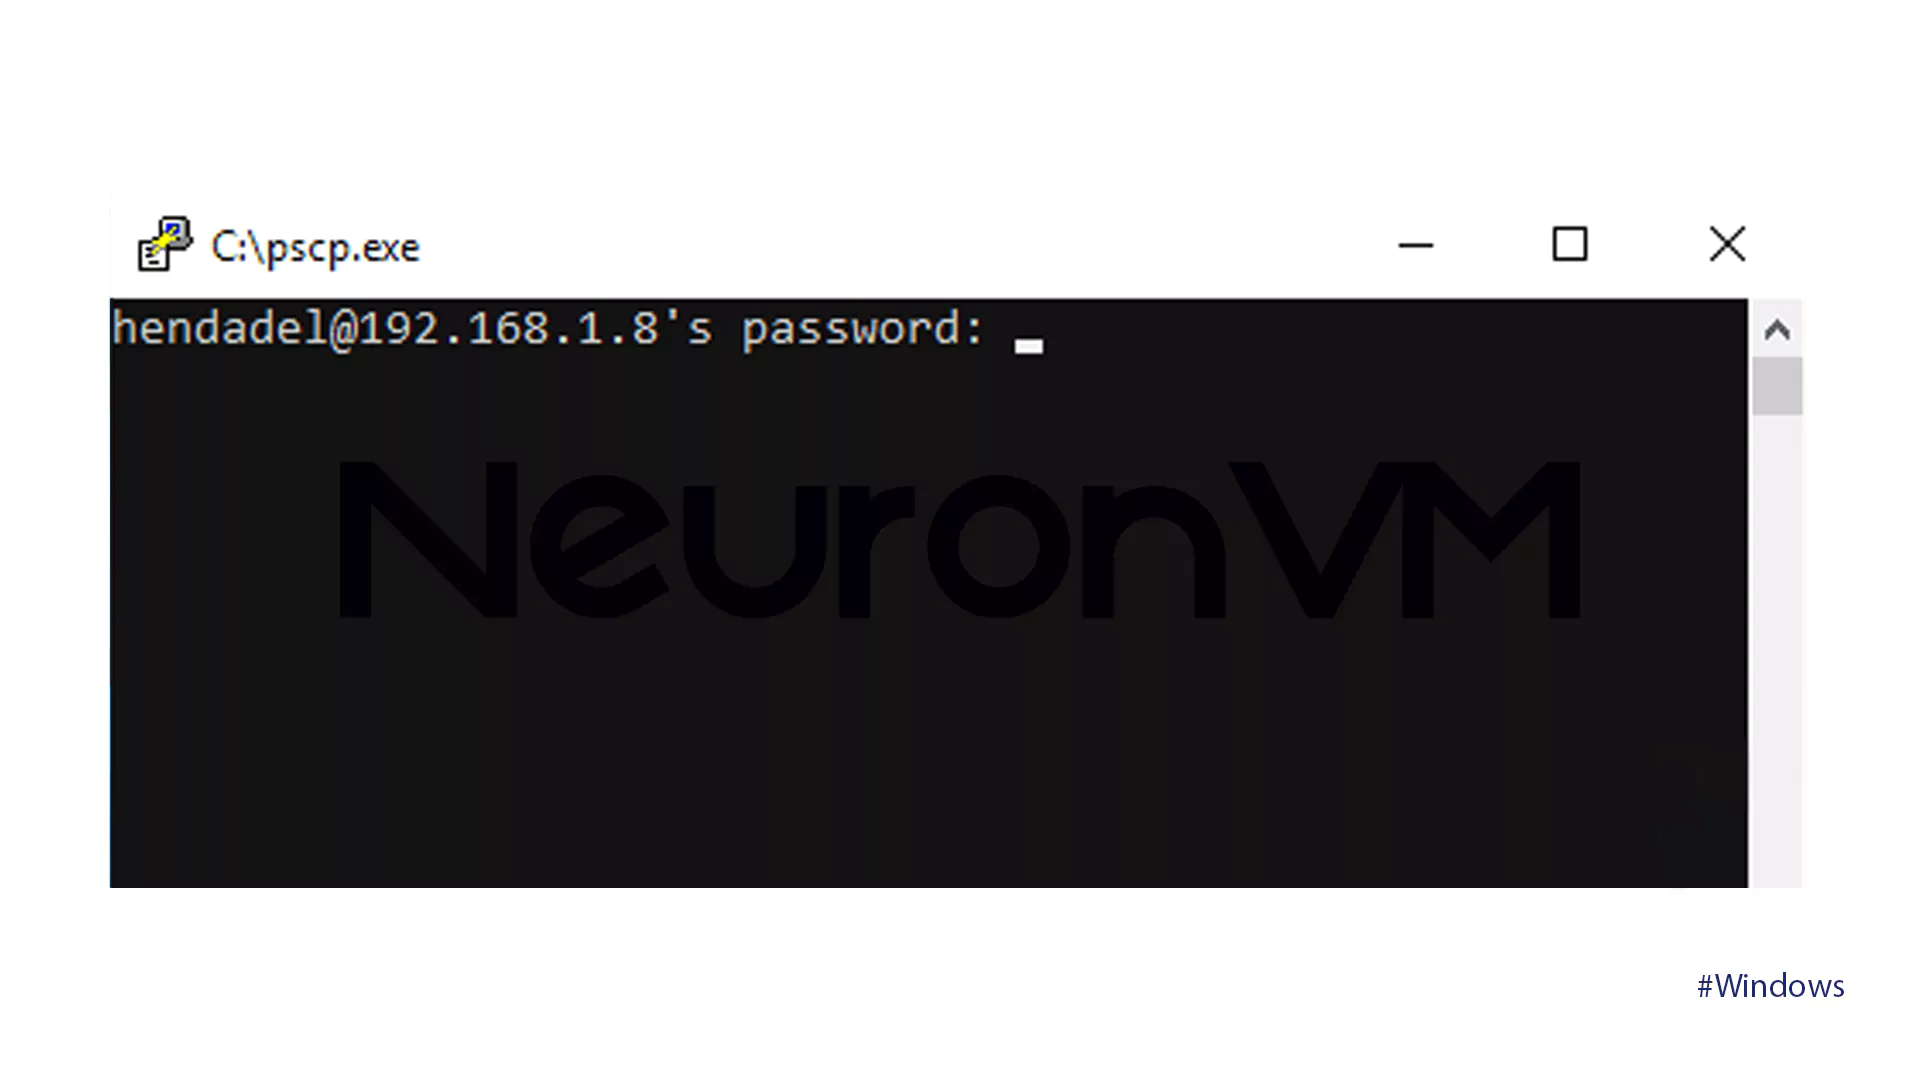
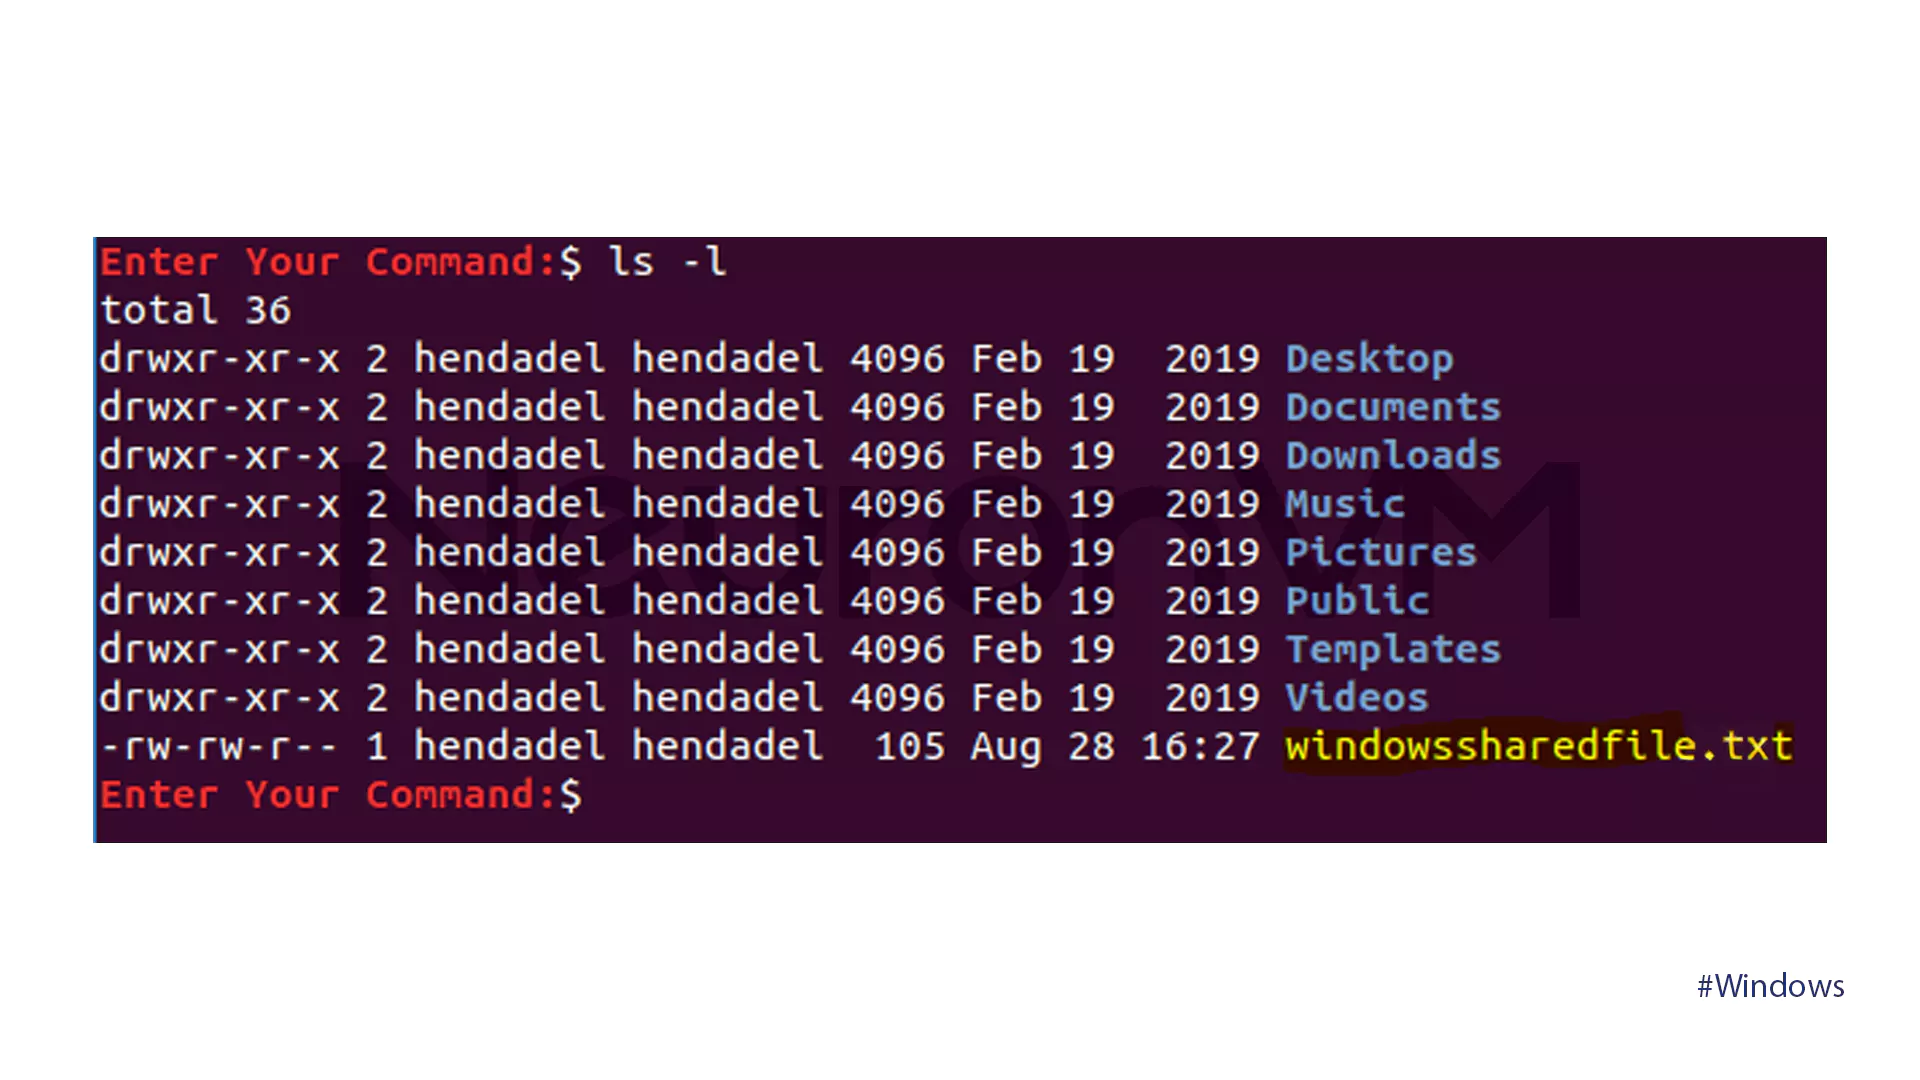
- If you correctly enter the password, this command will copy the Notepad text file from your Windows system to your Ubuntu home directory. You can now find the file in the home directory.
- Suppose you want to copy files from your Ubuntu machine to Windows. Start by opening the file explorer on the Windows machine, then execute the following command:
c:\pscp [email protected]:ubuntushared.
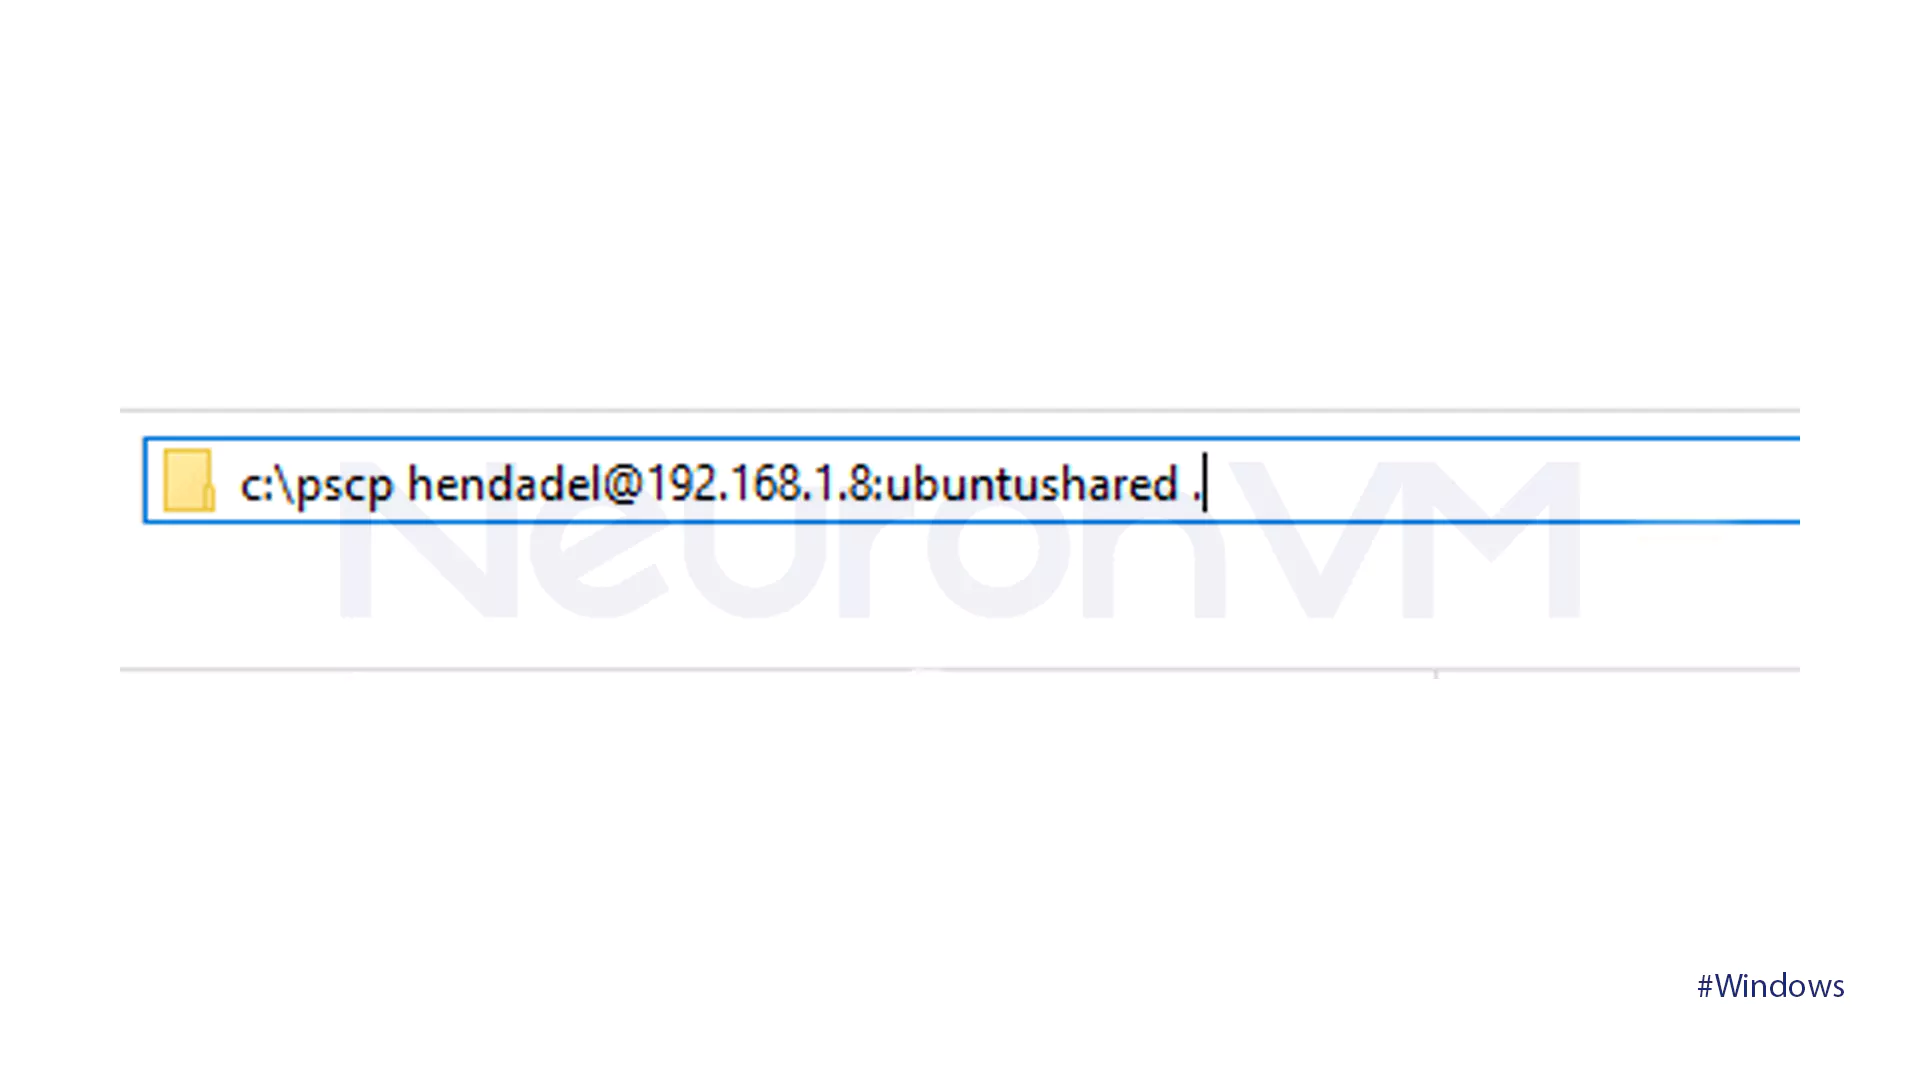
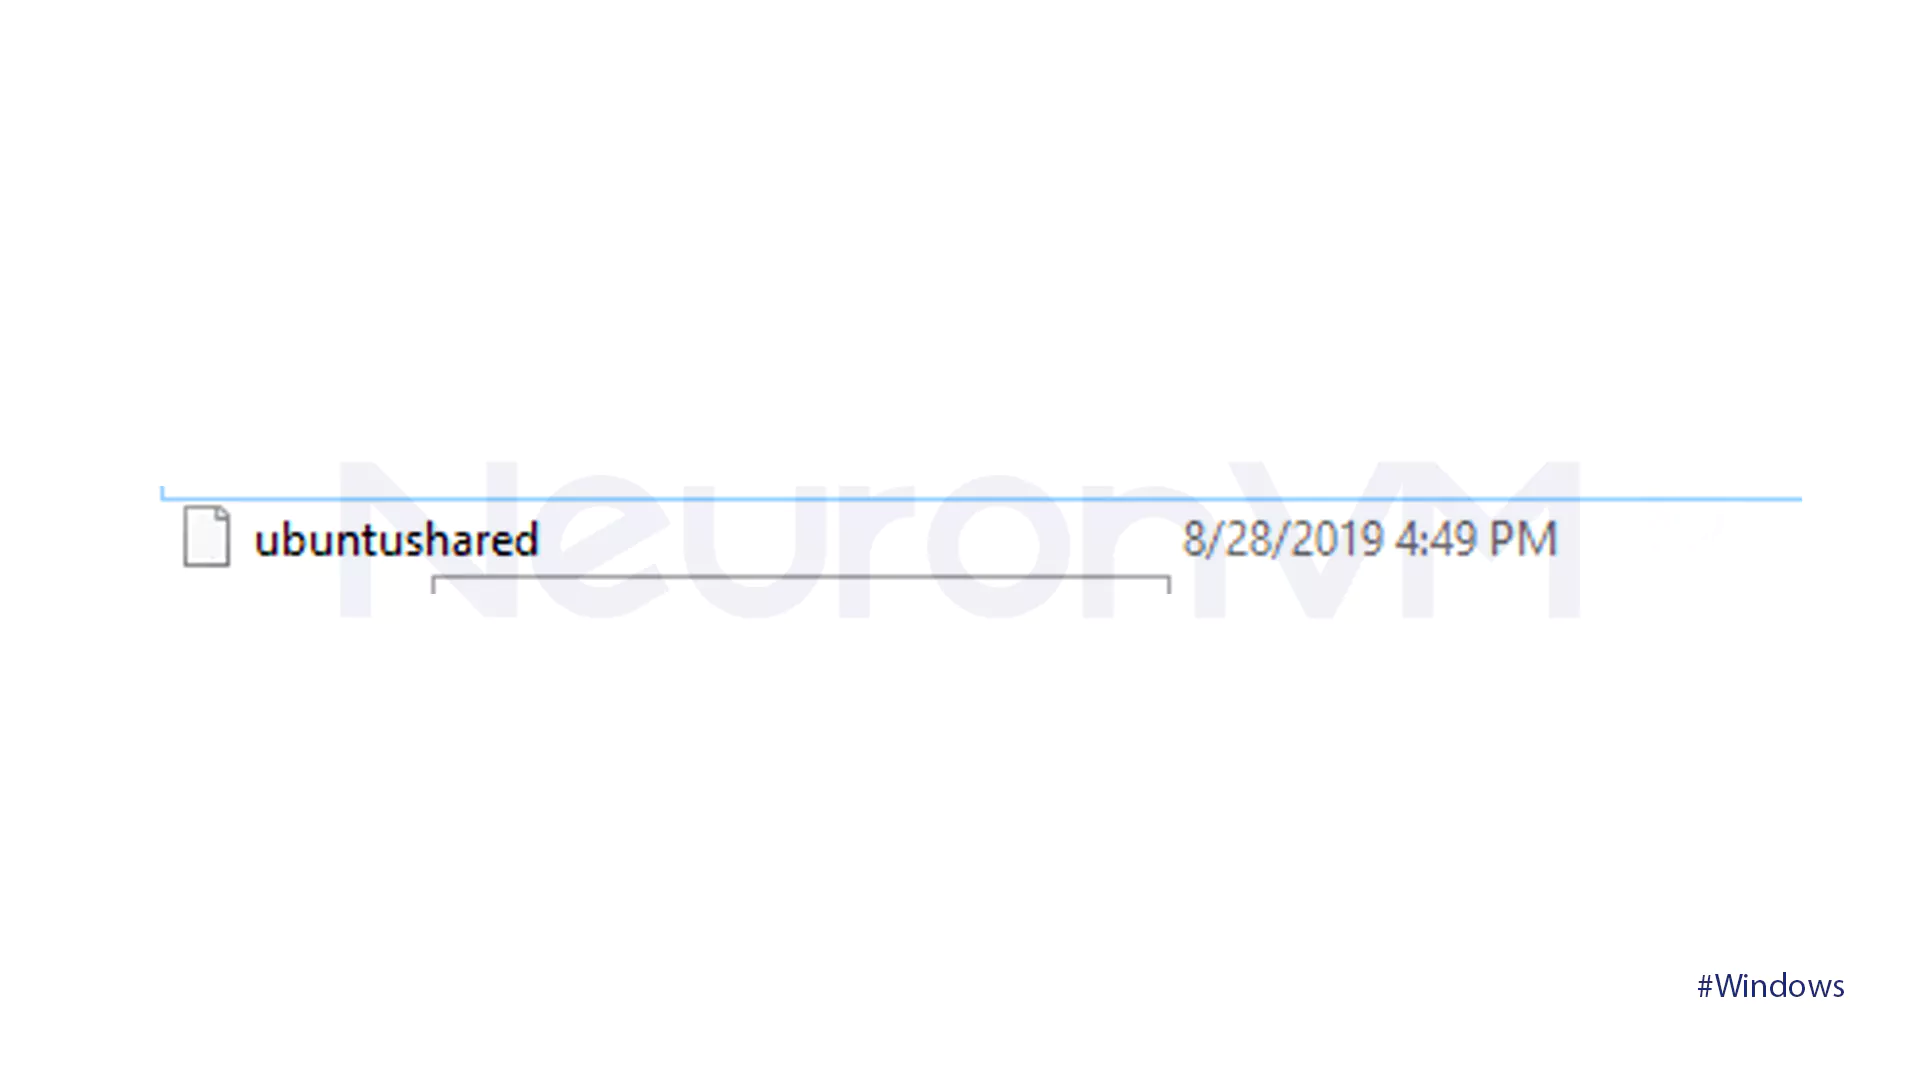
- Can you see the dot at the end of the command? When you execute the command, you will be asked to provide the password of your Ubuntu machine. Then, the file will be copied from Ubuntu to the current Windows directory.
Method 3: Transfer files using Samba
The third method for transferring files from Ubuntu laptop to Windows is to use Samba. In this method, we will install the Samba package on Ubuntu. We will also use the Windows Run program,m to access the shared folders of Ubuntu.
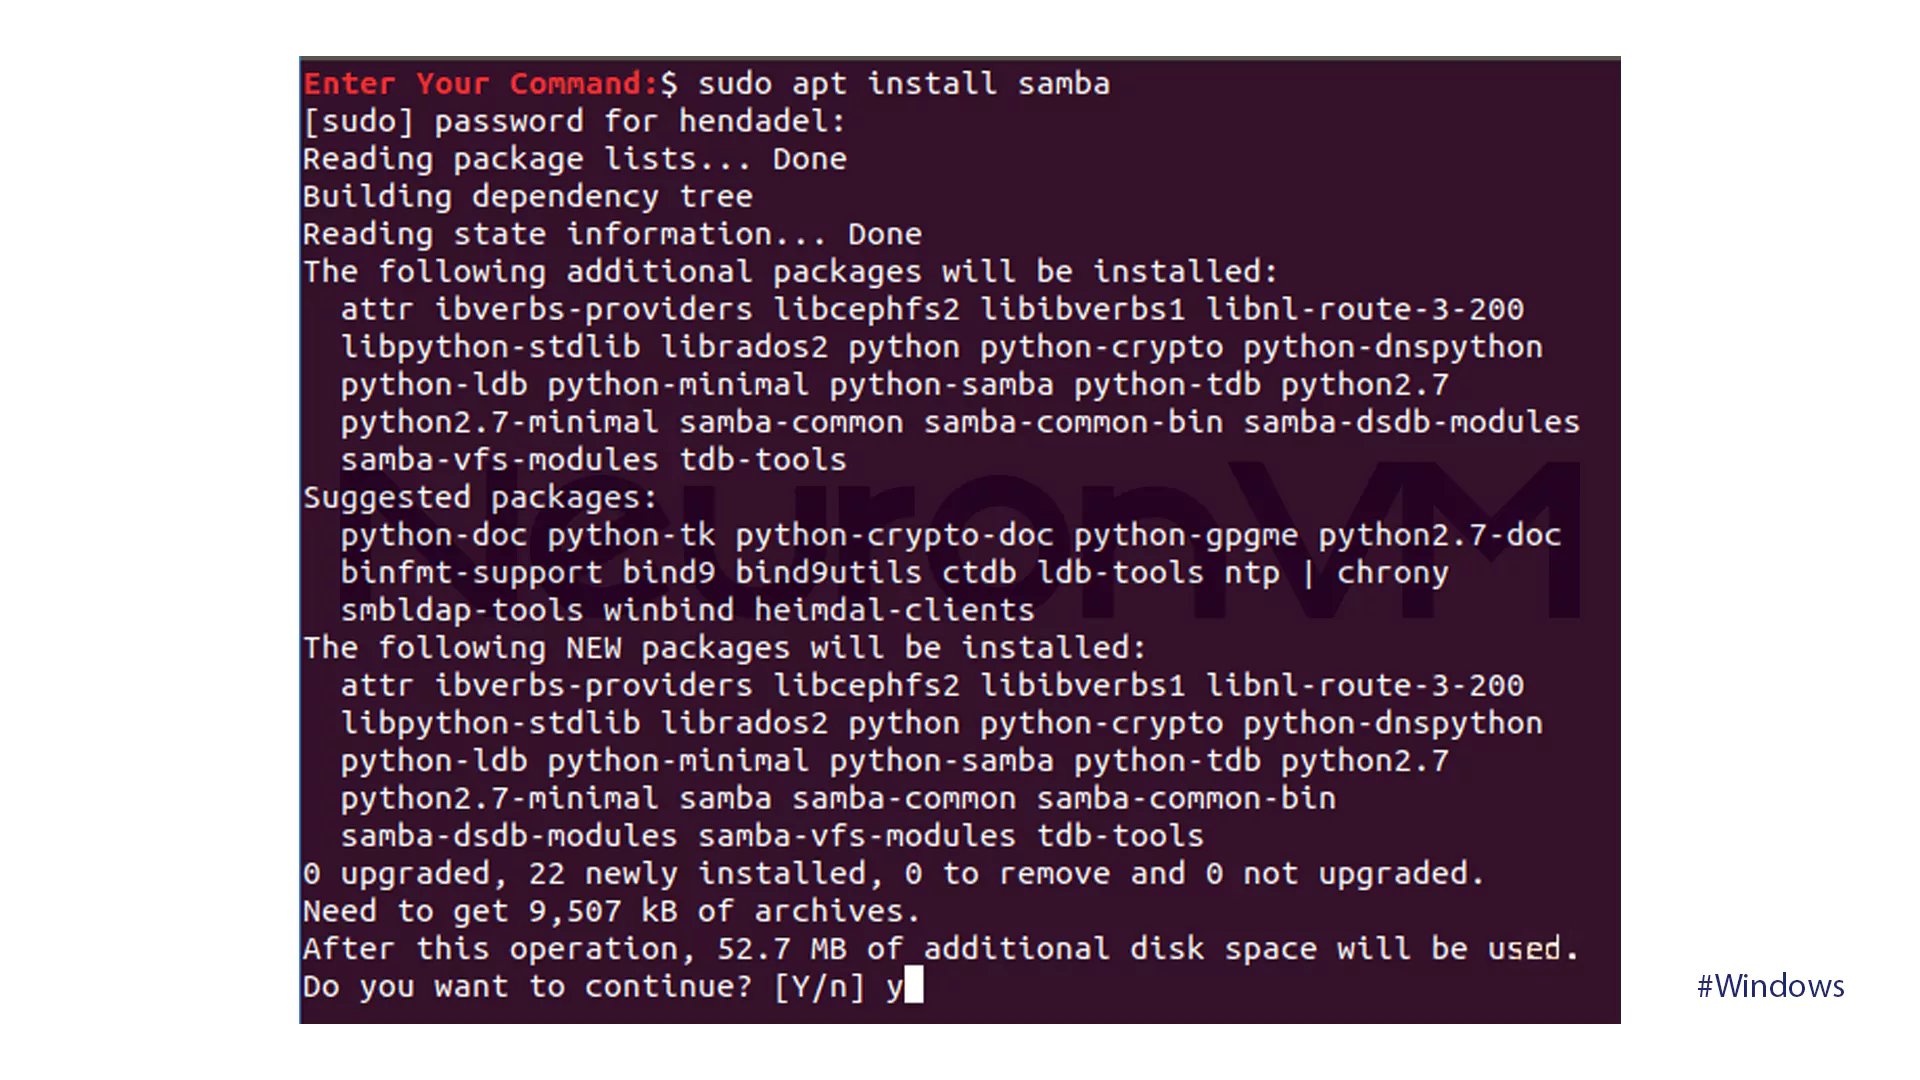
- Install the Samba package on Ubuntu with the command below:
sudo apt install samba
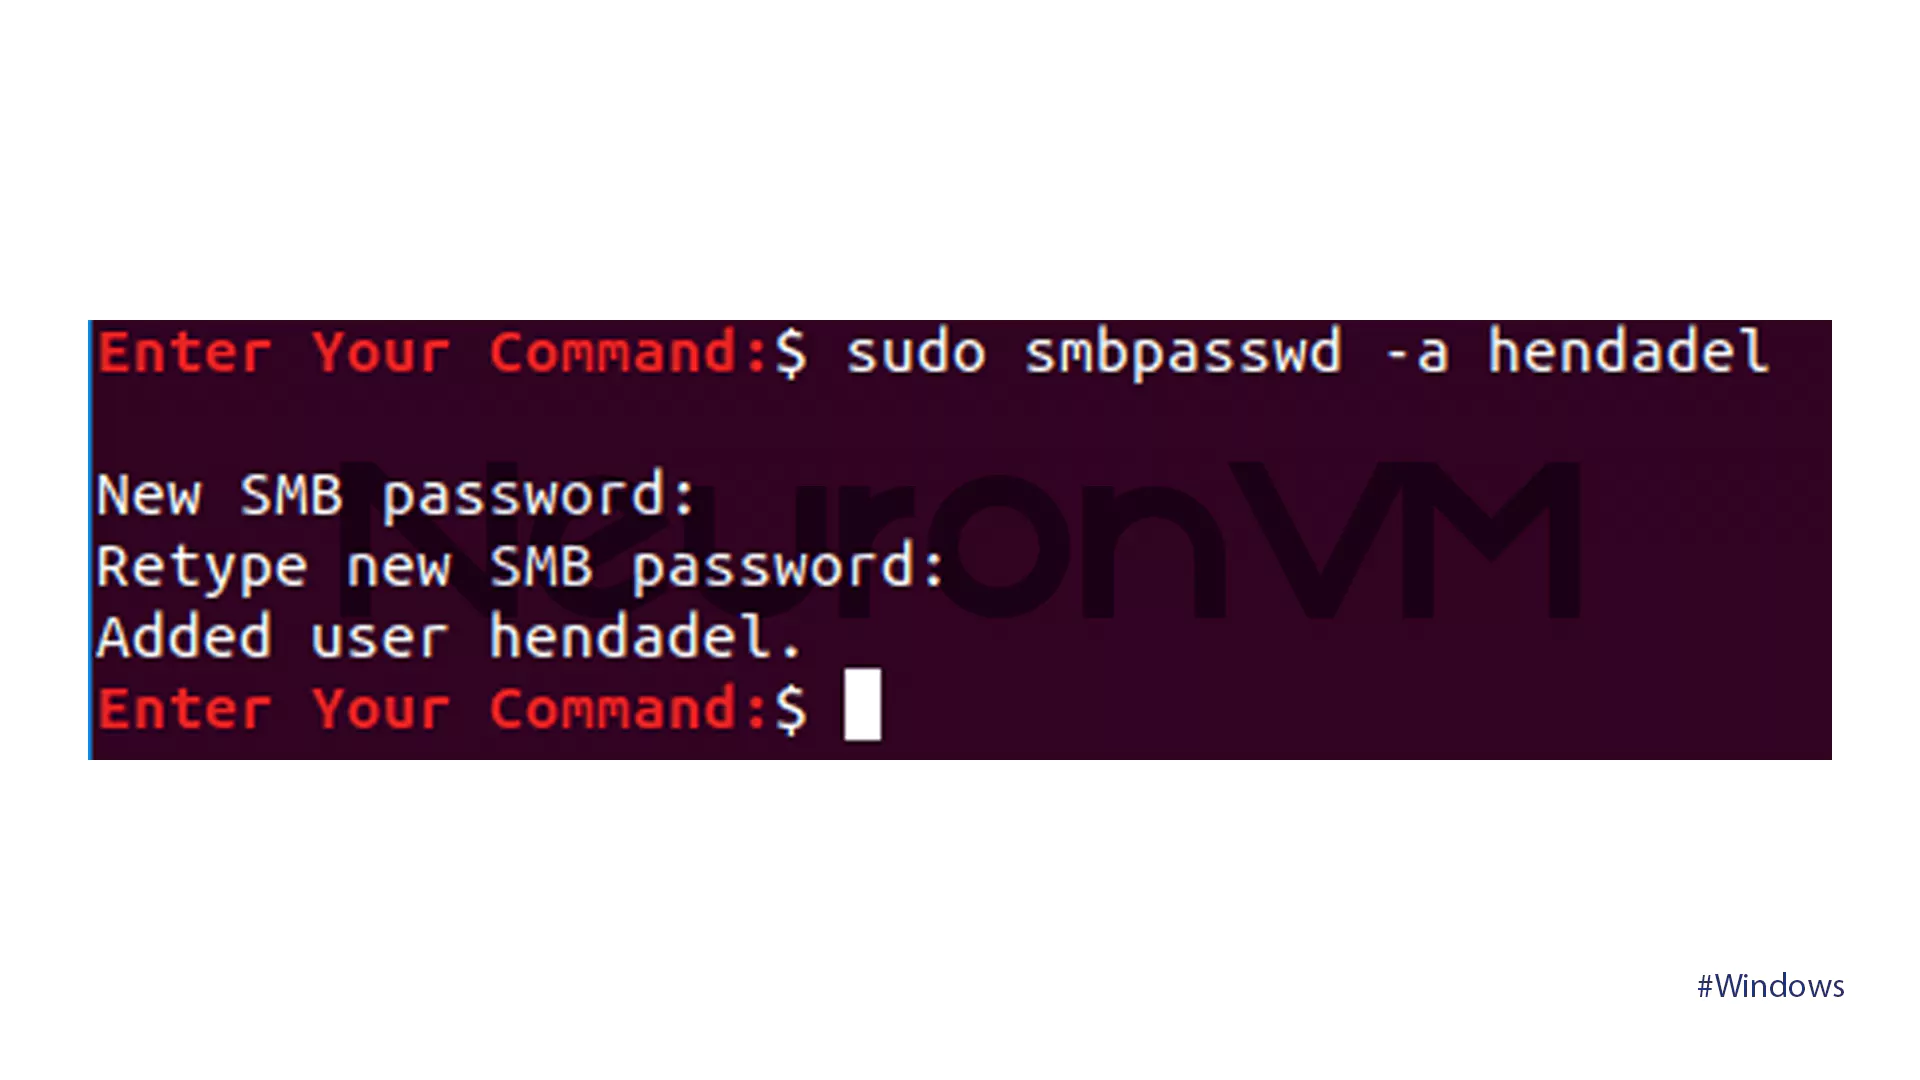
- You can give a password to the Samba share with the following command. Where hendadel is an Ubuntu user that you will be using when accessing the Ubuntu shared directory:
sudo smbpasswd -a hendadel
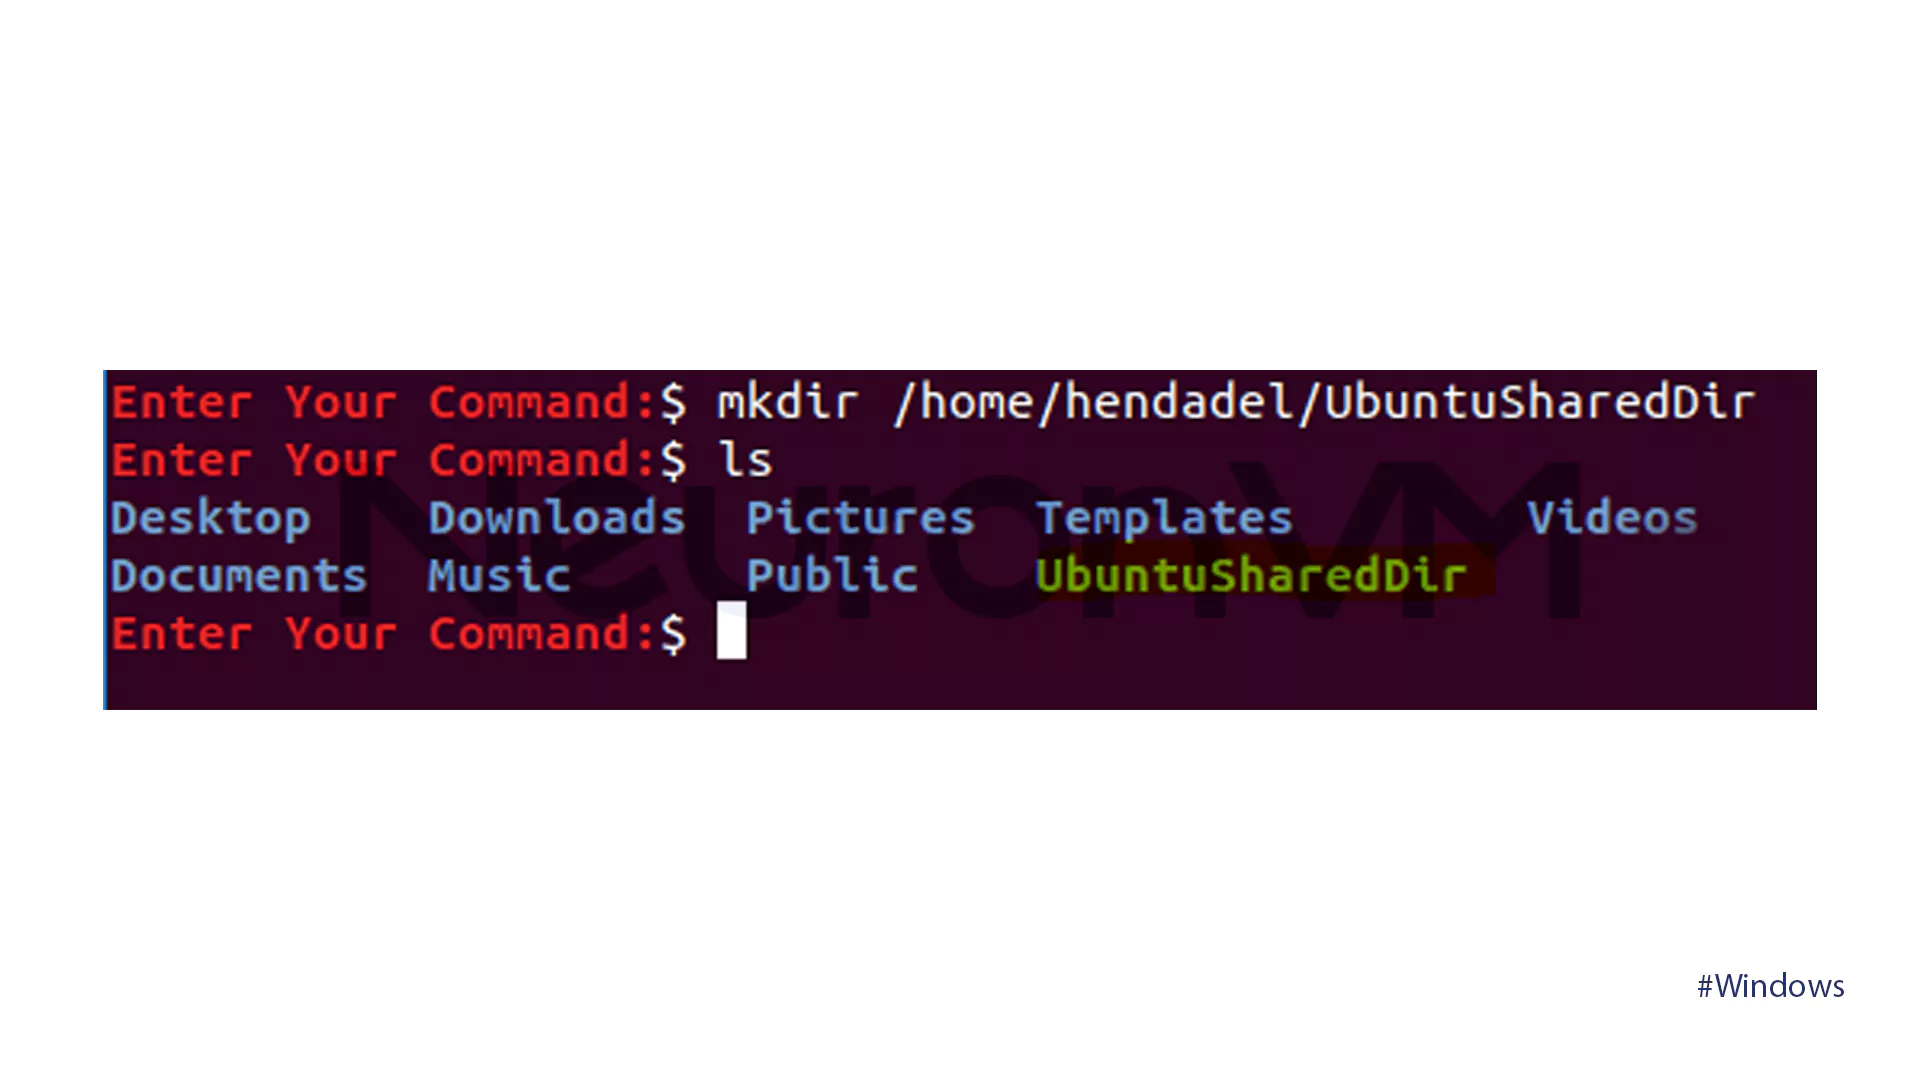
- Let’s create a directory to share your files:
mkdir /home/hendadel/UbuntuSharedDir
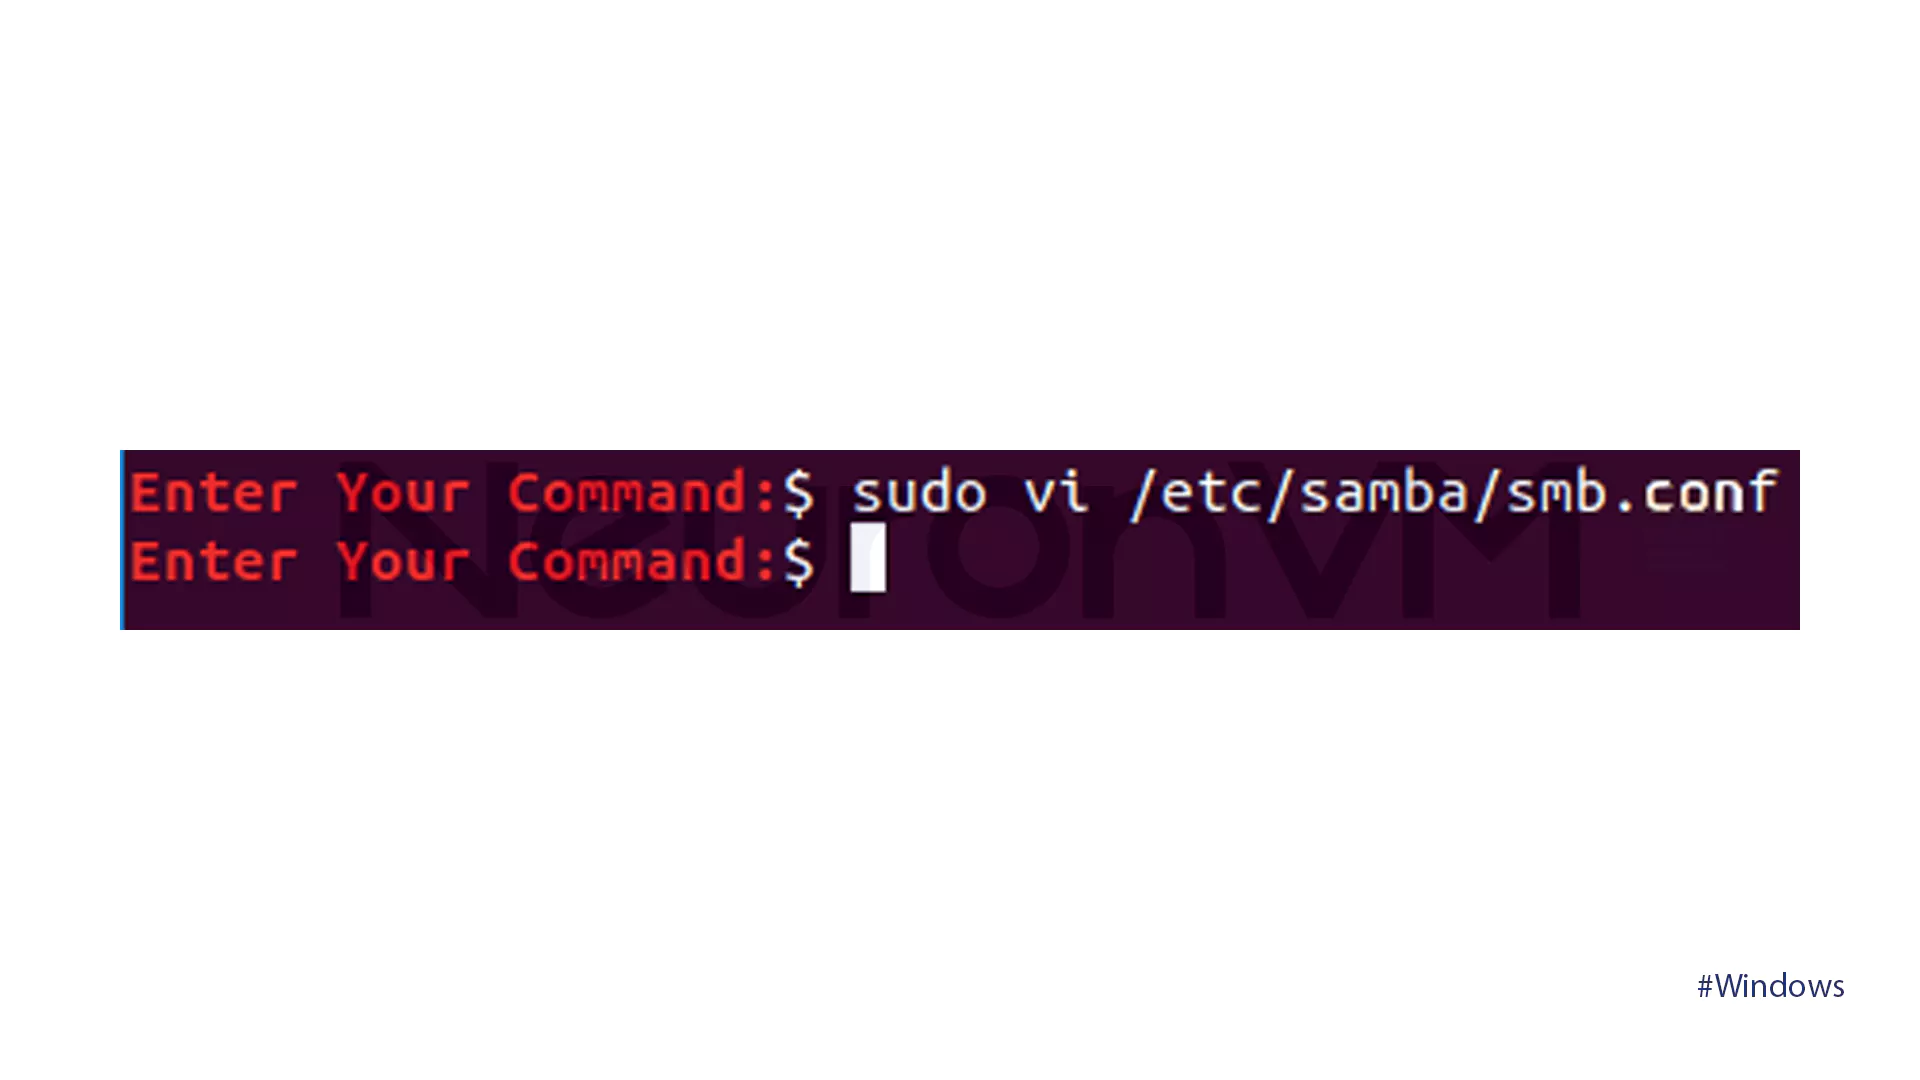
- Open the Samba configuration file in a text editor to make changes.
sudo vi /etc/samba/smb.conf
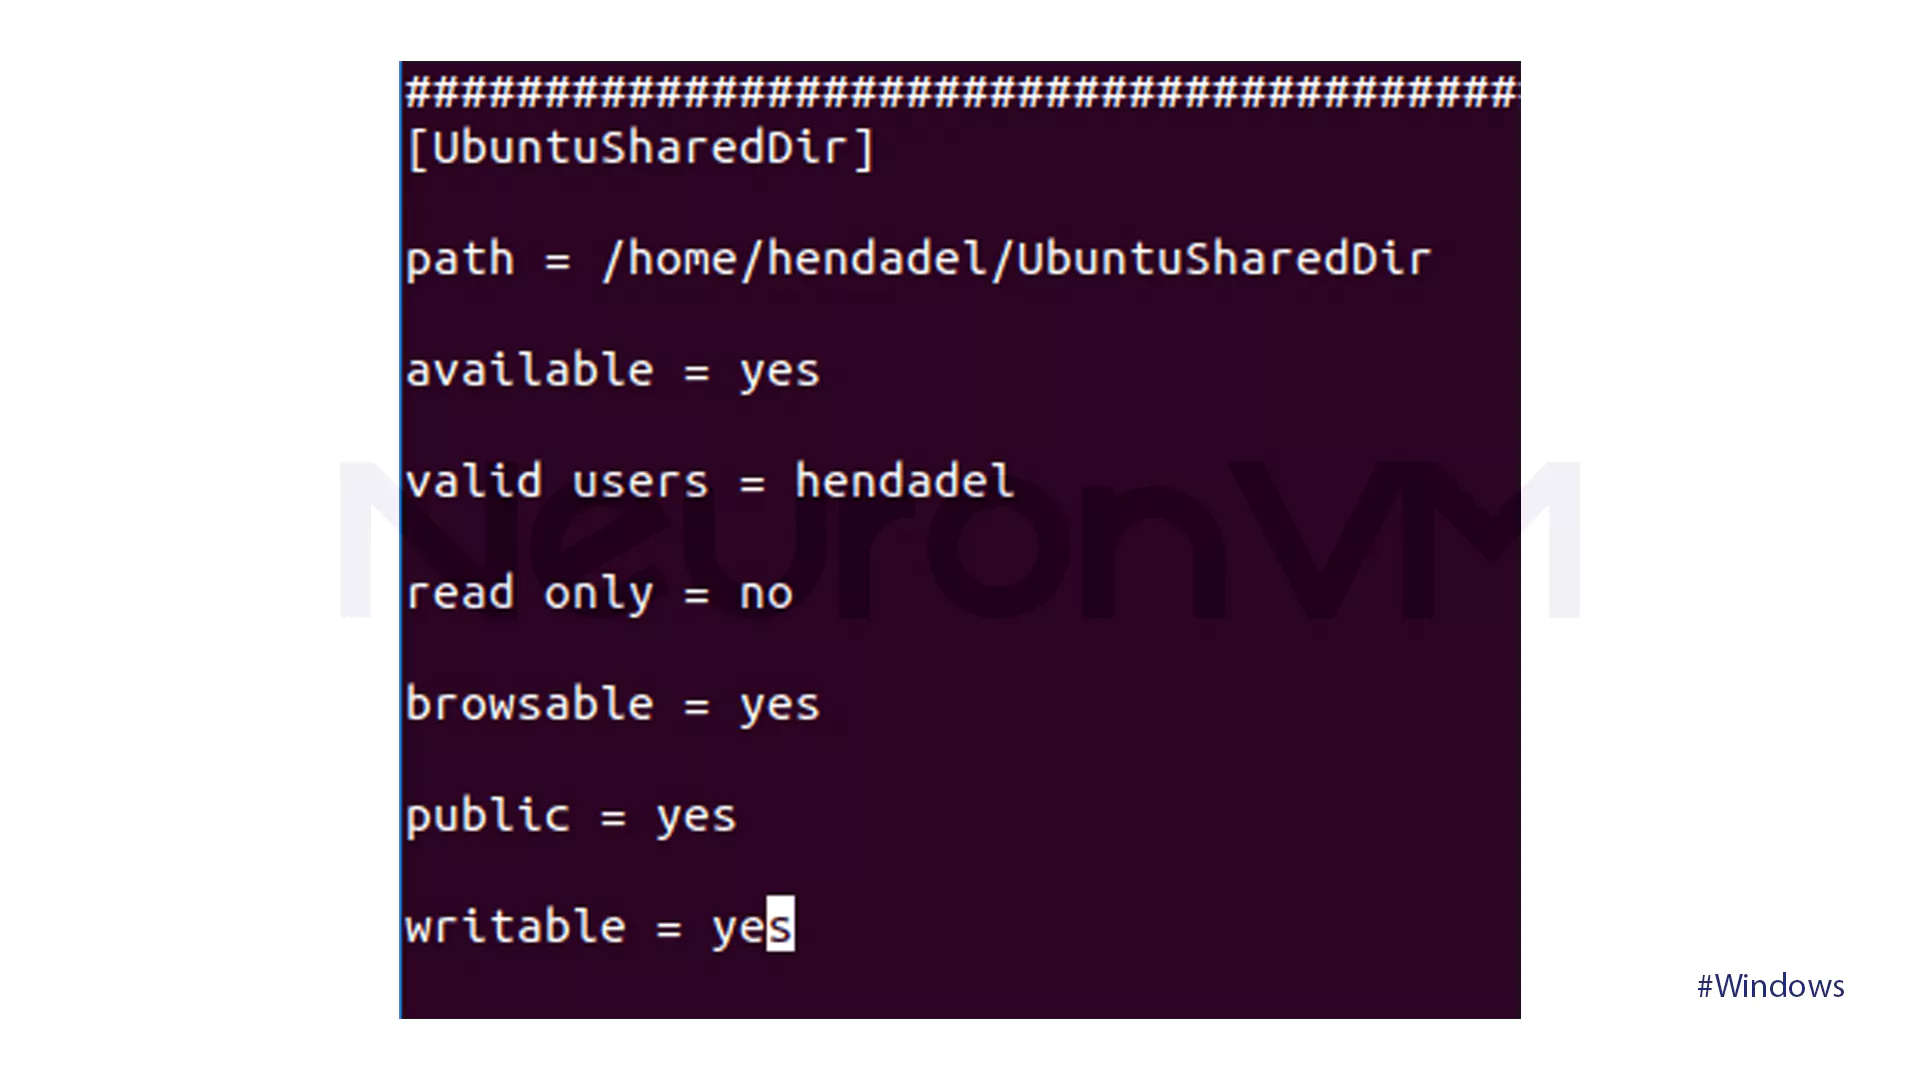
- Add the following lines to the end of the Samba configuration file.
[UbuntuSharedDir]
path = /home/hendadel/UbuntuSharedDir
available = yes
valid users = hendadel
read only = no
browseable = yes
public = yes
writable = yes
- The Samba configuration files look as follows:
- Save and close the Samba configuration file.
- Restart the Samba service using the given command:
sudo service smbd restart

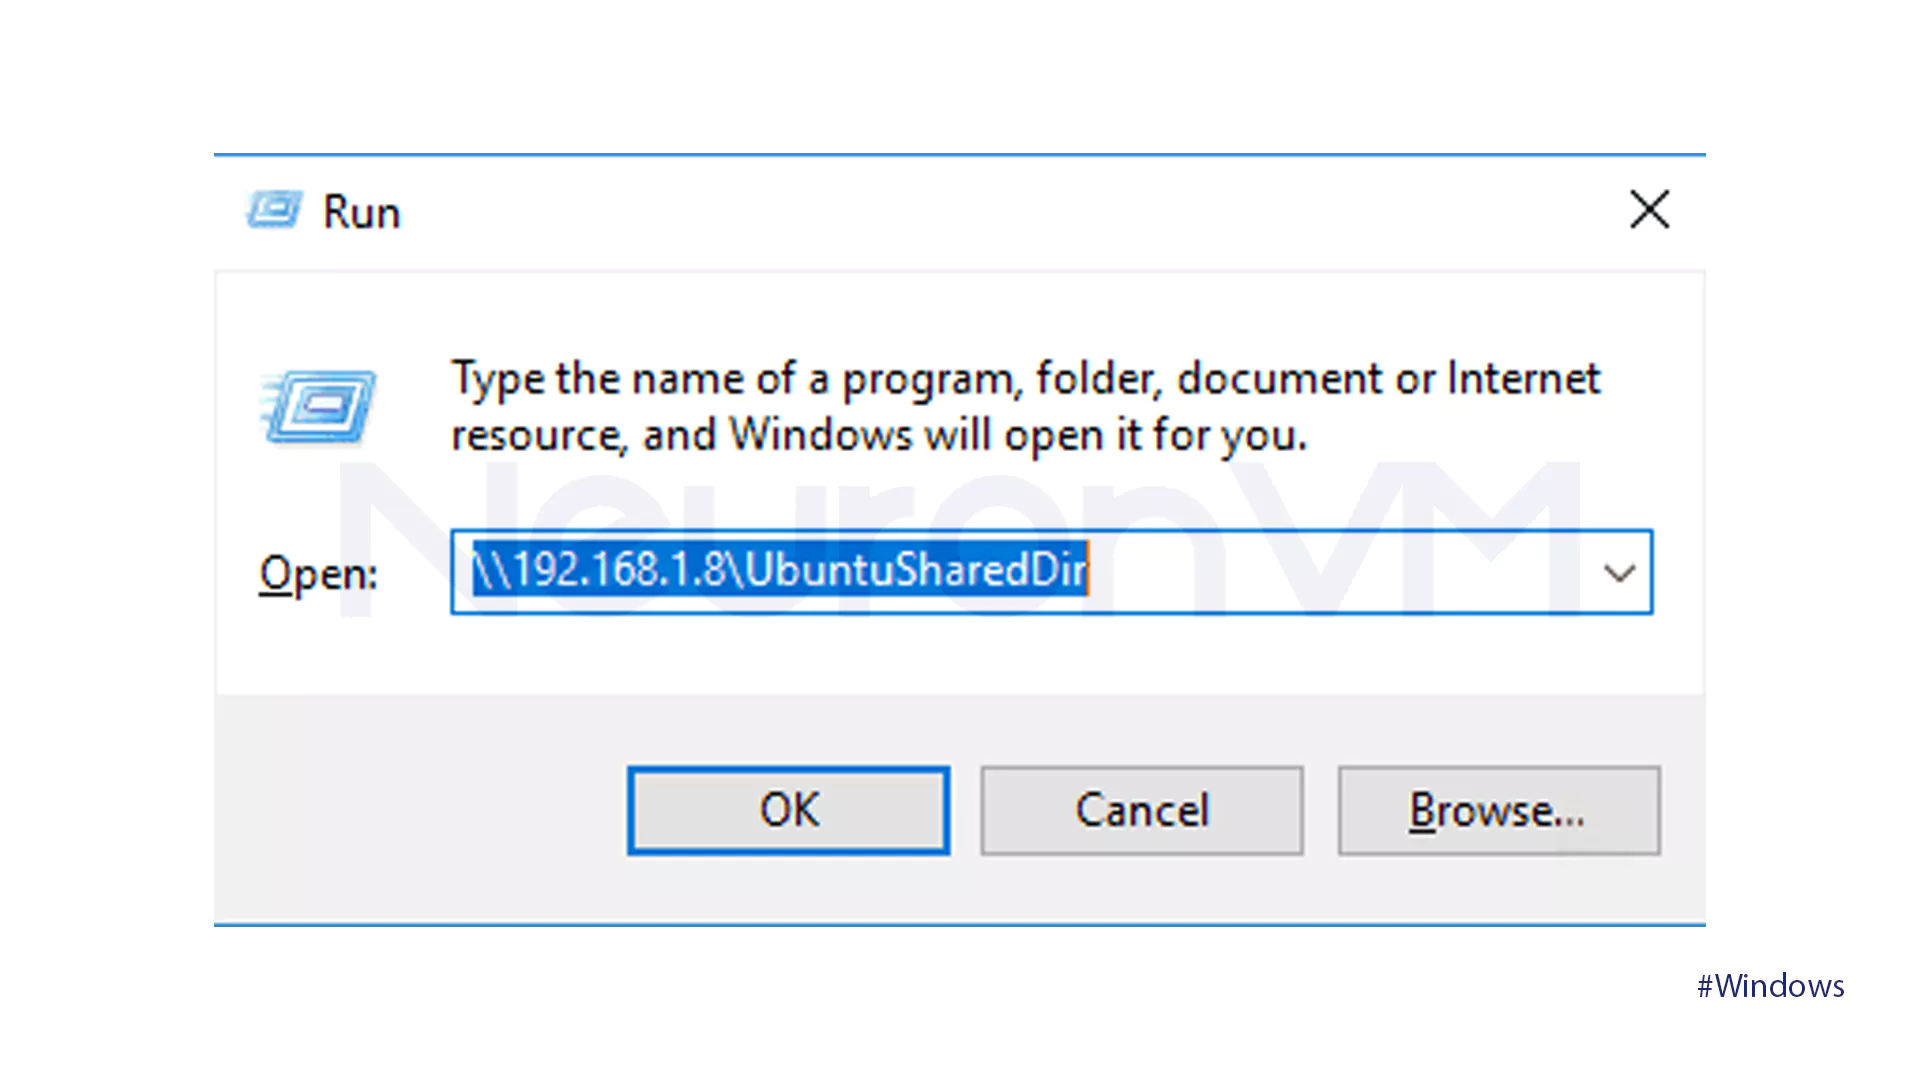
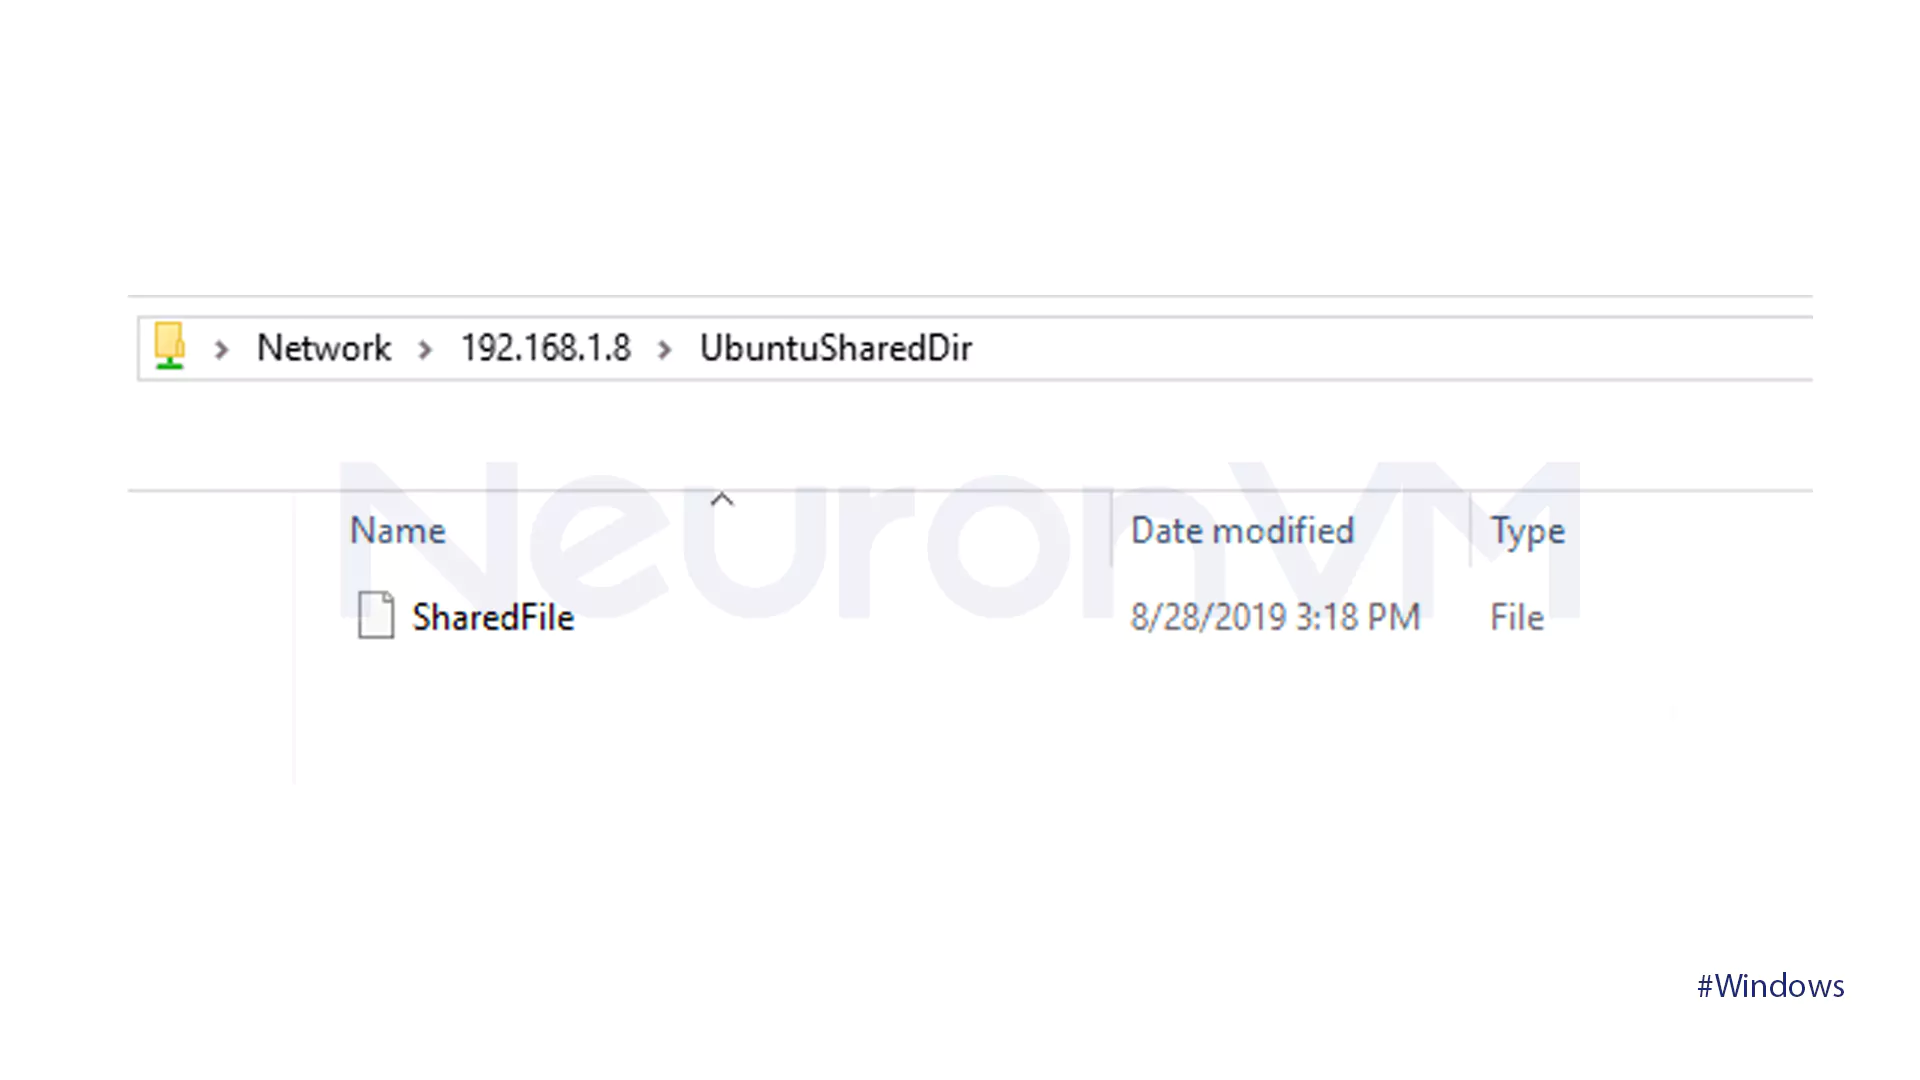
- On the Windows client machine, open the Run application from the Start menu and enter the IP address of the Ubuntu machine and the shared directory name as given below. Click the OK button to continue.
\\192.168.1.8\UbuntuSharedDir
- A Windows Security dialog box will be displayed, and you must type in your Samba username and password. Click the OK button to continue.

- You are now logged in to your Ubuntu shared folder and can copy files.
Method 4: Transfer files from Shared Network Folders
The easiest way to transfer files from Ubuntu laptop to Windows is to use Shared Network Folders. In this case, we create a shared folder from the Windows computer so that it appears on the Ubuntu computer.
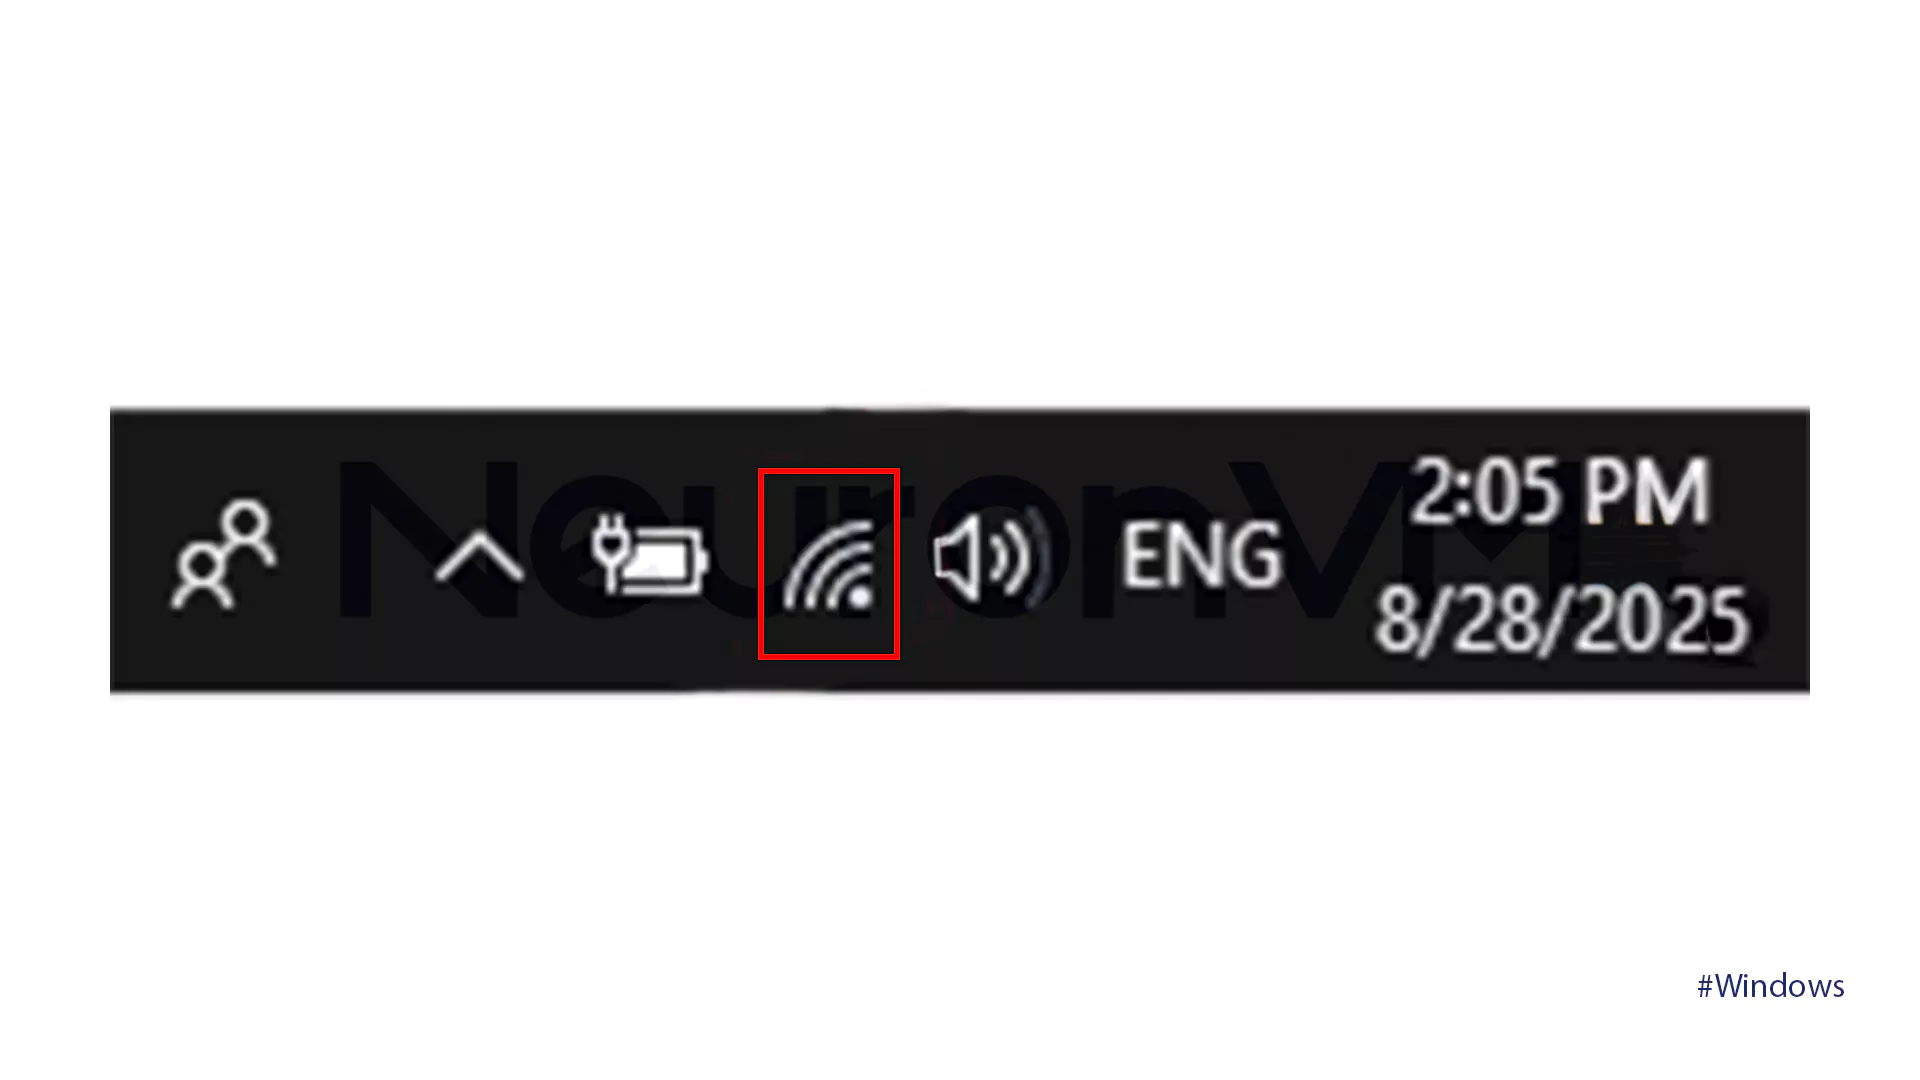
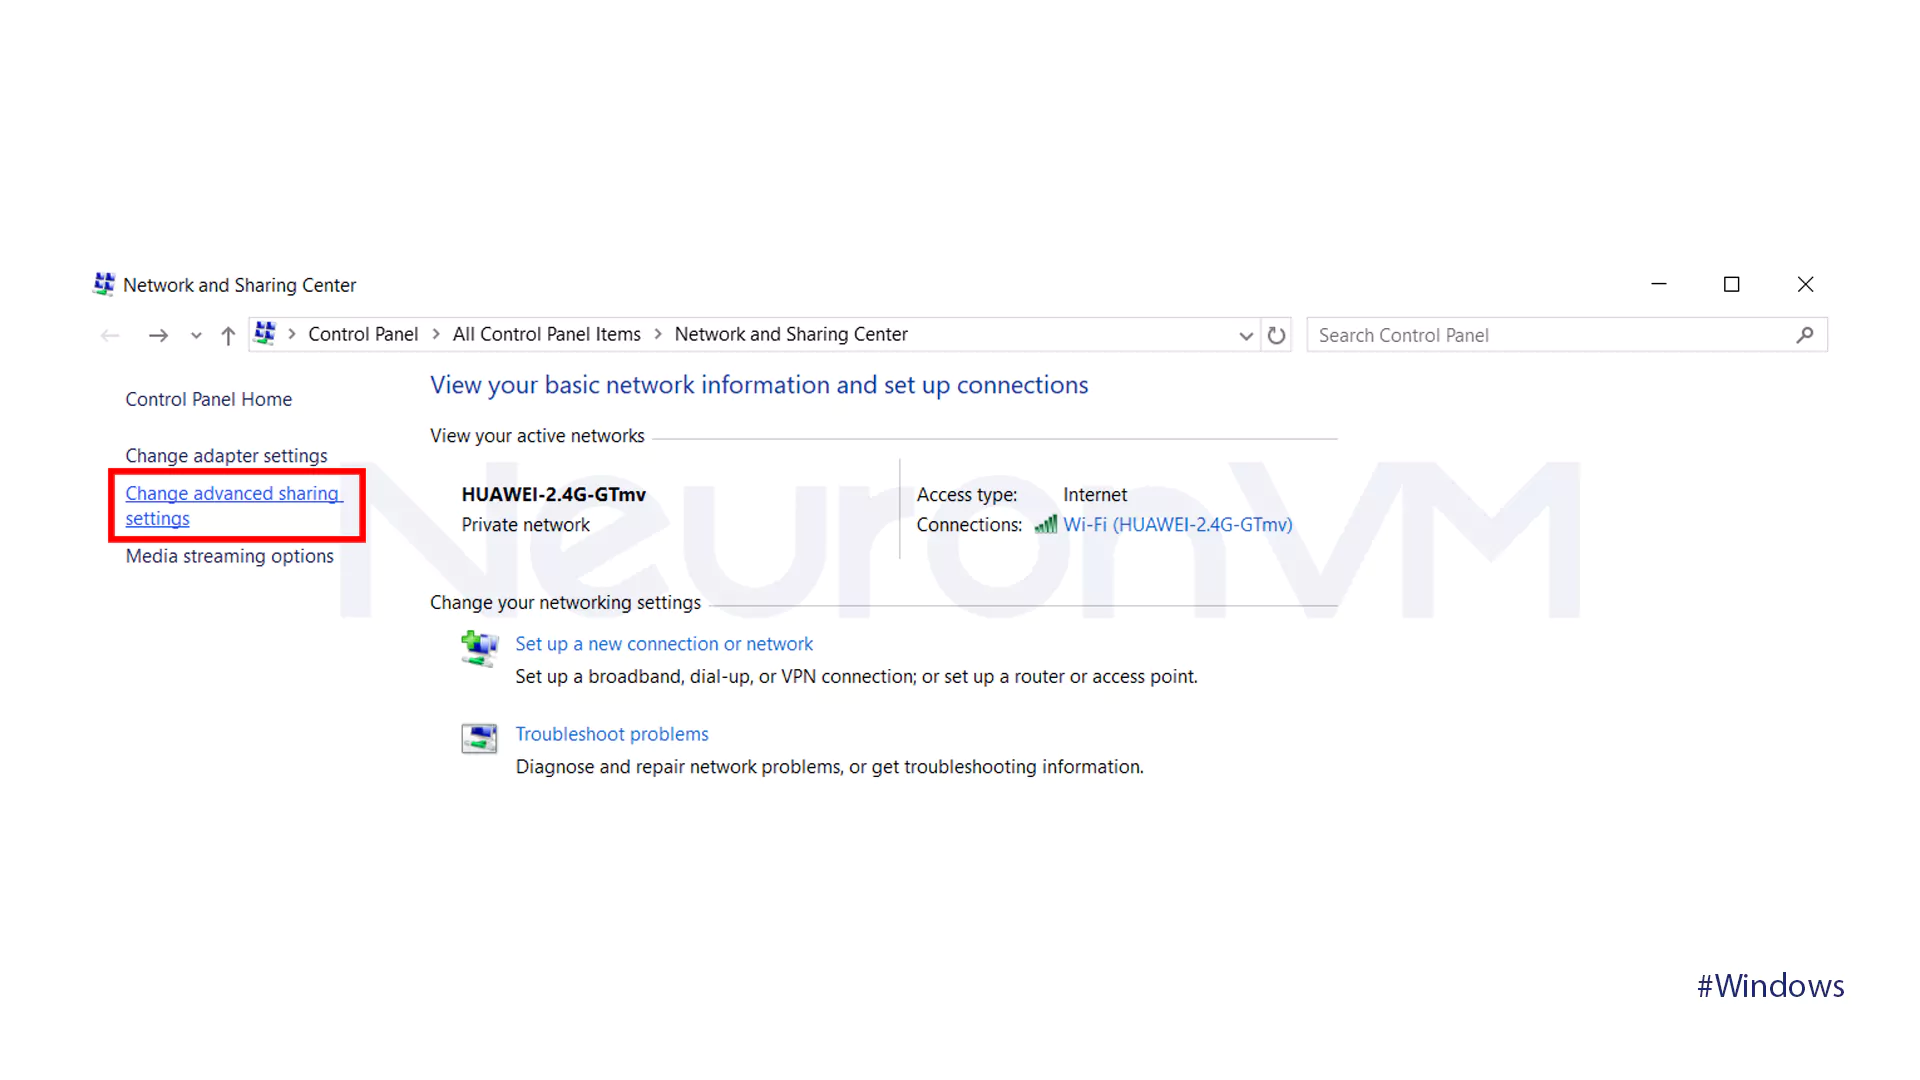
- On the Windows computer, right-click on the network connections icon on the bottom right-hand corner of the taskbar.
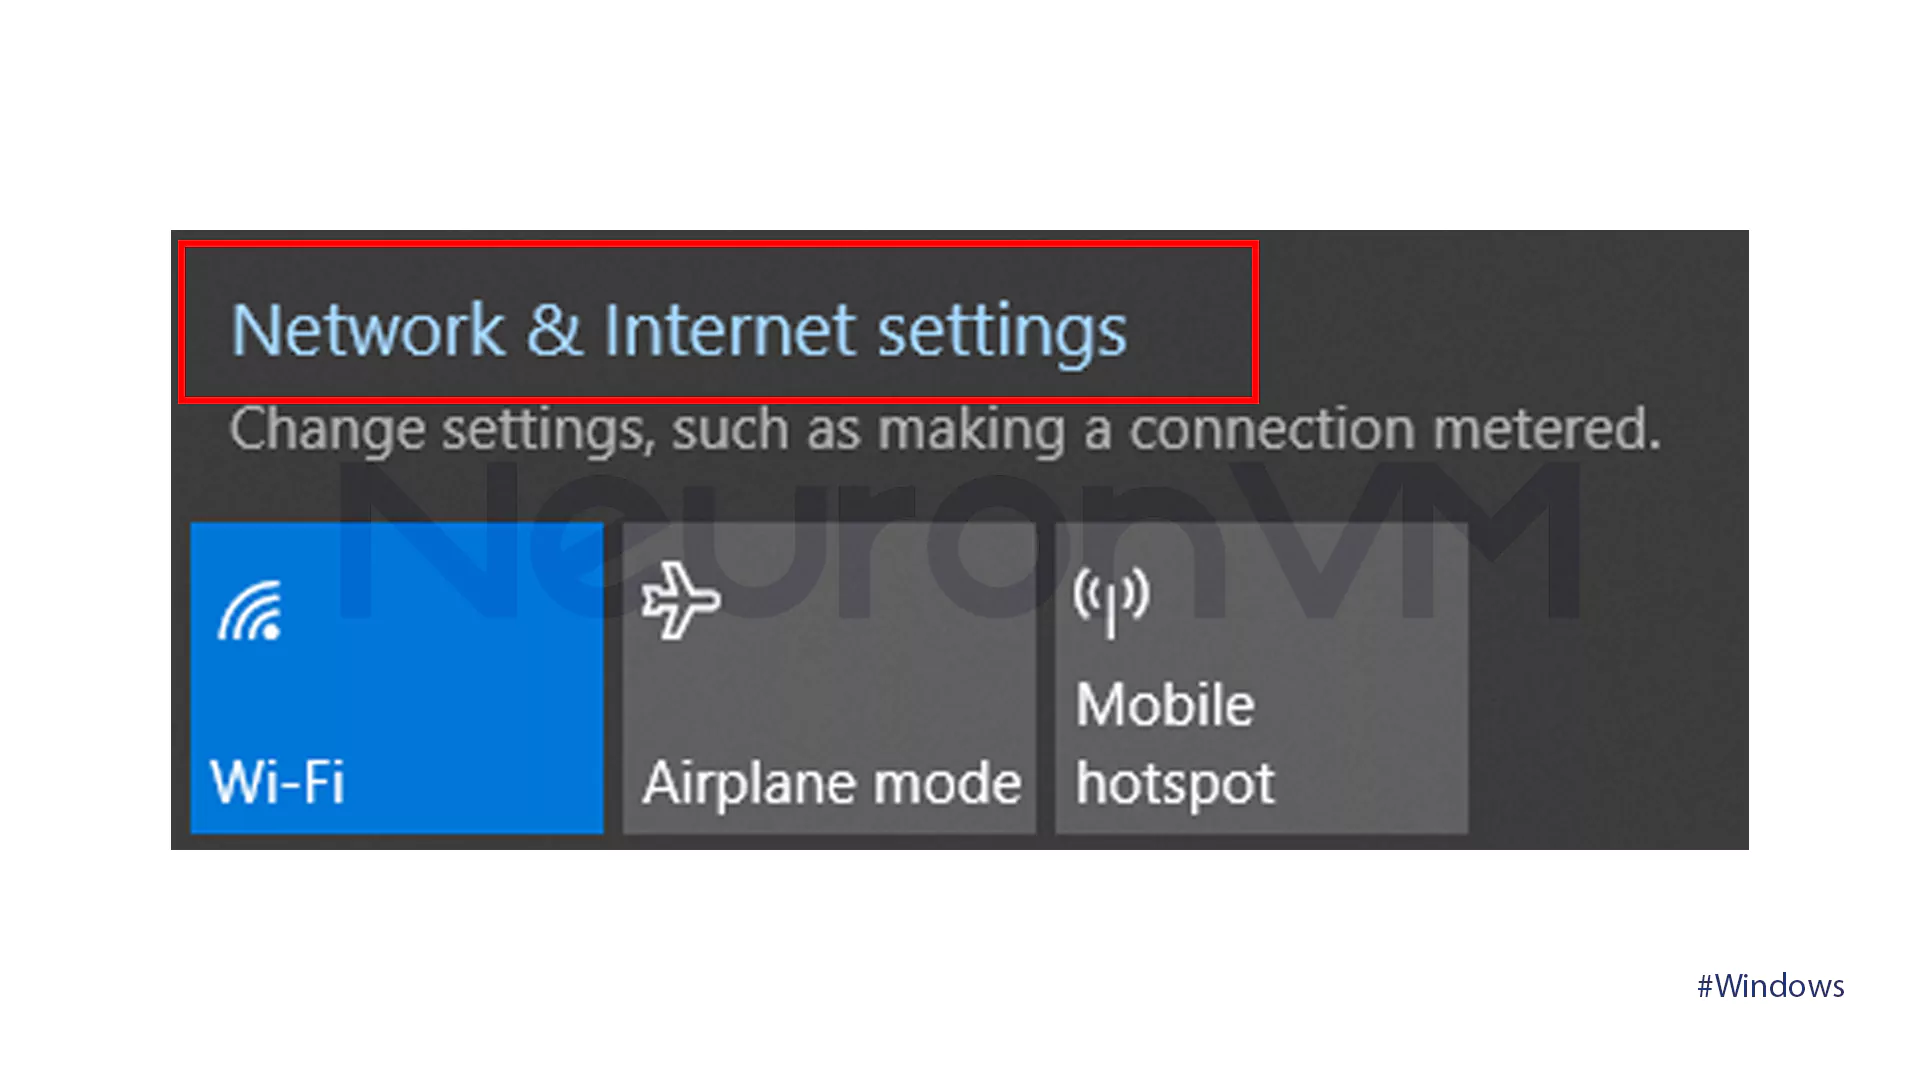
- Click on Open Network & Internet Settings.
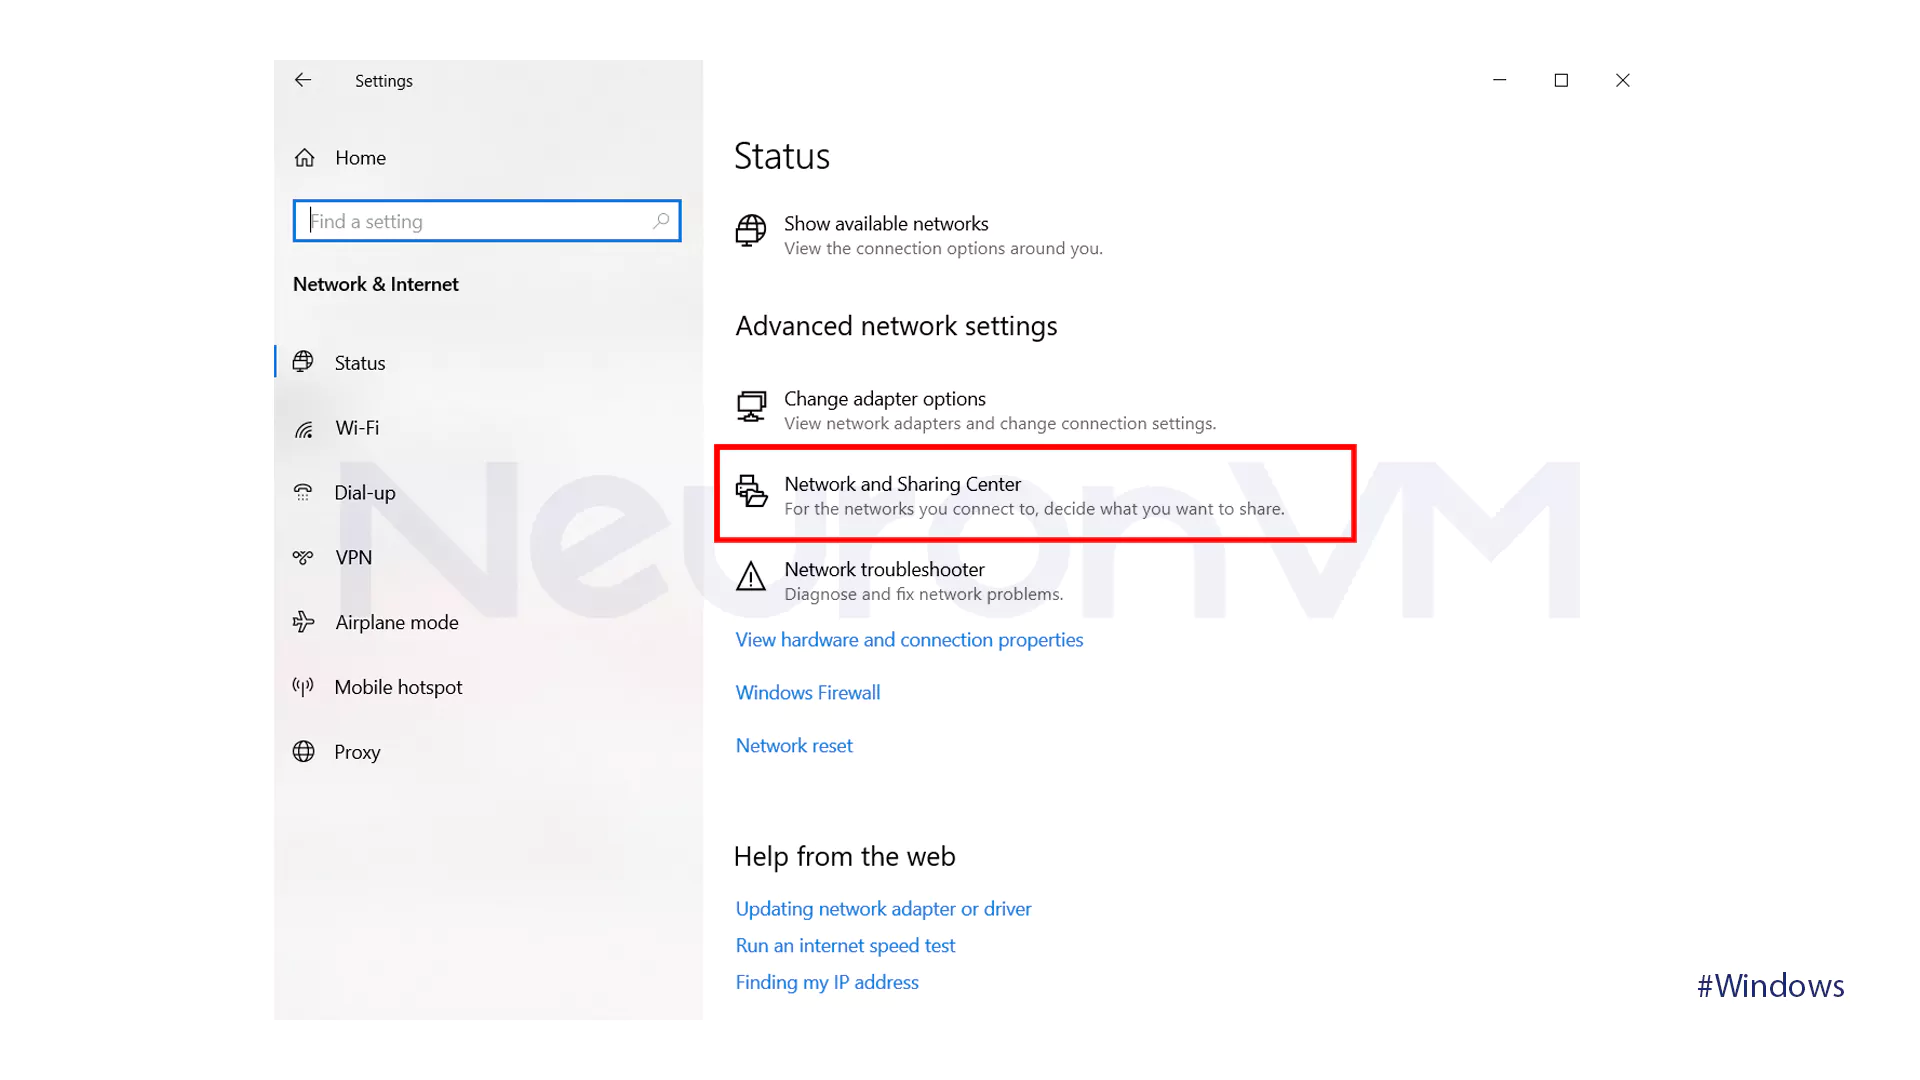
- Next, click on Network and Sharing Center.
- Then, choose Change advanced sharing settings.
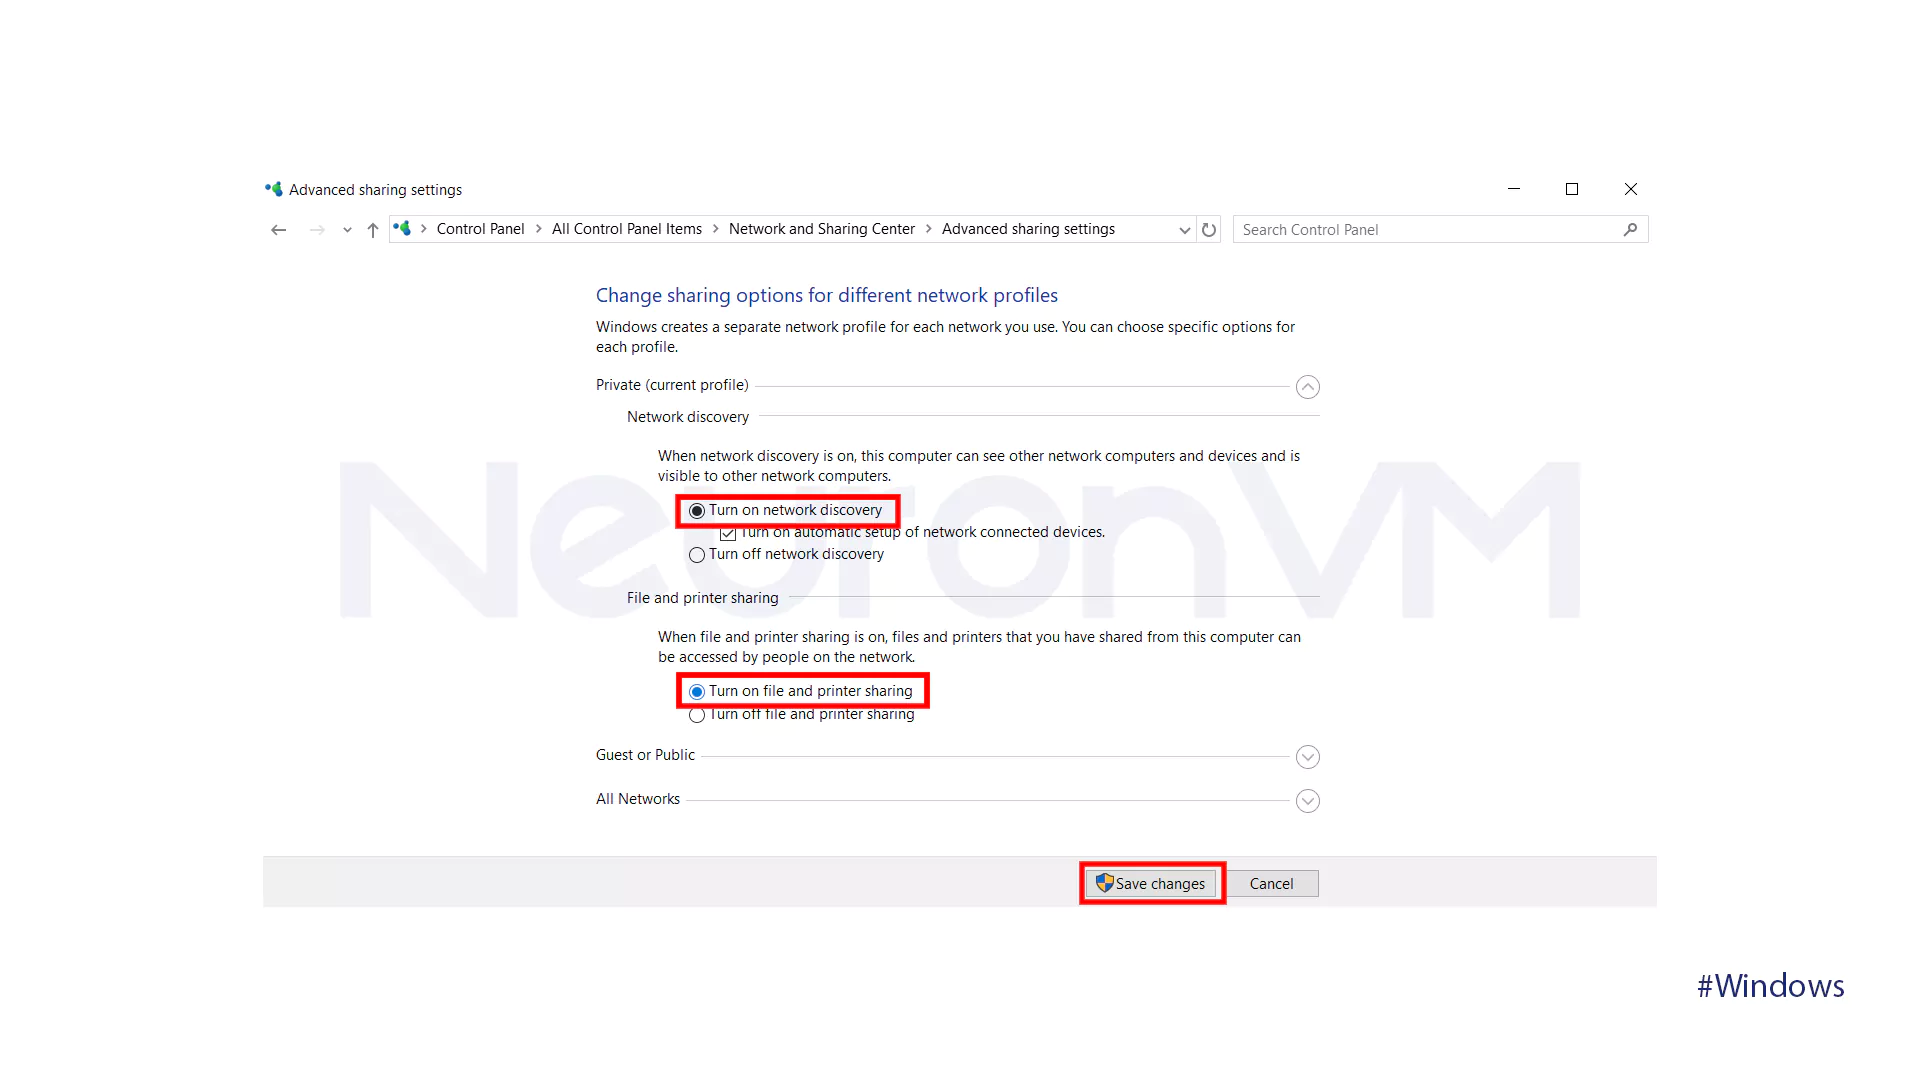
- Turn on the following options shown in the image below and click on Save Changes.
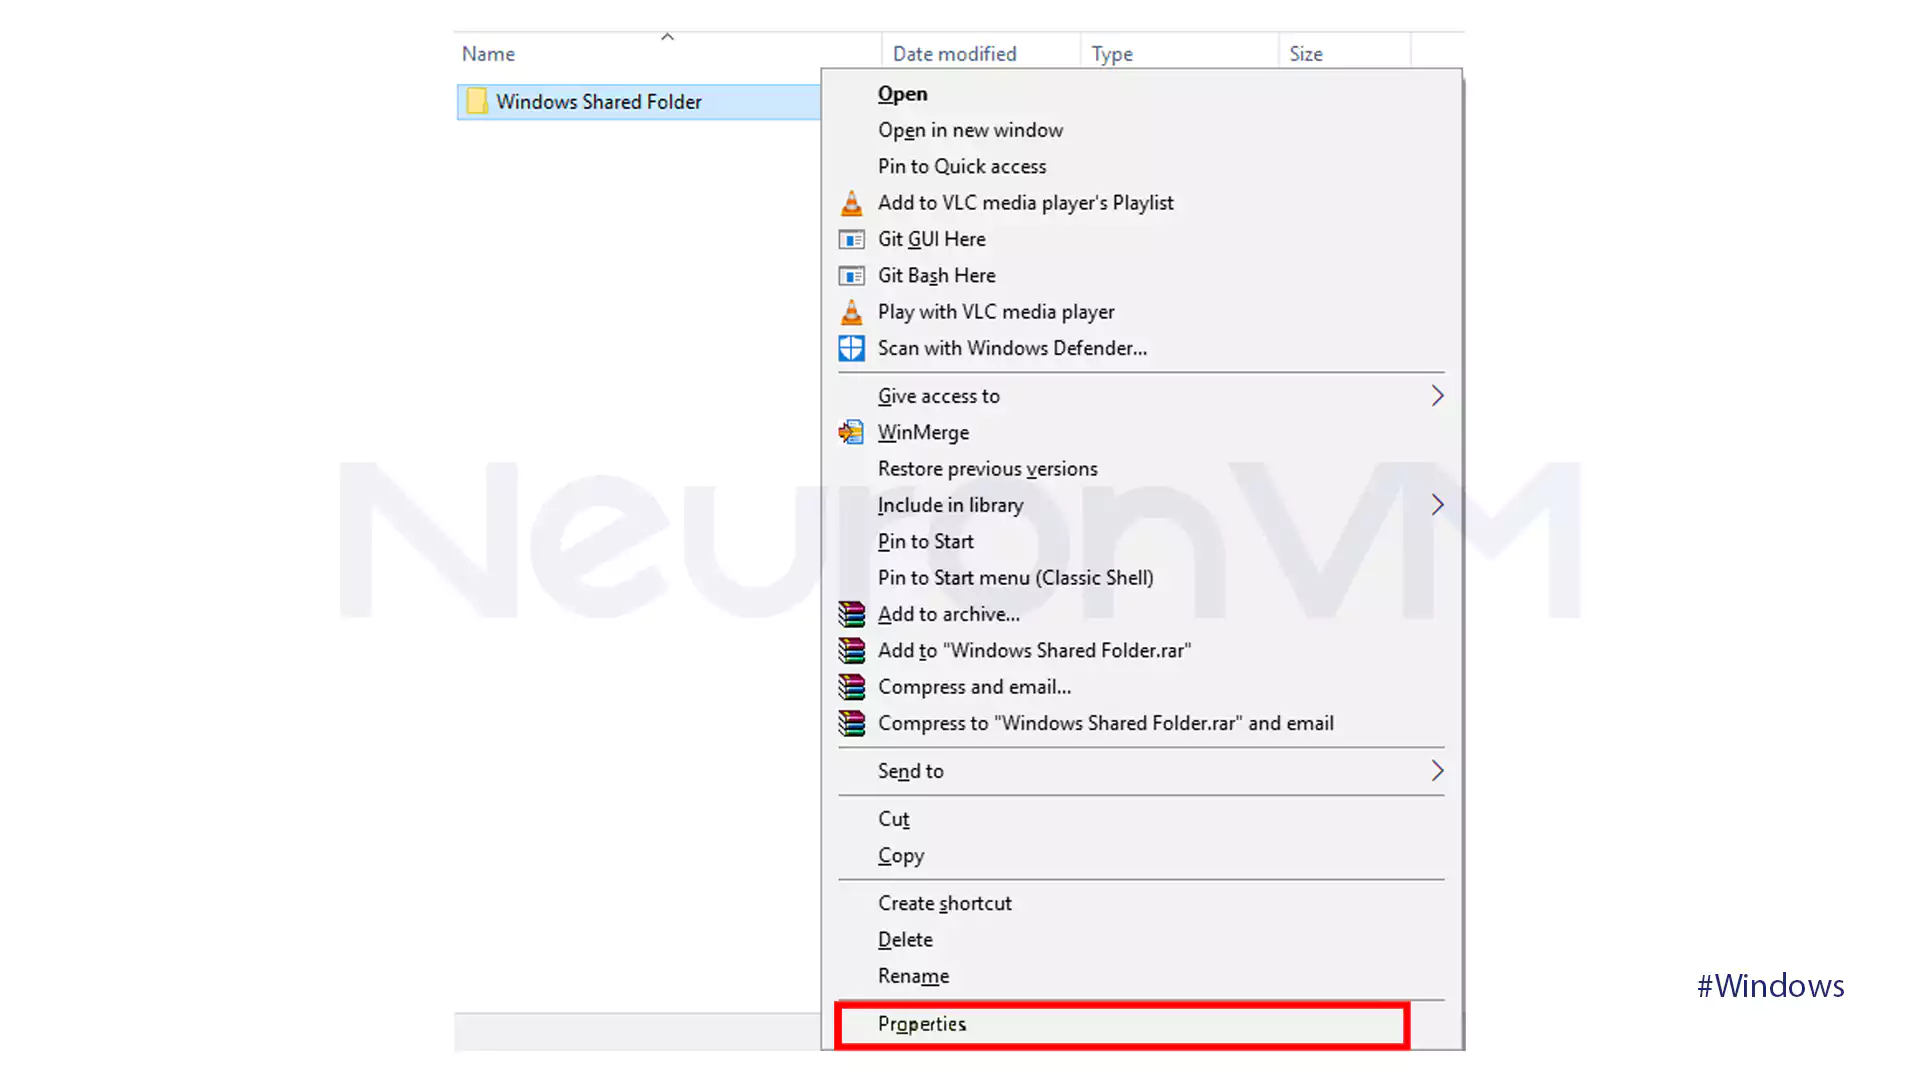
- Open your file explorer and go to the folder you want to share. Right-click on the folder and select Properties.
- After opening the properties of the folder, click on the Sharing tab and then on the Advanced Sharing button.
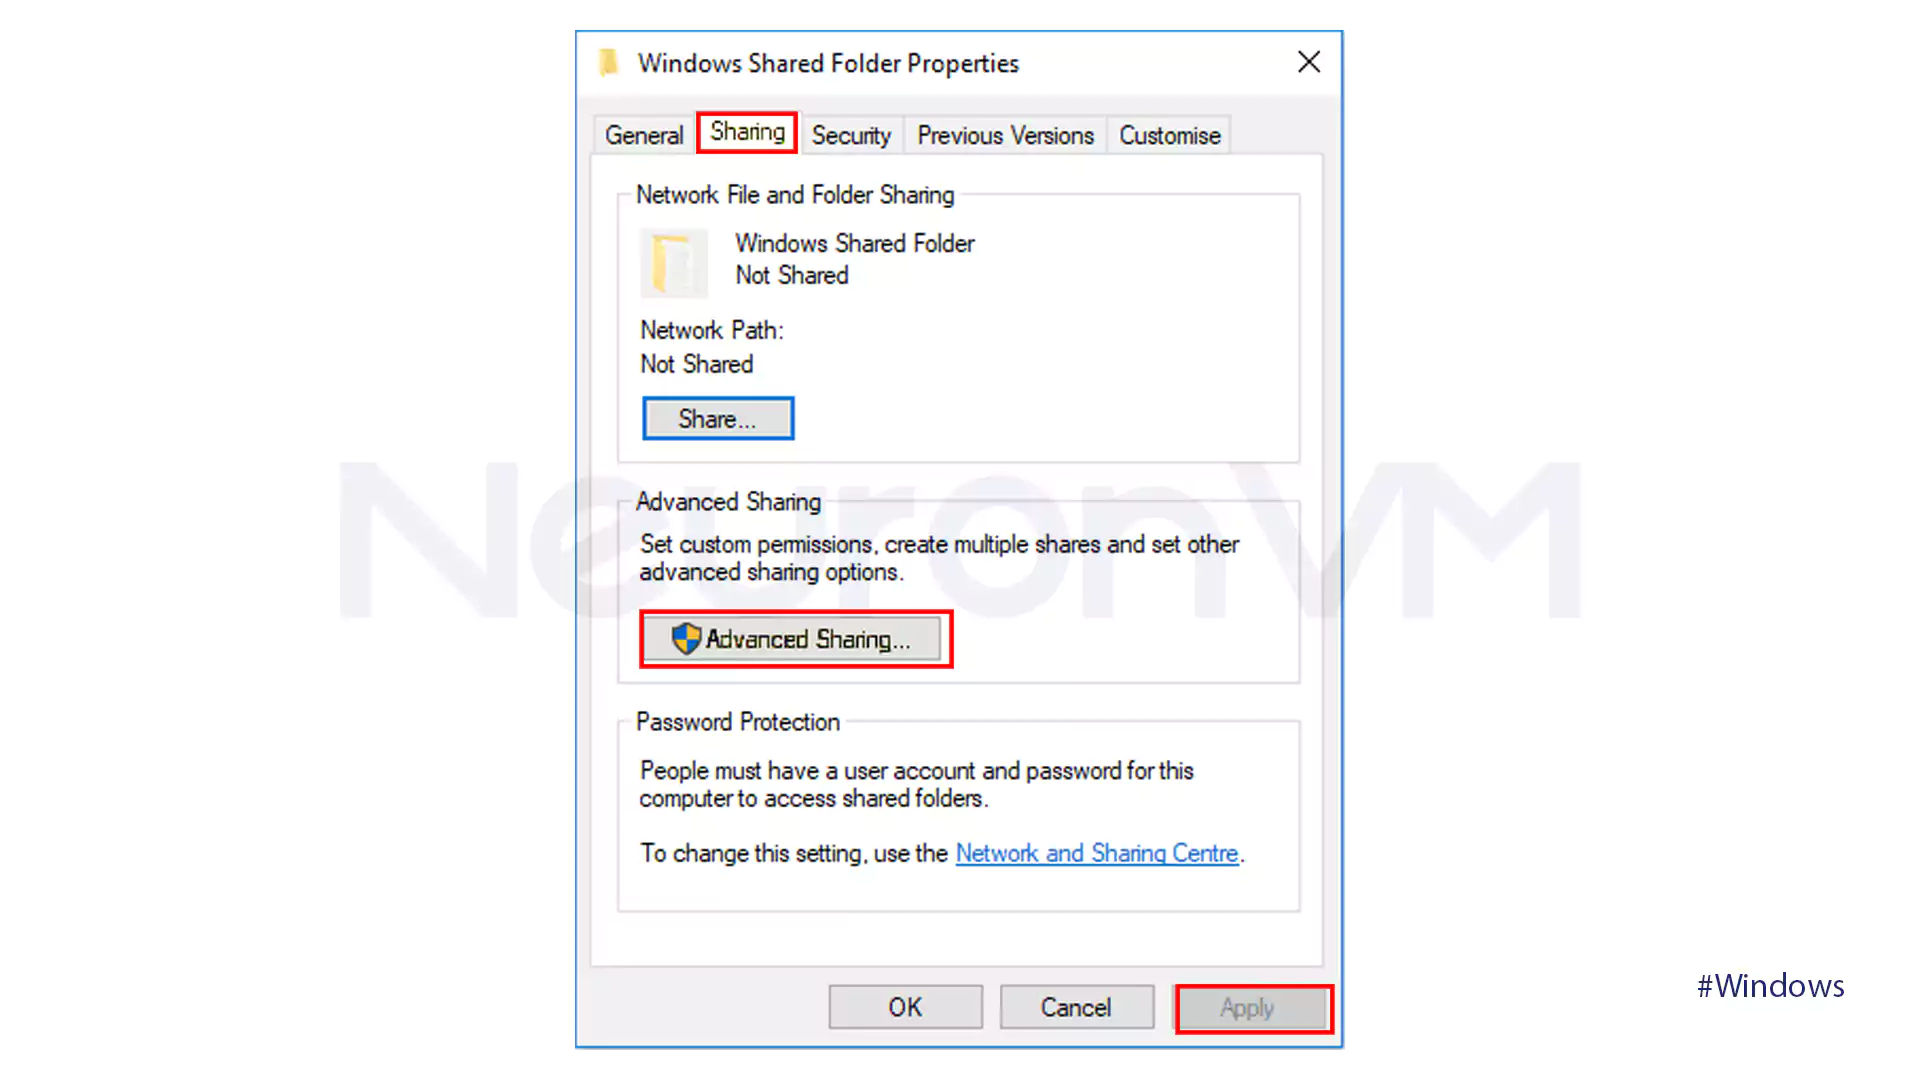
- Select the box that states Share this folder.
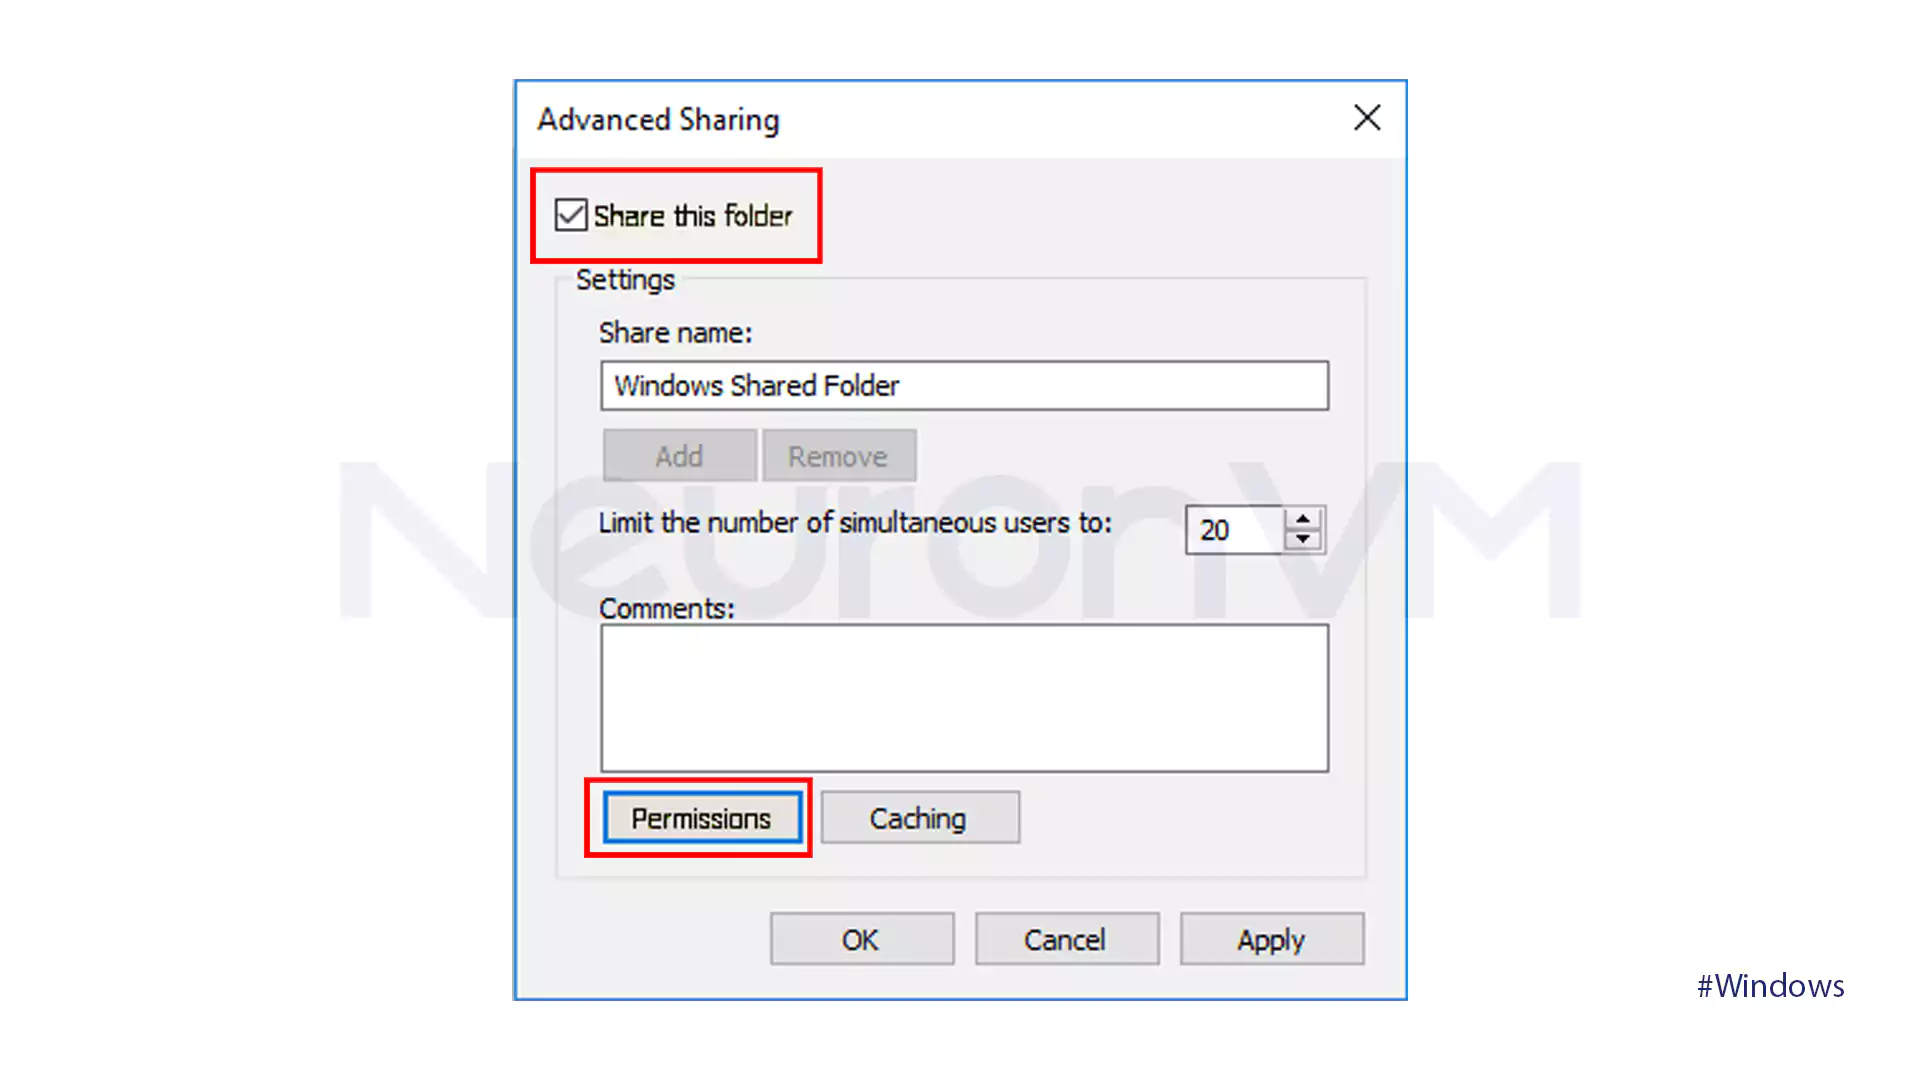
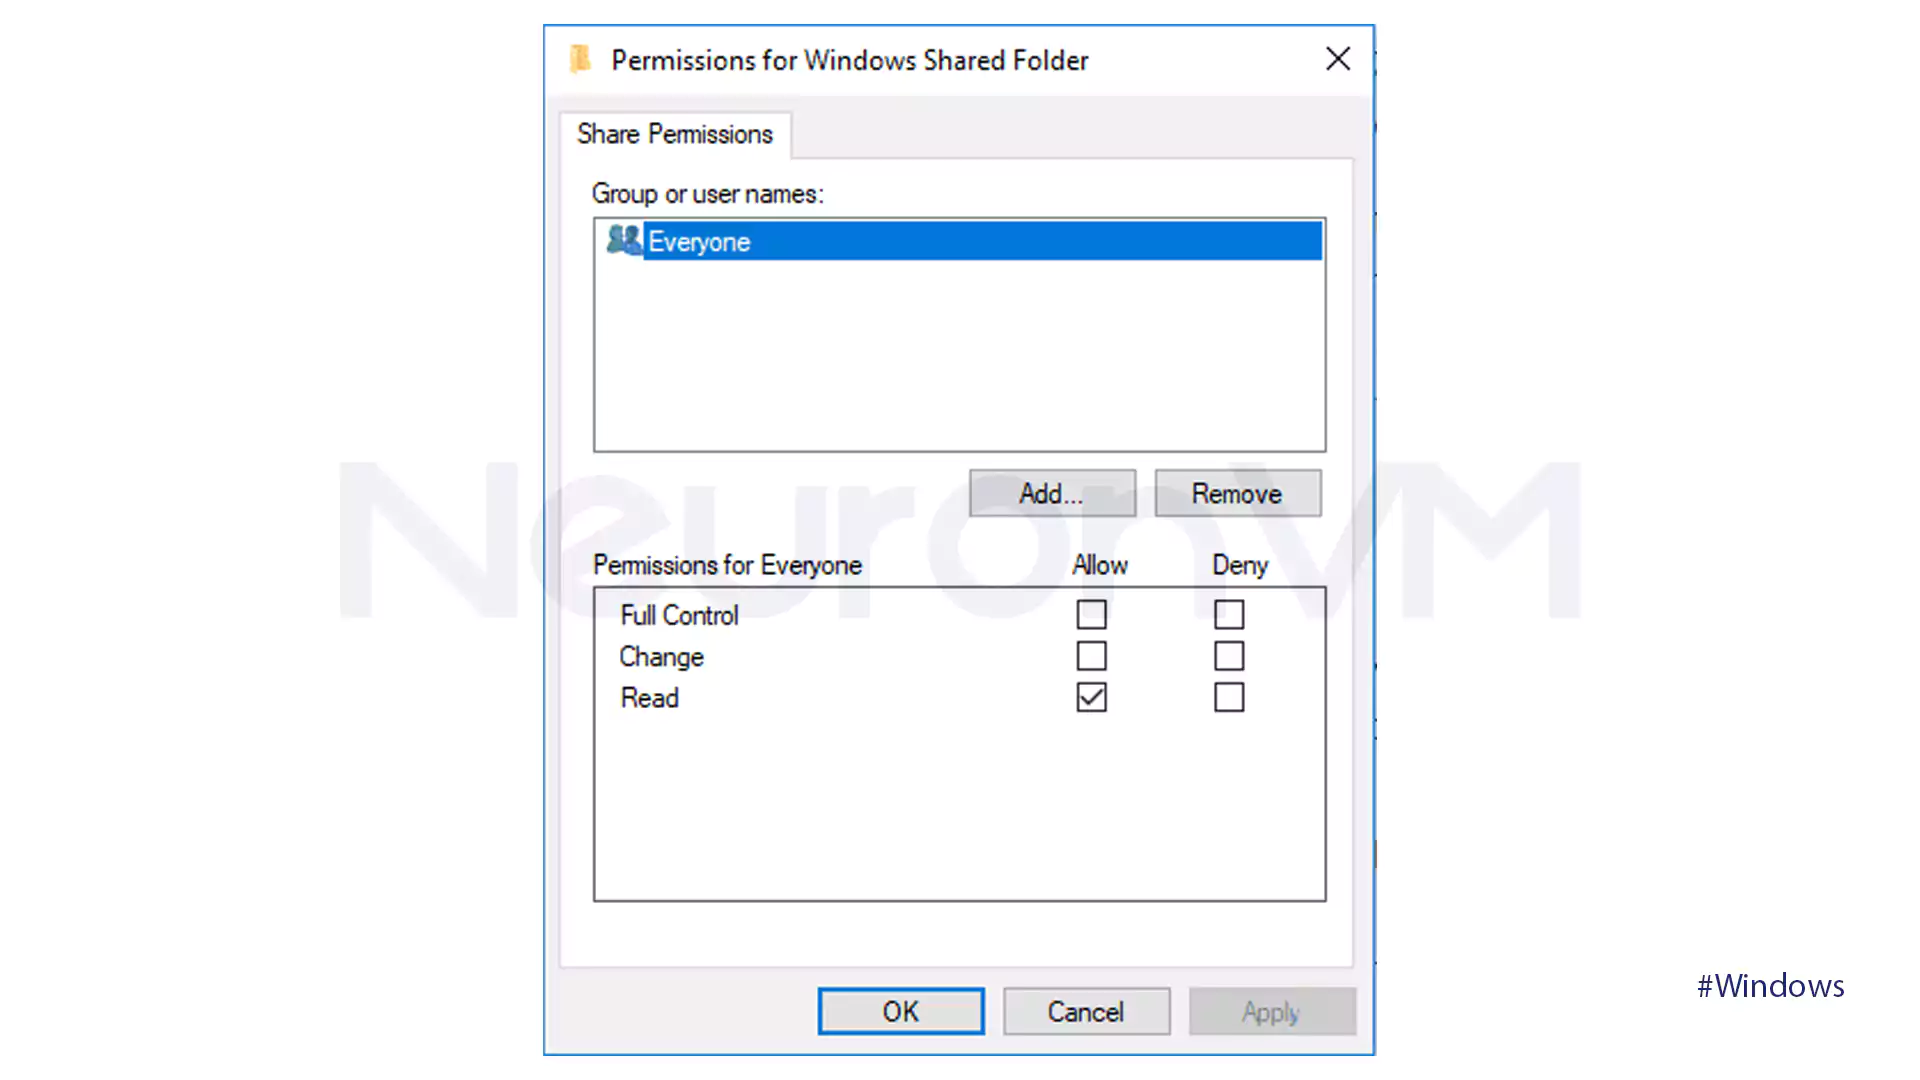
- In case you want to set permissions on the shared folder, i.e., Read on Write, click on the permissions button to modify your settings. Click the OK button.
- Open the file browser on the Ubuntu system now.
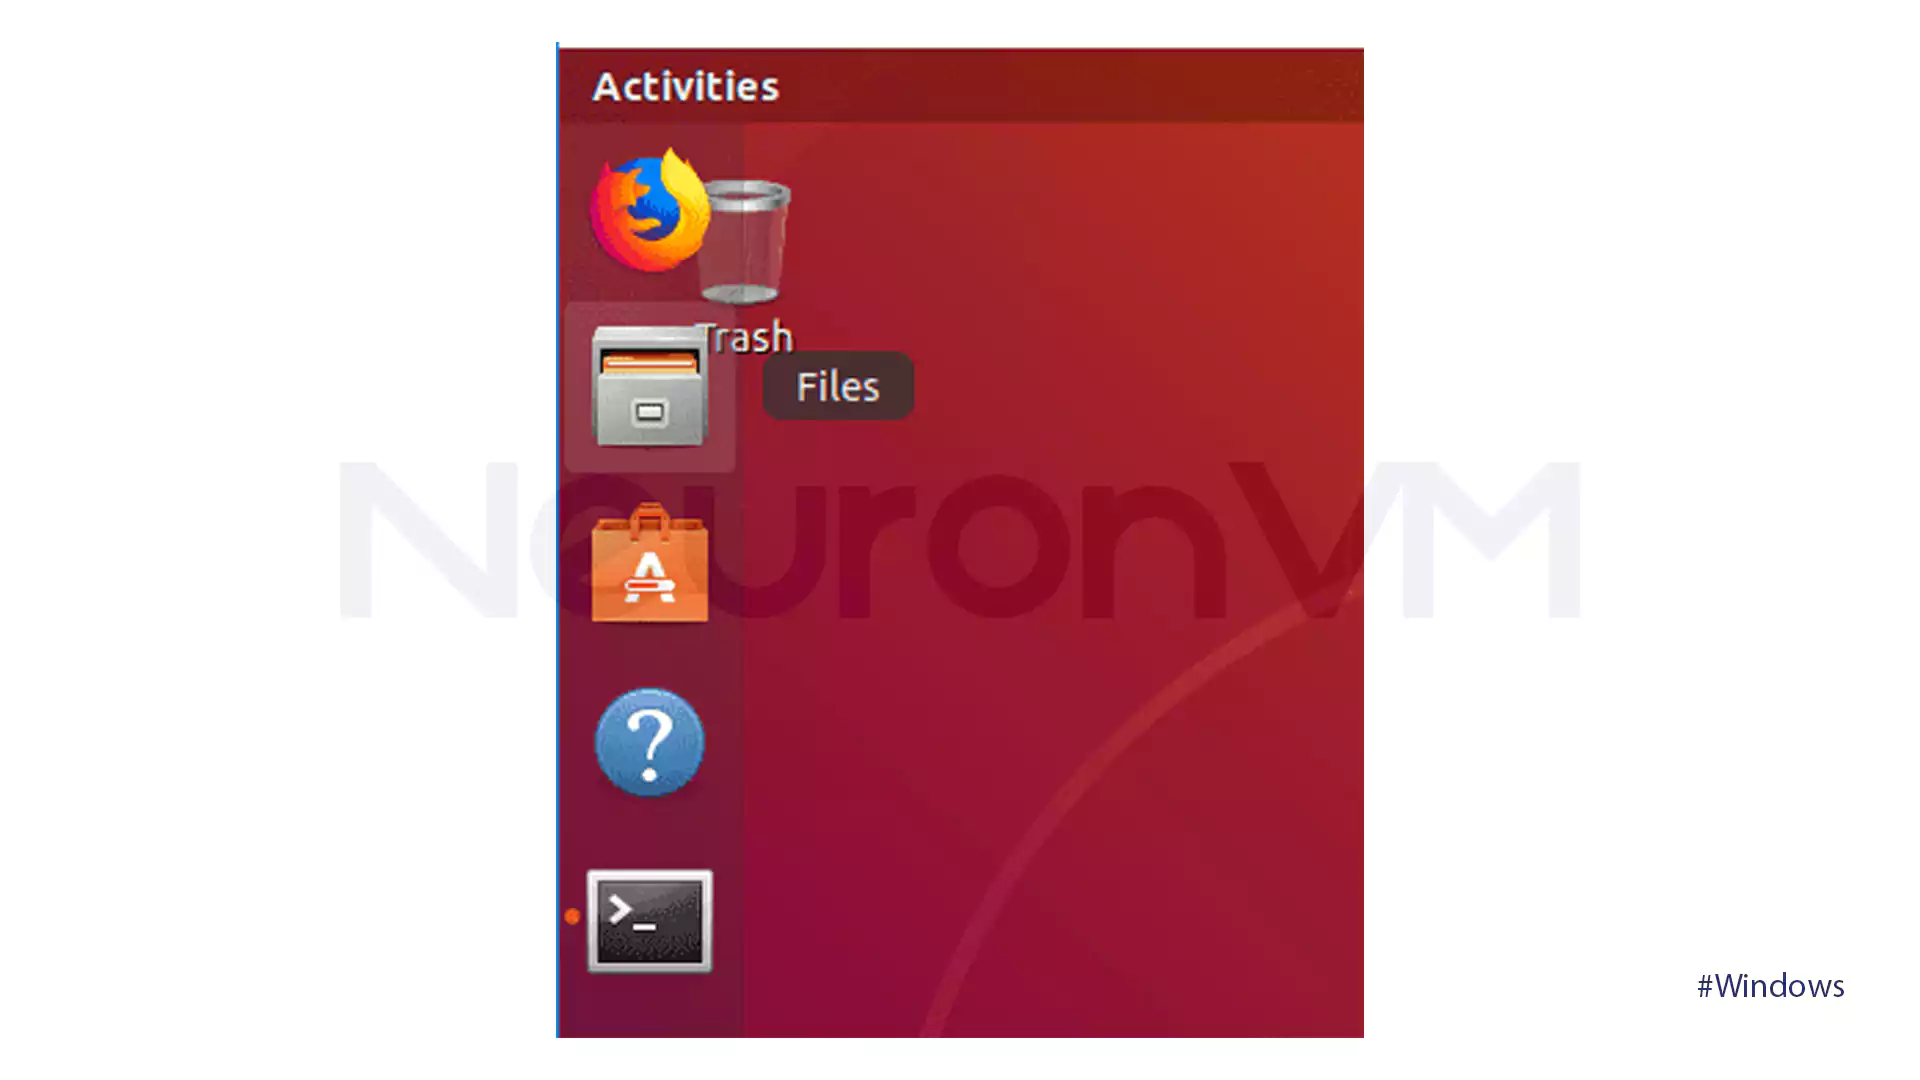
- Click on Other Locations in the left panel.
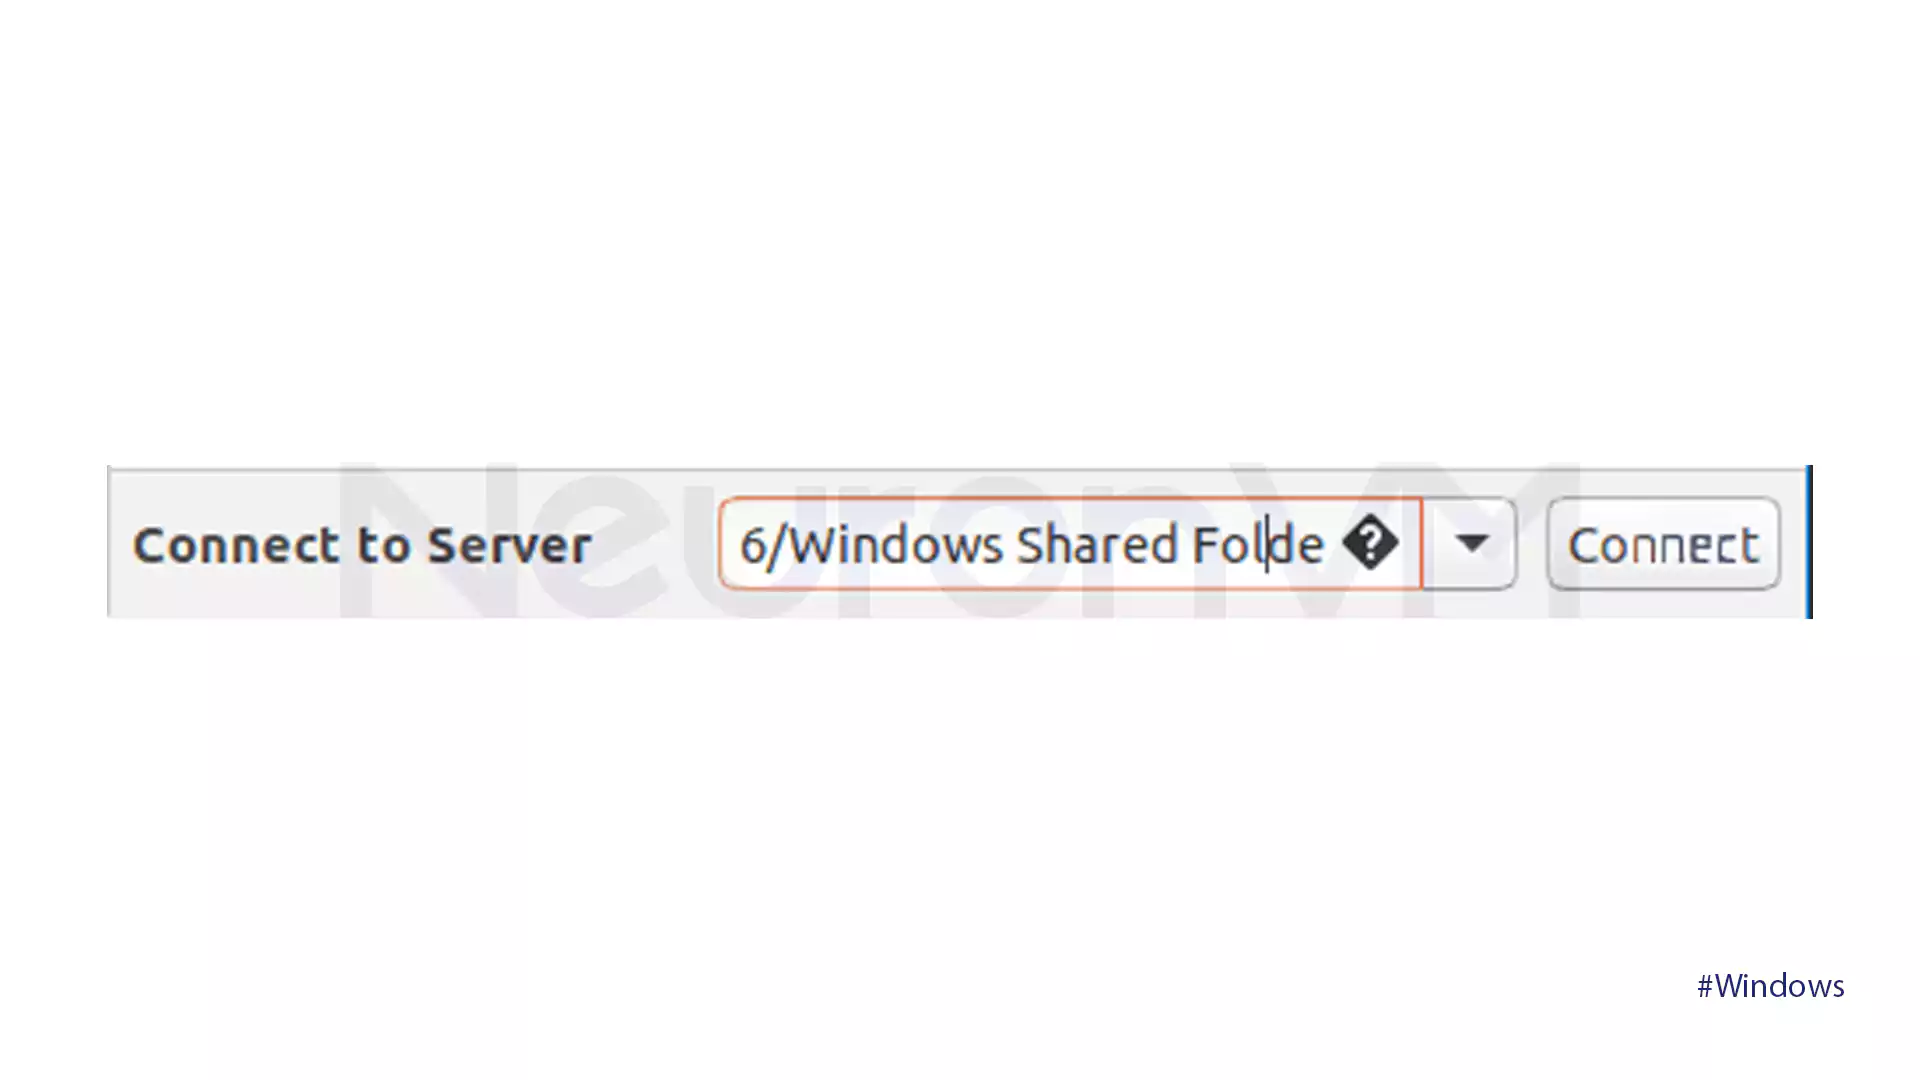
- In the bottom bar, type in your Windows PC’s IP address and the directory of the shared folder as indicated. Click the Connect button.
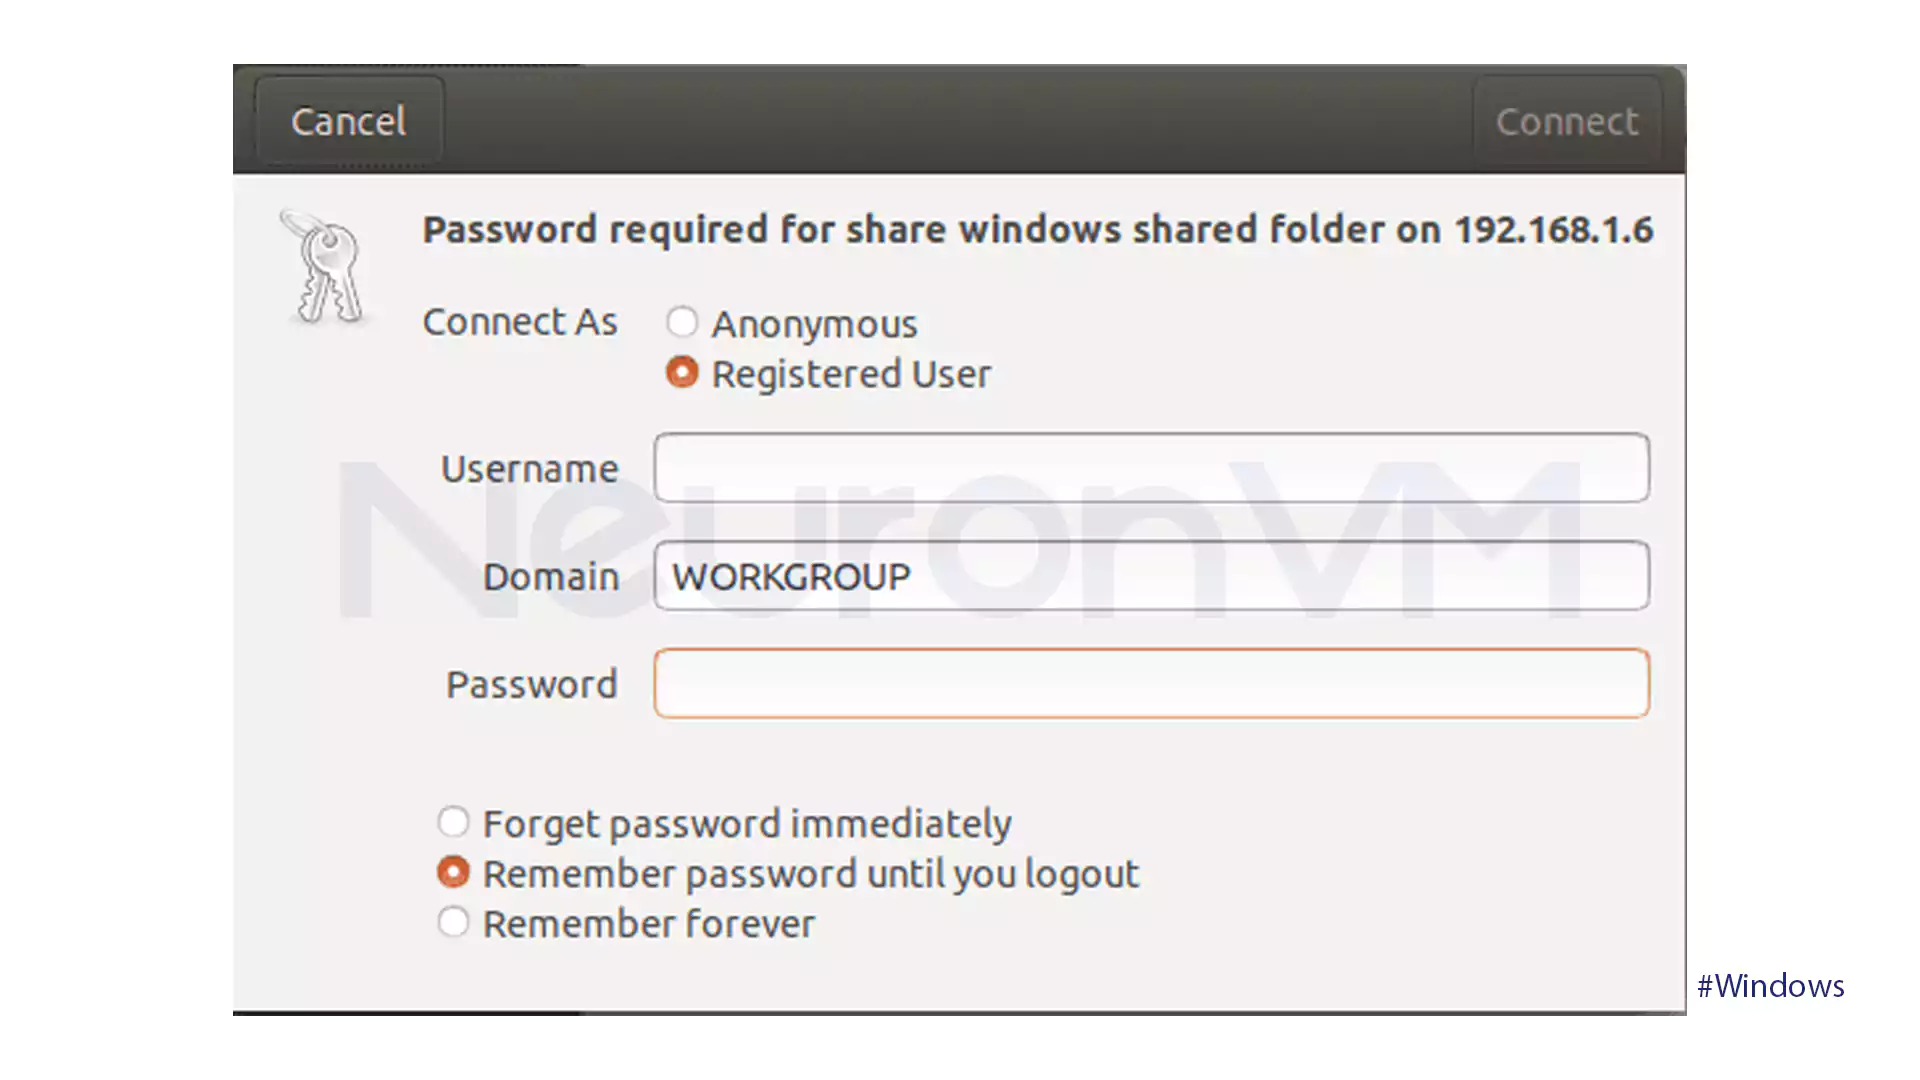
- You will be asked to authenticate. Kindly type in your password and username, then click the Connect button to continue.
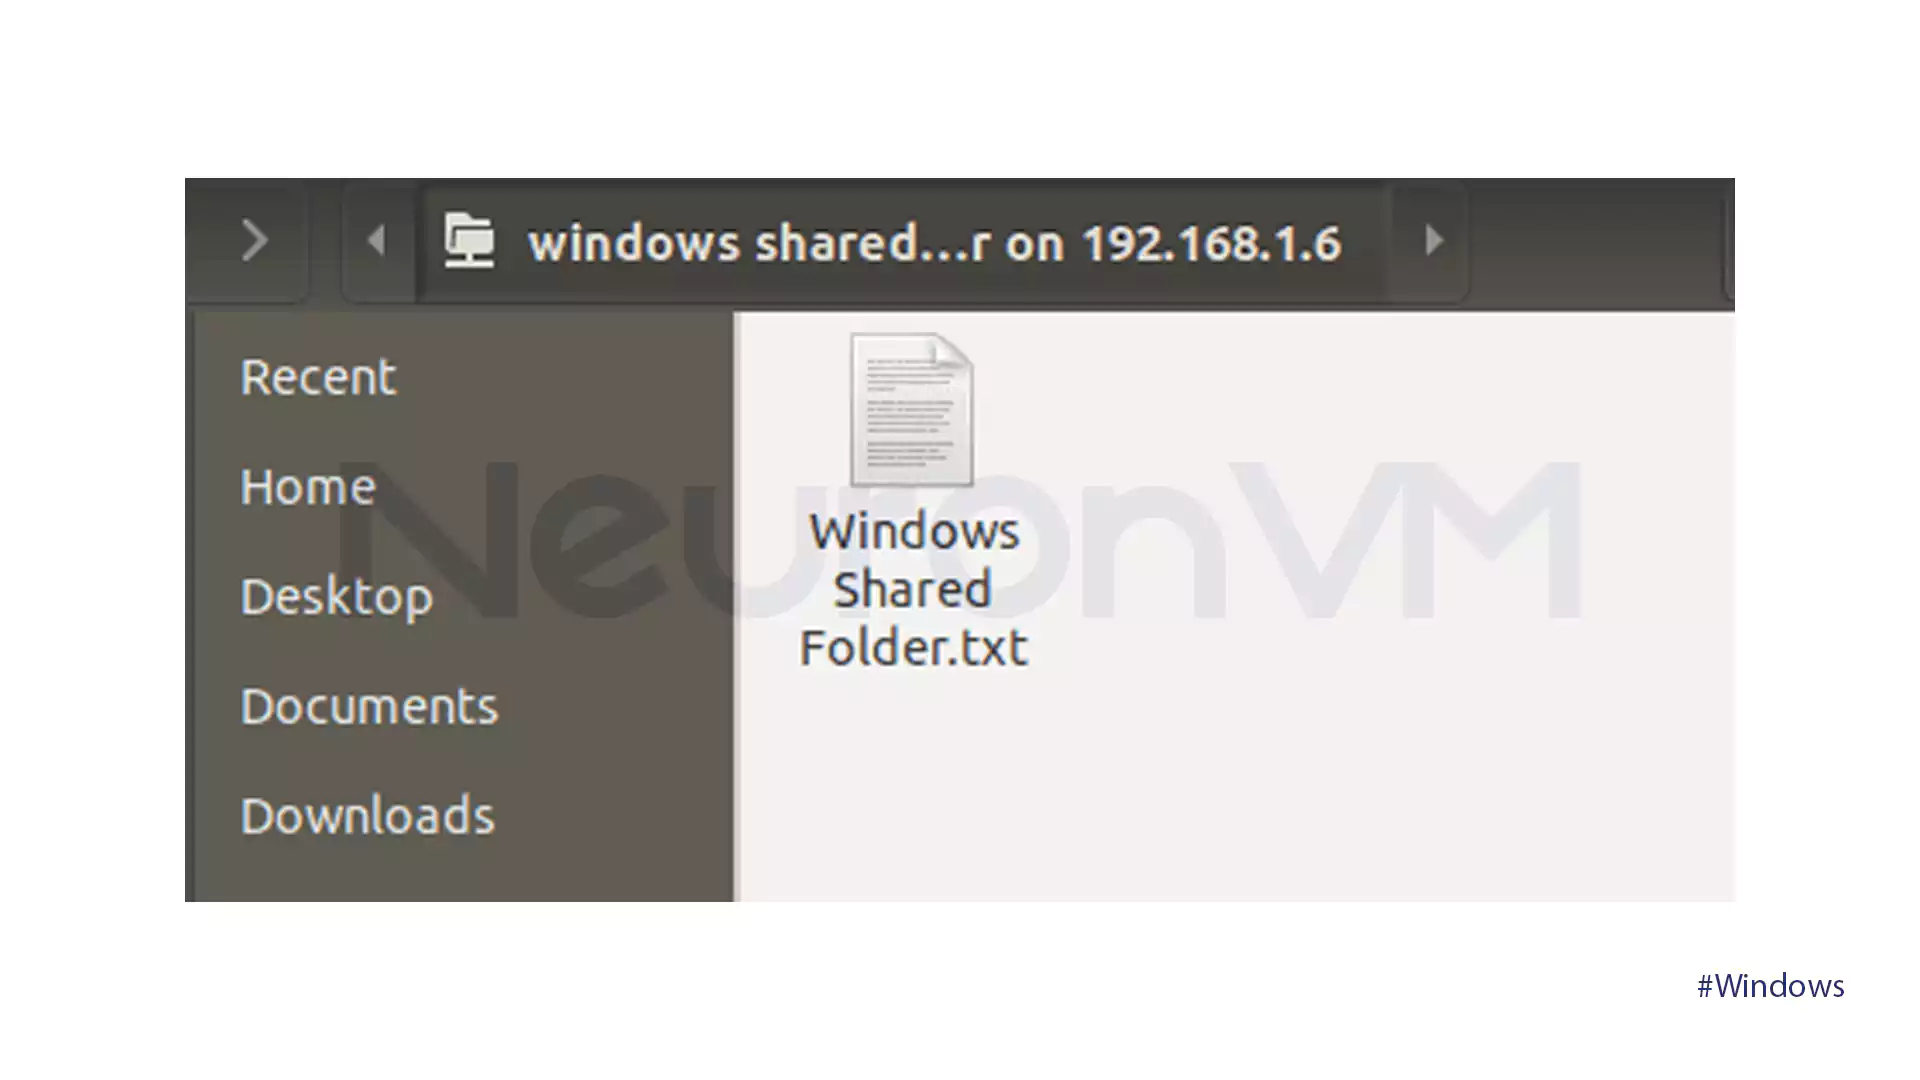
- You will now see your Windows shared folder. You can now share files between two PVs.
Method 5: Transfer files using Cloud Storage
The last method to transfer files from Ubuntu laptop to Windows is to transfer by using Cloud Storage.
- Wherever they are, you will always get them from a cloud service like Google Drive or Dropbox. Just upload your files from Ubuntu and access them from any device connected to the internet.
- You can download those files to your Windows desktop from the website or app of the cloud service.

Conclusion
These methods should help you to learn the ways to transfer files from Ubuntu laptop to Windows desktop. With some practice, you’ll be zipping files back and forth in no time.

