How to Access Virtual Memory Settings in Windows 11
 6m
6m
 0 comments
If you want to Access Virtual Memory Settings in Windows 11 and don’t know how follow this step-by-step guide and access your Virtual Memory effortlessly. Accessing Virtual Memory is important for managing it, or you can even troubleshoot performance issues, or you might even want to customize it. Important Note: While managing your virtual memory can improve your performance, it is better to let Windows manage it automatically.
What is a Virtual Memory in Windows 10?
Virtual Memory is an illusion of more memory, based on its name you can tell a computer pretends it has more memory when in real life it doesn’t.
Each program in the computer has its own virtual memory making it isolated, helping the computer run multiple programs at the same time, and making it run programs smoothly without worries about running out of memory.
It works by allowing the computer to use its own hard drive as memory when it runs out of it, this process frees up the RAM, so it can run important tasks. Read more about it on Microsoft’s main website.
Advantages of Virtual Memory
Virtual Memory is the solution to the limitations of Physical RAM, using Virtual Memory allows the system to handle more tasks.
Virtual Memory is cost-effective, you can easily manage it and it helps manage memory more efficiently.
It allows the process to access only the necessary memory segment, this action minimizes the need for external devices.
In the end, it is better to know that Virtual Memory improves our system’s performance it is not as quick as physical RAM.
Accessing Virtual Memory Settings in Windows
1-For the first step, go to the Start bar and click on Settings.
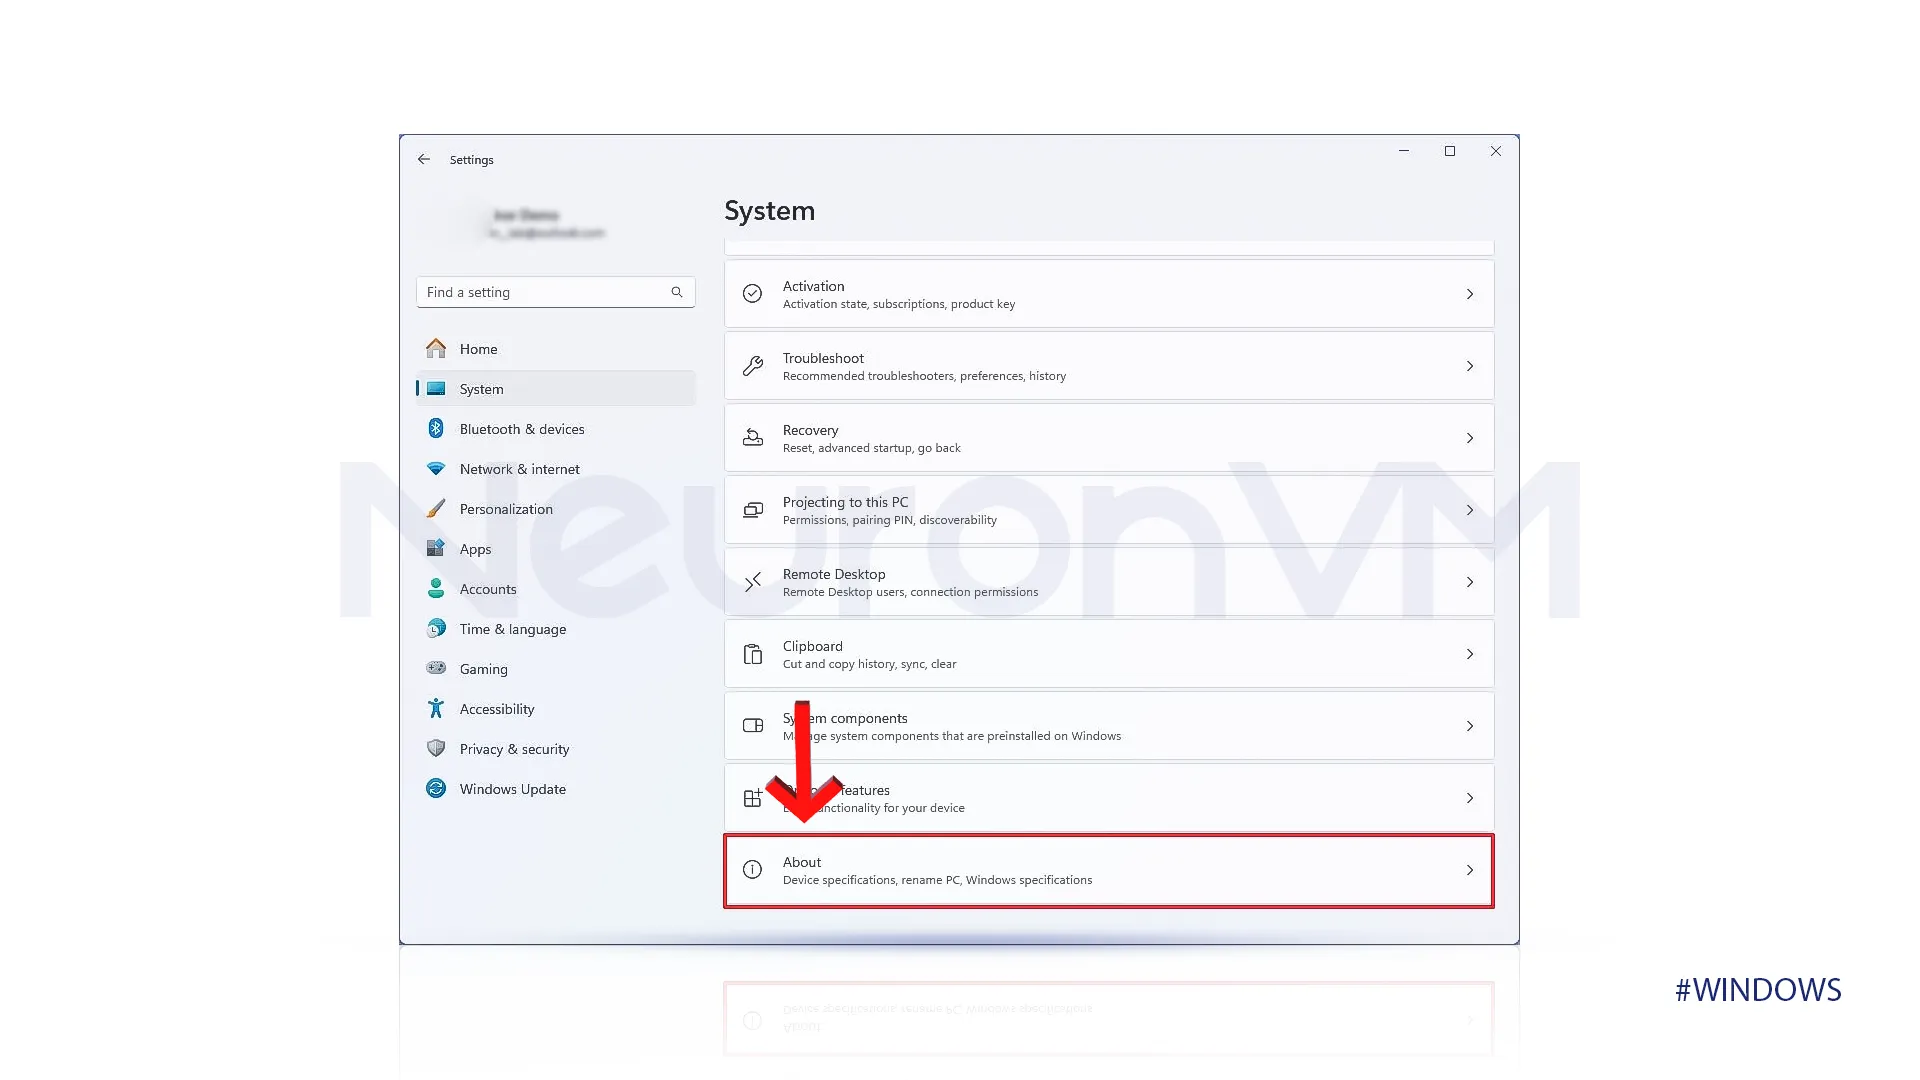
2-In the Settings, click on System.
3-When the System tab opens, at the bottom of the right side, you will see the About button, select that.
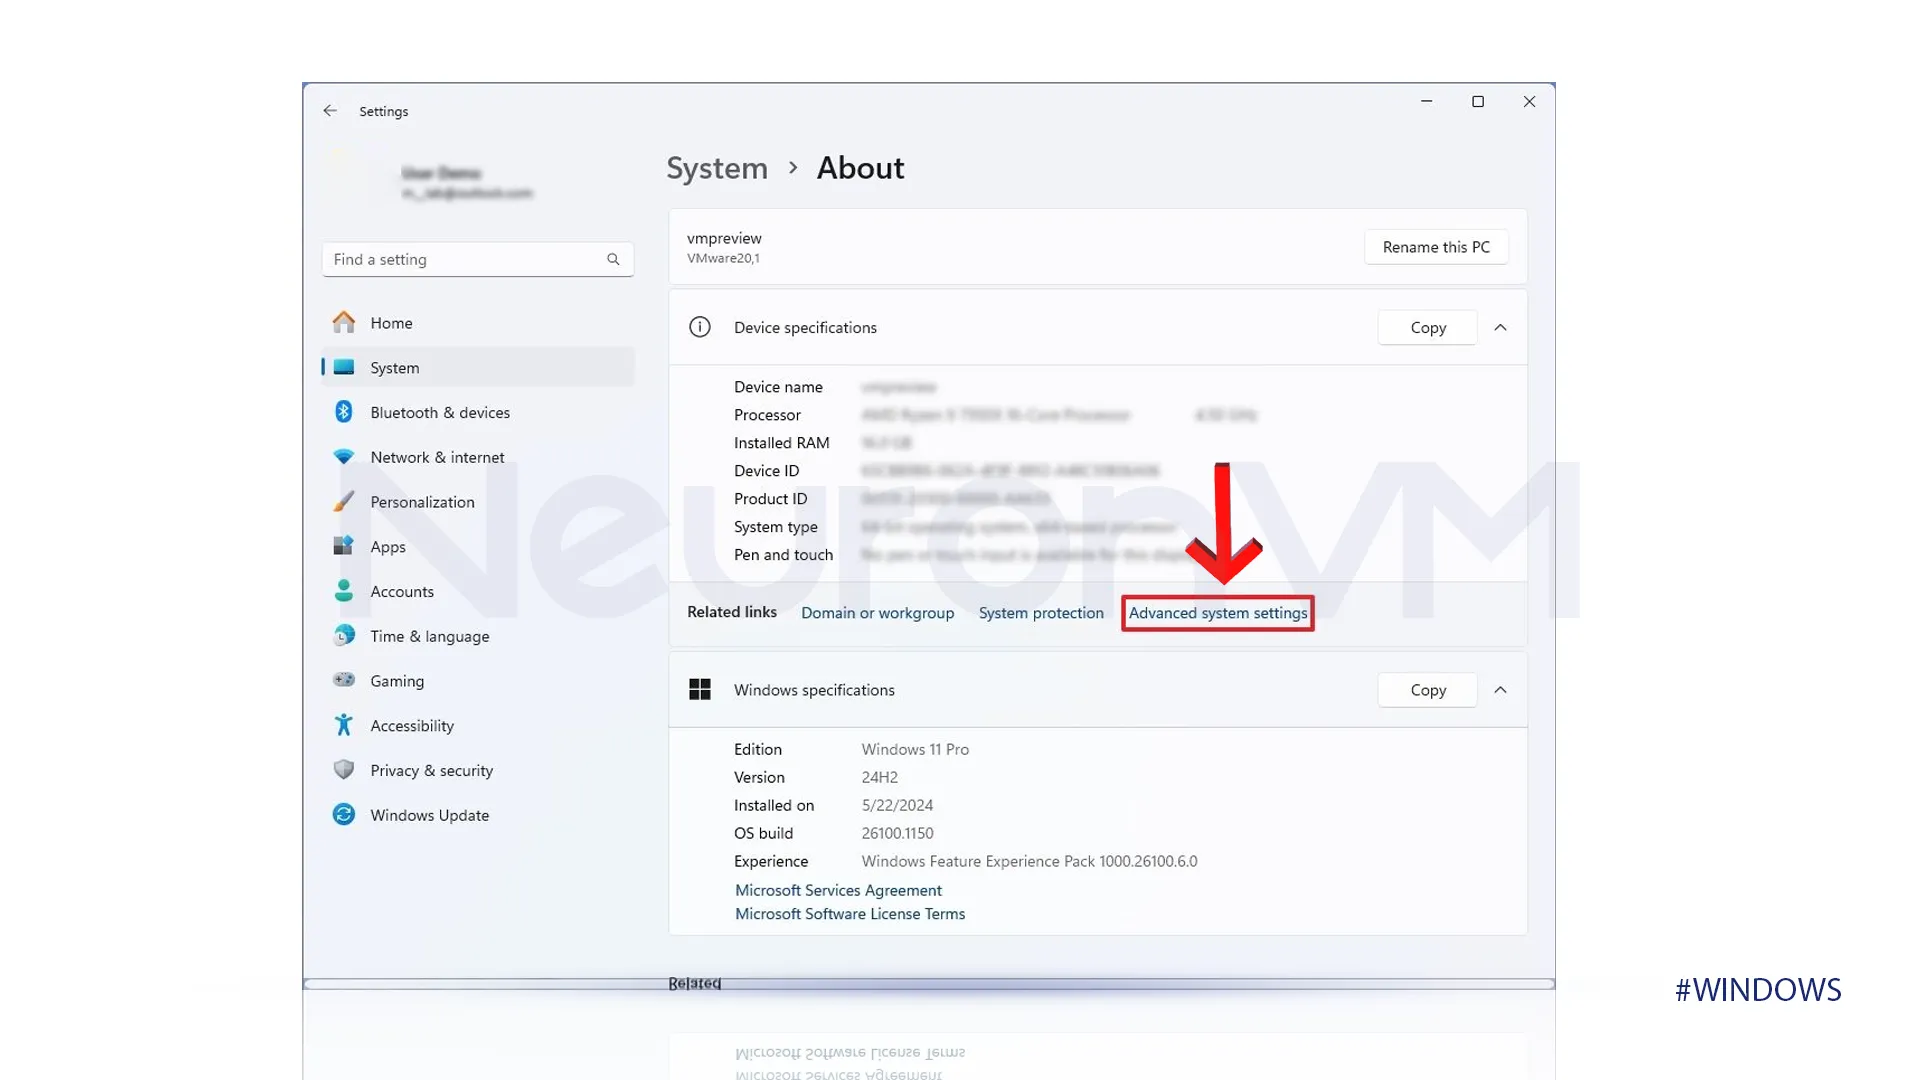
4-New tab will open after clicking on that, next to the System Protection, select Advanced system Setting.
5- You will see Settings in Advanced System Settings, click on it.
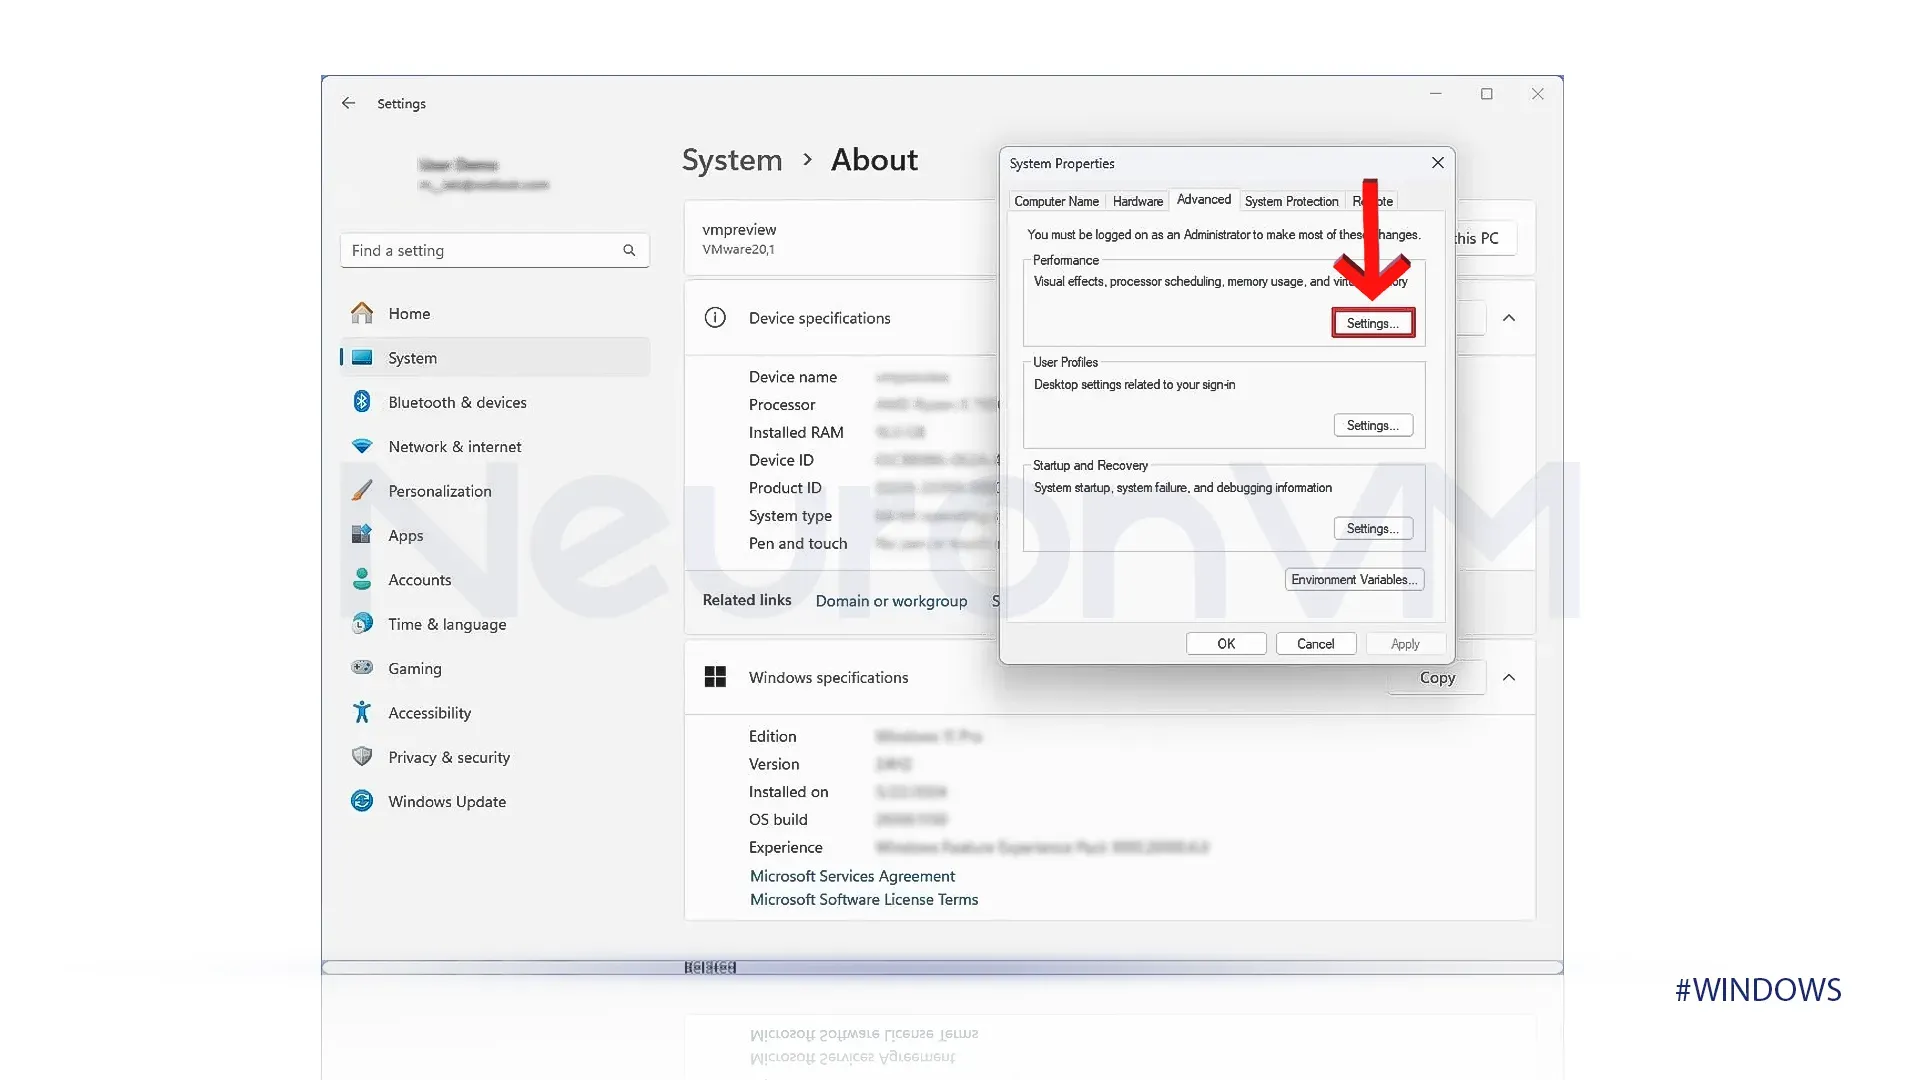
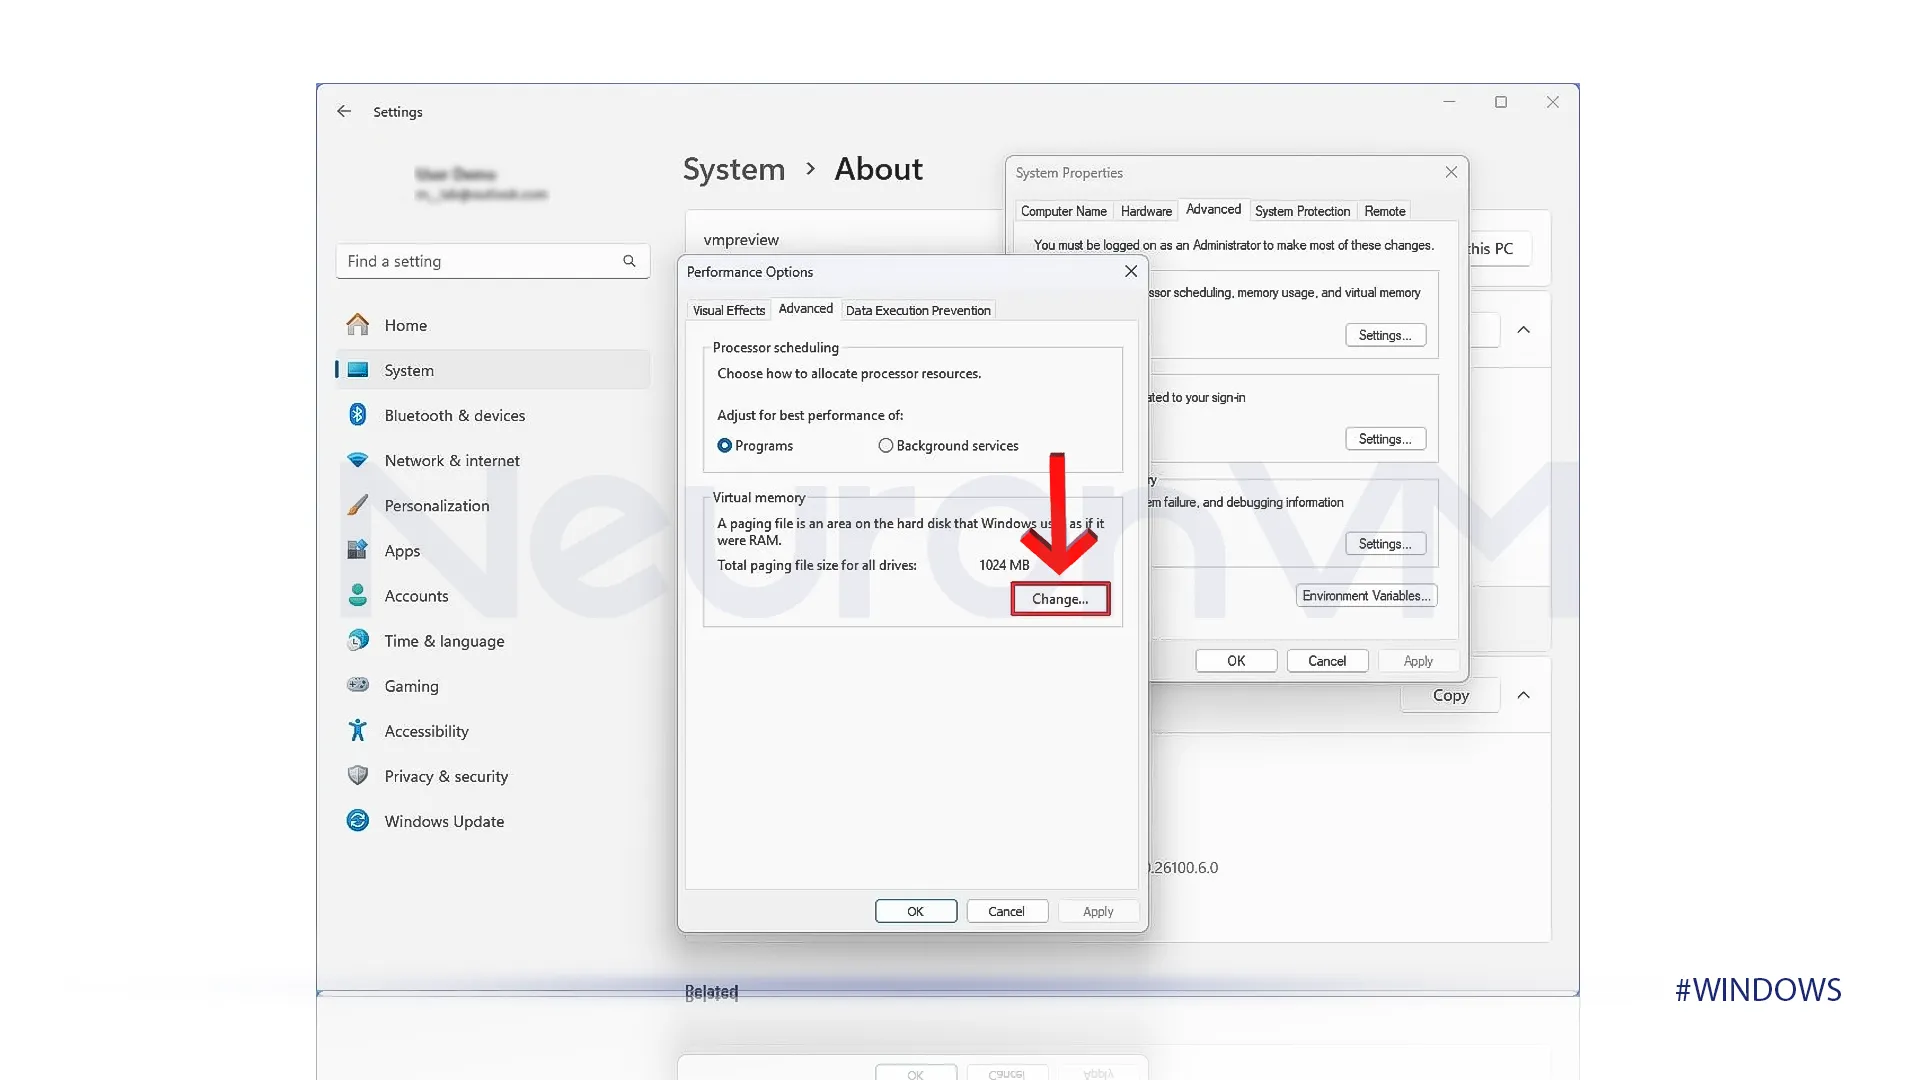
6-Once the new tab under the name performance options is open, click on the change button that is under the virtual memory section.
7- you will see an option under the name of Automatically manage paging file size for all drives, select that option.
8-In order to specify the size of the packaging, click on the Custome Size option.
9-Then choose the maximum size of the specified file.
10-After you enter all of the information correctly, click on the Set to set all of your information.
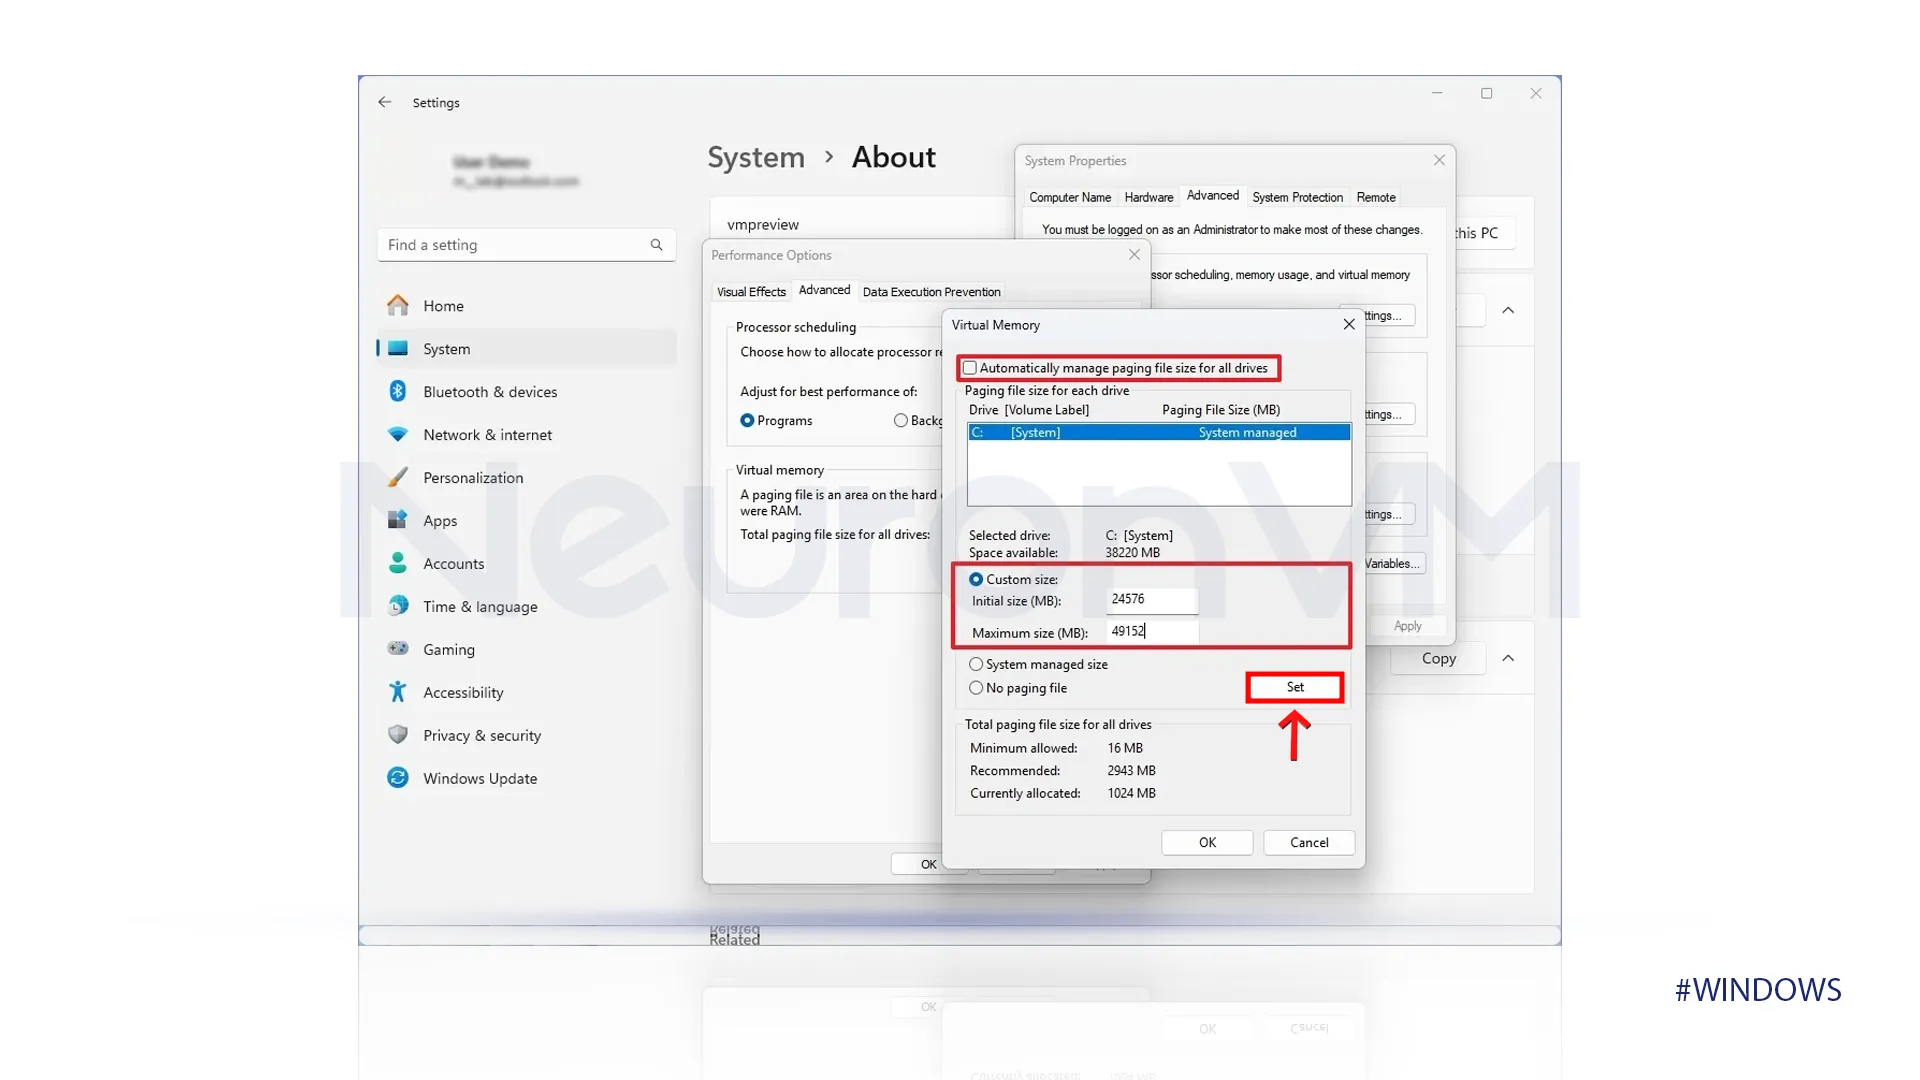
11- Then click on the OK button two times.
12-Restart the computer to save the changes you have made to your device.
Once you have done all of the previous steps you will be able to increase the device’s performance.
Conclusion
Accessing Virtual Memory in Windows 11 might sound overwhelming, but it is actually a straightforward process. This process can improve your device’s overall performance.
By following the steps that we have outlined in this tutorial, you can access your Virtual Memory and enhance your performance by using the combination of RAM and Virtual Memory, we also provided the concept of Virtual Memory and its advantages to give you an understanding of this concept, if you want to know more about Windows and have the best guides on it, check out our website.
You might like it
Windows Tutorials
How to Clear Cache in Windows 10 and 11 (Boost Speed)
Windows Tutorials
How to Use Shortcuts in Eclipse to Code Faster (With Example...
Windows Tutorials
How to Enable Bluetooth on Windows 10


