How to Configuration Proxy Server on MikroTik

 5m
5m
 0 comments
A proxy server acts as an intermediary between devices on a network and the internet. It can be used to enhance security, and network performance, and monitor internet usage. MikroTik is a popular brand of network equipment that provides a wide range of features, including the capability to configure a proxy server. In this guide, we will teach you how to configuration proxy server on MikroTik device.
If you intend to buy and set up a Mikrotik VPS server, we recommend that you review, test, and use the plans provided on our website before doing anything. The high quality of these servers will bring you to your goals.
Step 1: Accessing MikroTik RouterOS Interface
To begin configuring the proxy server on MikroTik, you first need to access the RouterOS interface.
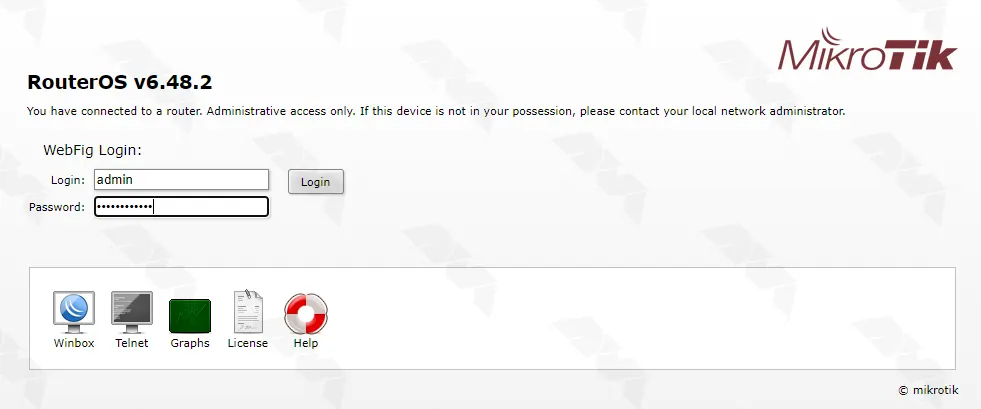
Connect your computer to the MikroTik device either using an Ethernet cable or via Wi-Fi. Open a web browser and enter the default IP address of the MikroTik router (usually 192.168.88.1) in the address bar. Enter your login credentials to access the RouterOS interface:
Step 2: Enabling Web Proxy
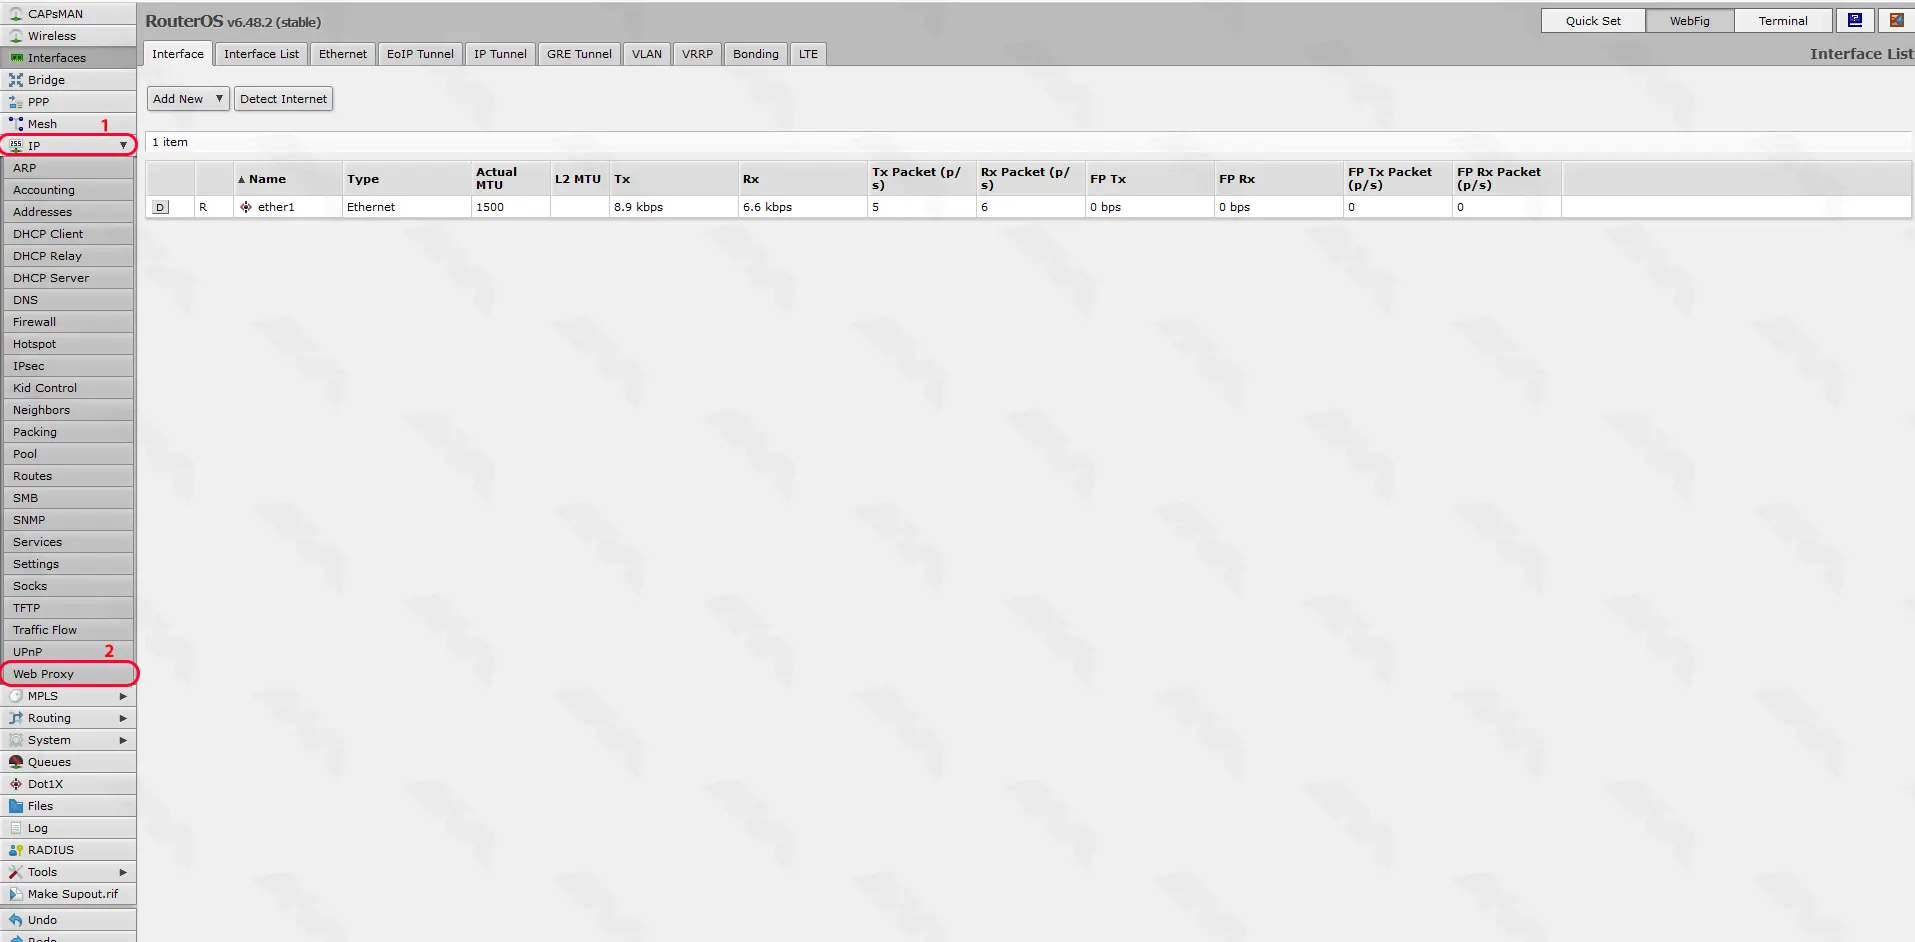
Navigate to the “IP” menu and select “Web Proxy” from the drop-down list.
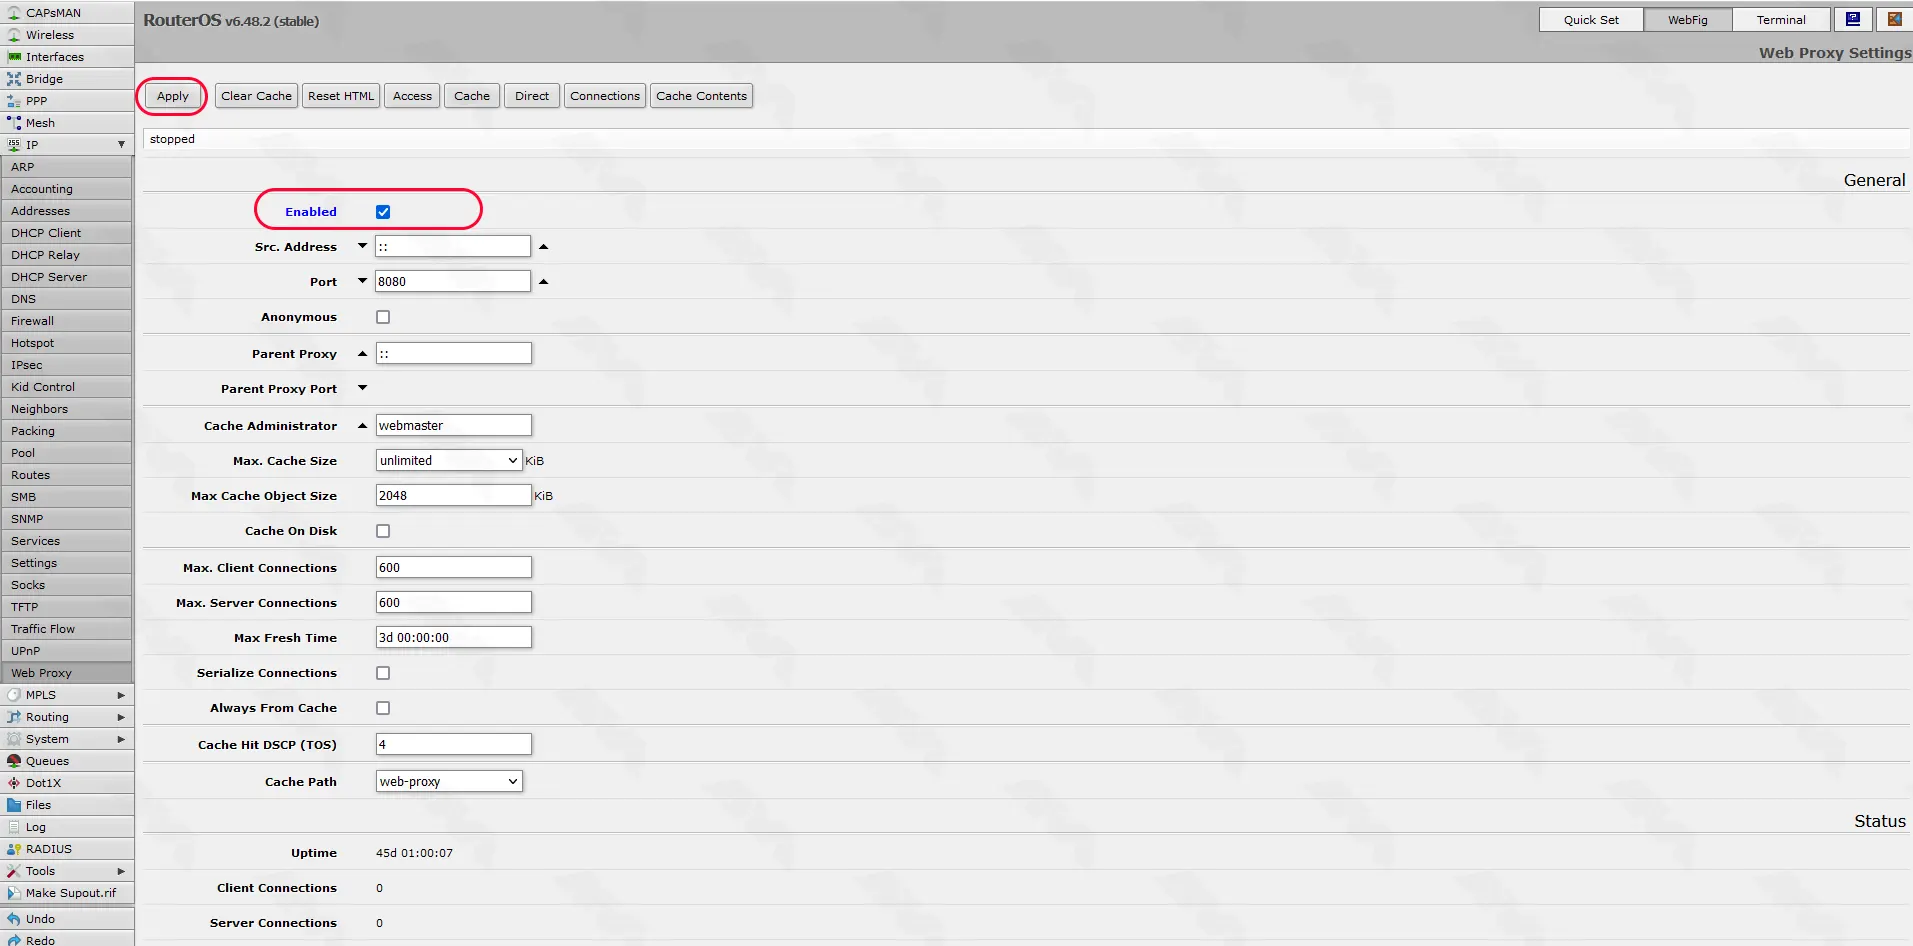
On the “Web Proxy Settings” page check the box next to “Enabled” and click on Apply to enable the web proxy feature:
Step 3: Configuring Proxy Settings
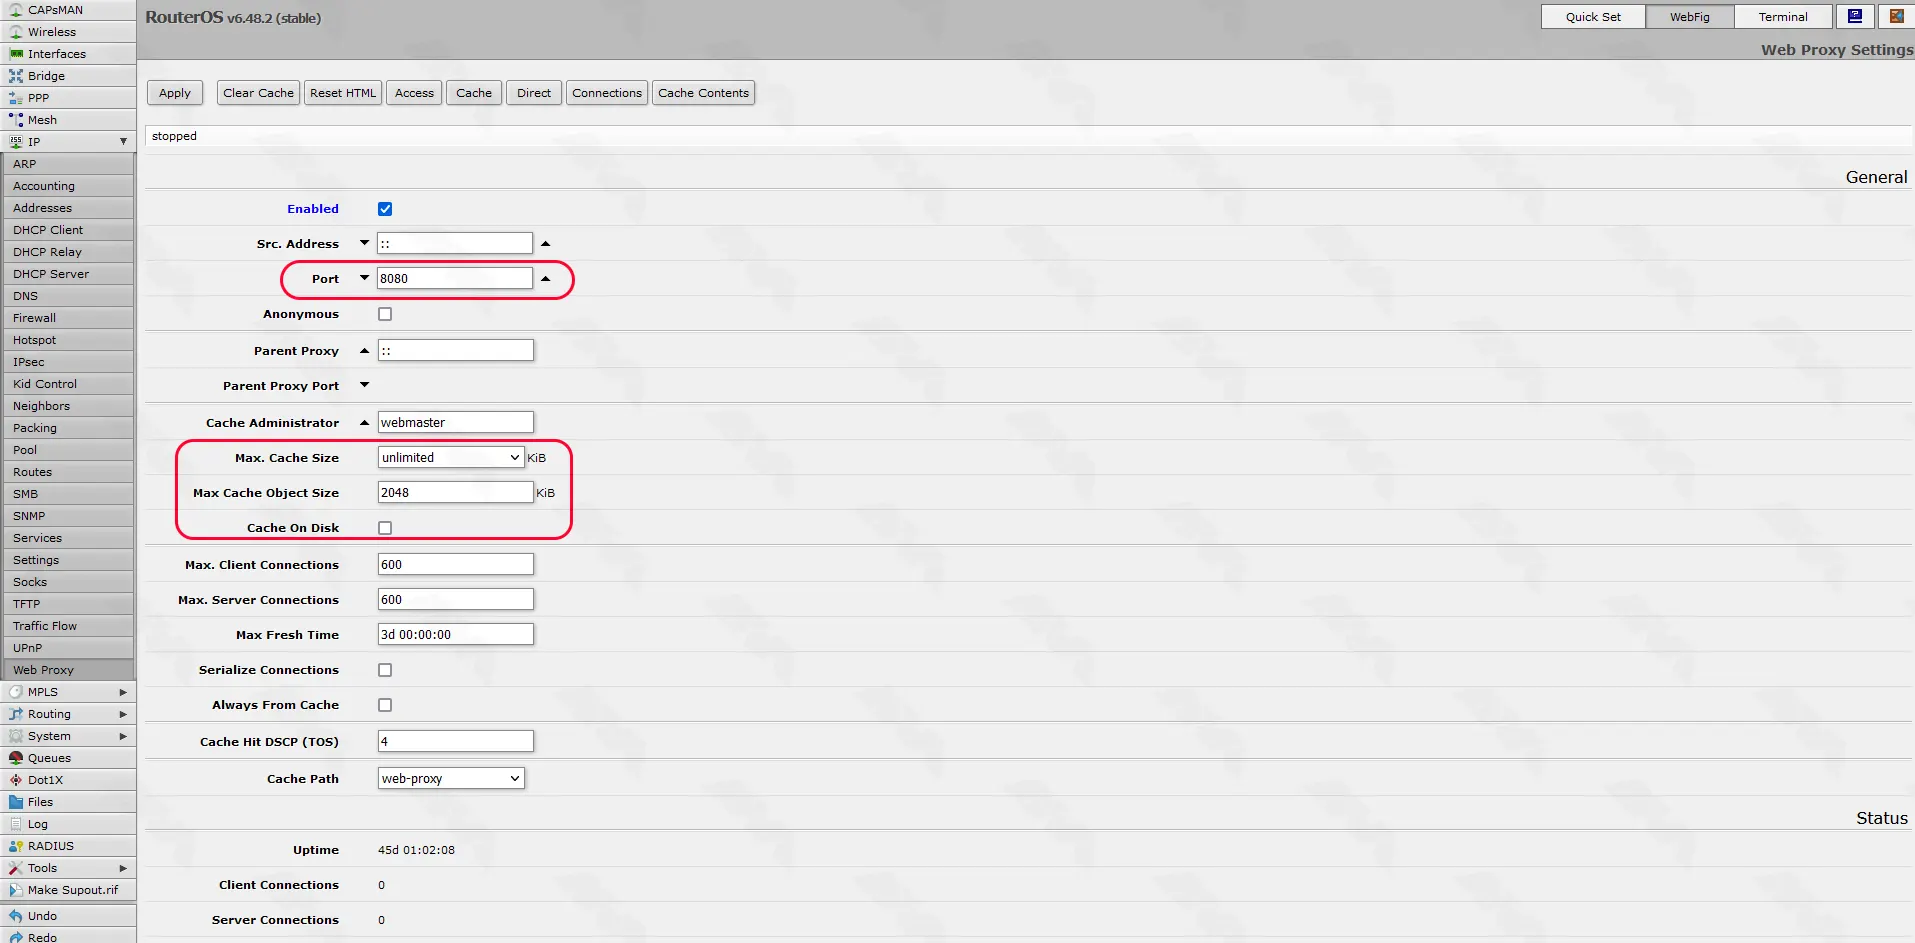
Under the “Web Proxy Settings” page, you can configure various settings for the proxy server.
Set the appropriate values for “Proxy Port” and “Cache Size” based on your requirements. You can also specify the maximum cache object size, cache on disk, and other advanced settings as needed:
Step 4: Defining Access Rules
To control which devices can access the proxy server, you need to define access rules.
Go to the “Access” tab in the “Web Proxy” menu.
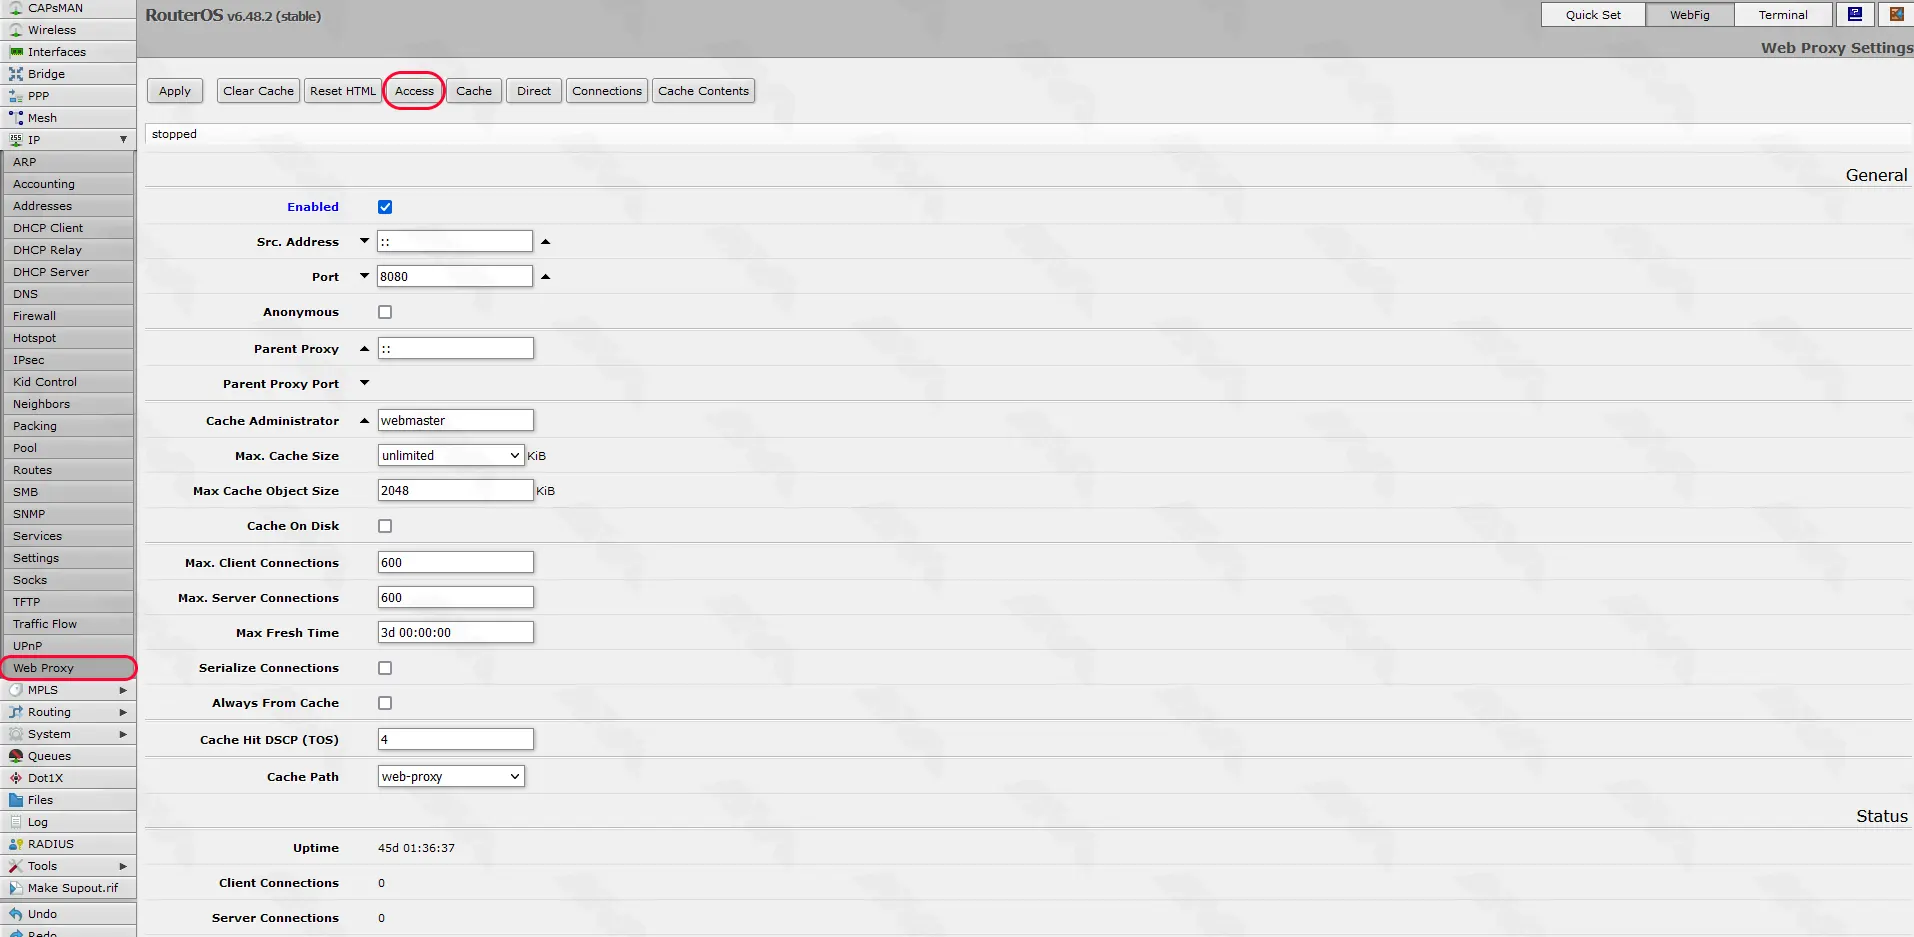
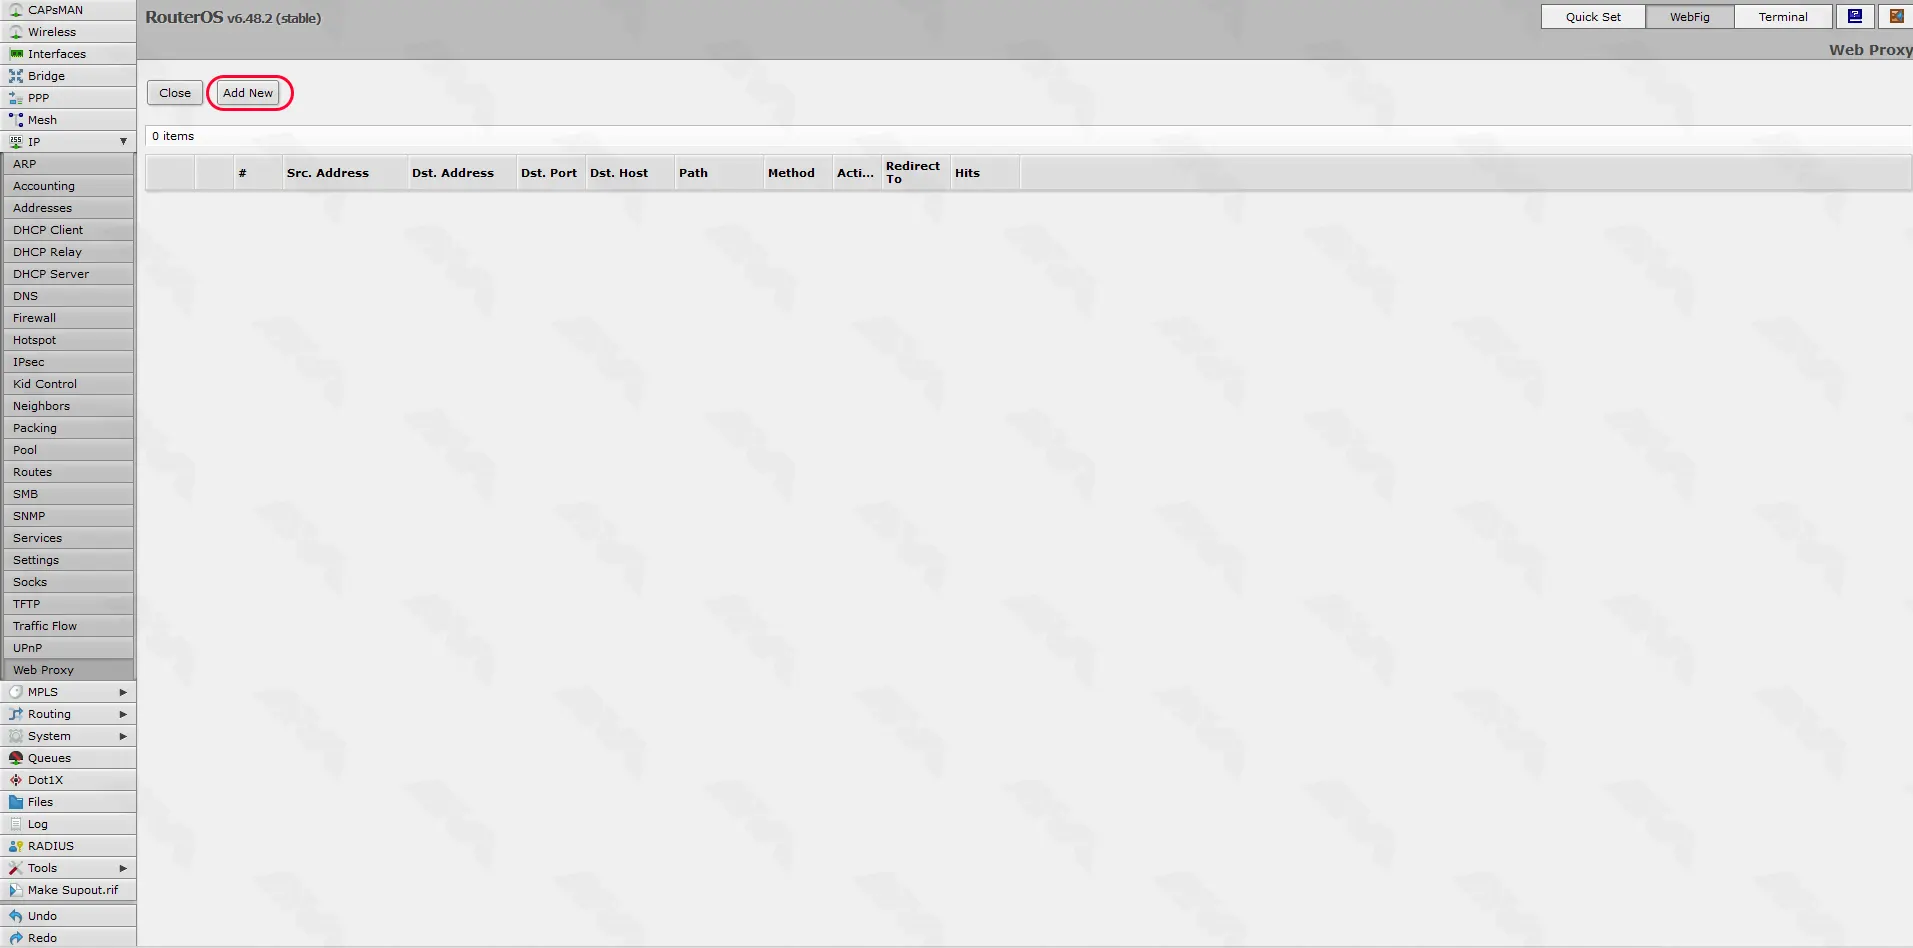
Click on the “Add New” button to add a new rule:
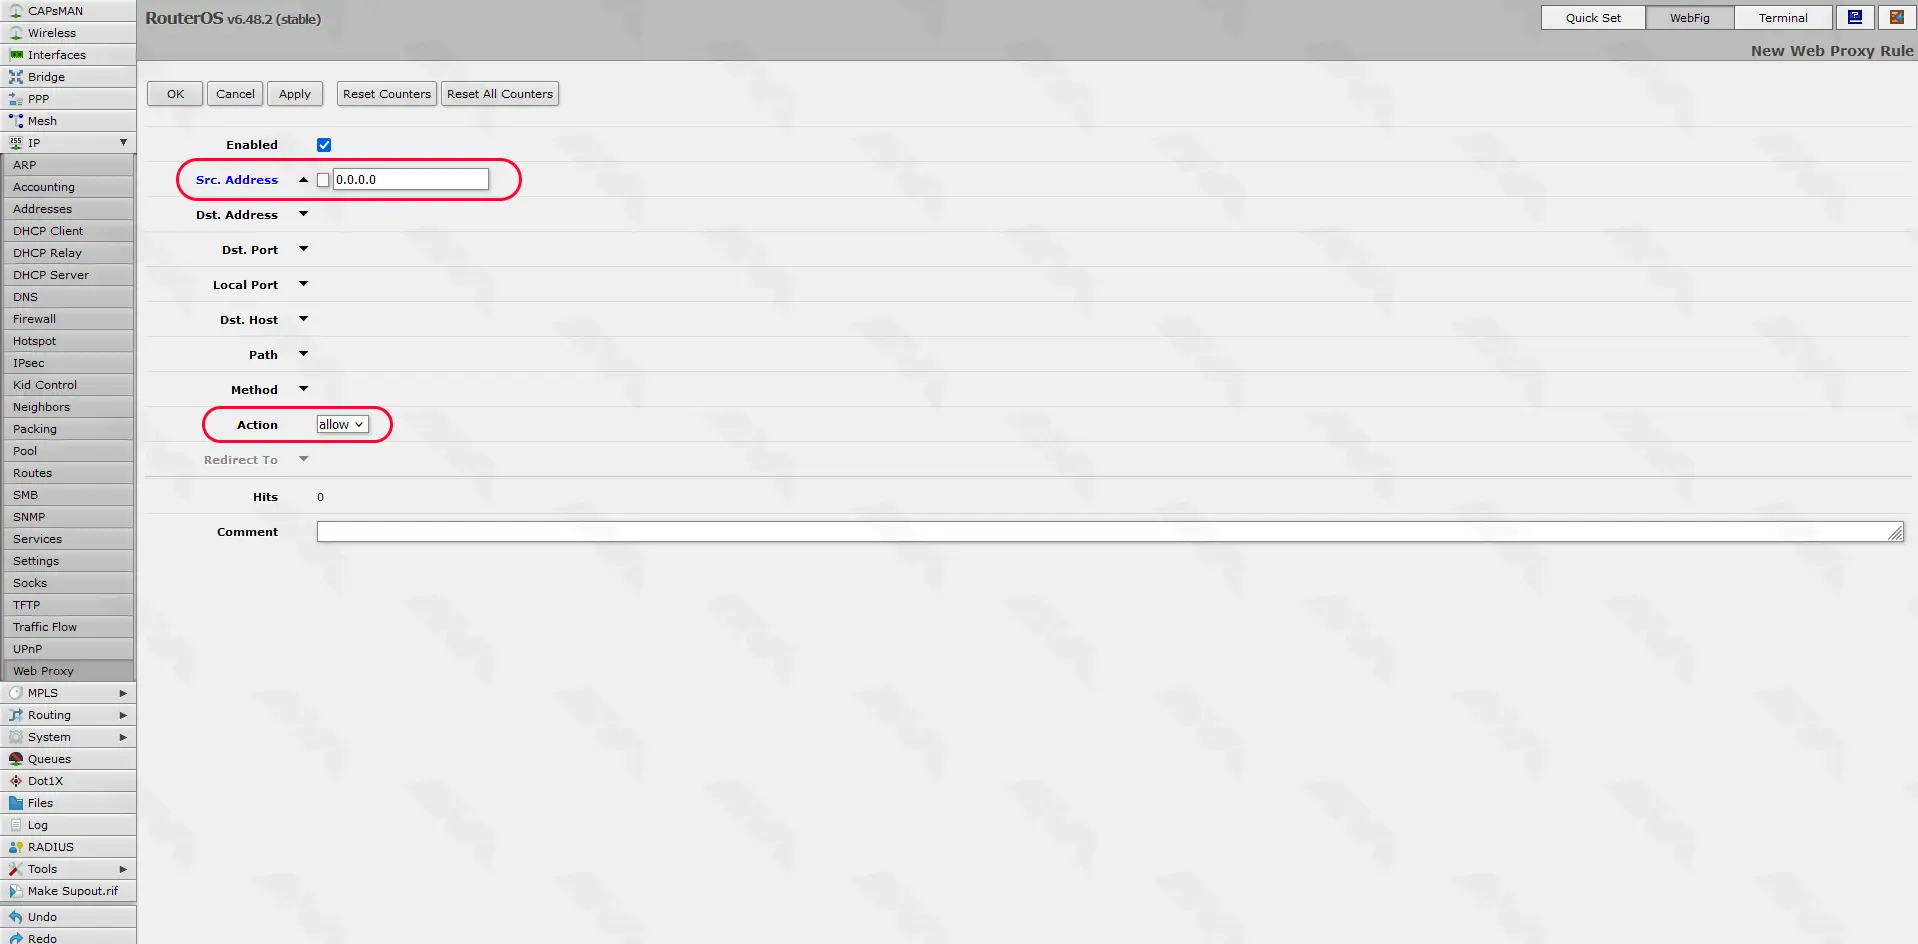
Enter the source address (IP or network) that is allowed to use the proxy, and set the action to “Allow.” Repeat this step for all the devices or networks that you want to grant proxy access to:
Step 5: Logging and Monitoring
If you wish to monitor and log the usage of the proxy server, navigate to the “Connections” tab in the “Web Proxy” menu.
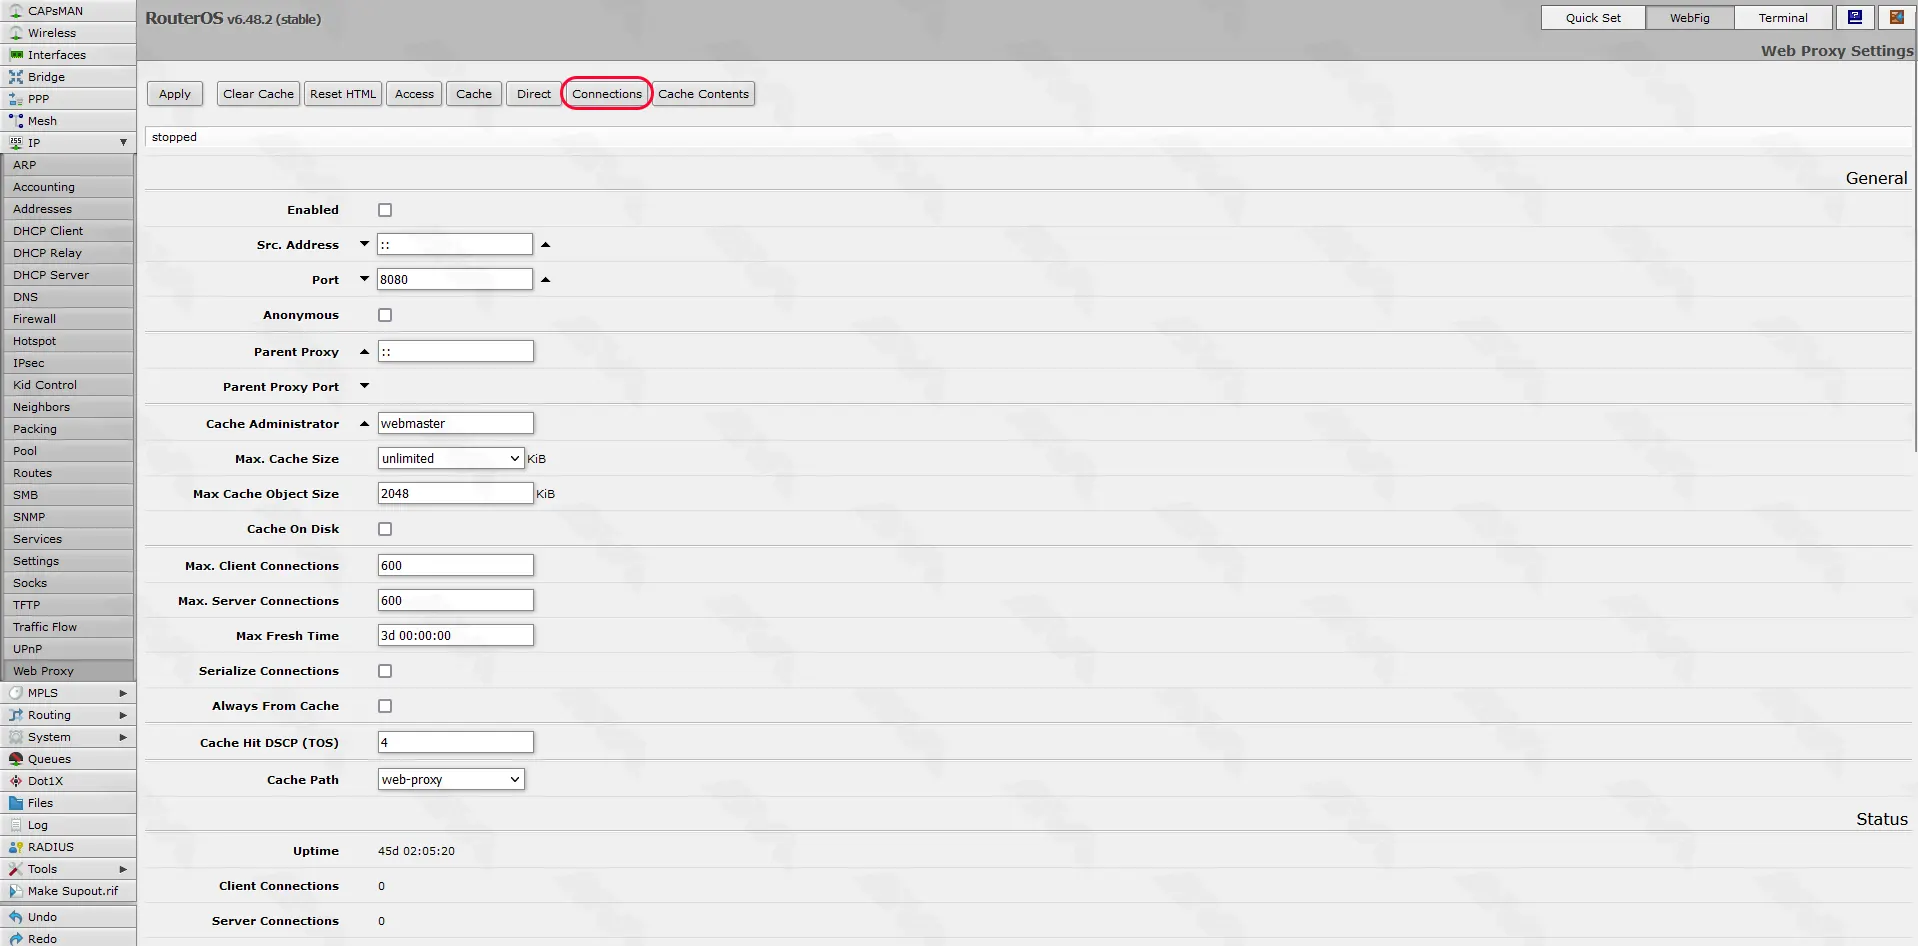
Here, you can enable logging and specify the log file name. Additionally, you can configure the maximum log file size and the action to take when the log file reaches its maximum size.
Conclusion
Configuration proxy server on MikroTik devices can provide various benefits, including improved security, enhanced network performance, and better control over internet usage. By following the steps outlined in this guide, you can enable, configure, and define access rules for a proxy server on your MikroTik device. Remember to consider your specific requirements and network environment when configuring the proxy server to ensure optimal performance and security.
You might like it

Almalinux Tutorials
How to Install and Configure HAProxy on AlmaLinux 8

Windows Tutorials
How to get Node.js server to run on Windows always

Debian Tutorials
How to Dual Boot Debian 12 and Windows (Step-by-Step)


