How to Enable Telnet Service in Windows Server 2019

 7m
7m
 0 comments
Telnet service is disabled in the Windows server by default, but enabling it is easier than it seems. In this article, we will guide you through how to enable telnet service in Windows Server 2019. We will provide a straightforward step-by-step tutorial on how to do it. However, it is better to know the usage of telnet service first.
What is a Telnet?
It is a network protocol with security vulnerabilities. It essentially connects with other remote computers under certain rules and conditions; it works by making connections between the local device you are working with and the remote device you want to connect to.
It creates a text-based communication channel. The difference between a telnet and an SSH connection is that a telnet is like a basic phone line, which means everyone on the line can hear you.
But SSH is like a secure phone call, and no one can hear the things you and the person you are talking to is talking about.
Telnet is a simple connection, and it is also very useful for text-based connections with remote systems, but you can’t transfer a file through the telnet protocol, so you need to use other protocols.
It is especially used for troubleshooting, and it can also be used to test network services. If you need to learn more about Telnet, visit Microsoft’s website.
Did you know you can use Telnet to connect routers and switches?
Enabling Telnet service in Windows Server 2019
Requirements
- Windows Server 2019
- Administrator privileges
Enabling Telnet service in Windows Server 2019
“Server manager”
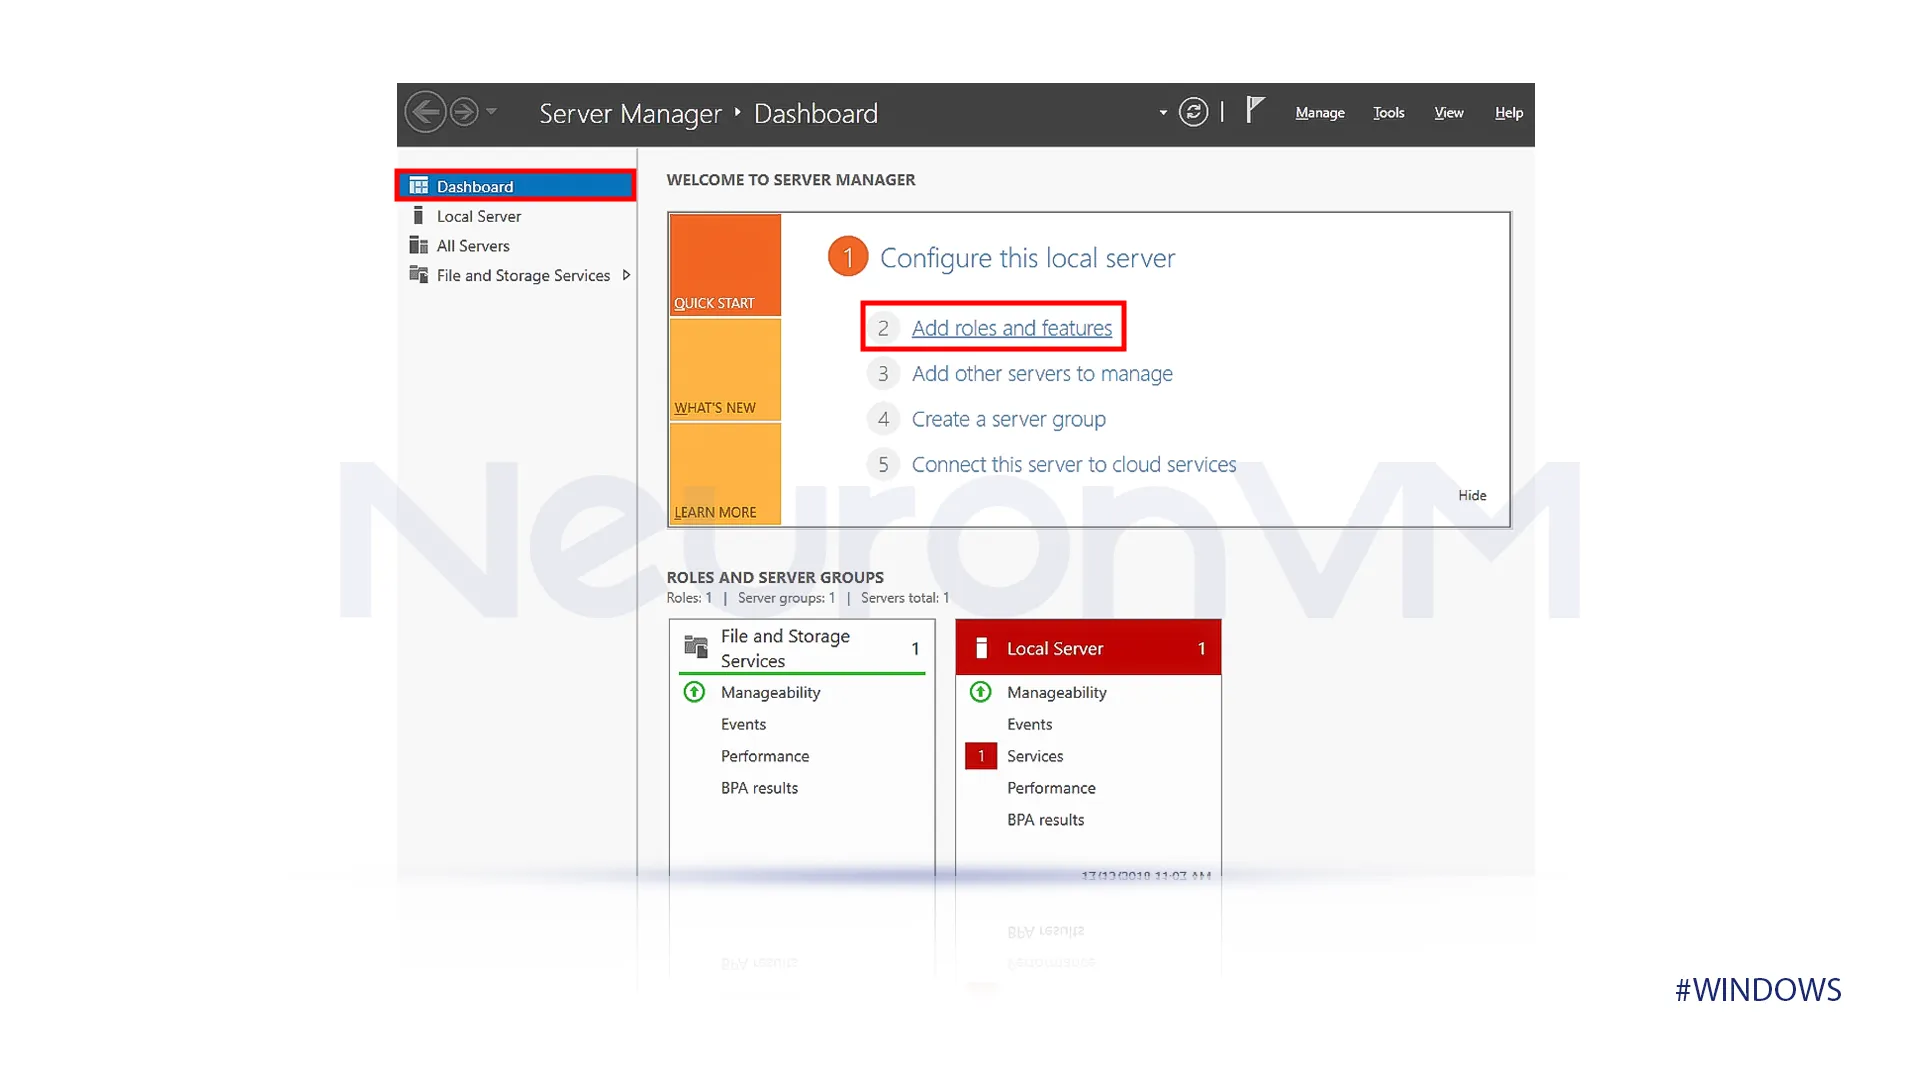
Click on the start button, find and select server manager from the list of applications, or simply search it in the box.
“Add roles and features”
After opening Server Manager, navigate to the “Dashboard” section and click Add new roles and features.
“Roles and Features Wizard”
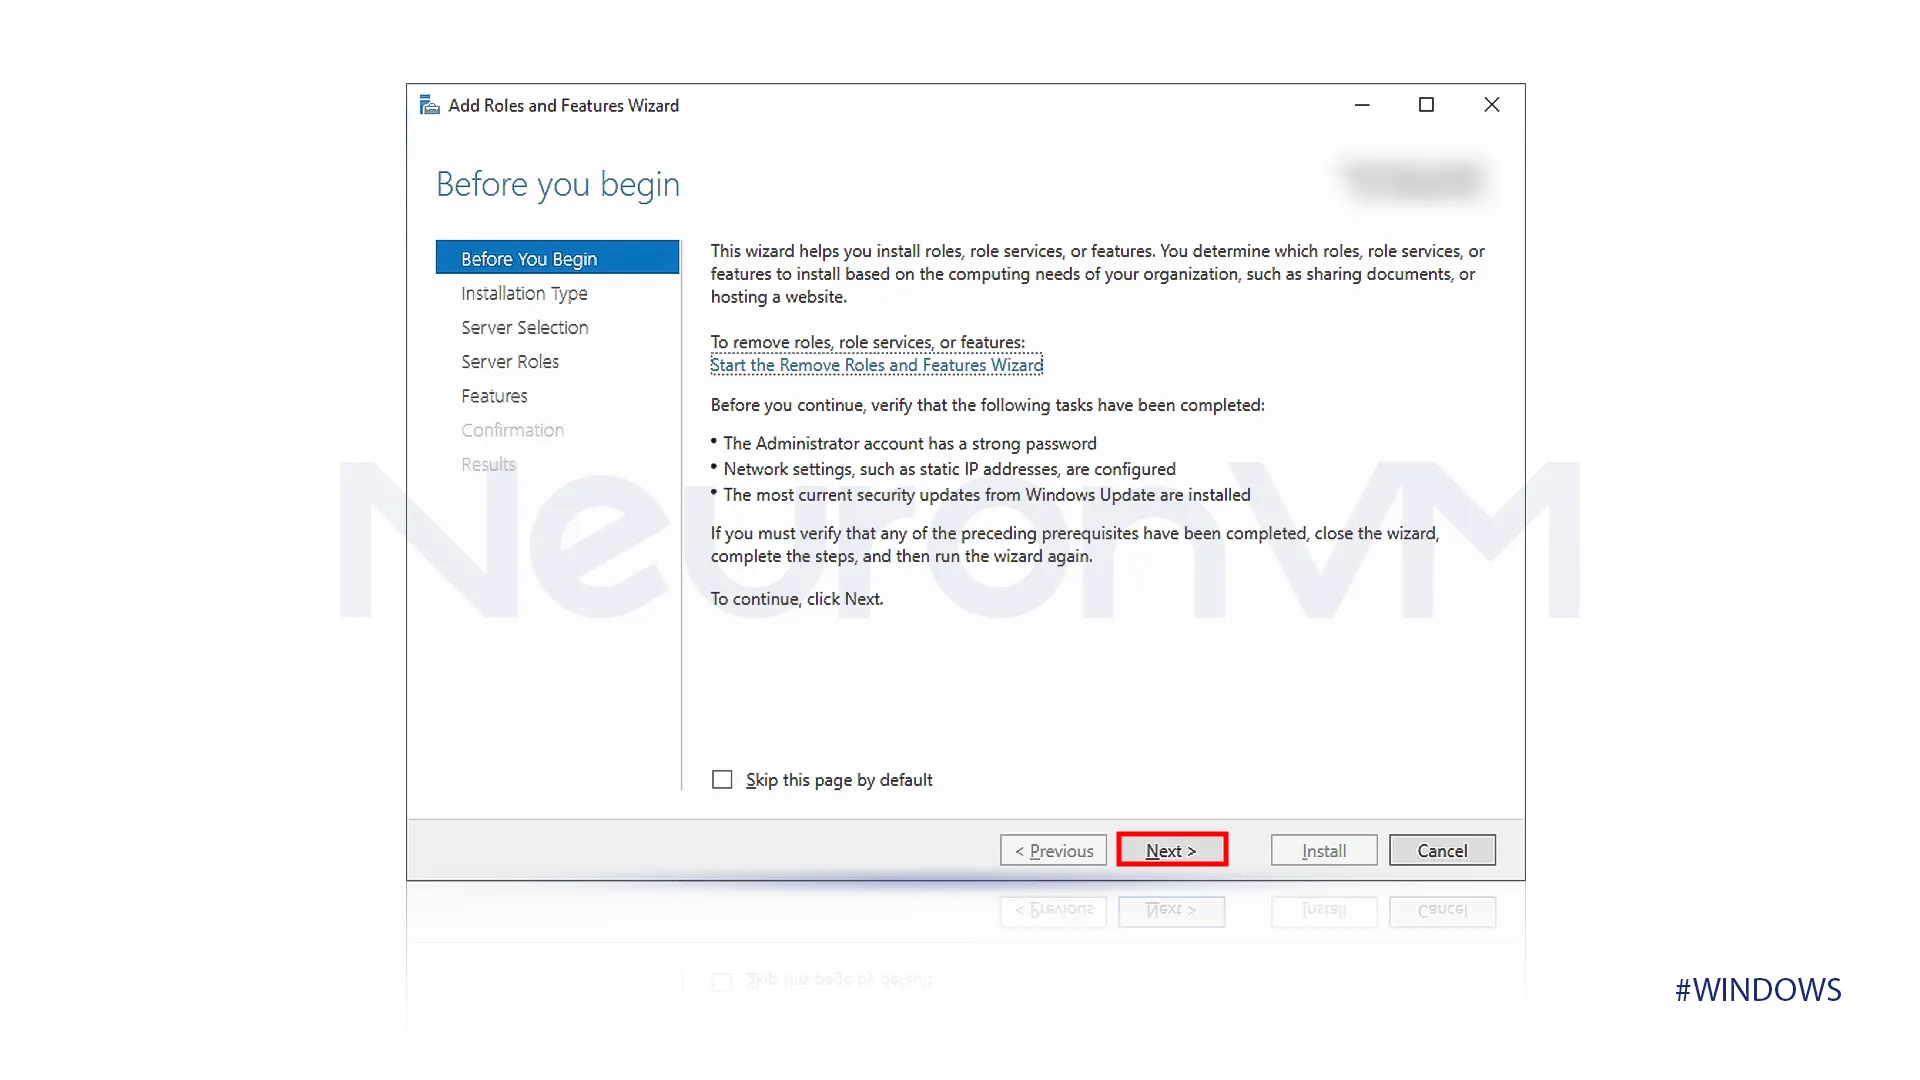
After you select “Add Roles and Features,” Make sure to review any provided information and click on the next button at the bottom of the screen.
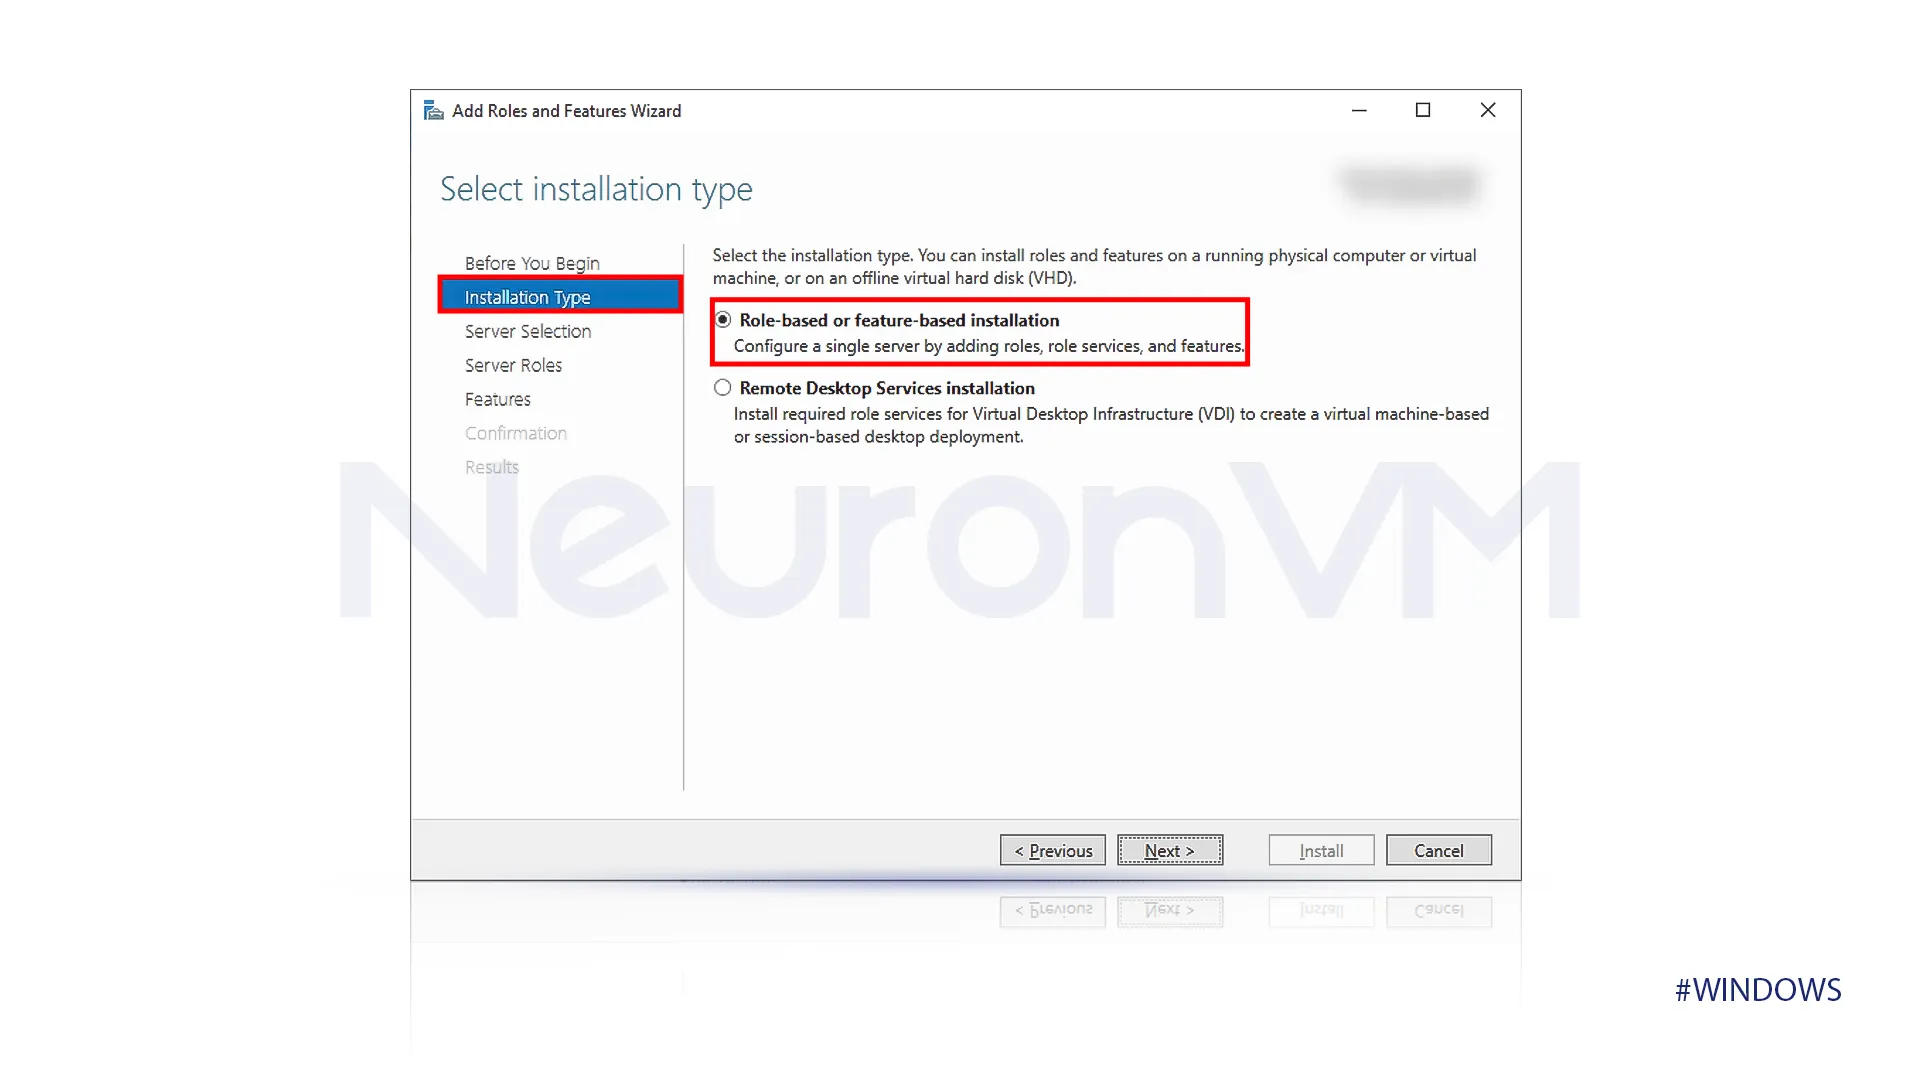
“Installation Type”
Select the role-based or feature-based as the installation type. This step confirms that you install individual features rather than a complete server role.
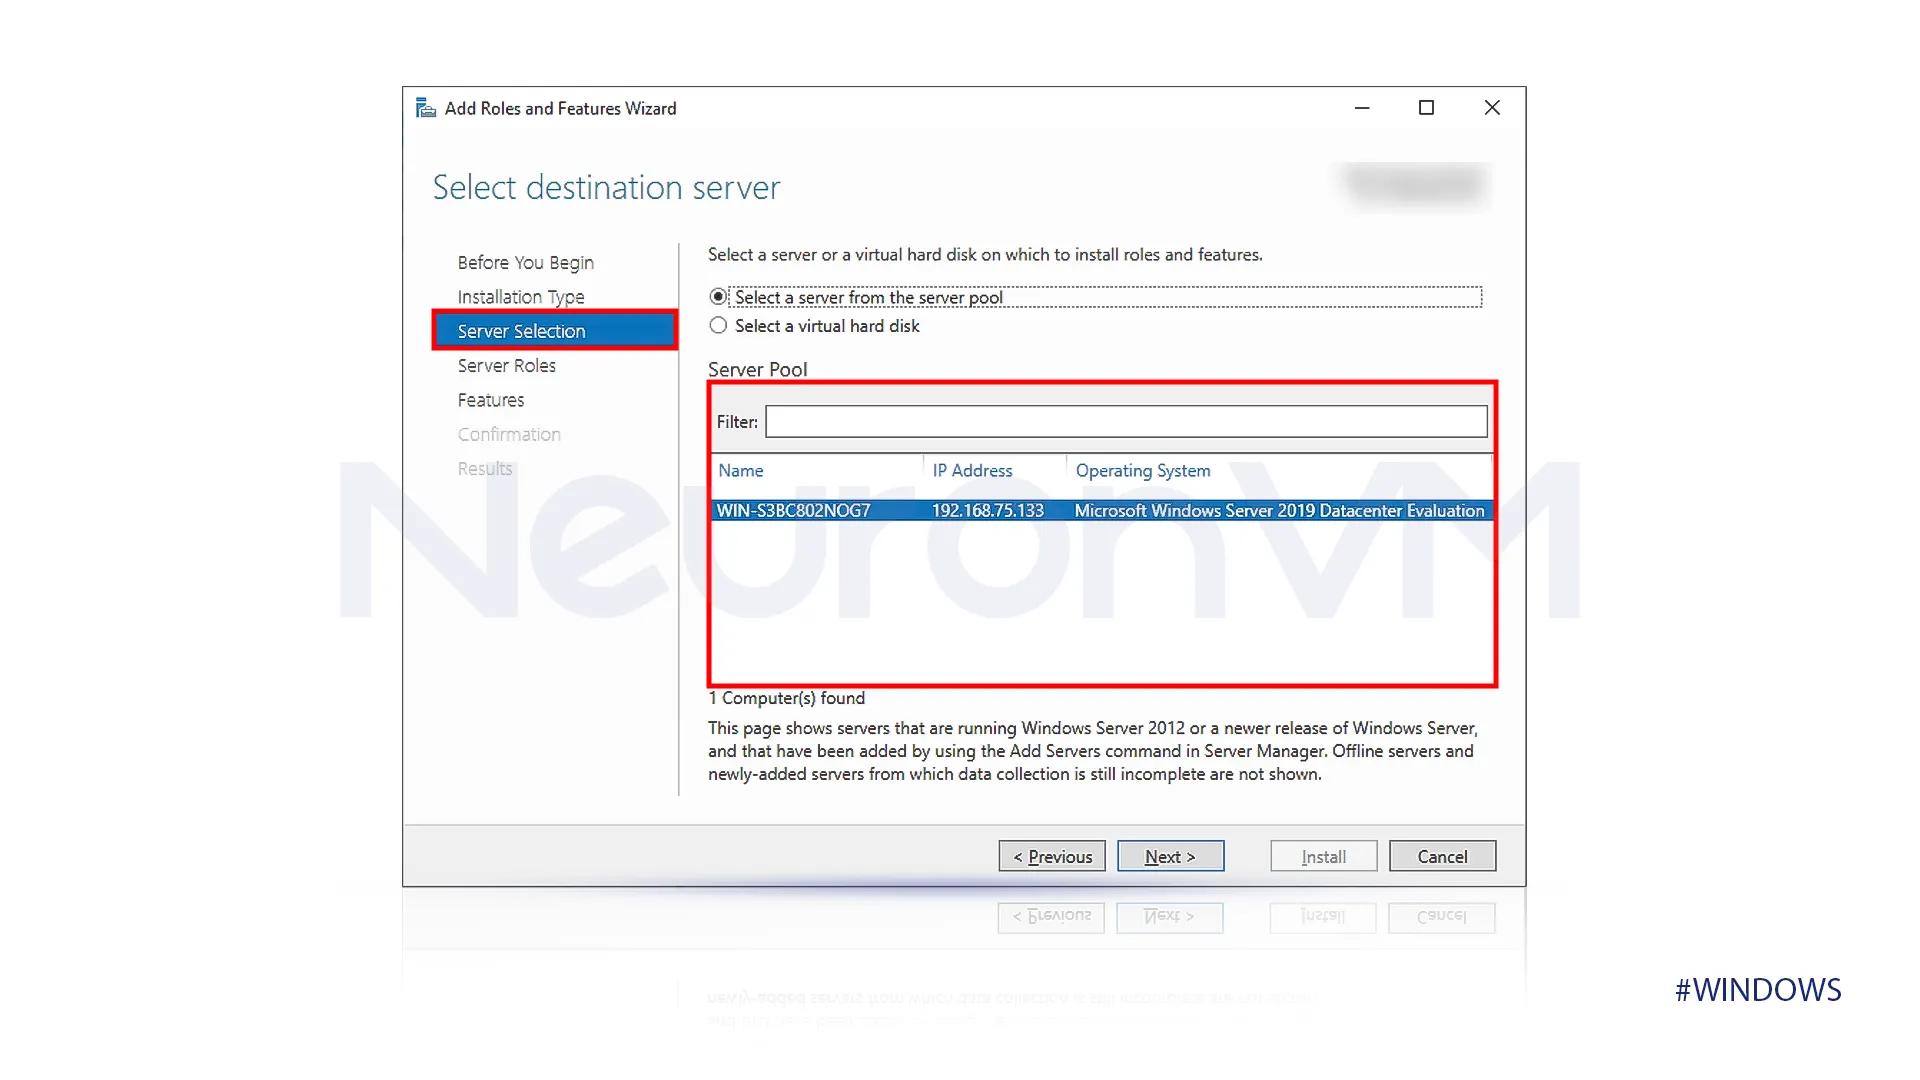
“Server Selection”
There will be a list of available servers on the “Server Destination Server” screen. The local server should be selected by default; if it is not, select the server you want to install the telnet client features. This step ensures that features are installed on the correct servers.
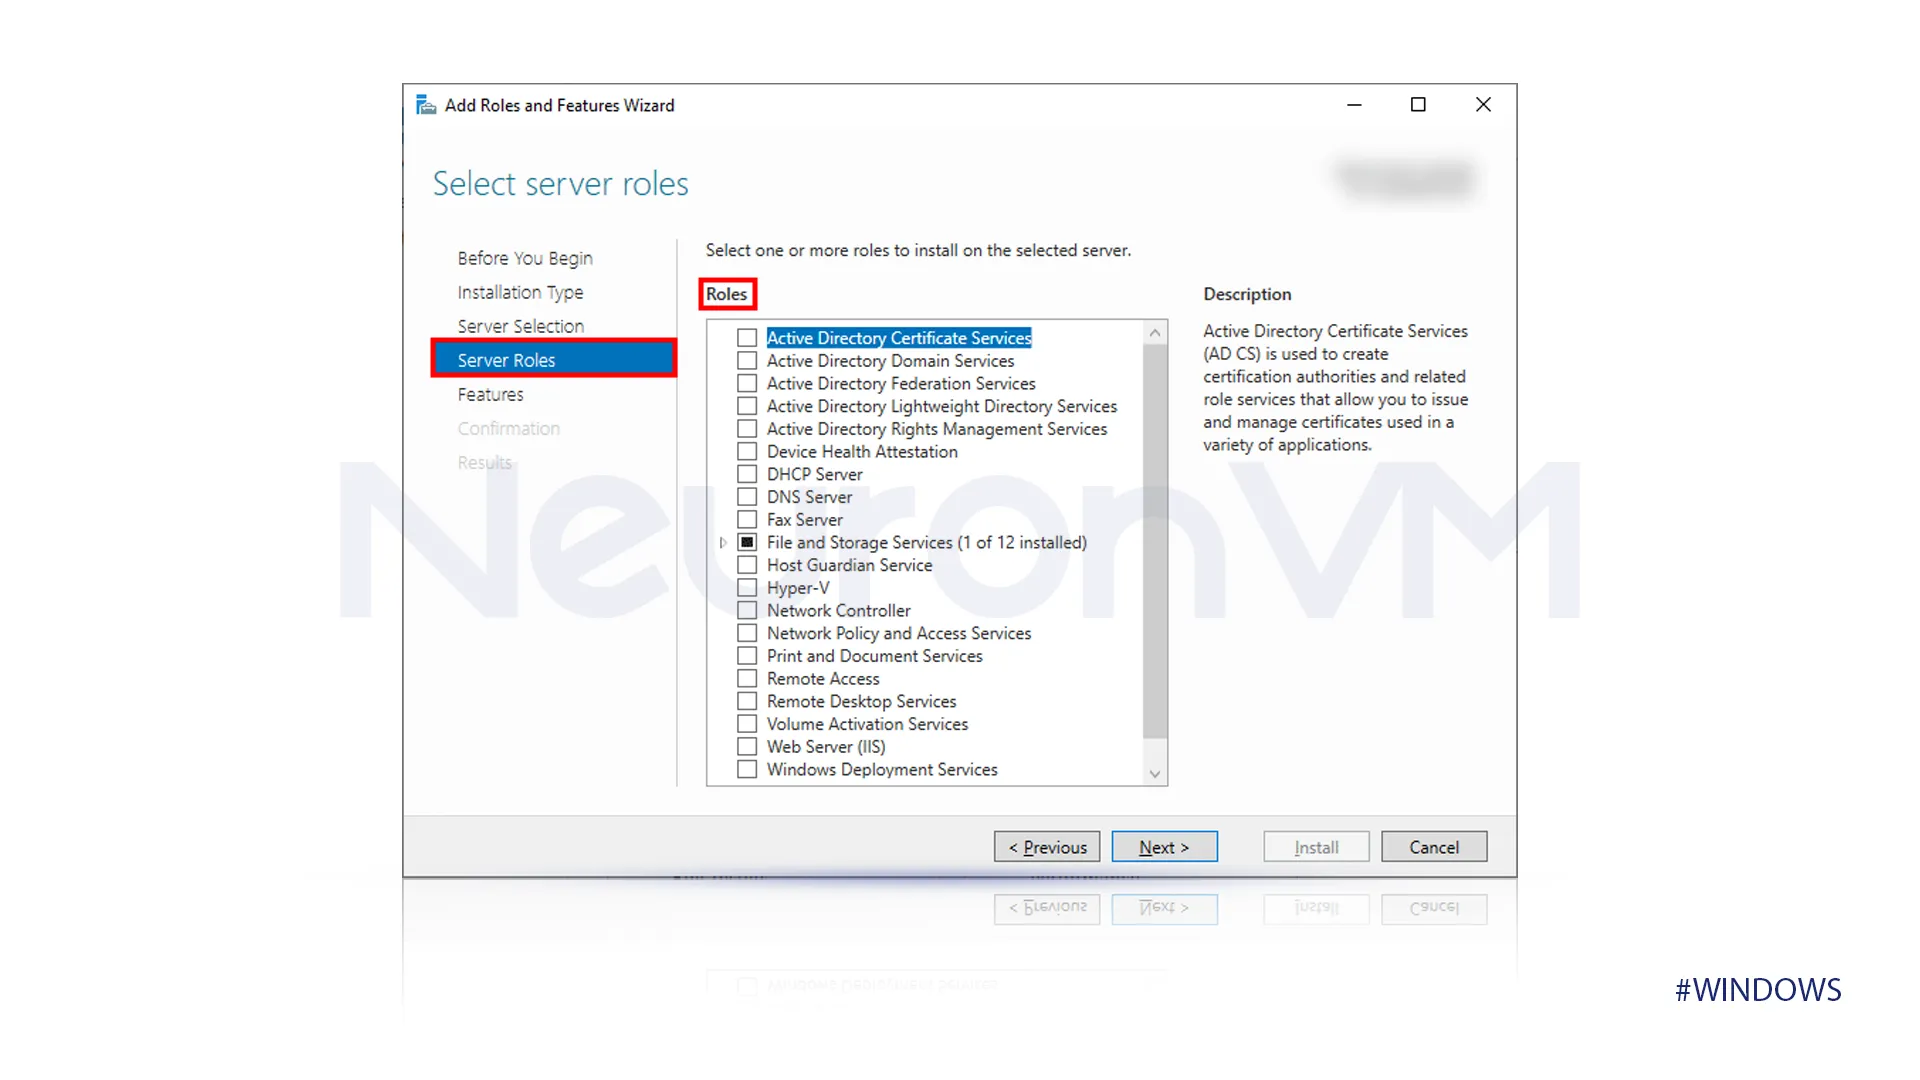
“Server Roles”
In the server roles section, do not select any server roles because we are installing a feature, not a full server role.
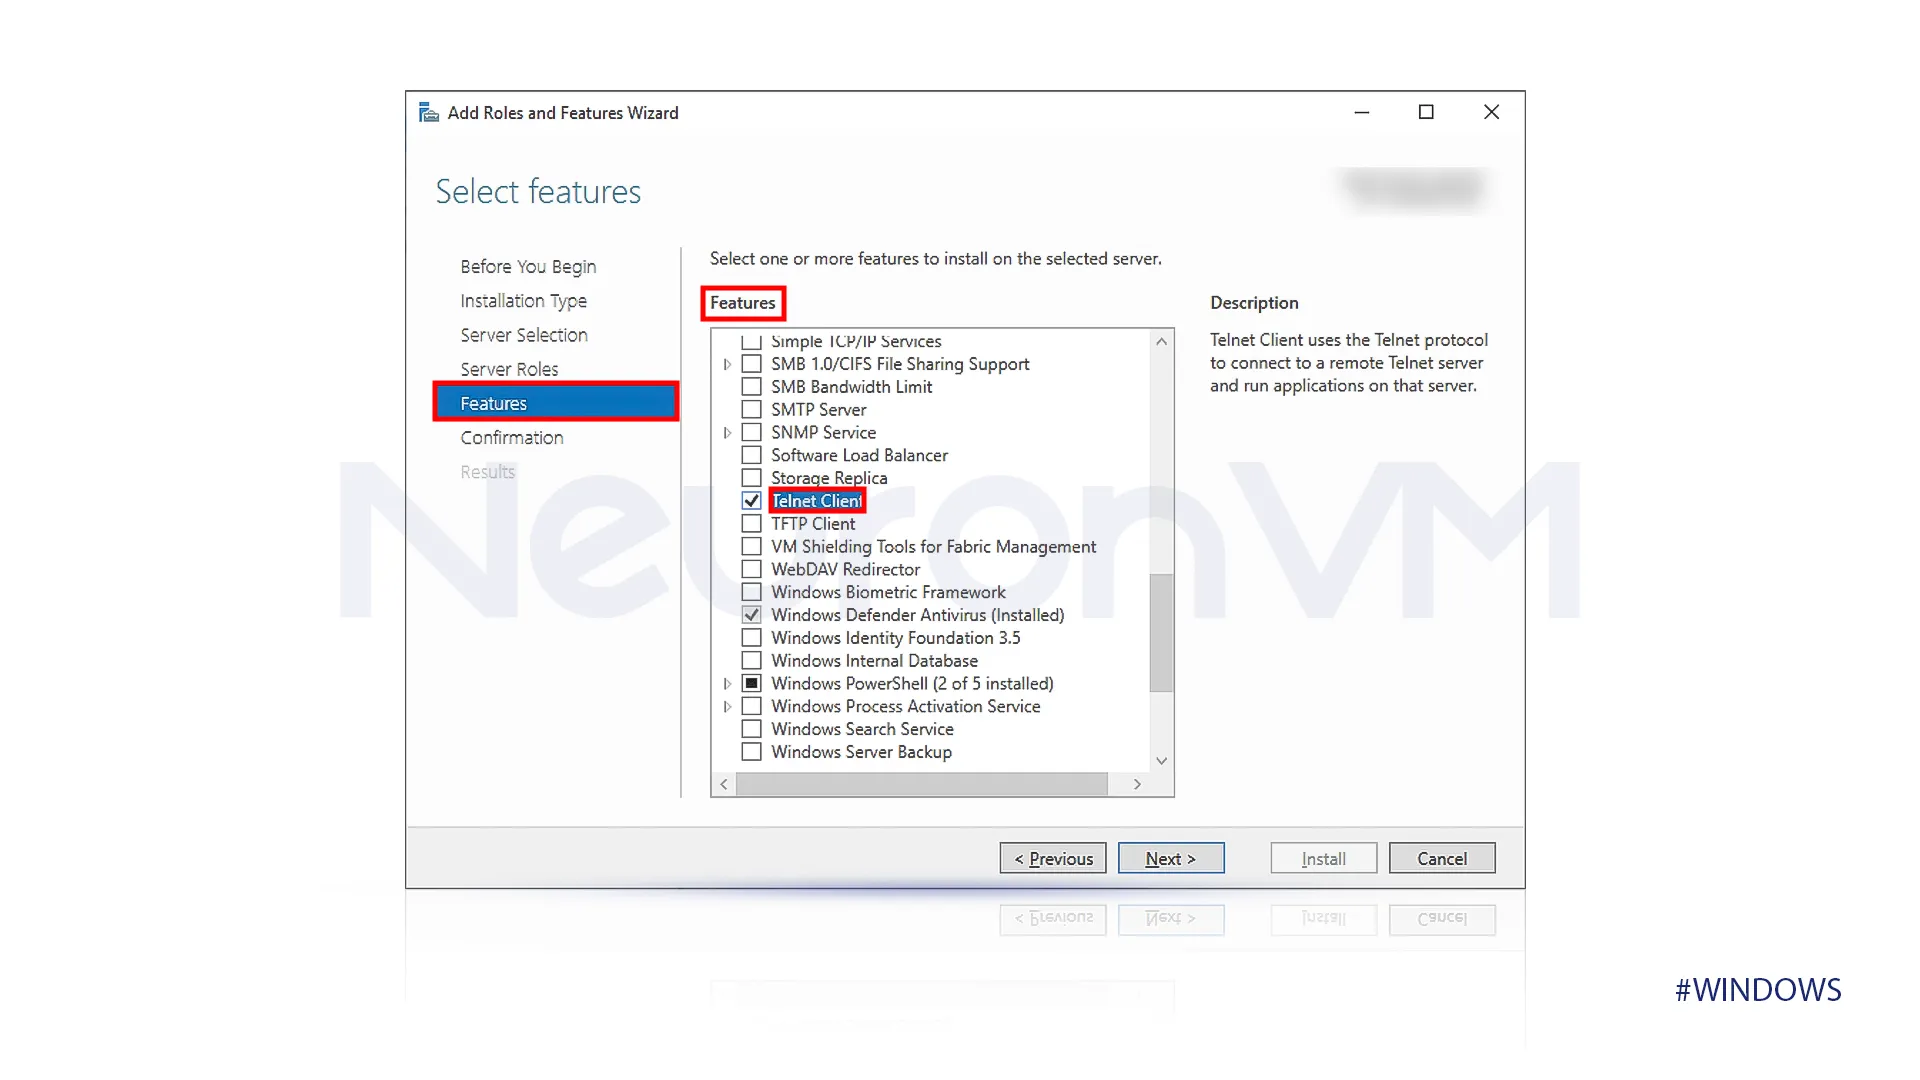
“Features”
A list of available features is presented on the “select features.” Select the “Talent client” this action marks this feature for installation.
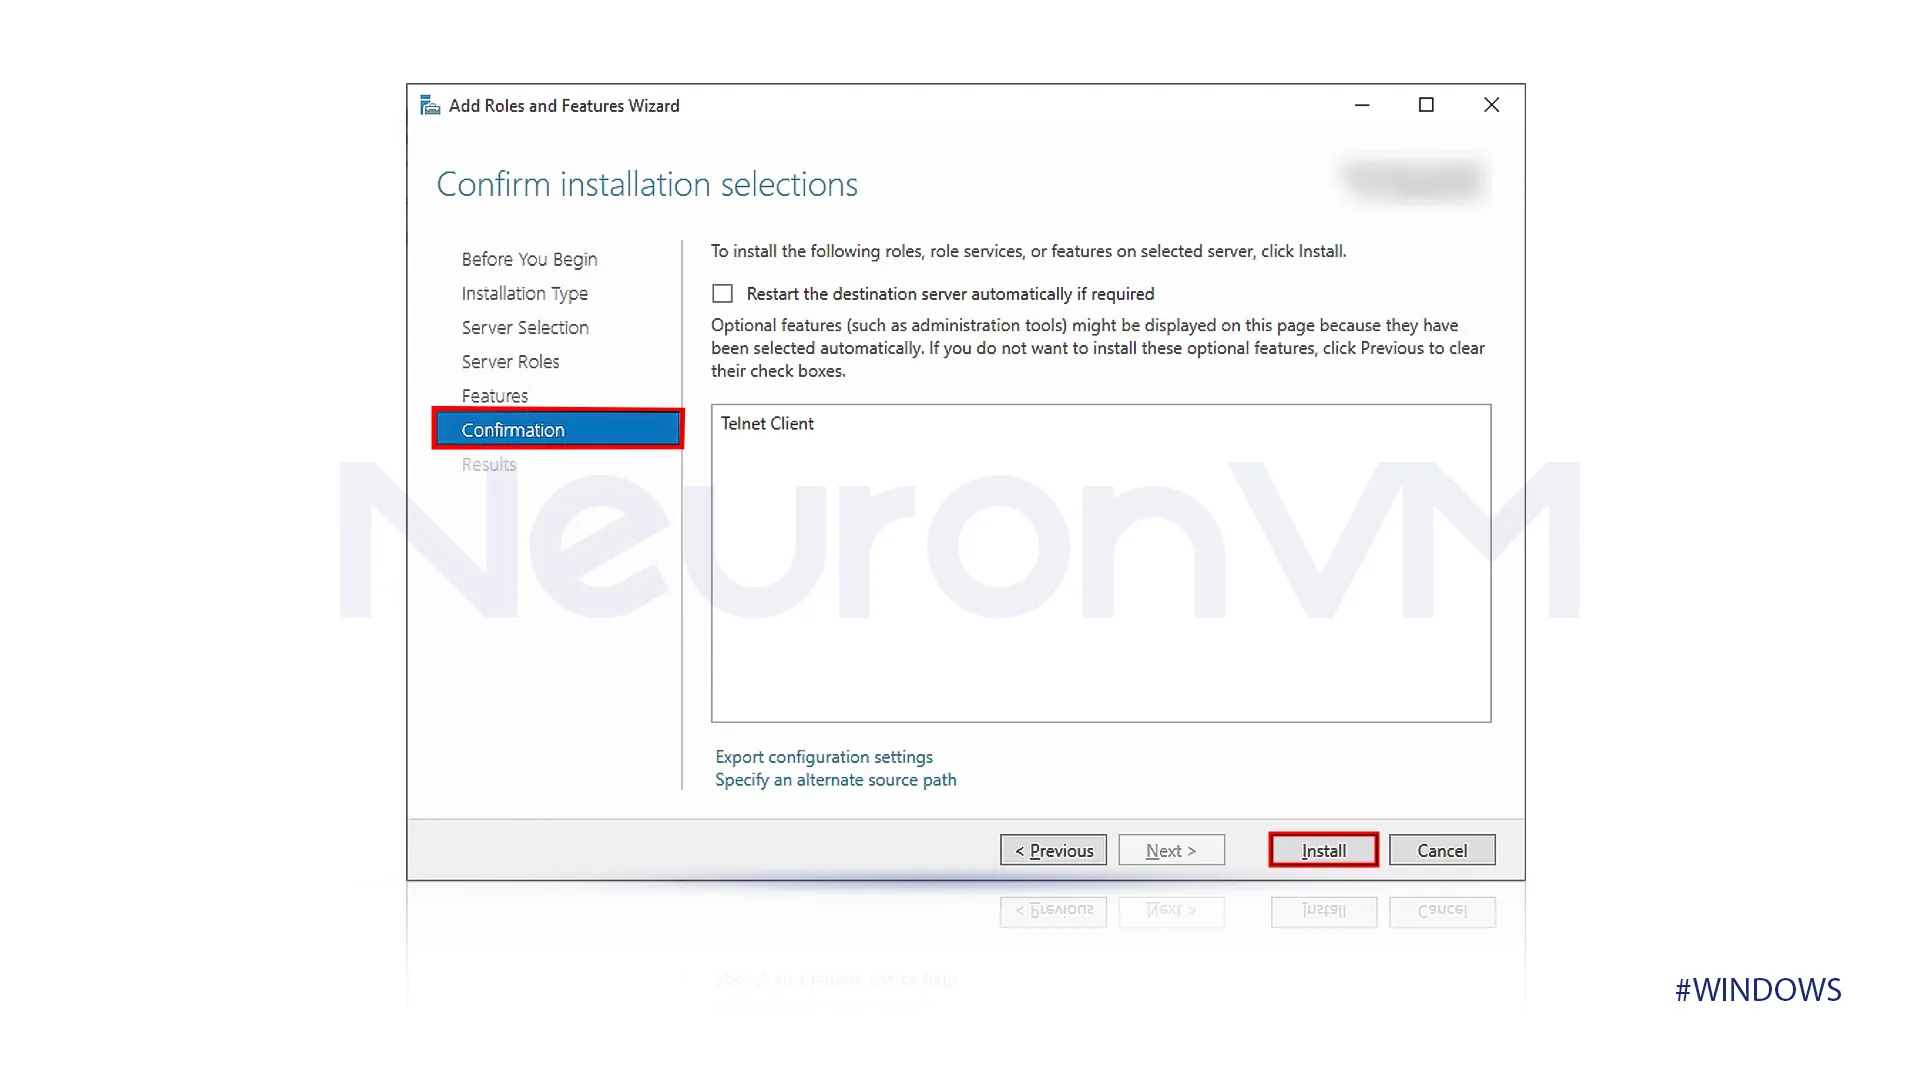
“Confirmation”
Review the settings and click on Install.
“Results”
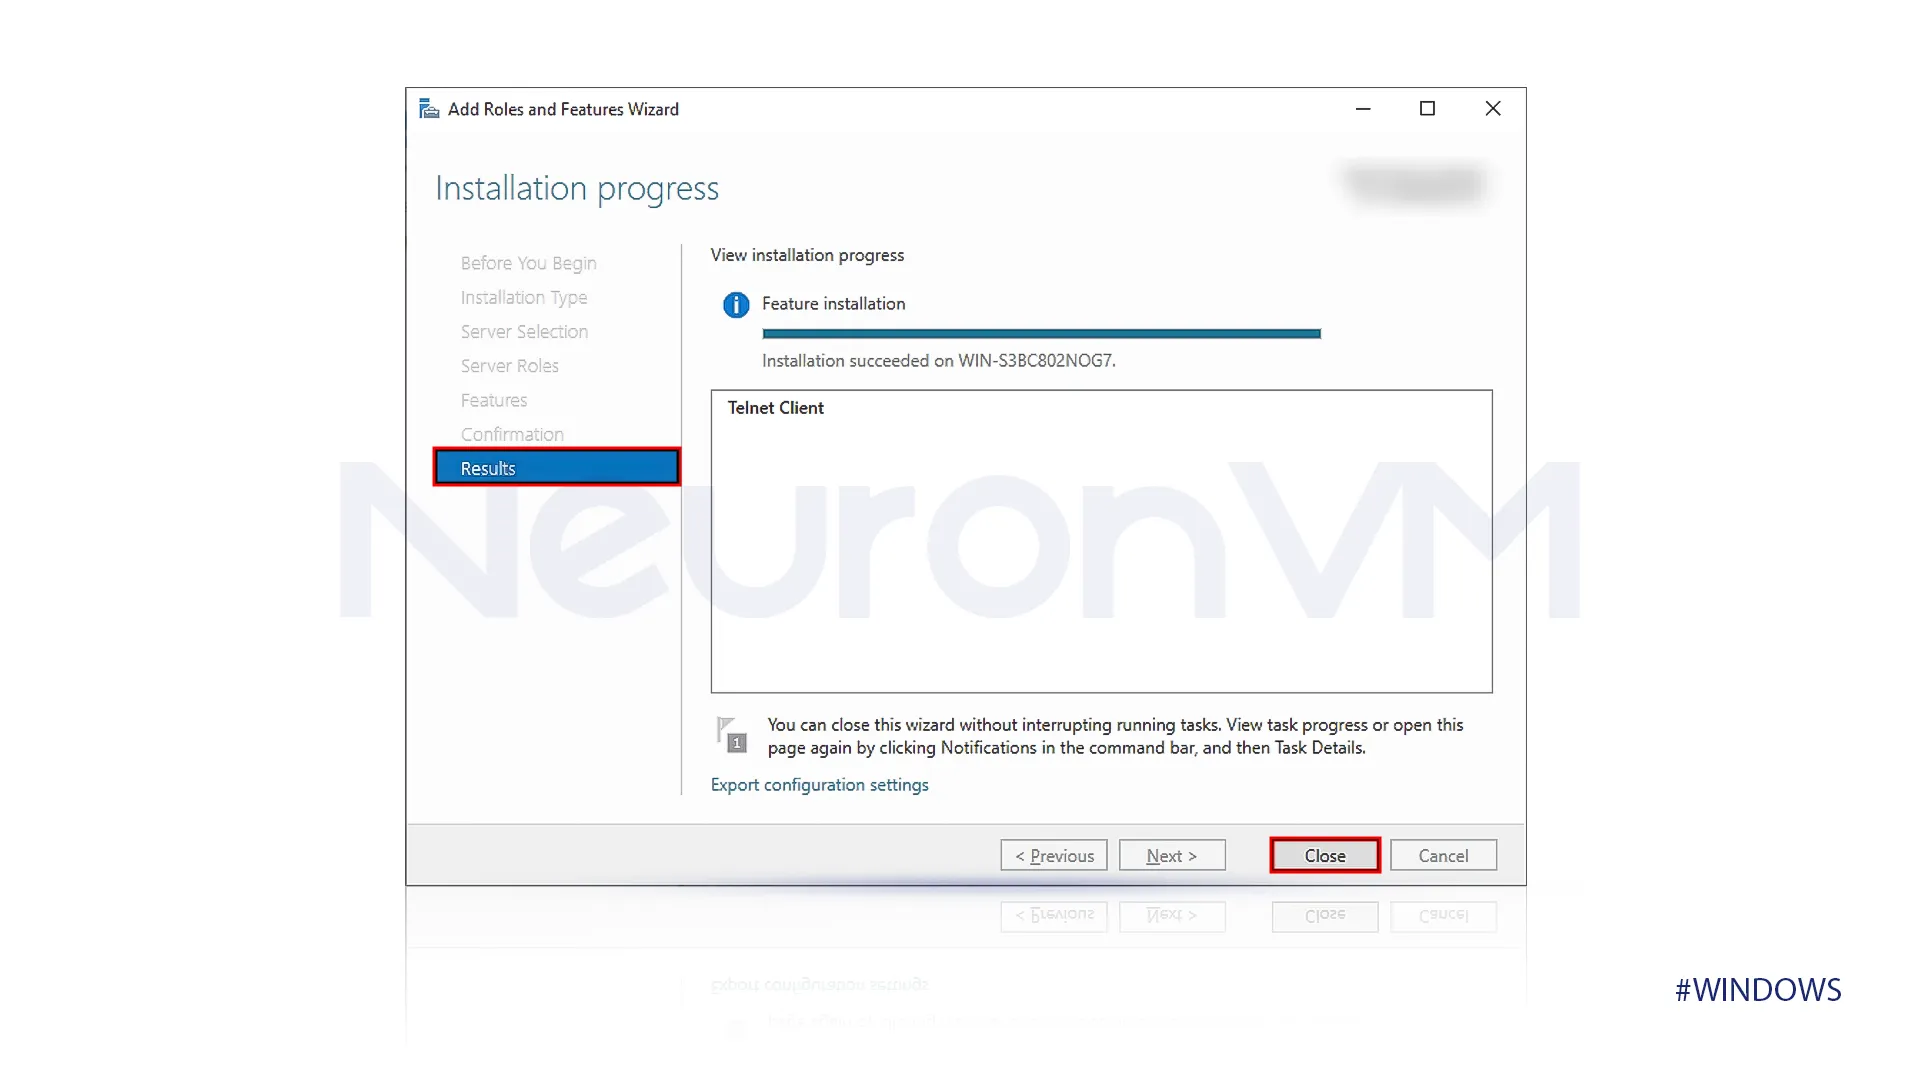
After the installation process is successfully finished, click on the close button to exit the wizard.
The talent client feature is now installed and can be used.
How should I verify Telnet service installation?
Open CMD or Powershell as you prefer, type the command “Telnet,” and press enter.
If Telnet is enabled on your computer, you should see a command similar to this.
Welcome to Microsoft Telnet Client


Escape Character is 'CTRL+]'


Microsoft Telnet>
Conclusion
After following this simple step-by-step guide, you can enable the Telnet Service on Windows Server 2019. We provided a simple tutorial on enabling Telnet, covering the concept of Telnet, its advantages, usage, and more.
Telnet is a powerful, lightweight, and valuable tool for network troubleshooting. But if you need more security, using more secure options like SSH for most remote administration tasks is better.
You might like it


