


SSH stands for Secure Shell, which allows users to securely access remote computers over an insecure network connection. This means that you can log in to a computer without having to worry about someone else being able to see your Password. In this tutorial, you will learn about how to install SSH on Linux Mint. The first thing you have to do after installing an operating system is to activate SSH on your system because it provides an encrypted network protocol to safeguard client logins and remote servers. In this way, you can access the device remotely and ensure the security of the operation.
In this section, we are going to mention some prominent features of this protocol:
1- Access control
2- Secure communication between users
3- Secure remote command execution
4- Secure remote login
5- Secure file transfer
6- Port forwarding
– A Linux VPS with Linux Mint operating system installed on your computer.
– Superuser privileges to install software on the system.
– An active internet connection to download the necessary packages.
Now, let’s see how you can install it on your Linux Mint. The following command on the terminal will help you to install the OpenSSH server:
sudo apt install openssh-server
Note: before you start the installation, make sure the Linux Mint server is up to date.
Now, SSH should start automatically on your system startup. But if you want to be sure of the installation, you can use the following command:
sudo systemctl is-enabled ssh
If you see “enabled” on your terminal, then your installation is successful, and it will run when the computer boots.
But if it is disabled or if the status shows inactive, use the command below:
sudo systemctl enable ssh
When you install and enable SSH, you can easily and safely connect to a remote system, server, or another computer. Keep in mind that you should enable it on both ends.
First of all, you should have an internal or external IP address or Hostname and also the username of the account we’re going to connect. Now use the SSH command for connection:
ssh username@ip-address/hostname
After the connection, you will receive the following message:
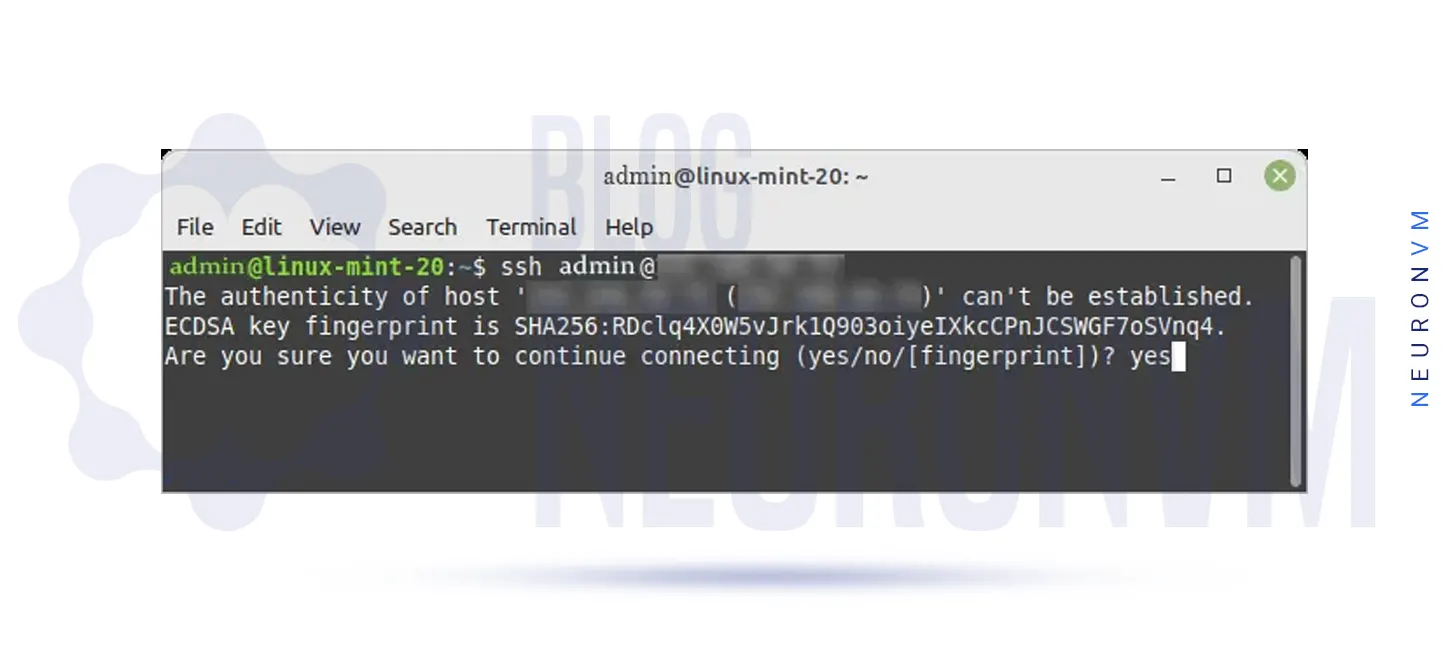
Then you should type Yes and then enter Password; when it’s done, press the Enter Key.
There may be a time when a firewall restricts you from using the connection between the client and server. If you want to solve this problem, use this command below:
sudo ufw allow ssh
Then, if you want to activate the firewall again, use the following:
sudo ufw enable
To refresh the newly made settings in order to implement them, use the following:
sudo ufw reload
Well done! Now, you can use SSH protocol for your connections and stay safe.
In this tutorial, we tried to discuss deeply how to install SSH on your Linux Mint server. This protocol is used by OpenSSH, which is the free version of the secure shell protocol. It is not installed as default, but it’s necessary to enable it. SSH is a good way to safeguard your connection. Upon the instructions we mentioned here, the SSH will be activated automatically when your system boots up.
 Tags
Tags


If you want to get the most out of Windows 10 VPS, you have to optimize its performance, security, a...


 Tags
Tags

Removing directories on Linux is necessary for various reasons. It helps organize and maintain a cle...
Tags


