
![Tutorial Install Postfix on Ubuntu 20.04 [Step by Step] - NeuronVM Blog](https://blog.neuronvm.com/wp-content/themes/bnvm/assets/images/mail.svg)
![Tutorial Install Postfix on Ubuntu 20.04 [Step by Step] - NeuronVM Blog](https://blog.neuronvm.com/wp-content/themes/bnvm/assets/images/facebook.svg)
![Tutorial Install Postfix on Ubuntu 20.04 [Step by Step] - NeuronVM Blog](https://blog.neuronvm.com/wp-content/themes/bnvm/assets/images/x.svg)
![Tutorial Install Postfix on Ubuntu 20.04 [Step by Step] - NeuronVM Blog](https://blog.neuronvm.com/wp-content/themes/bnvm/assets/images/instagram.svg)
![Tutorial Install Postfix on Ubuntu 20.04 [Step by Step] - NeuronVM Blog](https://blog.neuronvm.com/wp-content/themes/bnvm/assets/images/linkedin.svg)
![Tutorial Install Postfix on Ubuntu 20.04 [Step by Step] - NeuronVM Blog](https://blog.neuronvm.com/wp-content/themes/bnvm/assets/images/pinterest.svg)
![Tutorial Install Postfix on Ubuntu 20.04 [Step by Step] - NeuronVM Blog](https://blog.neuronvm.com/wp-content/themes/bnvm/assets/images/search.svg)
![Tutorial Install Postfix on Ubuntu 20.04 [Step by Step] - NeuronVM Blog](https://blog.neuronvm.com/wp-content/uploads/2021/10/Tutorial-Install-Postfix-on-Ubuntu20.04-Step-by-Step.webp "post-thumbnail")
![Tutorial Install Postfix on Ubuntu 20.04 [Step by Step] - NeuronVM Blog](https://blog.neuronvm.com/wp-content/themes/bnvm/assets/images/like2.svg)
![Tutorial Install Postfix on Ubuntu 20.04 [Step by Step] - NeuronVM Blog](https://blog.neuronvm.com/wp-content/themes/bnvm/assets/images/like3.svg)
![Tutorial Install Postfix on Ubuntu 20.04 [Step by Step] - NeuronVM Blog](https://blog.neuronvm.com/wp-content/themes/bnvm/assets/images/comment2.svg)
![Tutorial Install Postfix on Ubuntu 20.04 [Step by Step] - NeuronVM Blog](https://blog.neuronvm.com/wp-content/themes/bnvm/assets/images/share.svg)
![Tutorial Install Postfix on Ubuntu 20.04 [Step by Step] - NeuronVM Blog](https://blog.neuronvm.com/wp-content/themes/bnvm/assets/images/print.svg)
Postfix is a popular open-source Mail Transfer Agent (MTA) that can be used to route and send an email on a Linux system. It is estimating that about 25% of public mail servers on the Internet run Postfix. In this article, we are going to teach you How to Install Postfix on Ubuntu 20.04, step by step. If you intend to buy a Linux VPS server to run the Ubuntu operating system, we suggest you use the plans provided on our website, which are provided with immediate delivery.
To install Postfix on Ubuntu 20.04, follow these steps.
We will launch the terminal on Ubuntu 20.04 and update the system to get all the new packages and updates ready. To do this, type the following command in the terminal and then press Enter:
sudo apt update
After successfully running the above command, type the following command in your terminal and then press Enter:
sudo DEBIAN_PRIORITY=low apt install postfix
Here, DEBIAN_PRIORITY is an environment variable that allows us to configure additional options with regular Postfix installation.
These options appear in the terminal as notifications or dialog boxes that allow us to choose from the given options.
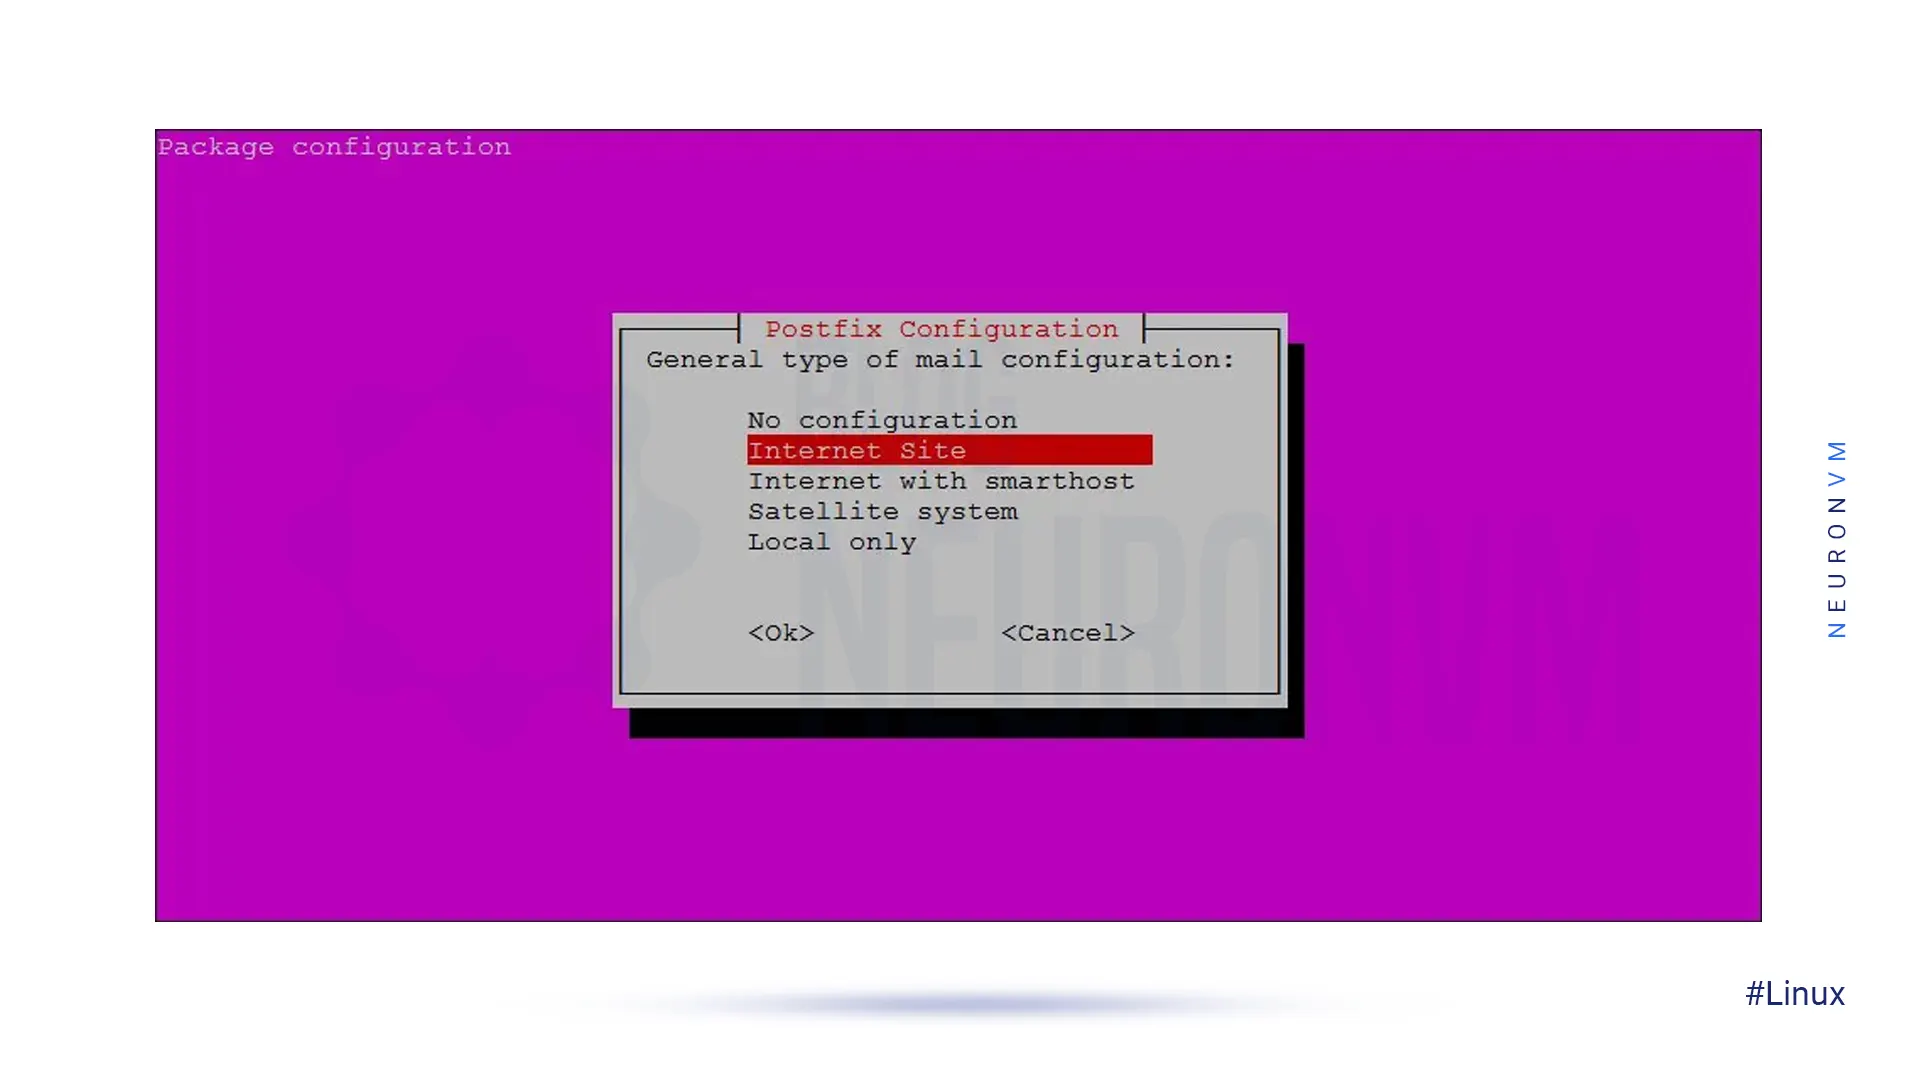
As soon as we press the Enter key to start the Postfix installation process, different types of email server configurations are displayed. Press the Enter key to continue as shown below:

In the Mail Server Configuration type page you can select the Internet Site option from that list and press the Enter key as shown below:
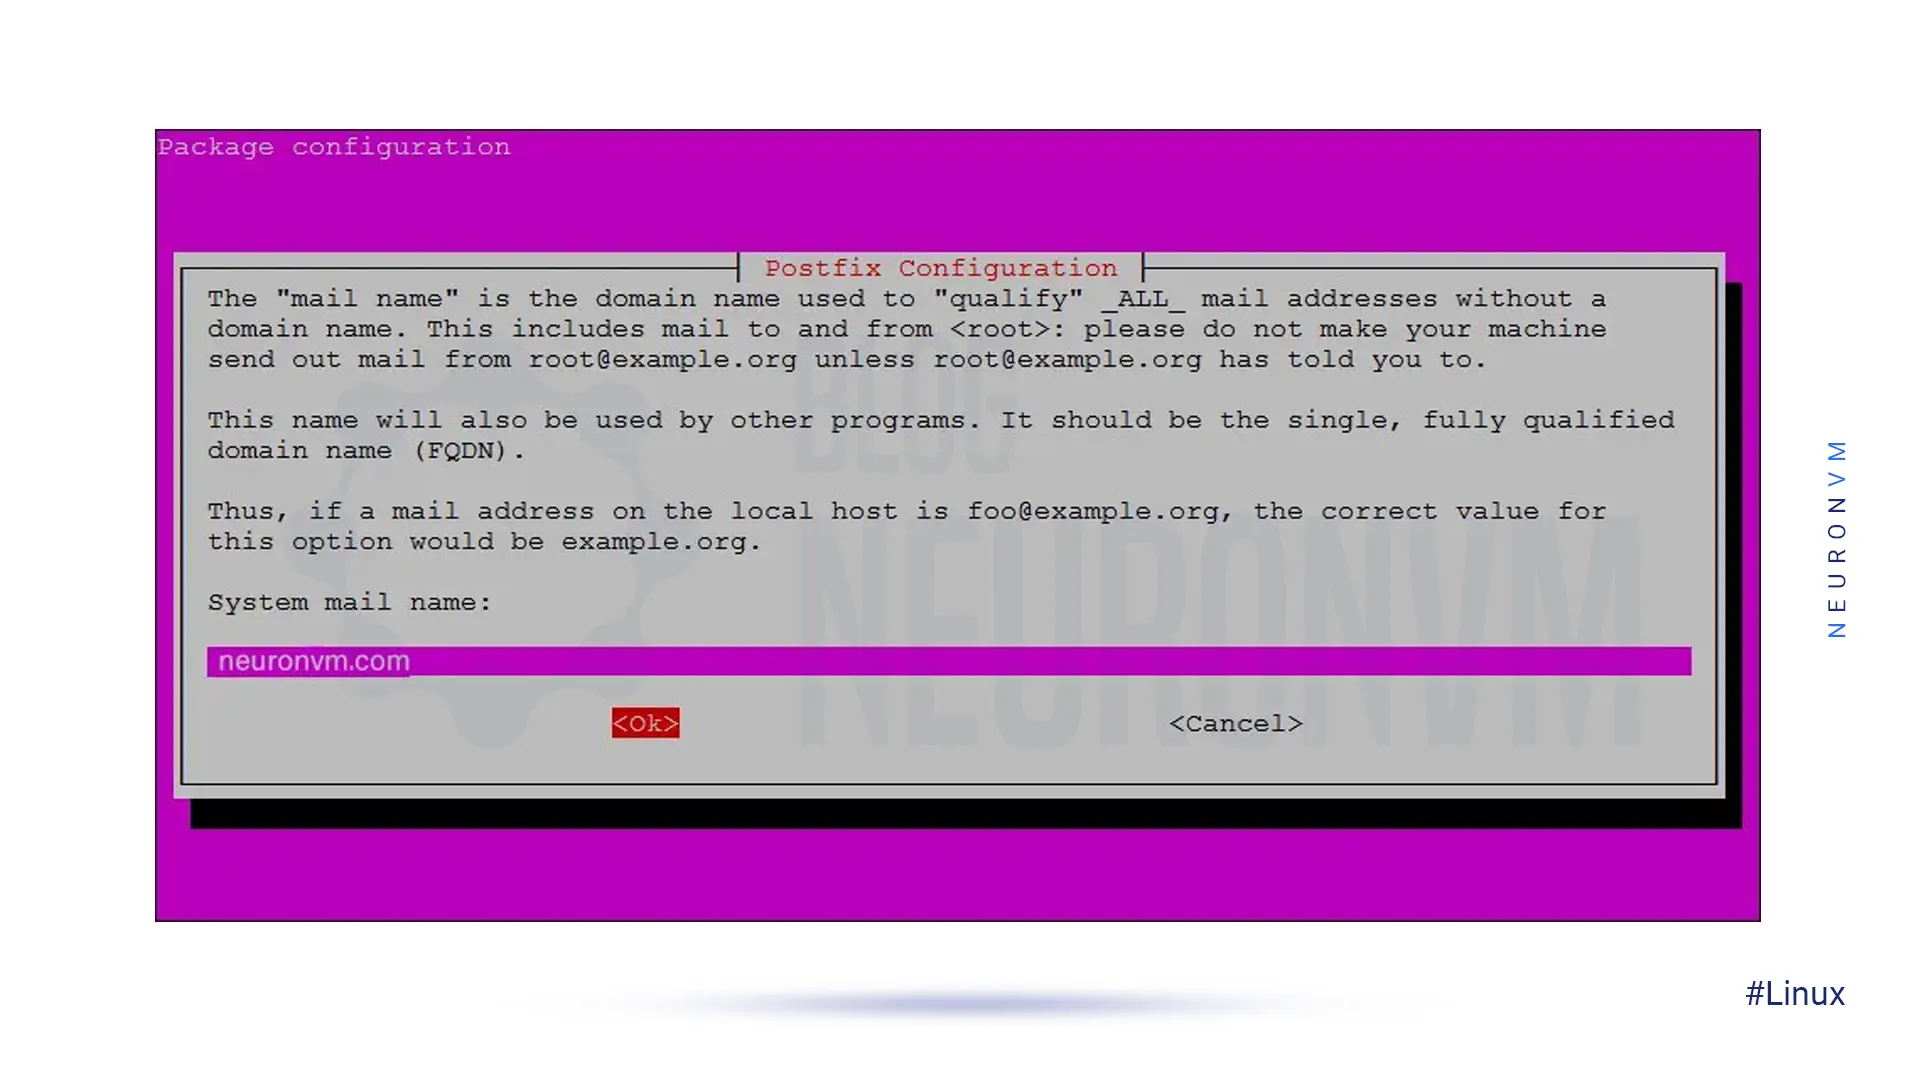
In the next step, select Fully Qualified Domain Name (FQDN) or System Mail Name.
I typed my email name in the textbox and then pressed the Enter key to continue:
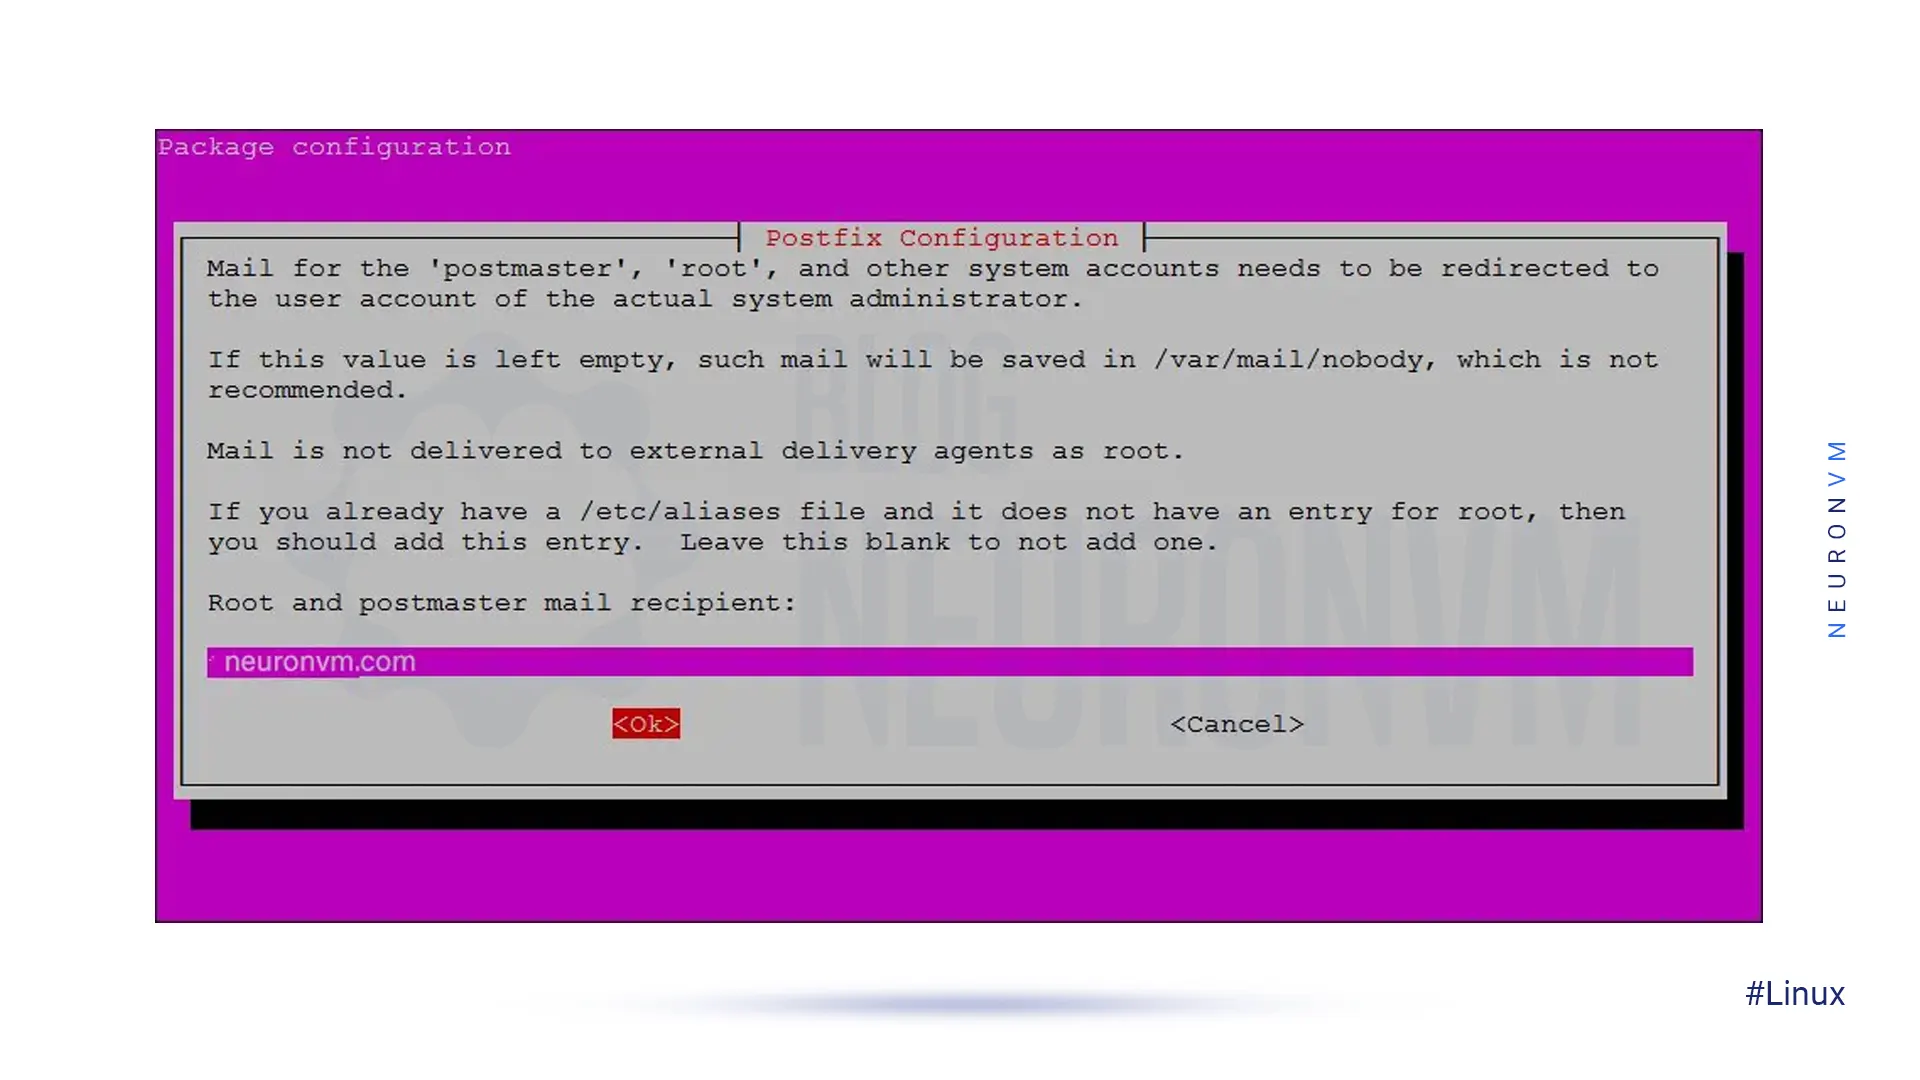
To select the Root and Postmaster Mail recipient, you can keep your original username in Ubuntu 20.04. Press the Enter key to continue:
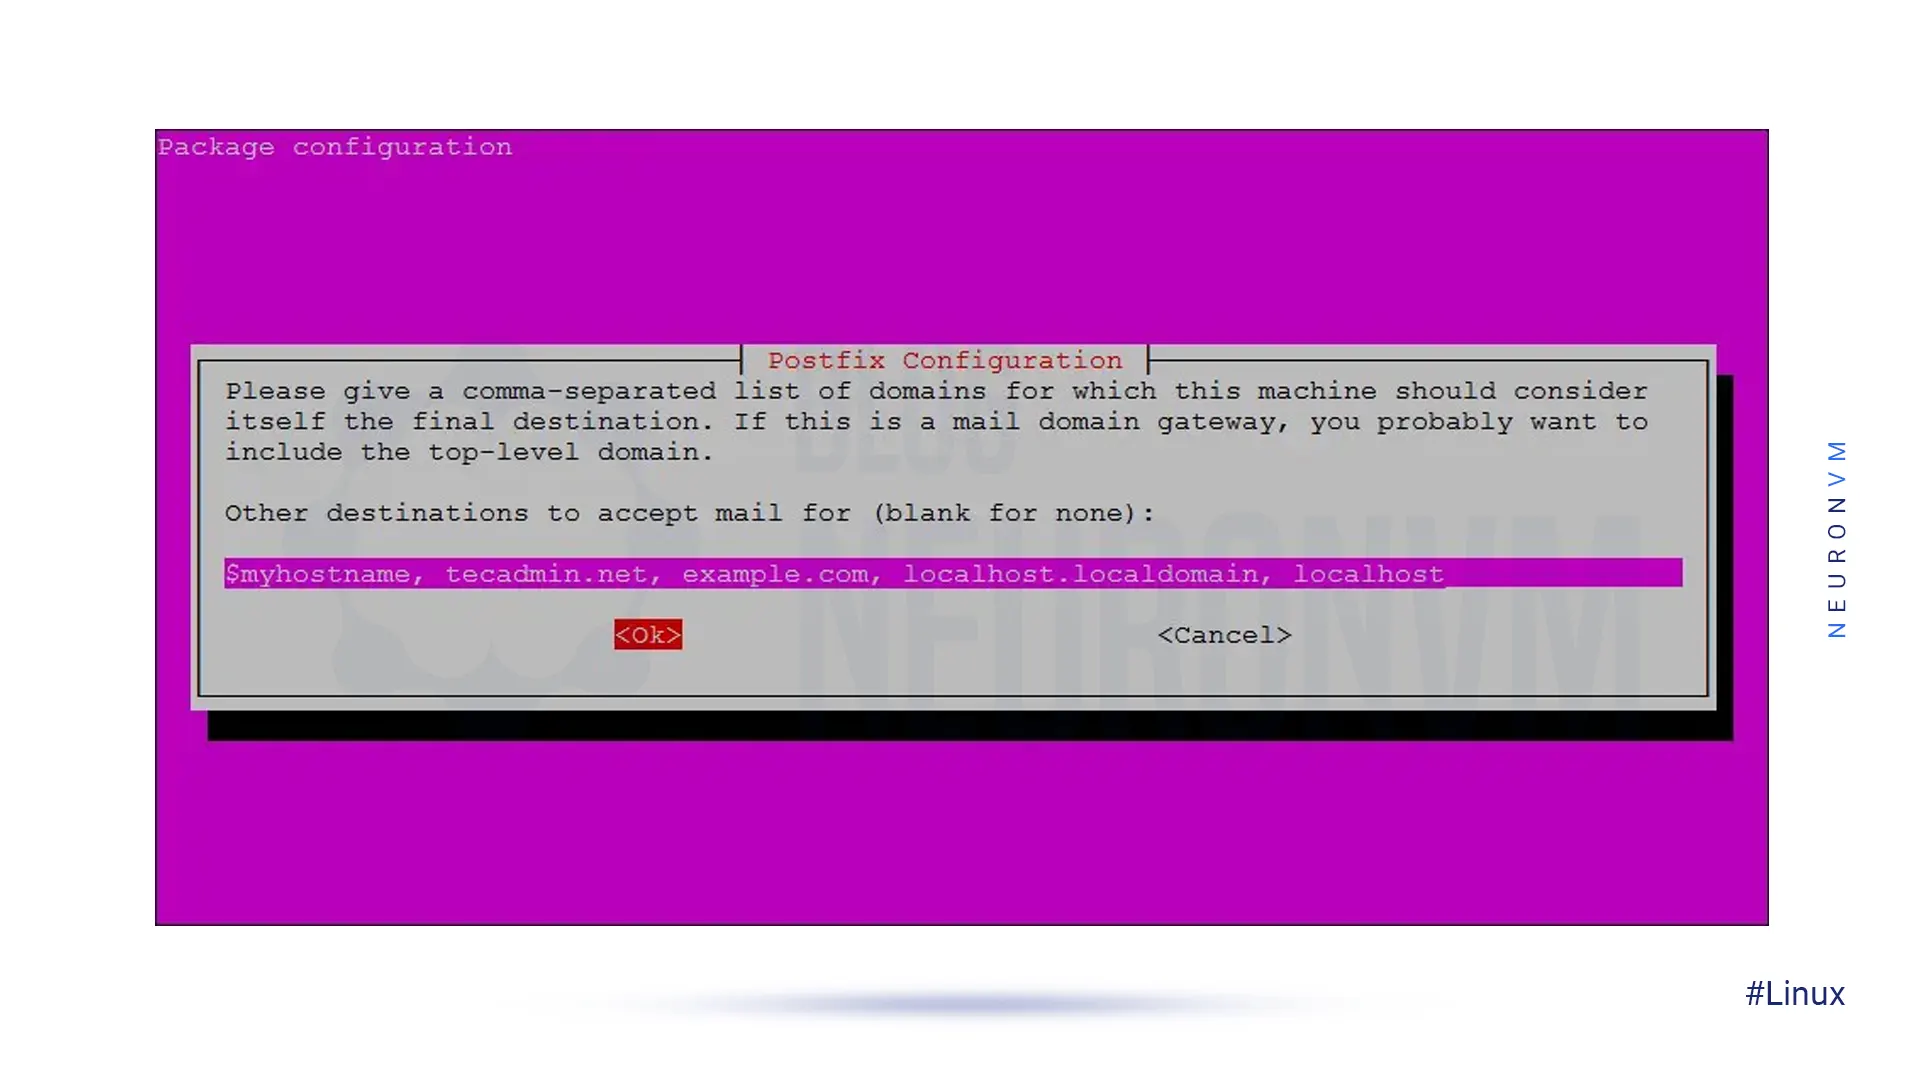
The next step is selecting all possible domains for which the email server can accept emails.
You can add another domain name according to your needs. Otherwise, you can go to the default options and press the Enter key to continue:
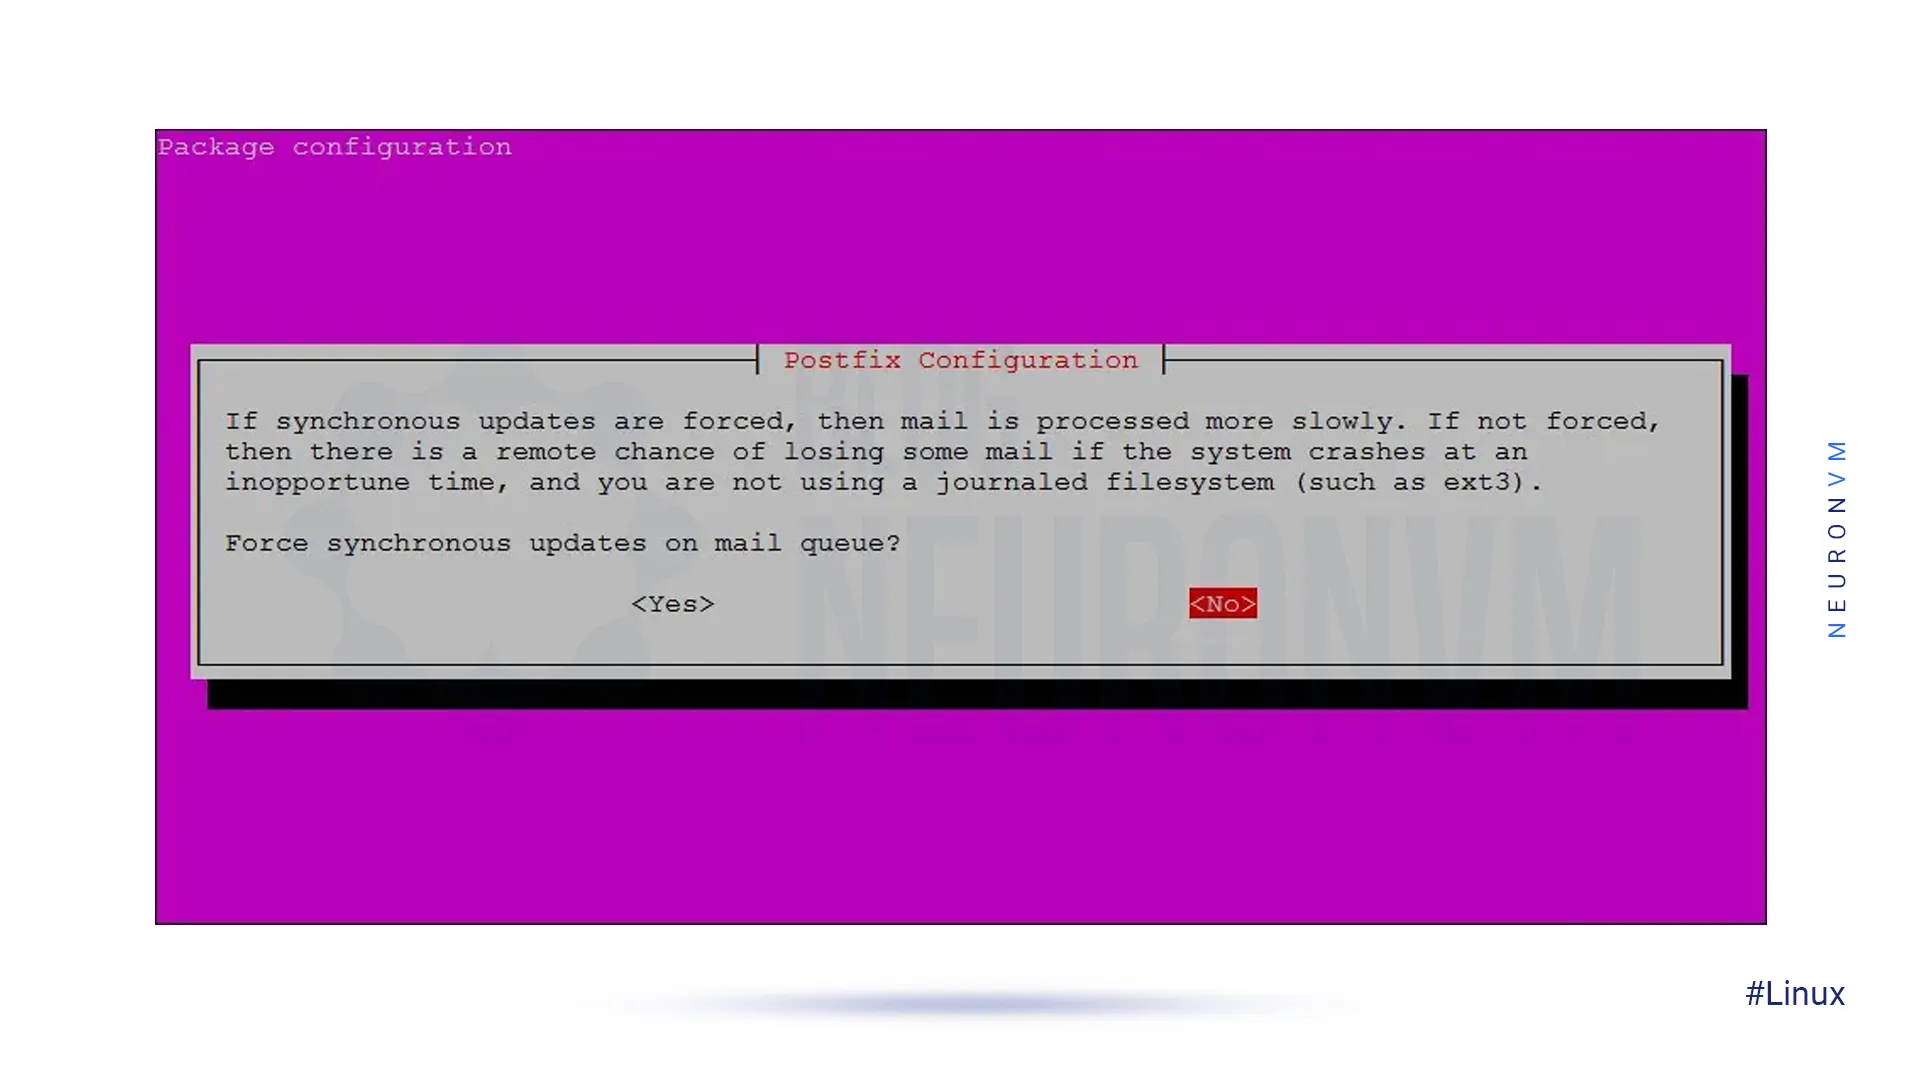
Now, you should determine the force of the synchronous update in the mail queue.
Select No, which is also the default option, and then press Enter to continue:
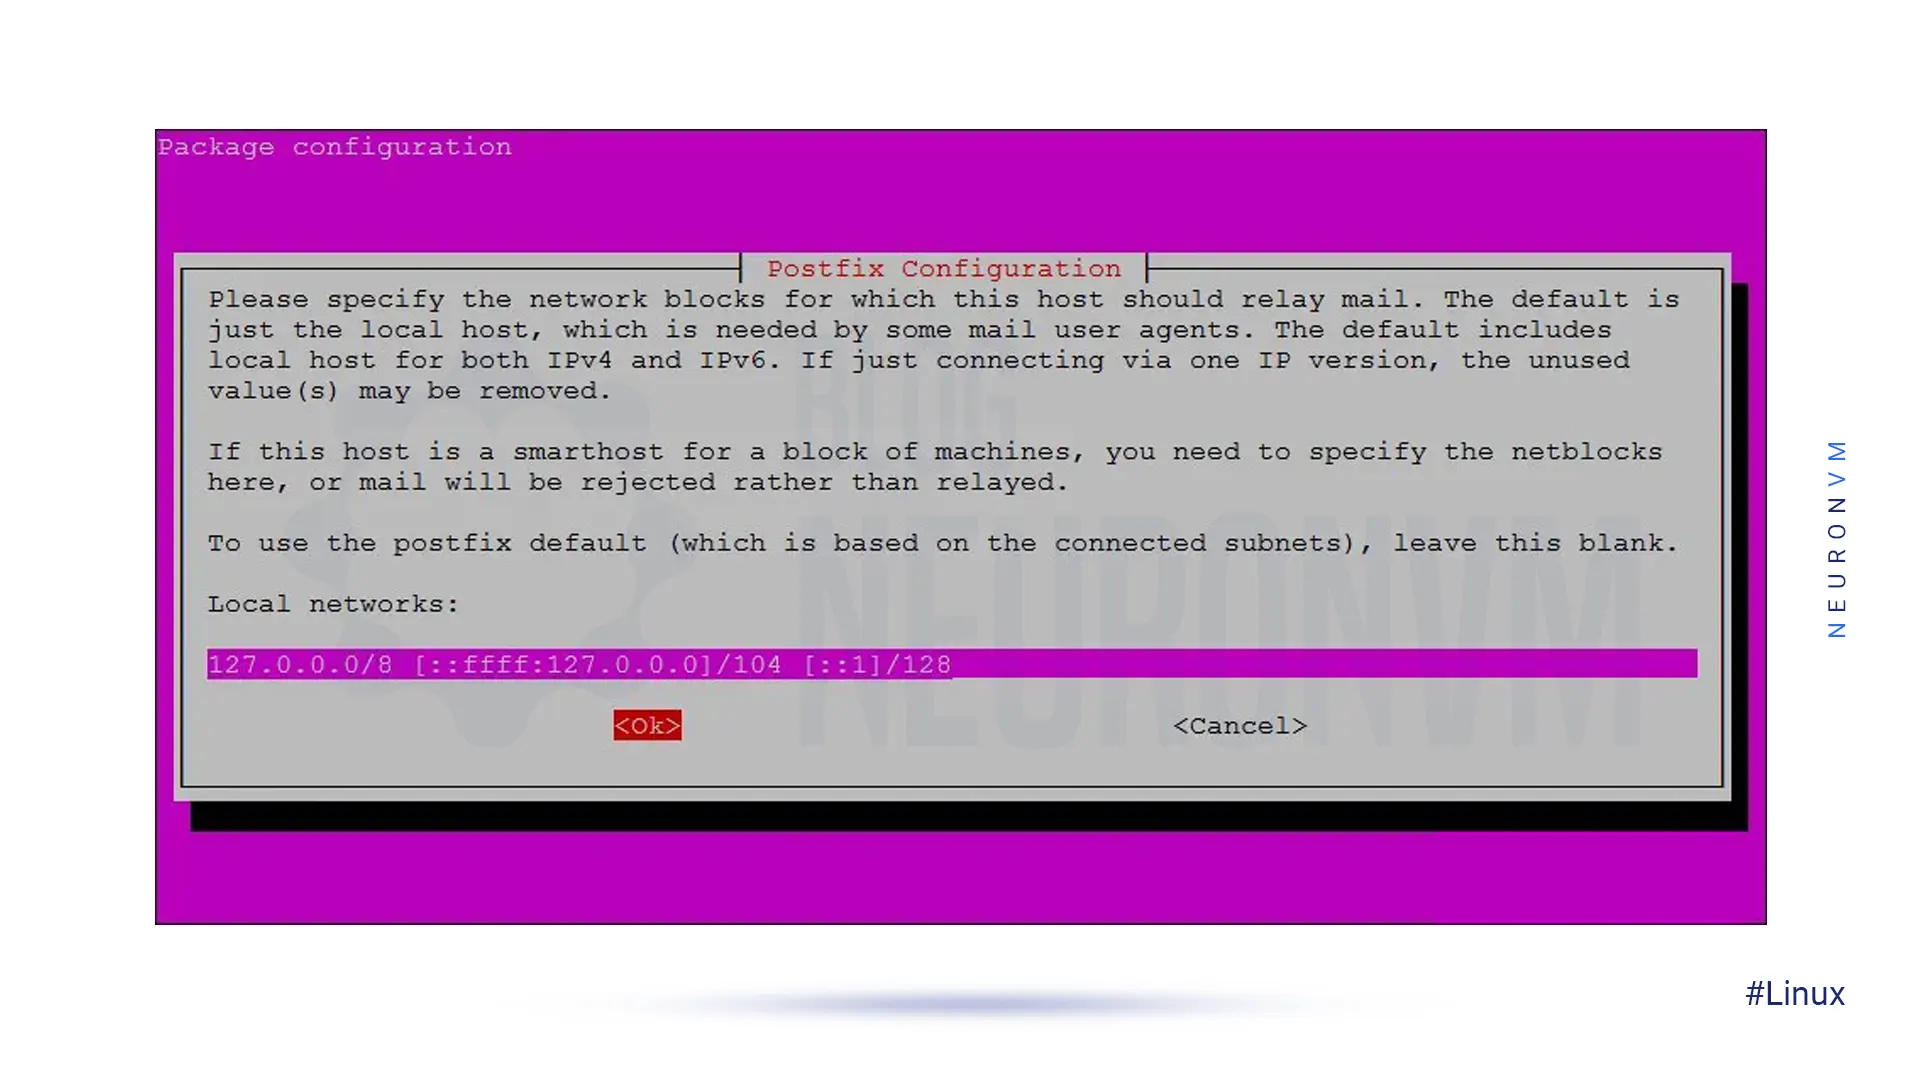
You can change LANs to suit your needs, or even select the default ones by pressing the Enter key:
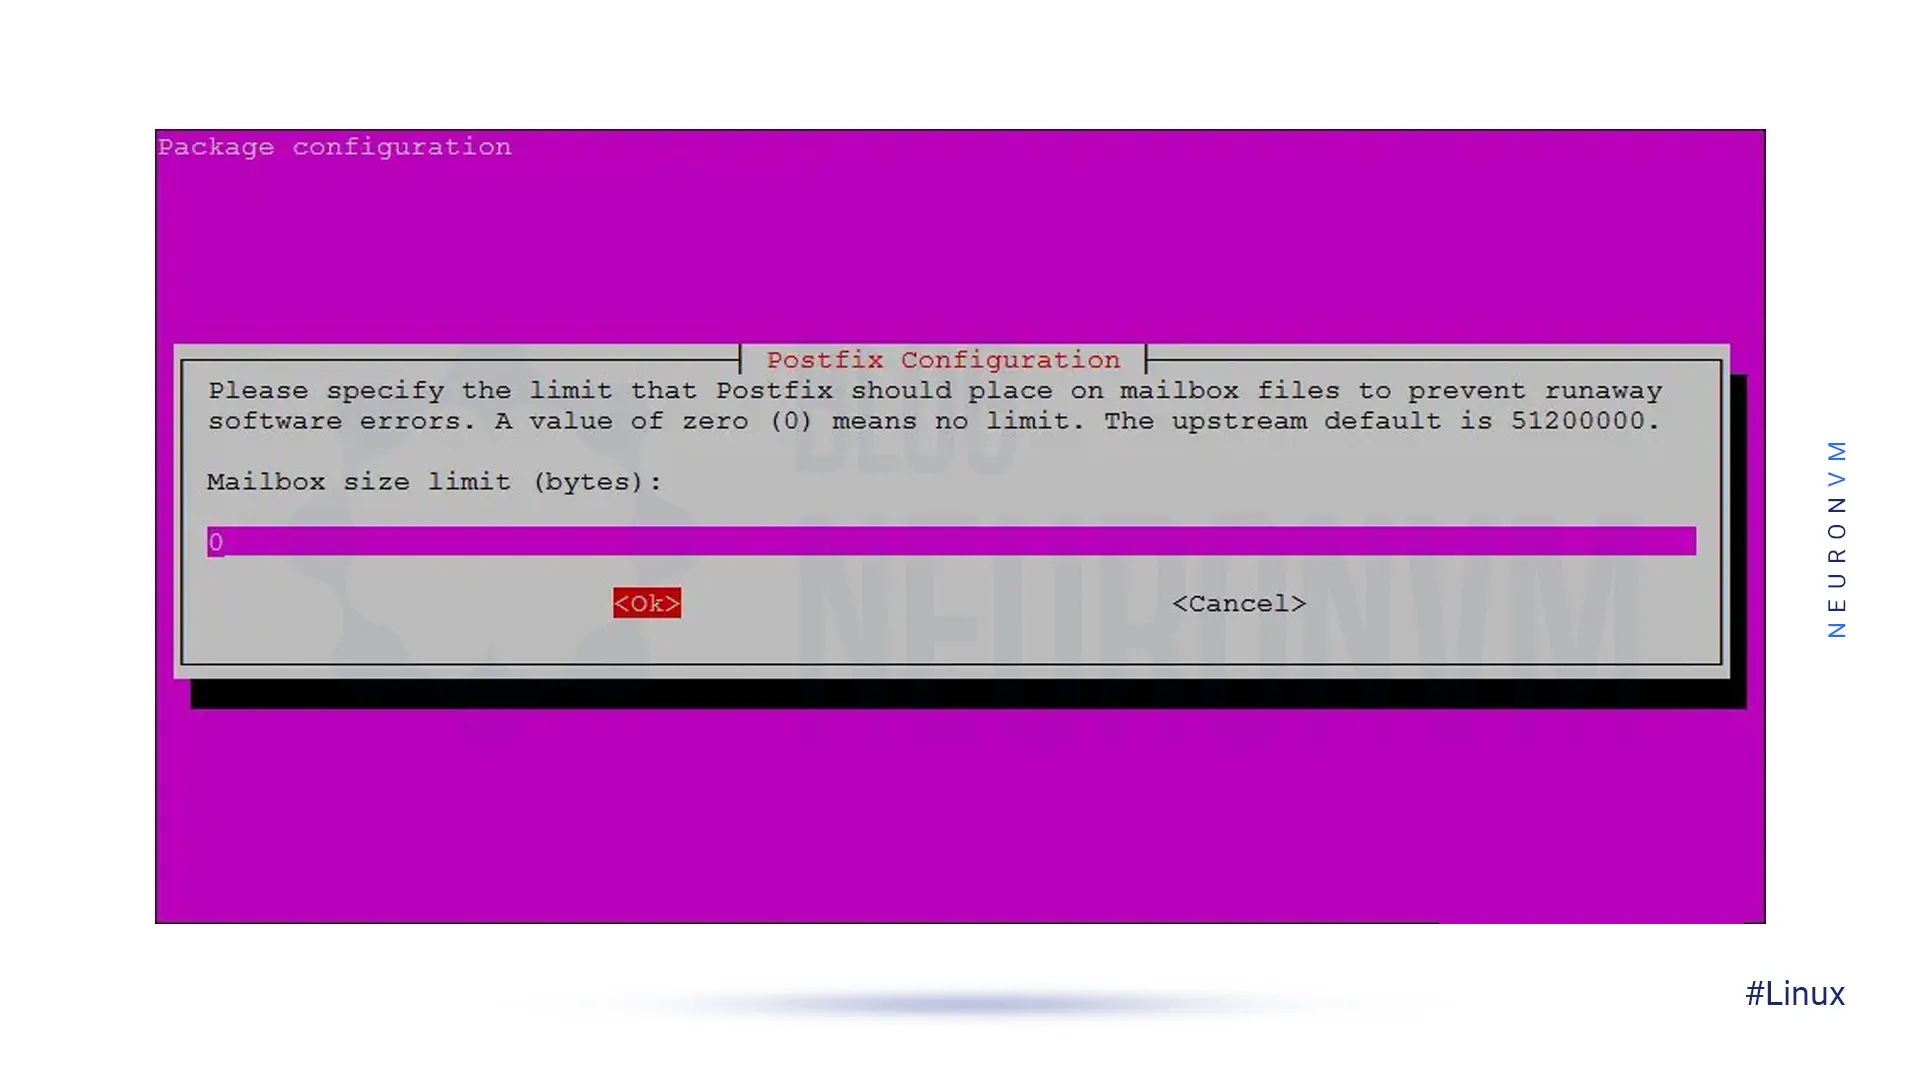
The next step is to adjust the size range of Mailbox by bytes. This is using to determine the size of messages that the inbox can accept.
Its default value is zero, which means that there is no limit to the size of the messages. Stick to the default option and press Enter:
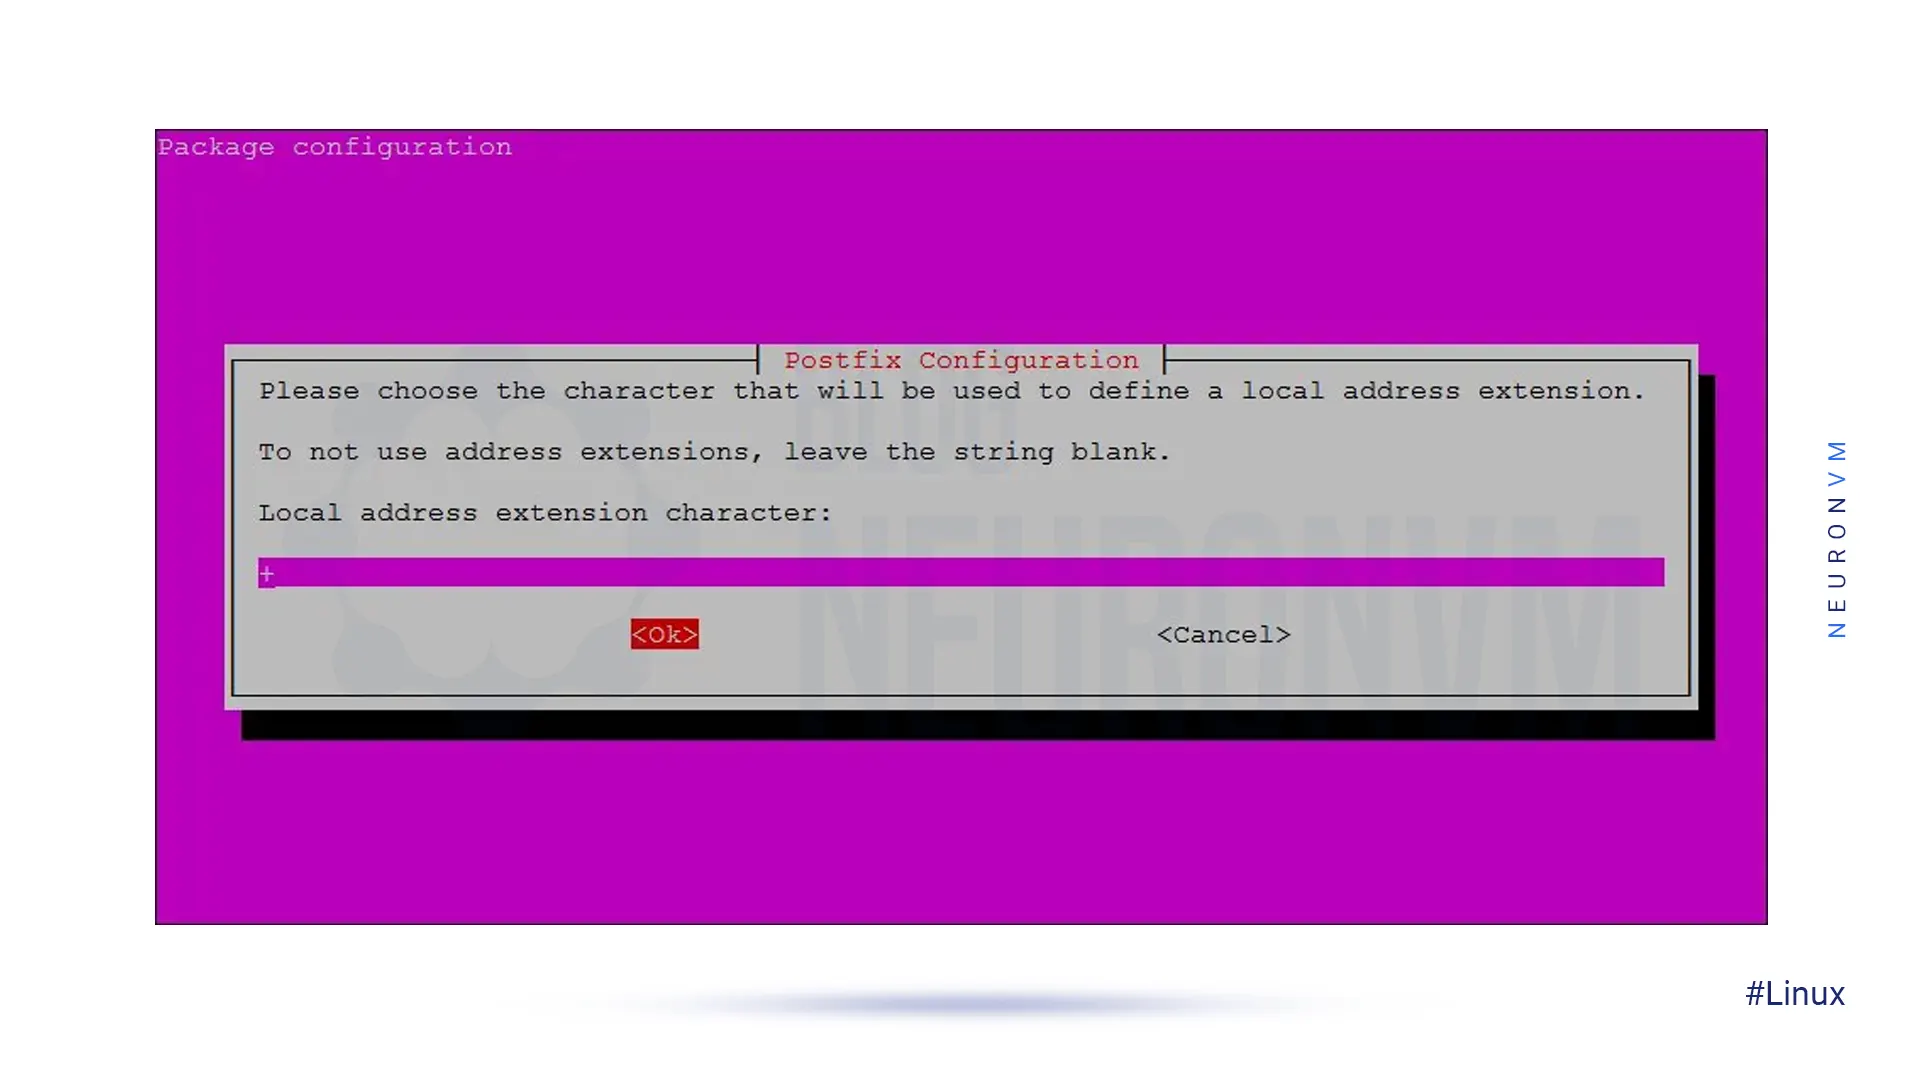
Stay with the default character and press the Enter key to continue:
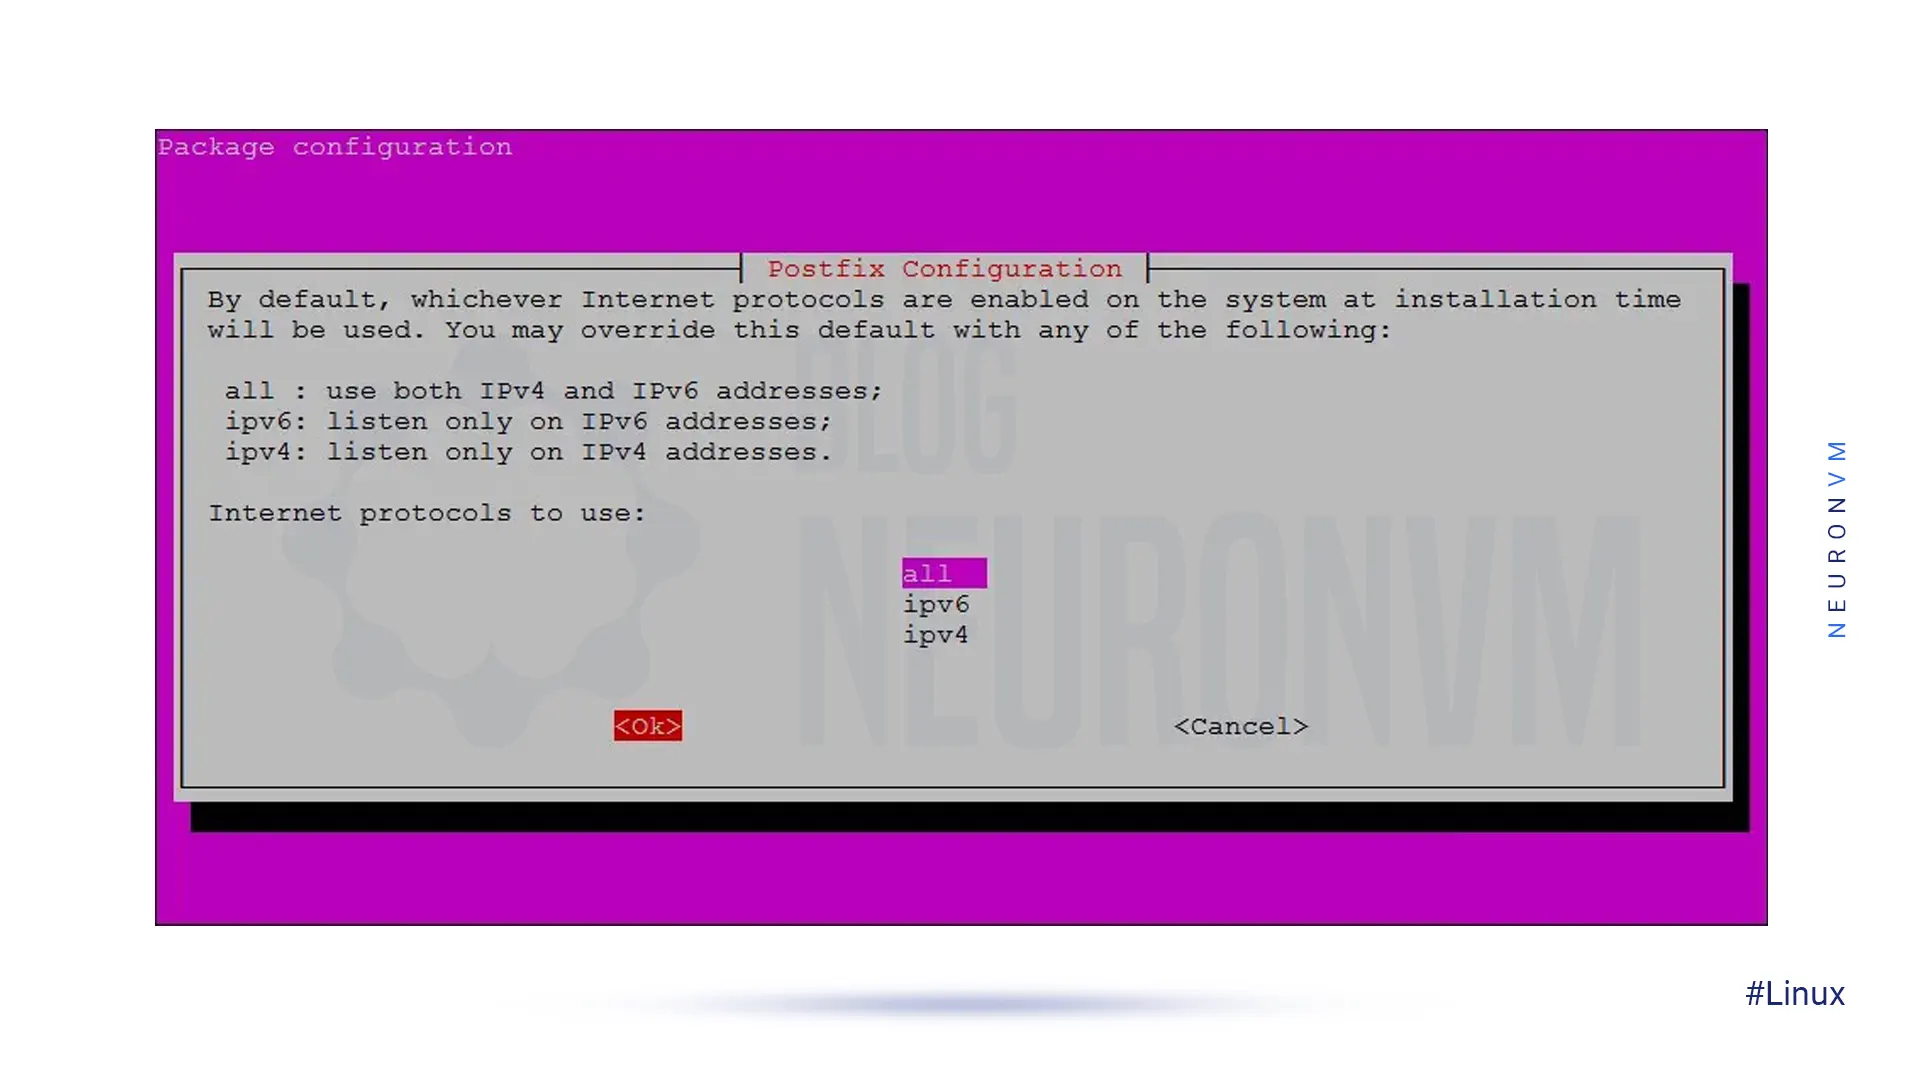
Finally, select all from this list and then press Enter to continue:
Now the Postfix installation process takes a while to complete.
If you need help with email configuration, we suggest you read the article How to Configure a Mail Server on Linux VPS.
In this article, you learned about the installation and setup of Postfix on Ubuntu 20.04. Everything was said about Postfix. To install this software, you can use our step-by-step tutorial, and if you have any questions or problems, you can ask in the comments section.
![Tutorial Install Postfix on Ubuntu 20.04 [Step by Step] - NeuronVM Blog](https://blog.neuronvm.com/wp-content/themes/bnvm/assets/images/hashtag.svg) Tags
Tags
![Tutorial Install Postfix on Ubuntu 20.04 [Step by Step] - NeuronVM Blog](https://blog.neuronvm.com/wp-content/themes/bnvm/assets/images/share_facebook.svg)
![Tutorial Install Postfix on Ubuntu 20.04 [Step by Step] - NeuronVM Blog](https://blog.neuronvm.com/wp-content/themes/bnvm/assets/images/share_x.svg)
![Tutorial Install Postfix on Ubuntu 20.04 [Step by Step] - NeuronVM Blog](https://blog.neuronvm.com/wp-content/themes/bnvm/assets/images/telegram.svg)
![Tutorial Install Postfix on Ubuntu 20.04 [Step by Step] - NeuronVM Blog](https://blog.neuronvm.com/wp-content/themes/bnvm/assets/images/share_linkedin.svg)
![Tutorial Install Postfix on Ubuntu 20.04 [Step by Step] - NeuronVM Blog](https://blog.neuronvm.com/wp-content/themes/bnvm/assets/images/share_pinterest.svg)

Programmers use different databases in web and application development. SQL or NoSQL-based databases...


 Tags
Tags

TermKit is a command-line interface replacement for Terminal. In this article, we are going to teach...
Tags


![Tutorial Install Postfix on Ubuntu 20.04 [Step by Step] - NeuronVM Blog](https://blog.neuronvm.com/wp-content/themes/bnvm/assets/images/bitcoin.png)
![Tutorial Install Postfix on Ubuntu 20.04 [Step by Step] - NeuronVM Blog](https://blog.neuronvm.com/wp-content/themes/bnvm/assets/images/tether.png)
![Tutorial Install Postfix on Ubuntu 20.04 [Step by Step] - NeuronVM Blog](https://blog.neuronvm.com/wp-content/themes/bnvm/assets/images/pm.png)
![Tutorial Install Postfix on Ubuntu 20.04 [Step by Step] - NeuronVM Blog](https://blog.neuronvm.com/wp-content/themes/bnvm/assets/images/paypal.png)
![Tutorial Install Postfix on Ubuntu 20.04 [Step by Step] - NeuronVM Blog](https://blog.neuronvm.com/wp-content/themes/bnvm/assets/images/Line.svg)
![Tutorial Install Postfix on Ubuntu 20.04 [Step by Step] - NeuronVM Blog](https://blog.neuronvm.com/wp-content/themes/bnvm/assets/images/calendar.svg)