


How to Install Nox Player on Windows Server

 6m
6m
 0 comments
 Print
Print
Tutorial on how to Install Nox Player on Windows Server 2012, 2016, and 2019 step by step. Nox Player is one of the best Android emulation software on the Windows server. This software allows you to run Android applications and games on your Windows server without having a mobile phone or tablet. As you know, the lack of space and the large volume that Android applications occupy in mobile has caused many users to install and run popular Android applications on their Windows. This was the reason why users started to simulate Android and test and run it in Windows so that they could run their favorite applications in Windows. In this article, we are going to teach you how to install Nox Player on Windows Server. If you intend to buy a Windows VPS server, we suggest you check the plans presented on our website and use them after testing. These plans are offered with immediate delivery.
Prerequisites:
1) Windows Server 2008, 2012, 2016, 2019, or Windows Server 2022.
2) 1.6 GHz processor or higher
3) 4 GB of RAM or higher
4) 8 GB of free disk space
How to Install Nox Player on Windows Server
In this section, we want to teach you how to install Nox Player on a Windows VPS Server.
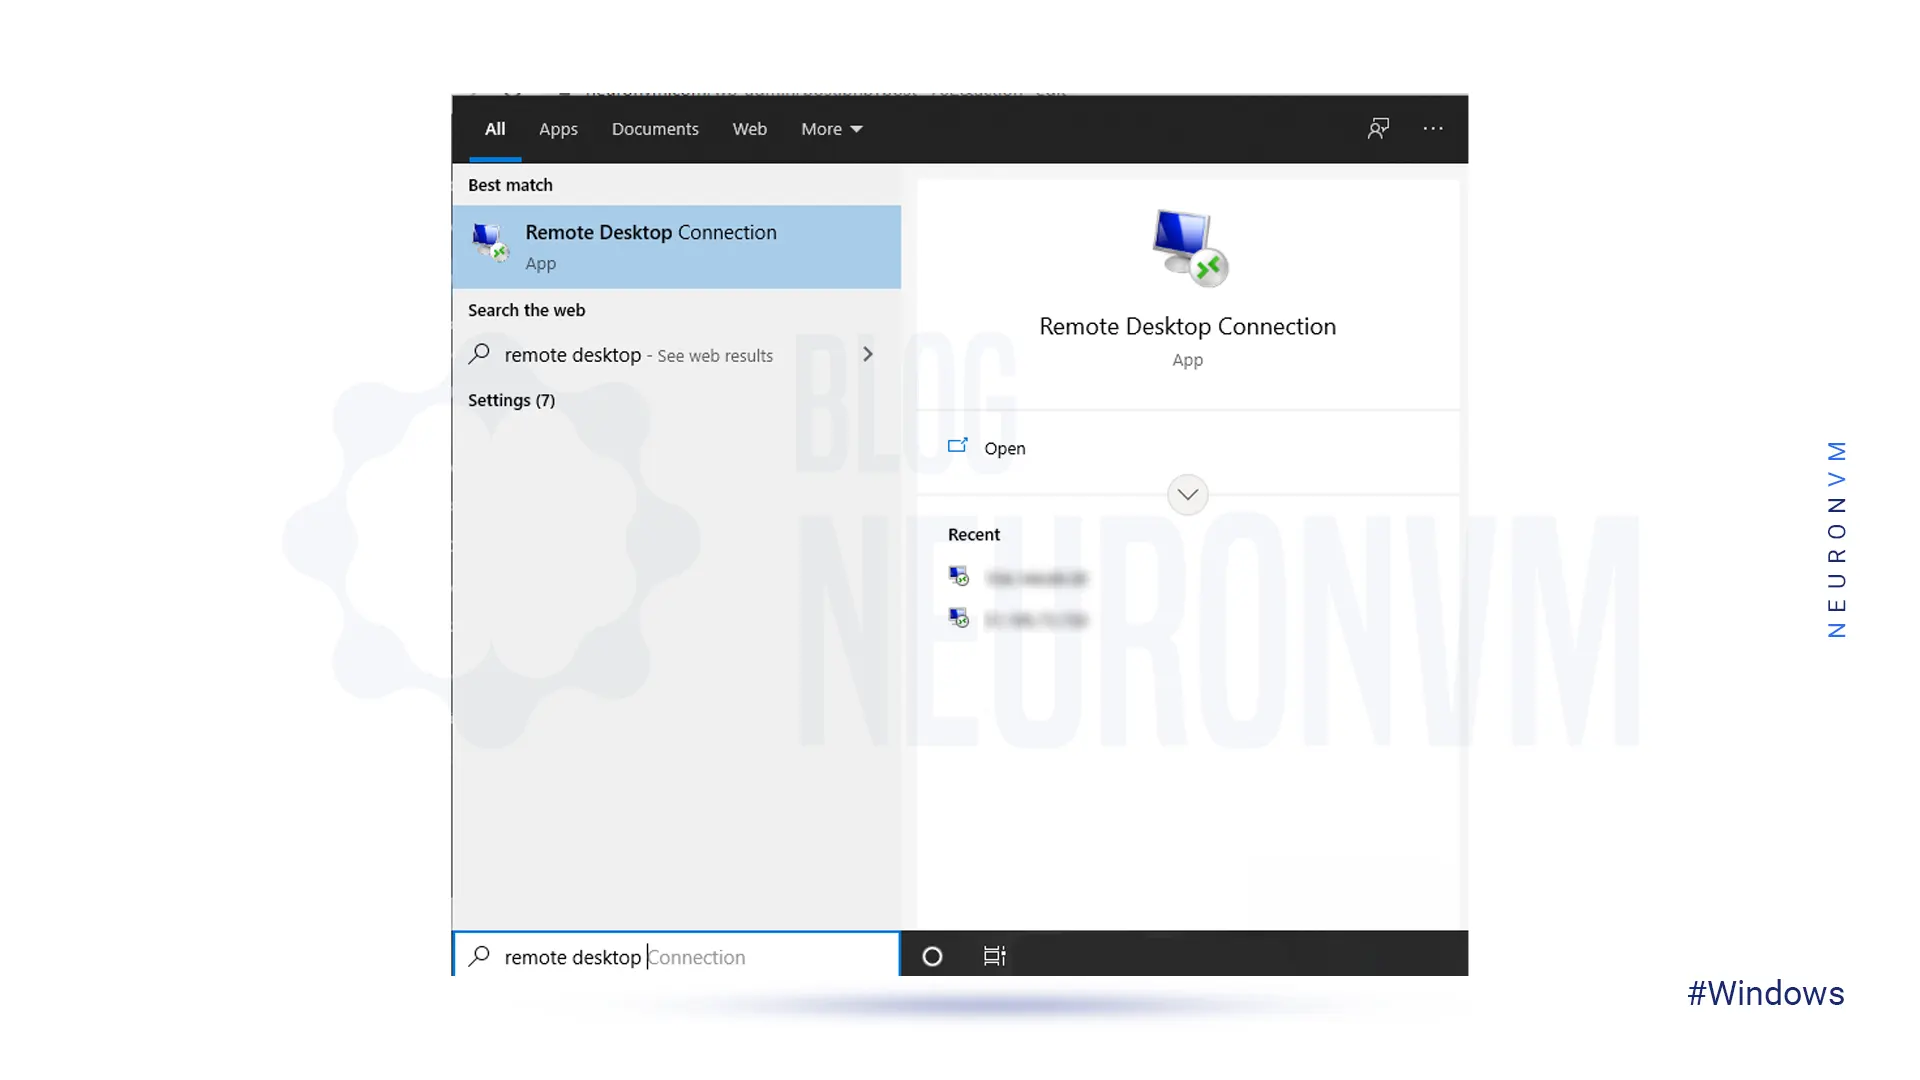
Type to search for and run Remote Desktop from the Start menu:
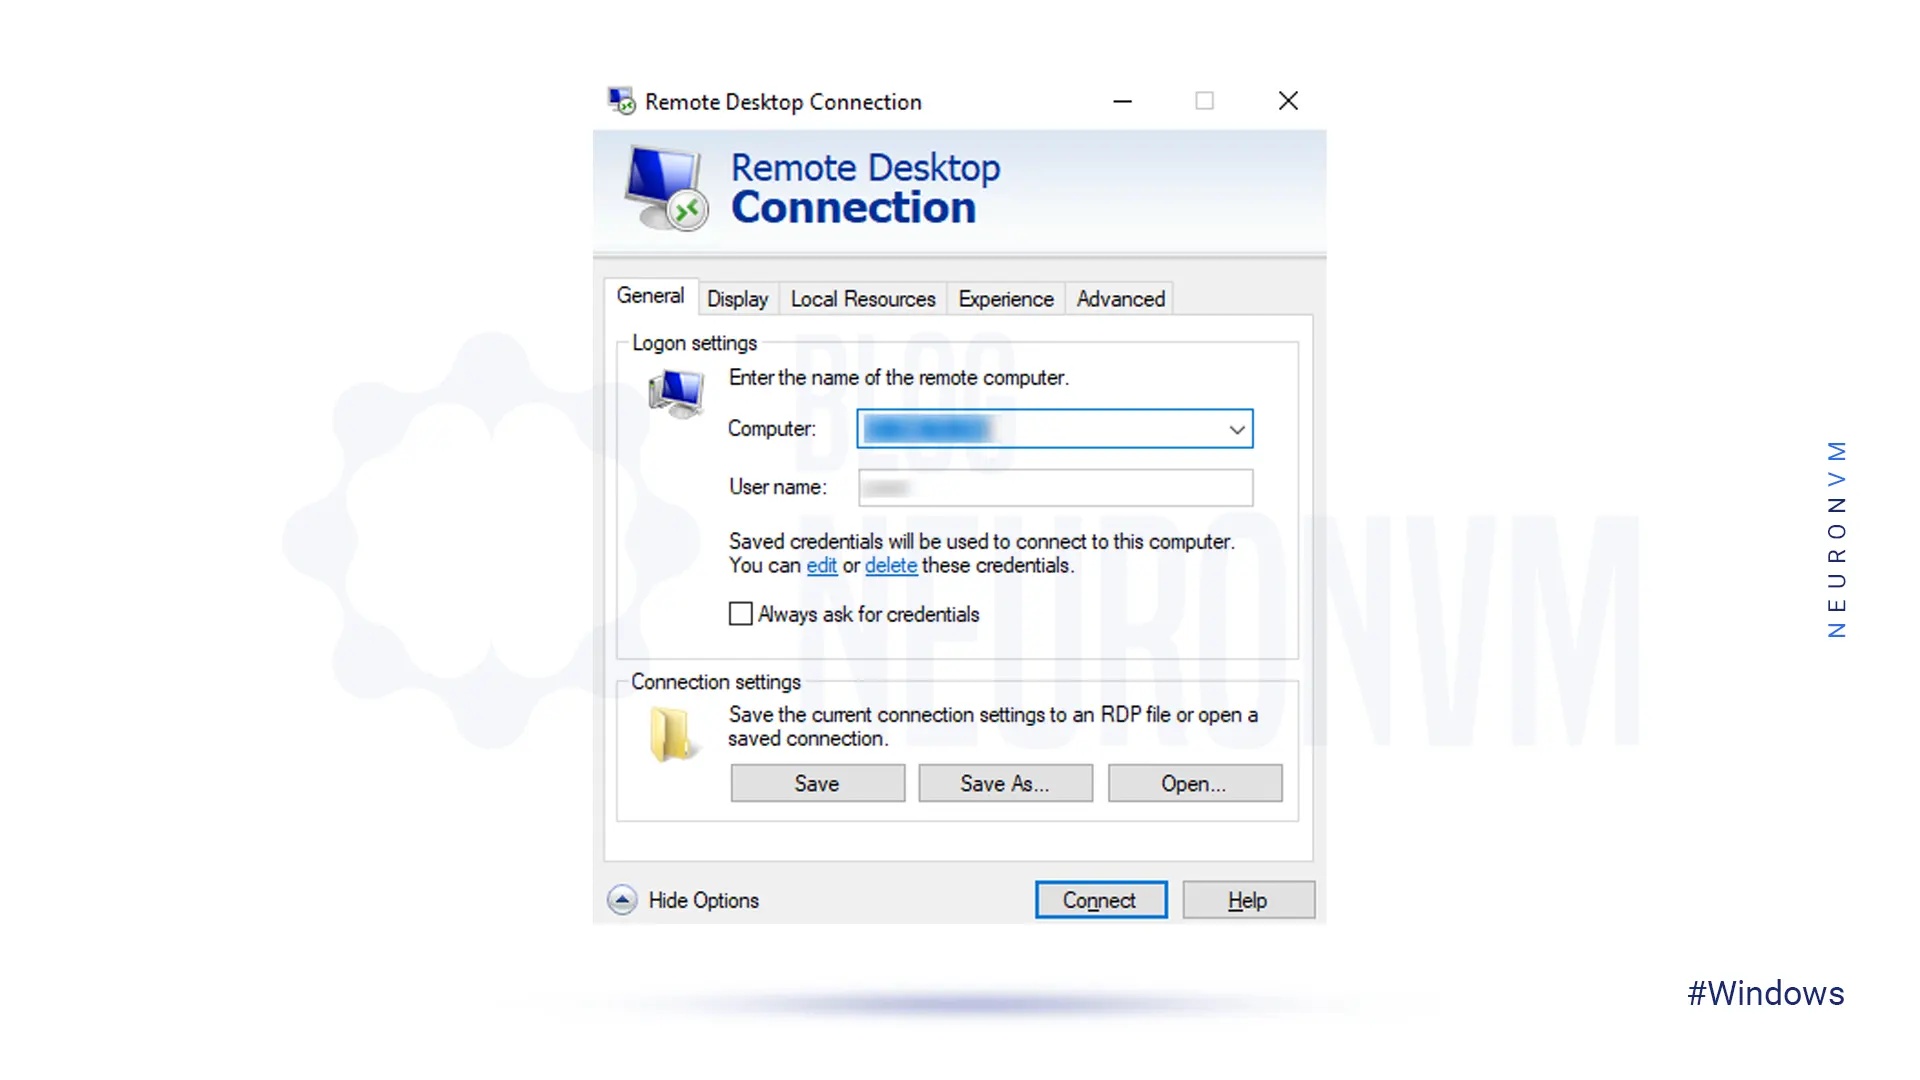
Type the server IP address to enter the server with its password. Then click Connect to enter the Windows server environment:
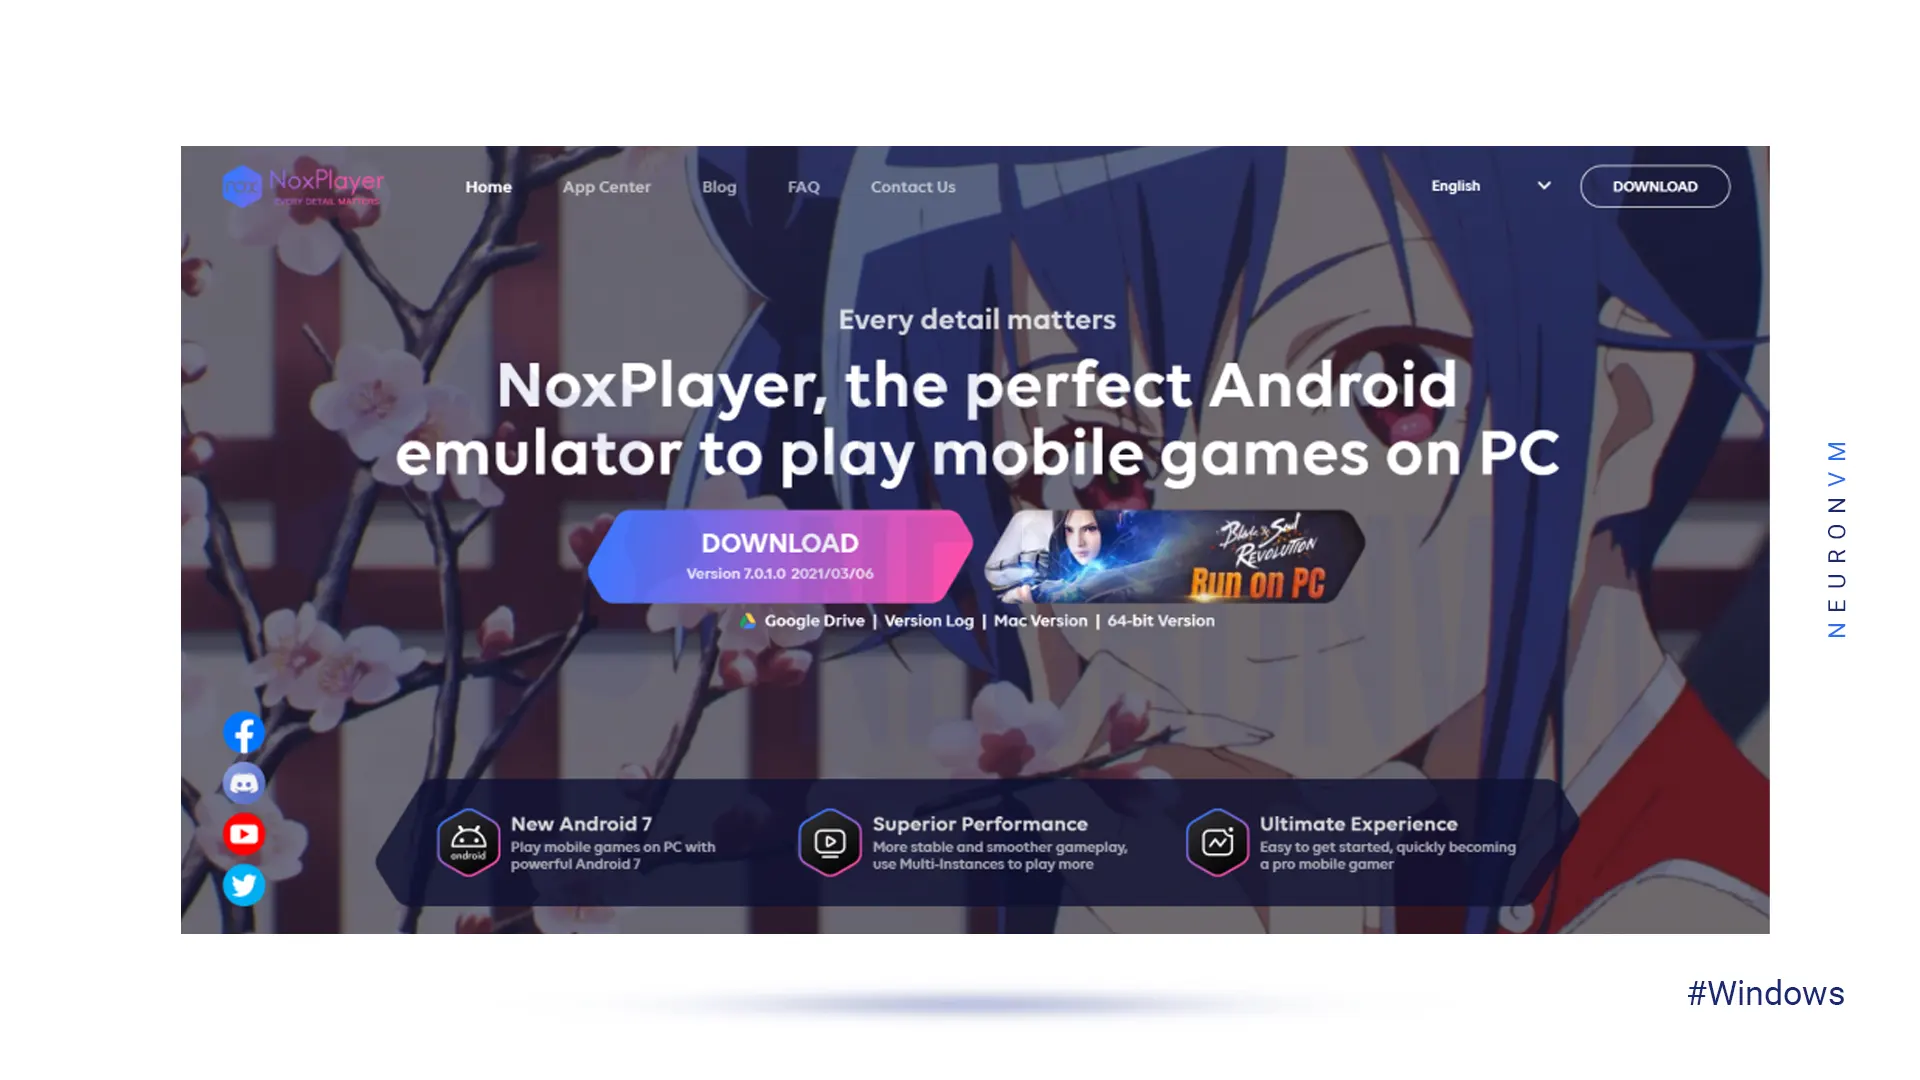
Open one of the browsers of your choice and enter the Nox Player website. Click on DOWNLOAD button:
After the download is finished, go to the downloads folder and double-click on the nox_setup file.
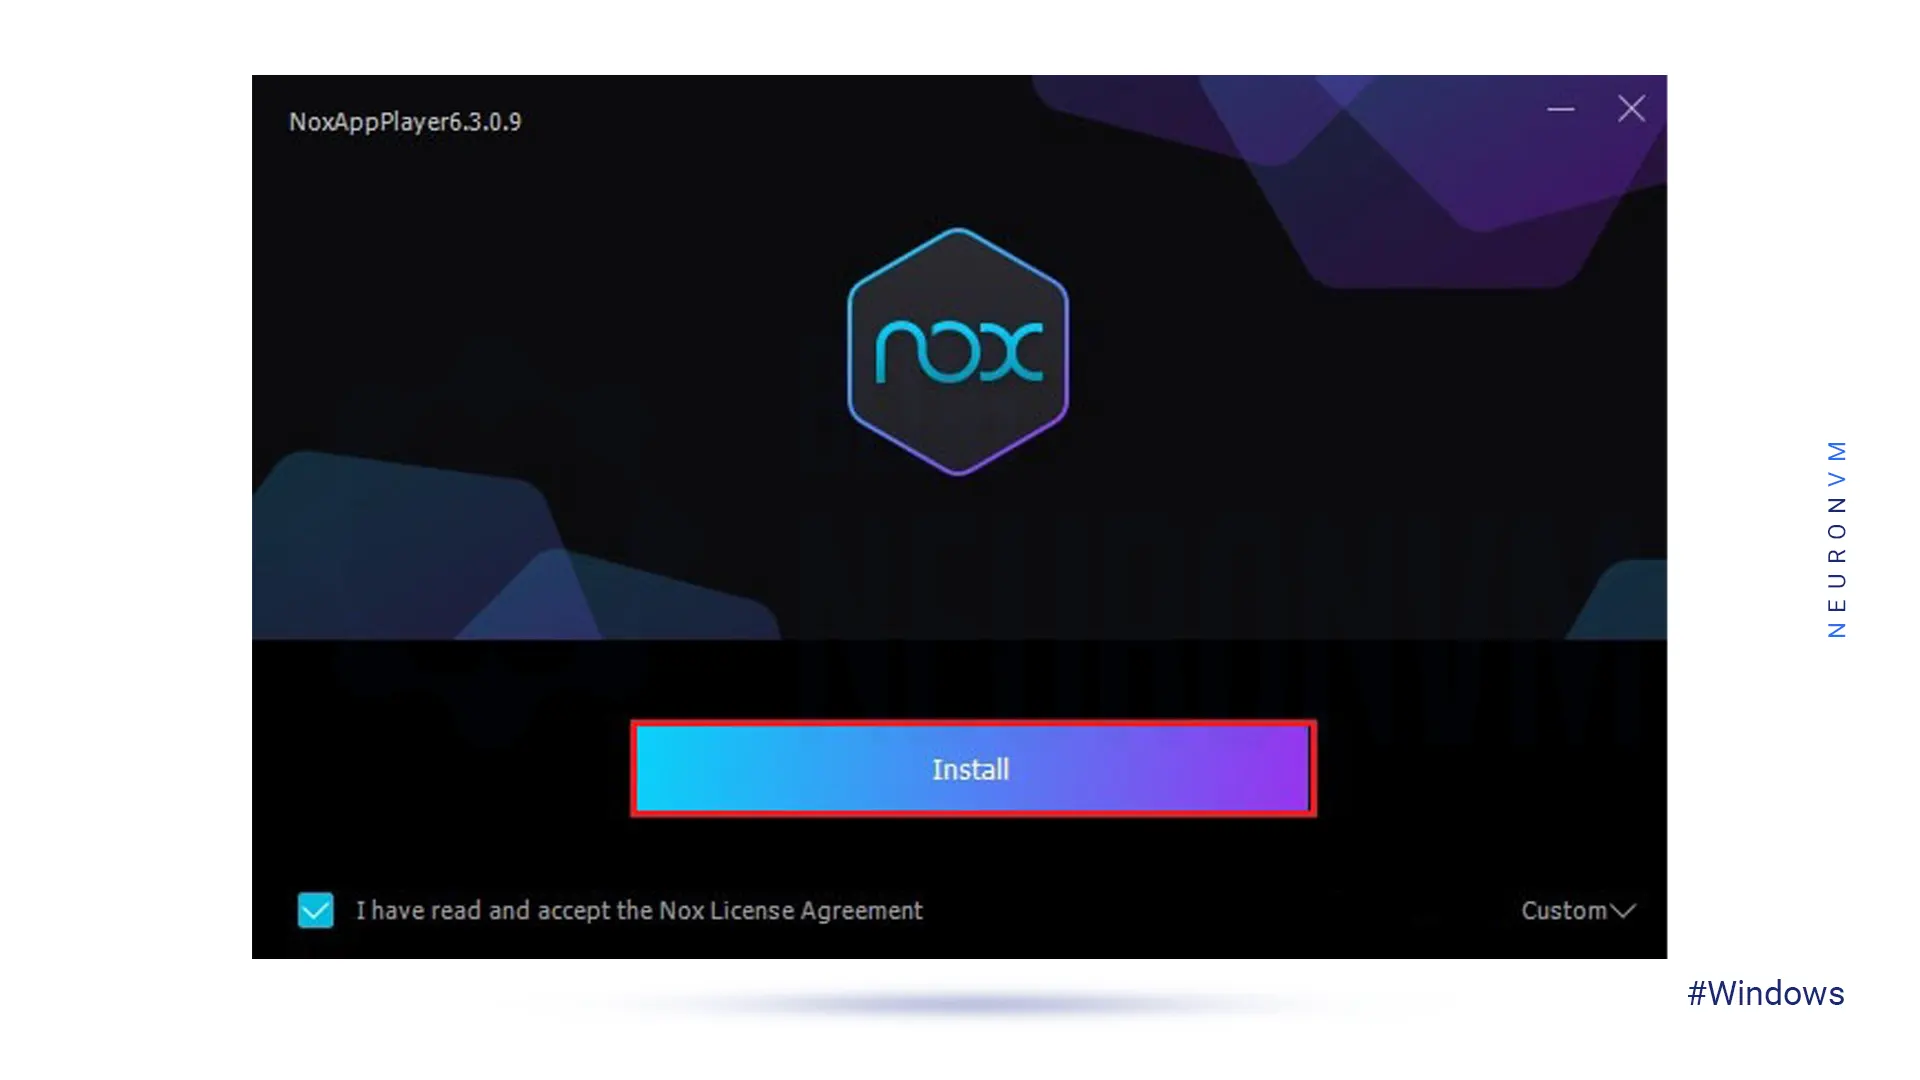
In this step, you must check the license agreement and, click on Install:
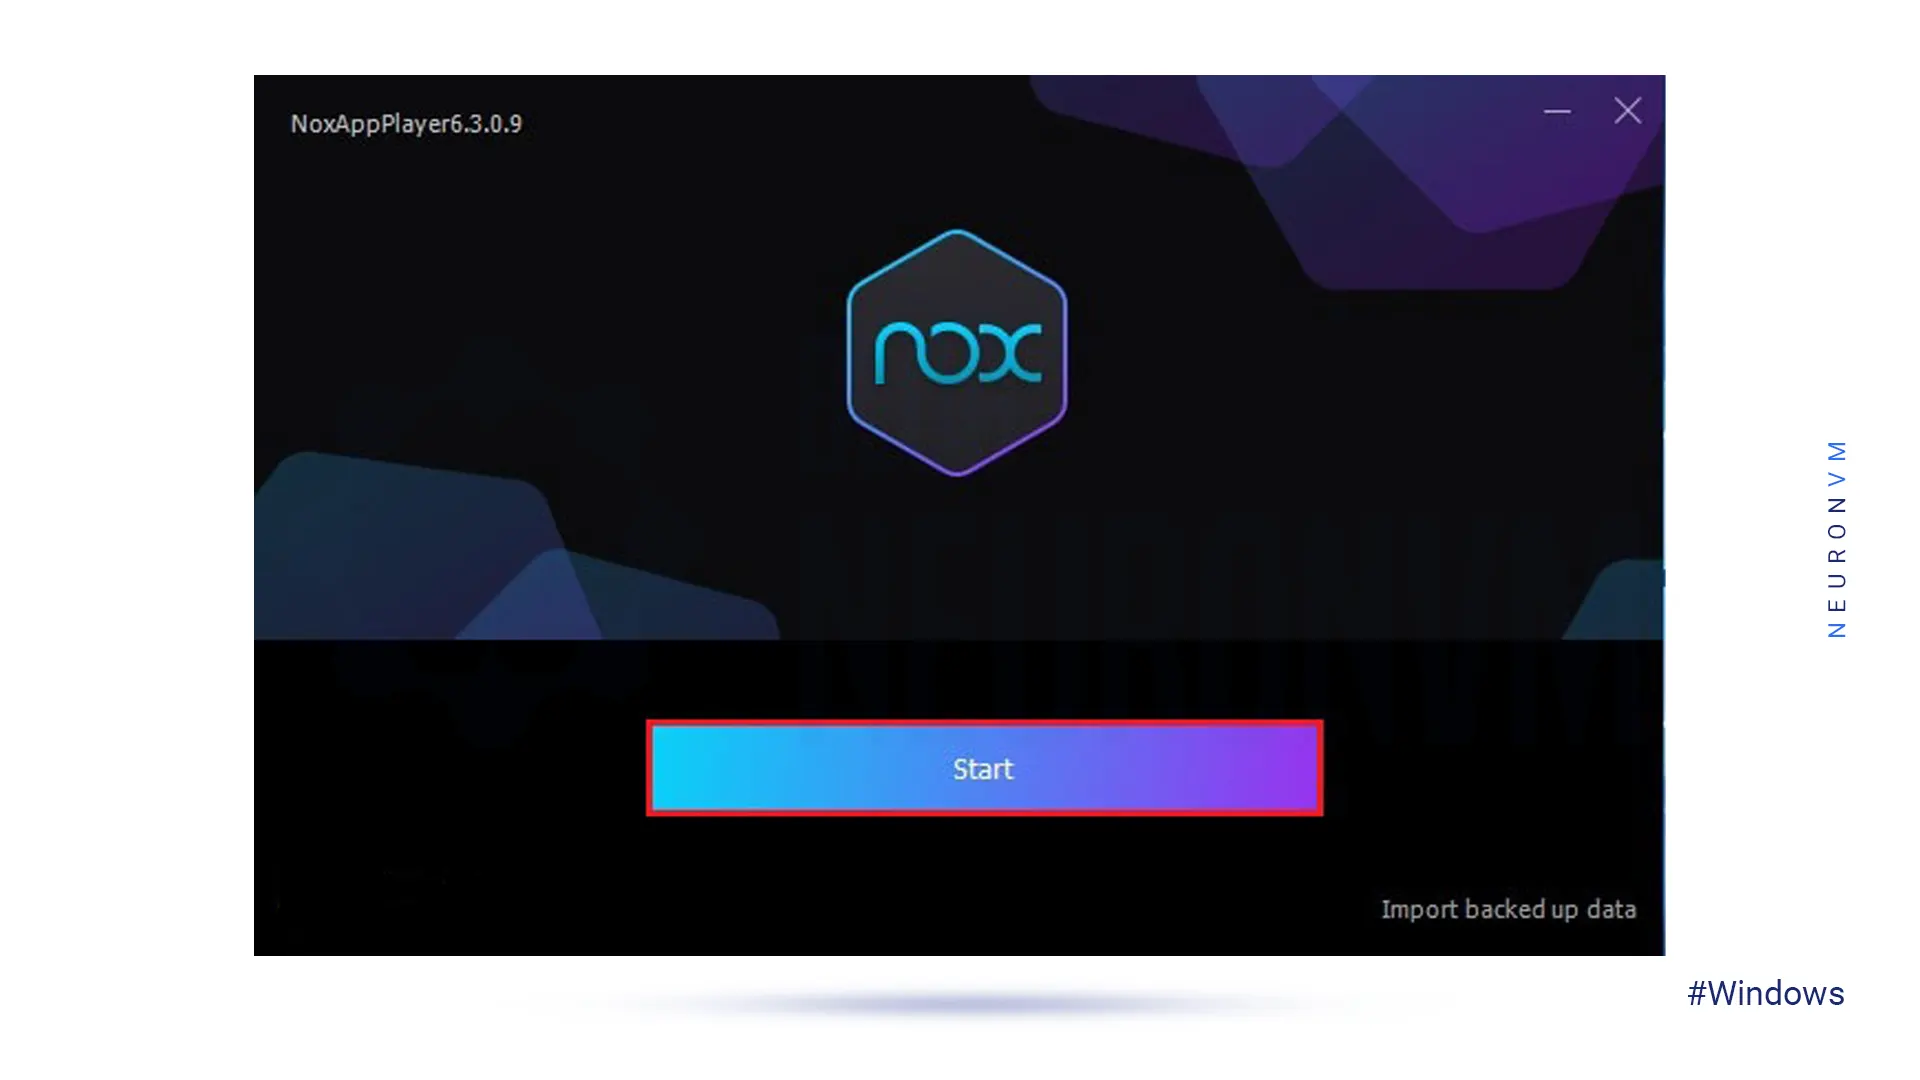
Then you have to wait for installation to finish.
Click on Start to run the Nox Player:
How to Setup Nox Player on Windows Server
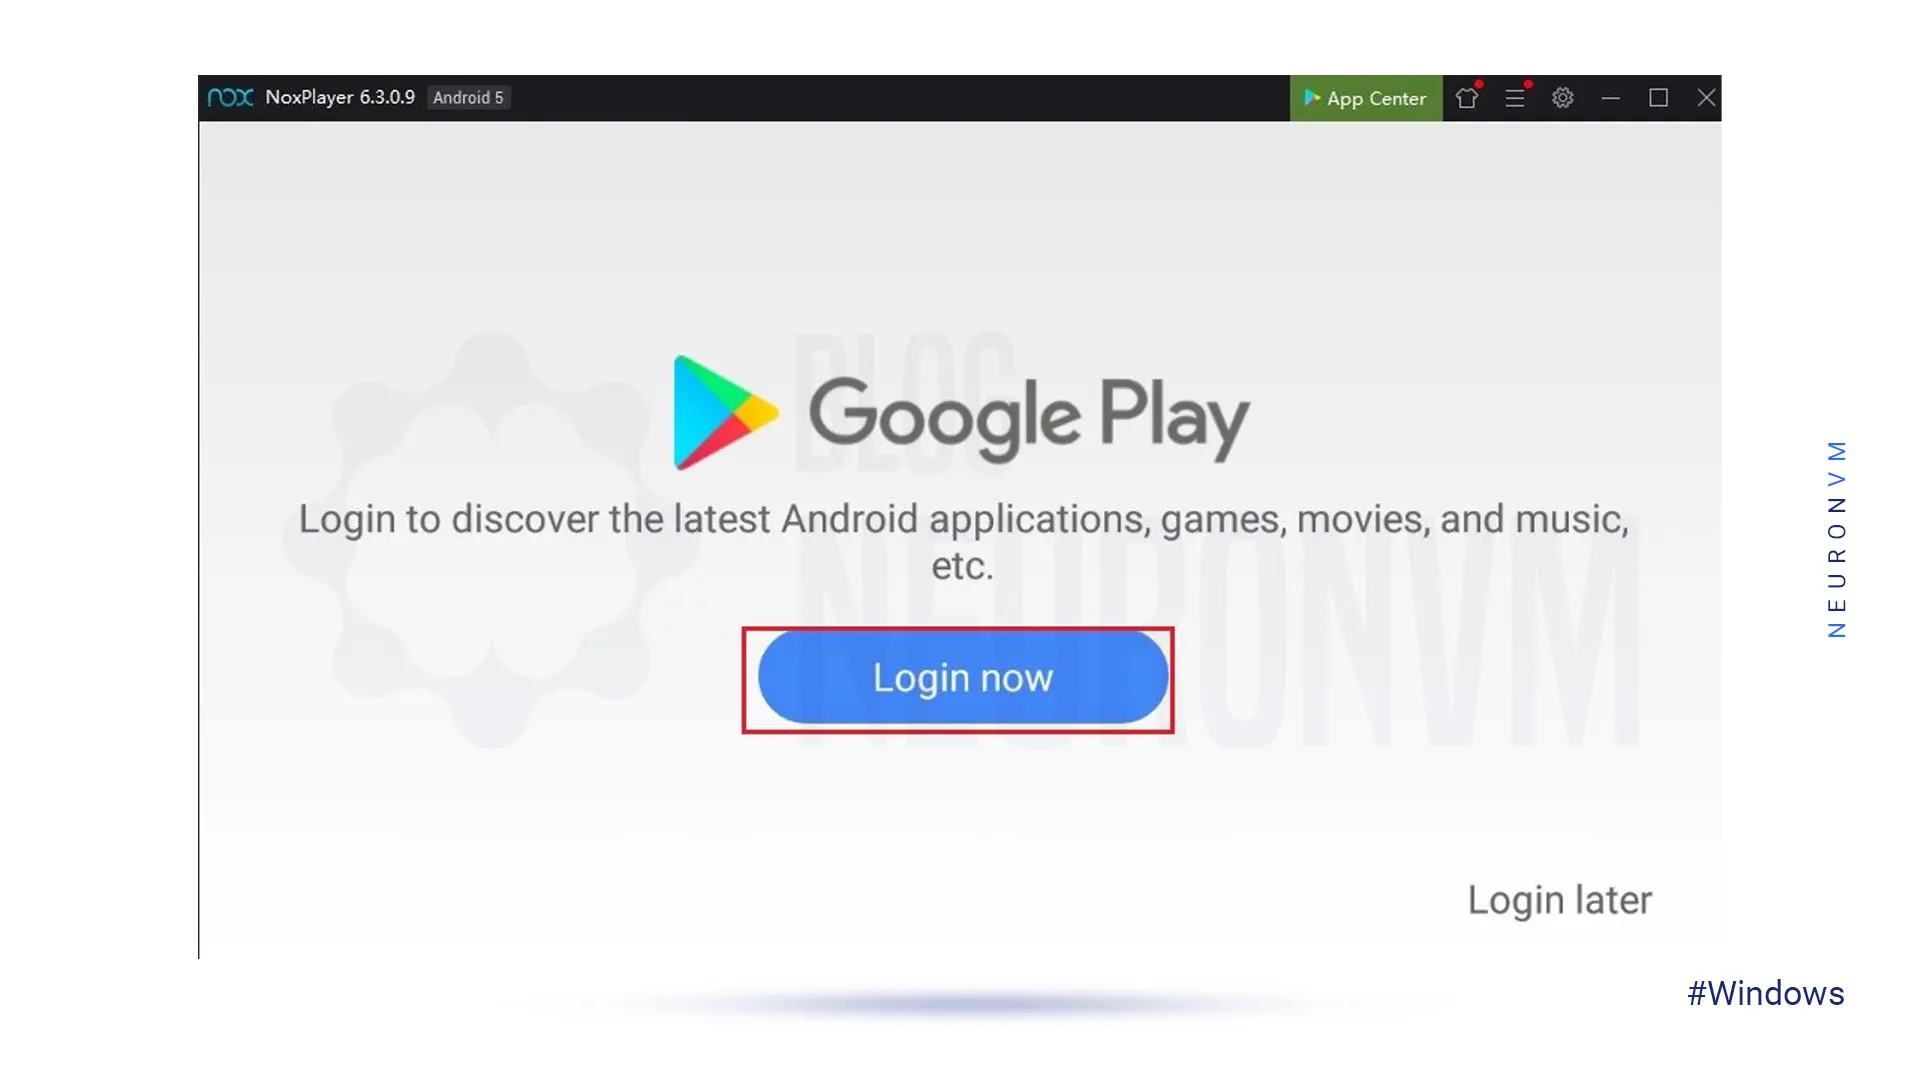
After successfully completing the above steps and running Nox Player, we want to set it.
Click Login to enter your Google Account:
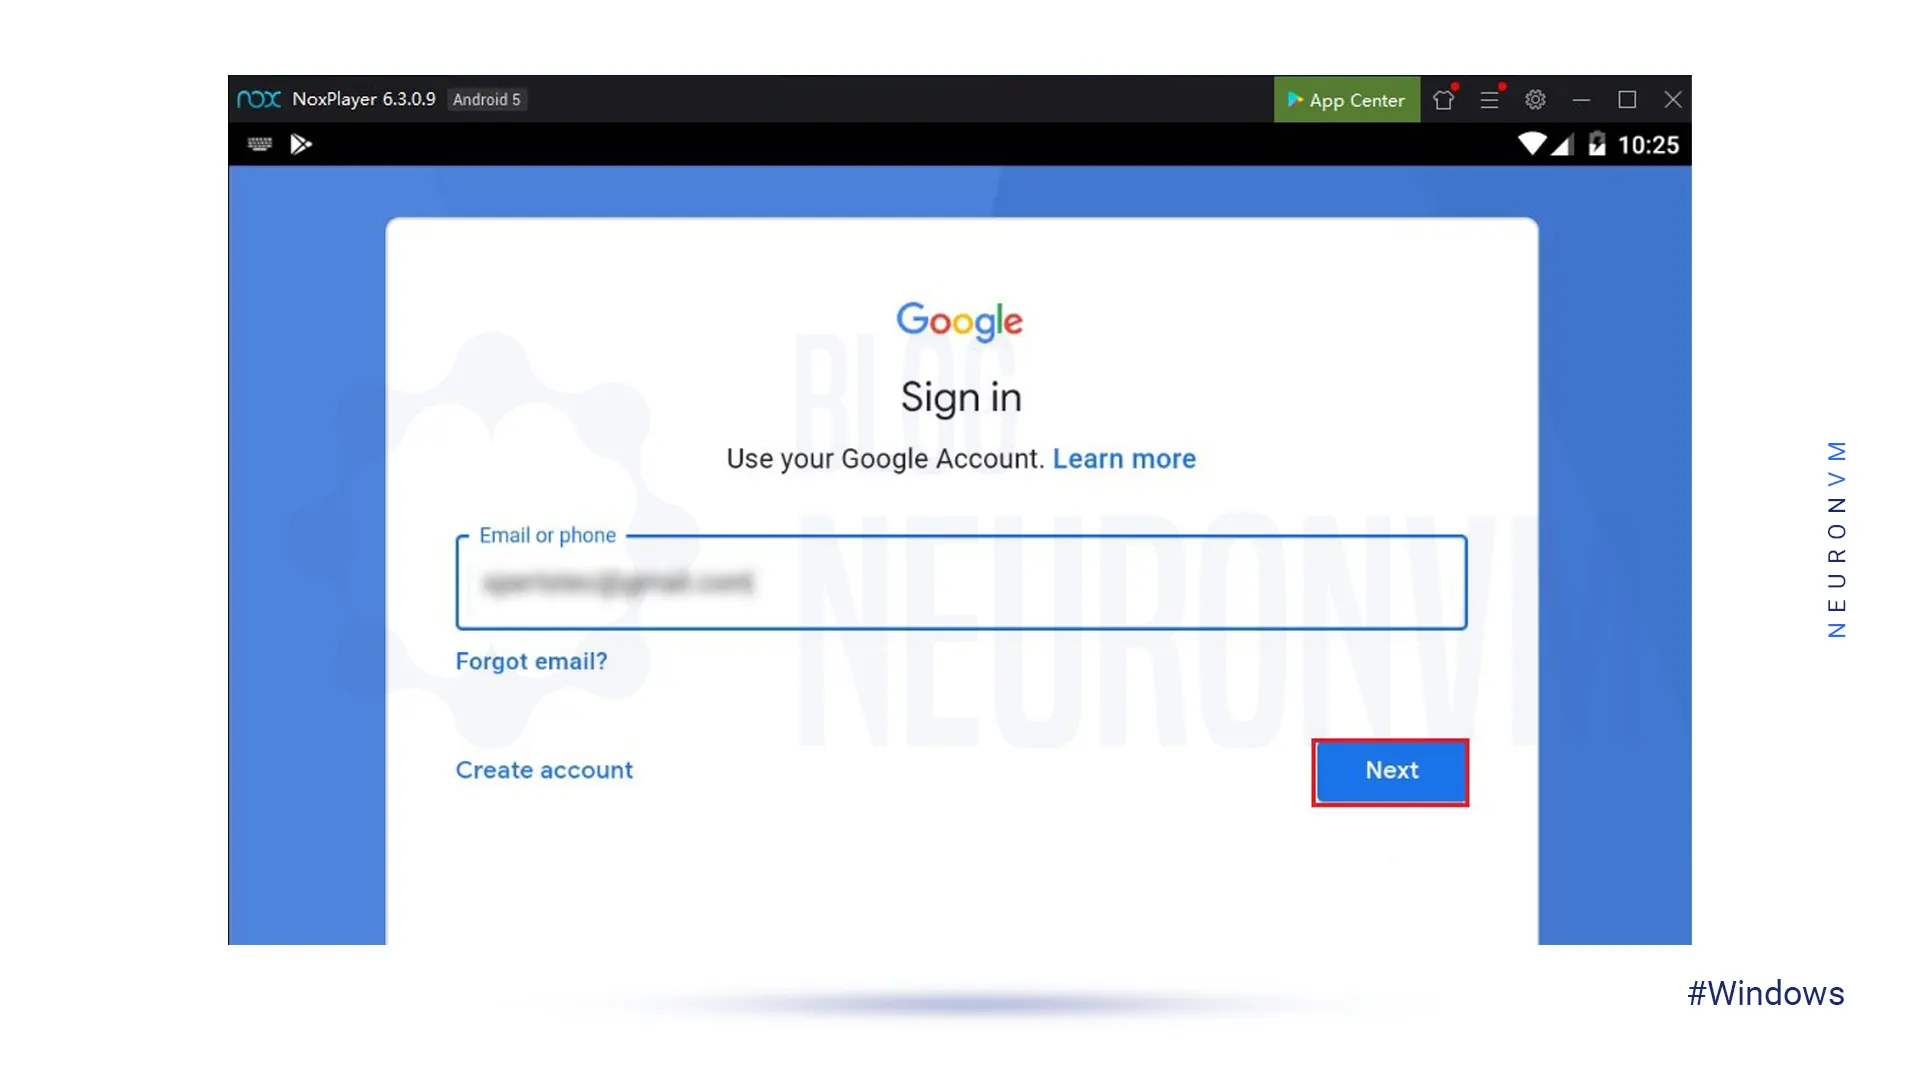
Then, you should type your Google email address and its password. Then click on Next to continue:
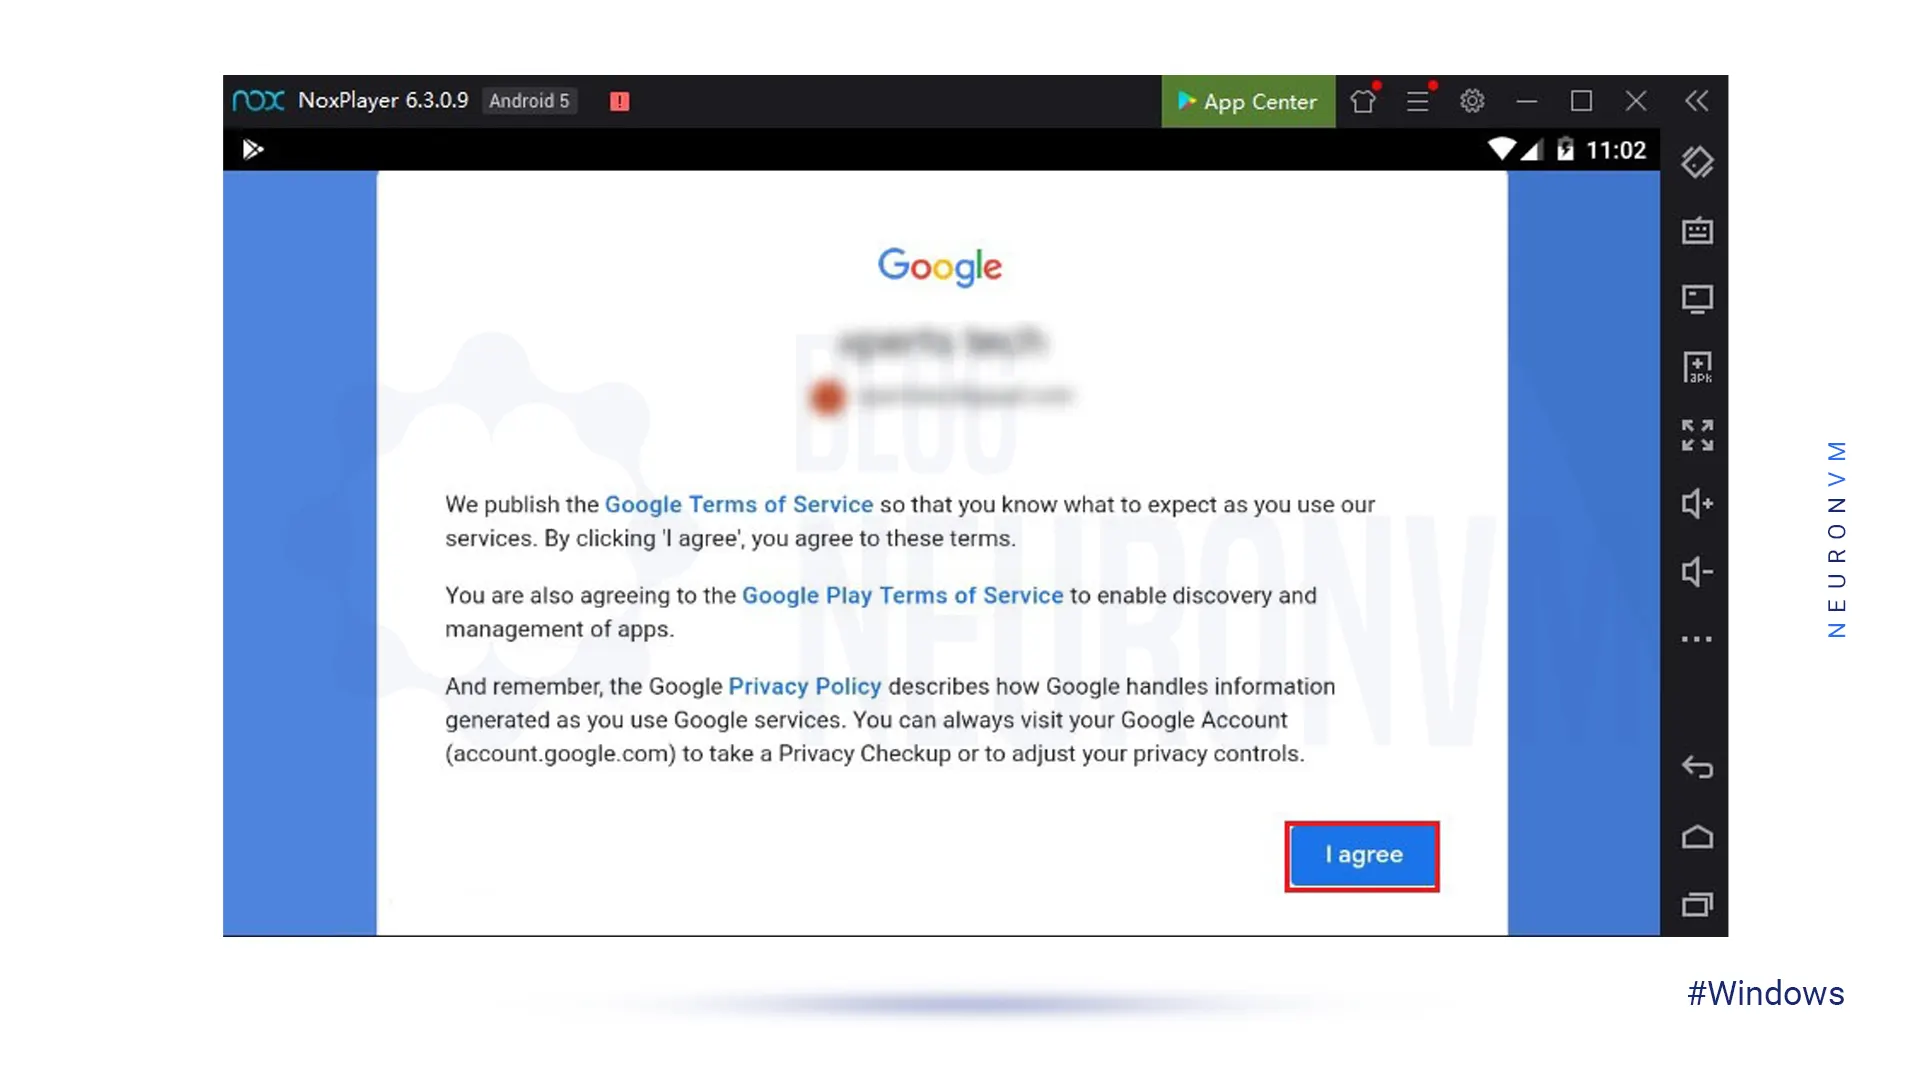
In the window that opens, click the “I Agree” to agree with the Google Play terms of services at the bottom of the page:
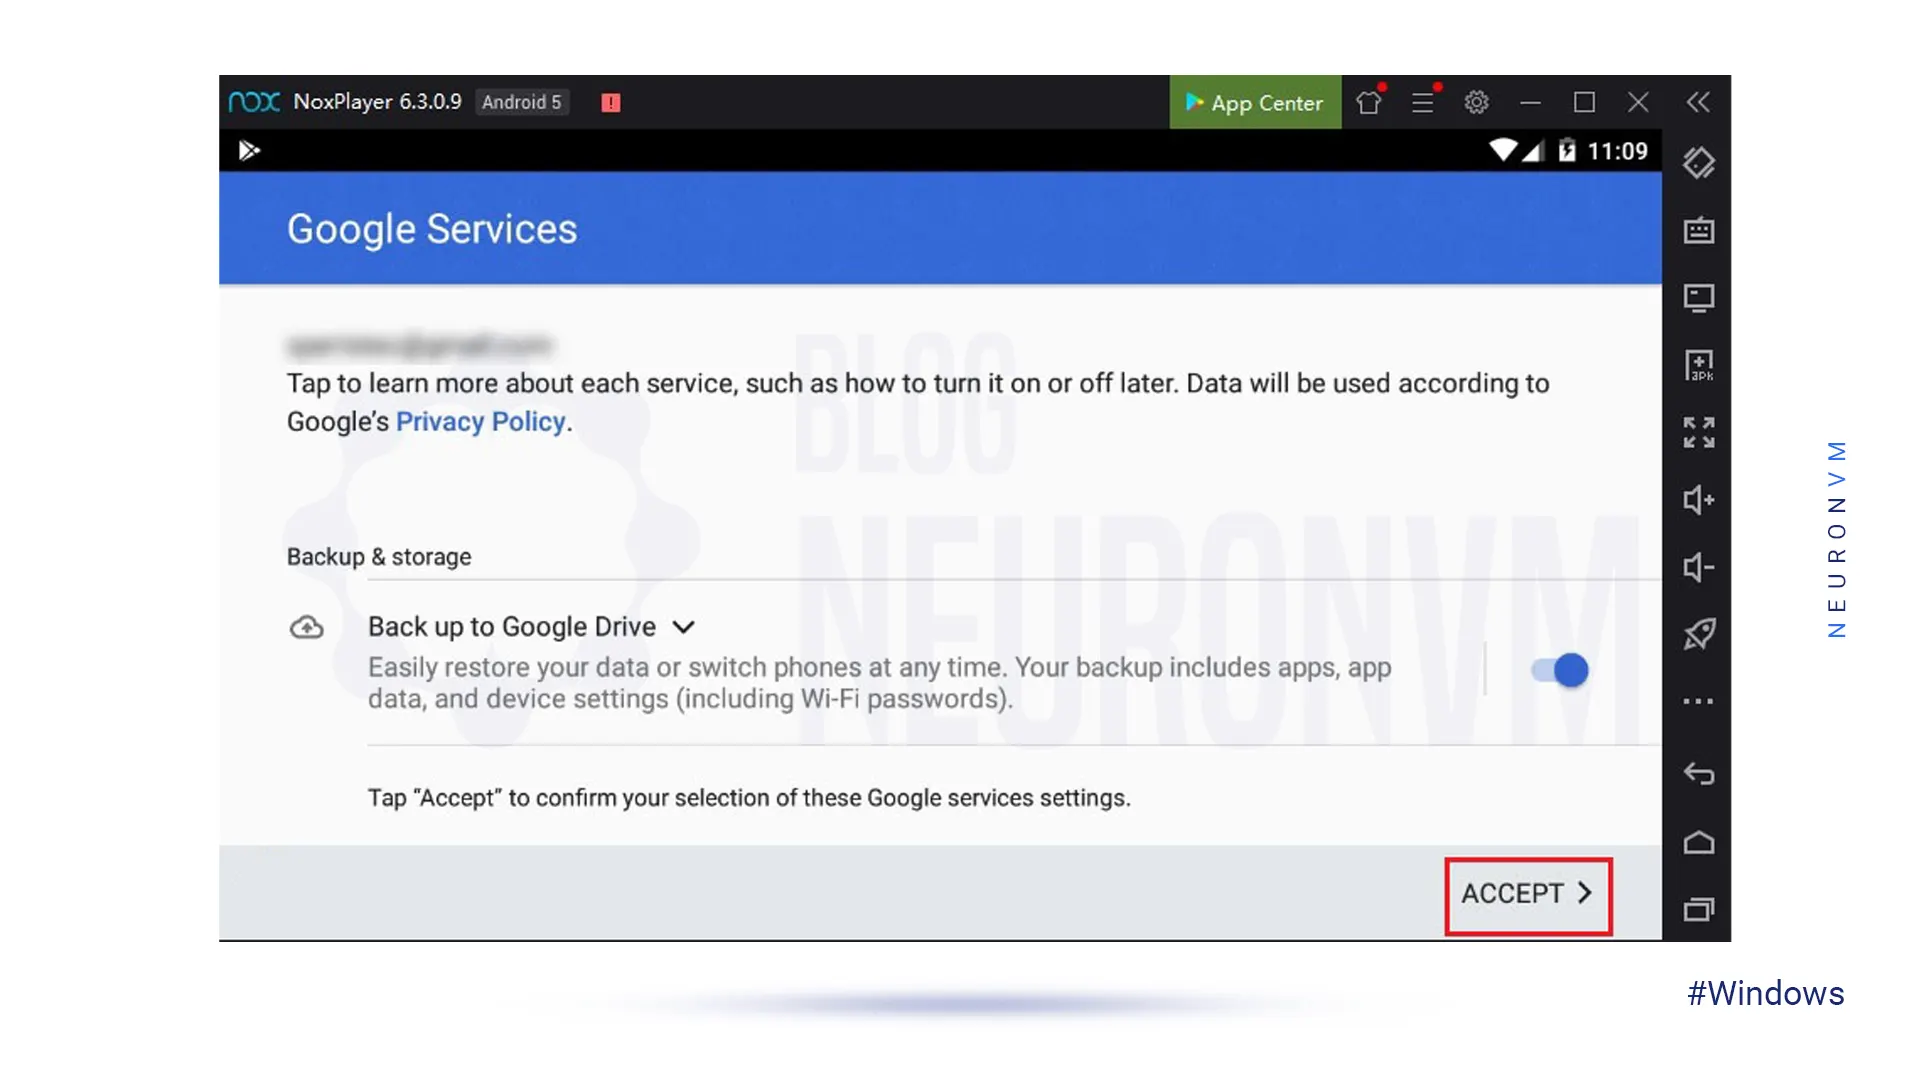
You should click on ACCEPT:
Finally, you can see the Nox Player home screen such as the following image:

We suggest that you read the interesting article Tutorial Install GameLoop on Windows Server to learn about another Android emulator.
Conclusion
Installing Now Player on your Windows server is a straightforward process that can be completed in just a few simple steps. By following the steps outlined in this guide, you can easily install Now Player on your Windows server and start enjoying the benefits of this popular media streaming application. Whether you are a fan of movies, TV shows, music, or sports, Now Player has something for everyone. So go ahead and install Now Player on your Windows server today and start streaming your favorite content with ease.
You might like it
cPanel Tutorials
Why is Cpanel email not forwarding to Gmail?

How to Upgrade VMware ESXi on a Dedicated Server
Almalinux Tutorials
How to Install SQLite on AlmaLinux 8