


Multicraft is a Minecraft server control panel that allows users to manage multiple servers using a web-based user interface. These servers can be on multiple physical or virtual machines, depending on the version. After reading this article, you will learn how to Install Multicraft on Ubuntu 18.04, so stay with us until the end.
Prerequisites
– A Linux VPS Server with Ubuntu 18.04
– Log in to your server as the root user
First, you need to install Apache2 and SQLite:
apt-get install apache2 sqlite
After installing the above items, now you should install PHP and the required PHP extensions:
apt-get install php7.4 php7.4-sqlite php7.4-gd
It’s time to install Java:
apt-get install openjdk-8-jdk
Then you need to open your desired text editor and edit the Apache configuration file /etc/apache2/apache2.conf:
nano /etc/apache2/apache2.conf
In this step, you should set the AllowOverride option to all in the Apache configuration file, in the <Directory /var/www/> section:
<Directory /var/www/>
        Options Indexes FollowSymLinks
        AllowOverride All
        Require all granted
</Directory>
Remember to save and exit the file.
Then you should reload the Apache configuration:
service apache2 reload
It is now time to download the Multicraft installer:
wget -O multicraft.tar.gz http://www.multicraft.org/download/index?arch=linux64
Remember to extract the installer:
tar -xzf multicraft.tar.gz
Then you should navigate to the extracted directory:
cd multicraft/
Finally, you should run the installation script:
./setup.sh
If you are asked a question by the installation script, press Enter to go to the default answer and also it’s better to answer no when asked to enable the built-in FTP server because it is not secure.
First, you should open your web browser and navigate to the IP address of the server.
http://IPaddress/multicraft/install.php
Remember to replace your IP address instead of the IP address in the command.
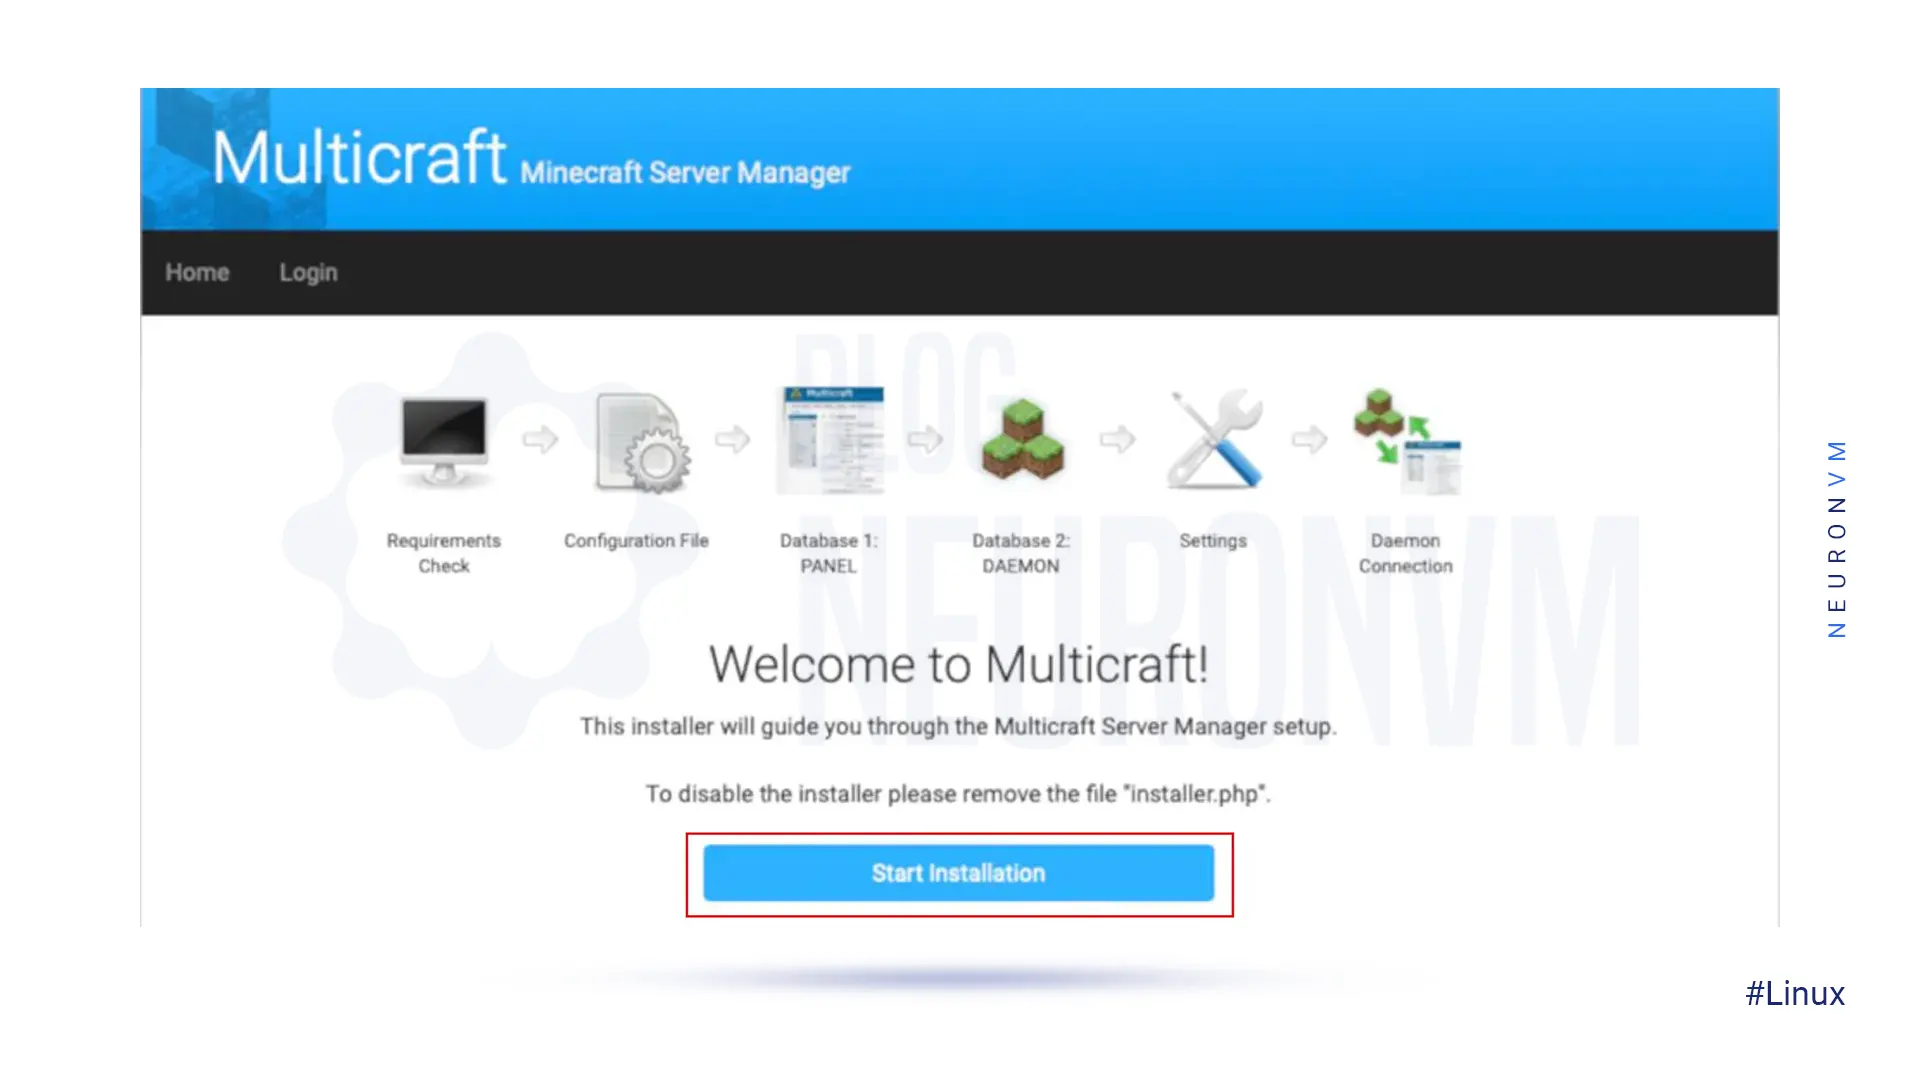
Now you should press Start Installation:
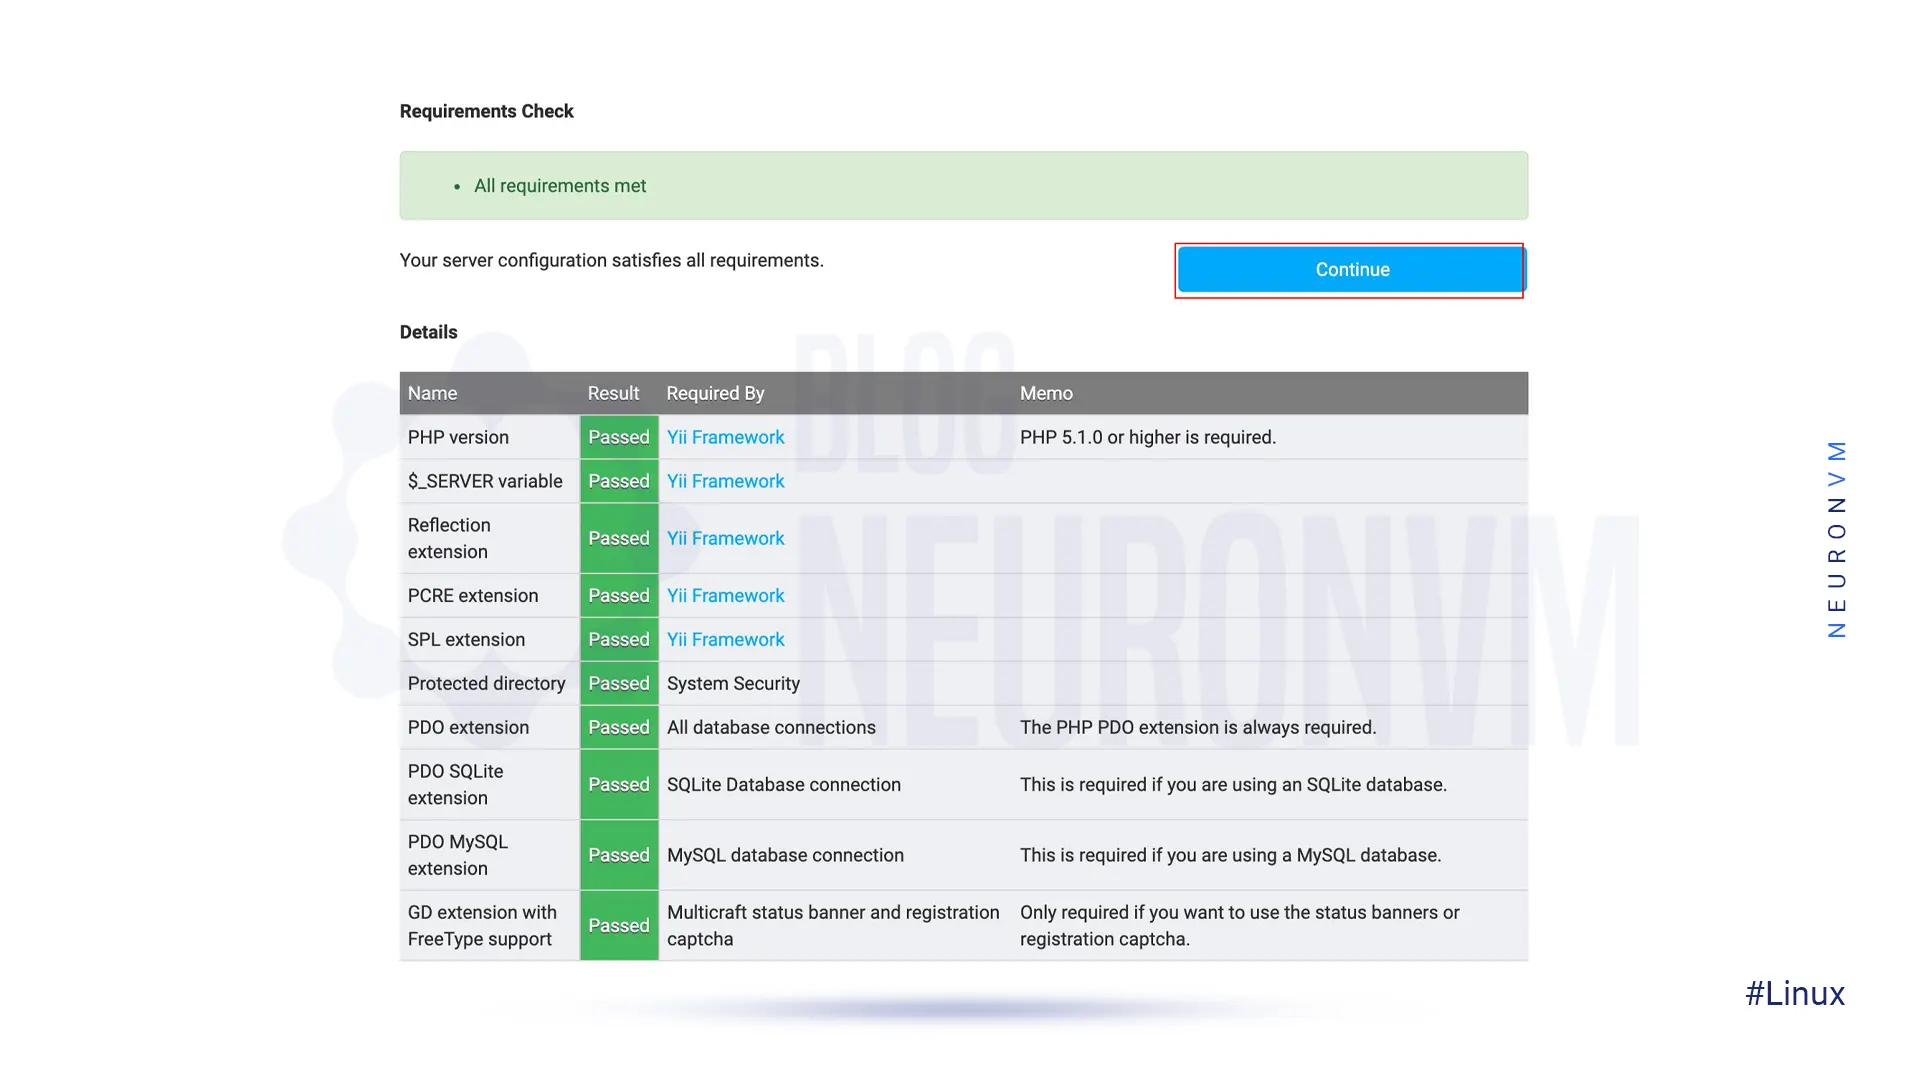
Then Multicraft will check the requirements and you should click on Continue:
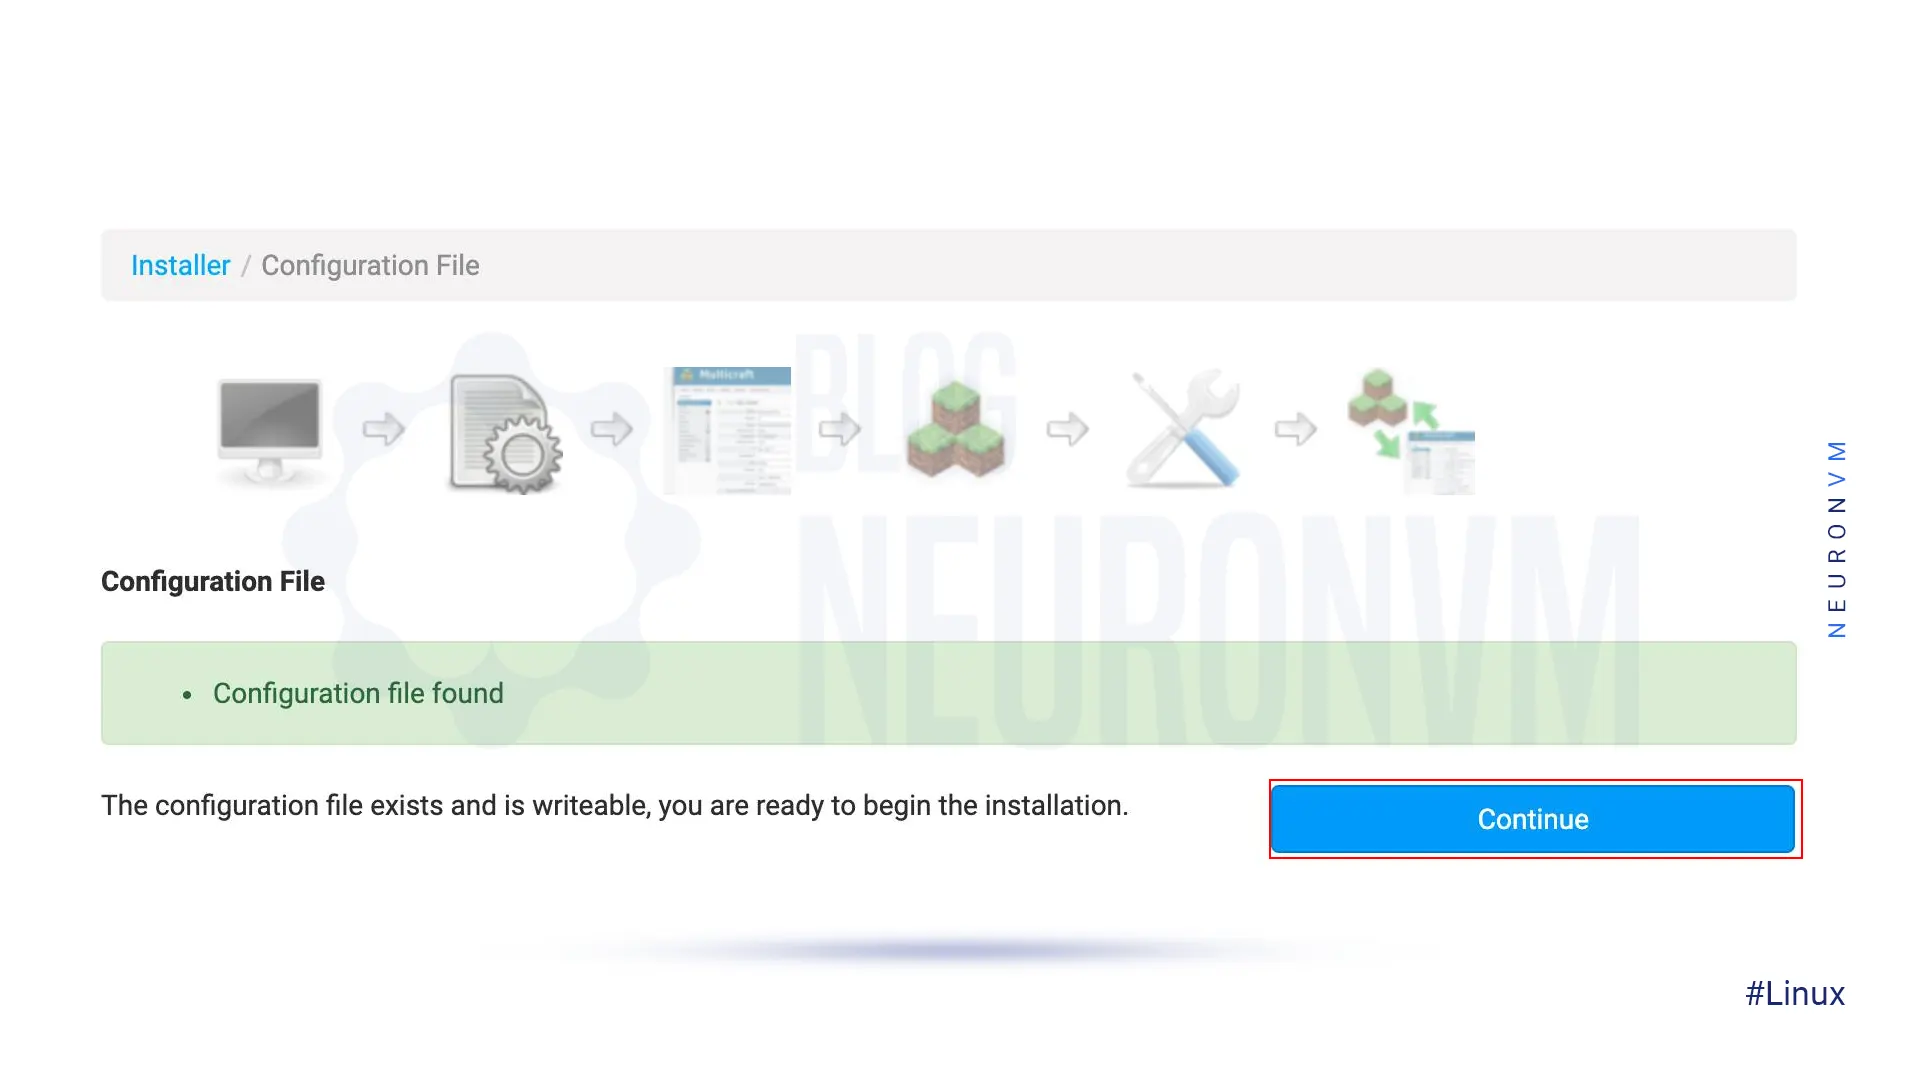
You will be asked for confirmation to copy the configuration file. If successful, click Continue again:
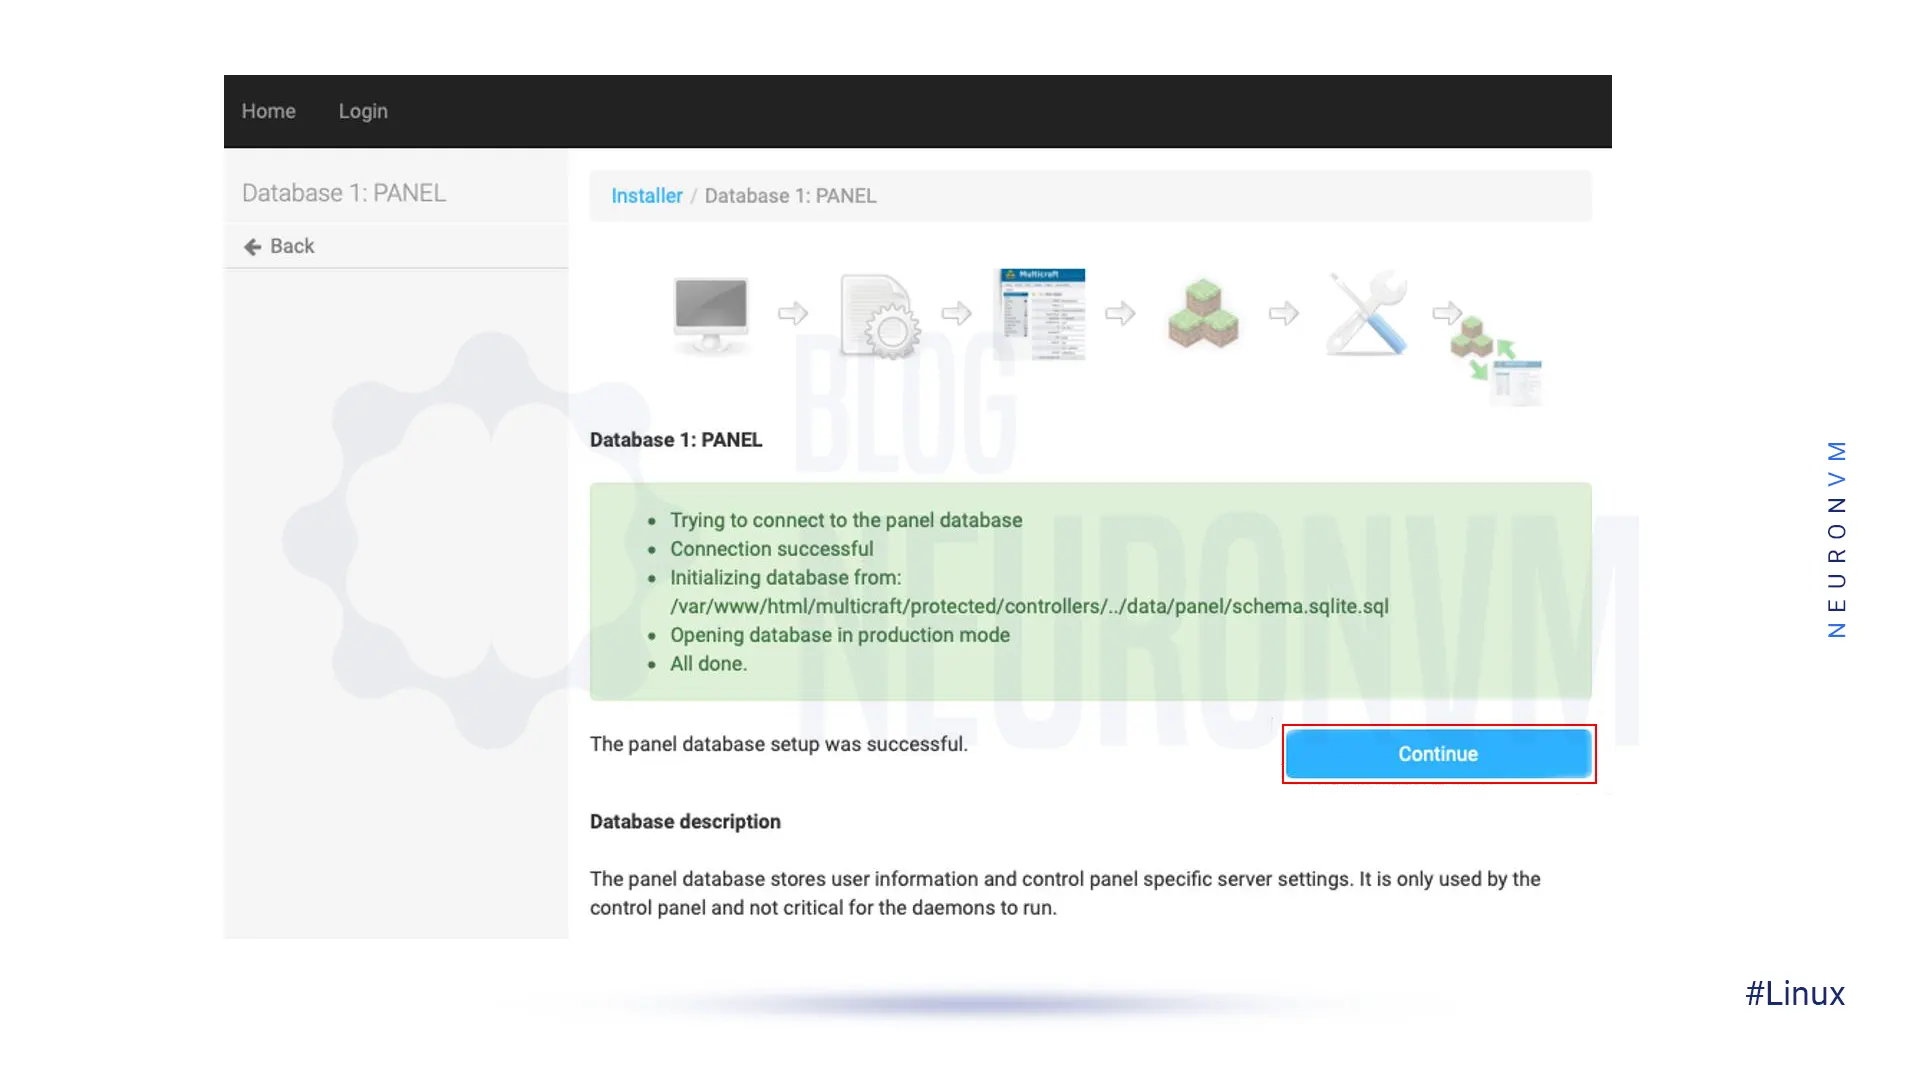
Now you should click on Initialize Database which is a database for initialization use.
Then click Continue:

Click on Continue again:
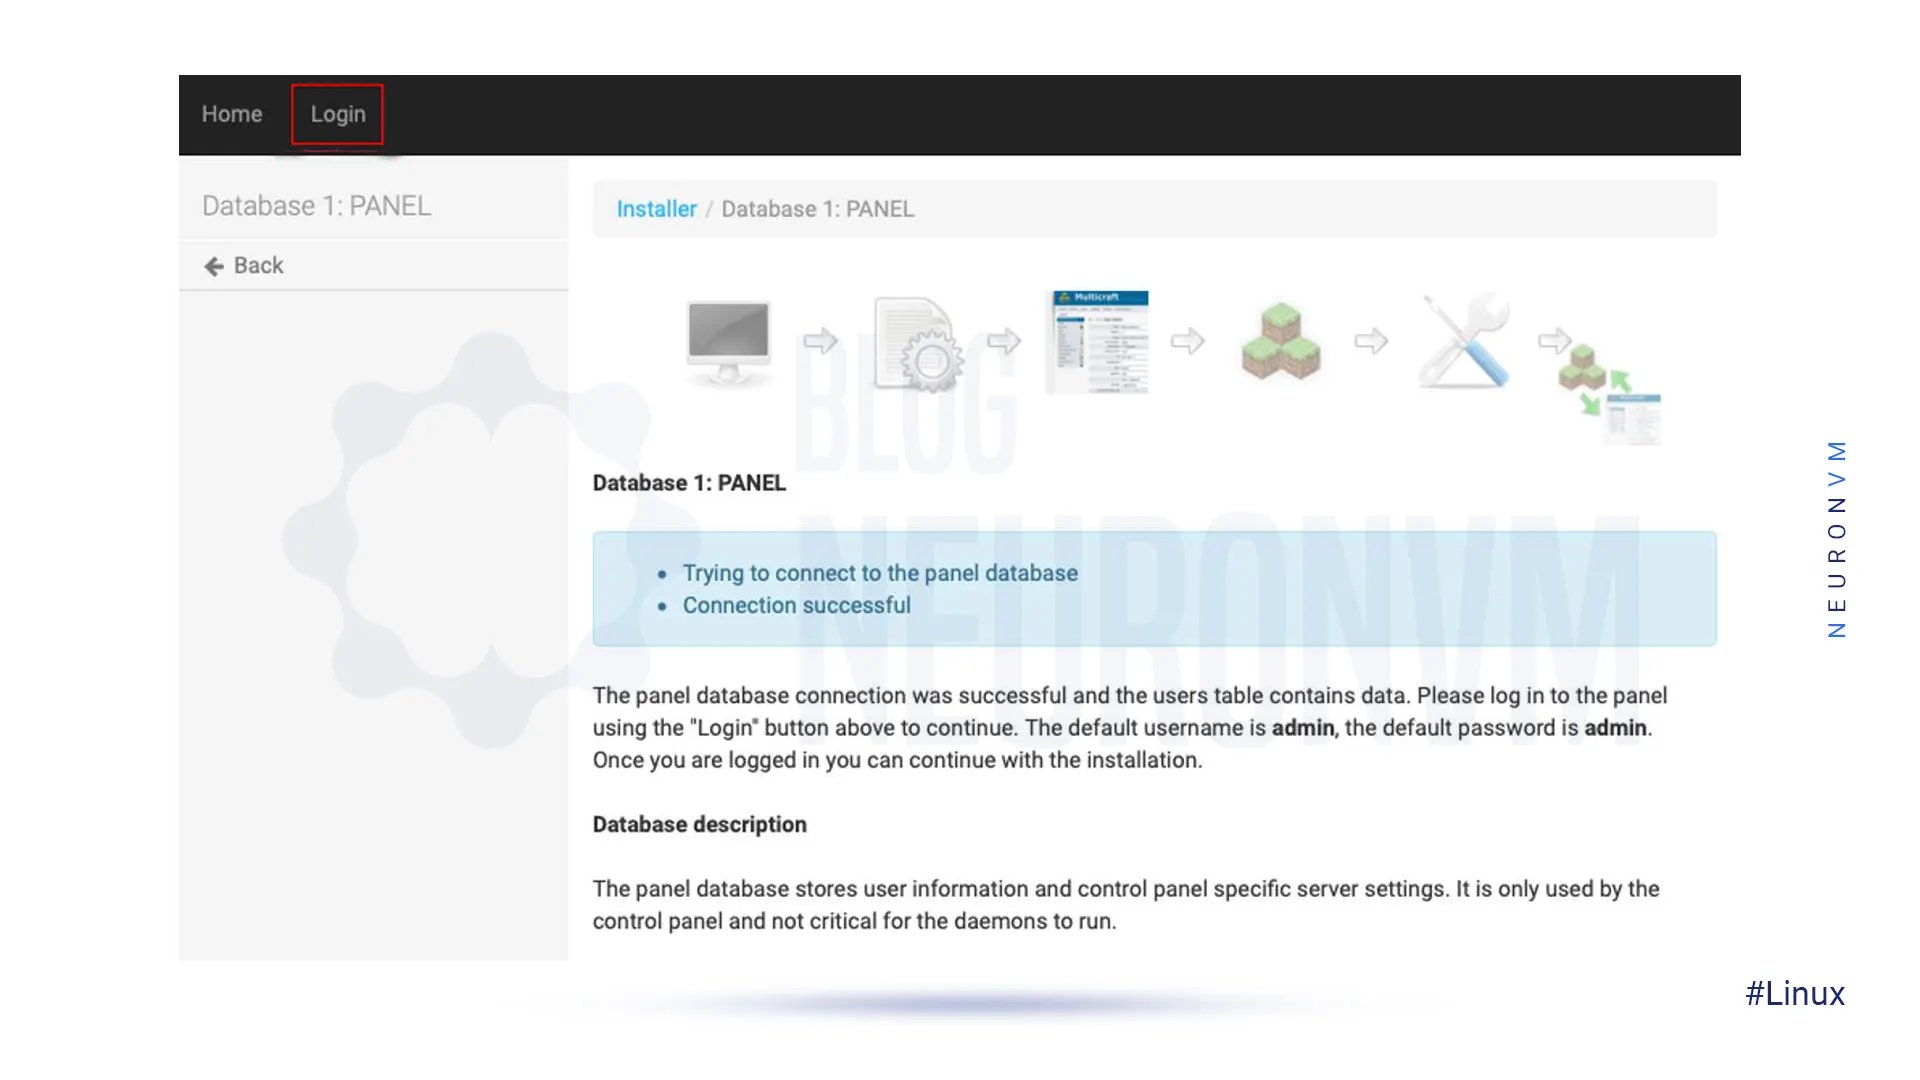
At this point click on Login at the top of the page.
On the sign-in page, you have to enter the Admin name and password and click on Login.
Then press Continue again:
Remember to enter your email address into the Administrator contact Email field and finally click on the Save:
Just enter the following command to start the Multicraft daemon:
/home/minecraft/multicraft/bin/multicraft -v start
Now you should navigate to your web browser, click on Refresh, and then Continue.
After doing the above, you should click Continue to Multicraft.
It is better to delete the Multicraft installation file for security purposes. So, run the following command:
rm /var/www/html/multicraft/install.php
In this article, we have provided a step-by-step guide on how to install Multicraft on Ubuntu 18.04. By following these instructions, you can easily set up a powerful control panel for managing your game servers efficiently. Whether you are a seasoned server admin or new to server management, Multicraft offers a user-friendly interface that simplifies the process of installing plugins, monitoring server performance, and managing multiple game servers. If you need to install Multicraft on Windows, we suggest you read the article How to Seamlessly Install Multicraft on Windows.
 Tags
Tags


In this article, we are going to teach you How to Install TFTP Server on Ubuntu 20.04. TFTP is an ab...


 Tags
Tags

Yakuake is a drop-down terminal emulator for Linux systems that allows users to have quick access to...
Tags


