


KVM (Kernel-based Virtual Machine) is an open-source virtualization platform that allows you to run multiple virtual machines on a single dedicated server. Installing KVM on a dedicated server can provide you with the flexibility to create and manage virtual machines for your specific needs. In this article, we will walk you through How to Install KVM on a dedicated server.
KVM stands for Kernel-based Virtual Machine. Kernel-based virtualization is actually supported for your virtual hardware and can manage it. This virtualizor is implemented by the new generation of AMD and AMD CPU processors.
Redhat is one of the main developers of KVM virtualization. The virtualizor is installed on the Linux operating system or the host server. However, due to its special technology, it creates virtual servers with its own core or kernel. This allows you to install a virtual server or any operating system you need, such as Windows, BSD, Linux, etc., and use it easily. KVM provides high quality for the guest operating system because it provides dedicated resources to its virtual server.
One of the advantages of the KVM virtualizor is support for Windows and Linux.
1- Disable SELinux
2- Installing a 64-bit operating system
3- VT enabled to boot from BIOS
4- Create partitions as follows:
5- The supported storage types include LVM File, Thin LVM, ZFS, ZFS Thin, ZFS Compressed, ZFS Thin Compressed, and Ceph Block Device.
To learn how to install KVM on a dedicated server, please follow us in the rest of this post.
Before starting the KVM installation process, we recommend that you visit our Cheap Dedicated Server plans. Then follow the steps below to install KVM on a dedicated server.
First, connect to your server using Putty or SSH. Then run the following commands to install KVM:
wget -N http://files.virtualizor.com/install.sh
chmod 0755 install.sh
./install.sh [email protected] kernel=kvm
It may take some time to download and install KVM depending on your internet speed, so we recommend that you be patient until the installation process is completed.
You will be asked below if you want to reboot. Type “y” and press enter.
Do you want to reboot now ? [y/N]
After the Virtualizor has been successfully installed, it is necessary to open the browser and type one of the following addresses to access it:
https://your-server-ip:4085/

http://Your-Server-IP:4084/

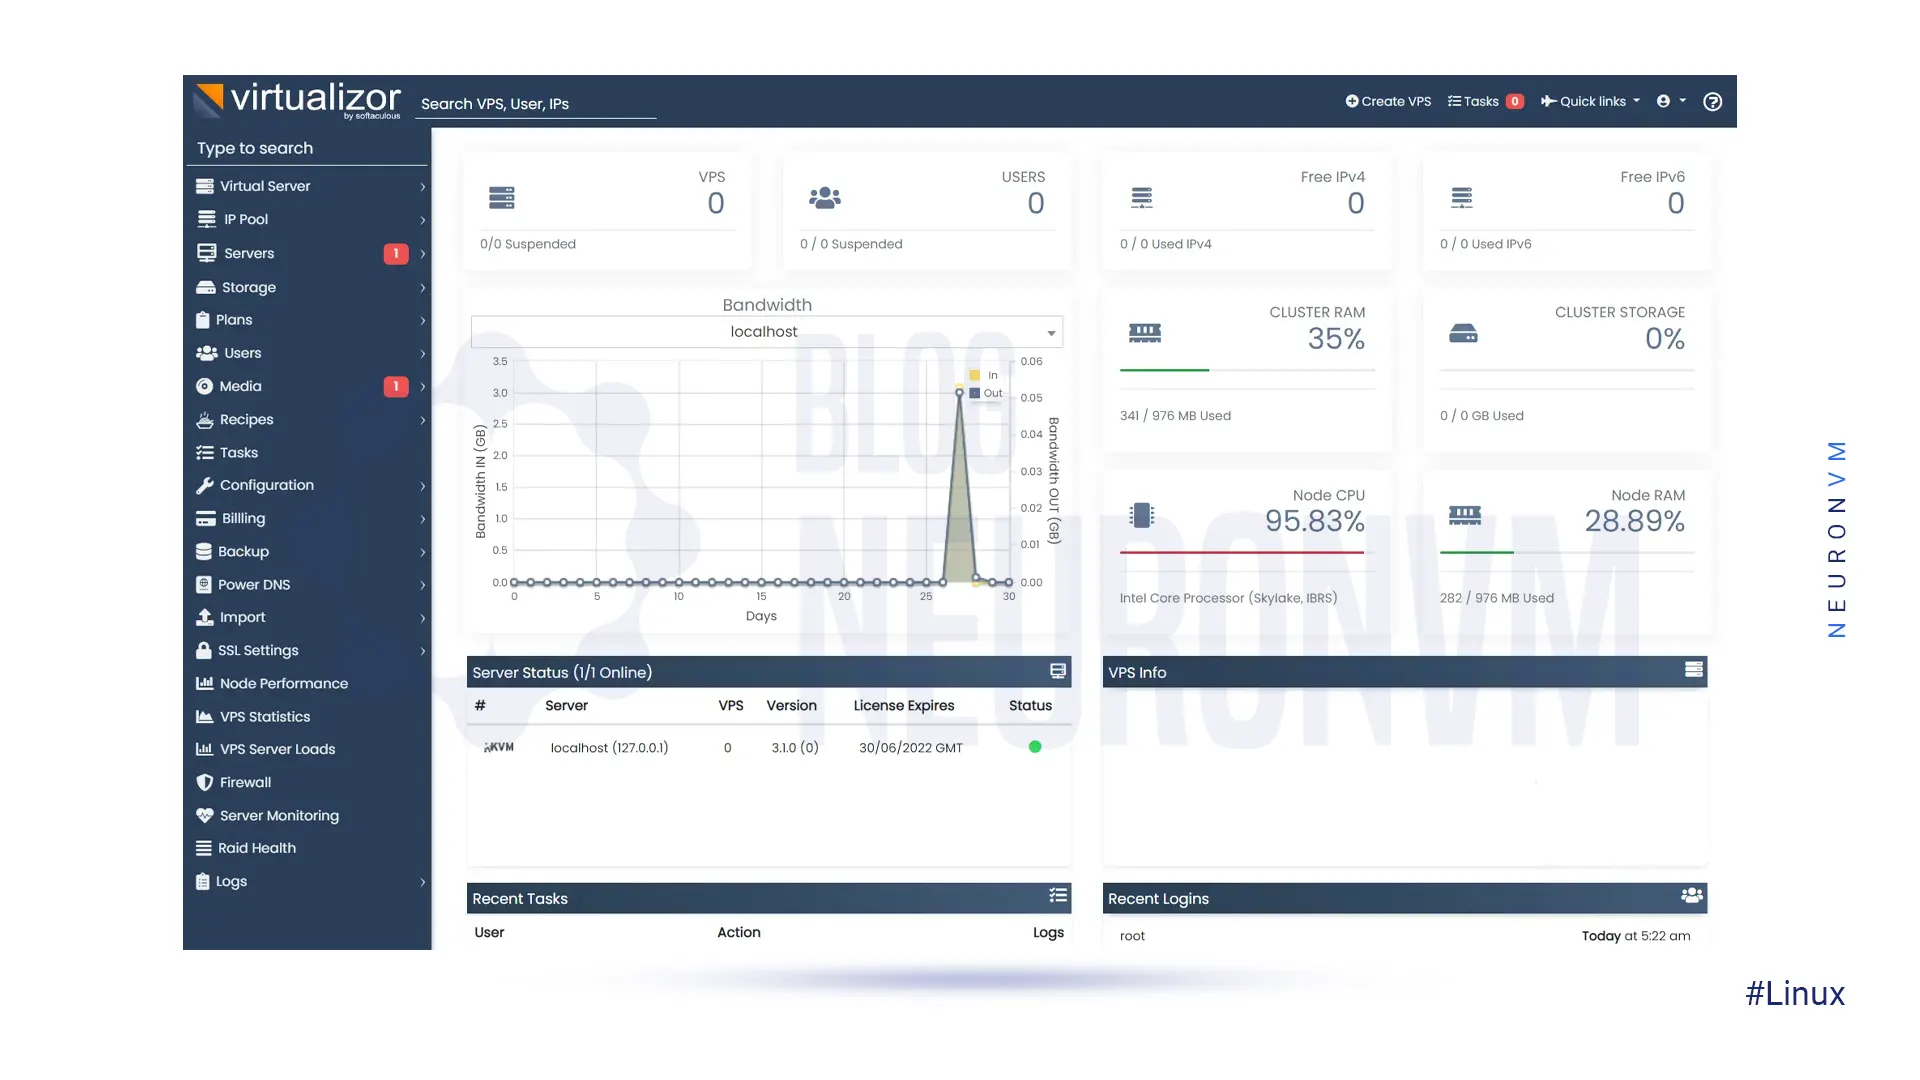
After successfully logging in, you will see the Virtualizor dashboard as shown below:
In this section, we will teach you some configurations and settings related to Virtualizor. It is necessary to allow access to ports 4081 – 4085 by running the following commands.
For RHEL & CentOS versions lower than 7:
iptables -I INPUT 1 -p tcp -m tcp --dport 4081:4085 -j ACCEPT
iptables -I INPUT 2 -p tcp -m tcp --dport 5900:6000 -j ACCEPT
For RHEL & CentOS versions higher than 7:
firewall-cmd --zone=public --permanent --add-port=4081-4085/tcp
firewall-cmd --zone=public --permanent --add-port=5900-6000/tcp
firewall-cmd --reload
To define the storage space, it is necessary to go to the management panel:
Virtualizor –> Storage –> Add Storage
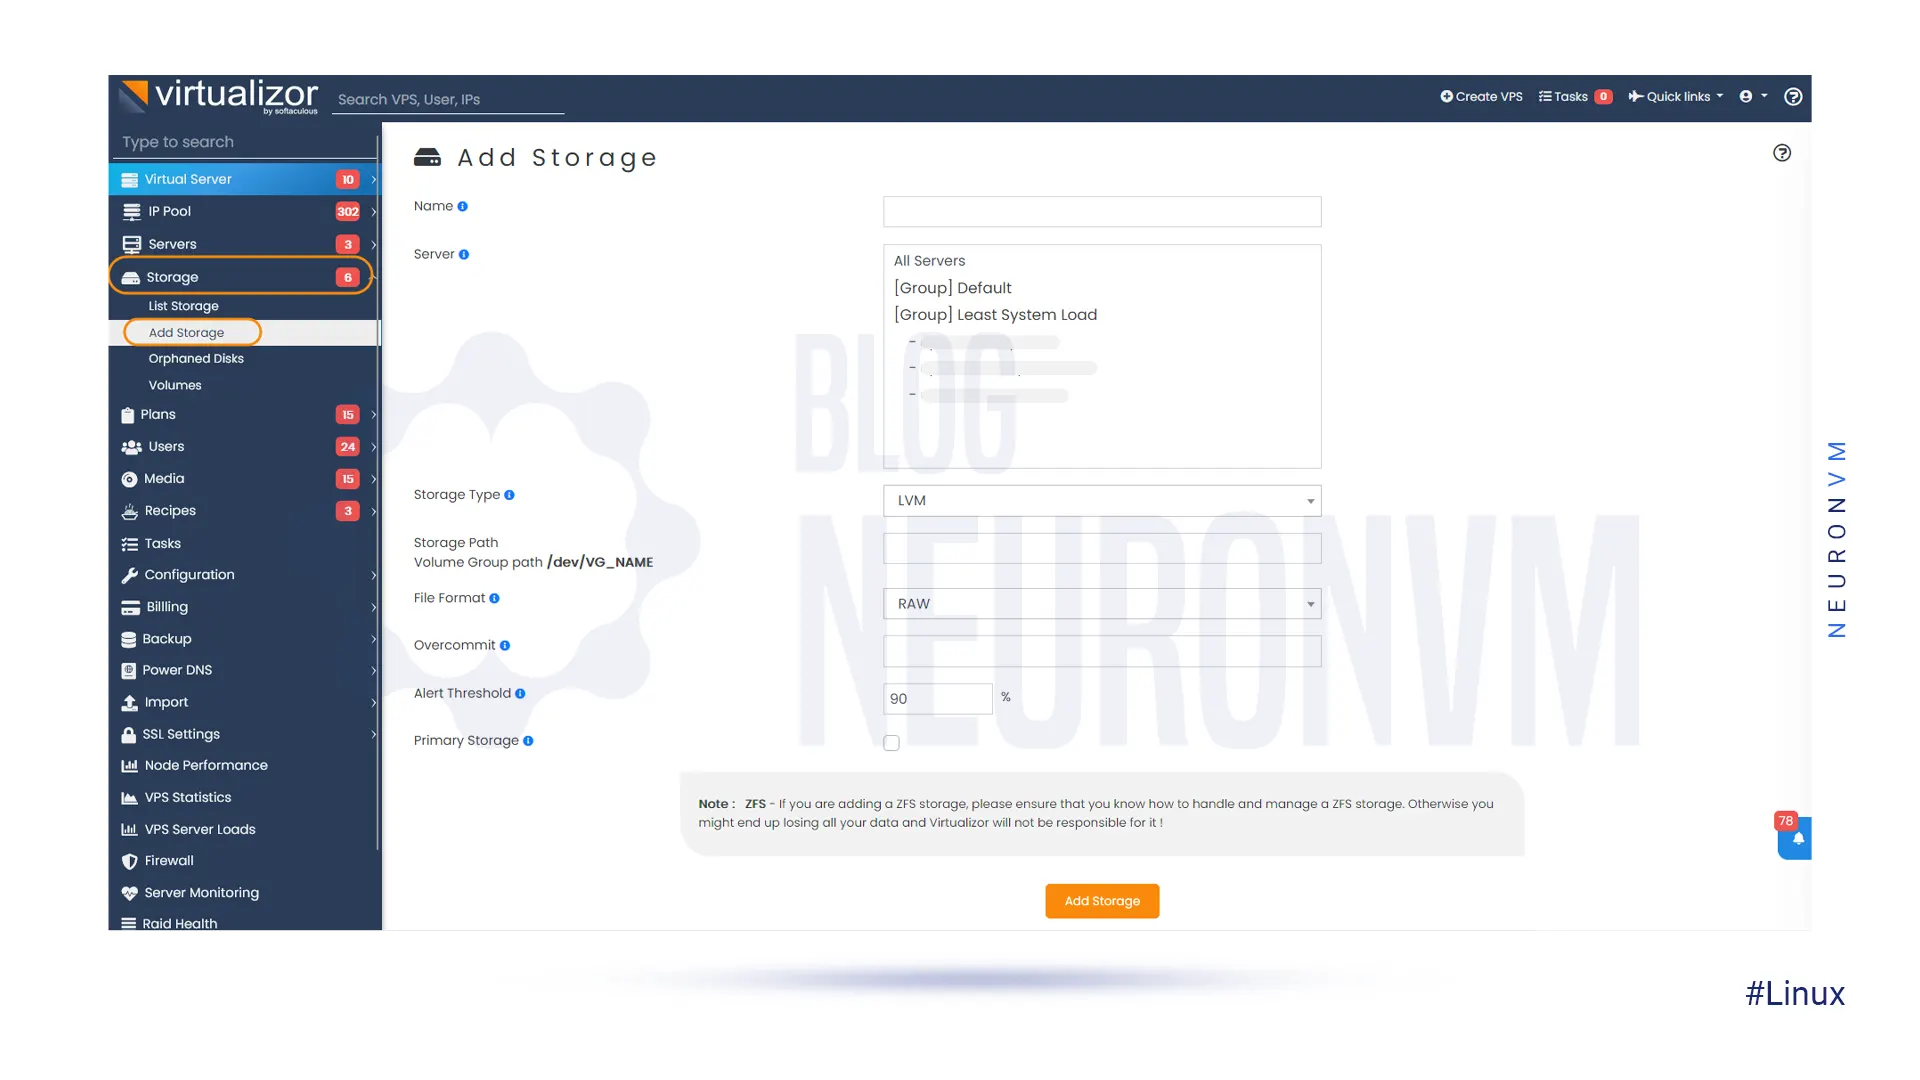
As you can see in the picture above, you can easily create Storage by filling in the required fields.
In this post, you were taught How to Install KVM on Dedicated Server and how to access and configure it. Interestingly, KVM uses a combination of Security Advanced Linux (SELinux) and Secure Virtualization (sVirt) for advanced VM security and isolation. KVM can also use any standard storage supported by Linux, including some local disks and network-attached storage (NAS). Ask your questions in the comments section. We suggest that you read the article How to Install Virtualizor on Dedicated Server.


Minecraft is a popular sandbox video game created by Markus Persson and developed by Mojang Studios....


 Tags
Tags

Linux Mint, a free and open-source operating system, is built upon the Linux kernel and the Ubuntu o...
Tags


