


This article will teach you How to Install Cacti on Fedora 34. Among the monitoring tools, Cacti is in a higher position due to its open source and availability of resources. Cacti has made the monitoring process easy and powerful by having a web-based management environment and various templates for different operating systems and devices. If you need to run Fedora on a Linux VPS server and install Cacti on it, we suggest you check the plans provided on our website and then use them.
Prerequisites:
– Apache webserver to display network diagrams created by PHP and RRDTool
– MySQL Database Server to store cacti information
– PHP script module to create charts using RRDTool
– A PHP plugin for SNMP for data access
– NET-SNMP for network management
– An RRDTool database tool for managing and retrieving time series data such as CPU load, network bandwidth, etc.
First, you should install Apache:
dnf install httpd httpd-devel
MariaDB offers an alternative to MySQL and is a community-developed fork of the MySQL database project. To install MariaDB, just run the following command:
dnf install mariadb-server -y
Now install PHP:
dnf install php-mysqlnd php-pear php-common php-gd php-devel php php-mbstring php-cli
Now you should install the PHP-SNMP prerequisites for data access:
dnf install php-snmp
Also, you should install NET-SNMP for network management:
dnf install net-snmp-utils net-snmp-libs
Finally, install RRDTool:
dnf install rrdtool
After completing the installation prerequisites for installing Cacti, you should start it:
systemctl start httpd.service
systemctl start mariadb.service
systemctl start snmpd.service
In this step, you need to configure the system startup links. Configure Apache, MySQL, and SNMP Services to start on boot:
systemctl enable httpd.service
systemctl enable mariadb.service
systemctl enable snmpd.service
Now it’s time to install Cacti on your Fedora 34 system. In the first step, you need to install and enable the EPEL Repository. Then you can install the Cacti application:
dnf install epel-release
dnf install cacti
First, you should secure the MySQL Server:
mysql_secure_installation
Now you are going to create the MySQL Cacti database. You should log in to the MySQL Server with the newly created password create the Cacti database with the Cacti user and then set a password for it:
mysql -u root -p
Enter password:
MariaDB [(none)]> create database cacti;
Query OK, 1 row affected (0.00sec)

MariaDB [(none)]> GRANT ALL ON cacti.* TO cacti@localhost IDENTIFIED BY 'neuronvm';
Query OK, 0 rows affected (0.00 sec)

MariaDB [(none)]> FLUSH privileges;
Query OK, 0 rows affected (0.00 sec)

MariaDB [(none)]> quit;
Bye
Next, you should install Cacti tables in MySQL. The first step to install cacti tables in MySQL is to find the path to the database file using the RPM command, then enter the following command to install the cacti tables in the new Cacti database:
rpm -ql cacti | grep cacti.sql
The output sample is as follows:
/usr/share/doc/cacti-1.2.6/cacti.sql
OR
/usr/share/doc/cacti/cacti.sql
After having the location of the Cacti.sql file, you can install the tables. Remember to enter the Cacti user password.
mysql -u cacti -p cacti < /usr/share/doc/cacti-0.8.8b/cacti.sql
Enter password:
In this step, you will configure the MySQL settings for Cacti. Open the /etc/cacti/db.php file with any editor:
vi /etc/cacti/db.php
You should make the following changes and then save the file:
/* make sure these values reflect your actual database/host/user/password */
database_type = "mysql";
database_default = "cacti";
database_hostname = "localhost";
database_username = "cacti";
database_password = "your-password-here";
database_port = "3306";
database_ssl = false;
Now configure the Firewall for Cacti:
firewall-cmd --permanent --zone=public --add-service=http
firewall-cmd --reload
First, open the /etc/httpd/conf.d/cacti.conf file in your desired editor:
vi /etc/httpd/conf.d/cacti.conf
You should have access to the Cacti application on your local network or at any IP level. So you have to enable it. For example, this article enables LAN network 123.45.67.8/01 access.
Alias /cacti   /usr/share/cacti

<Directory /usr/share/cacti/>
        Order Deny,Allow
        Deny from all
        Allow from 123.45.67.8/01
</Directory>
Then remember to change the settings in the latest version of Apache as follows:
Alias /cacti   /usr/share/cacti

<Directory /usr/share/cacti/>
        <IfModule mod_authz_core.c>
                # httpd 2.4
                Require all granted
        </IfModule>
        <IfModule !mod_authz_core.c>
                # httpd 2.2
                Order deny,allow
                Deny from all
                Allow from all
        </IfModule>
<Directory>
In the end, you must restart the Apache service:
systemctl restart httpd.service
You should open the /etc/cron.d/cacti file to set Cron for Cacti:
vi /etc/cron.d/cacti
Be careful to Uncomment the following line. The poller.php script runs every 5 minutes and collects known host data used by the Cacti application to display graphs.
#*/5 * * * * cacti /usr/bin/php /usr/share/cacti/poller.php > /dev/null 2>&1
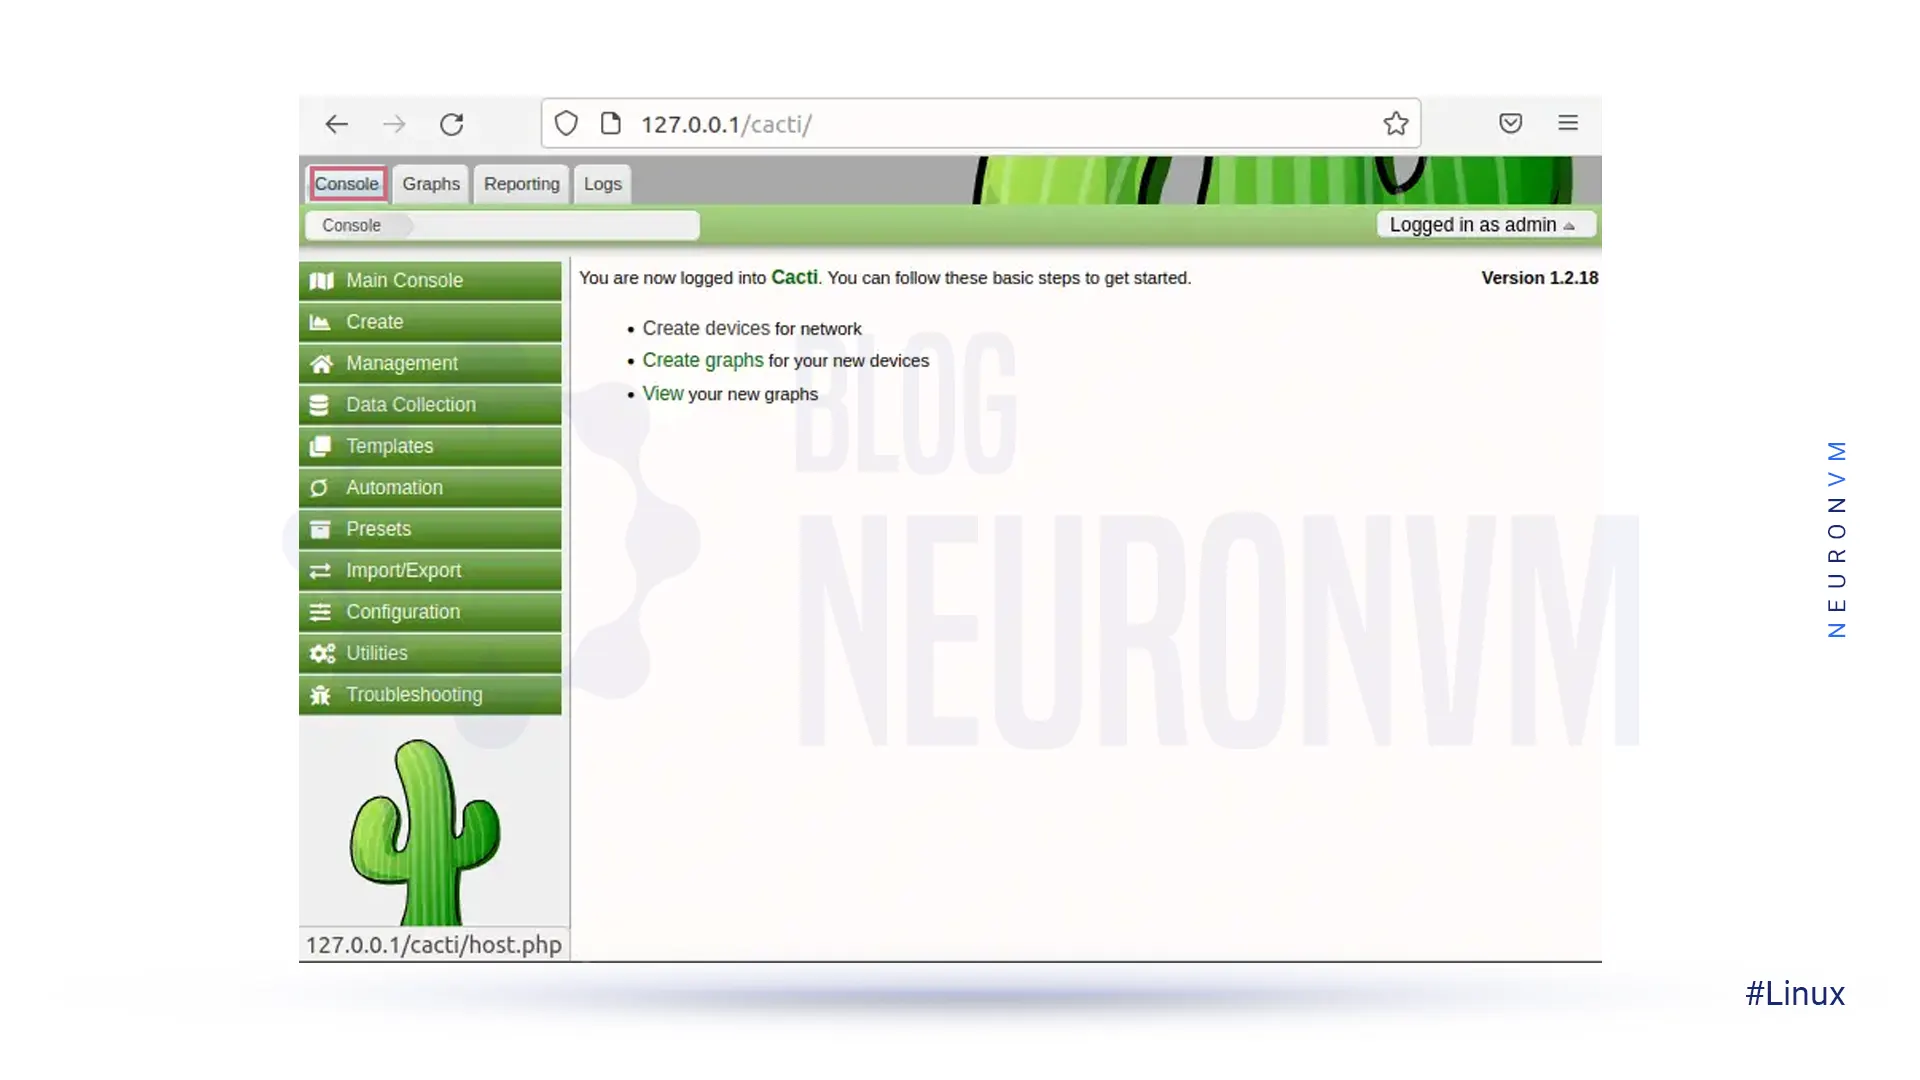
Go to http://YOUR-IP-HERE/cacti/ and follow the installer instructions through the following pages. Then you must enter the default login details and press the Enter key.
User: admin
Password: admin

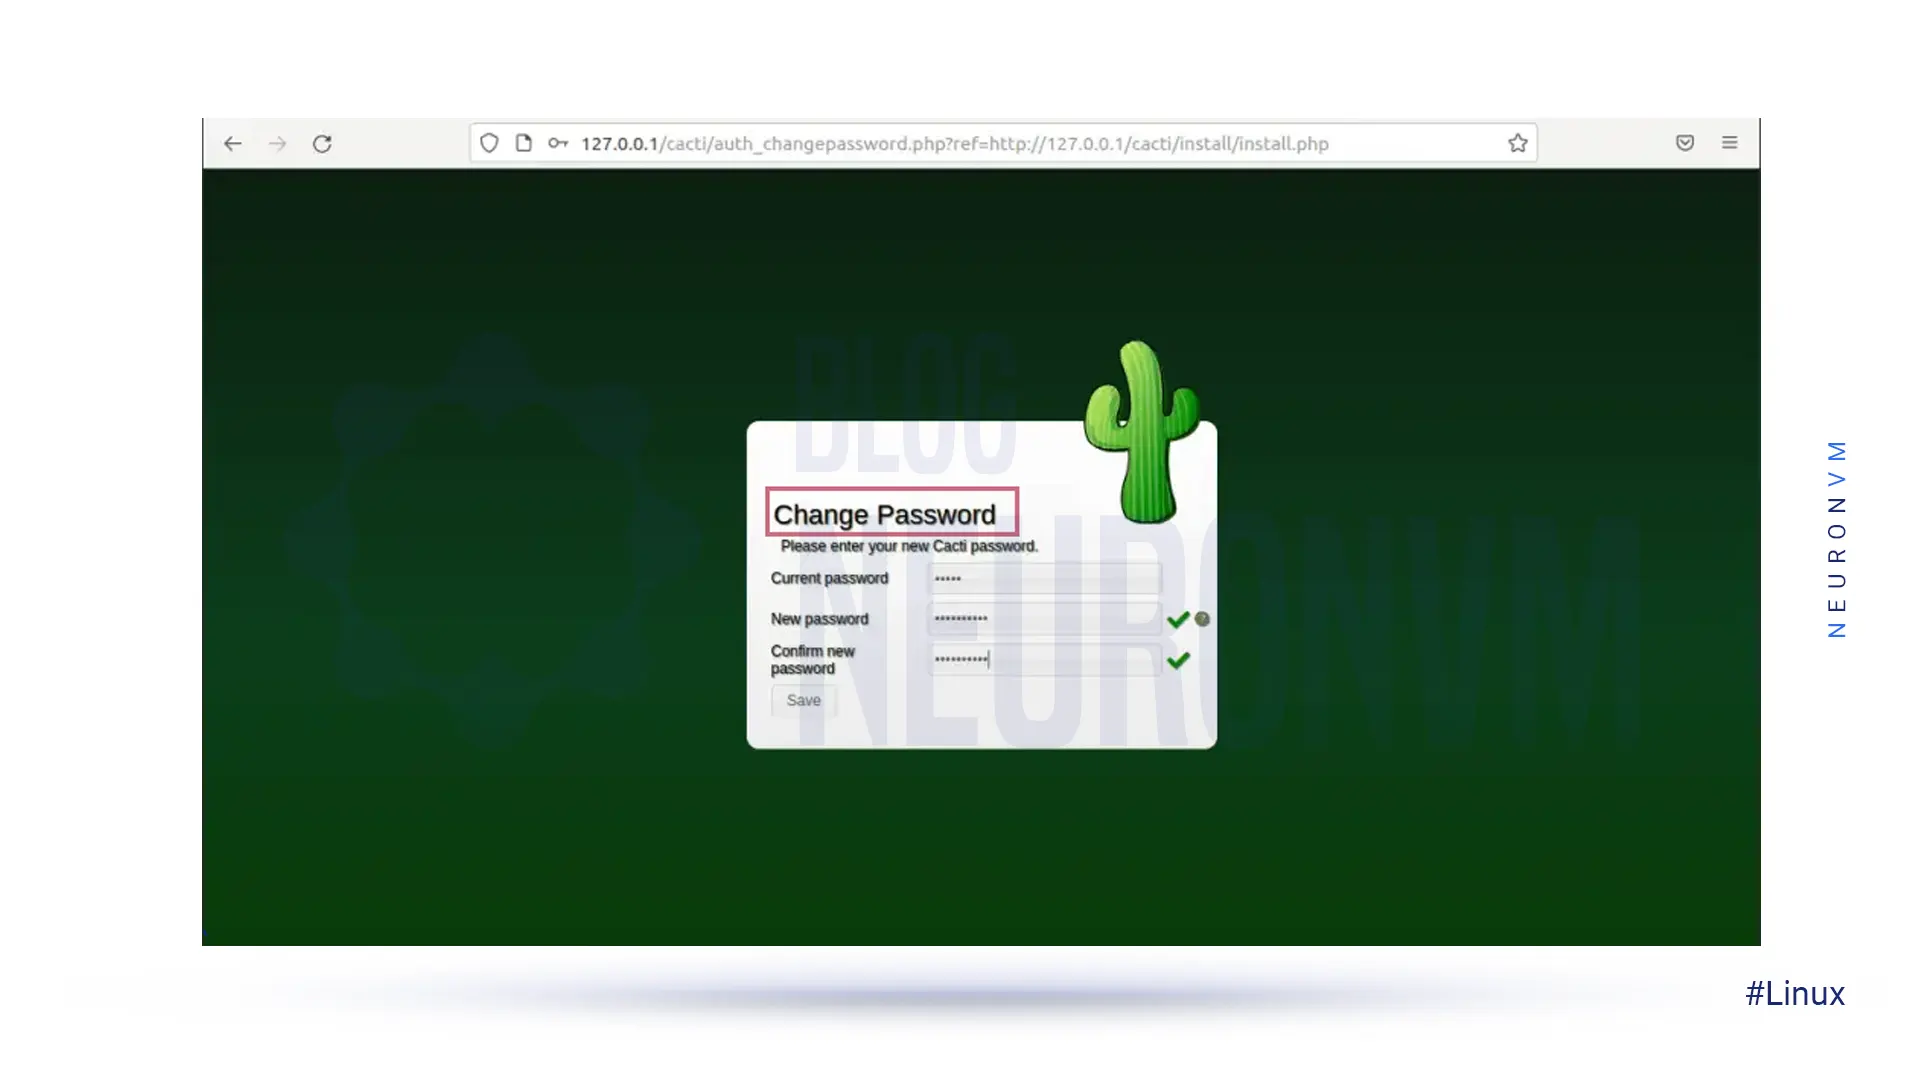
Now you need to change the default Cacti password:
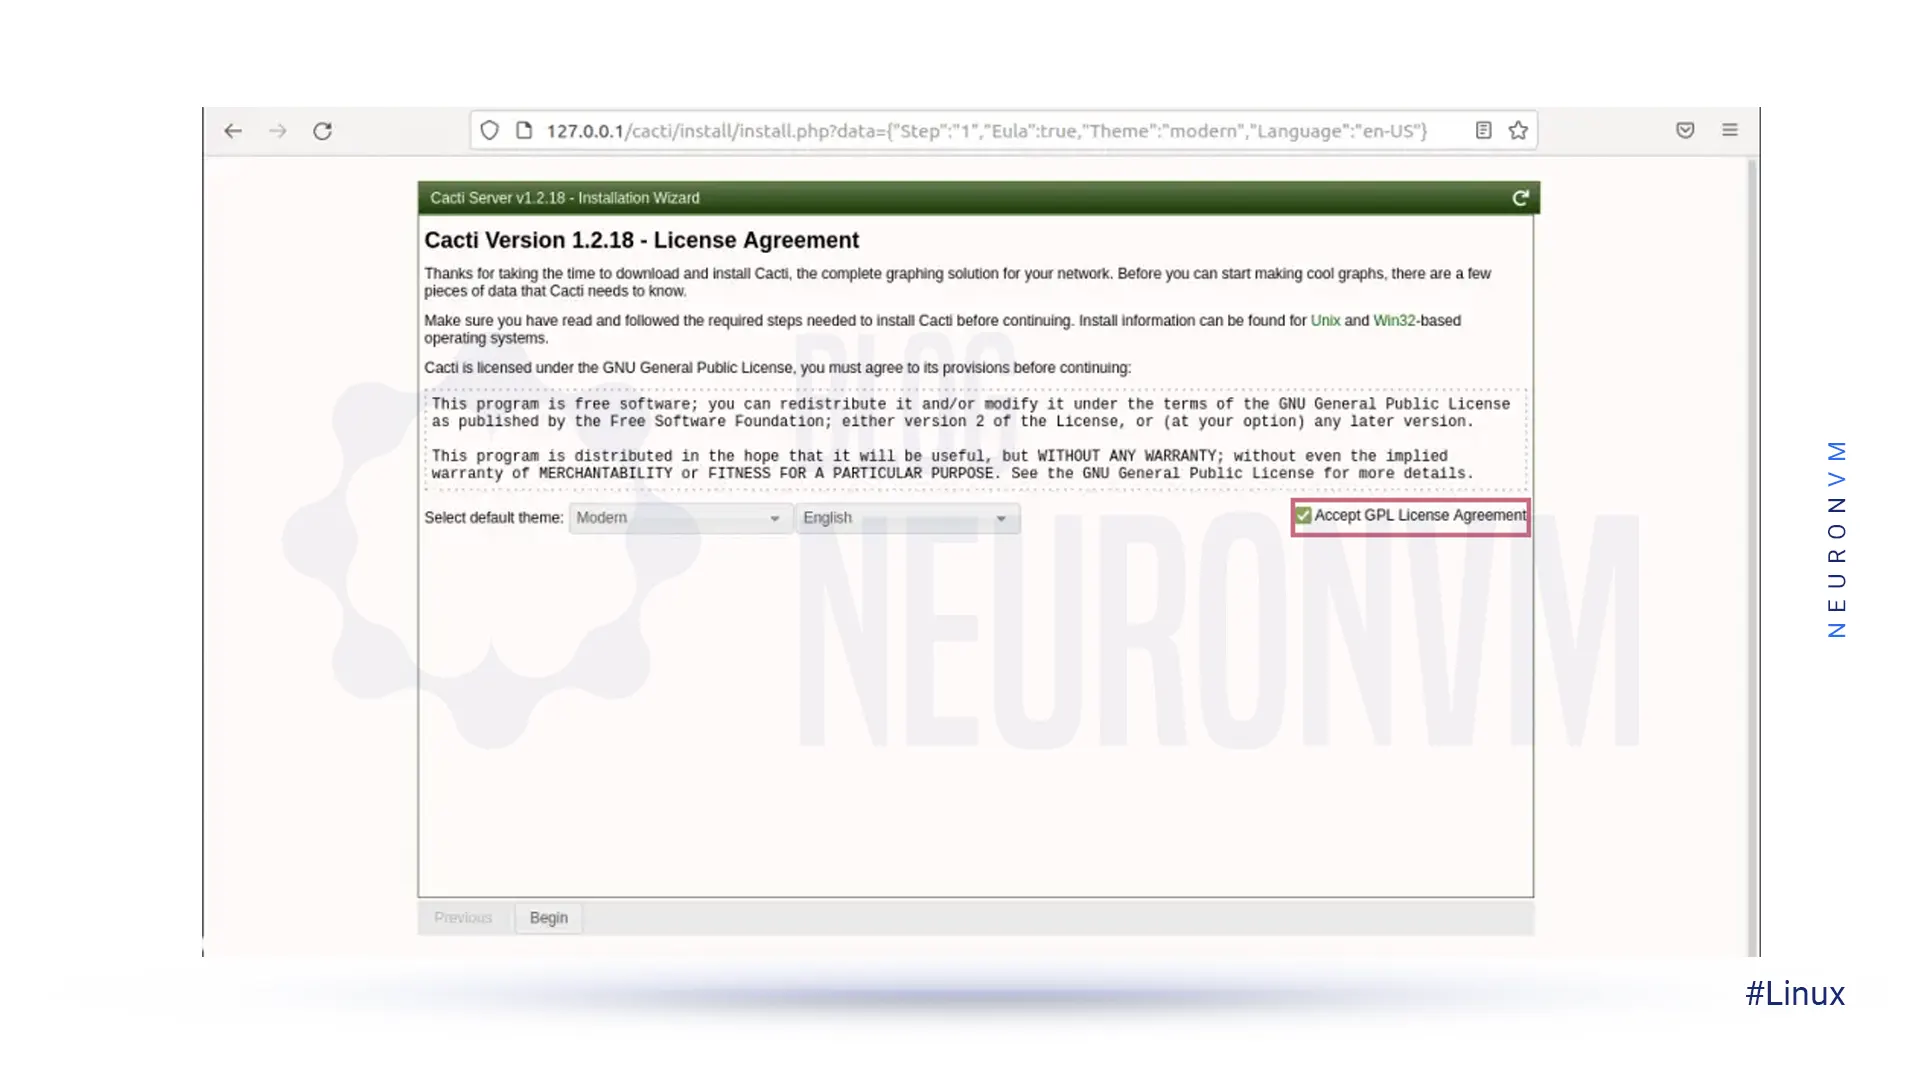
Check the Cacti License Agreement box:
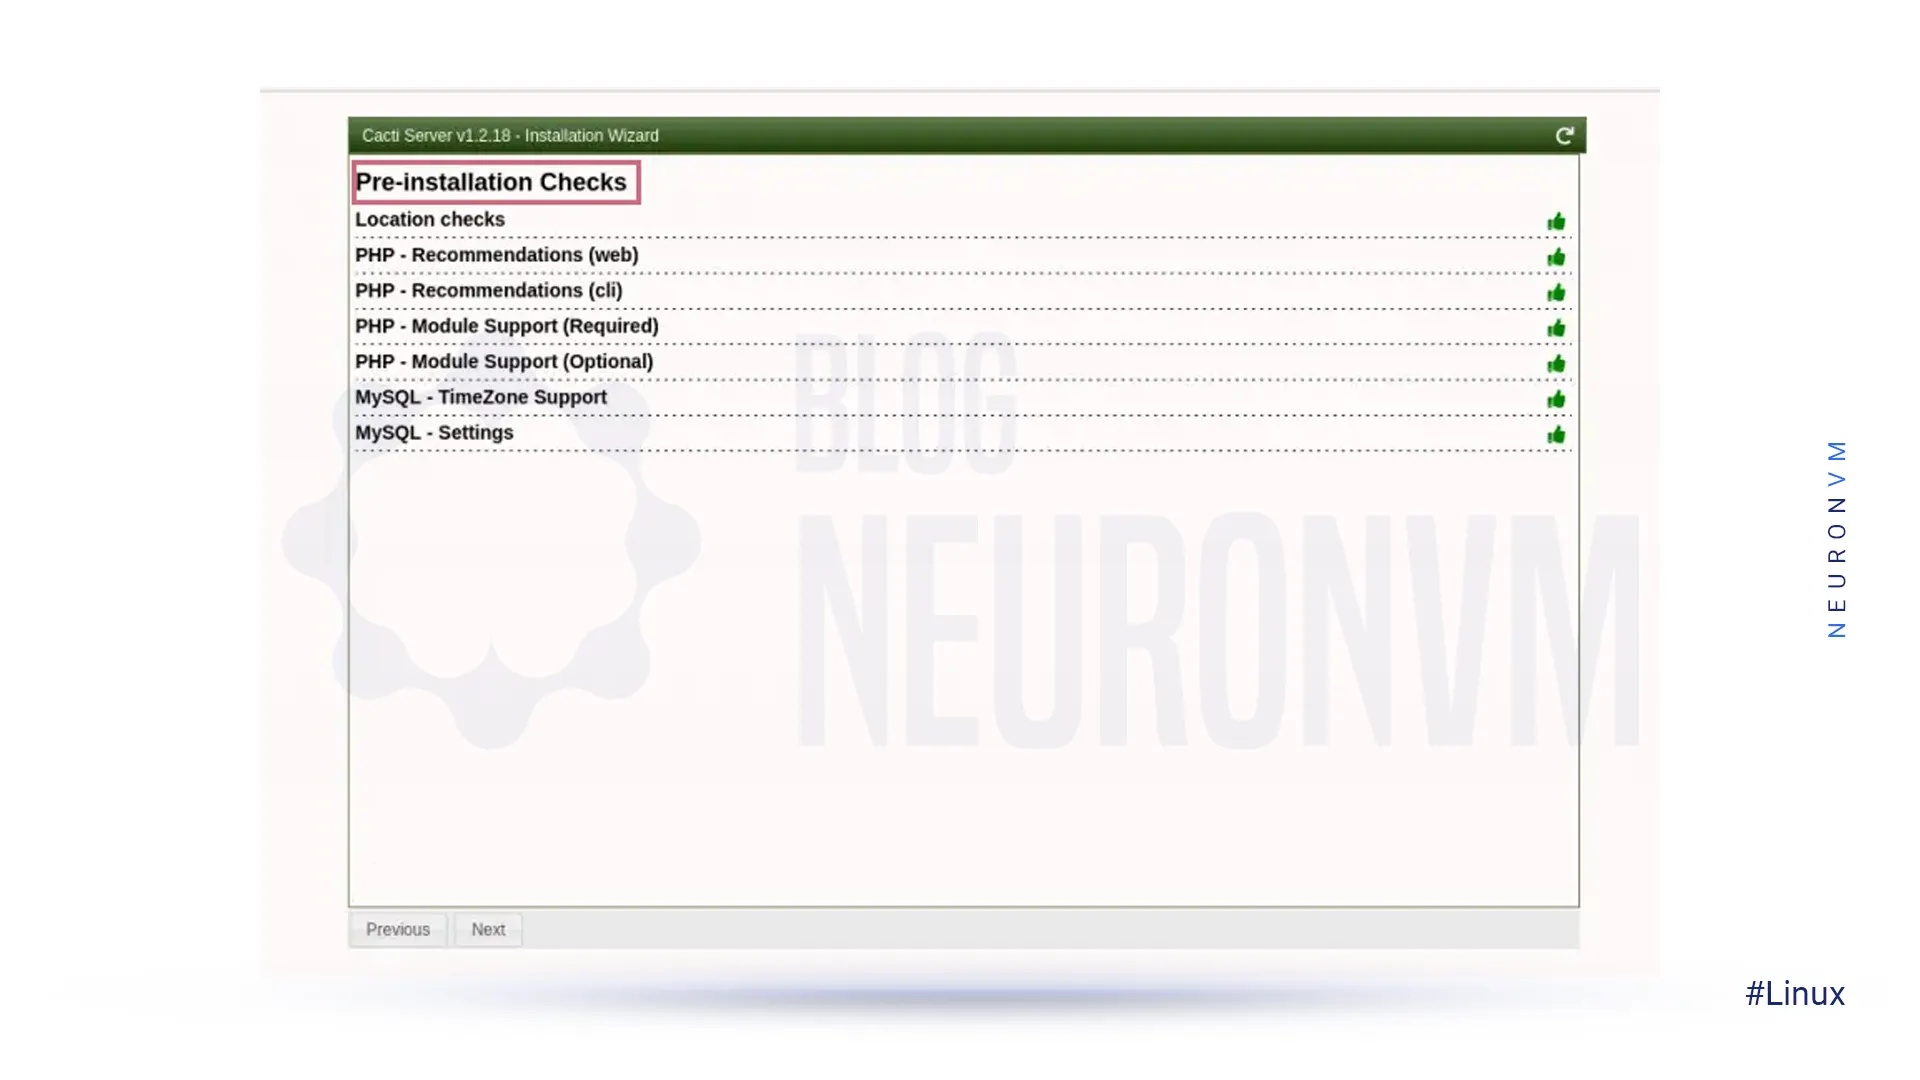
In this step, the screen shows Pre-install Checks for Cacti installation. Then you should correct the suggested settings in your /etc/php.ini file as shown in the image, and restart Apache after making the changes:
memory_limit = 800M
max_execution_time = 60
date.timezone = Asia/Kolkata
Now you should give the Cacti user access to the MySQL TimeZone database so that the database is filled with TimeZone global information:
mysql> use mysql;
mysql> GRANT SELECT ON mysql.time_zone_name TO cacti@localhost;
mysql> flush privileges;
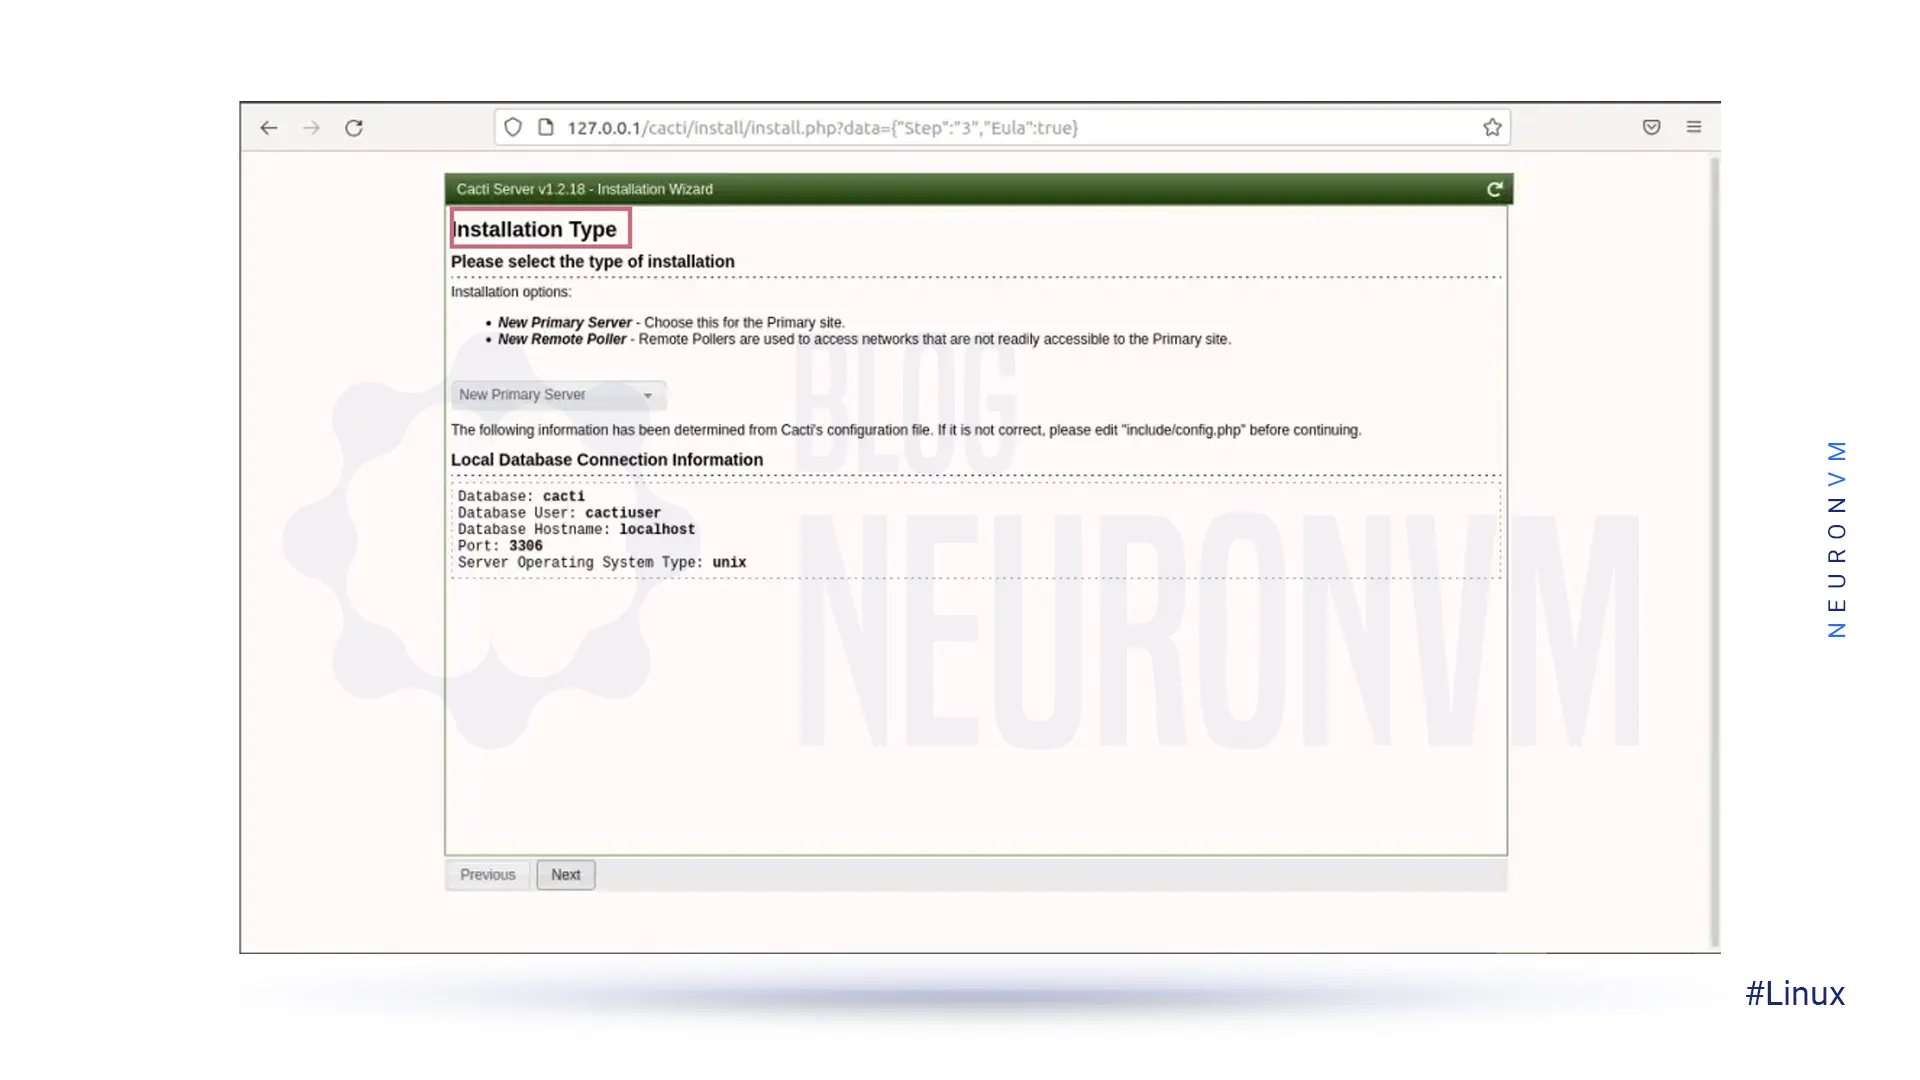
In the installation type, you must select “New Install“:
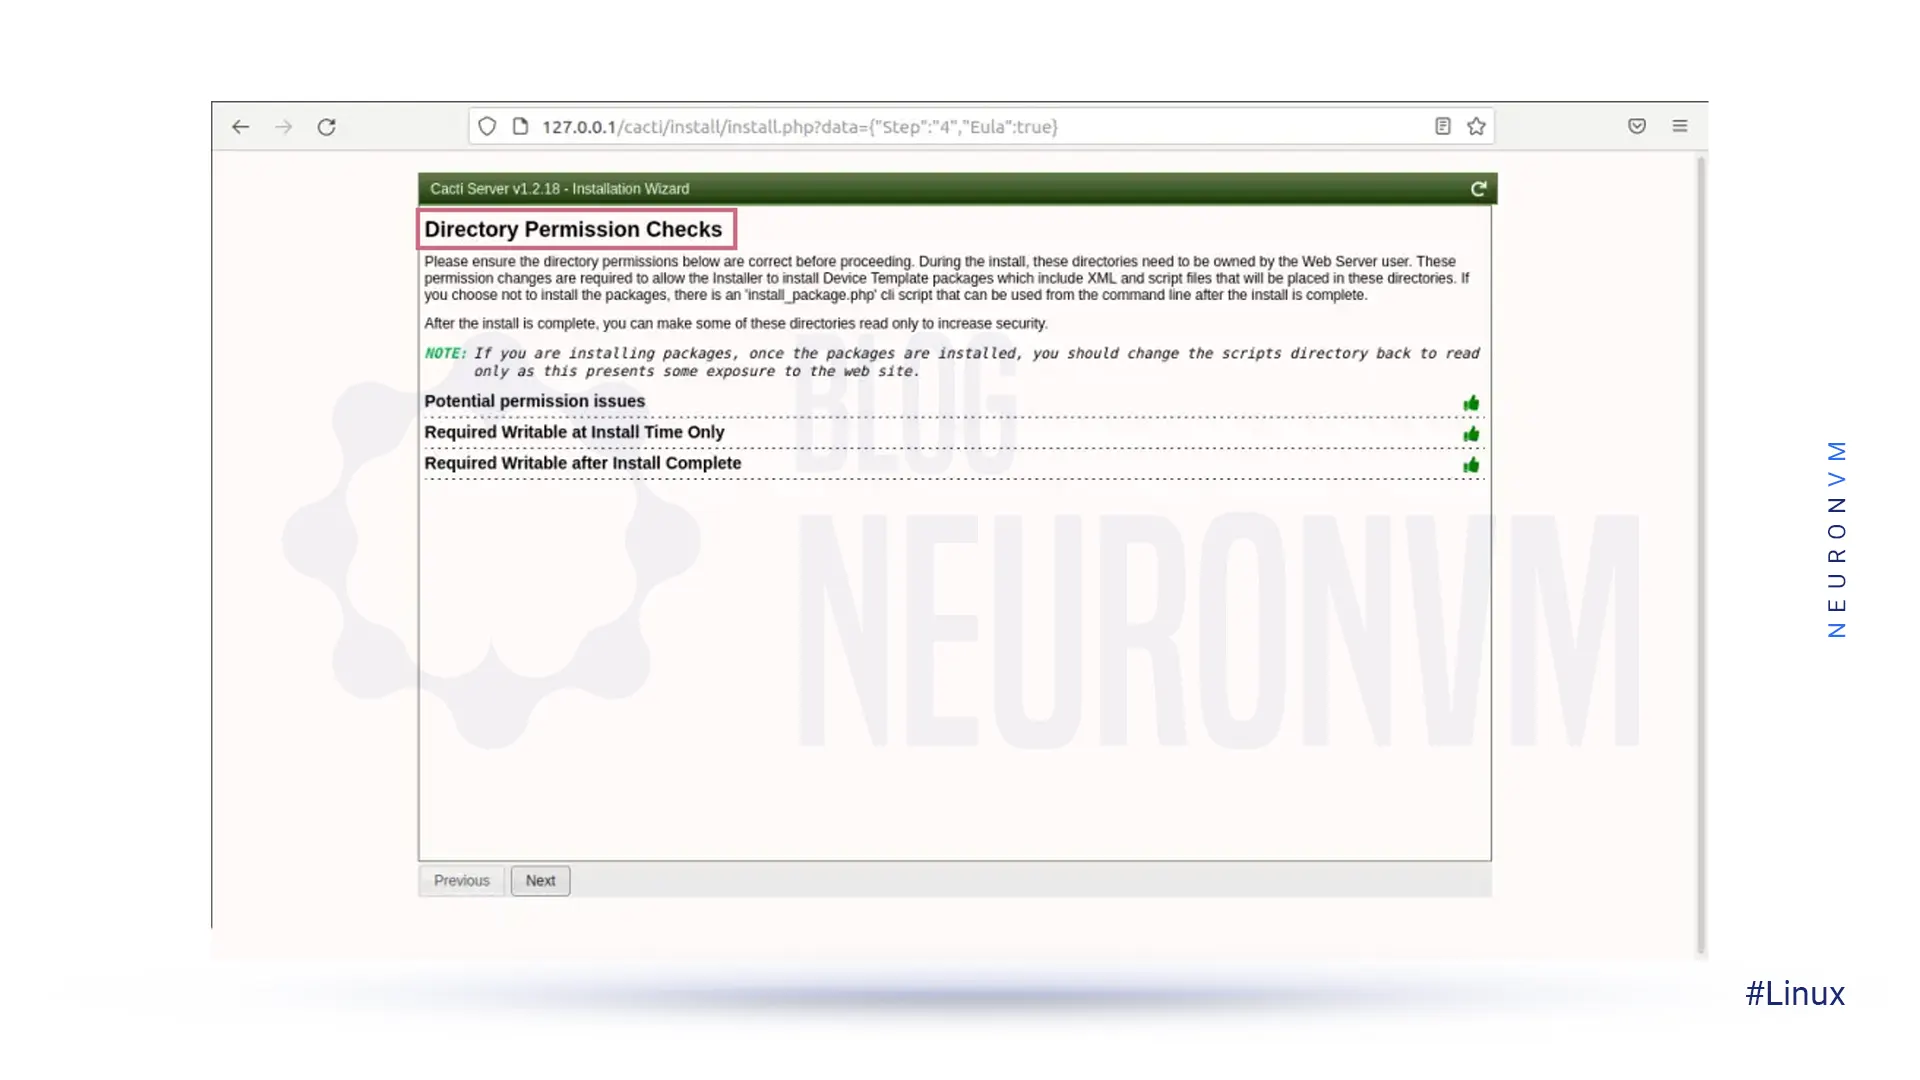
Make sure all permissions in the following directory are correct:
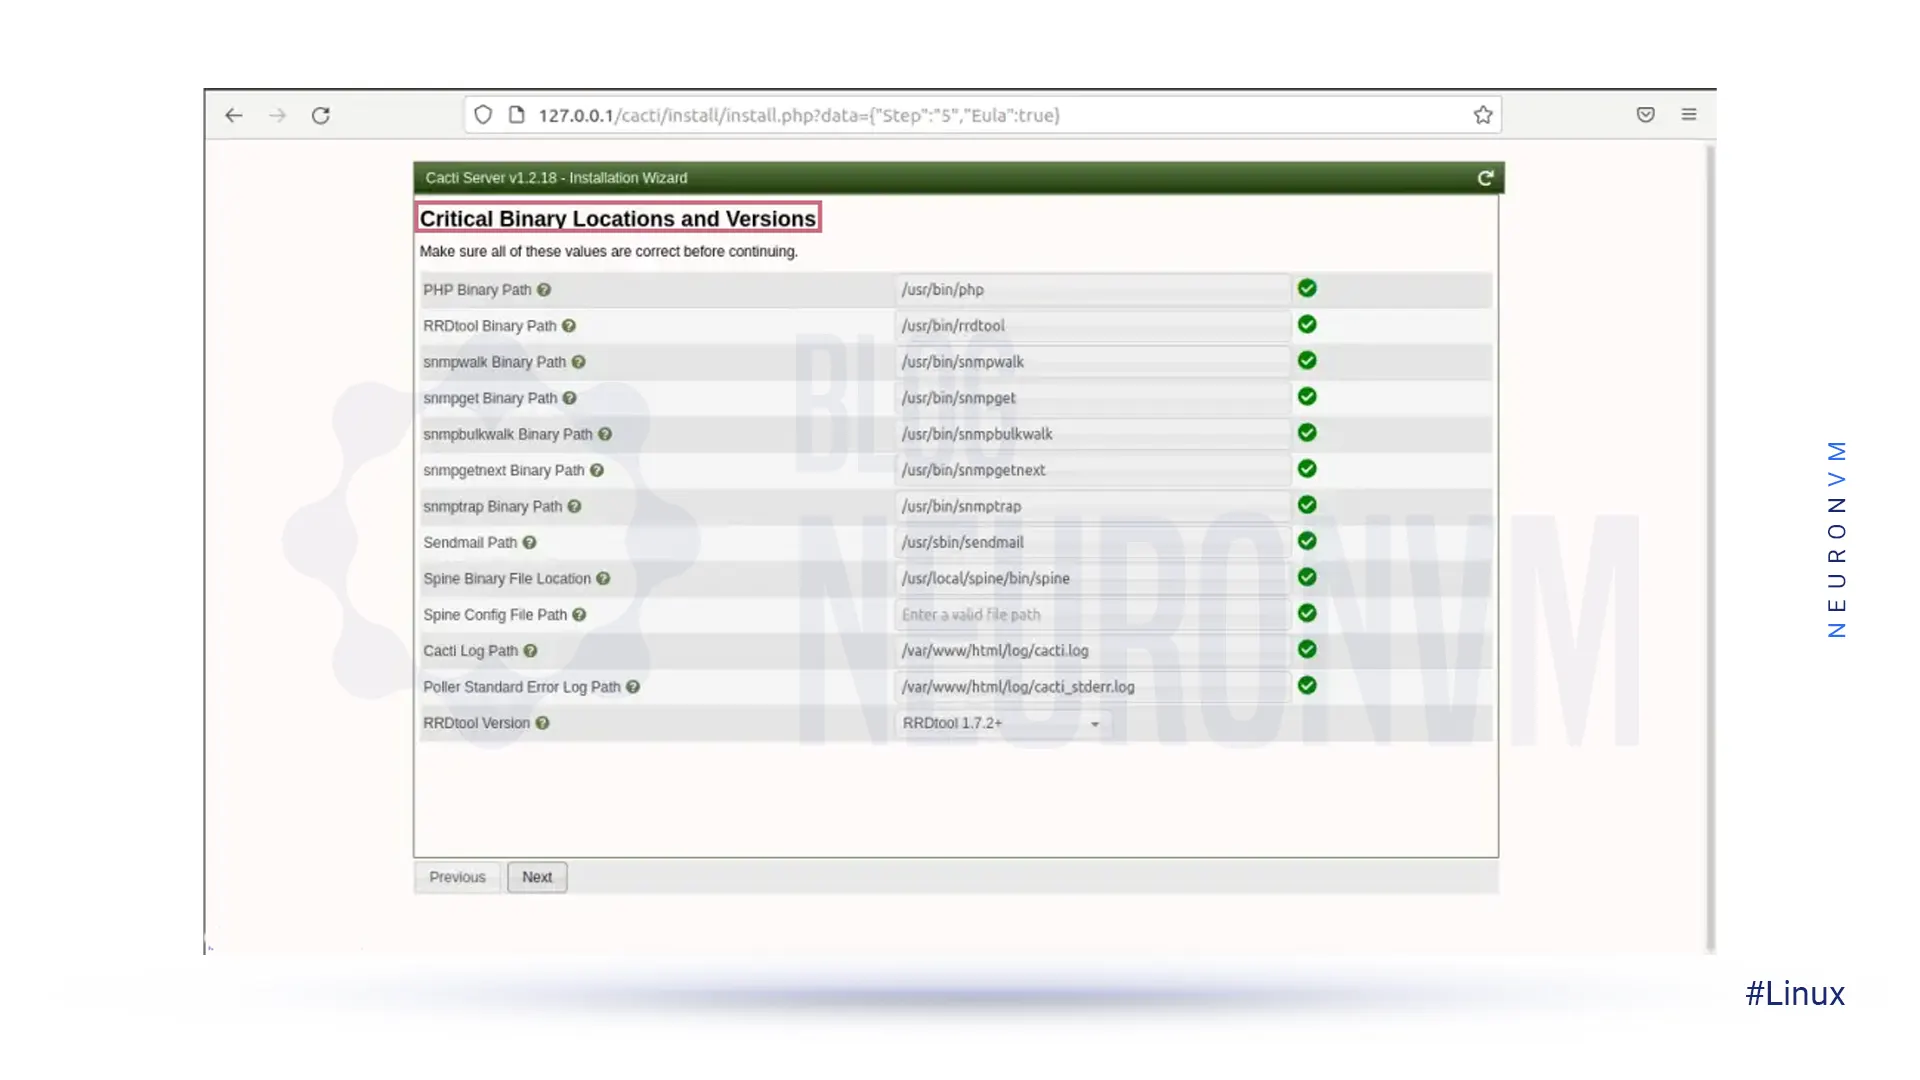
Then you need to know that all of these Critical Binary Locations and Versions values are correct:
In this step, you should select the default Data Source Profile to use in the polling sources:
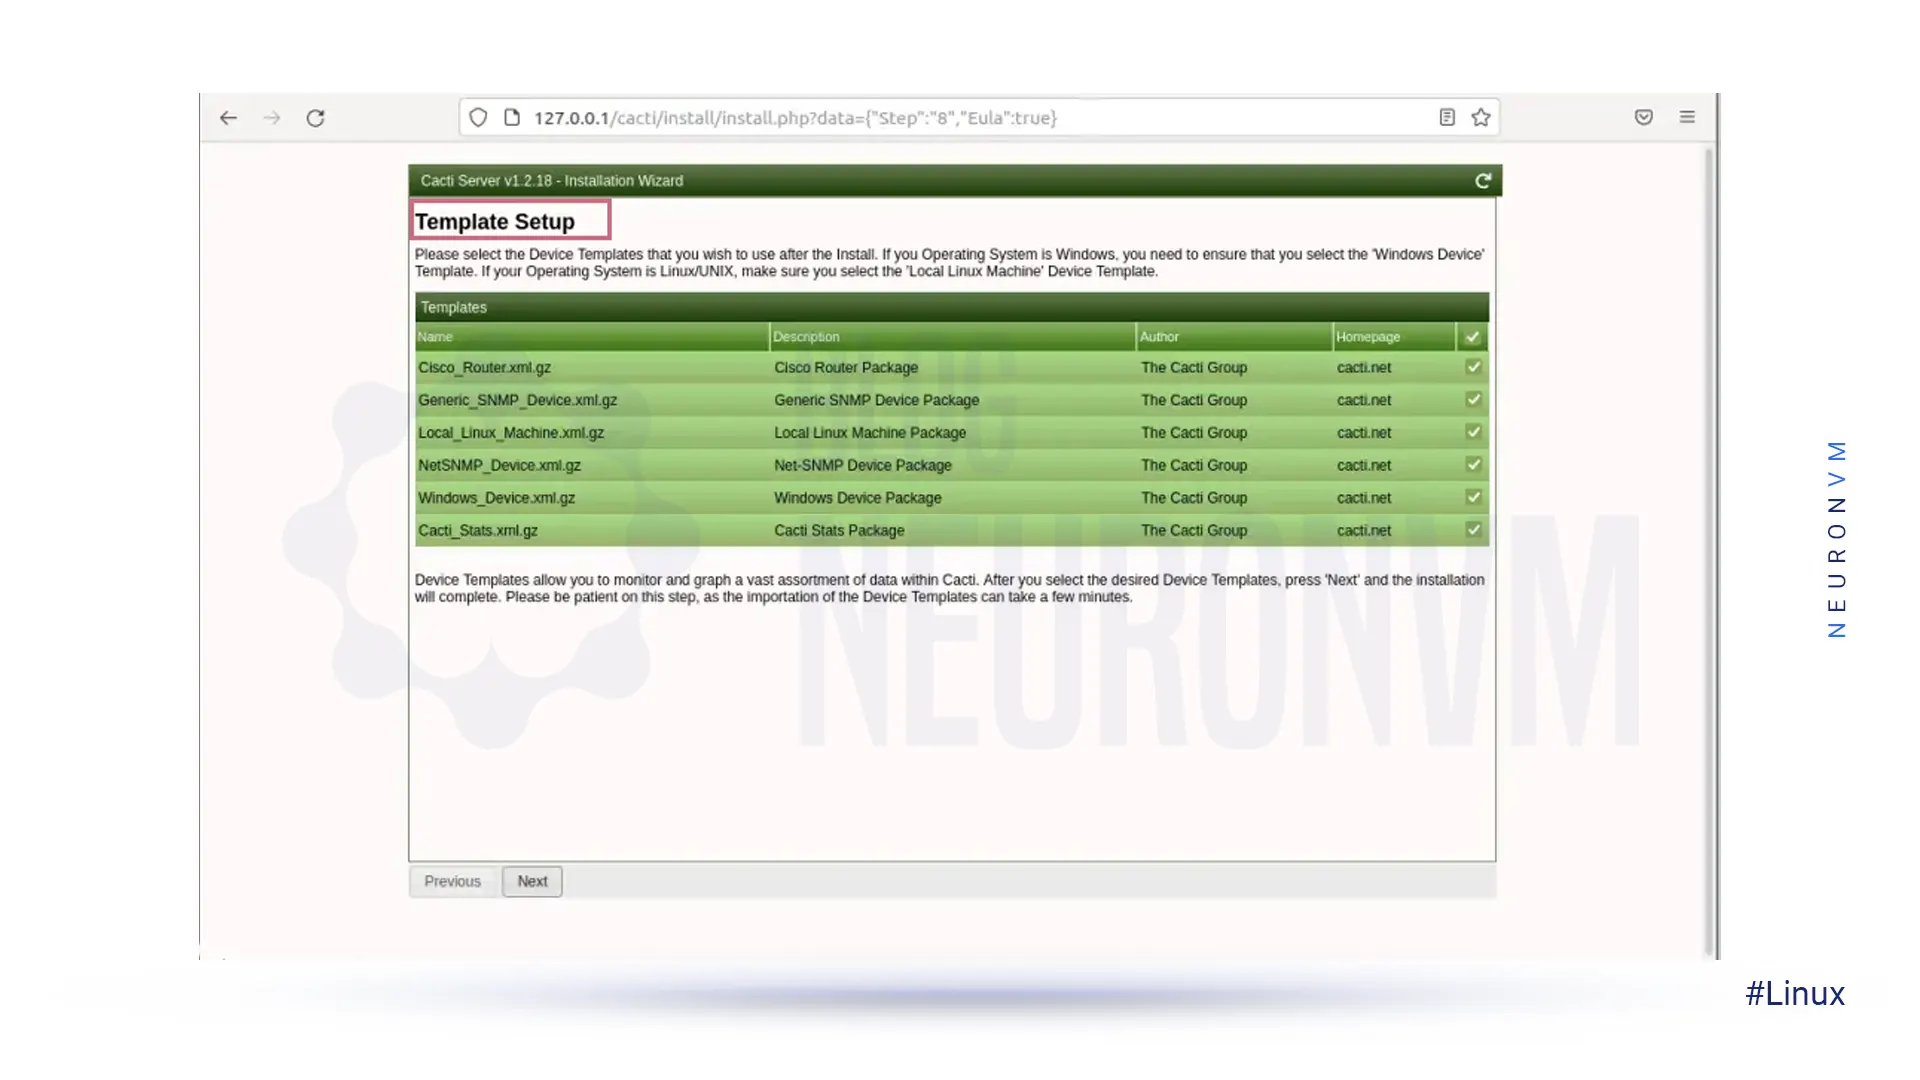
Now you need to select the Device Templates that you want to use after installing Cacti:
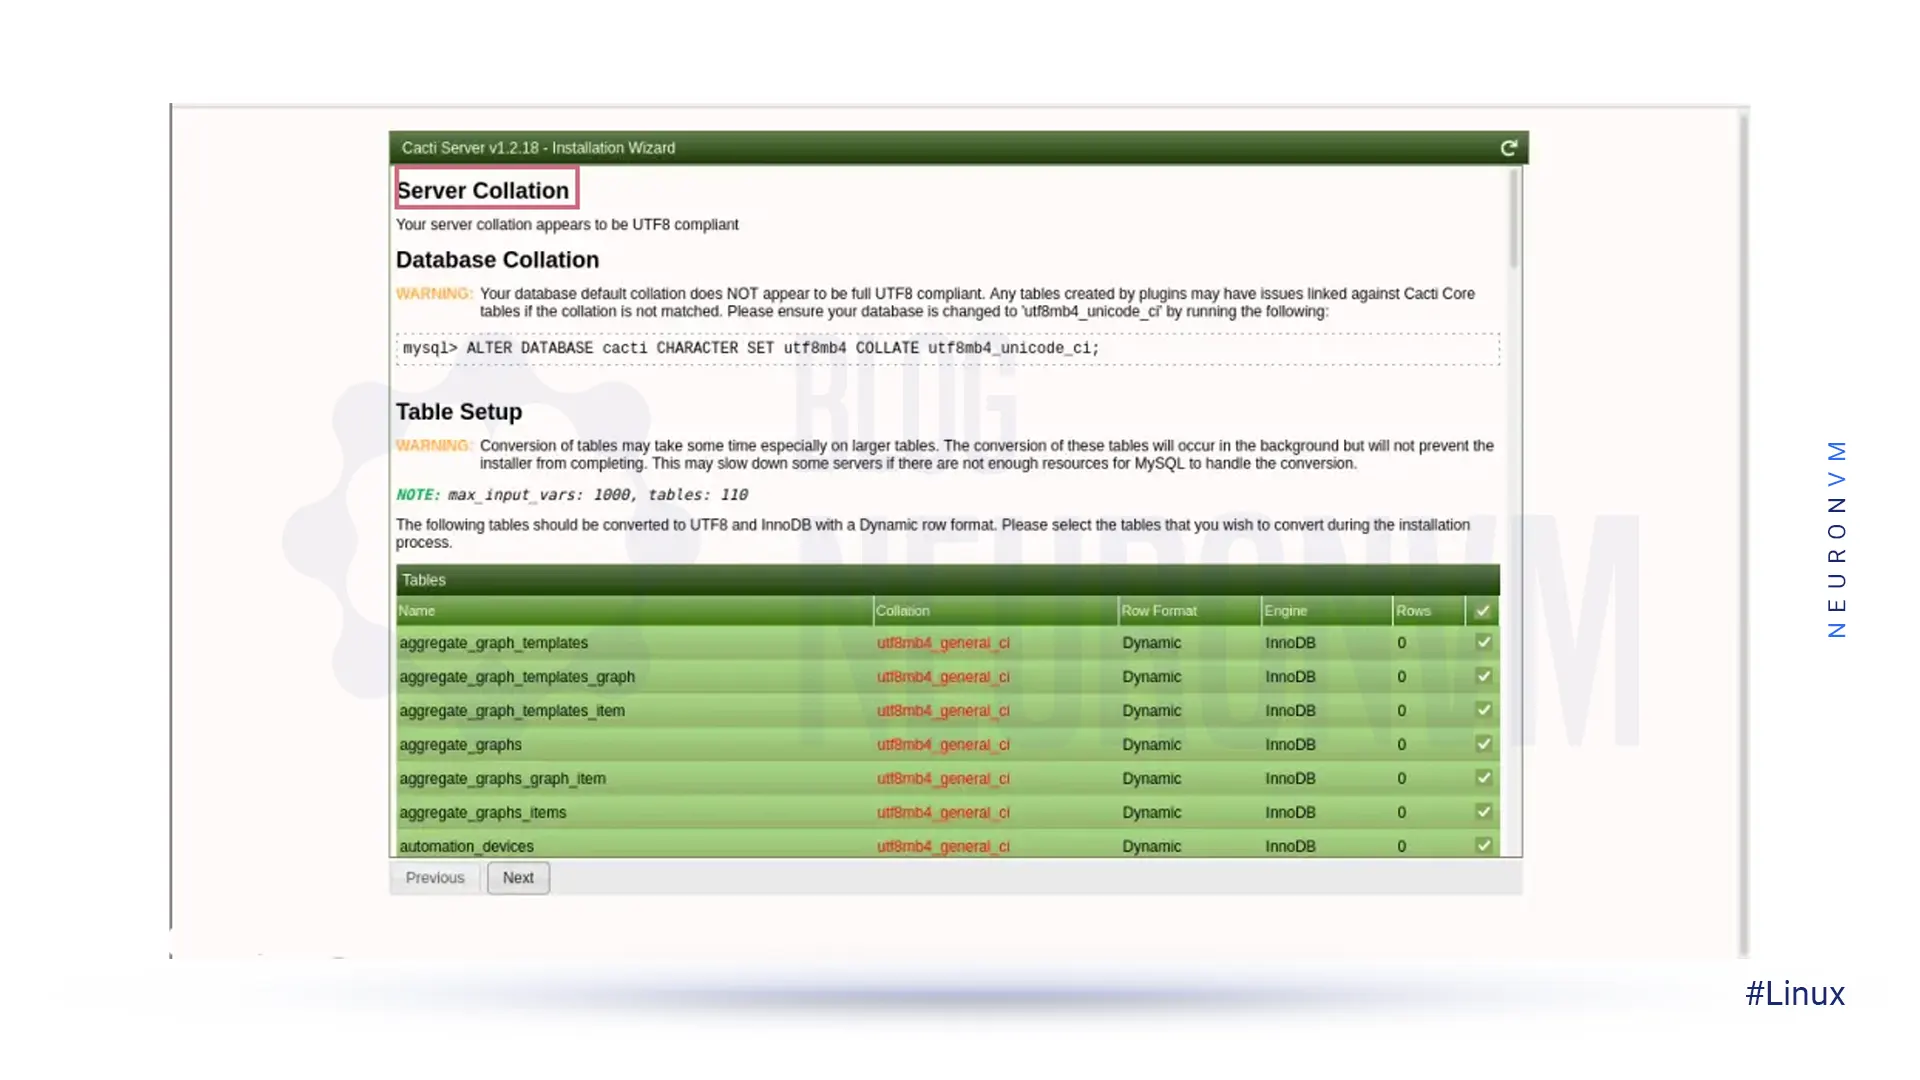
Next, you should set the Server Collation in your MySQL /etc/my.cnf configuration file under the [mysqld] section:
[mysqld]
character-set-server=utf8mb4
collation-server=utf8mb4_unicode_ci
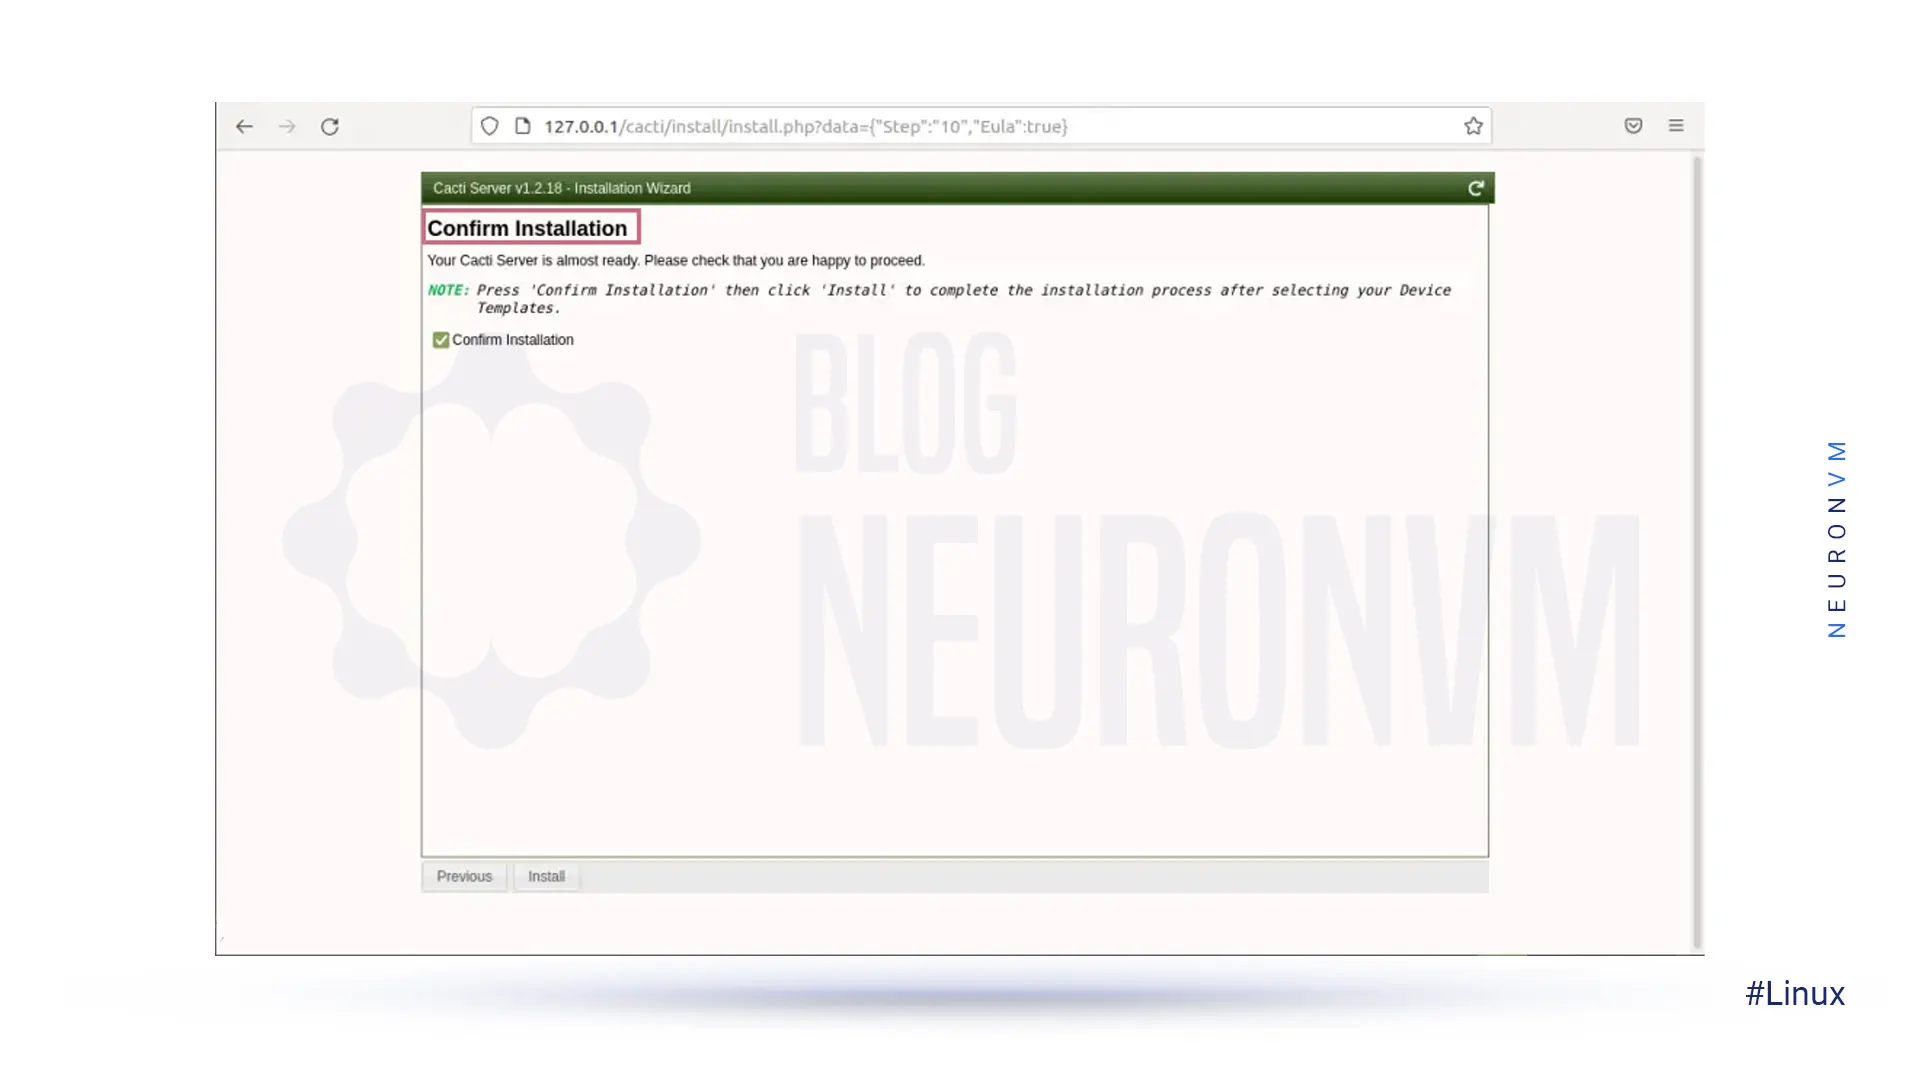
Then check the Confirm Installation box and wait until the end of the process:
***
Installing Cacti on Fedora 34 is a straightforward process that can greatly enhance your monitoring and graphing capabilities for your network infrastructure. By following the steps outlined in this article, you can easily set up and configure Cacti to collect data, generate graphs, and provide valuable insights into the performance of your network devices. With Cacti’s user-friendly interface and powerful features, you can efficiently monitor and troubleshoot issues, ultimately improving the overall efficiency and reliability of your network environment. So why wait? Start installing Cacti on Fedora 34 today and take control of your network monitoring needs. If you are interested in other Linux distributions, including AlmaLinux, we suggest you read the article Tutorial Install and Configure Cacti on AlmaLinux 8.
 Tags
Tags


Developers spend a lot of time using a text editor, which is why a text editor is an important tool....


 Tags
Tags

Netstat is a powerful networking command-line tool used to display network information and statistic...
Tags


