


Nowadays people can have their own online shop or showcase in a few days with the help of content management systems. This is an enjoyable and easy way to manage your site with the help of content management systems, even if you have very little information about codes. One of these systems that is useful in setting up an online store is Joomla. This guide will help you learn How to Install and Use Joomla on Fedora 34. So keep reading to figure out more about this issue.
Prerequisites:
1. A Linux VPS Server with Fedora 34 operating system
2. Apache Web Server
3. PHP
4. MySQL/MariaDB
5. User account with root privileges
To install and use Joomla on fedora, first, you should download Joomla from the official website to use on your Linux VPS. To do this, enter the following command:
wget https://github.com/joomla/joomla-cms/releases/download/3.6.0/Joomla_3.6.0-Stable-Full_Package.zip
After downloading, you should copy the package of downloaded source files using the following command:
cp Joomla_3.6.0-Stable-Full_Package.zip /var/www/html/
Then extract the downloaded source files package using the following command in the Apache DocumentRoot directory (ie /var/www/html/):
cd /var/www/html
unzip Joomla_3.6.0-Stable-Full_Package.zip
Next, you need to change the ownership of the directory. Remove the source file and then run the following command to change the ownership of the directory with the user and group ‘Apache‘ recursively:
rm -rf Joomla_3.6.0-Stable-Full_Package.zip
chown -R apache:apache /var/www/html/
ls -l

total 80
drwxr-xr-x. 10 apache apache  4096 Jul 12 17:25 administrator
drwxr-xr-x.  2 apache apache    42 Jul 12 17:25 bin
drwxr-xr-x.  2 apache apache    23 Jul 12 17:25 cache
drwxr-xr-x. 2 apache apache 4096 Jul 12 17:25 cli
drwxr-xr-x. 17 apache apache 4096 Jul 12 17:25 components
-rw-r--r--. 1 apache apache 2915 Jul 12 17:25 htaccess.txt
drwxr-xr-x. 5 apache apache 4096 Jul 12 17:25 images
drwxr-xr-x. 2 apache apache 61 Jul 12 17:25 includes
-rw-r--r--. 1 apache apache 1393 Jul 12 17:25 index.php
drwxr-xr-x. 13 apache apache 4096 Jul 12 17:25 installation
drwxr-xr-x. 4 apache apache 51 Jul 12 17:25 language
drwxr-xr-x. 5 apache apache 66 Jul 12 17:25 layouts
drwxr-xr-x. 12 apache apache 4096 Jul 12 17:25 libraries
-rw-r--r--. 1 apache apache 18092 Jul 12 17:25 LICENSE.txt
drwxr-xr-x. 2 apache apache 23 Jul 12 17:25 logs
drwxr-xr-x. 20 apache apache 4096 Jul 12 17:25 media
drwxr-xr-x. 27 apache apache 4096 Jul 12 17:25 modules
drwxr-xr-x. 14 apache apache 4096 Jul 12 17:25 plugins
-rw-r--r--. 1 apache apache 4226 Jul 12 17:25 README.txt
-rw-r--r--. 1 apache apache 842 Jul 12 17:25 robots.txt.dist
drwxr-xr-x. 5 apache apache 64 Jul 12 17:25 templates
drwxr-xr-x. 2 apache apache 23 Jul 12 17:25 tmp
-rw-r--r--. 1 apache apache 1690 Jul 12 17:25 web.config.txt
At this point, you should configure the Apache server. If you just want to host your Joomla website under the Apache web server, you can follow the steps below or go to the Apache virtual hosting and create a separate host for your Joomla site and then follow the rest of the instructions in this article.
Now open the Apache configuration file with your desired editor:
vi /etc/httpd/conf/httpd.conf
Then you have to search for the directive and change it:
ServerAdmin [email protected]

ServerName joomla.example.com:80
Remember that the user and the group must be Apache.
Now you should restart Apache by running the following command:
service httpd restart
You can make the httpd service start automatically in the next boot with the following command:
systemctl enable httpd.service
Then verify httpd is running and the listening request is on port 80 with the following command:
[root@example ~]# netstat -antp | grep httpd

tcp 0 0 :::80 :::* LISTEN 1705/httpd
Now you should configure the Firewall. To do this first, open port 80 on the firewall or disable iptables with the following command:
firewall-cmd --zone=public --add-port=80/tcp --permanent
firewall-cmd --reload
In this step, you should create a Joomla Database. To do this first, set the MySQL root password using the following command:
mysqladmin -u root password 'tyjee'
Then you should log in to MySQL with root credentials:
mysql -u root -p
In this step, create a database called ‘Joomla‘ in MySQL using the following command:
mysql> create database joomla;
Then you must grant the Joomla database to the ‘Joomla’ user in MySQL by running the following command:
mysql> grant all on joomla.* to joomla@'localhost' identified by 'tyjee';
Query OK, 0 rows affected (0.0 sec)

mysql> flush privileges;
Query OK, 0 rows affected (0.00 sec)
Restart the MySQL service with the following command:
systemctl restart mariadb.service
Then you should enable it automatically at system startup by entering the following command:
systemctl enable mariadb.service
At first, you should type http://192.168.0.11 on your browser to configure Joomla.
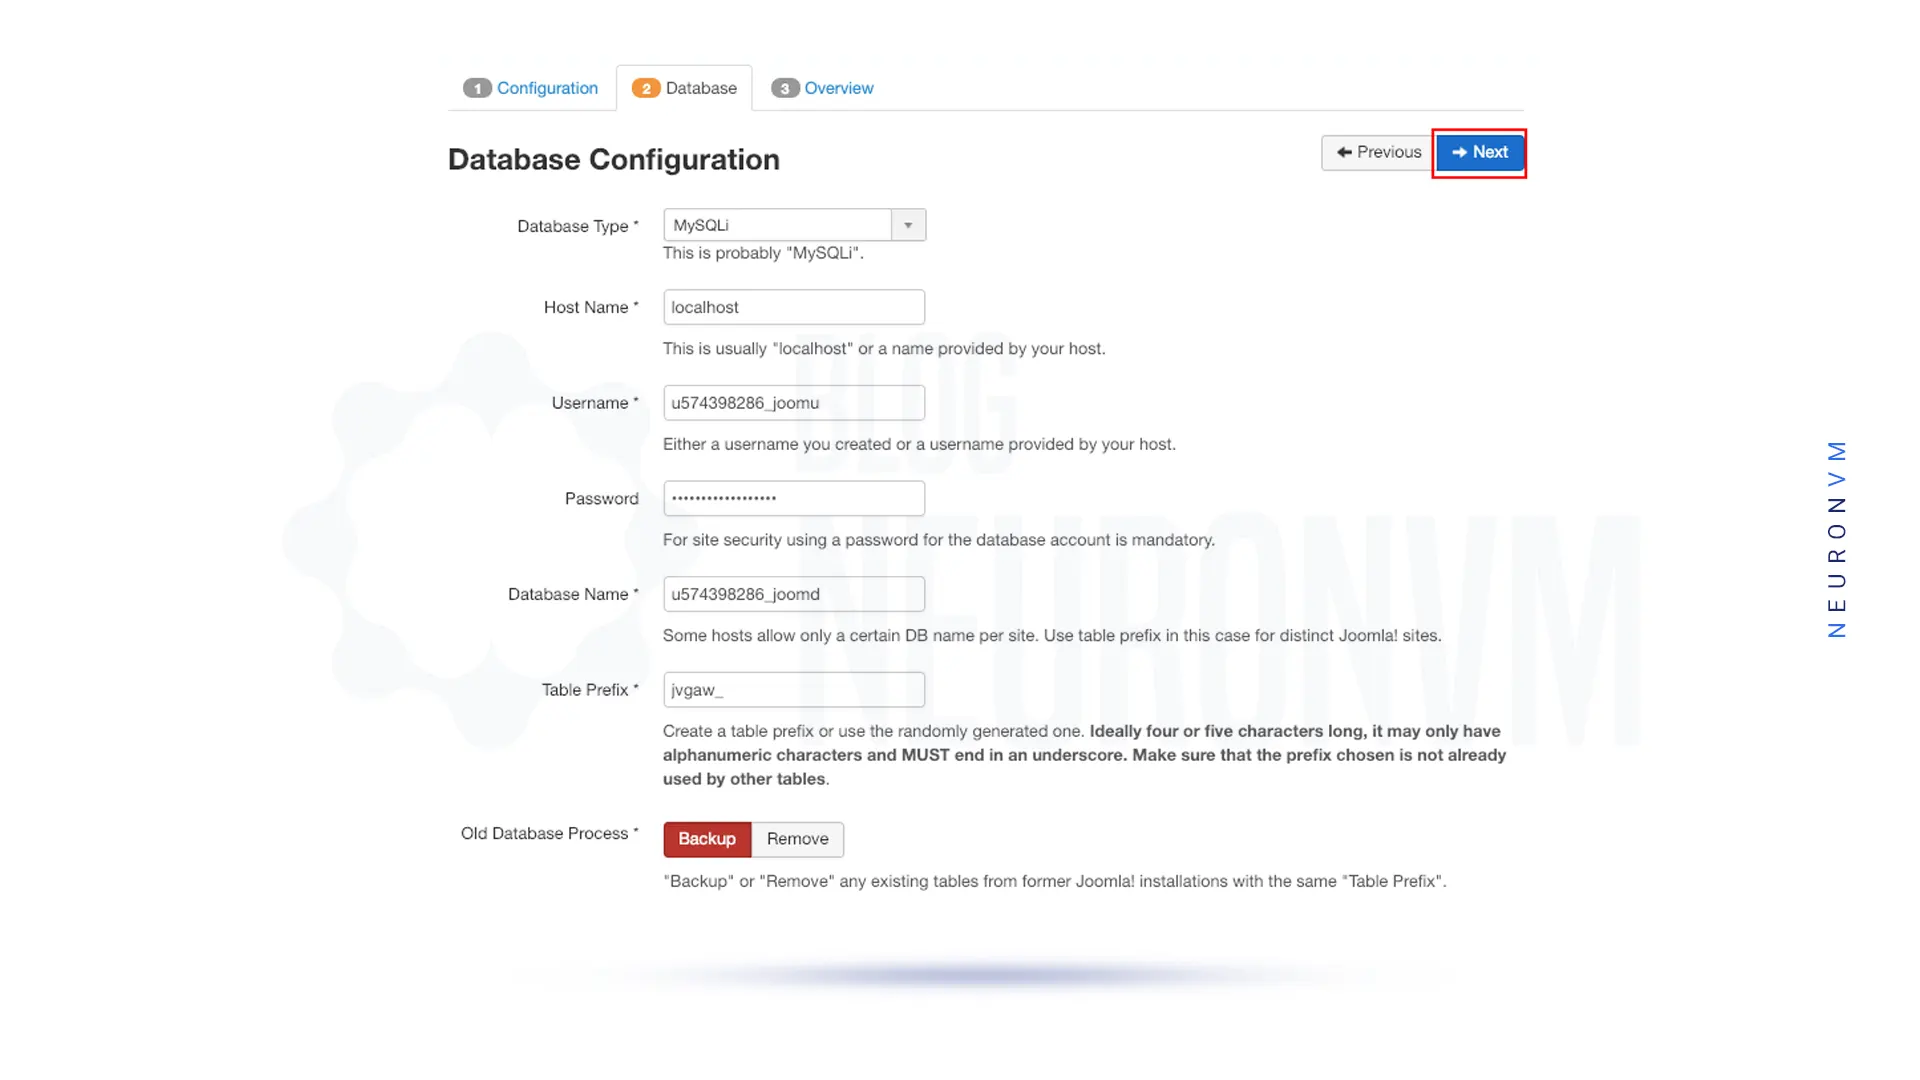
Then fill up information such as database name, username, and password and click Next:
Since FTP isn’t used in this step, you should leave it blank and click Next.
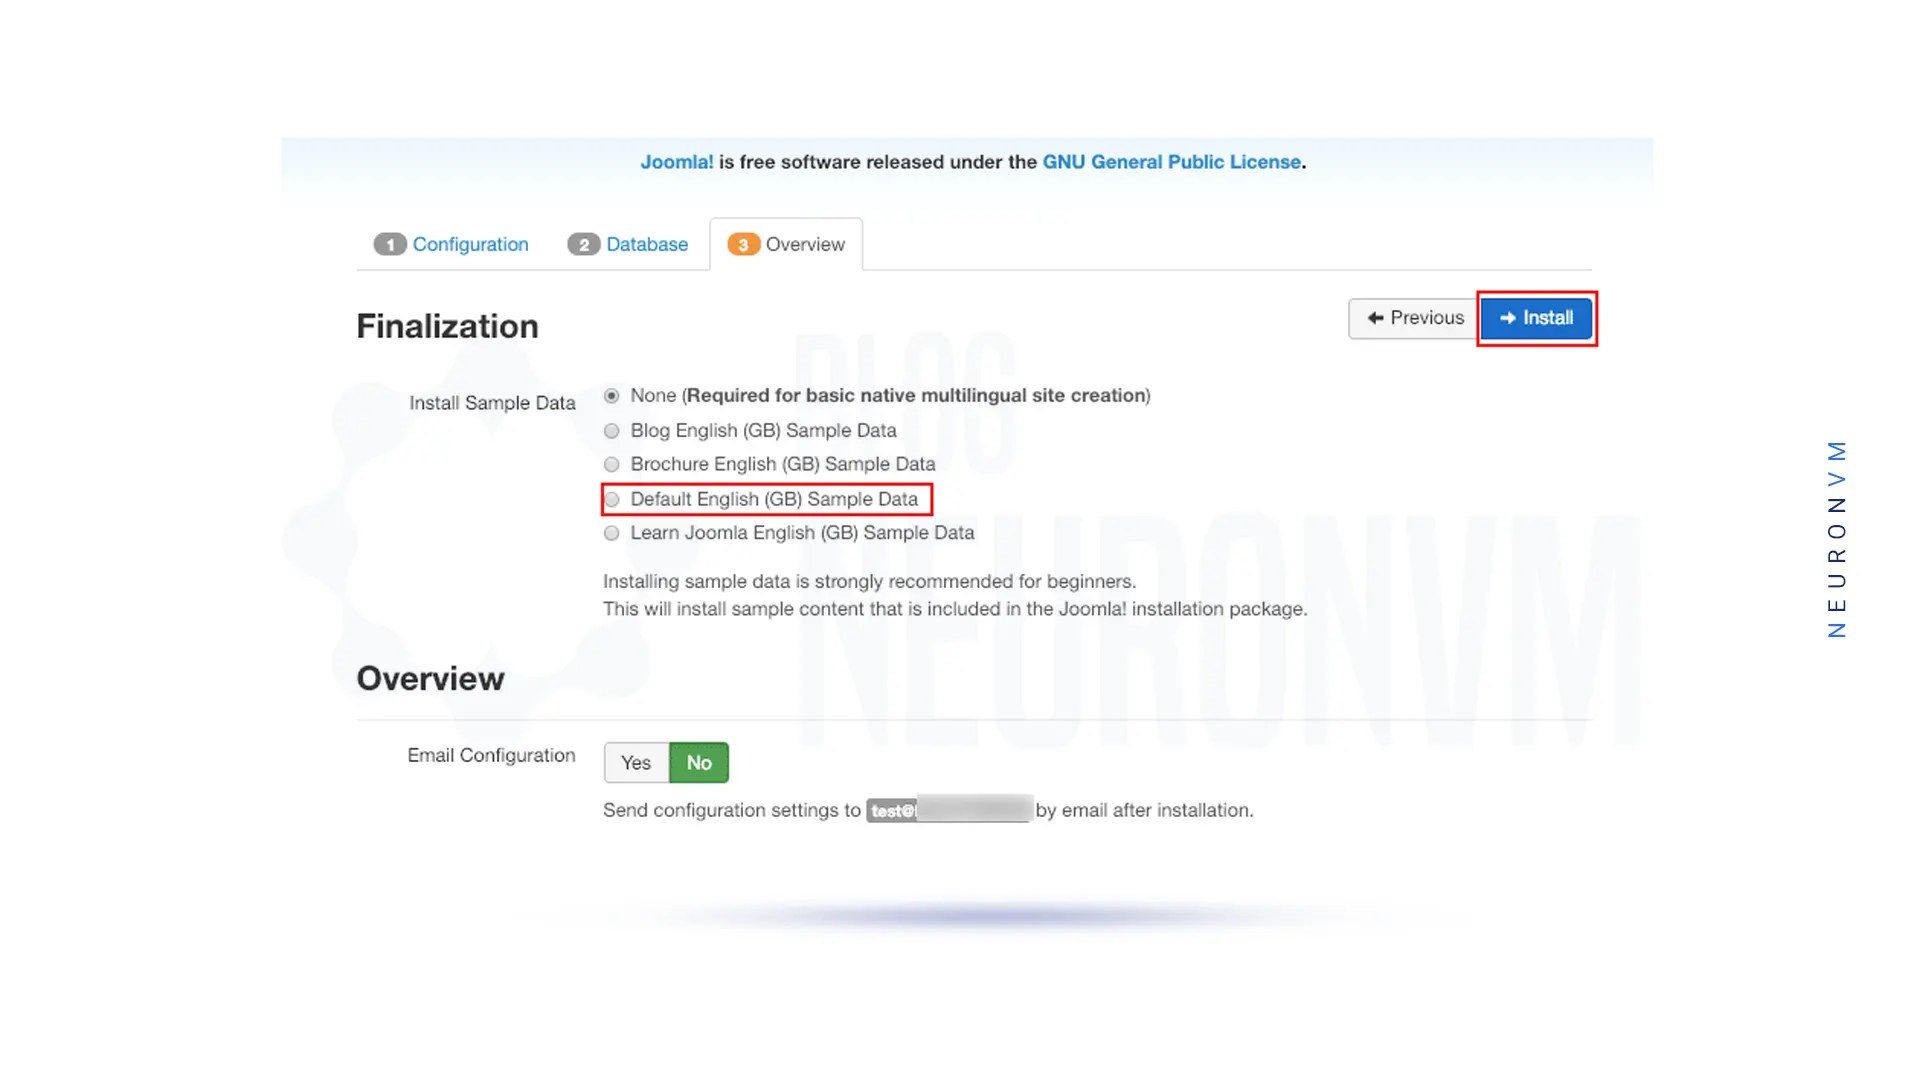
Now you should install Sample Data and click Install:
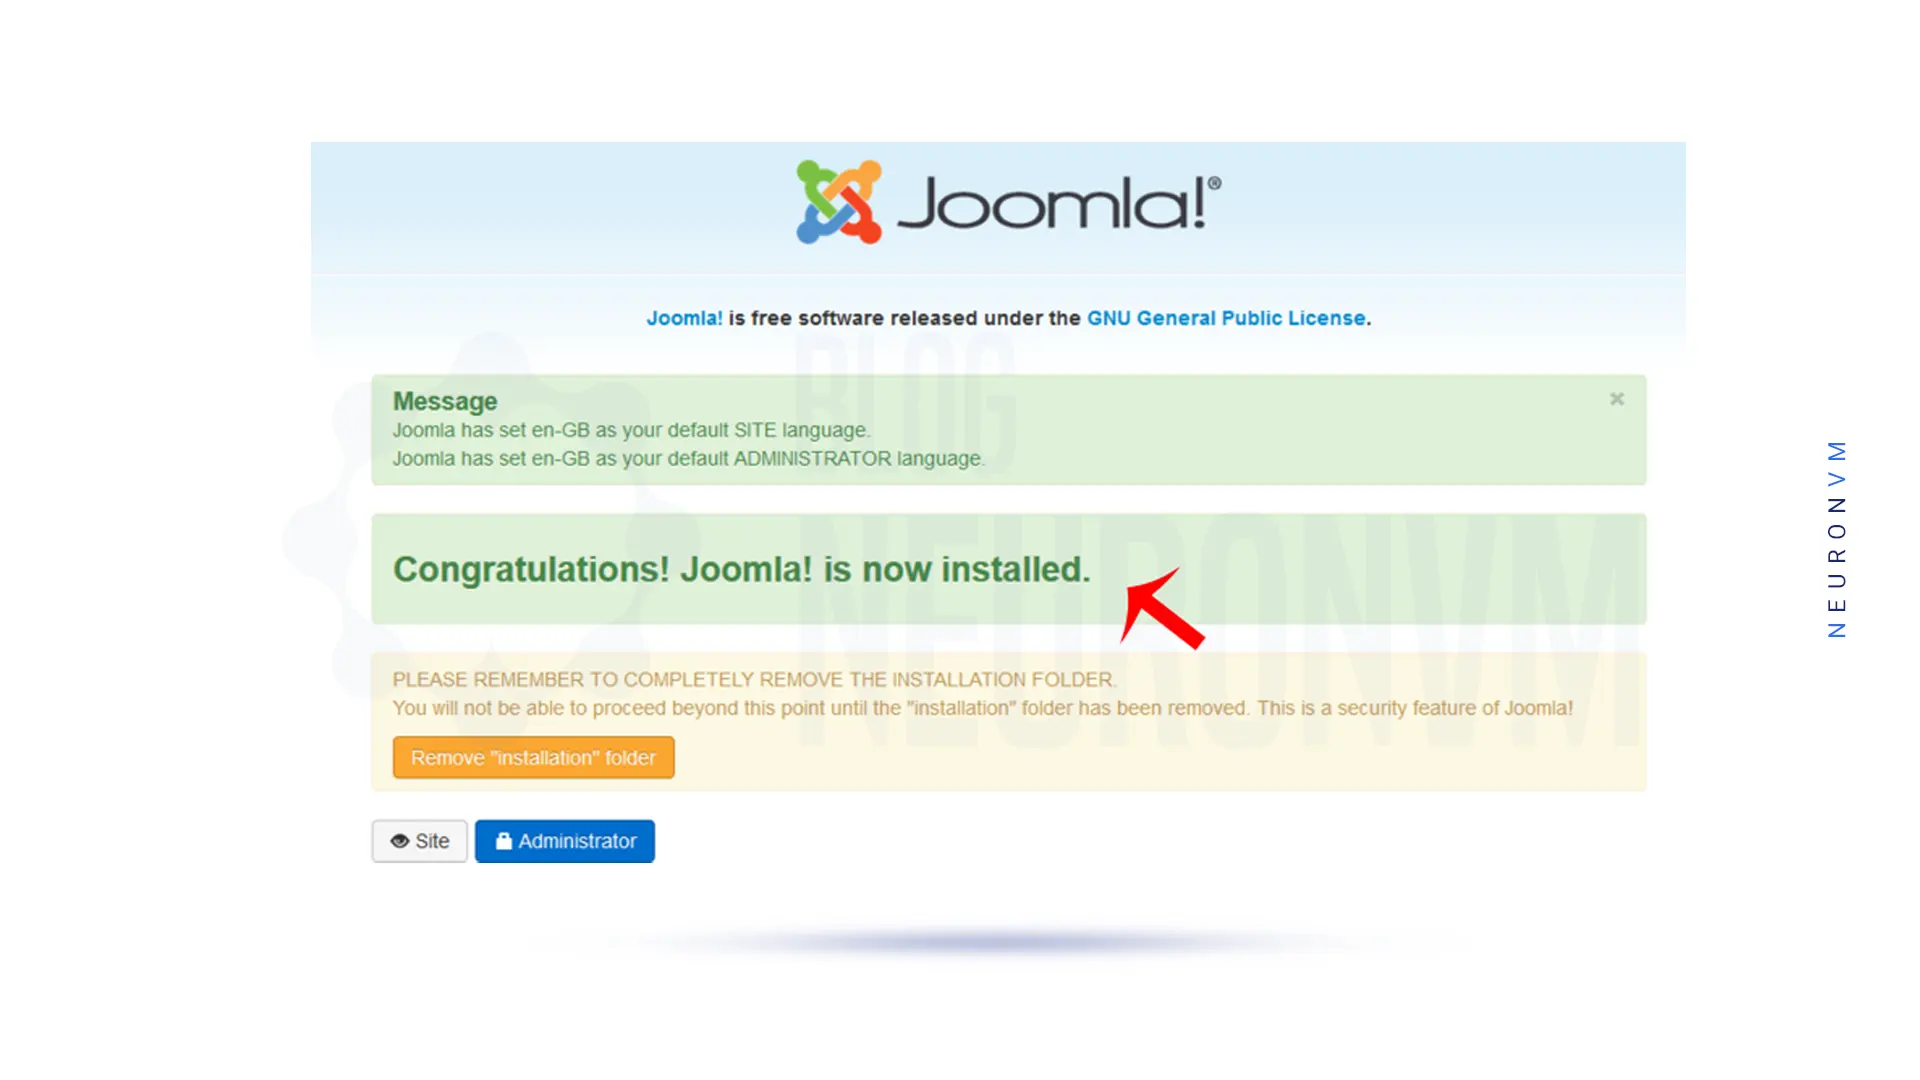
Finally, Joomla is installed.
If you get an error stating that the configuration file or directory isn’t writable, you should copy and paste the following configuration code into the ‘configuration.php‘ file in the root folder of your site:
<?php
class JConfig {
        public $offline = '0';
        public $offline_message = 'This site is down for maintenance.<br /> Please check back again soon.';
        public $display_offline_message = '1';
        public $offline_image = '';
        public $sitename = 'test.example.com';
        public $editor = 'tinymce';
        public $captcha = '0';
        public $list_limit = '20';
        public $access = '1';
        public $debug = '0';
        public $debug_lang = '0';
        public $dbtype = 'mysqli';
        public $host = 'localhost';
        public $user = 'joomla';
        public $password = 'tynewf';
        public $db = 'joomla';
        public $dbprefix = 'ytrwq_';
        public $live_site = '';
        public $secret = '1EgHg0qZmyb7';
        public $gzip = '0';
        public $error_reporting = 'default';
        public $helpurl = 'https://help.joomla.org/proxy/index.php?option=com_help&keyref=Help{major}{minor}:{keyref}';
        public $ftp_host = '127.0.0.1';
        public $ftp_port = '21';
        public $ftp_user = '';
        public $ftp_pass = '';
        public $ftp_root = '';
        public $ftp_enable = '0';
        public $offset = 'UTC';
        public $mailonline = '1';
        public $mailer = 'mail';
        public $mailfrom = '[email protected]';
        public $fromname = 'test.example.com';
        public $sendmail = '/usr/sbin/sendmail';
        public $smtpauth = '0';
        public $smtpuser = '';
        public $smtppass = '';
        public $smtphost = 'localhost';
        public $smtpsecure = 'none';
        public $smtpport = '25';
        public $caching = '0';
        public $cache_handler = 'file';
        public $cachetime = '15';
        public $MetaDesc = 'Joomla Testing Website';
        public $MetaKeys = '';
        public $MetaTitle = '1';
        public $MetaAuthor = '1';
        public $MetaVersion = '0';
        public $robots = '';
        public $sef = '1';
        public $sef_rewrite = '0';
        public $sef_suffix = '0';
        public $unicodeslugs = '0';
        public $feed_limit = '10';
        public $log_path = '/var/www/html/logs';
        public $tmp_path = '/var/www/html/tmp';
        public $lifetime = '15';
        public $session_handler = 'database';
}
You can remove the installation directory by clicking the Remove Installation button. If an error occurs, You can remove it manually by entering the following command:
rm -rf installation/
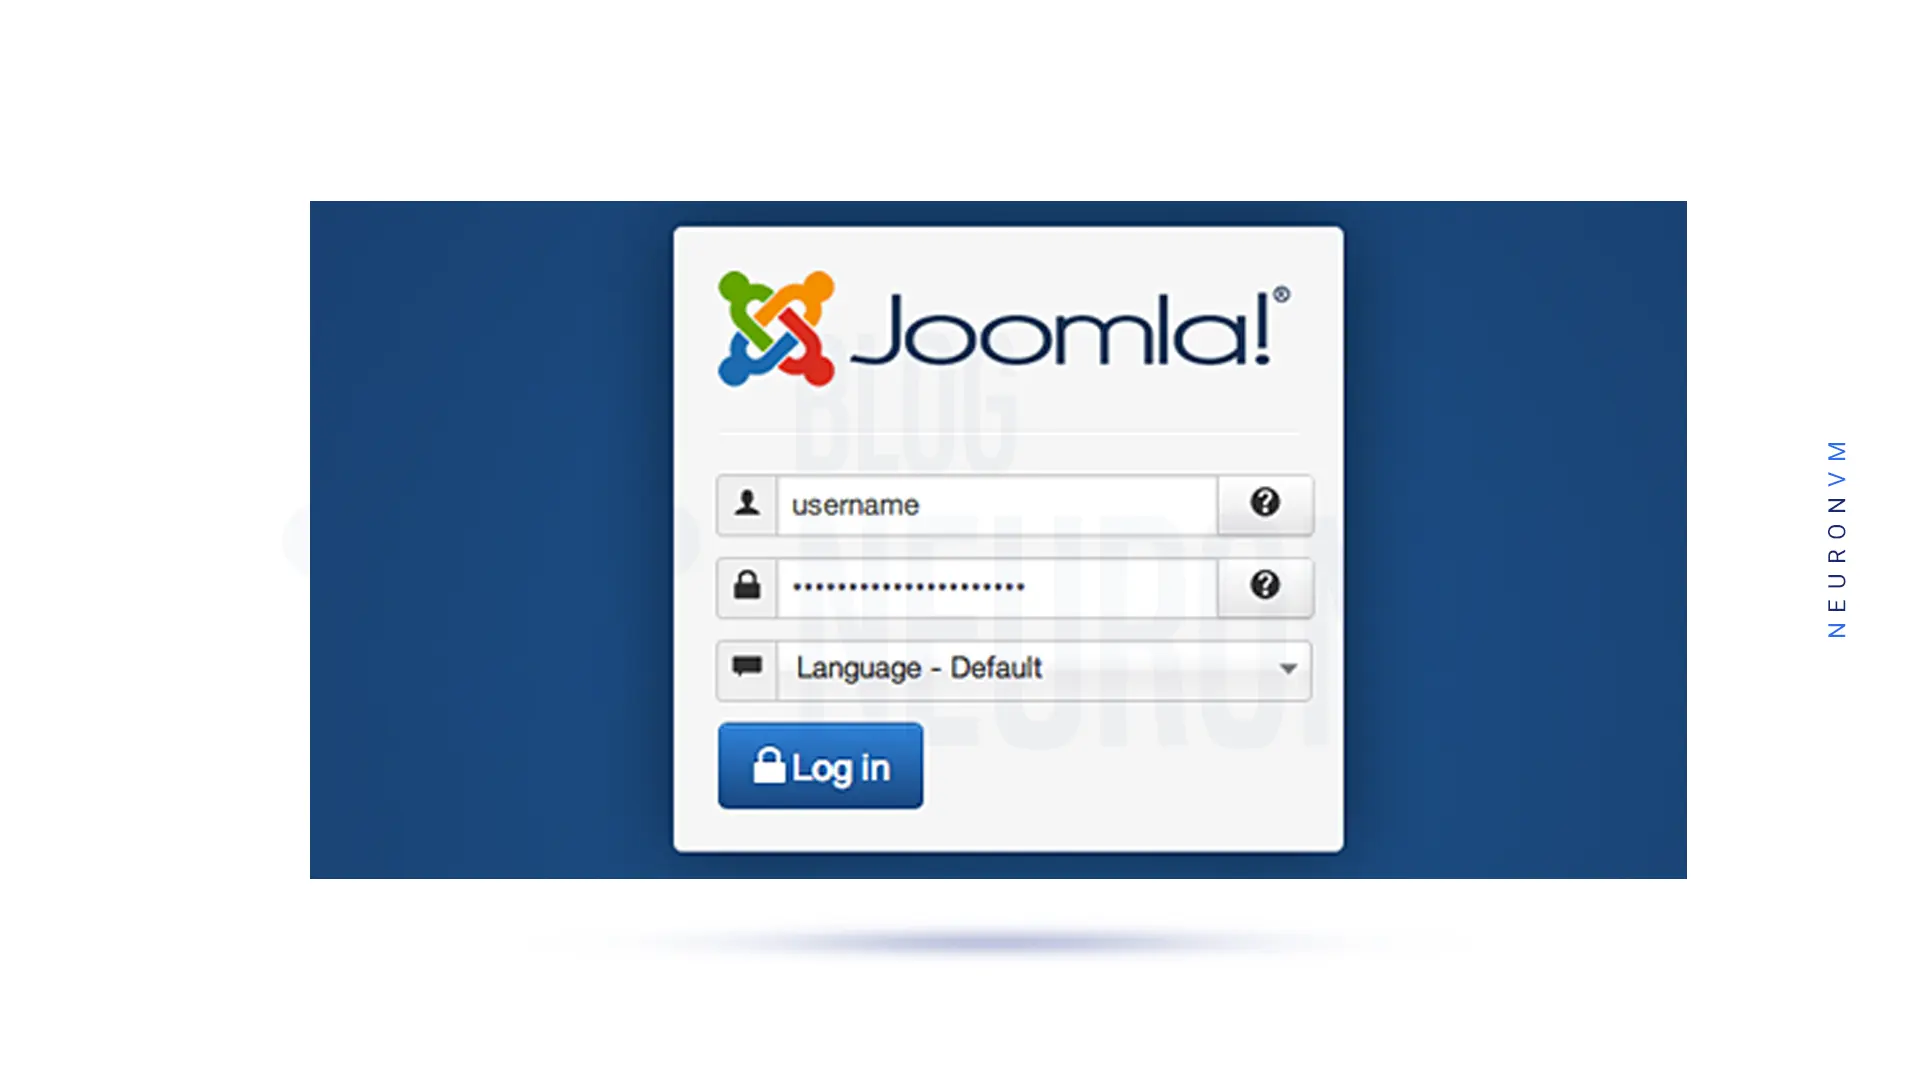
You should fill in the Login Form and click Login to log in to Joomla.
To log in as a site administrator, you have to fill in your username and password and then click Login:
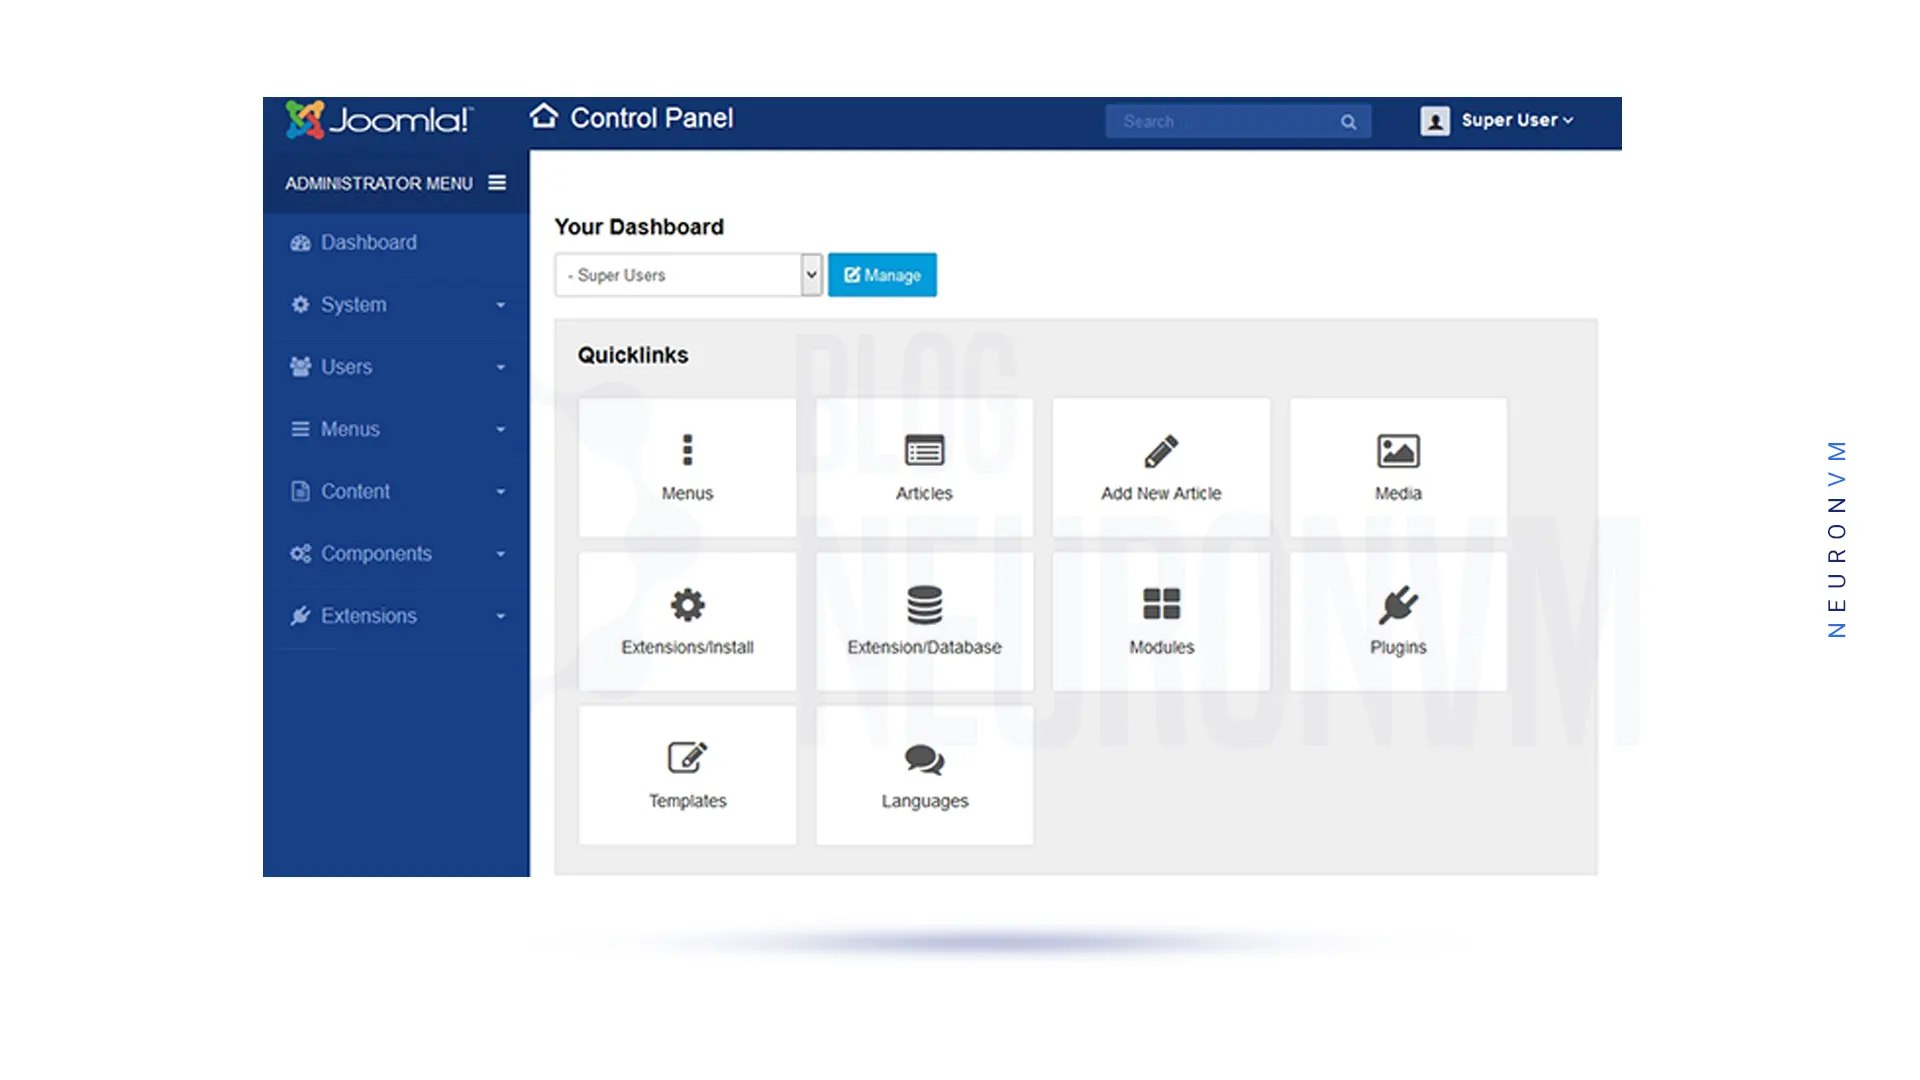
You can see the Joomla Admin Dashboard in the following image:
You can update Joomla with One-Click Update, which is the easiest method to update Joomla. The above method is only suitable for Joomla 3.x.x to 3.x.x – updates. Joomla alerts you to an update in the Administrator Control Panel. It is the responsibility of the site administrator to start and verify the update and Joomla will not update automatically.
Note that you should use the Current Backup of your site before performing the update.
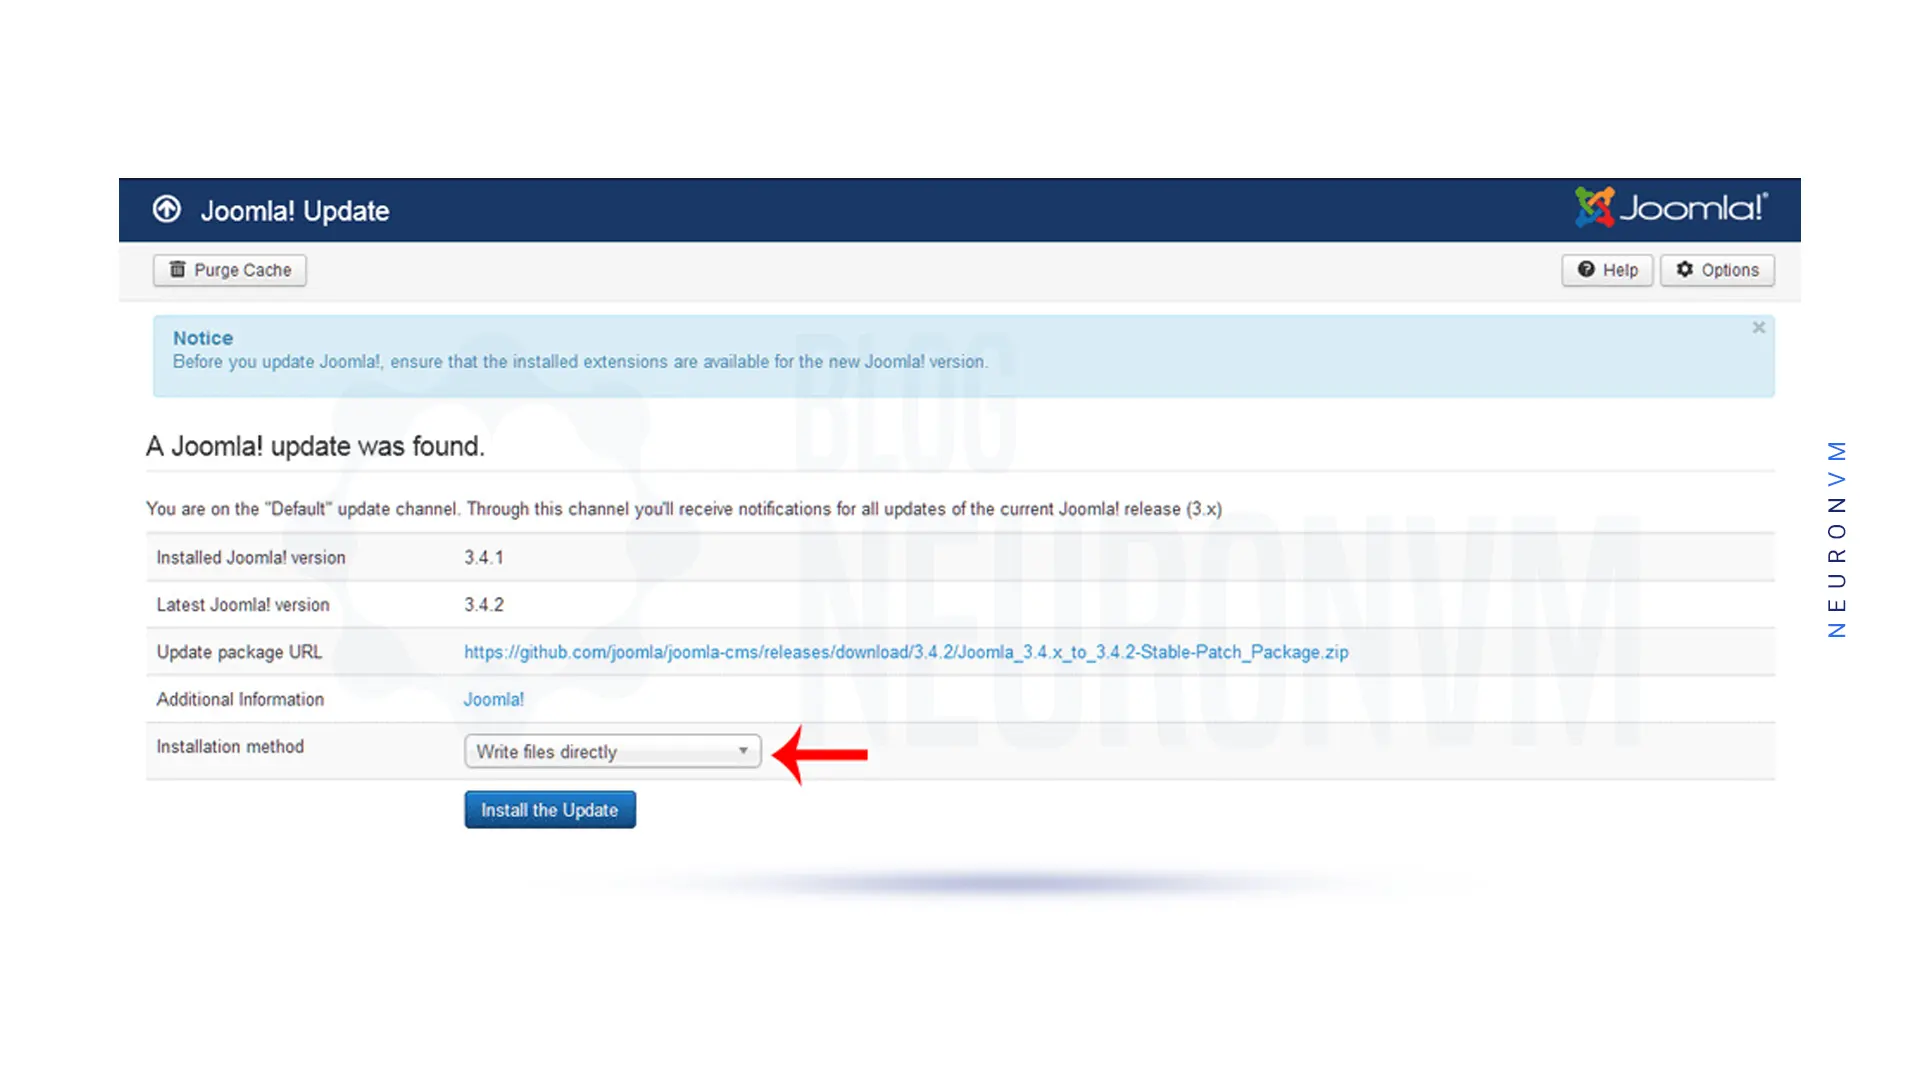
To update Joomla first, you should log in to the Admin Control Panel and click Update Now, which shows you the installed version of Joomla and the latest available version.
There are two options in this section, one is “Write files directly” which is the default method and the second option is “Write files using FTP” to update new original files in Joomla Installation. If FTP is already installed, you can select the FTP update option or click the Install the Update button to carry updates:
Note that you may need to clear your browser cache to adjust for any changes to JS/CSS files.
Each of these content management systems performs better for specific sites. Joomla is a much better choice than WordPress for building and running complex sites like a store site. Now that You’ve successfully installed and set up Joomla on Fedora 34 with Apache, MariaDB, and PHP. You can now start building your website using the Joomla CMS. If you want, you can read the article on how to install Joomla on Ubuntu.
 Tags
Tags


Developers spend a lot of time using a text editor, which is why a text editor is an important tool....


 Tags
Tags

Gradle is a useful build tool that supports several popular programming languages and technologies. ...
Tags


