


OpenLDAP is an open-source implementation of the Lightweight Directory Access Protocol (LDAP), which is widely used for managing a centralized directory service. In this tutorial, we will guide you step by step to install and configure OpenLDAP on Windows operating system. At the beginning of this article, we will tell you the prerequisites. Then in the next step, you will be taught how to install OpenLDAP on Windows. The final step will explain how to configure and complete the OpenLDAP installation process. Stay with us.
To install OpenLDAP on Windows, you need to ensure that your system meets the following requirements:
– Processor: A modern processor with a clock speed of at least 1 GHz or higher.
– RAM: A minimum of 2 GB RAM.
– Network Interface: An Ethernet adapter or any other network interface to communicate with clients and other servers.
If you need to buy a Windows VPS server, we suggest you use the various plans offered on our website with high performance and a wide variety of locations.
In this section, we want to teach you how to install OpenLDAP on Windows. The first step is to download OpenLDAP from the official website.
Now, wait for the download to finish.
Then, You should go to the Downloads folder and double-click on the downloaded file.
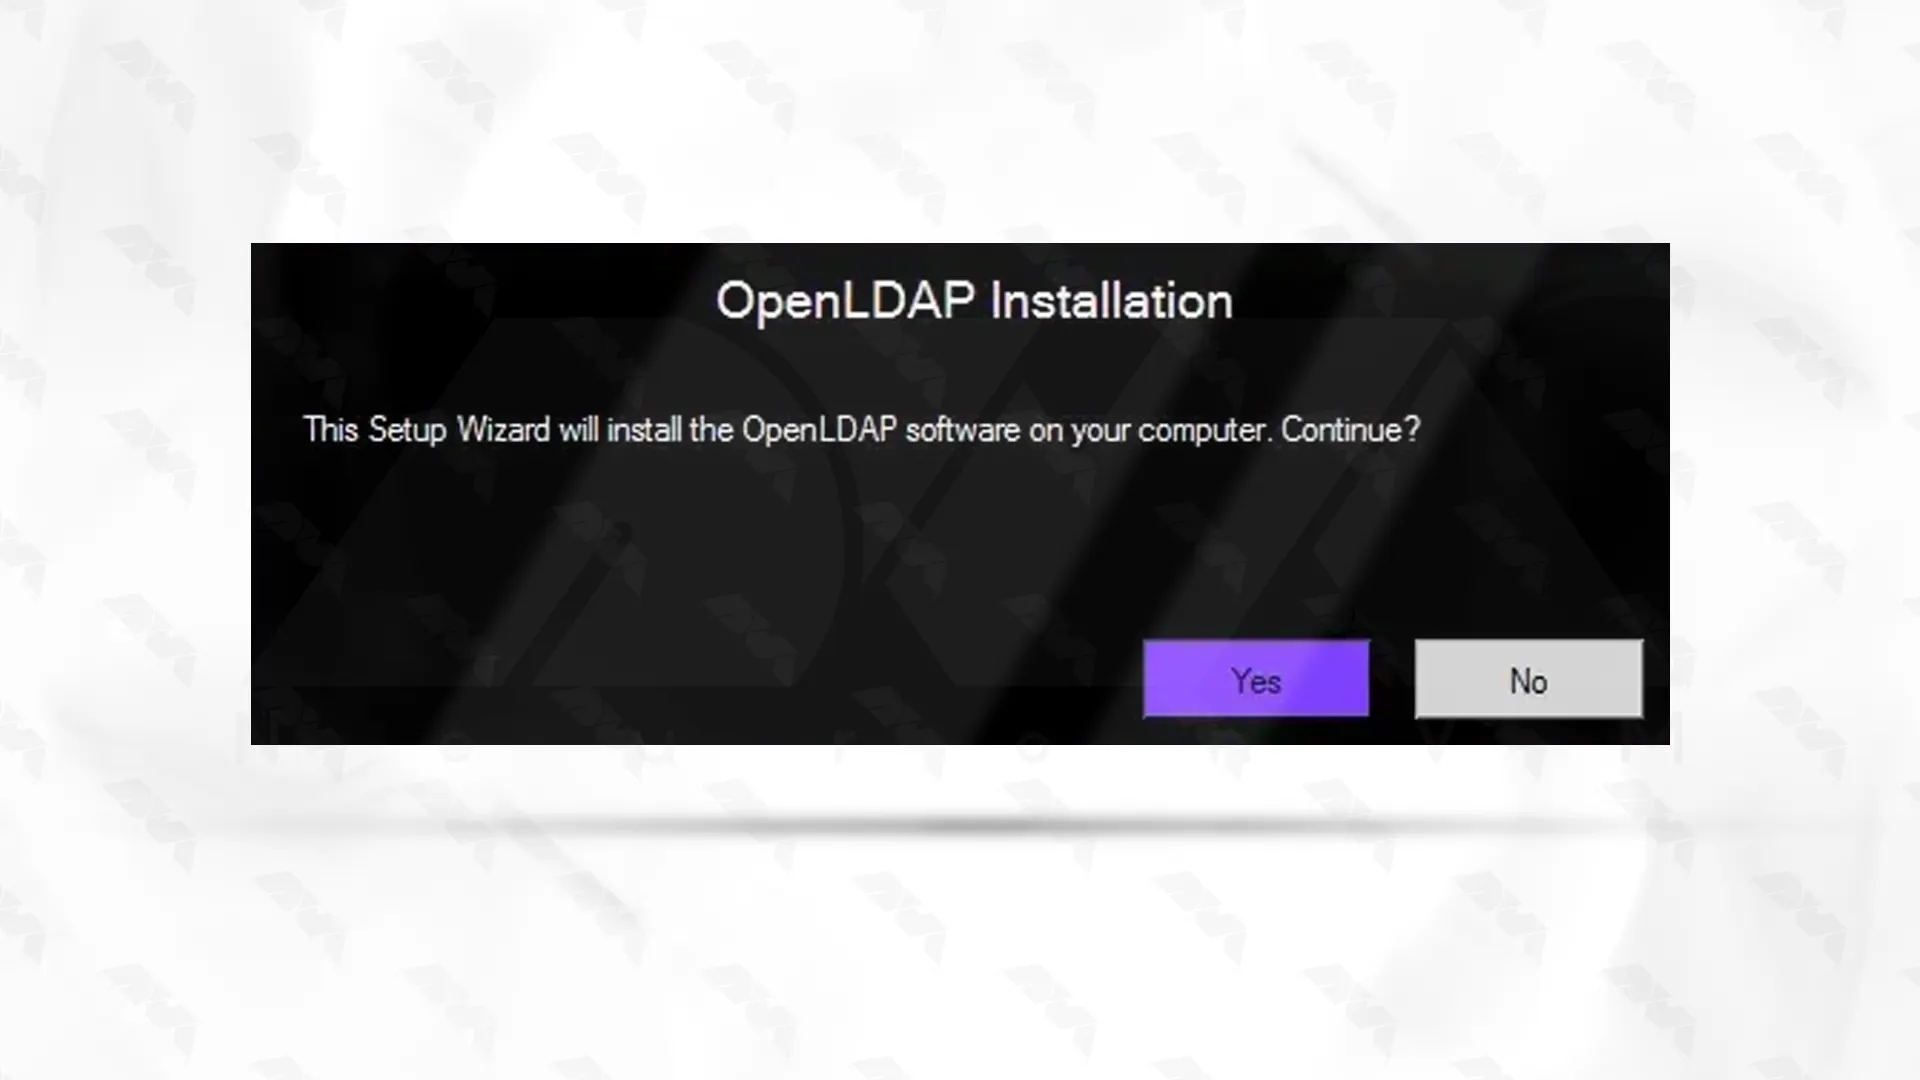
You will be asked if you want the setup wizard to install OpenLDAP. Click Yes:
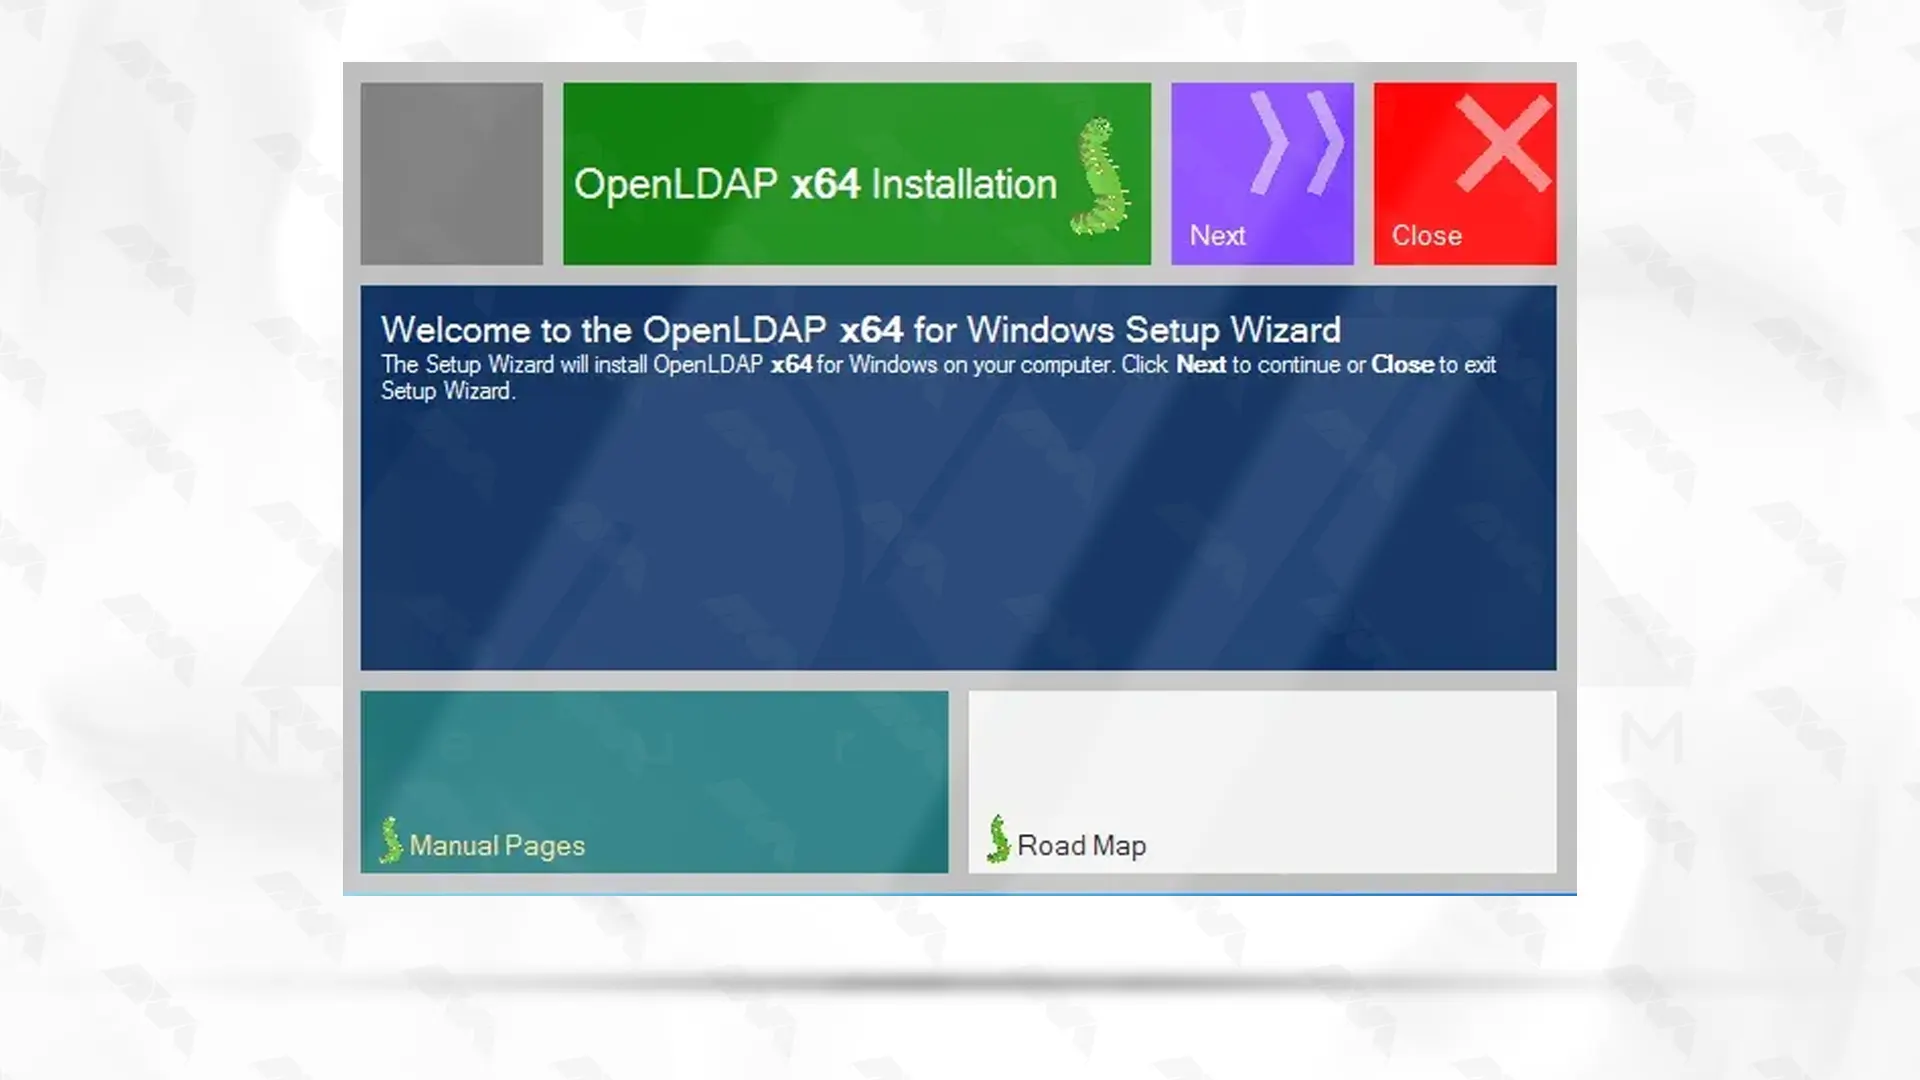
In the window that opens, click Next to continue:
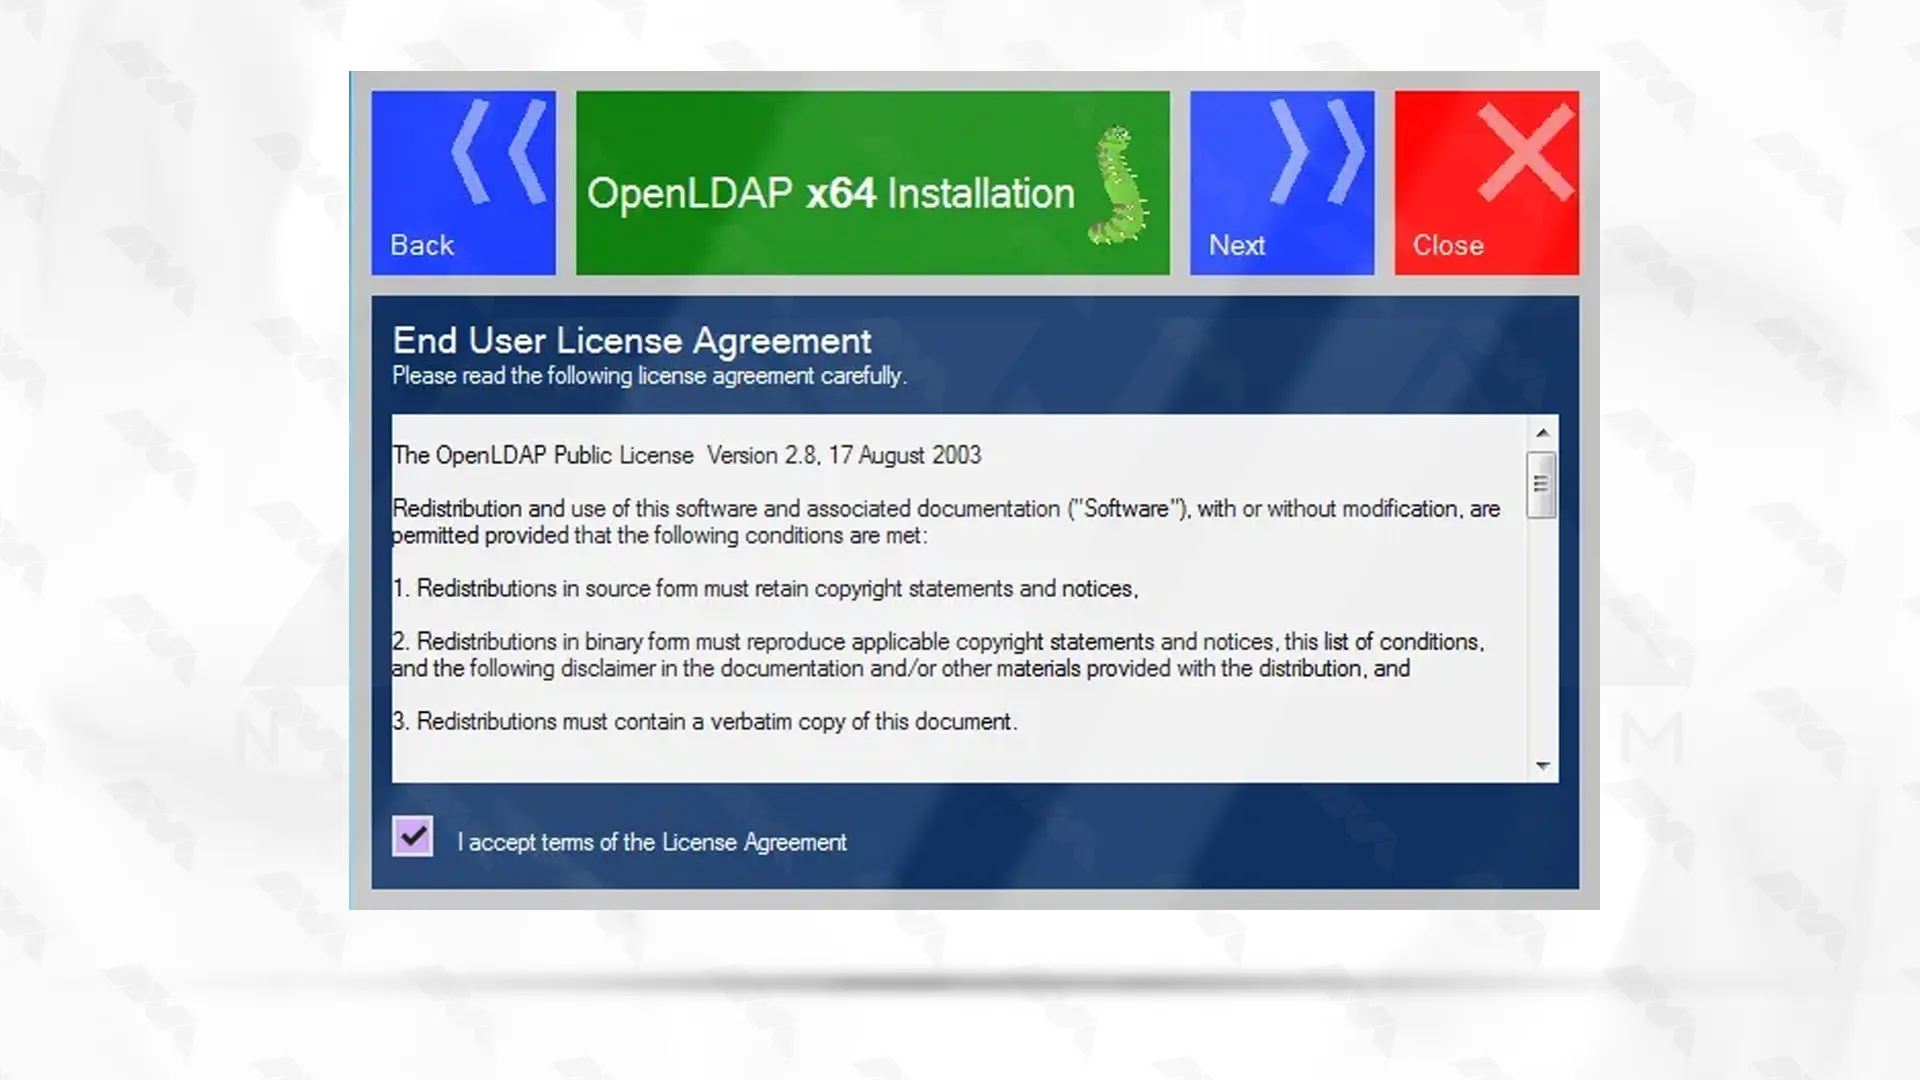
Now you should check the box for “I accept terms of the License Agreement” and click Next again:
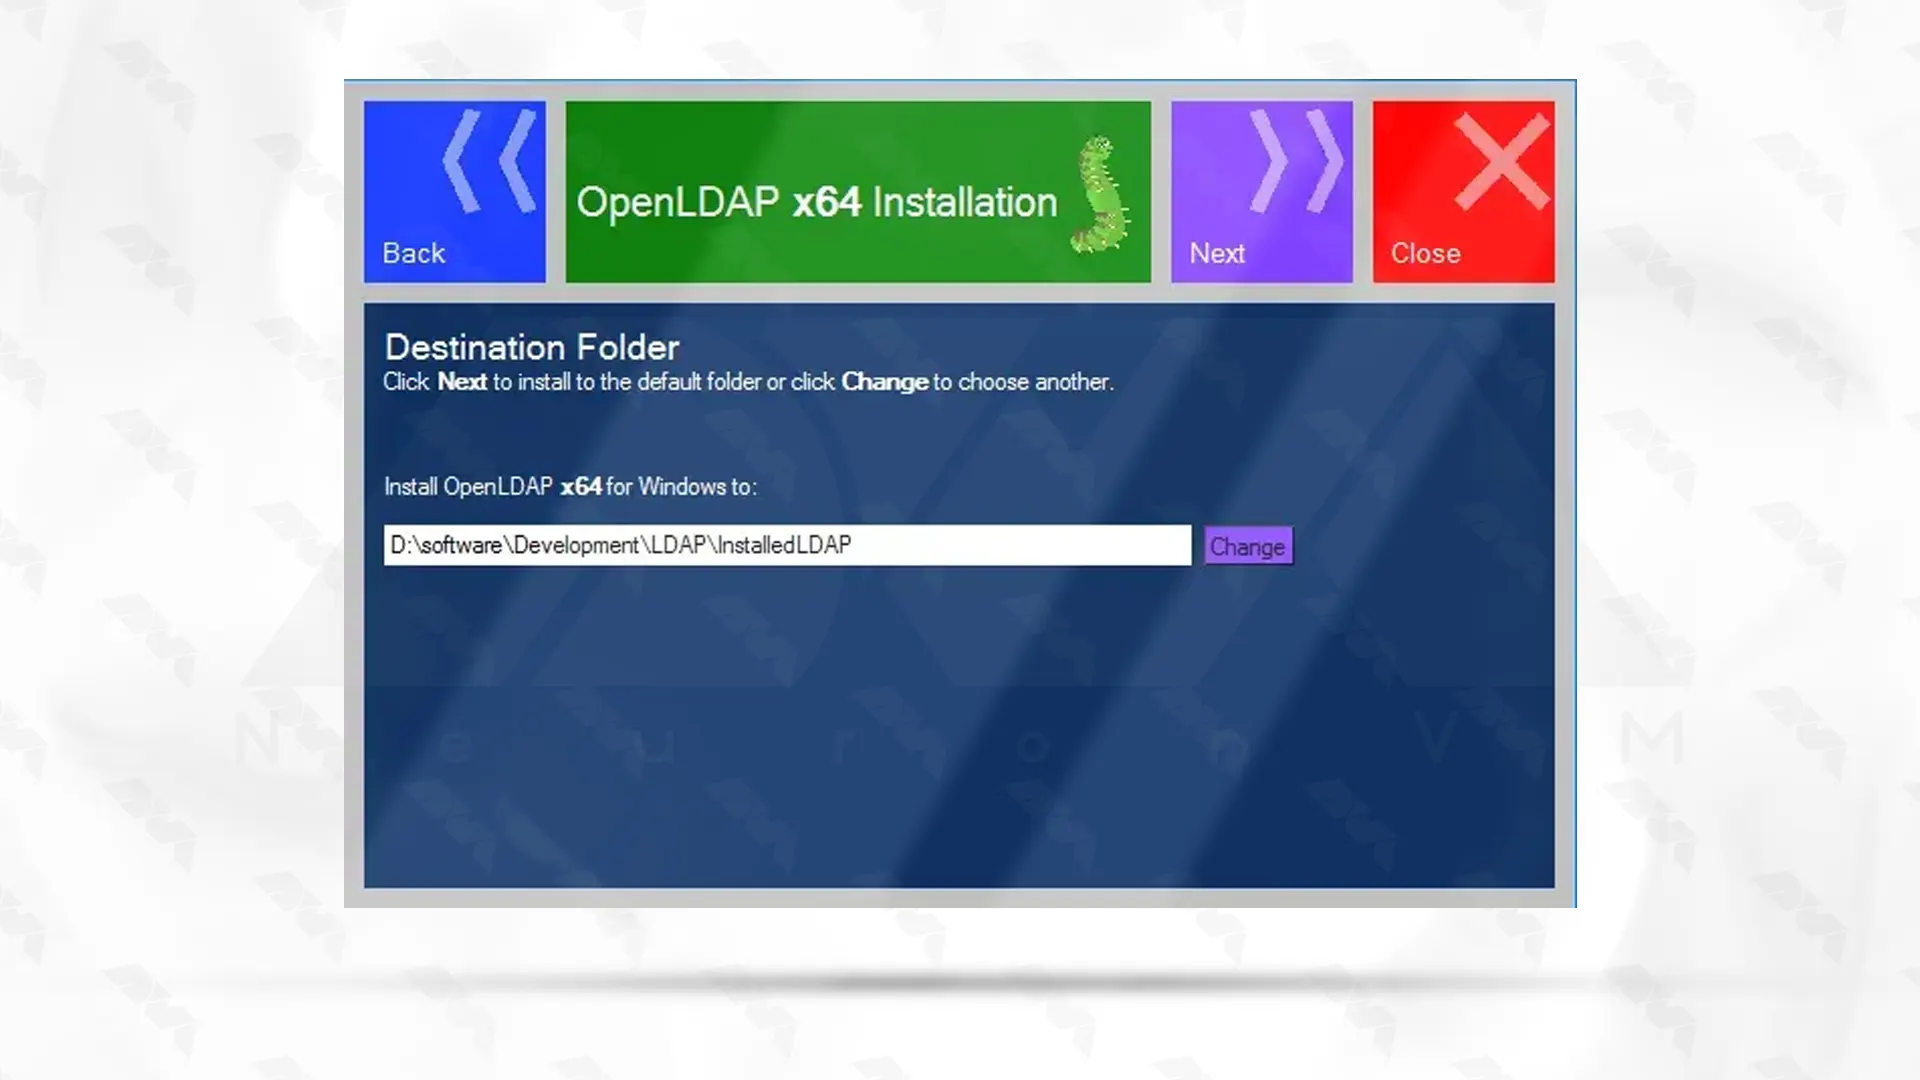
In this step, you can change the destination folder by clicking on change. Then click Next:
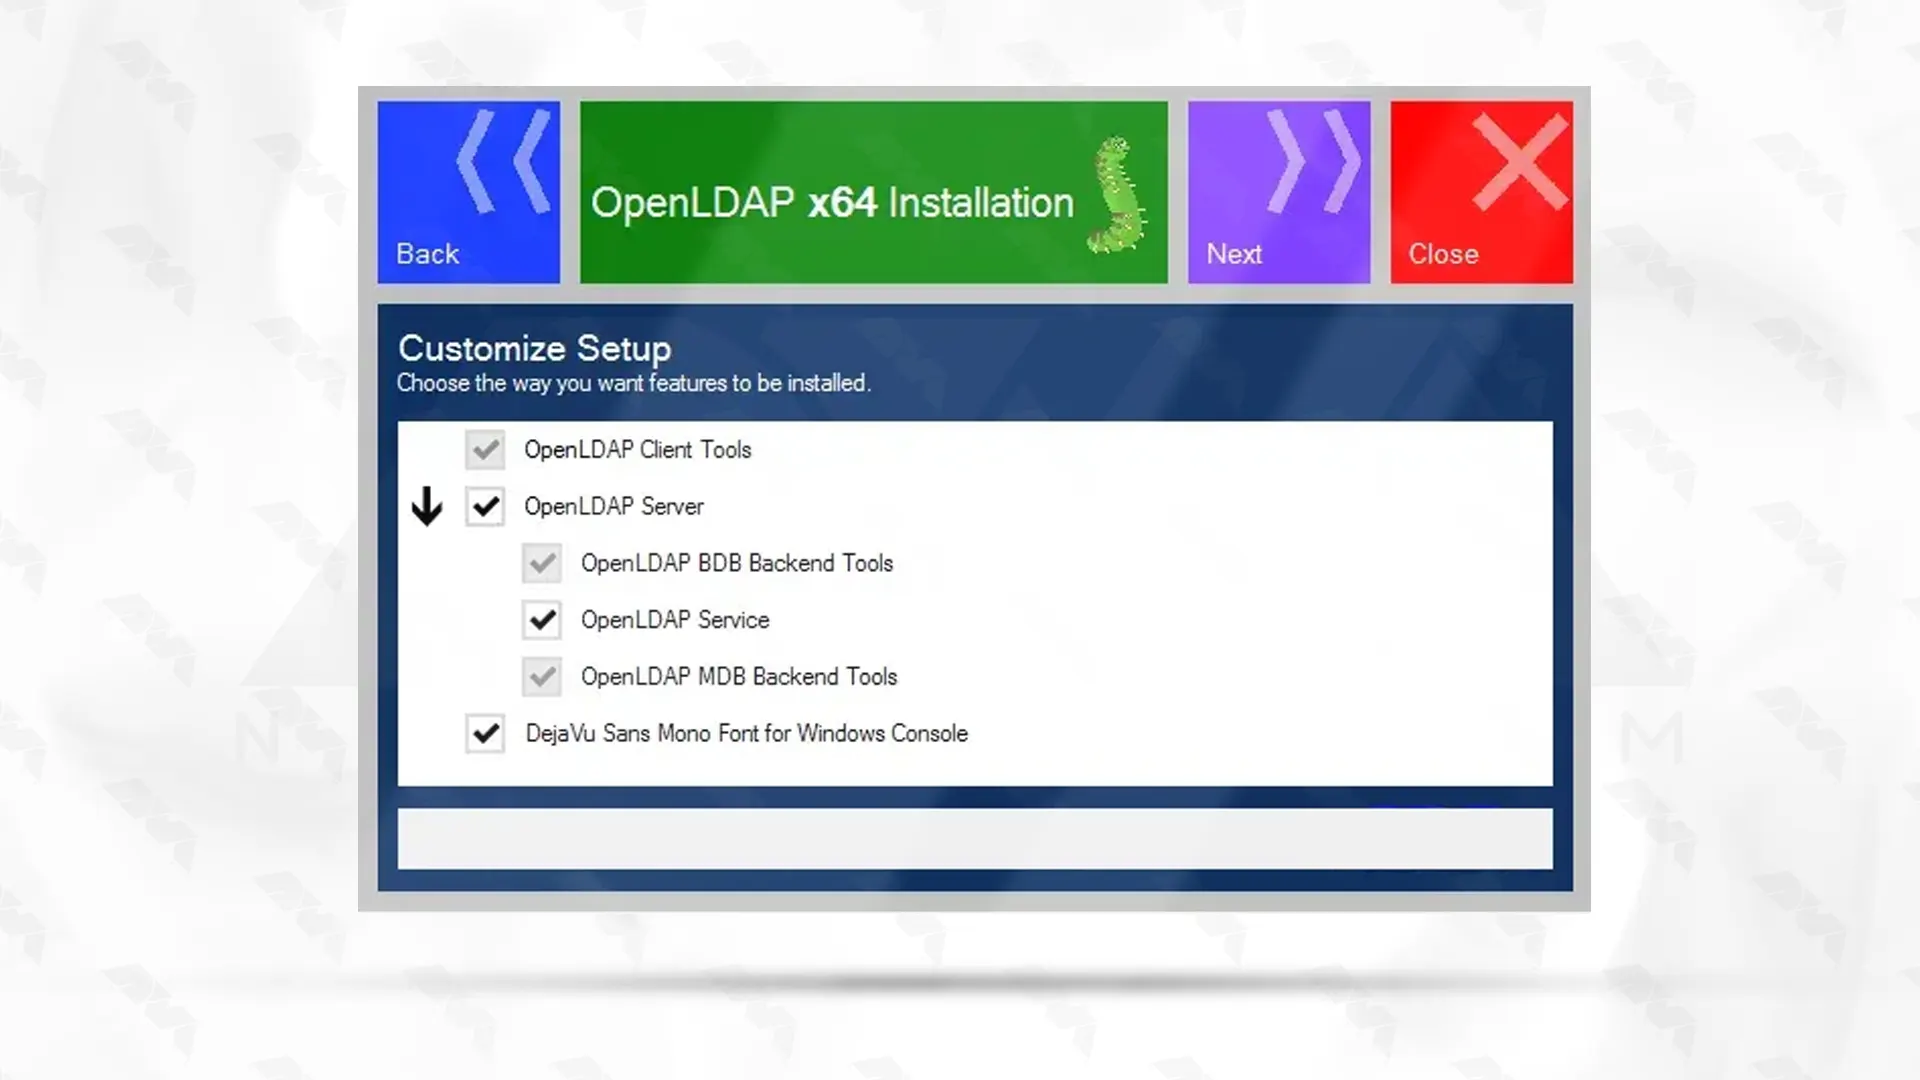
Now you should select the way you want features to be installed and then click Next again:
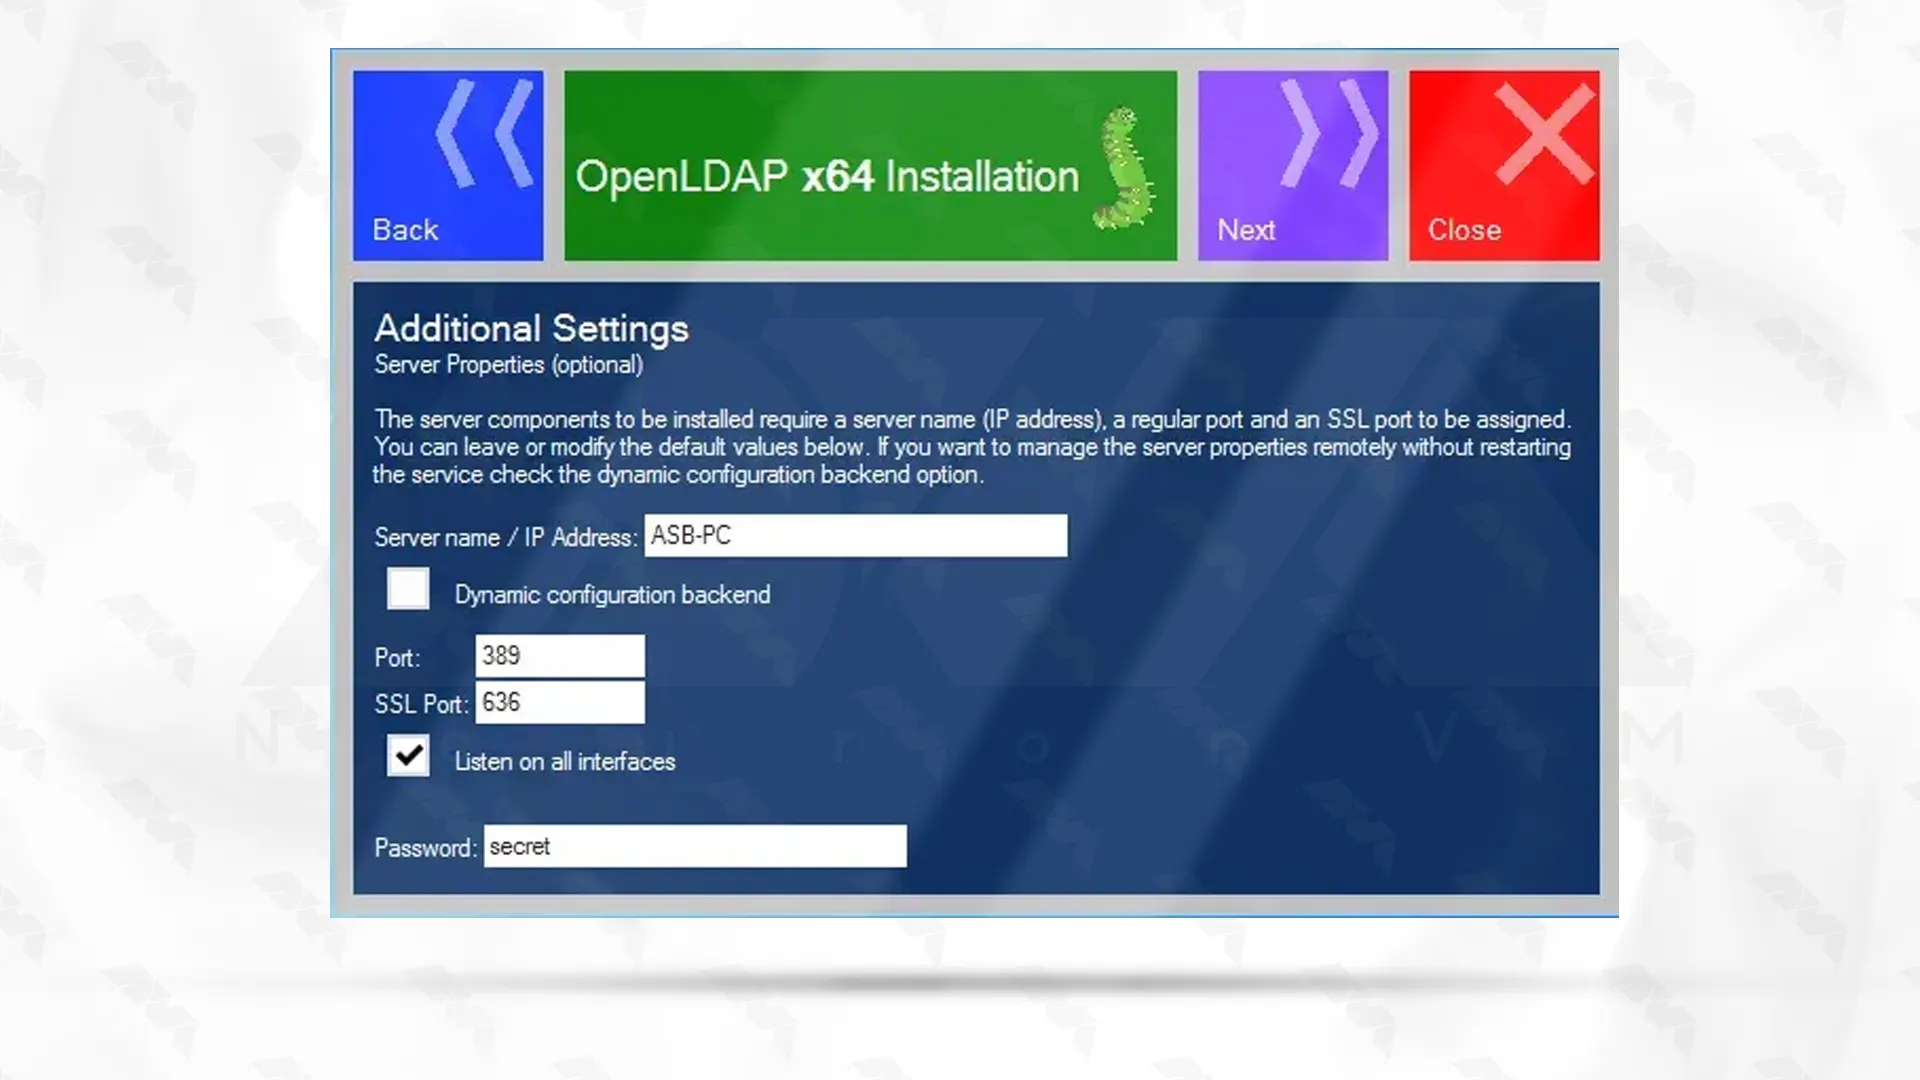
At this point, you can modify the default values. If you want to manage server properties remotely, you should check the dynamic configuration backend option. Finally, click Next:
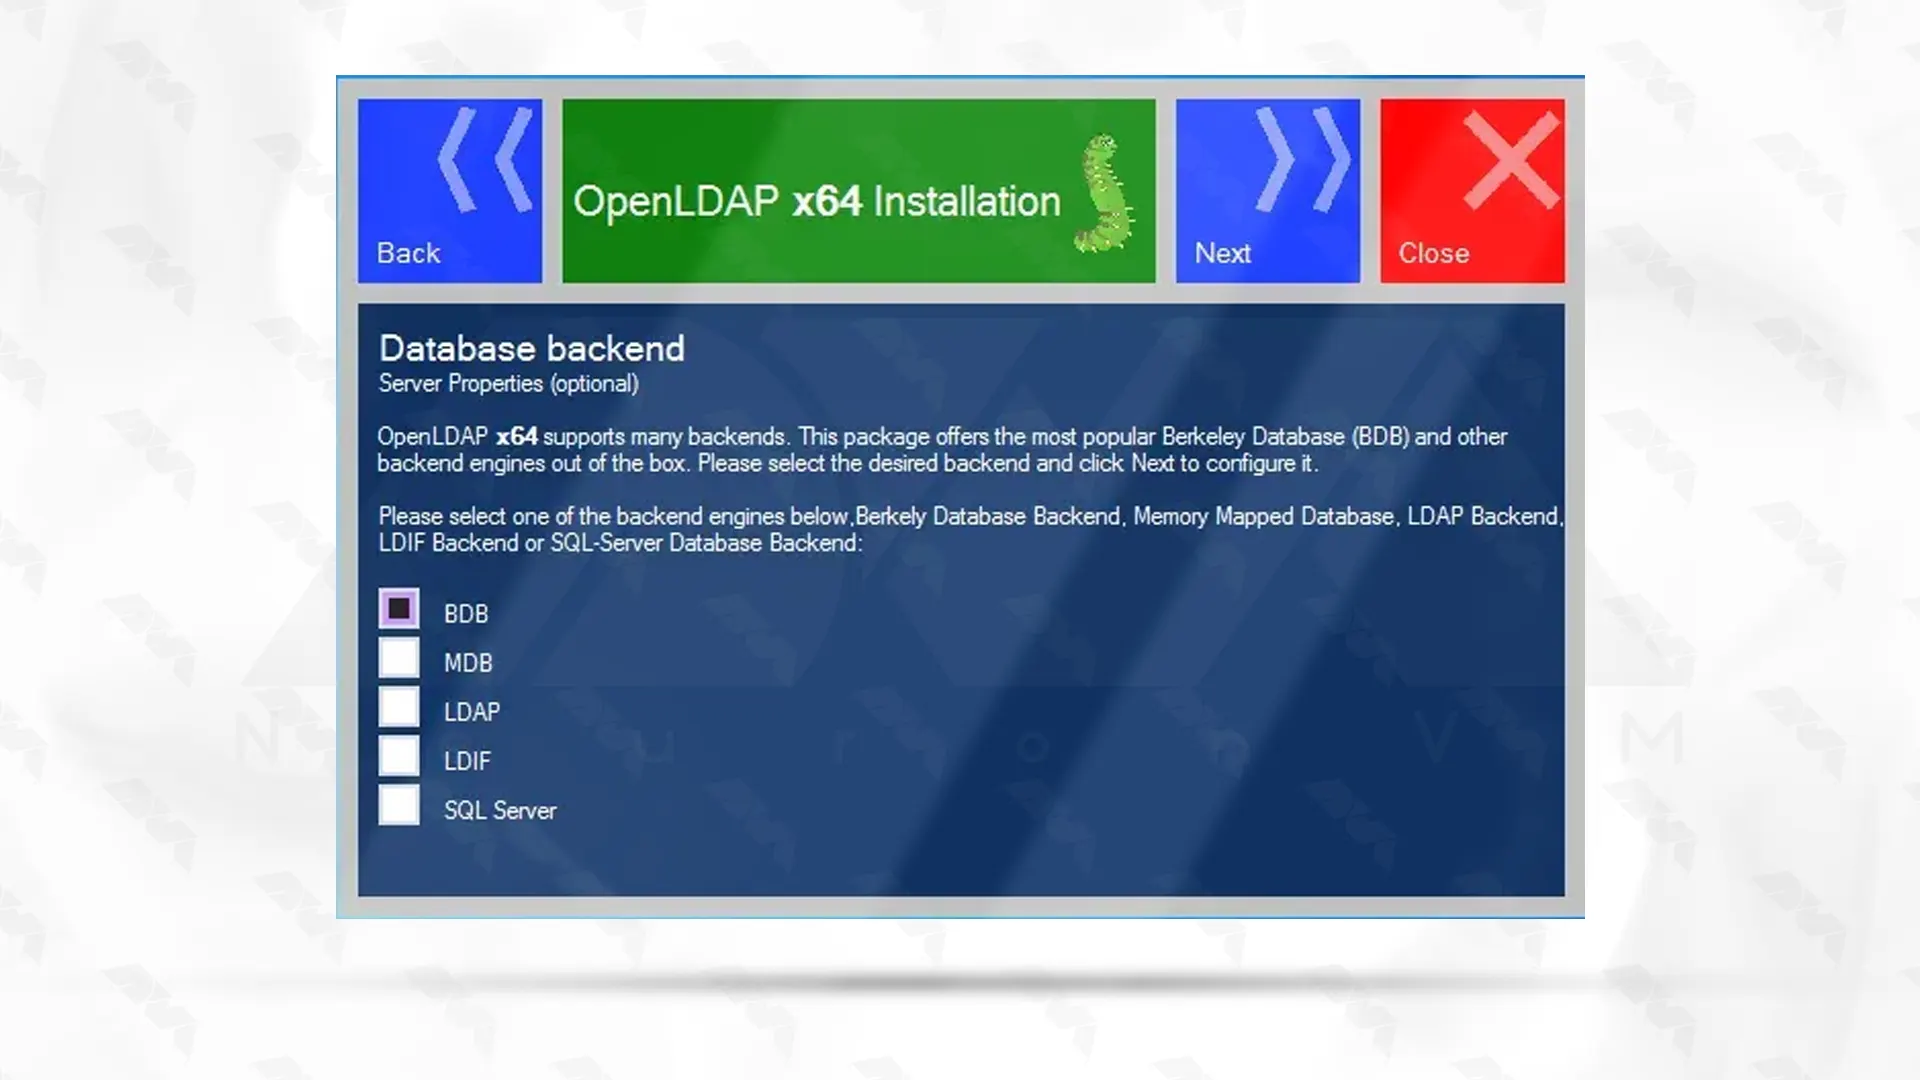
Now you should select one of the backend engines and then click Next:
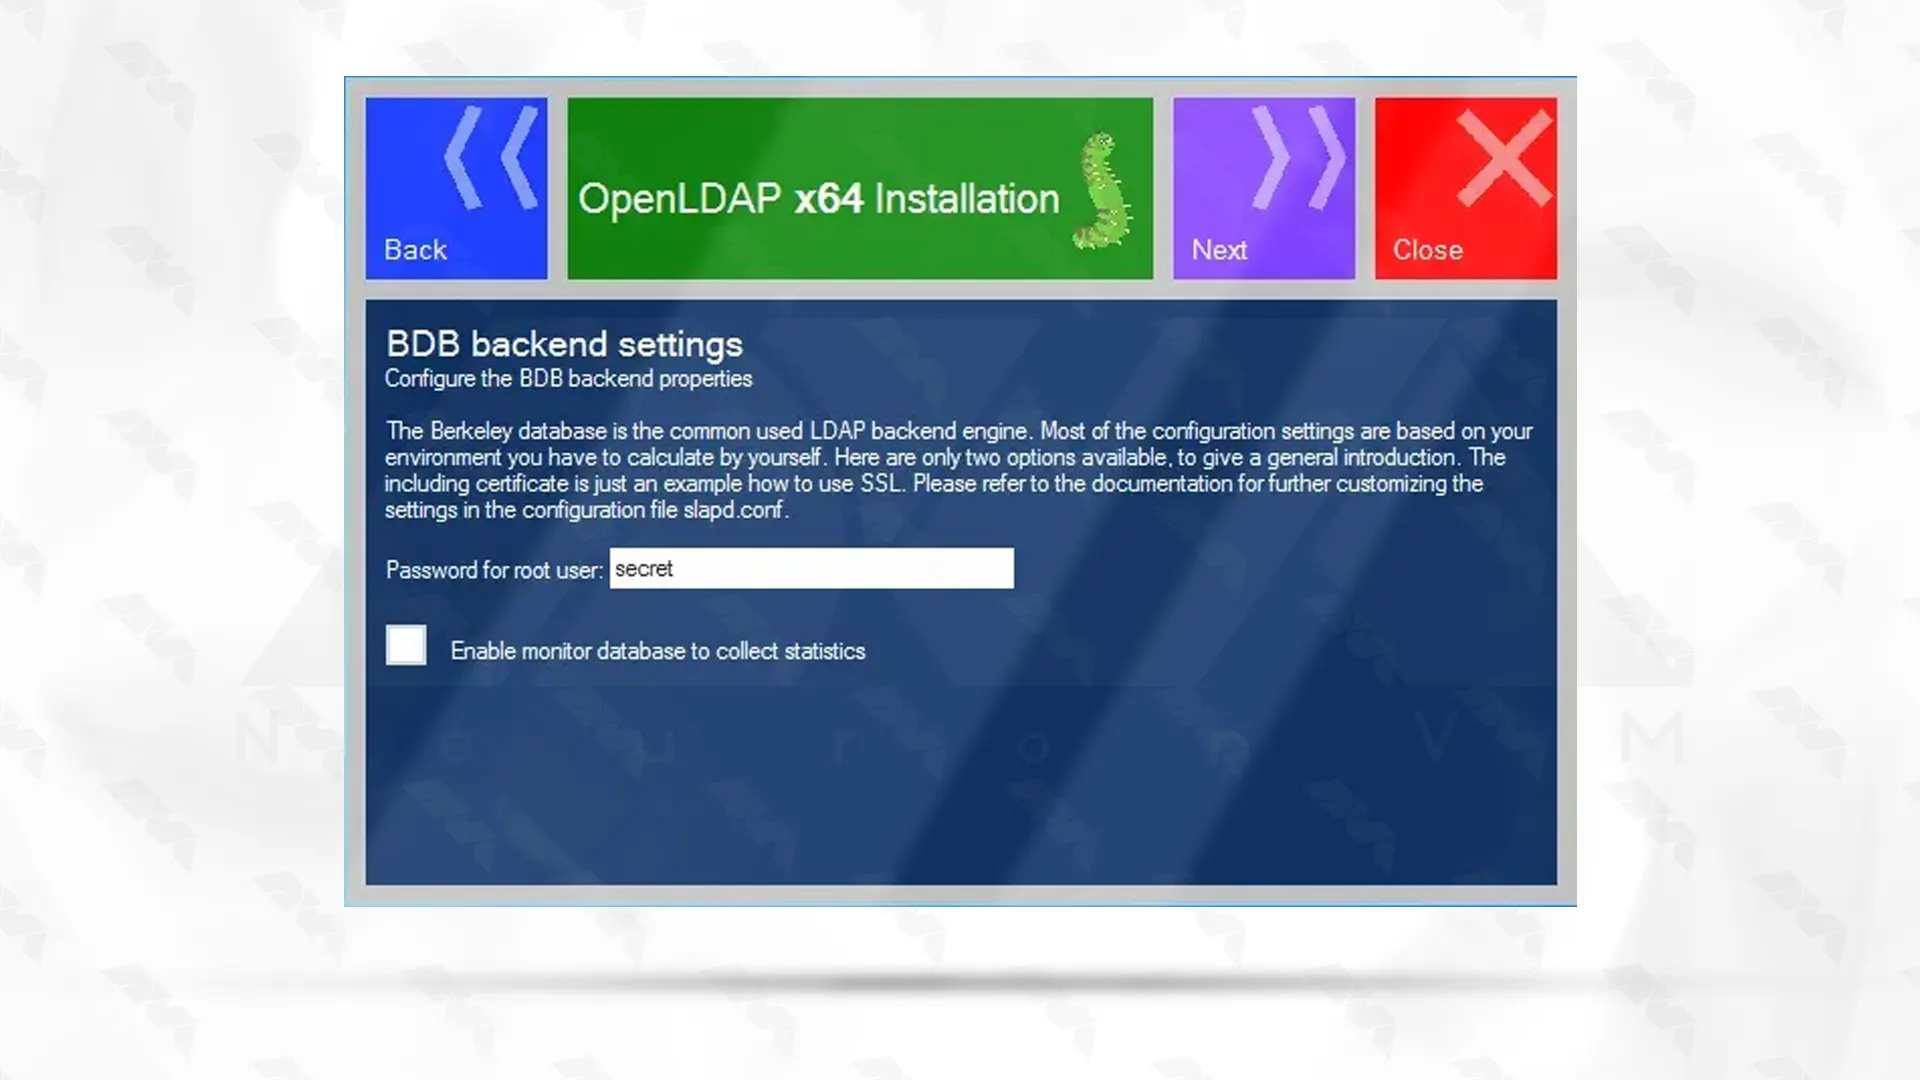
You can configure BDB backend Properties here and Then click Next:
You should click the Install button to start the installation:
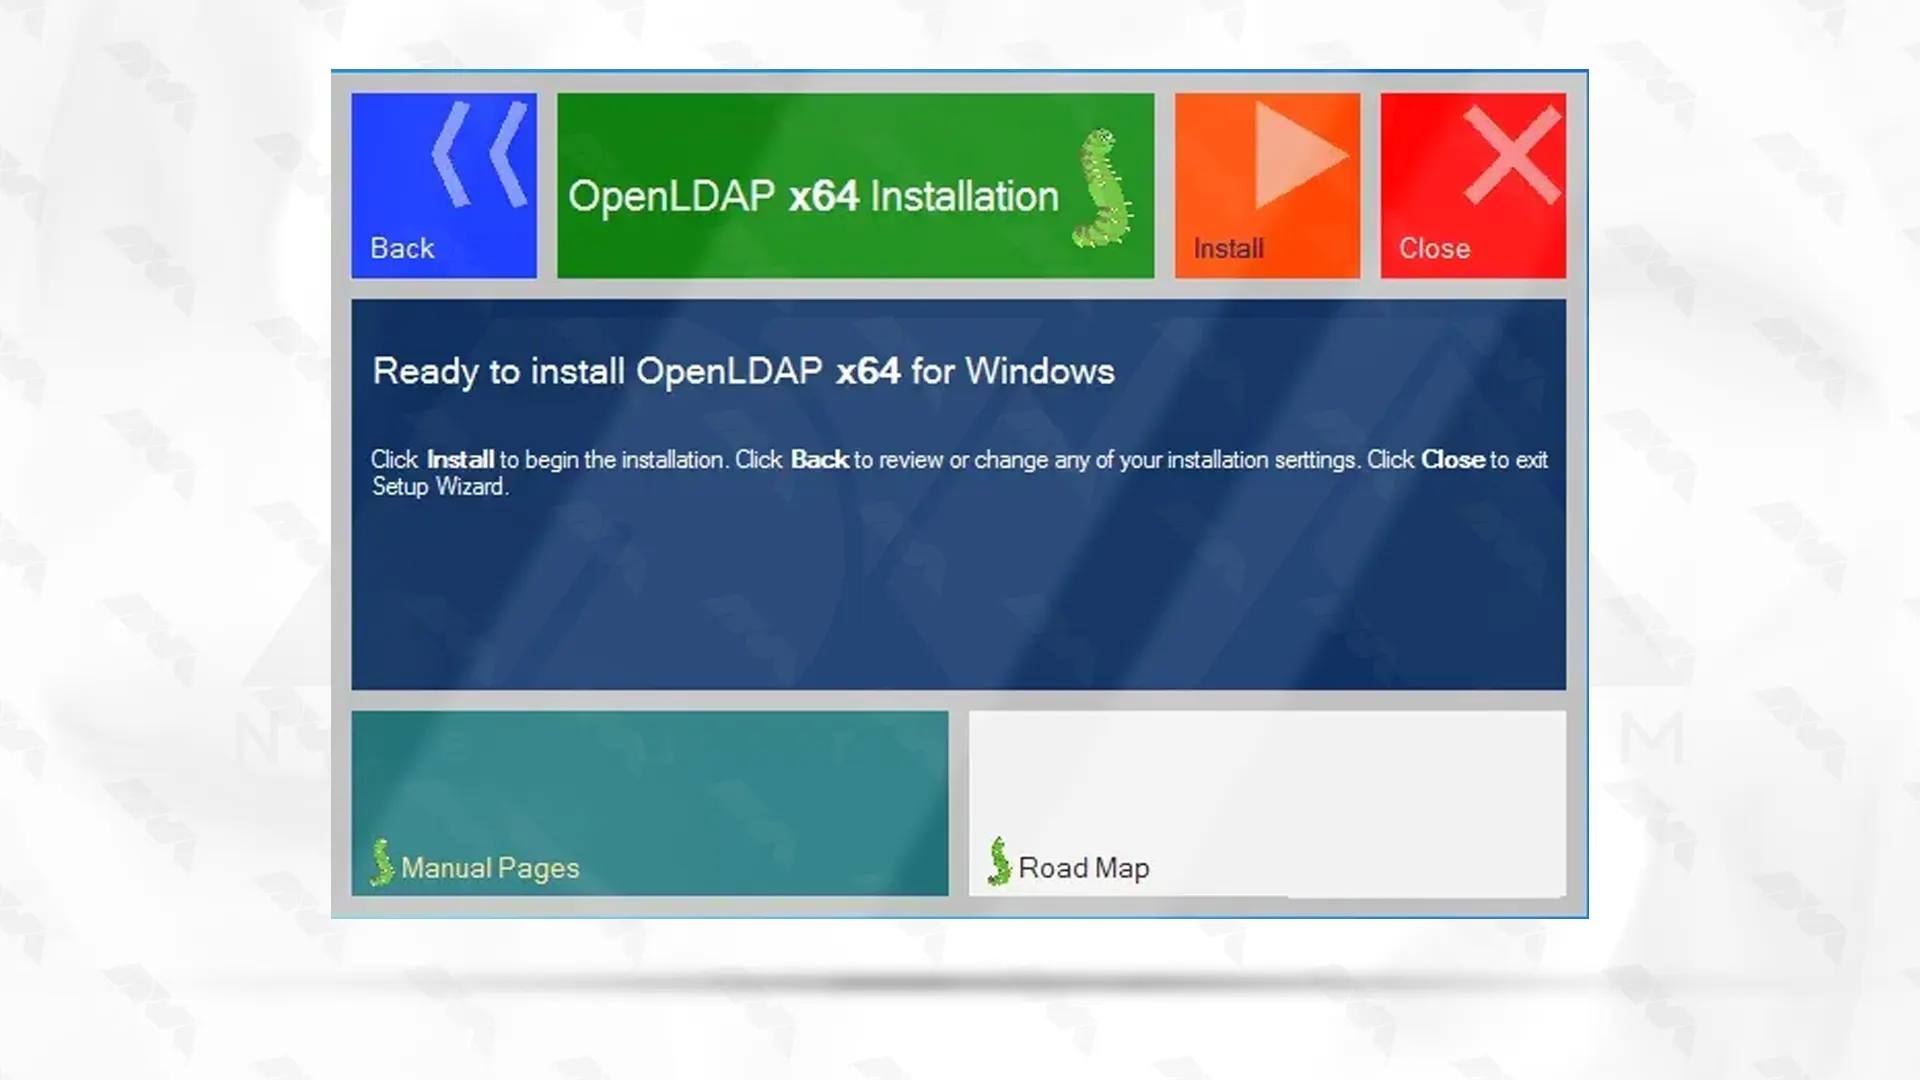
Wait a few moments for the installation process to finish. Finally, click close to exit the setup wizard.
This article introduced you to LDAP and also OpenLDAP. Continuing the article, You learned how to install and configure OpenLDAP on Windows with our step-by-step tutorial. It also runs on the BSD family of operating systems, as well as a wide range of other operating systems.
 Tags
Tags


Photoshop is one of the most popular graphic software that is used to edit, reconstruct, and make ch...


Python Programming Language is an easy-to-learn language, which is why many novice programmers choos...
 Tags
Tags


